-
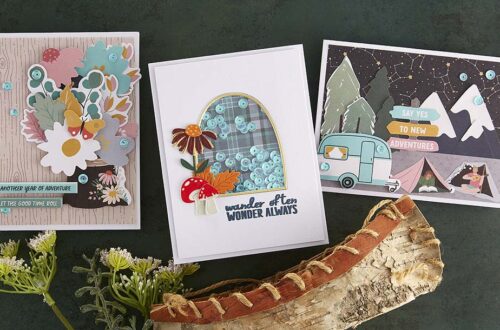
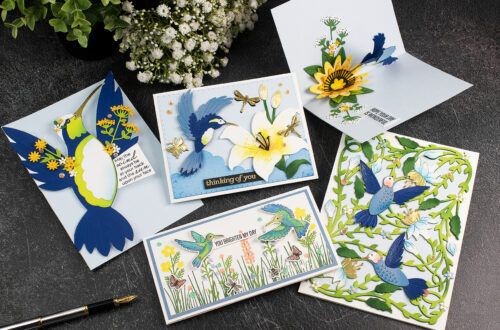
Country Road Inspiration Ideas with Rachel Alvarado
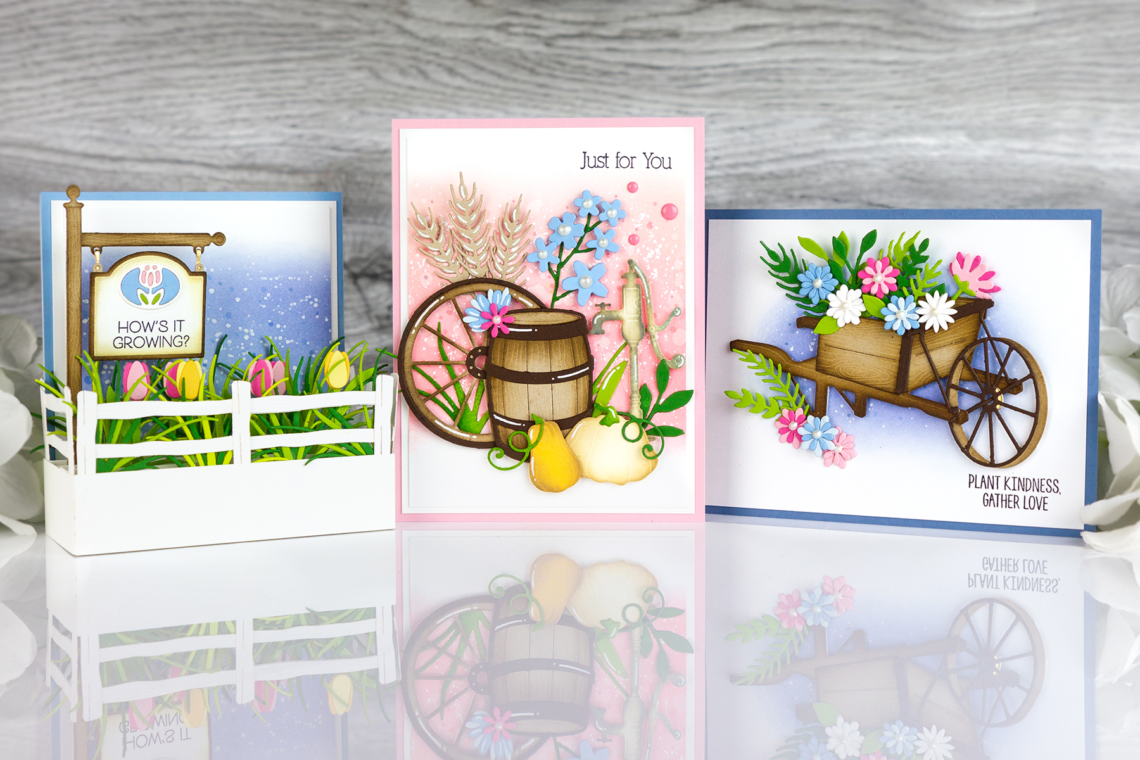
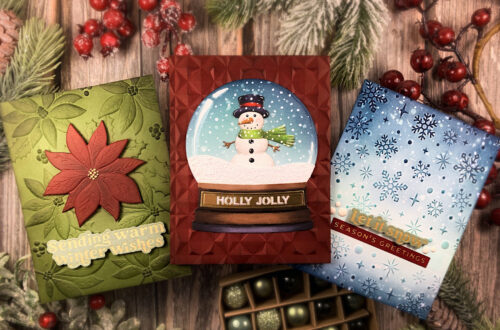
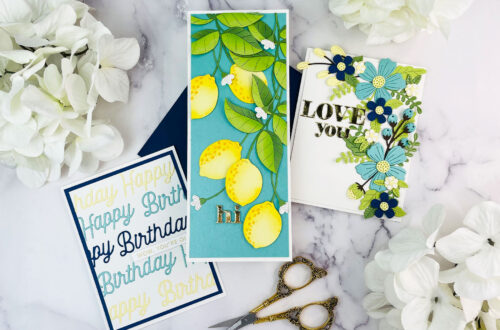
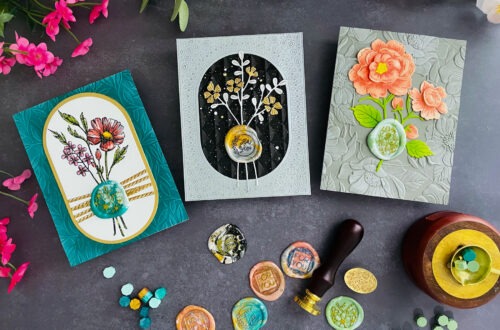
Hello crafty friends! It’s Rachel Alvarado from RachelAlvaradoDesigns.com, and I have a few projects to share with you today that feature products from the gorgeous new Country Road Collection by Annie Williams. Rustic Greeting Card For my first project, I created an A2-sized card featuring items from the Rustic Garden, Garden Builder, and Seasonal Décor Etched Die Sets. For both my large wagon wheel and barrel, I die-cut my lighter pieces from some Portobello Cardstock and lightly blended them with Gathered Twigs and Ground Espresso Distress Inks to add some shading. I then cut the darker pieces from a piece of Timber Cardstock and adhered them all together. I die-cut…
-
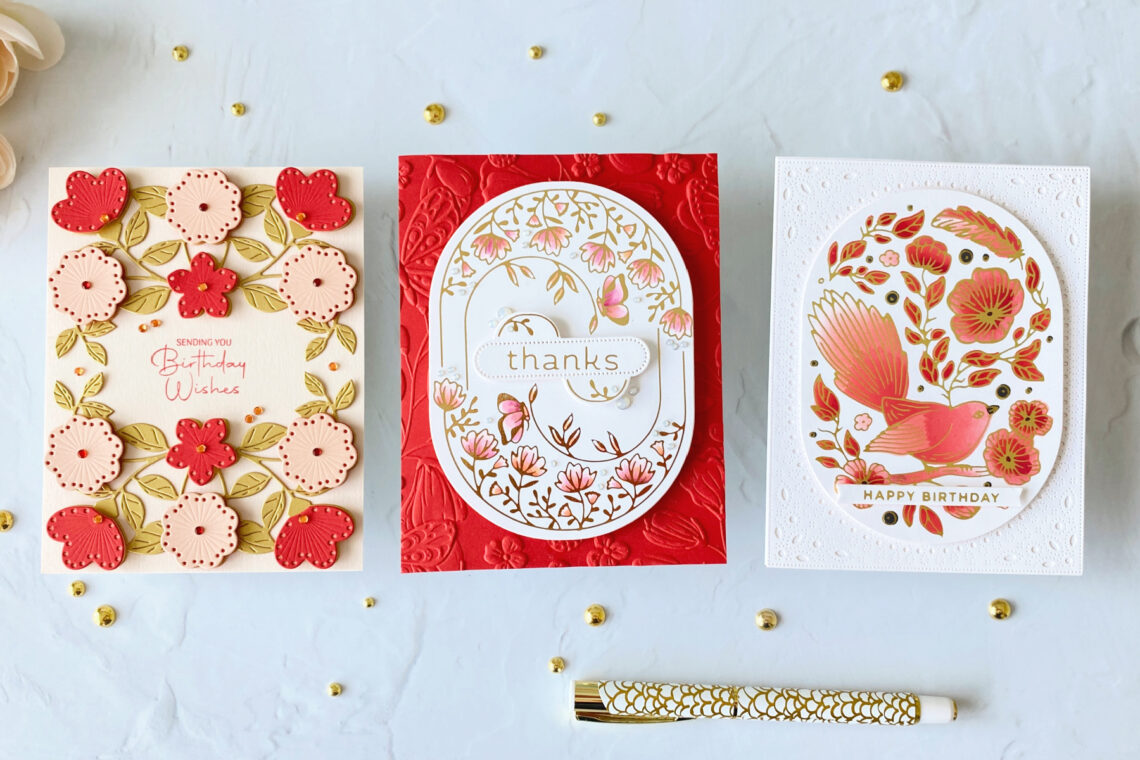
The Country Road Card Ideas With Brenda Noelke
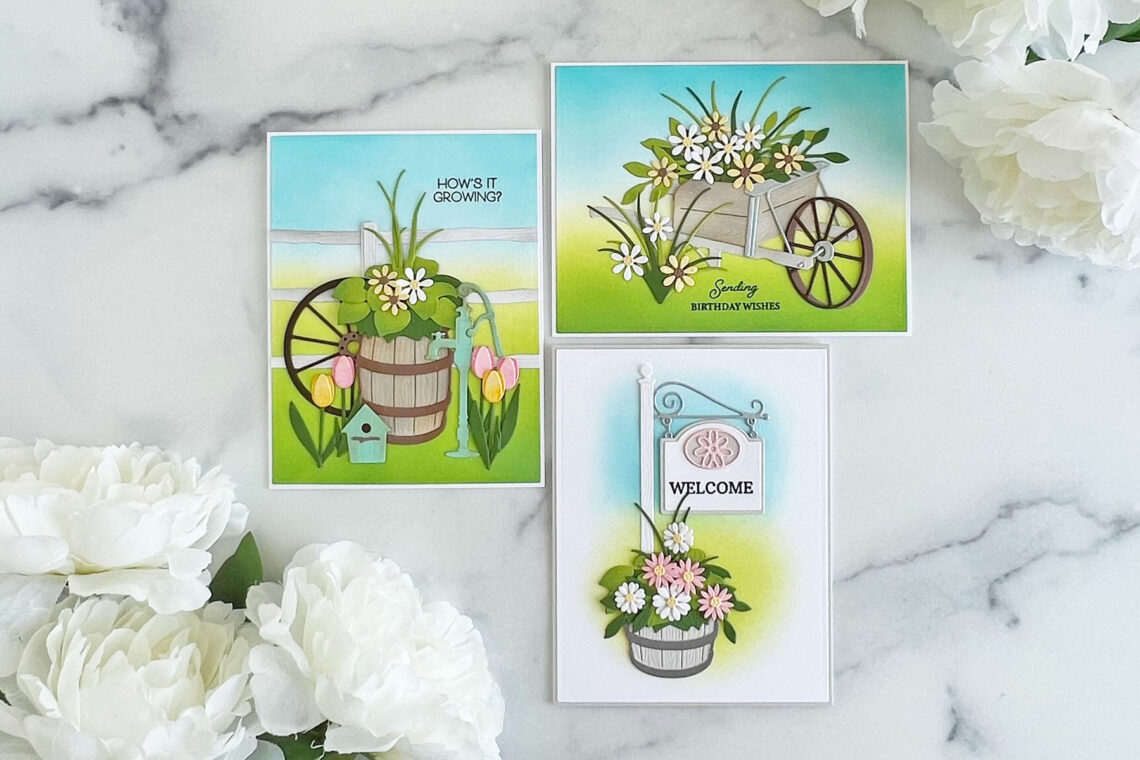
Hello, crafty friends!! Brenda Noelke here from My PaperCut Creations! I’m thrilled to be guest posting on the Spellbinders blog again today! I’m sharing three cards using the Country Road Collection designed by Annie Williams!! I’ve always been a huge fan of Annie’s cards and I’m so excited for her first collection! My cards today have more of a Spring or Summer theme going on, but there is also a seasonal die set that I can’t wait to use! SENDING BIRTHDAY WISHES CARD I began by die-cutting the wheelbarrow in Country Wheelbarrow Etched Dies from Silver Fox, Latte, Timber, and Brushed Silver cardstock. I brushed a bit of Distress Oxide Ink…
-
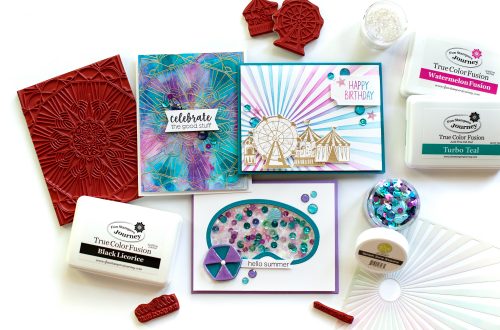
Birthday Explosion Box How-To
Hello crafty friends! It’s Rachel Alvarado from RachelAlvaradoDesigns.com, and I have a fun (and fairly simple) birthday explosion box to share with you today! I have step-by-step instructions below to help you figure out how to make the main portion of the box. I used birthday-themed items here, however, you can use whatever colors and decorations that you like! Переглянути цей допис в Instagram Допис, поширений Spellbinders Paper Arts (@teamspellbinders) Step-by-Step Instructions To start, I created my largest box first – which would be my outer layer. I trimmed 5 pieces of card stock and then scored a ½” tab on the 4 side pieces as shown above.…
-
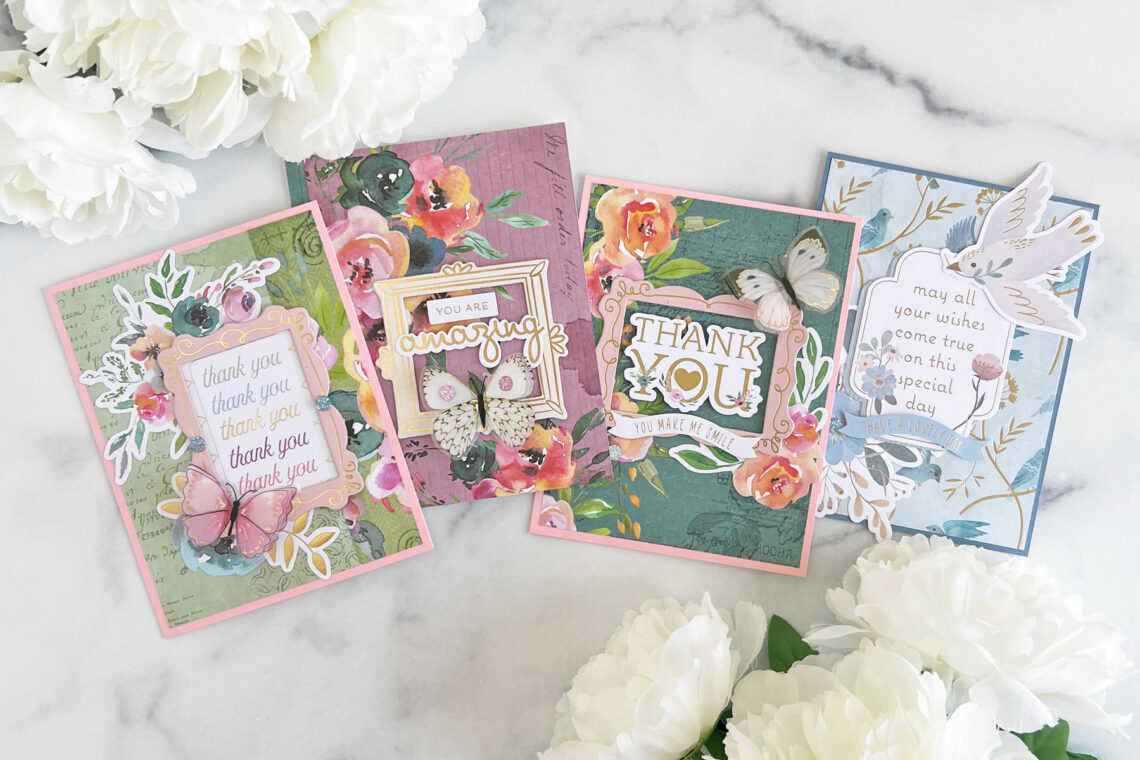
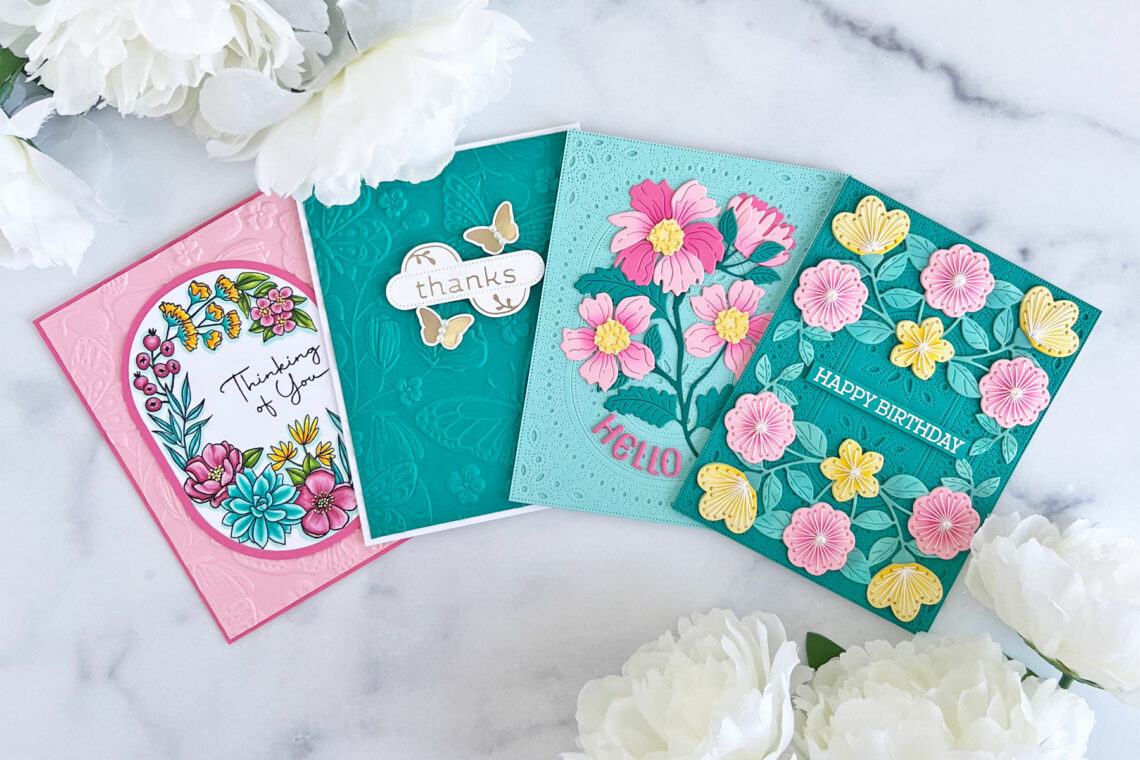
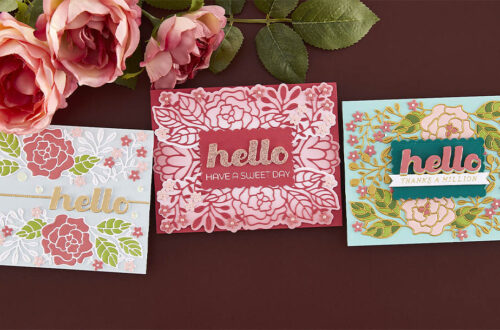
The Floral Friendship Suite Card Ideas With Brenda Noelke
Hello, fellow crafters and cardmakers!! Brenda Noelke here from My PaperCut Creations! I’m thrilled to be guest posting on the Spellbinders blog again today! I’m sharing three cards using the Floral Friendship Suite Collection!! This collection is absolutely beautiful!! These cards came together so quickly by just mixing and matching different elements from the collection!! I fell IN LOVE with the watercolor papers and die-cuts!! The only supplies I added to my cards today, other than this collection, were a couple of pieces of cardstock. THANK YOU CARD For this card, I layered a couple of patterned papers and adhered them to an A2 panel of Pink Sand Cardstock, before…
-
The Stylish Ovals Collection With Brenda Noelke
Hello, crafty friends!! Brenda Noelke here from My PaperCut Creations! I’m super excited to be a guest on the Spellbinders blog again today! I’m sharing three cards using the Stylish Ovals Collection!! There is something for everyone in this collection…stamps, dies, embossing folders, foil stamping, and stitching dies!! It’s AMAZING! THINKING OF YOU CARD I began by stamping the image and sentiment from the Stylish Oval Birthday Wishes Stamp Set onto white cardstock with Copic-friendly black ink. I colored it with Copic markers and die-cut it with a die from the Essential Stylish Ovals Etched Dies. I also die-cut Fruit Punch cardstock with the next largest die in the same…
-
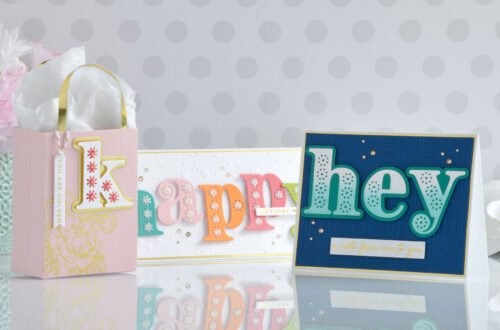
Stylish Ovals Card Ideas with Rachel Alvarado
Hello crafty friends! It’s Rachel Alvarado from RachelAlvaradoDesigns.com. I have a few colorful projects to share with you today that feature products from the gorgeous new Stylish Ovals Collection. Stylish Oval Birthday Card For my first card, I created an A2-sized birthday card using both the new Stylish Oval Birthday Wishes Clear Stamp Set combined with the Essential Stylish Ovals Etched Dies. I first created my base piece by trimming a piece of Raindrop Color Essentials Card Stock to 4.25” x 11” and then scoring at 5.5” along the long side. I then used a rounded corner punch to round each corner edge. Next, I used the Essential Stylish Oval…
-
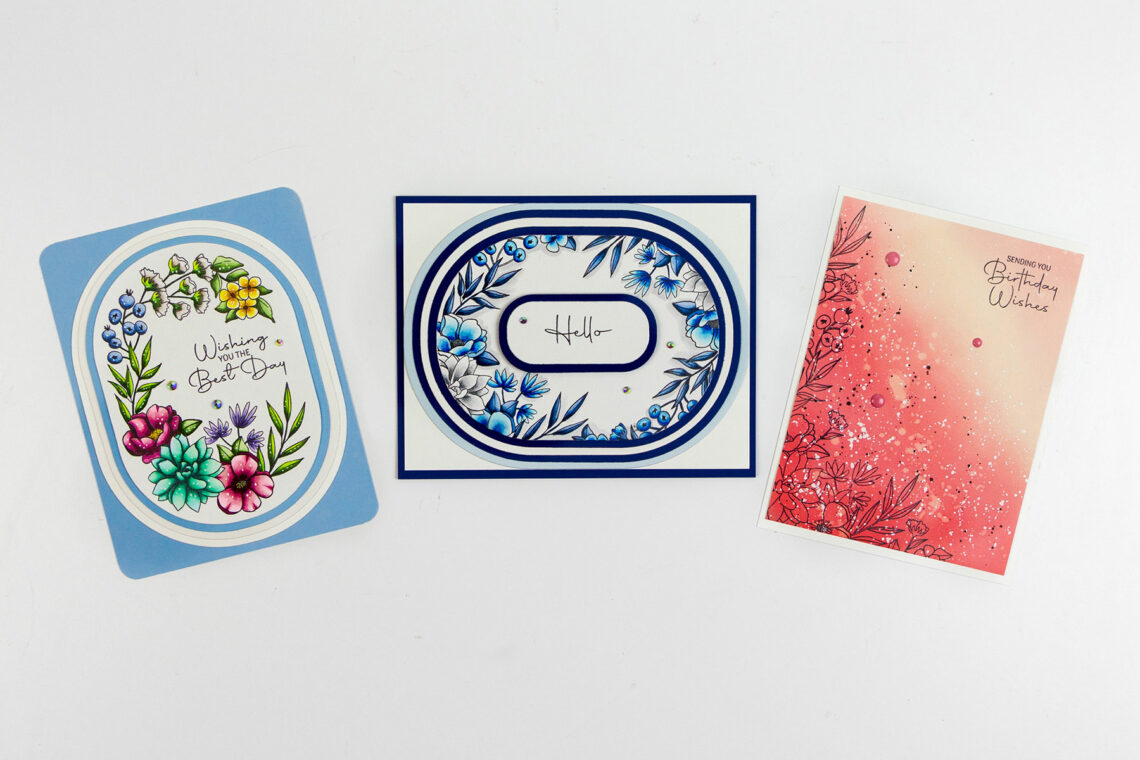
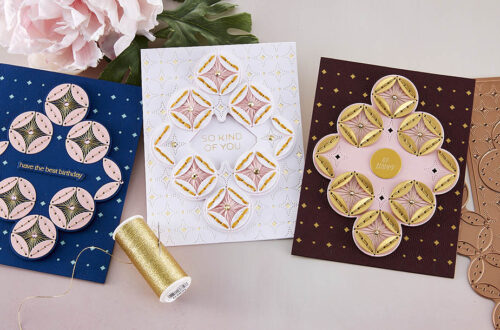
Design Decisions: Keeping the Process Simple Using the Stylish Ovals Collection with Joan Bardee
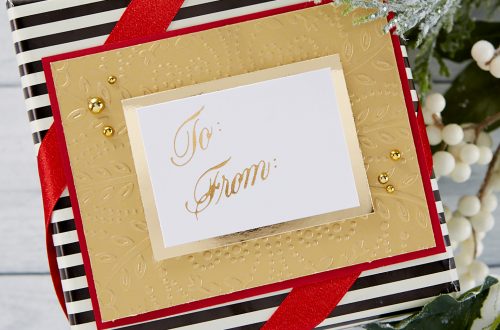
Hello crafters! Do you have a hard time settling on a card design? I’m Joan Bardee and I confess to remaking my cards multiple times. Today I’m sharing how I simplified my design decisions using the beautiful Stylish Ovals Collection. I took a long look at the collection and noted that several of the products have a symmetrical or near-symmetrical design. Symmetry, where one half of the design mirrors the other half, is balanced and evokes calm. So, for each card, I opted to use: 1. the same limited color palette (red/peach, white, and/or gold), and 2. a symmetrical or near symmetrical layout. I found that by making these decisions…
-
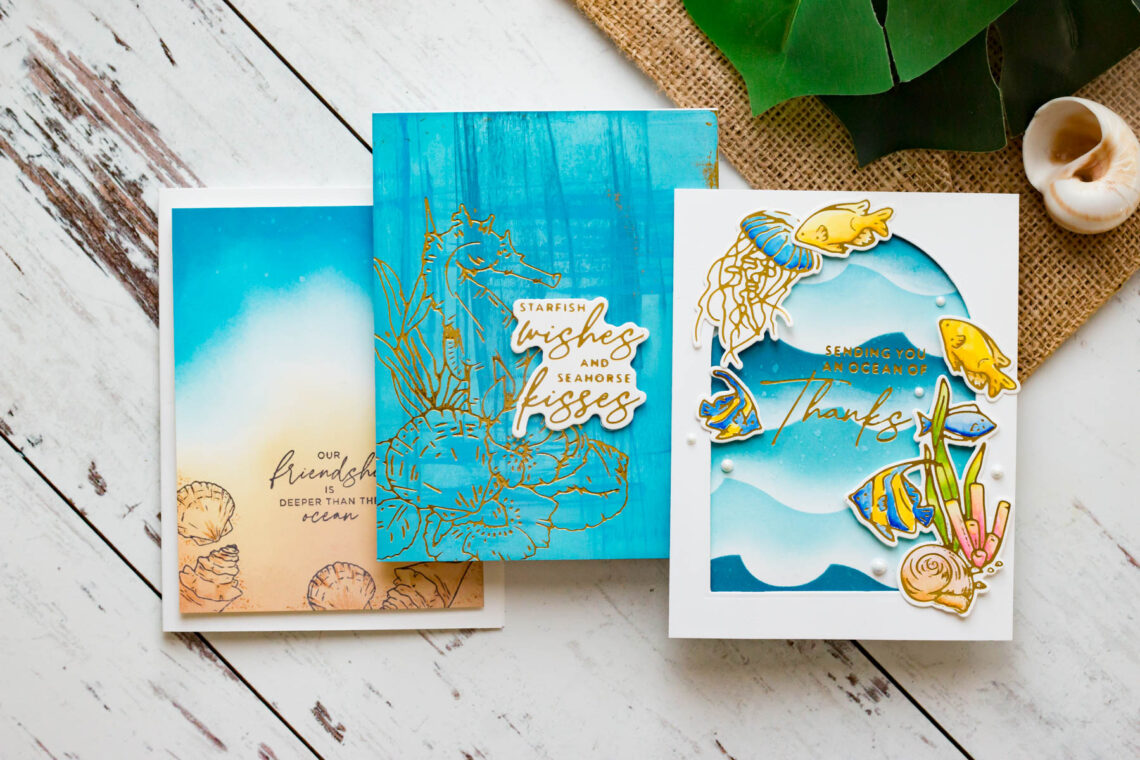
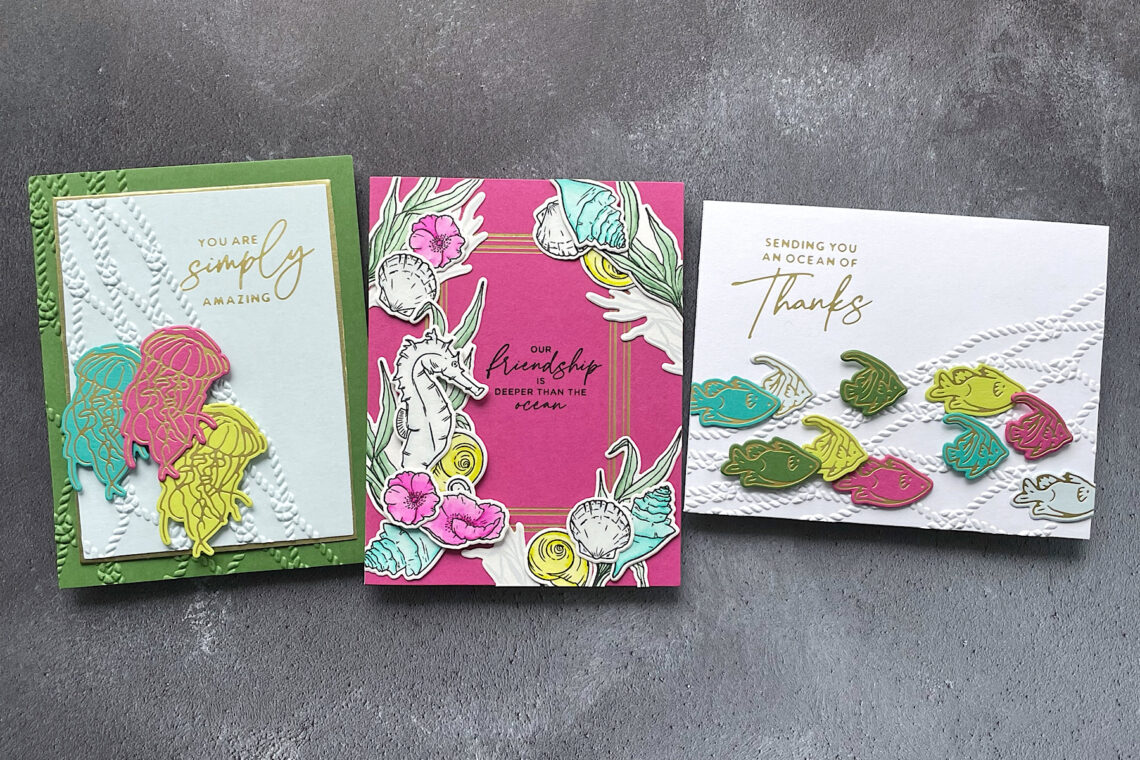
Creating “Oceans” Without Watercoloring Using the Seahorse Kisses Collection with Joan Bardee
Hello crafters! I’m Joan Bardee and today I am sharing 3 ocean-themed cards using the beautiful Seahorse Kisses Collection designed by Dawn Woleslagle. As I’m sure many of you know, Dawn Woleslagle is an amazing watercolorist. The Seahorse Kisses Collection would be beautiful watercolored. However, since I’m not on speaking terms with watercolors, I decided to create ocean backgrounds with ink blending on specialty papers. I hope you like the results. A Modern Inky Tide This abstract modern take on ocean tides was inspired by these amazing cards that Yana Smakula made with Spellbinders Glimmer Specialty Cardstock. This paper, designed to be the perfect paper for hot foiling, has a…
-
Seahorse Kisses Cards with Marie Nicole
Hello again, crafty friends! Marie here from Marie Nicole Designs. I am sharing three creations using the Seahorse Kisses collection. This collection includes stamps, dies, glimmer plates, and even a stunning embossing folder. If you love all things under the sea, this is a collection that will catch your attention! GLIMMER OVER A FUN BACKGROUND My first card features the large glimmer plate image of a seahorse along with some shells, flowers, and sea plants. I kept it simple by making a fun background to glimmer over. I created the background by dragging several colors of blue ink pads across my paper in different directions to leave some streaks. Then,…
-
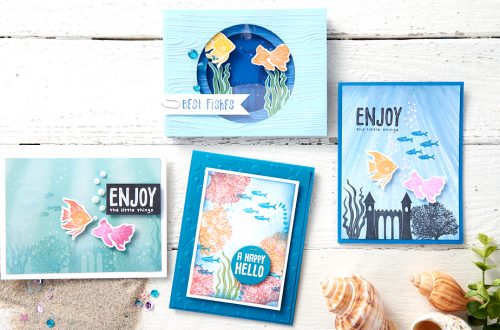
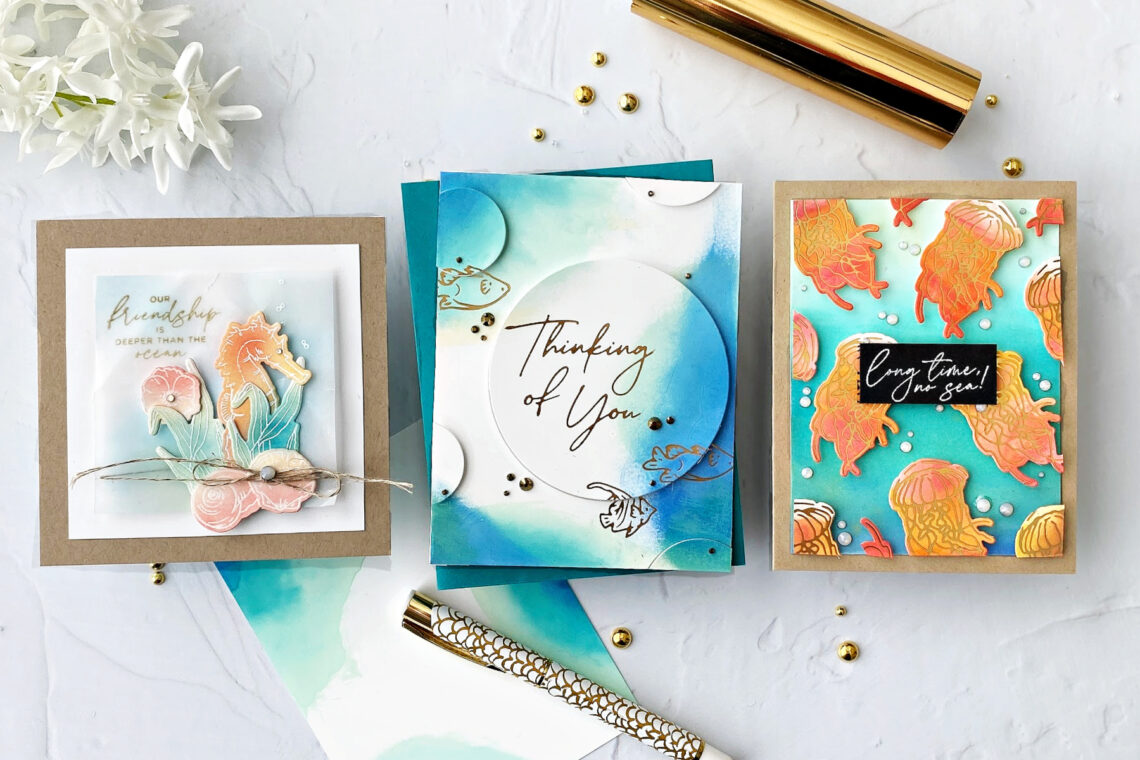
Vibrant Aquatic Cards Featuring Seahorse Kisses Collection with Emily Leiphart
Hello, crafty friends! It’s Emily Leiphart here and I’m thrilled to be guesting on the Spellbinders blog, featuring the Seahorse Kisses Collection by Dawn Woleslagle. I’m a long-time fan of Dawn’s artistry and jumped at the chance to work with her first collection for Spellbinders. I love the aquatic theme of Seahorse Kisses and the beautiful images and sentiments. I chose five colors, plus gold, to feature on all three of these cards using all five sets from this collection. You Are Simply Amazing Jellyfish Card My first card features a simple design featuring the Seahorse Kisses Sentiments, which I heat foiled with Matte Gold Hot Foil before using the…