Creating 3 Different Layouts Using Dies as Embellishments
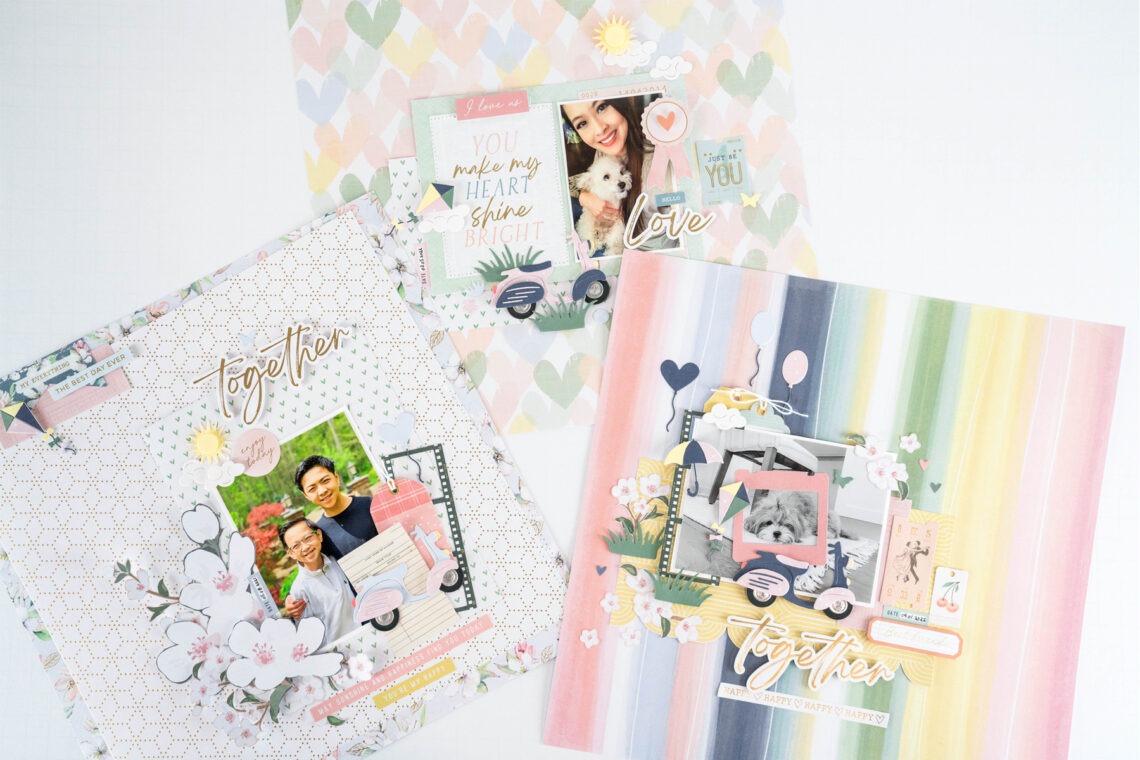
Hi everyone! I’m Stephanie Dang, and I am the guest designer for this beautiful collection called, Heartfelt by Rosie’s Studio. If you would like to see more of my work or follow me, please find me at @paperandi and on my blog. The inspiration for my projects is inspired by the beautiful soft colors of the Heartfelt Collection. It reminds me of all the beautiful memories we have throughout the years. You will find all supplies to recreate all 3 layouts at the bottom of my blog post.
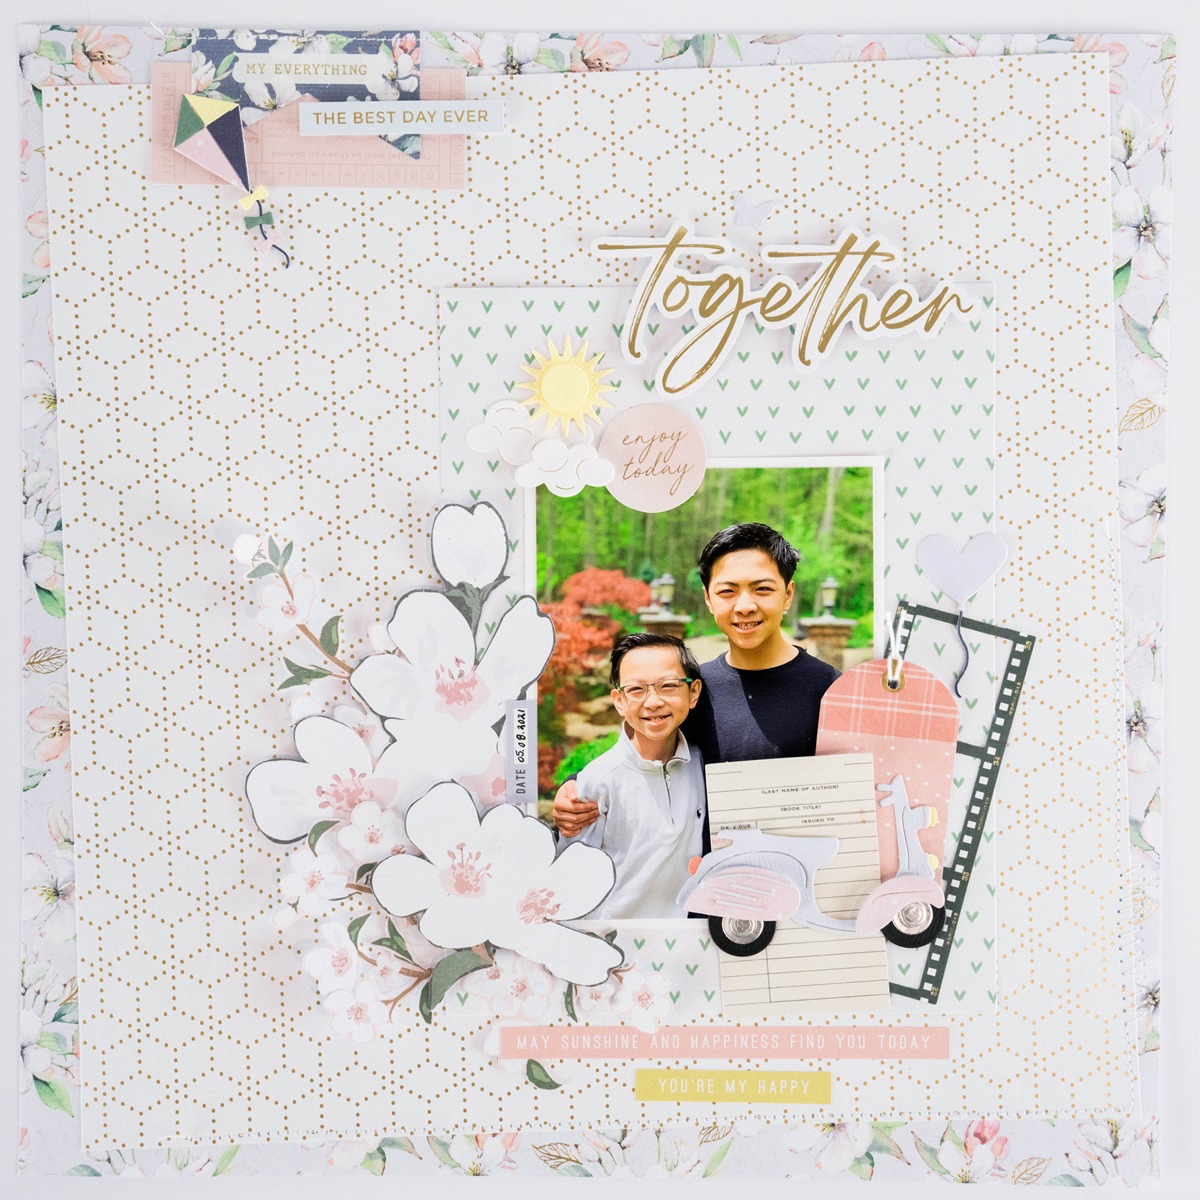
- Step 1: For the first layout, create the background by using the floral flower paper as the base. Take the white hexagon paper, trim half an inch on each edge, and adhere to the base by slightly tilting the paper. Add your stitching.
- Step 2: Take the heart paper and size it down by trimming it slightly bigger than your chosen photo.
- Step 3: Add your tags to the top of the page and to the bottom right of the photo.
- Step 4: Fussy-cut flowers from the floral papers and add to the left of the photo.
- Step 5: Die-cut the clouds, sun, kite, and electric scooter. Add the clouds and sun to the right top of the photo. Add the kite to the top left of the page. Add the scooter to the left bottom of the photo.
- Step 6: Add finishing touches by adding the title “together”, the circular label “enjoy today”, the date to the left of the photo, and sentiments at the bottom of the photo.

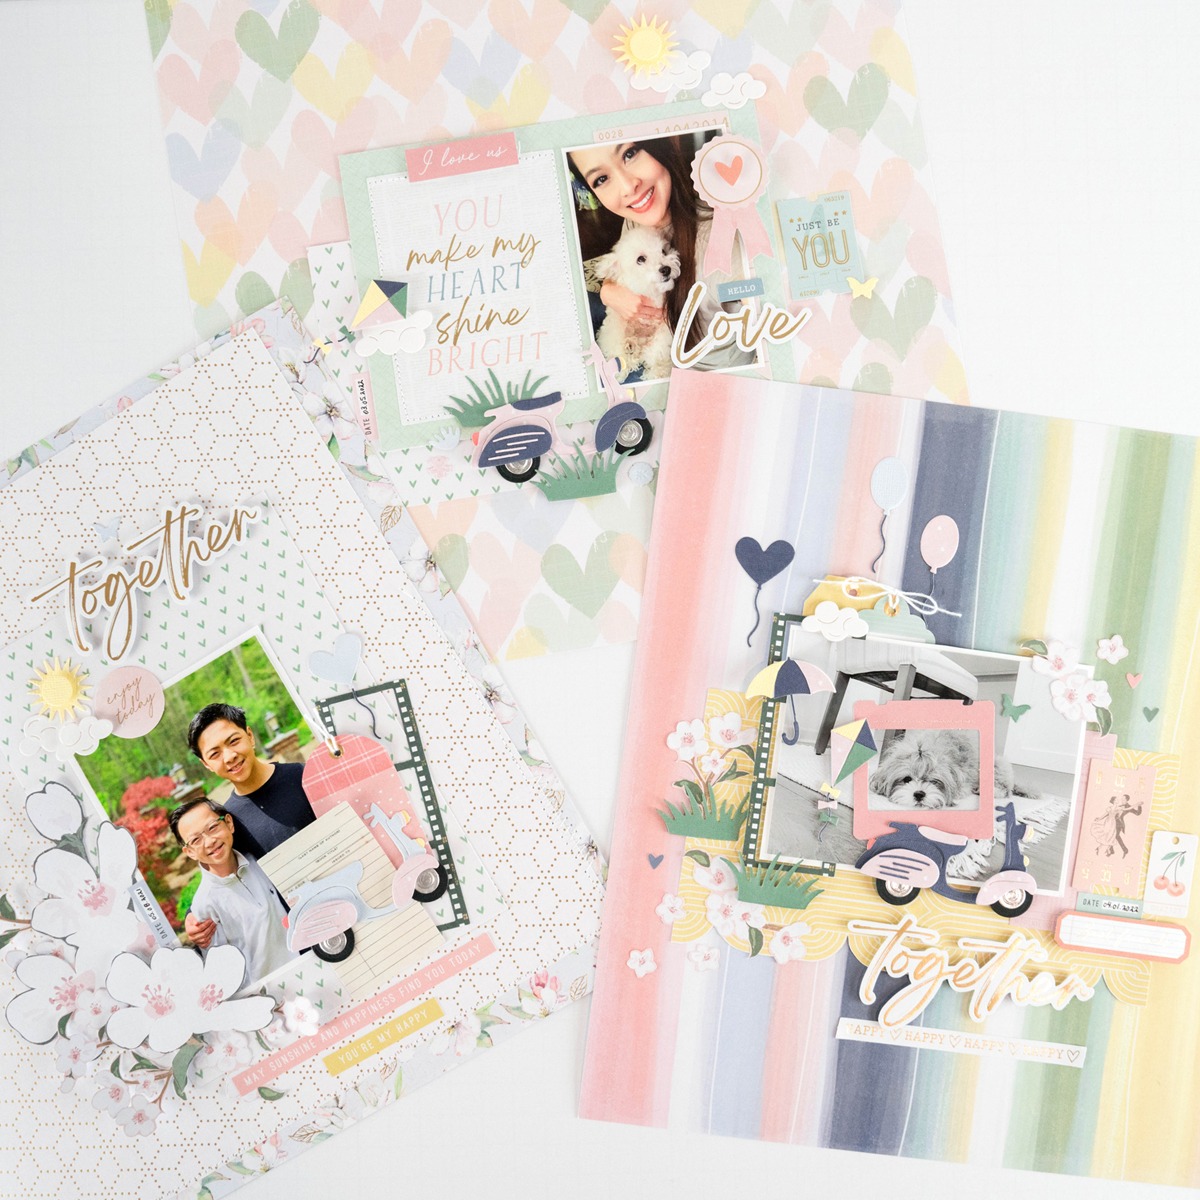
- Step 1: For the second layout, lay down the heart paper as a base for the layout. Take the heart paper and trim it to 5 ¾” h w x 4 ½” h. Take the pastel green paper and trim it to 6 ¾” x 4 ¾ h. Layer one slightly diagonal from each other.
- Step 2: Take your photo in the size of 2” w x 3 ¾” h, and frame it on white cardstock. Take the “You make my heart shine bright” card and add it to the left of the pastel green paper. Add the framed photo next to the card. Add your stitching to the card.
- Step 3: Add the “I love us” to the top of the card. Add the ribbon, title “hello love”, and ticket to the right side of the photo. Add your date to the left bottom side of green pastel paper.
- Step 4: Cut out the following die cuts embellishments on cardstock: kite (pink, green, navy, yellow), 2 large cloud (white), 1 small cloud (white), 2 grass (green), 3 flowers (2 blue, 1 pink), 1 scooter (navy, pink, black, silver, yellow, and red), 1 sun (yellow), and 1 butterfly (yellow).
- Step 5: Add the sun, 1 large cloud, and 1 small cloud above the photo to the right. Add the kite and 1 large cloud to the left of the card. Add the scooter, grasses, and flowers to the bottom of the card and photo. Finish the layout by adding the yellow butterfly, and heart on top of the ribbon.
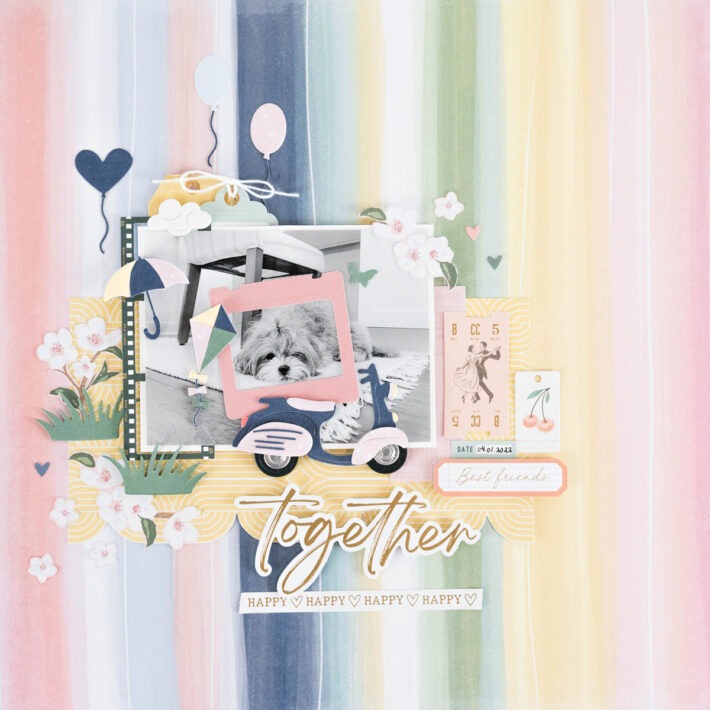
- Step 1: For the third layout, use the stripe paper for the base of the layout. Trim the yellow paper as seen in photo in size 7 ¾” w x 4”. Make sure to follow the curve of scallops on the bottom edge of paper. Add your photo 4 ¾” w x 3 ½” h and frame it in white cardstock.
- Step 2: Add the yellow paper and photo as seen in the photo towards the left side of the page. Add the film strip to the left side of the photo. Add the tickets, tags, and dates to the right side of the photo. Add tags to the top left side of the photo. Add your twine to one of the tag.
- Step 3: Add title and sentiment to the bottom of the photo.
- Step 4: Cut out florals from papers. Die cut the following: 1 heart balloon (navy), 2 oval balloons (blue, pink), 1 small cloud (white), 1 umbrella (yellow, navy, pink), 1 kite (yellow, navy, pink, green), 2 grasses (green), 1 butterfly (green), and 1 scooter(navy, pink, silver, black, yellow, red).
- Step 5: Adhere balloons and cloud to top left of photo. Add frame to photo. Adhere umbrella and kite to left of the photo. Add the florals and grasses towards left side of photo and top right side of photo. Add the scooter to bottom right of the photo. Add finishing touches by using the mini hearts from the collection in navy, green, and pink.
Spellbinders Supplies:

Other supplies
Adhesive, dimensional adhesive, twine, sewing machine, thread, cardstocks (navy, red, yellow, silver, black, and white).
I hope you enjoyed all 3 of my layouts, and feel inspired to create these yourself by using the beautiful collection by Rosie’s Studio along with Spellbinder’s dies. If you would like to see more of my work or follow me, please find me at @paperandi and on my blog. Thank you for reading and have a very blessed week!
2 Comments
Grace
Beautiful!
Stephanie Dang
Thank you!