Make A Scene by Becca Feeken | Kinetic Cards with Jean Manis
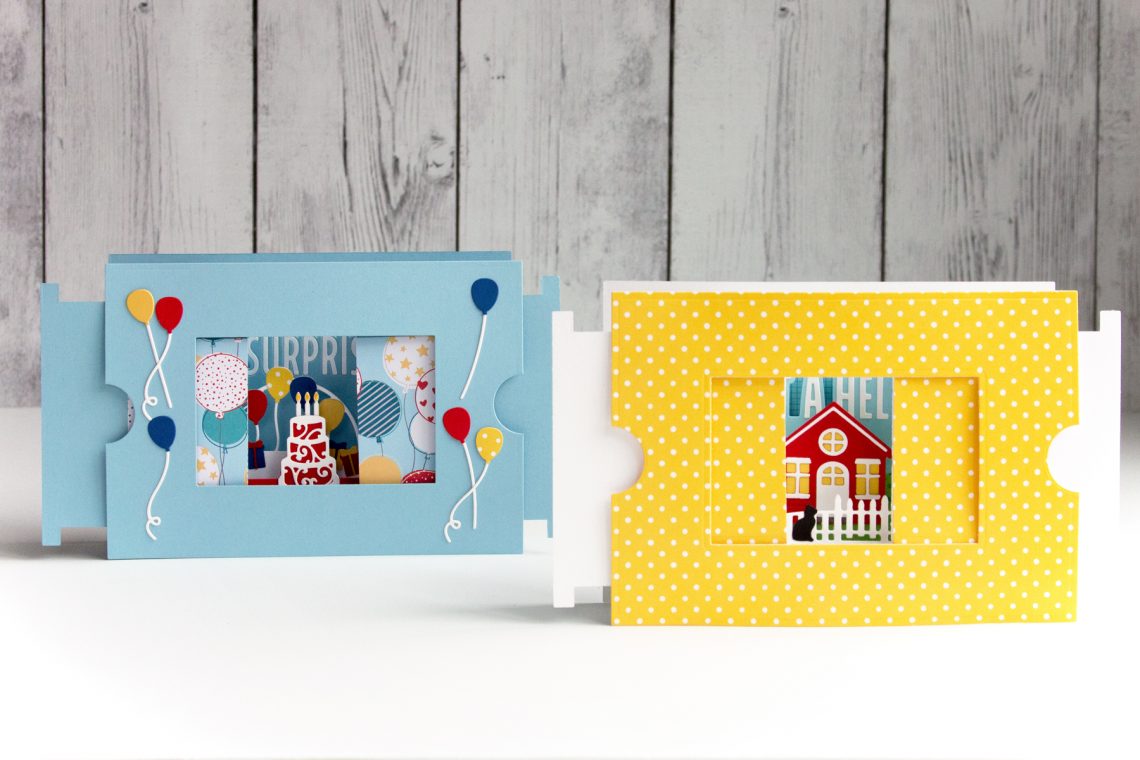
Hello crafty friends! I’m Jean, a papercrafter living in the Pacific Northwest blogging at Right as Rain. I am delighted to share three cards created with the Make A Scene Collection by Amazing Paper Grace for Spellbinders. Creating scenes with dies is one of my favorite papercrafting activities. With this collection, you can create unique kinetic cards for a variety of occasions, which are sure to brighten the recipients’ day!
The basic steps for the three cards are the same: create the Make A Scene Card Base, craft the Front, Middle, and Back scenes, and assemble. All three cards shown use Make A Scene Bold Greetings set to create the Back scene. The overall size of the card is 7″ x 5″ with an opening of 4″ x 2 1/2″.
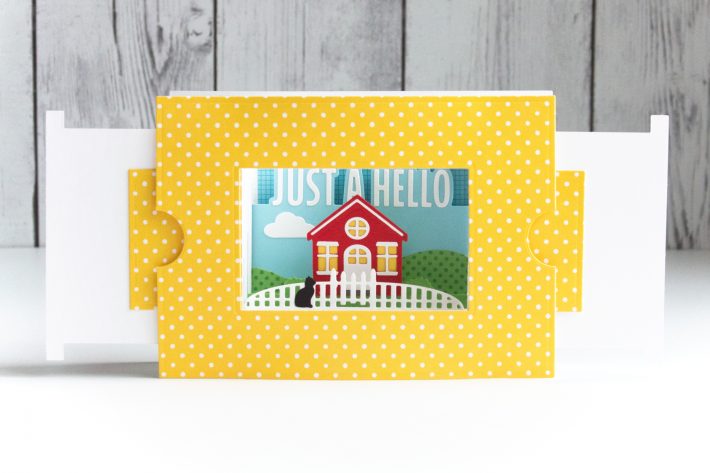
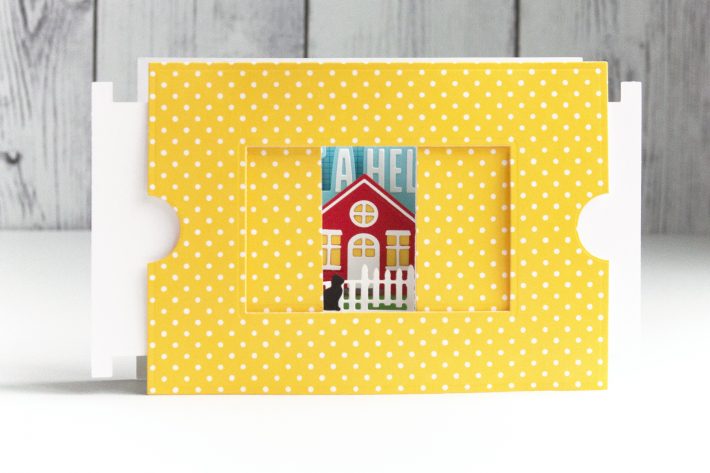
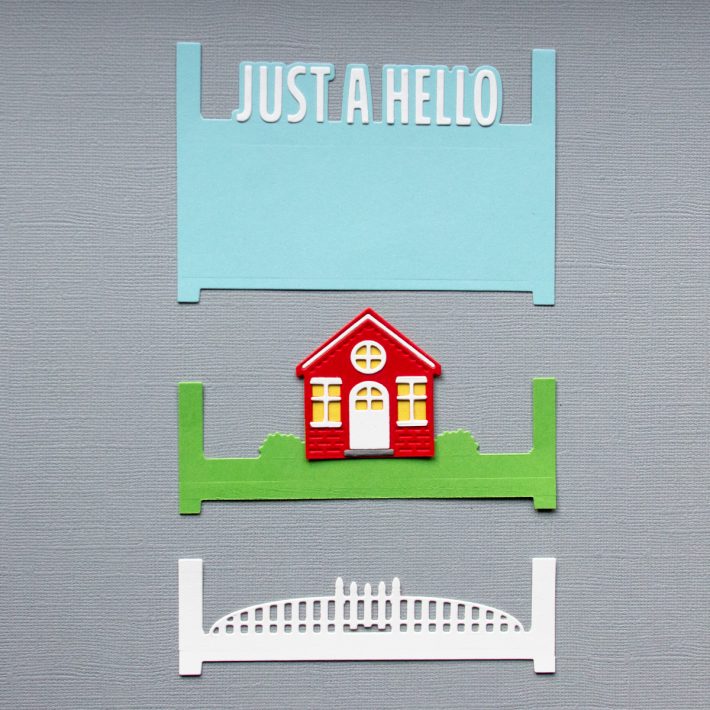
The first card combines the “Just A Hello” sentiment with elements from the Cozy Home Scene and Rolling Along Scene sets.
Photo of the three basic layers (Back Scene is shown on top, Front Scene on the bottom).
- Create the Make A Scene Card Base with solid cardstock and patterned paper. Add light-weight white cardstock to back of patterned paper with double-sided adhesive for stability.
- Cut the Front Scene with the fence piece in the Cozy Home Scene set from white cardstock.
- Cut cat from black cardstock with die in the Rolling Along Scene set; adhere to fence.
- Cut the Middle Scene from green cardstock with the house piece in the Cozy Home Scene set.
- Cut the house with the same die from red cardstock. Trim off the bottom and decorate with window, door, and threshold pieces cut from white and colored cardstock. Adhere house to the front of the green cardstock piece.
- Cut the sentiment with the Make A Scene Bold Greetings die from blue cardstock. Cut the letters from white cardstock; adhere using the negative piece of the letters for alignment.
- Cut cloud from white cardstock and adhere to the sentiment scene.
- Cut a hill from patterned paper with die in the Rolling Along Scene and adhere to the sentiment scene. The hill should be adhered slightly below the horizon line of the house (if the hill is just at the horizon, the bottom of the hill will be visible when the card is fully open).
- Place scenes into slots of the card base.
- Cut patterned paper with the Make A Scene Card Base front opening die. Cut piece into two sections and adhere to the opening with the card closed.
Additional ideas: add a sentiment to the card front with the Make A Scene Sentiments set; add flowers in front of the fence cut with dies in the Rolling Along Scene.
Spellbinders Supplies:
Other Supplies:
white cardstock; patterned paper; colored cardstock; adhesive.
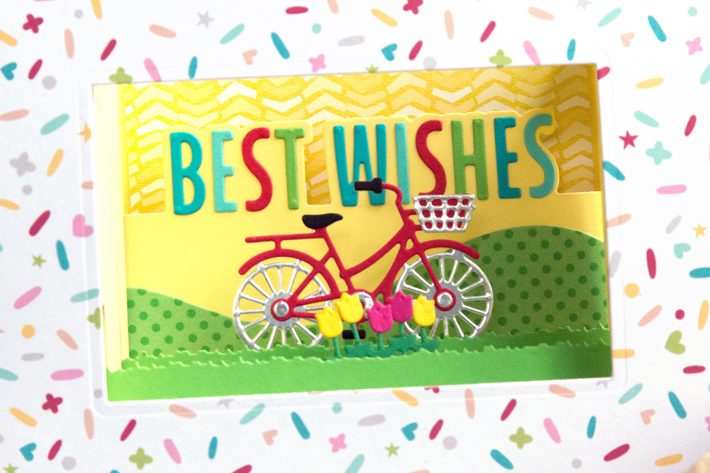
The second card combines the “Best Wishes” sentiment with elements from the Rolling Along Scene and Picture Perfect Window Scene sets.
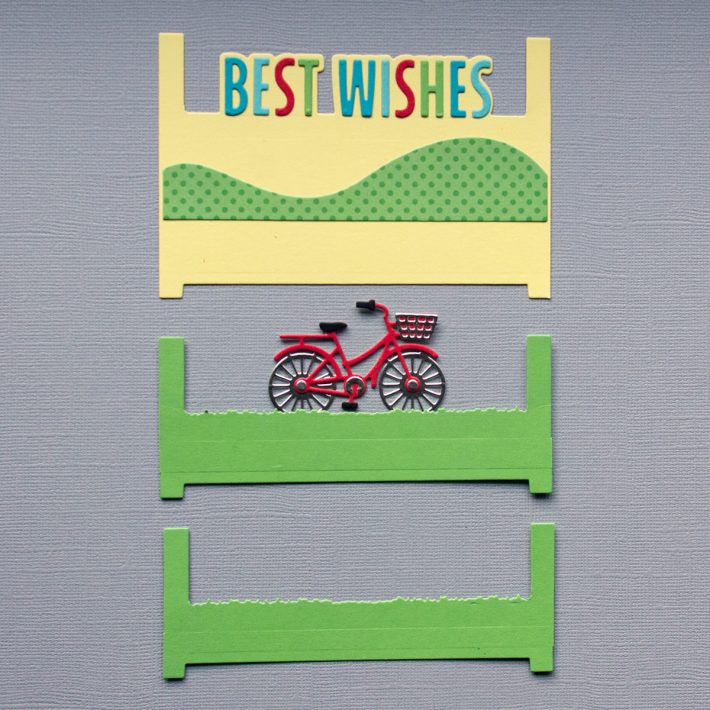
Photo of the three basic layers (Back Scene is shown on top, Front Scene on the bottom).
- Create the Make A Scene Card Base with solid and patterned paper. Add light-weight white cardstock to back of patterned paper for stability.
- Cut the Front Scene with the grass piece in the Rolling Along Scene set from green cardstock.
- Cut tulips with the Picture Perfect Window Scene die set. Adhere to the back of grass piece.
- Cut the Middle Scene from green cardstock with the grass piece in the Rolling Along Scene set.
- Cut the bike from silver foil cardstock with the bike piece in the Rolling Along Scene set.
- Cut additional bike pieces from black, red, and silver foil cardstock using pieces in the Rolling Along Scene set. Glue to silver bike piece.
- ·Adhere bike to the back of the grass piece.
- Cut the sentiment with the Make A Scene Bold Greetings die from yellow cardstock. Cut the letters from colored cardstock; adhere using the negative piece of the letters for alignment.
- Cut a hill from patterned paper with die in the Rolling Along Scene and add to the sentiment piece. The hill should be adhered slightly below the horizon line of the bike (if the hill is just at the horizon, the bottom of the hill will be visible when the card is fully open).
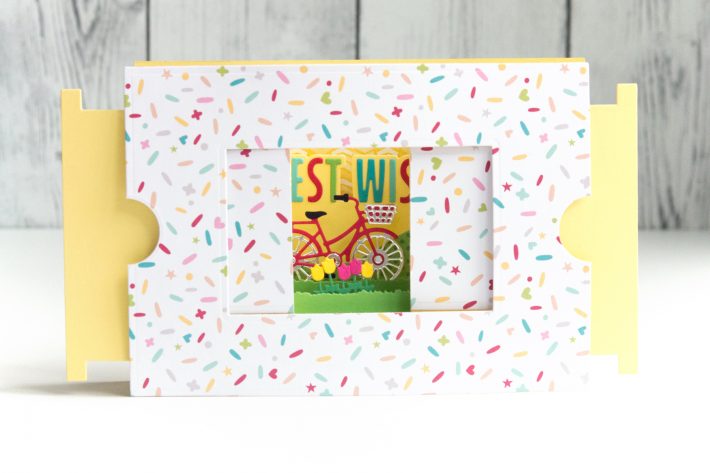
- Place scenes into slots of the card base.
- Cut patterned paper with the Make A Scene Card Base front opening die. Cut piece into two sections and add to the opening with the card closed.
The card can be embellished in a number of ways, including the addition of a sentiment to the card front with the Make A Scene Sentiments set.
Spellbinders Supplies:
Other Supplies:
white cardstock; patterned paper; silver foil cardstock; colored cardstock; adhesive
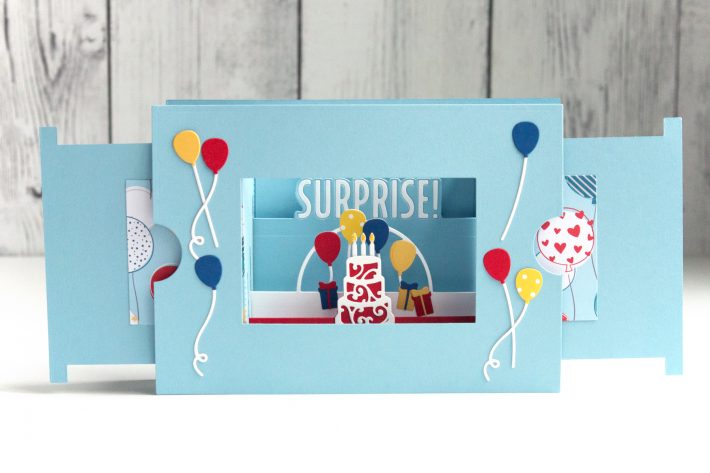
The final card combines the “Surprise!” sentiment with elements from the Celebration Scene and Rolling Along Scene sets.
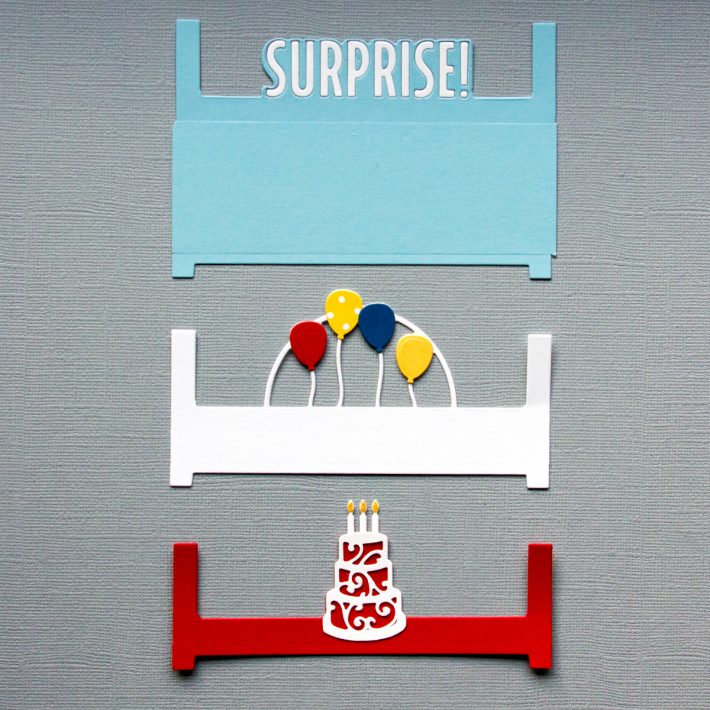
Photo of the three basic layers (Back Scene is shown on top, Front Scene on the bottom).
- Create the Make A Scene Card Base with blue cardstock.
- Cut the Front Scene with the cake die in the Celebration Scene set from red cardstock. Cut cake detail from white cardstock and fussy-cut the bottom. Glue to the red cardstock piece. Cut candles from white cardstock and add glitter accents. Once dry, glue to the back of the cake.
- Cut the Middle Scene from white cardstock with the balloon piece in the Celebration Scene set. Cut balloons from colored cardstock and patterned paper; adhere to balloon outline piece.
- Cut packages with dies in the Rolling Along Scene set. Assemble and adhere to both sides of balloons.
- Cut the sentiment with the Make A Scene Bold Greetings die from blue cardstock with the letter and outline dies. Cut the letters from white cardstock and inlay into sentiment.
- Place scenes into slots of the card base.
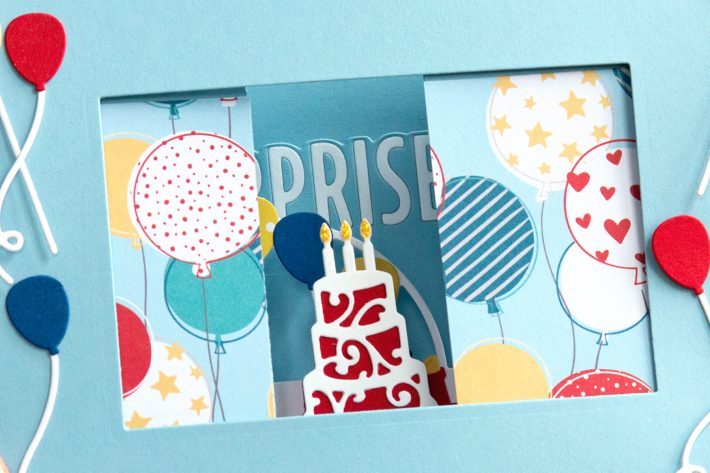
- Cut patterned paper with the Make A Scene Card Base front opening die. Cut piece into two sections and add to the opening with the card closed.
- Cut additional balloons and strings to decorate card front.
The card can be embellished in a number of ways, including the addition of a sentiment to the card front with the Make A Scene Sentiments set.
Spellbinders Supplies:
Other Supplies:
white cardstock; patterned paper; colored cardstock; glitter accents; adhesive
Thank you for dropping by the Spellbinders blog today. There are dozens of ways in which the Make A Scene Collection can be used to create one-of-a-kind kinetic cards. I hope you’re inspired to give the collection a try!

One Comment
slangnv
You have to give Jean a lot of credit! She has explained this process very well and even threw in a few tips! Lovely cards, so colorful and full of energy. That is what Jean has to make all these cards!