“Love You More” Cards with Jung AhSang
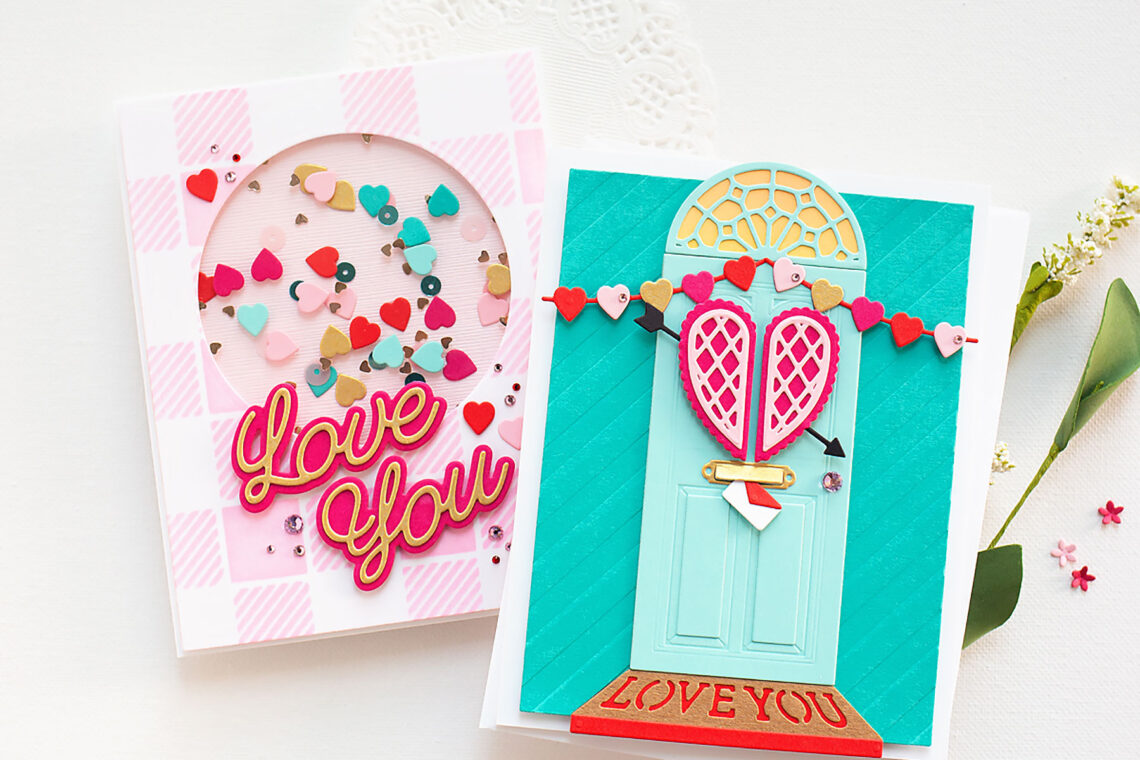
Hello crafty friends! It’s Jung AhSang here, and I am so excited to be returning for another guest post on the Spellbinders blog. If you’d like to follow my crafty projects, my blog is jungahsang.wordpress.com, and my Instagram is @junglebarrya. Today, I’m working with some products from the Love You More collection. I absolutely love the Open House collection already, but it’s even better when more coordinating products are released, and I can make more Open House cards. I made a card with the Open House Valentines, and a shaker card with the Love You More cutting dies.
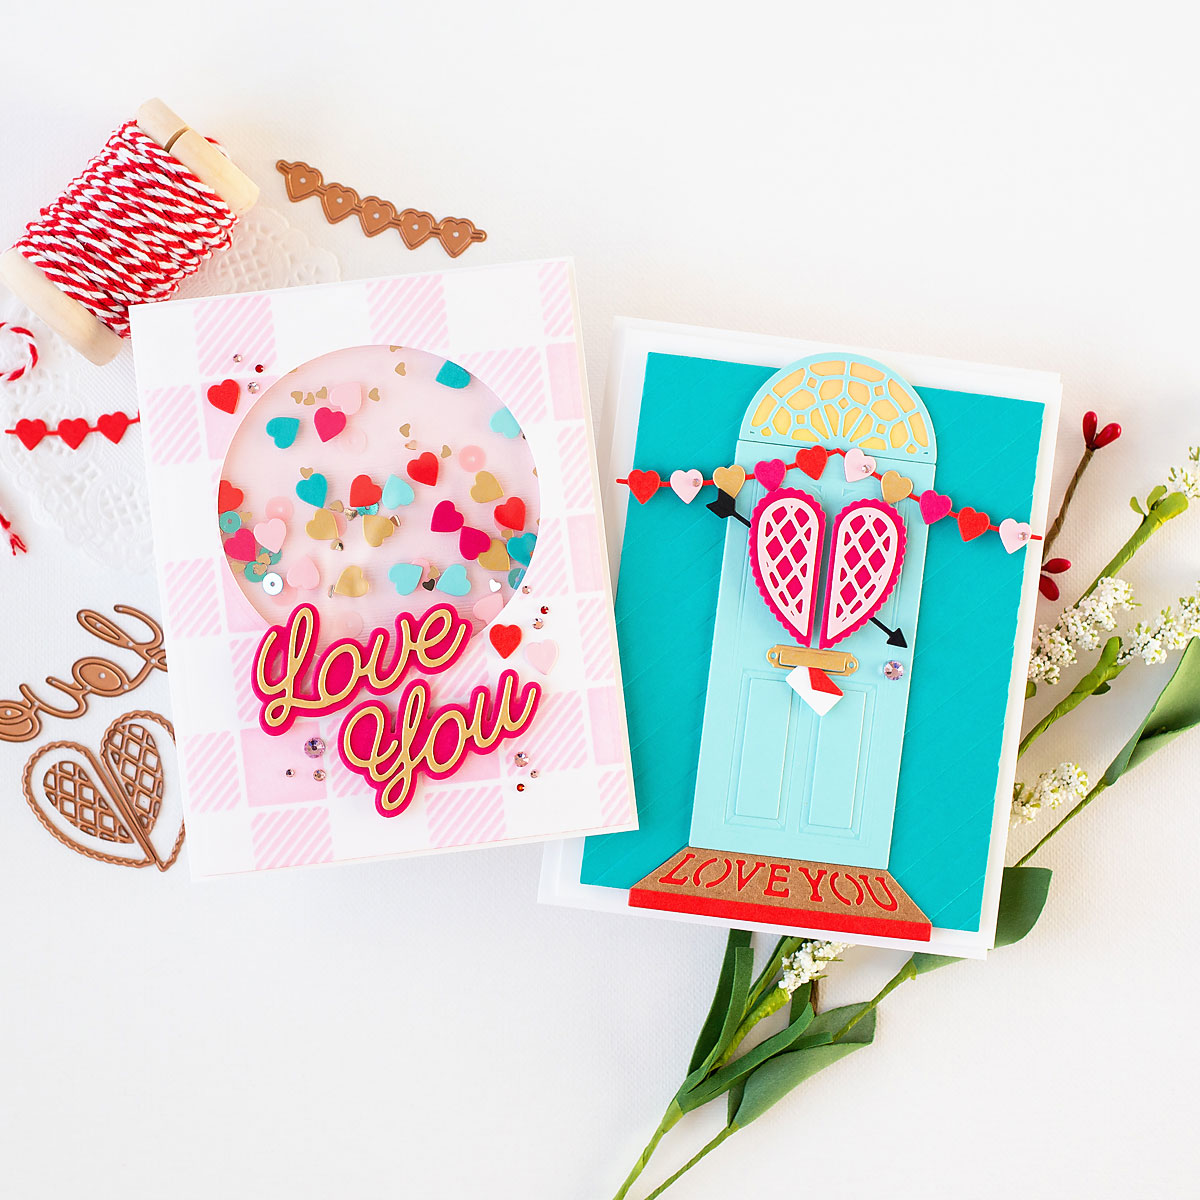
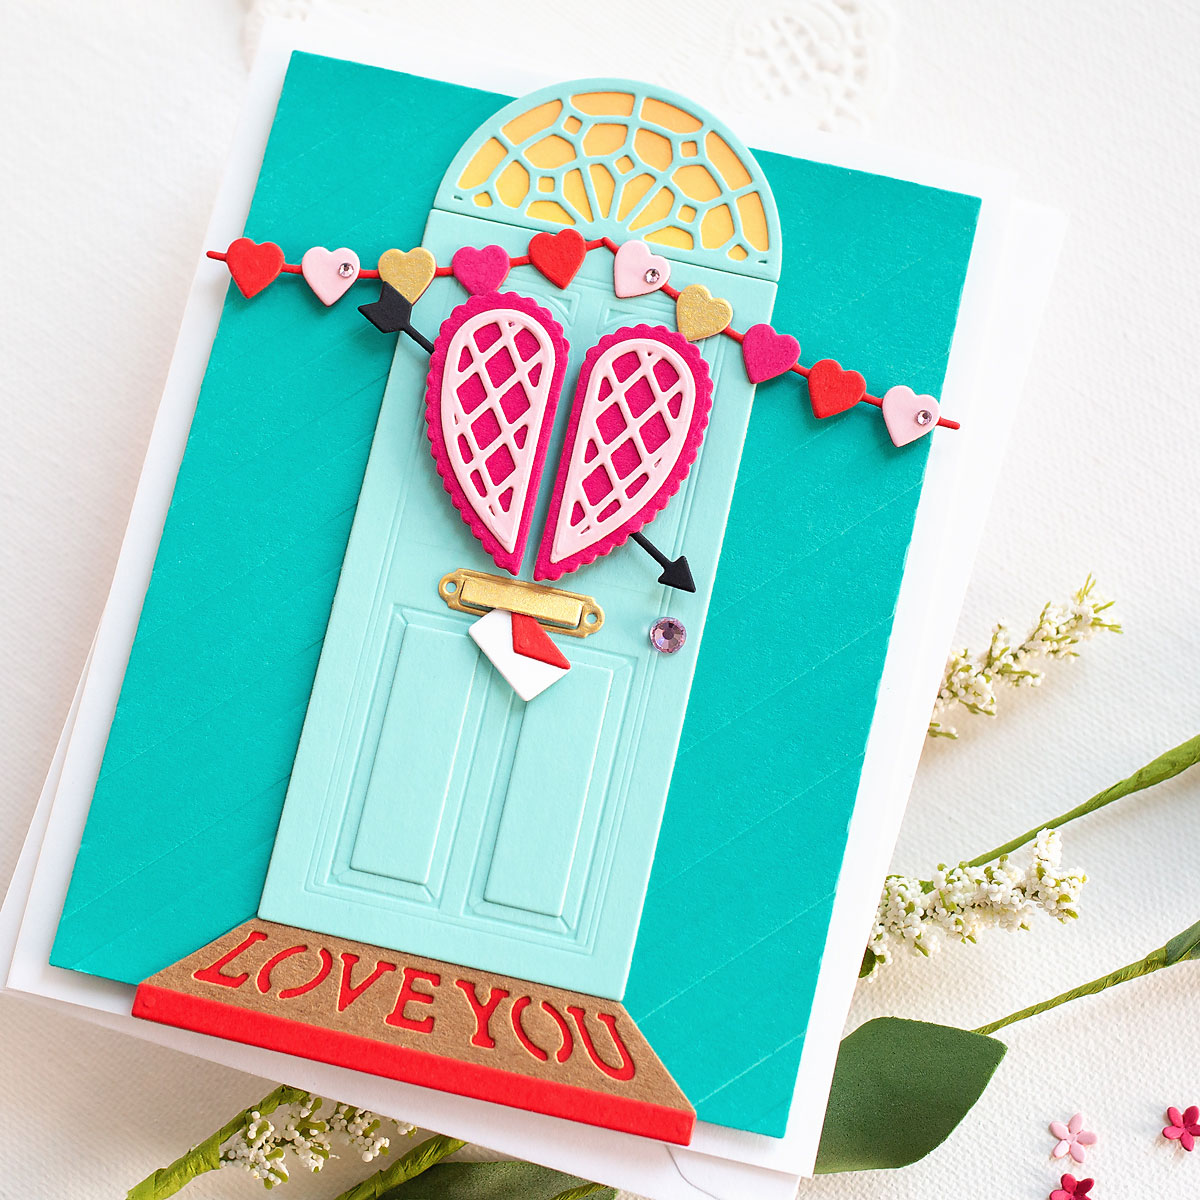
For my first card, I used the Open House Valentines dies along with the Open Door Base to create a Love You card.

I die cut the door, window, and letterbox from the Open House collection. The door mat, hearts banner, cupid heart décor, and the letter are from the Open House Valentine. I also die cut a background panel, and I used the Love Stripes embossing folder to create some texture.

I adhered the background panel with foam tape to a side folding A2 white card base. Then, I glued on the door mat, the door, and the window. For the décor, I added 2 of the hearts banners, and then popped up the cupid heart halves with foam tape. To finish off the card, I added a pink gem for the door knob, and tiny pink gems to the heart banner.
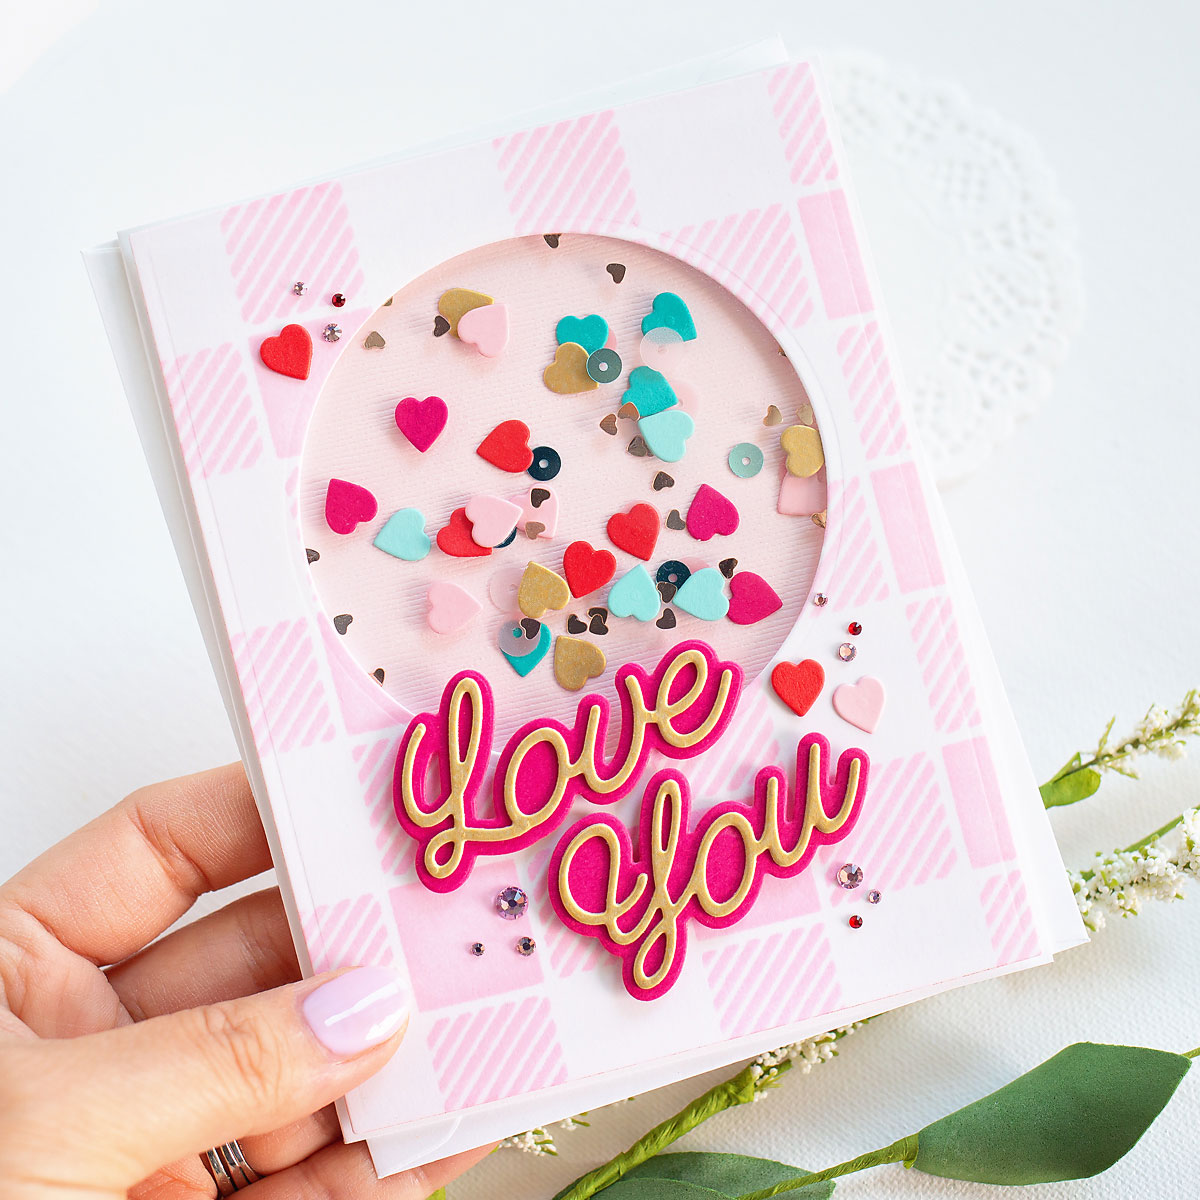
For my second card, I decided to make a shaker card. I used the Love You More cutting dies, and I also cut some shaker pieces with the heart die from the Open House Valentine set.
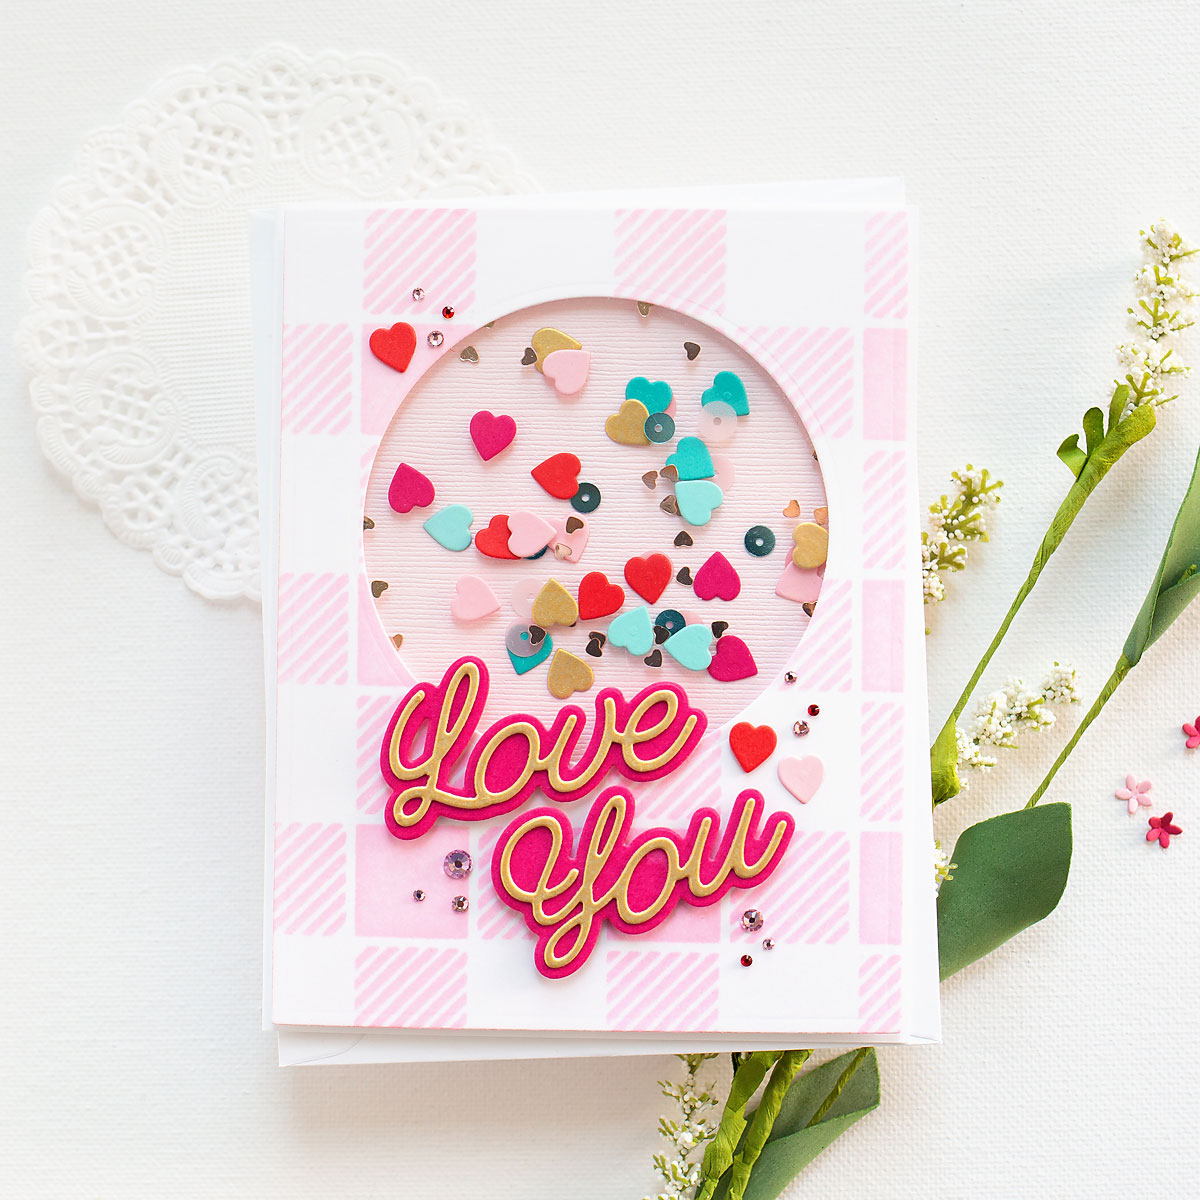
On a piece of white cardstock, I used the Buffalo Check stencil and pink ink to create my top panel. I die cut a circle from the upper part of the panel, and then glued a piece of acetate behind the circle. I lined the back of the buffalo check panel with foam tape; I made a well around the circle with the foam tape, making sure not to leave any gaps. I added the die cut hearts, as well as some sequins from my stash to the well, and then added a piece of pink cardstock to back the shaker. I adhered the entire shaker panel to a side folding A2 white card base.
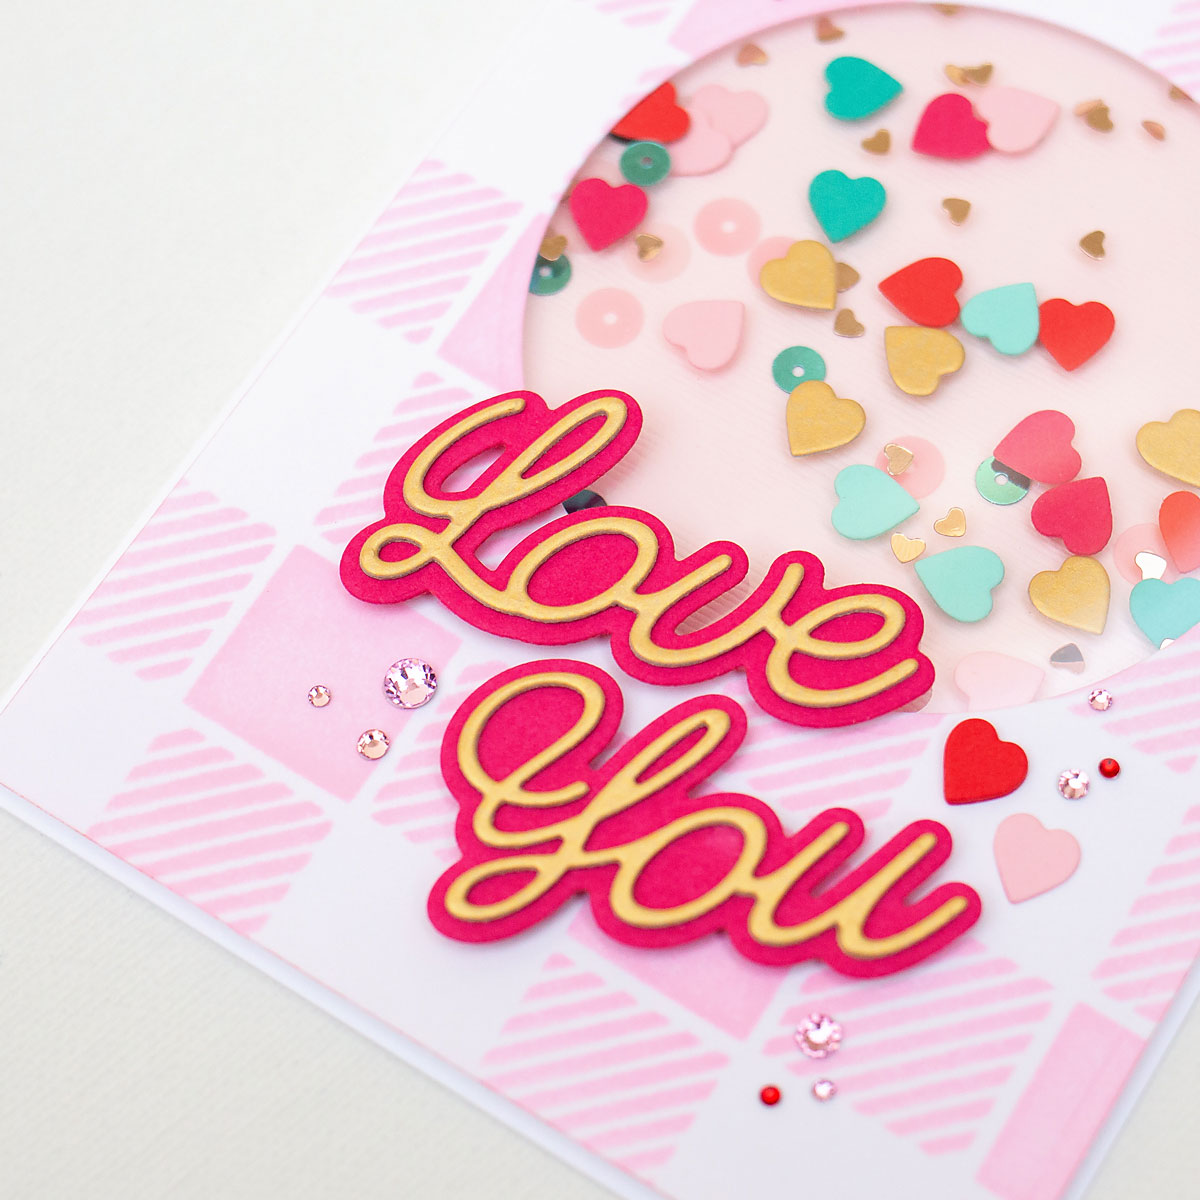
Next, I added the sentiment that I diecut with foam squares (I diecut the “love” and “you” 2 times from gold cardstock, and the shadow piece from dark pink cardstock). To finish off the card, I added a few more of the diecut hearts, and some pink and red gems.
Spellbinders Supplies:

Other Supplies
Distress ink in Spun Sugar, foam tape, acetate, sequins

I am thrilled with how my cards turned out. I love everything pink, all the hearts, and I always love working with the Open House collection. I hope my Love You More collection cards have inspired you to get crafty. Thank you so much for stopping by, and make sure you come back to the Spellbinders blog for even more inspiration.
2 Comments
aussie425
Hi, is there a card tutorial or dimensions for the D I Y card on your front page please? (It’s with a couple of valentine cards) Cheers and thankyou, Marilyn in the UK.
Nove stampiljke
After this tutorial, I love Spellbinder even more 🙂