Embossing Folder of the Month Kit – Card Inspiration with Annie Williams
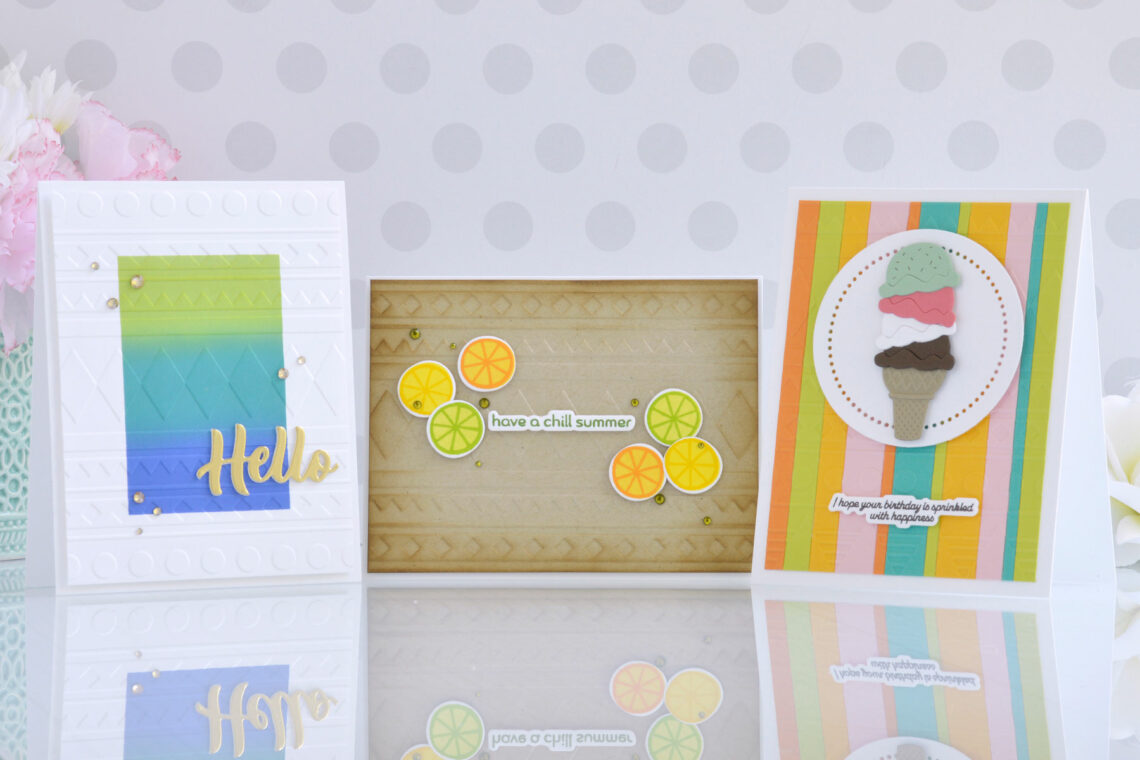
Hi there, this is Annie Williams and I’m excited to be back on the blog today to share a couple of projects using the July Embossing Folder of the Month Kit from Spellbinders. The simple, yet bold pattern of the Geometric Stripes Embossing Folder makes it easy to add some fun texture to cards for all kinds of occasions.
Beach Blanket Look
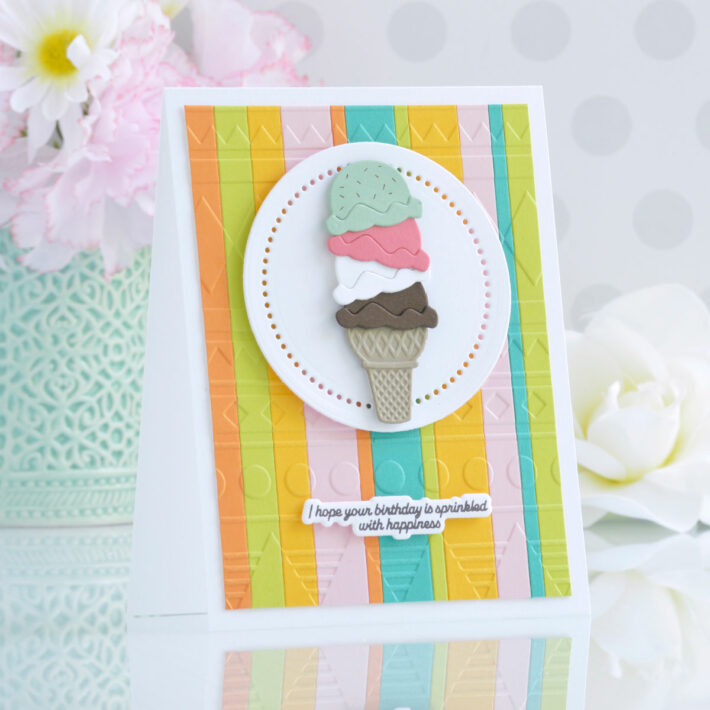
The bold stripes in the Geometric Stripes Embossing Folder reminded me of a beach blanket, so I thought it’d be fun to weave in some bold colors too. Here I used strips of cardstock to create a striped background that I embossed as well for this bright summer birthday card.
- Trim a piece of scrap cardstock to 3.875” x 5.125” and apply adhesive over the entire surface.
- Die-cut Persimmon, Peridot, Saffron, Pink Sand, and Teal Topaz Cardstock using the cutting die from the Add A Stripe Of Color Glimmer Plate Set.
- Lay the strips of colored cardstock down onto the scrap panel, trim off any overhanging cardstock with a pair of scissors, and emboss the panel using the Geometric Stripes Embossing Folder.
- Die-cut white cardstock using the large die and pattern from the Essential Circles Die Set.
- Die-cut Portobello, Timber, white, Dahlia, and mint cardstock using the ice cream cone die from the Food Truck Die Set and assemble the stacked cone with liquid glue.
- Stamp a sentiment from the Have A Chill Summer Stamp Set onto white cardstock using brown ink and cut it out with the coordinating die.
- Adhere the embossed panel to a top-folding A2-sized white card base with a tape runner.
- Add the circle die-cut, ice cream cone, and sentiment to the card front with foam adhesive.
- Add brown sprinkles to the ice cream cone with a fine-line marker.
Brightly Blended Background
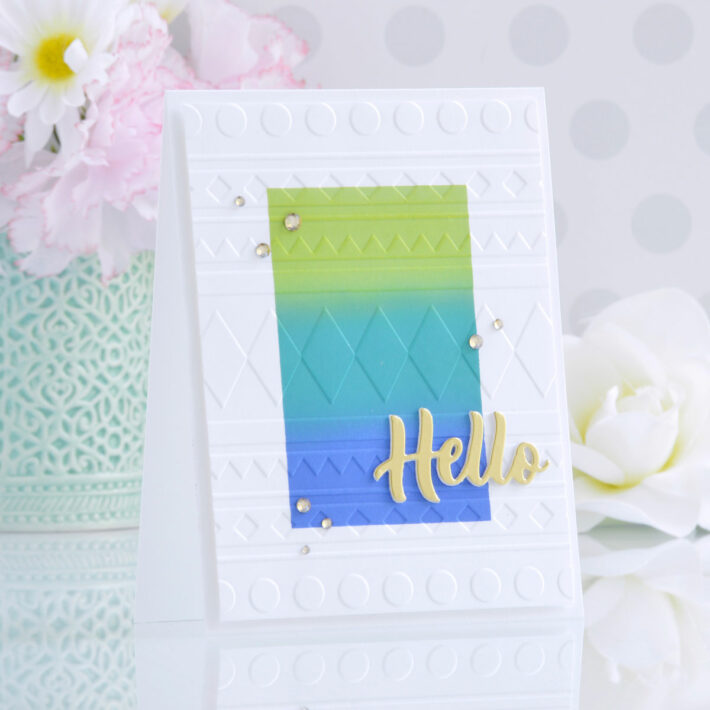
Next, I wanted to create a brightly blended and embossed background for this clean and simple hello card.
- Trim a piece of white cardstock to 4” x 5.25” and mask off the edges of the panel using masking paper or Post-It Tape.
- Blend Twisted Citron, Peacock Feathers, and Blueprint Sketch Distress Oxide Ink over the center of the panel with a blending tool.
- Once dry, emboss the panel using the Geometric Stripes Embossing Folder.
- Die cut Mirror Gold and white cardstock using the hello die from the Tiara Trifold Die Set and adhere the layers together with liquid glue.
- Add the embossed panel to the front of a top-folding A2-sized white card base with foam adhesive.
- Adhere the sentiment to the front of the card with liquid glue.
- Embellish with Gold Mix Gems.
Simple Edge Inking
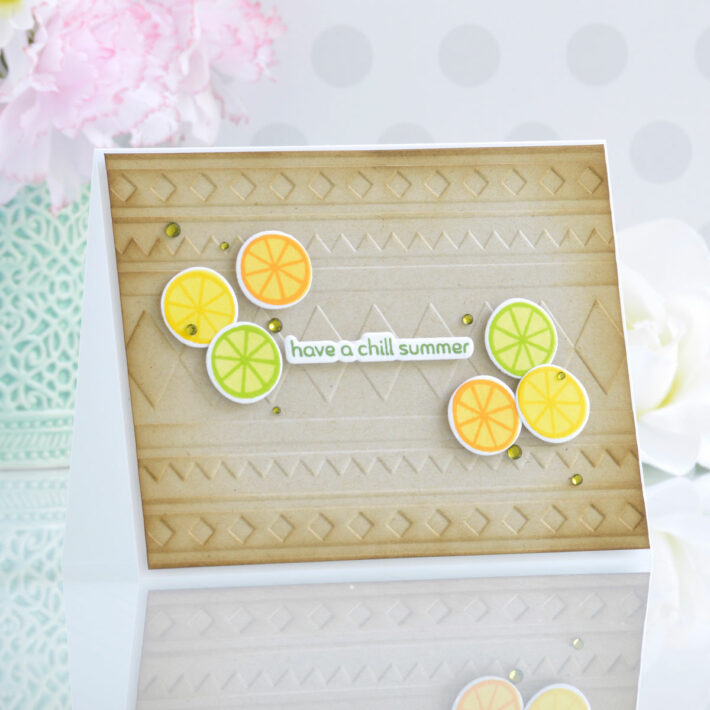
Lastly, I decided to create a simple and fresh summer card with a little inking to enhance the beautiful background pattern and a few cute citrus slices.
- Trim a piece of kraft cardstock to 4.125” x 5.375” and emboss it using the Geometric Stripes Embossing Folder.
- Blend Gathered Twigs Distress Ink around the edges of the embossed panel with a blending brush.
- Stamp the citrus slice images from the Have A Chill Summer Stamp Set onto white cardstock using yellow, orange, and green inks.
- Stamp a sentiment from the same stamp set onto white cardstock using dark green ink.
- Die-cut the images and sentiment out with the coordinating dies.
- Add the embossed panel to a top-folding A2-sized white card base with foam adhesive.
- Pop the sentiment and images up in the center of the card with more foam adhesive.
- Embellish with Green Color Essentials Gems.
Spellbinders Supplies:

Other supplies
White heavyweight cardstock, Twisted Citron, Peacock Feathers, and Blueprint Sketch Distress Oxide Ink, blending tools, Post-It tape, tape runner, foam adhesive, Stampin’ Up Mint Macaroon Cardstock, Versafine Clair Pinecone Ink, Tombow Fudenosuke brown pen, Gathered Twigs Distress Ink, blending brush, Lemon, Autumn, Citrus, Apricot, Fern, Grass, and Basil Color Fuse Inks from Rubbernecker Stamps
I hope you enjoyed this trio of bright summertime cards and thanks so much for stopping by today. You can find more inspiration over at my blog AnnieBWills.com.

