Parcel & Post Collection Three Ways with Brenda Noelke
Hello, crafty friends!! Brenda Noelke here from My PaperCut Creations! I’m super excited to be guest posting on the Spellbinders blog today! I have three cards to share with you featuring the fantastic Parcel & Post Collection. I absolutely love that this collection can be used for so many different occasions just by switching up the colors, sentiment and die-cuts!!
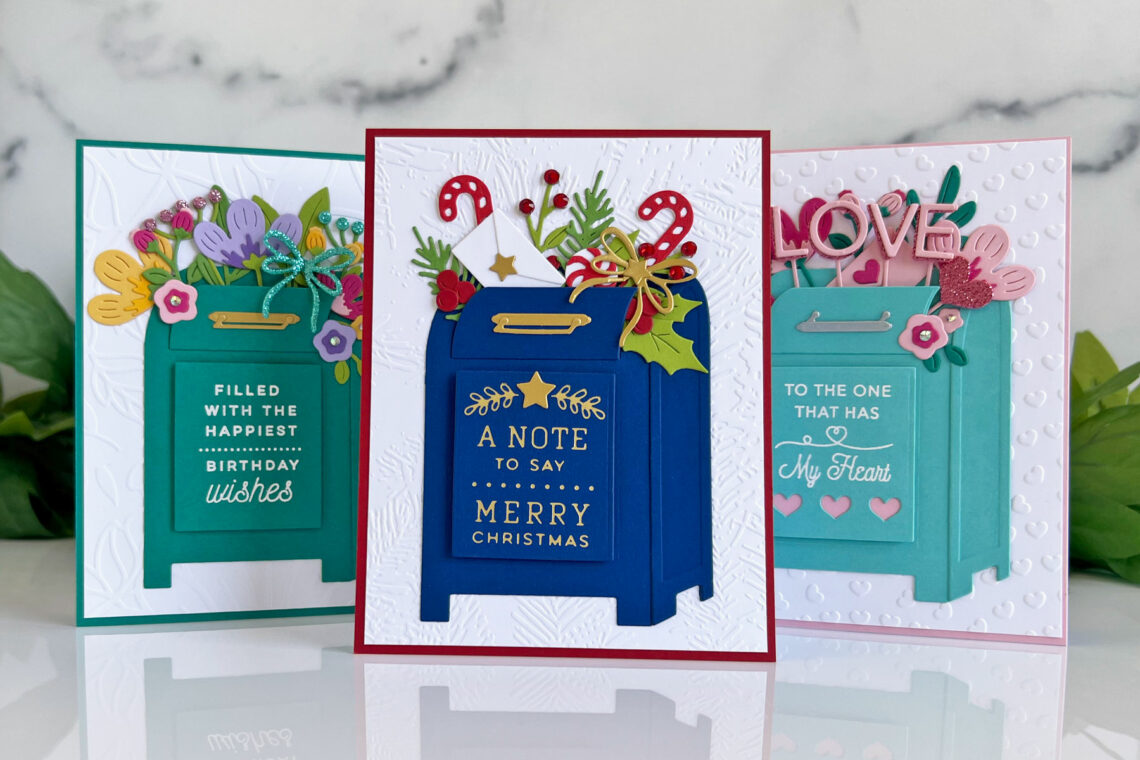
Birthday Wishes Parcel & Post Mailbox
It seems that I am always in need of birthday cards, so that’s what I created first using the Parcel & Post Mailbox Die Set! I started by die-cutting all of the components from Lagoon, Lilac Blossom, Royal Amethyst, Pink Sand, Rainforest, Beeswax, Chamomile, Brushed Gold and bright pink cardstock. I also die-cut the bow and tiny circles for the flowers from Peony Pinks and Shimmering Tropics foam sheets.

The sentiment, from the Parcel & Post Sentiments Clear Stamp Set, was white heat embossed onto Lagoon cardstock and cut out with the rectangular die in the set. All of the elements were arranged and most of them were adhered together with liquid glue. The rectangular die-cut with the sentiment and the opening of the mailbox were adhered with foam tape.
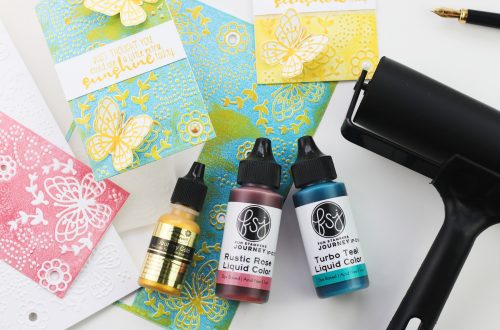
For the background, a panel of white cardstock was embossed with the Garden Path Embossing Folder of the Month and the Platinum 6. I trimmed it slightly smaller than A2 and adhered it to a panel of Lagoon cardstock, then a white, top-folding card base. The mailbox and flowers were adhered to the front of the card with liquid glue. The final touch was a trio of Spectrum AB Color Essentials Gems added to the centers of the smaller flowers for a bit of sparkle and shine.
Christmas Parcel & Post Mailbox
The Parcel & Post Christmas Decorations Die Set is a wonderful addition to the Parcel & Post Mailbox! I just love all of the little die-cut accessories in this set! For this one, the mailbox and handle were die-cut from Cosmic Sky and Brushed Gold cardstock using the Parcel & Post Mailbox Die Set. All of the accessories are from the Parcel & Post Christmas Decoration Dies. They were die-cut from Phone Booth, Fern, Rainforest, Brushed Gold and White cardstock.
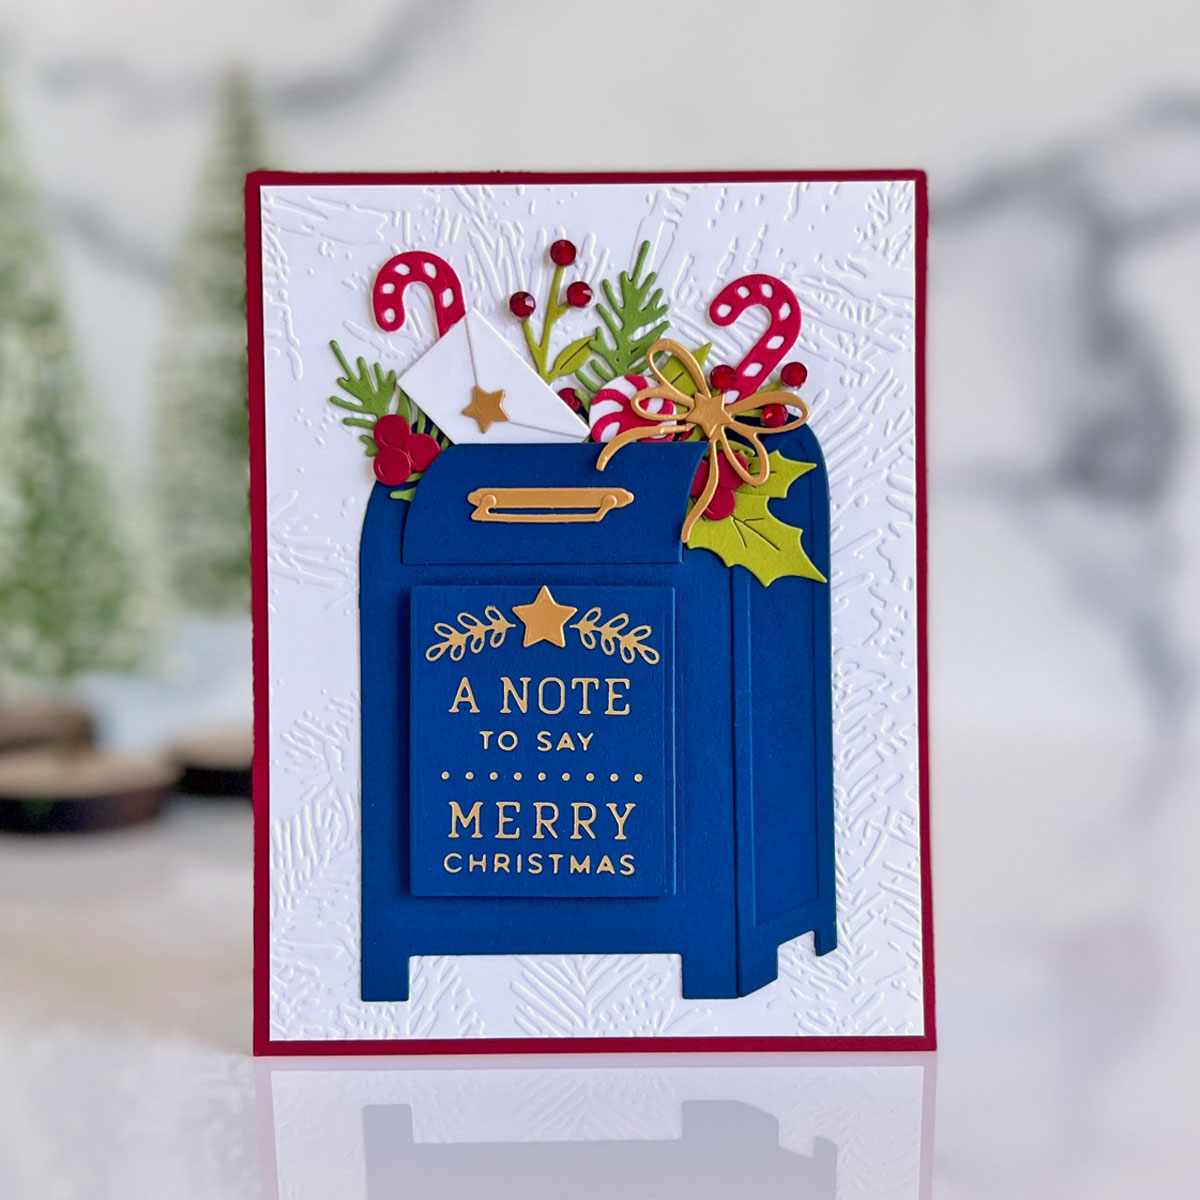
The sentiment was foiled onto Cosmic Sky cardstock using the Glimmer Foiling System and Matte Gold Foil with the Christmas Mailbox Greetings Glimmer Hot Foil Plate Set, then cut out with the rectangle die in the Parcel & Post Mailbox Set. It was popped up, along with the opening of the mailbox, with foam tape.
For the background on this one, the Forevergreen Embossing Folder was embossed onto a panel of white cardstock. I find that embossing folders are a great way to add interest to the background, without distracting from the focal point. The panel was trimmed slightly and adhered to an A2 size panel of Phone Booth cardstock, then a white, top-folding card base. Red Mix Color Essential Gems were the perfect finishing touch!!
Love Parcel & Post Mailbox
My last card would be perfect for Valentine’s Day, an Anniversary or just to let someone know how much you love them!! The Parcel & Post Heart Decorations Die Set includes some adorable heart and love dies that pair perfectly with the Parcel & Post Mailbox Die Set!

For this one, the hearts and “love” were cut from Pink Sand and a foam sheet from the Peony Pinks Set using the Parcel & Post Heart Decorations Set. The mailbox and flower accessories were die-cut from Teal Topaz, Lagoon, Pink Sand, Brushed Silver and bright pink cardstock using the Parcel & Post Mailbox Die Set.
The sentiment, from the Parcel & Post Sentiments Clear Stamp Set, was white heat embossed onto Teal Topaz cardstock and cut out with the rectangular die in the set. The tiny hearts were die-cut from the rectangle using a die from the Parcel & Post Heart Decorations Set and backed with Pink Sand cardstock. All of the elements were arranged and most of them were adhered together with liquid glue. The rectangular die-cut with the sentiment and the opening of the mailbox were adhered with foam tape.
The background was embossed onto white cardstock with the Spreading Love Embossing Folder of the Month. It was trimmed slightly and adhered to an A2 size panel of Pink Sand cardstock, then a white, top-folding card base. A trio of Spectrum AB Color Essentials Gems finishes this one off!
Spellbinders Supplies:

Other supplies
Versamark, Scotch foam tape, liquid glue, 110 lb. white cardstock, white detail embossing powder, bright pink cardstock.
Thank you so much for joining me today for three ways to use the Parcel & Post Collection! Happy crafting!
July 2018 Large Die of the Month is Here! Join Our Club Contest!
Cut & Emboss Folders Inspiration | Handmade Cards & Tags with Bibi Cameron