Christmas Flourish Collection – Holiday Card Inspiration with Annie Williams
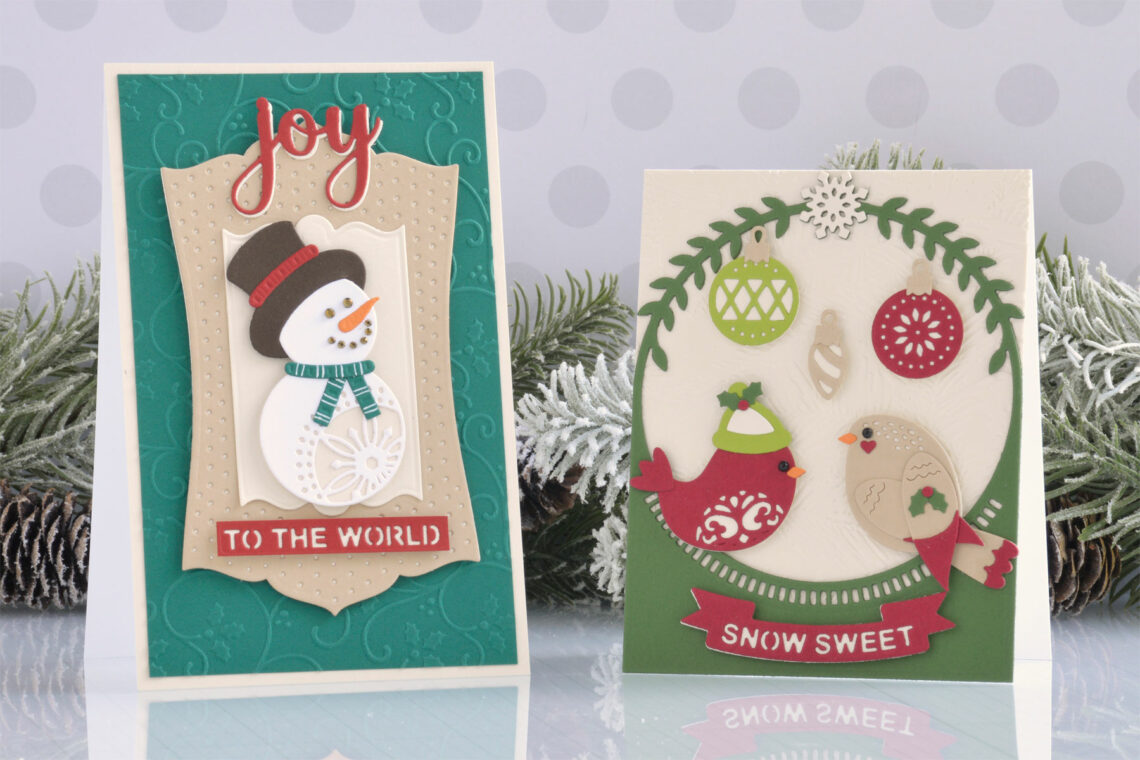
Hi there, this is Annie Williams and I’m excited to be back on the blog today to share a couple of projects using the new Christmas Flourish Collection by Becca Feeken.
The sweet holiday designs and gorgeous background frames inspired me to mix all of the products in this collection to create three pretty holiday cards in a variety of sizes.
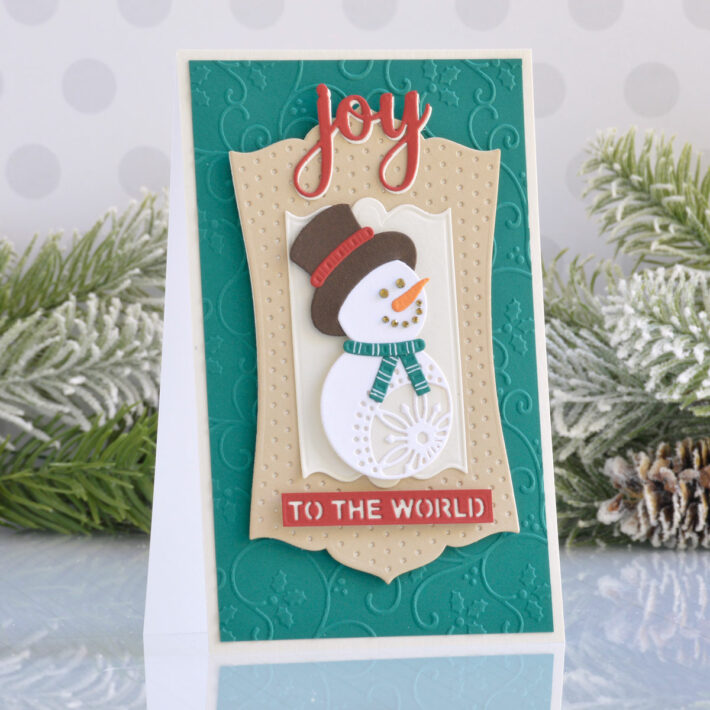
Snowman Joy Mini Slimline Card
I loved all of the sweet details in the snowman from the Let It Snowman Die Set. Here I added this adorable guy to a pretty background with lots of layers and texture for a rustic holiday mini slimline card.
- Die cut white, Blue Spruce, Timber, Persimmon, and Pomegranate Cardstock using the snowman and accessory dies from the Let It Snowman Die Set.
- Add striping details to the scarf with a white paint pen and assemble the snowman with liquid glue. Adhere a piece of Alabaster Cardstock behind the snowflake design and add Gold Mix Gems to the eyes and mouth.
- Die cut Dune and Alabaster Cardstock using the frame dies from the Noel Mini Slimline Frame Die Set and adhere together with liquid glue.
- Trim a piece of Blue Spruce Cardstock to 4” x 6.5” and emboss it using the Holly Flourish Embossing Folder.
- Mat the embossed panel with Alabaster Cardstock and adhere to a top-folding white card base measuring 4.25” x 6.75” with a tape runner.
- Add the frame and snowman to the card front with foam adhesive.
- Die cut Pomegranate and Alabaster Cardstock using the sentiment dies from the Joy Flourish Doily Die Set and adhere to the front of the card with liquid glue and foam adhesive.
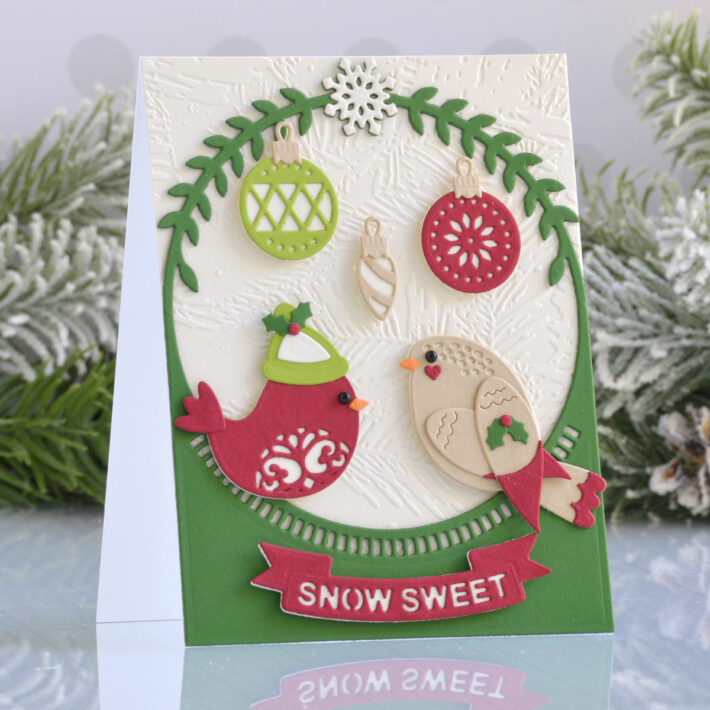
Snow Sweet Birds Card
The holiday birds from the Sugarplum Tweets Die Set are so cute that I had to work with this one next. Here I combined them with the frame from the Let It Snowman Die Set for a simple and sweet holiday wreath card.
- Die cut Phone Booth, Rainforest, Dune, Alabaster, Persimmon, and Fern Cardstock using the bird and accessory dies from the Sugarplum Tweets Die Set.
- Assemble with liquid glue and add Fashion Jet Pearls as their eyes.
- Trim a piece of Alabaster Cardstock to 4.25” x 5.5”, emboss it with the Forevergreen Embossing Folder, and adhere it to a top-folding A2-sized white card base with tape runner.
- Die cut Fern Cardstock twice with the frame die and Phone Booth and Alabaster Cardstock with the sentiment die from the Let It Snowman Die Set.
- Adhere the frame die-cuts together and add to the card front with liquid glue.
- Die cut Rainforest, Phone Booth, Dune, and Alabaster Cardstock with the ornament dies from the Merry Flourish Die Set and assemble with liquid glue.
- Add the birds, ornaments, and sentiment to the card front with foam adhesive.
Winter Lantern Card
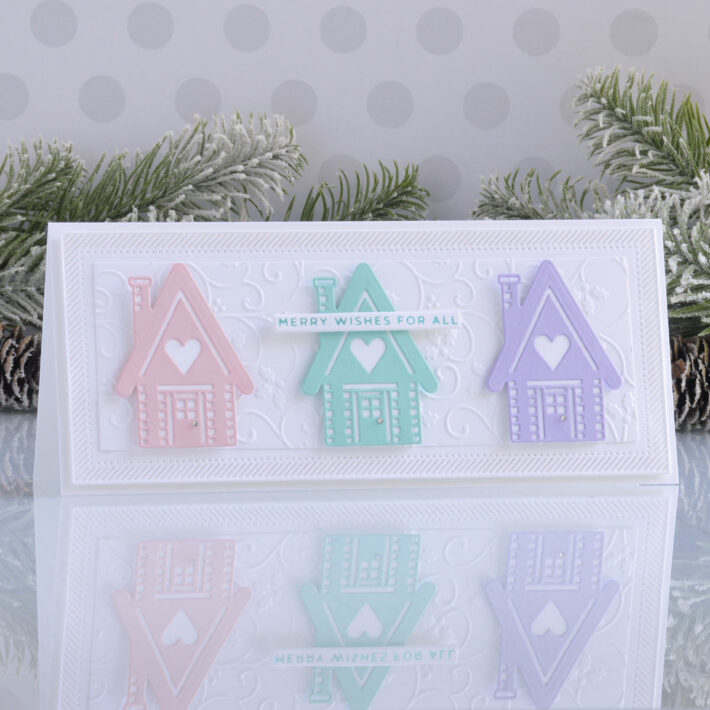
Lastly, I thought the cottage from the All Hearts Come Home A2 Cardfront Die Set was so sweet and would work beautifully with the frame from the Flourished Ornament Slimline Die Set for a soft and pretty Christmas card.
- Die cut Pink Sand, Waterfall, and Purple Mist Cardstock using the house die from the All Hearts Come Home A2 Cardfront Die Set.
- Add white cardstock behind the die-cuts to cover the openings and embellish the door knob with a Crystal Gem.
- Die cut white cardstock using the frame outline and inner frame outline dies from the Flourished Ornament Slimline Die Set.
- Emboss the smaller die-cut using the Holly Flourish Embossing Folder, adhere to the larger frame with a tape runner, and add to a top-folding white card base measuring 3.75” x 8.75” with foam adhesive.
- Apply Moondust Hot Foil to white cardstock using one of the sentiments from the Glitter Wishes Glimmer Plate Set and cut it out with the coordinating die.
- Add the house die-cuts to the card front with foam adhesive and pop the sentiment up on top with more foam adhesive.
Spellbinders Supplies:

Other supplies
White heavyweight cardstock, white paint pen, tape runner, foam adhesive.
I hope you enjoyed these pretty holiday cards and thanks so much for stopping by today. You can find more inspiration over at my blog AnnieBWills.com.

One Comment
Sara
Thank you so much for these I love this 😊😍😍