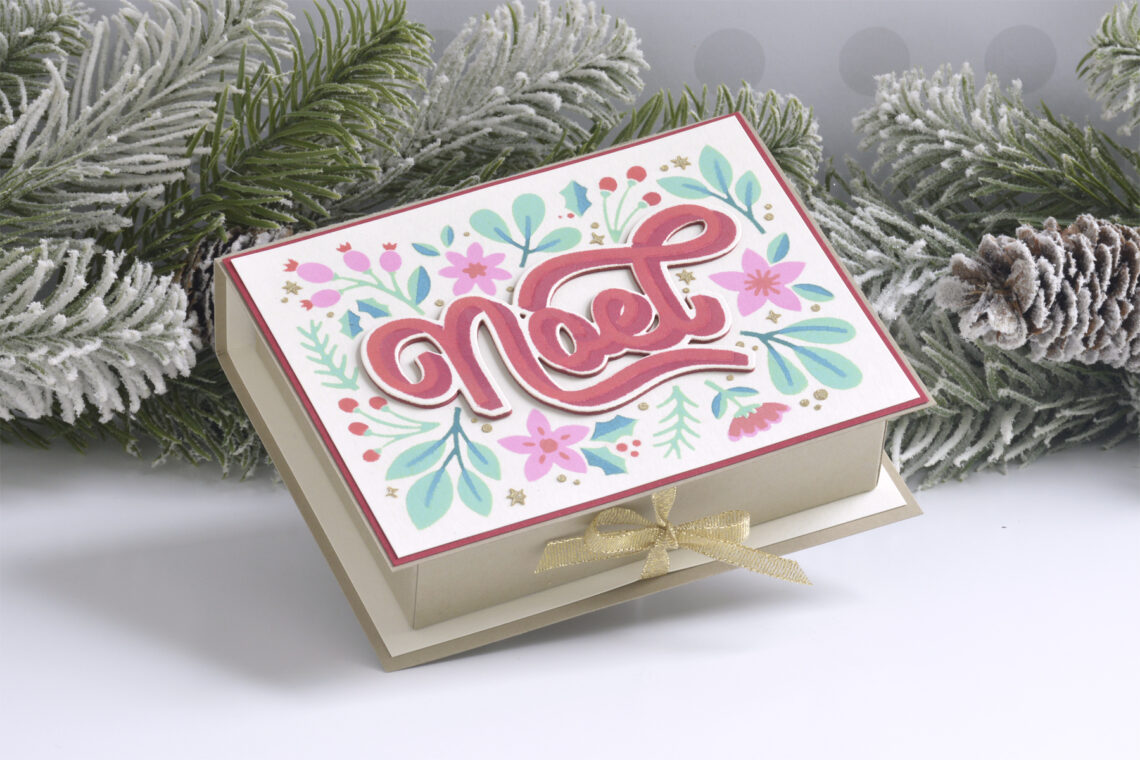
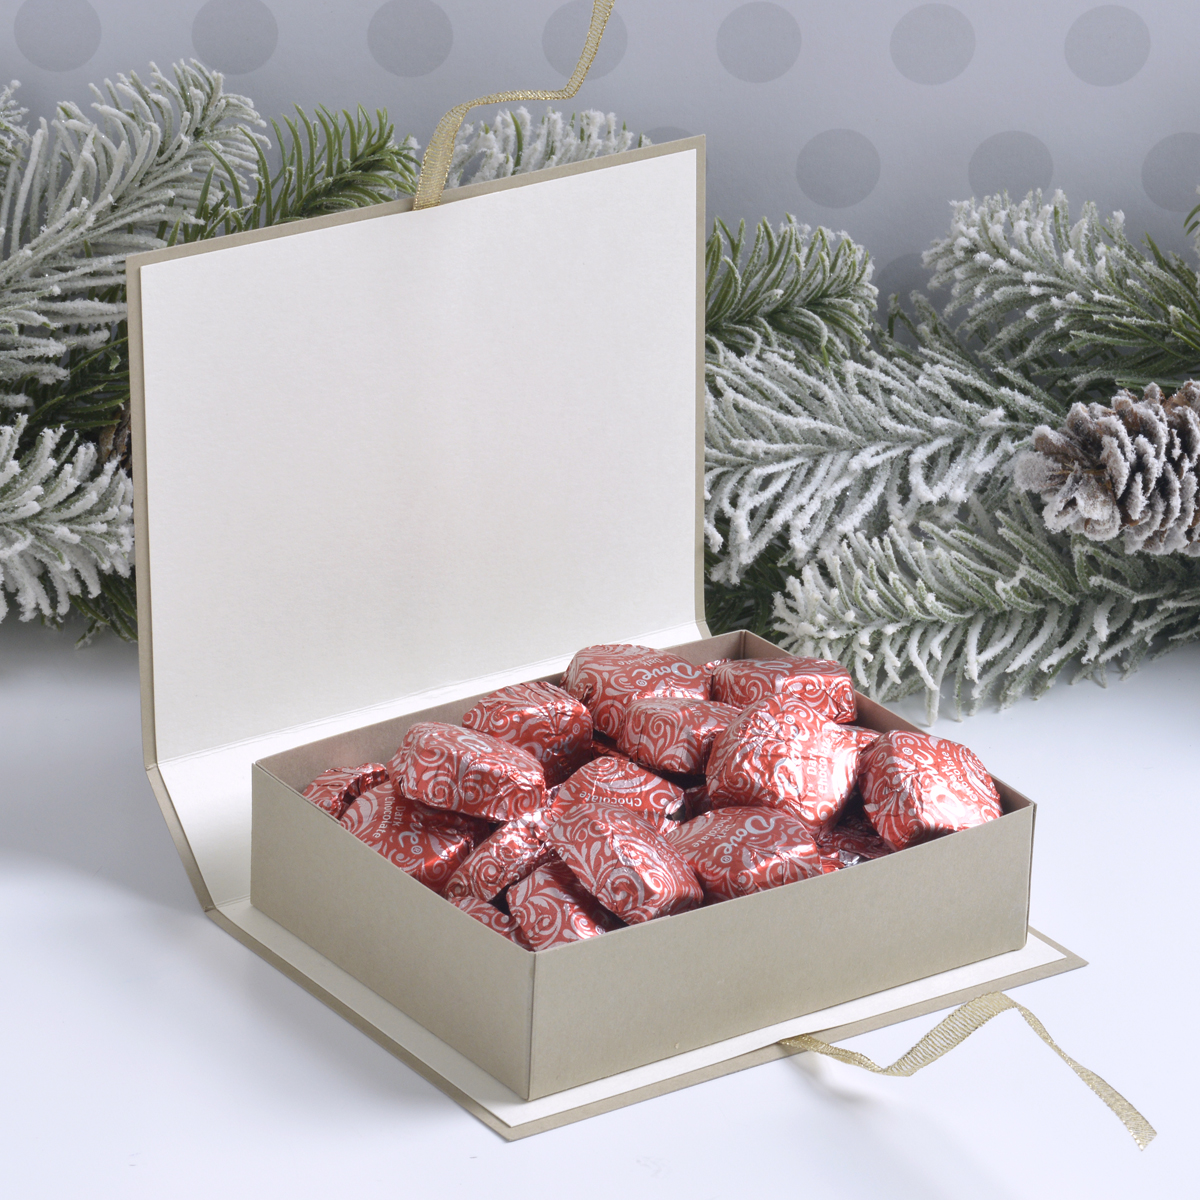
Stenciled Book Box with the Layered Christmas Stencils How-To
Hi there, this is Annie Williams and I’m thrilled to be back on the blog today to share this fun book box tutorial made with the new Layered Christmas Stencils Collection. I love making handmade gift boxes, especially around the holidays, but if you’re strictly a cardmaker then you can just follow the directions to create the box top as a card instead!
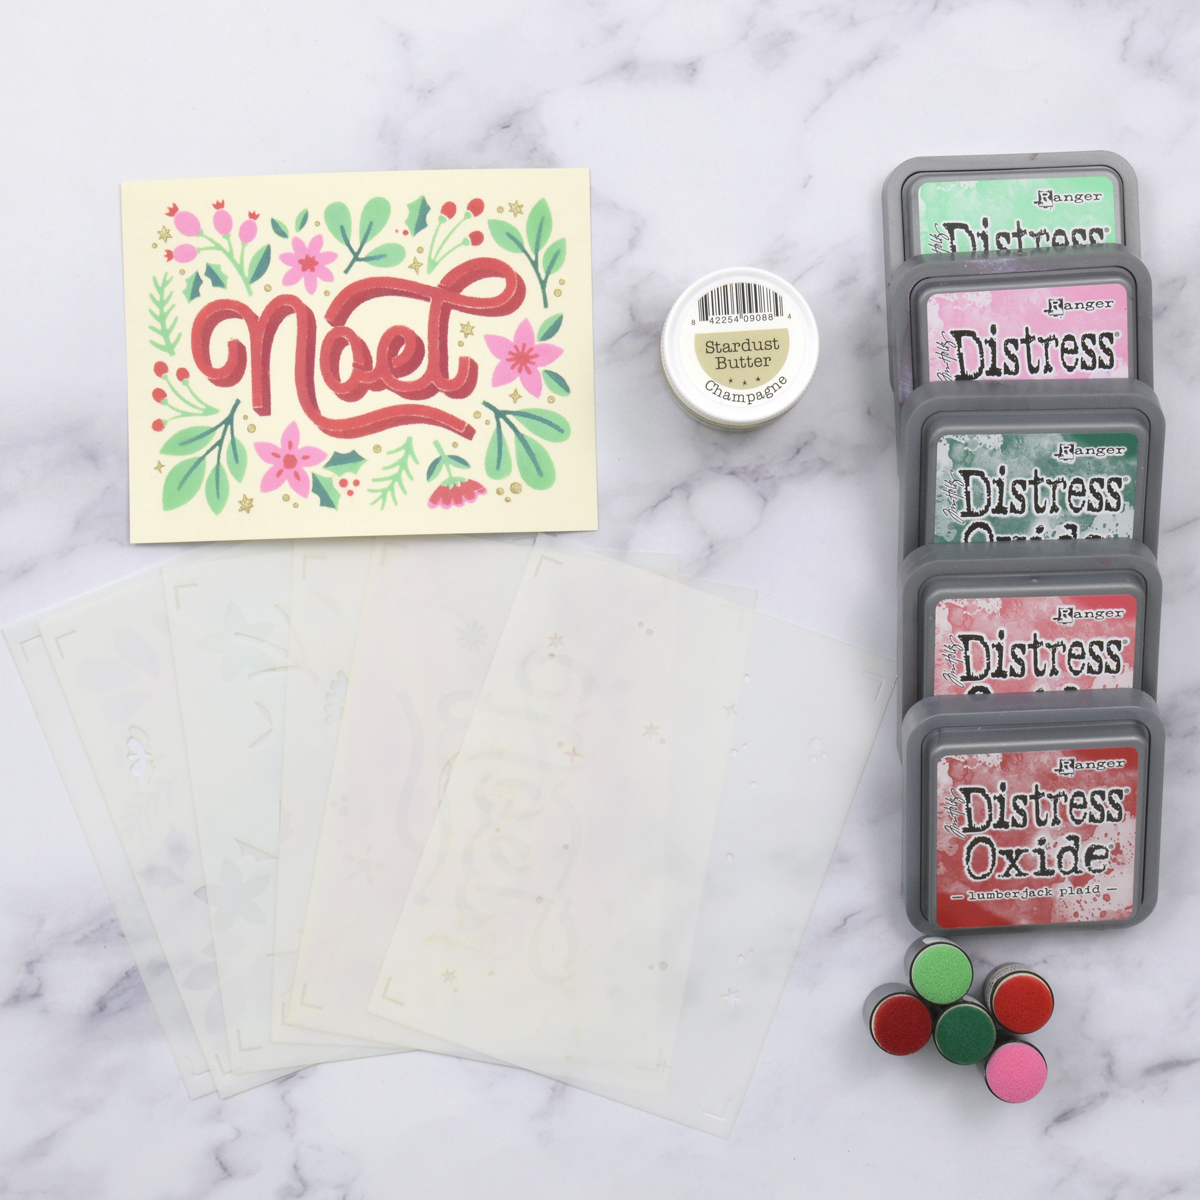
- Trim a piece of Alabaster Cardstock to 4” x 5.25”.
- Using a sponge dauber with a firm pouncing motion (as opposed to the usual circular blending motion), apply Cracked Pistachio Distress Oxide Ink through stencil 1 of the Layered Noel Foliage Stencil Set.
- Similarly, add Kitsch Flamingo and Pine Needles Distress Oxide Ink through stencils 2 and 3. But don’t bring out stencil 4 yet! Instead, add Festive Berries Distress Oxide Ink using stencil 5.
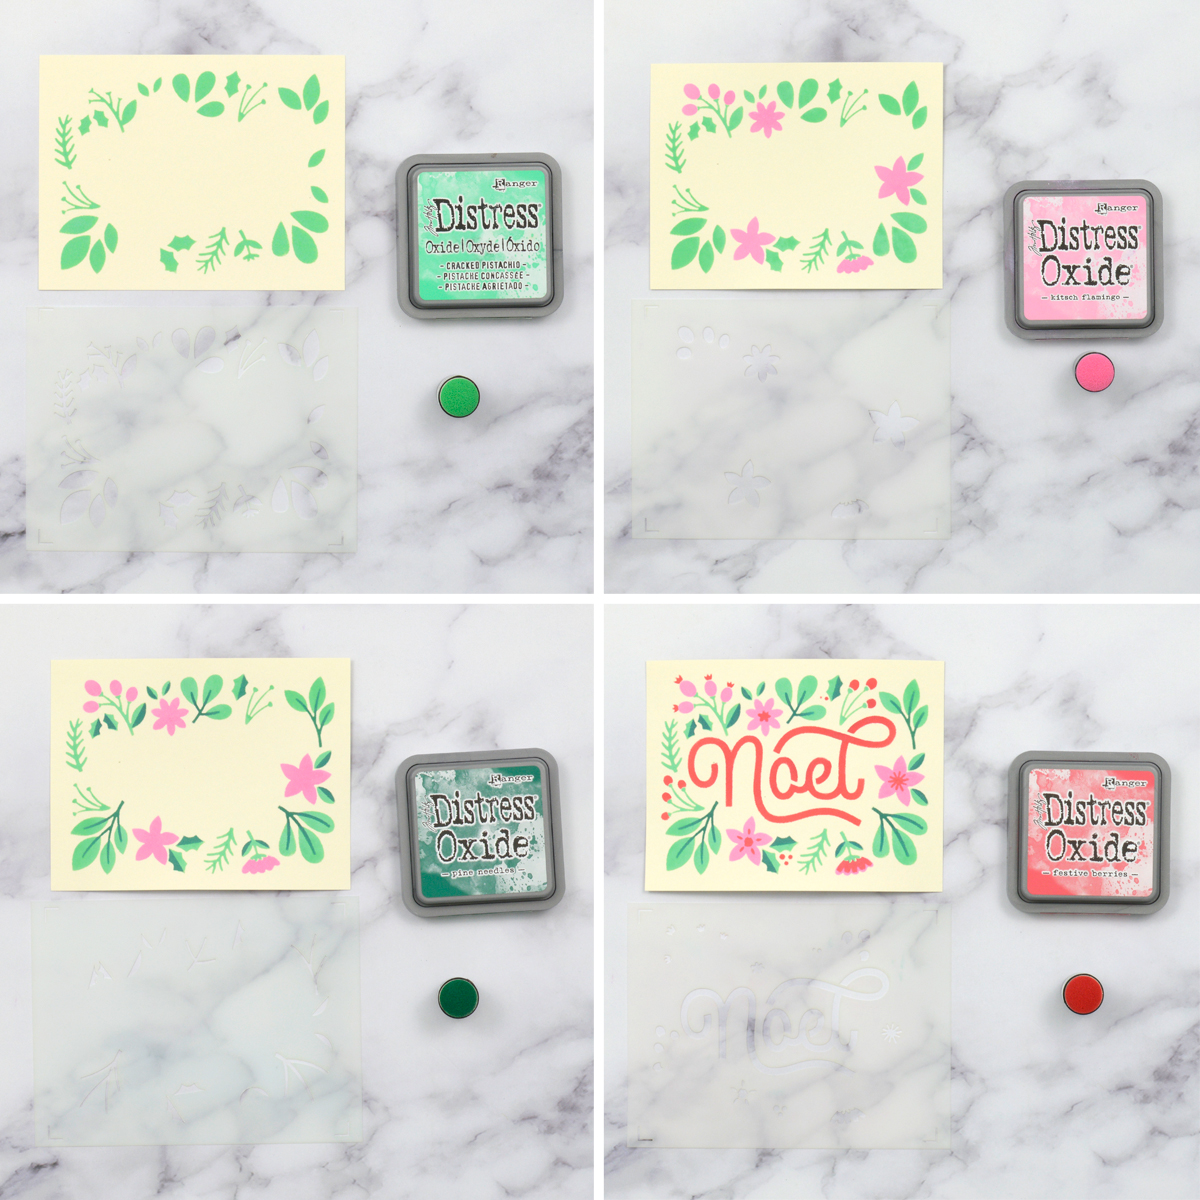
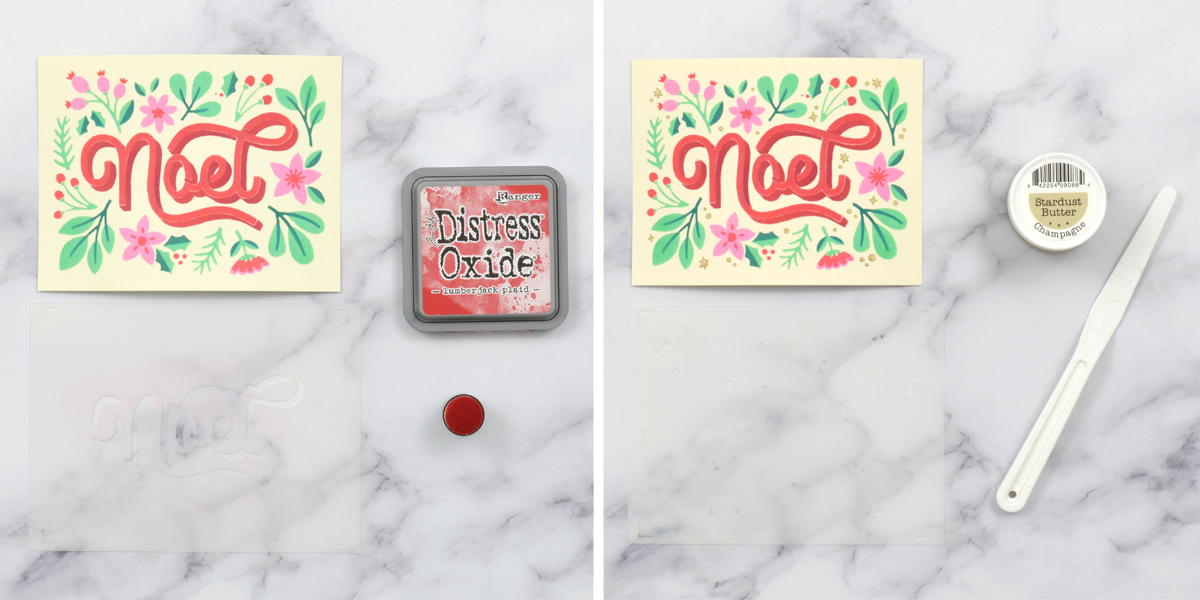
- Next, add Lumberjack Plaid Distress Oxide Ink using stencil 6.
- Position stencil 4 over the inked design now and add Champagne Stardust Butter through the stencil with a palette knife. Set aside to dry completely and rinse the stencil and knife quickly after use.
- We skipped stencil 4 in the sequence because the Stardust Butter remains wet for a longer time and dries dimensional, which would have made stenciling subsequent layers difficult.
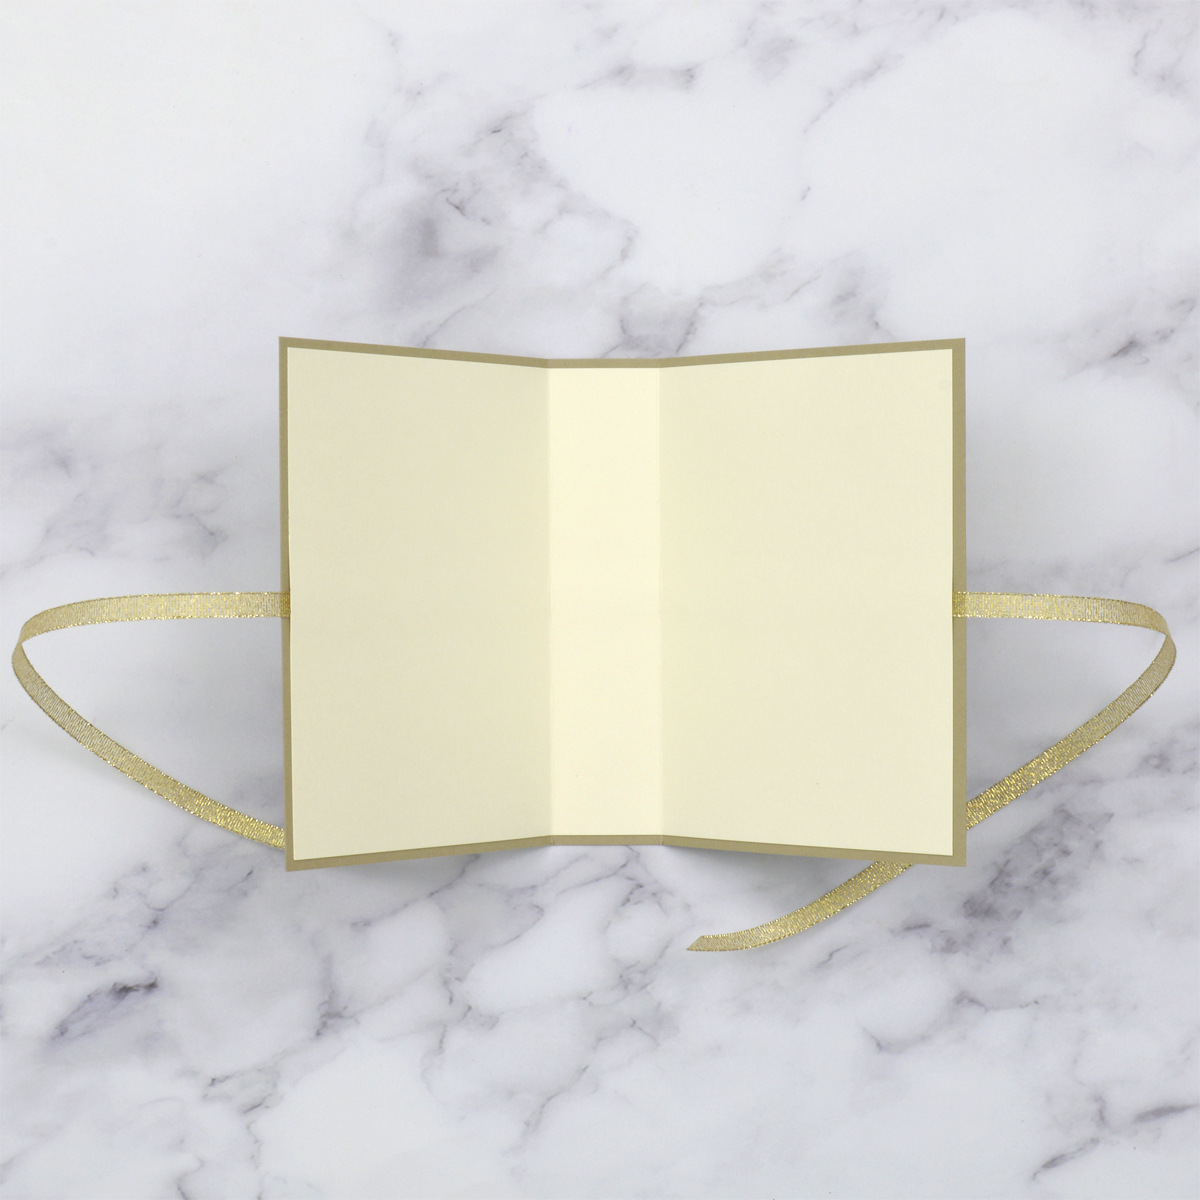
- Trim a piece of Portobello Cardstock to 9.75” x 5.5” and a piece of Alabaster Cardstock to 9.5” x 5.25”.
- Cut a piece of ¼” gold ribbon to about 12” or more and sandwich it in the center between the Portobello and Alabaster panels, attaching them together with a strong adhesive. (I used a combination of double-sided adhesive sheets and liquid glue.)
- Score the entire bundle at 4.125” and 5.375. It may help to score both sides of the bundle a couple of times before creasing the folds to form the “book cover”.
- Trim another piece of Portobello Cardstock to 7.25” x 6.25”.
- Score each side of the panel at 1.25” and trim small wedges out of the corners as shown to form tabs.
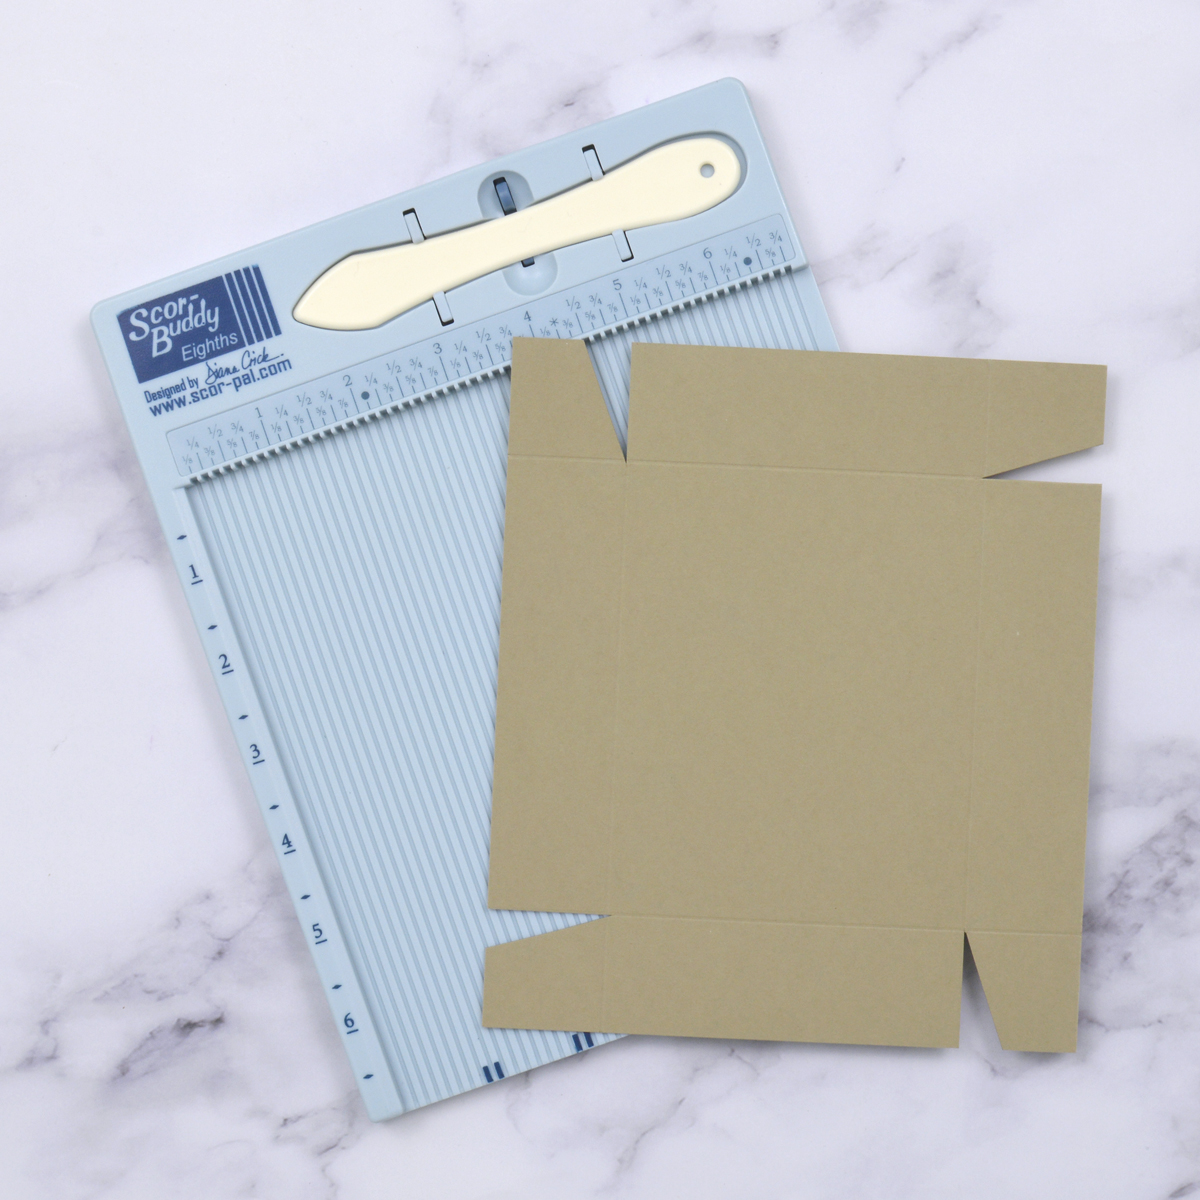
- Fold the sides of the box up on the score lines and adhere the four corners together with liquid glue using the tabs.
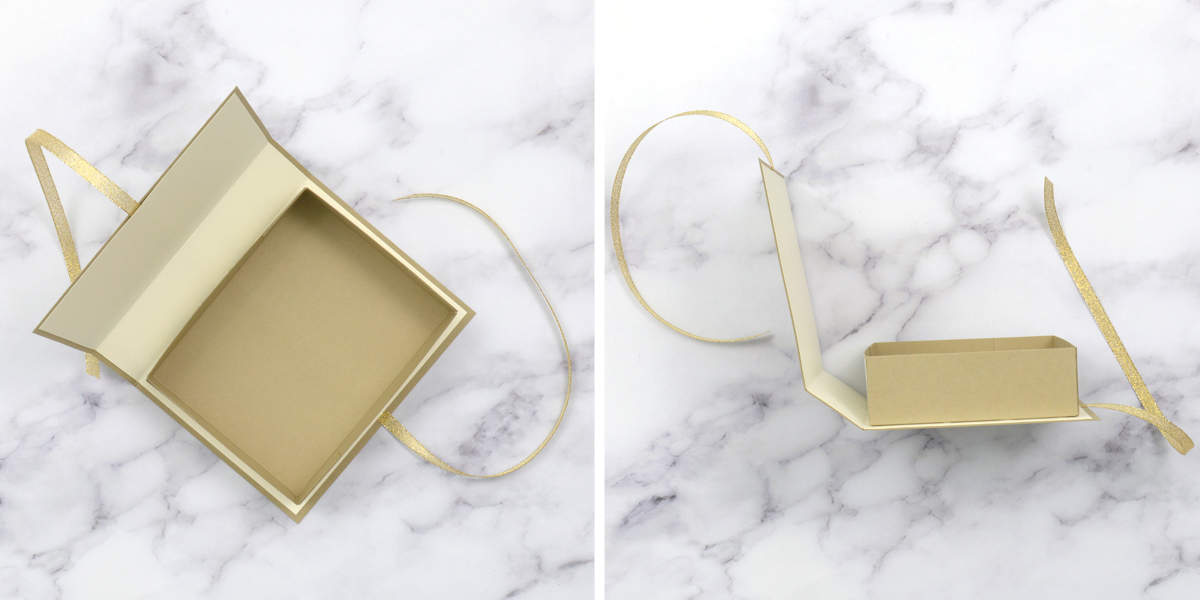
- Adhere the box bottom to the right side of the inside of the “book cover” with strong liquid glue, butting the box up close to the “binding” and leaving a ¼” border around the other three sides.
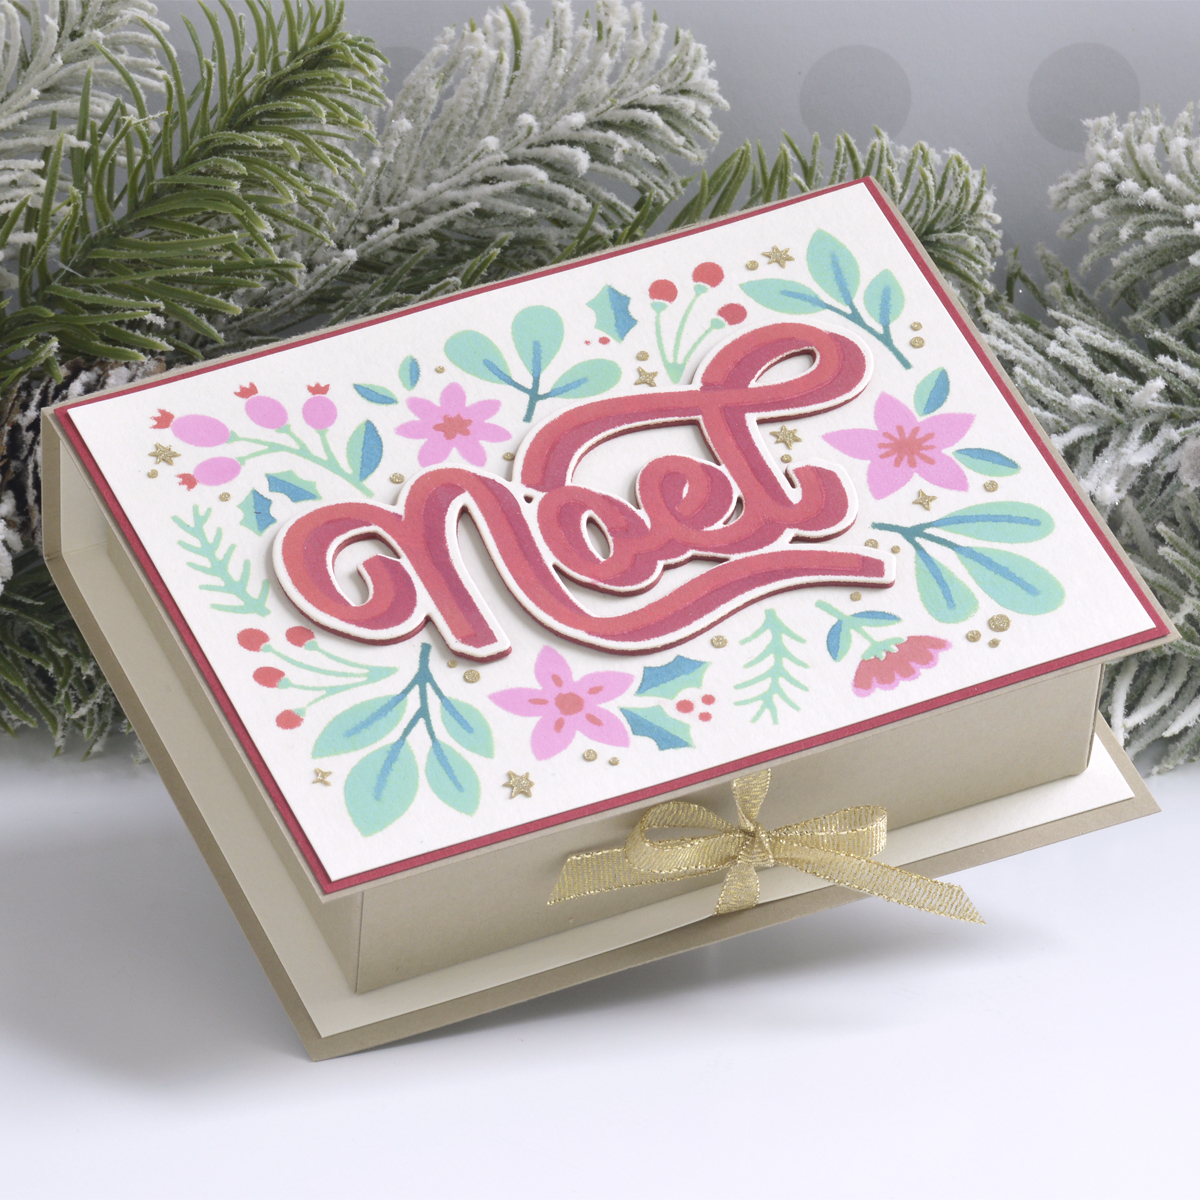
- Mat the stenciled panel with Phone Booth Cardstock and adhere it to the front of the book.
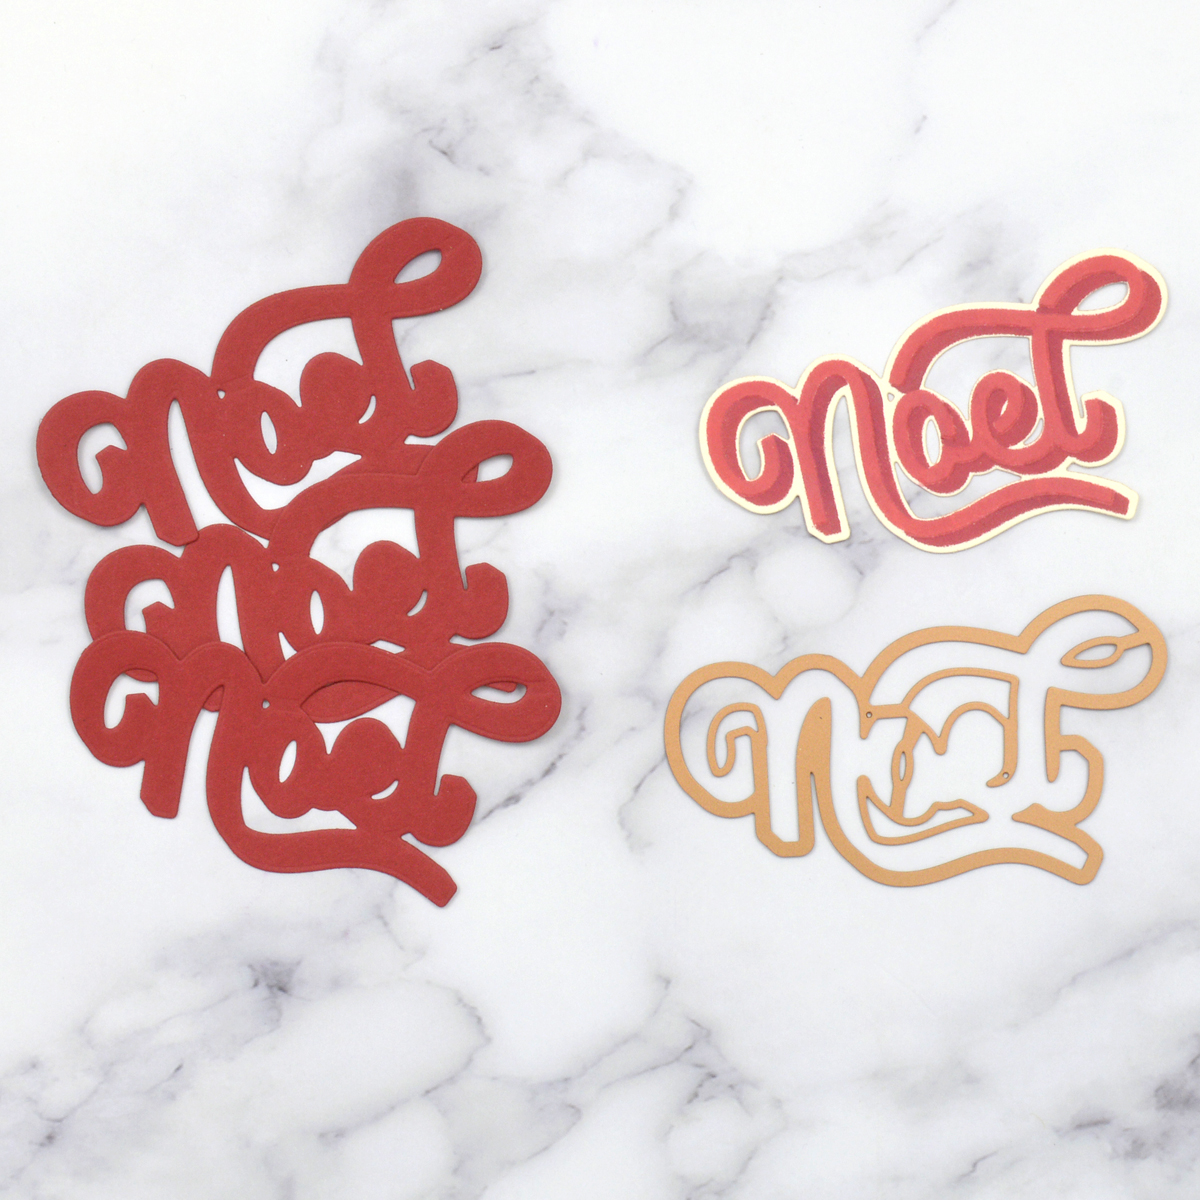
- Stencil a second sentiment onto Alabaster Cardstock using Festive Berries and Lumberjack Plaid Distress Oxide Ink and stencils 5 and 6.
- Cut it out with the coordinating die and then cut three more layers out of Phone Booth Cardstock to adhere behind the sentiment for colorful dimension.
- Fill the box with a gift card, candy, or small gift.
- Tie the box closed tightly with the ribbon and trim the ends as desired.
Spellbinders Supplies:

Other supplies
Sponge daubers, Cracked Pistachio, Kitsch Flamingo, and Lumberjack Plaid Distress Oxide Inks, palette knife, gold metallic ribbon, scissors, double-sided adhesive sheets
I hope you enjoyed this fun stenciled Christmas book box and that you give it a try! Thanks so much for stopping by today…you can find more inspiration over at my blog AnnieBWills.com.
One Comment
Susan Stenning
Brilliant book box design, thanks for sharing.