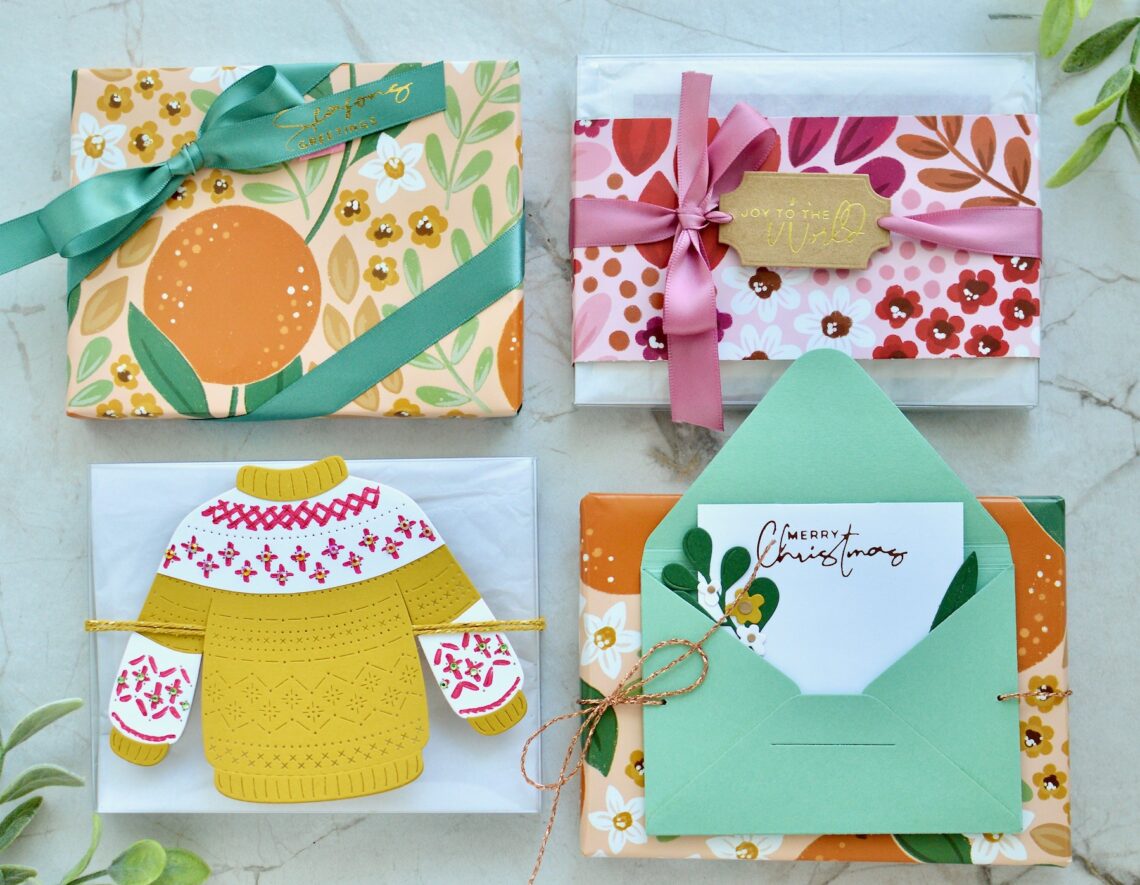
Wrapping and Presenting Crystal Clear Boxes for Holiday Gifts
Hello, friends! It’s Savannah O’Gwynn from Savannahland2. I’m honored to be sharing some of my ideas for holiday gift wrapping using the Crystal Clear Boxes, Vivant twines and ribbons, and Pepin Press papers, as well as many different Spellbinders dies and goodies!
One of my favorite gifts to give to my loved ones for their birthday or for the holidays is a stack of handmade cards!
#SAVfact: I rarely write in my cards because I like to give them as gifts and let the recipient use them🙃 Grab some of these supplies and give out beautifully packaged handmade cards to all your friends, family, neighbours this holiday season.
Below I’ve shared a few ideas to get you started that range from simple & elegant to detailed & fun (plus a bonus idea).
Tips & Tricks
Before we start, here are a few tips when using Crystal Clear Boxes, Vivant twines and ribbons, and Pepin Press papers:
TIP #1: The great thing about these clear boxes is that you can package your cards inside and let the top card’s front shine in the spotlight (You did work really hard on these handmade cards! Show it off!).
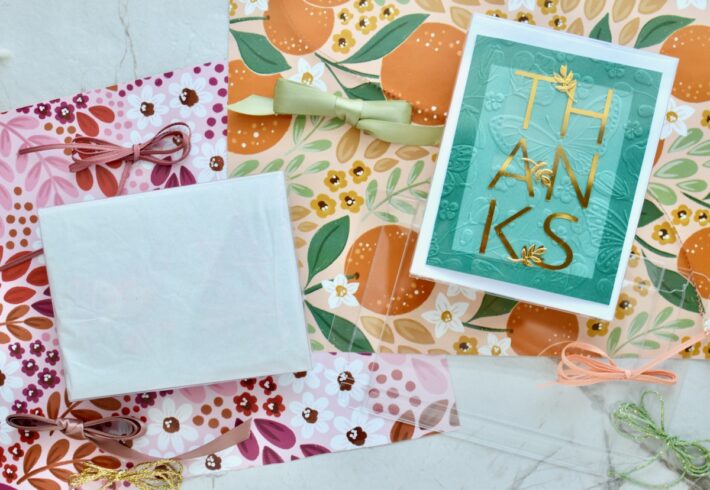
TIP #2: If you want to add a bit more mystery (and another “gift” to unwrap), you can wrap your cards with thin tissue paper to make the box, ribbons, and paper the focal point. Add colored tissue paper to match your Pepin Press papers for extra pizazz!
TIP #3: Secure the clear box ends with clear tape- this helps make the box more sturdy and gives maximum protection for your cards.
TIP #4: All of these ideas can be modified for any other occasion by switching dies, papers, and color themes!
Paper, Tag, and Ribbon- OH MY!
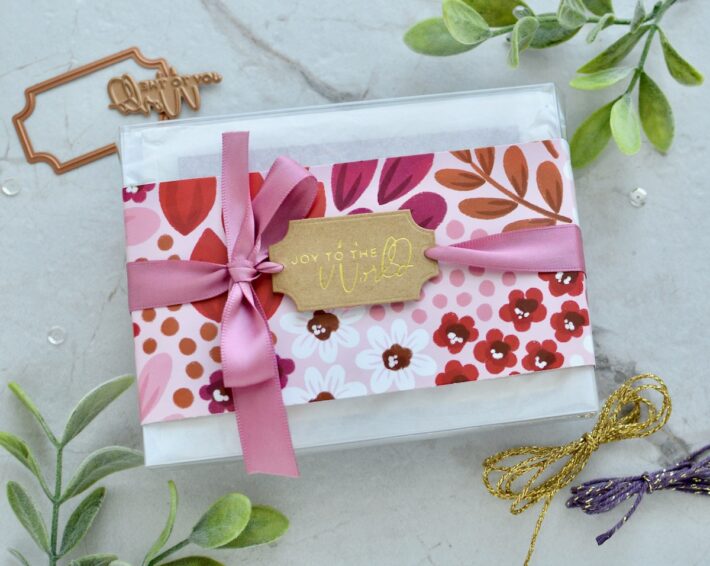
Three simple elements make this gift wrap elegant and perfect for anyone.
- Wrap cards in tissue paper and secure Crystal Clear Boxes
- Cut Pepin Press papers to 2 1/4” to 2 1/2” wide and attach to clear box using double-sided tape.
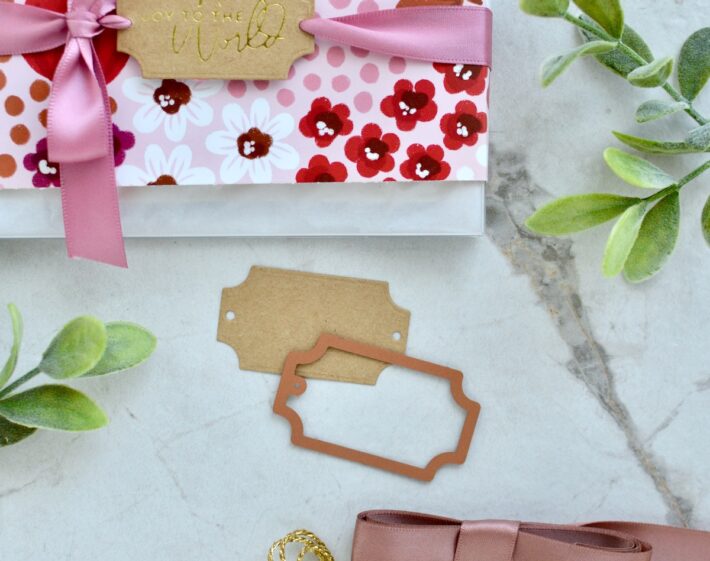
- Create a tag using frame die (I used Envelope of Wonder tag die).
TIP: Die-cut the tag twice, flipping it the second time, to create holes on each side of the tag that are perfectly matched up.
- Hot foil a sentiment on tag using gold foil.
- Attach tag to box using Vivant Satin Old Purple Ribbon.
TIP: Layer multiple ribbons and twines for an elevated look.
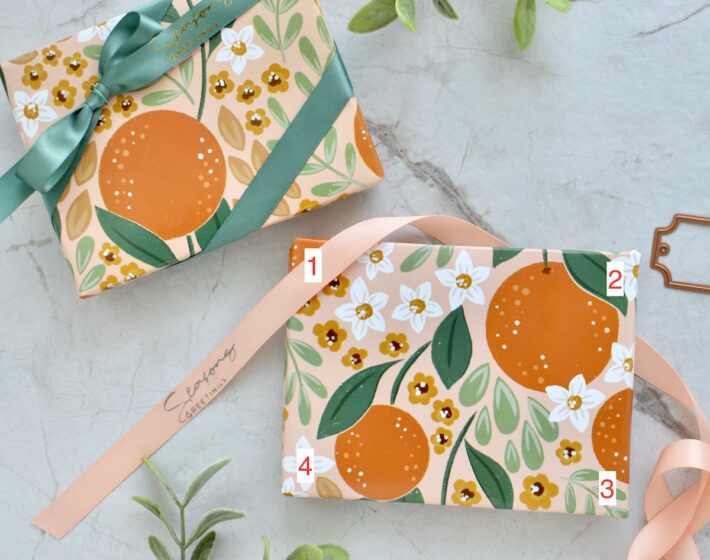
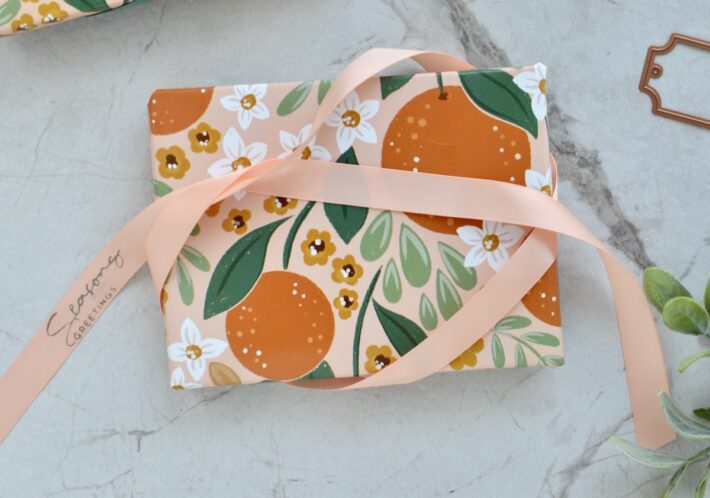
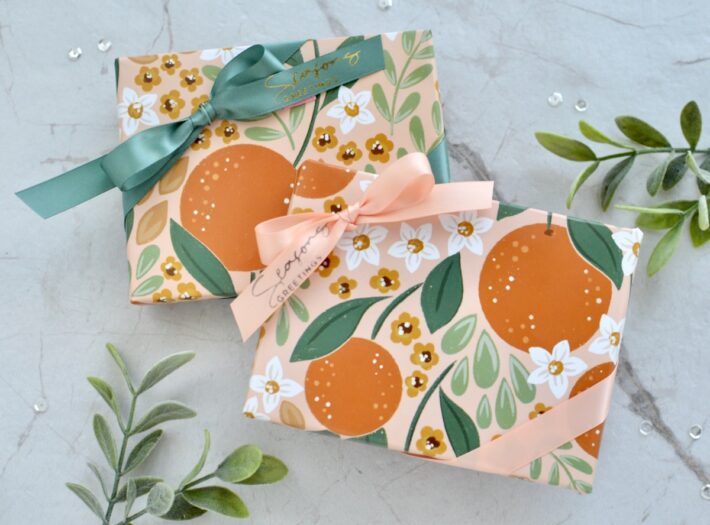
Foiled and Corner Ribbon-Wrapped
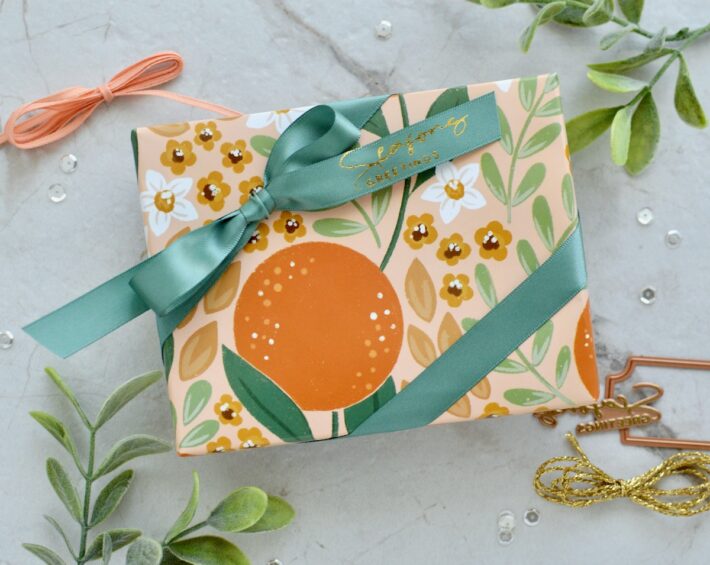
This technique looks super pretty and kind of difficult to tie but foiling ribbon and wrapping on a “slant” is VERY EASY! BONUS— the Pepin Press papers make this combo look stunning!
- Place cards in a box and wrap with papers.
TIP: Run your fingers along the edge of the wrapped box for a crisp wrapped edge.
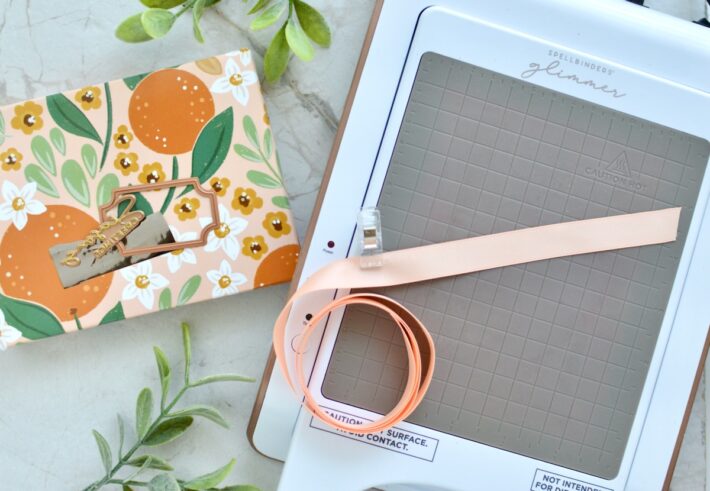
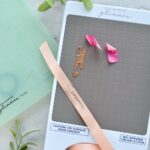
- Foil your ribbon with a sentiment making sure the sentiment is at least 6” away from the end (you can foil either end, left or right).
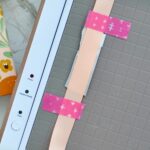
TIP: Use washi tape to hold the ribbon in place while foiling.
TIP: Remember to take off all the washi tape before using ribbon to wrap your gift! You might see some of my hot pink washi tape that I forgot to remove on my green ribbon 🙃
- Take LEFT end of the ribbon with foiled sentiment and place it on the LEFT TOP corner leaving 6” to the LEFT.
- Using a number system— wrap the ribbon by going OVER 1 > UNDER 2 > OVER 3 > UNDER 4.
- Tie a bow with the foiled sentiment showing.
Faux Stitched Sweater Tag
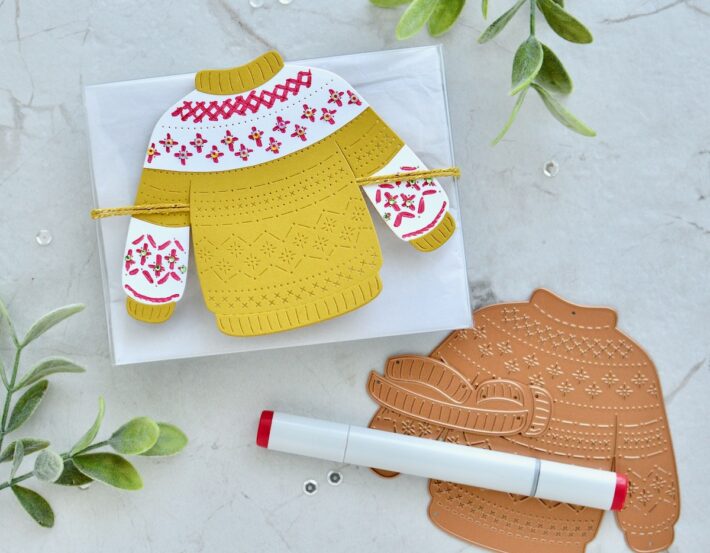
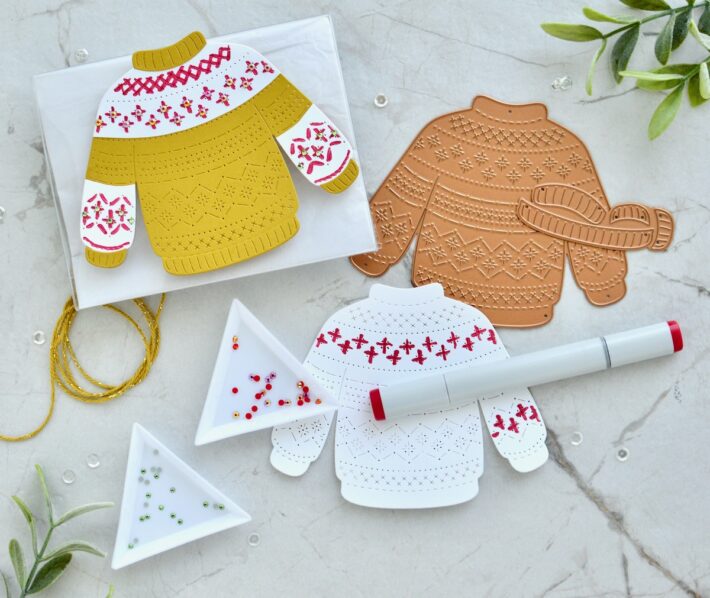
I’ve been faux stitching and stitching on my cards for years (see a “Cross Stamp Stitching” video HERE and HERE), and I’m in LOVE with the Stitched Christmas Sweater dies! This is an easy way to create an “ugly sweater” tag for your card gift boxes!
- Die-cut the sweater image multiple times in various colors.
- Cut up sweater image and attach to bottom sweater image to create “ugly sweater” design.
- Faux stitch on the sweater using a marker to create stitches.
- Add gems and embellishments and attach sweater tag to clear box using matching twine.
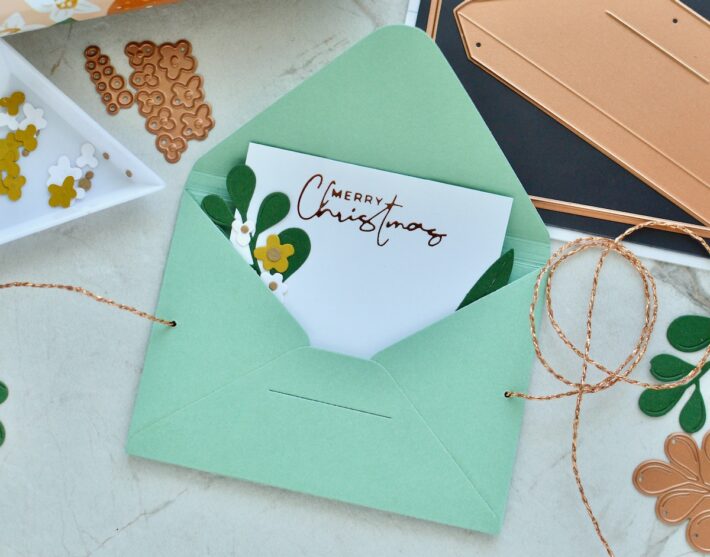
Pop-Up Envelope Tag
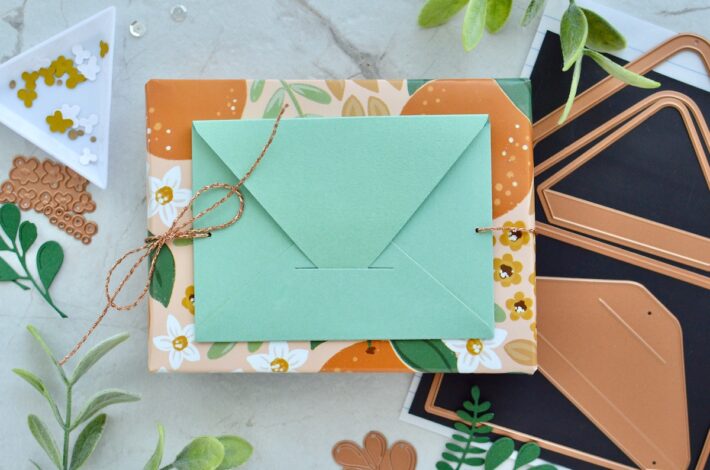
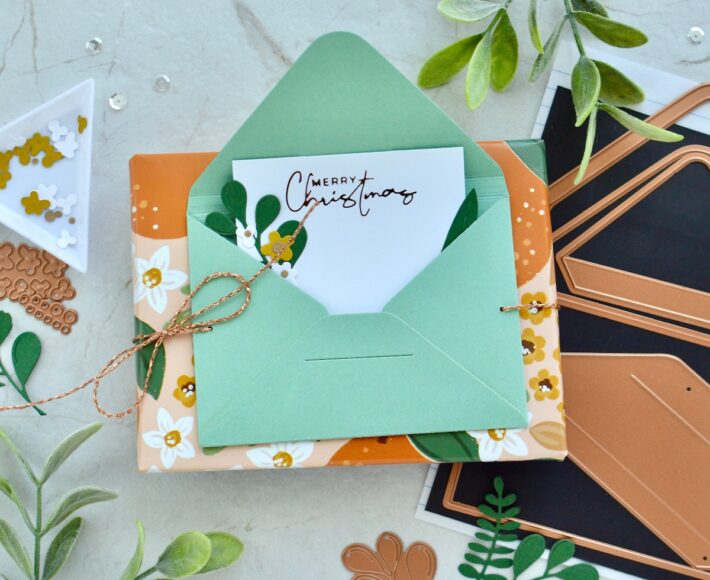
I came up with the idea of a pop-up envelope when the Envelope of Wonder tag die were released. You can check out my original video and Instagram post for more details.
Adding a pop-up envelope will give an element of surprise to your gift.
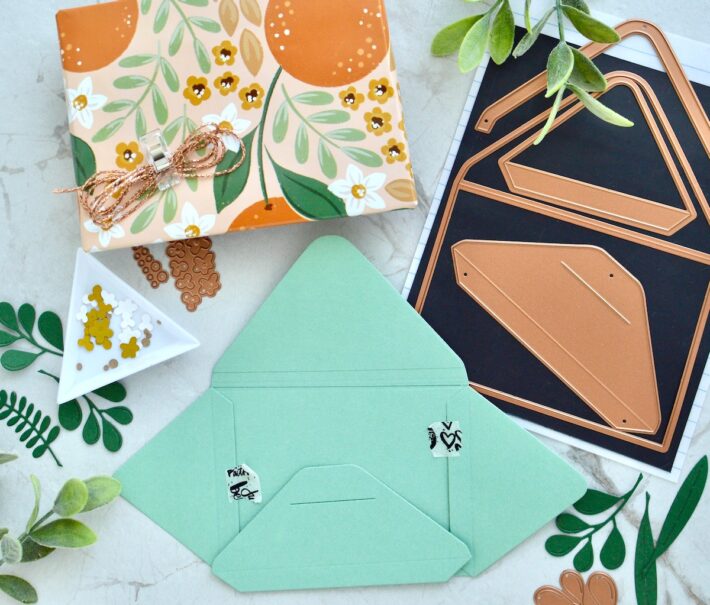
- To create the pop-up envelope, die-cut all the envelope pieces and embellishments.
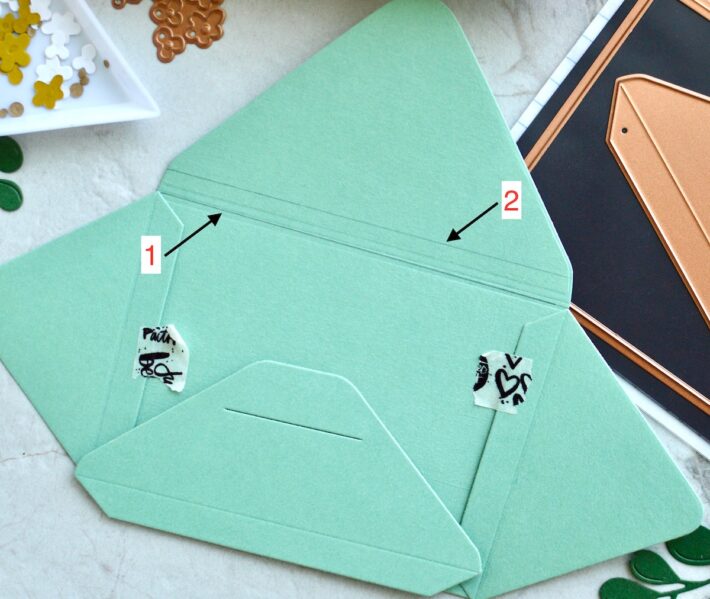
- Use a ruler to measure and score 1/4” to 5/16” from the bottom envelope crease (number 1 in photo)— this extra score line (number 2 in photo) is important to help make the message “pop-up” when opening the envelope.
TIP: Tape sides of envelope to base to help get an accurate measurement for extra score line.
- Assemble envelope pieces.
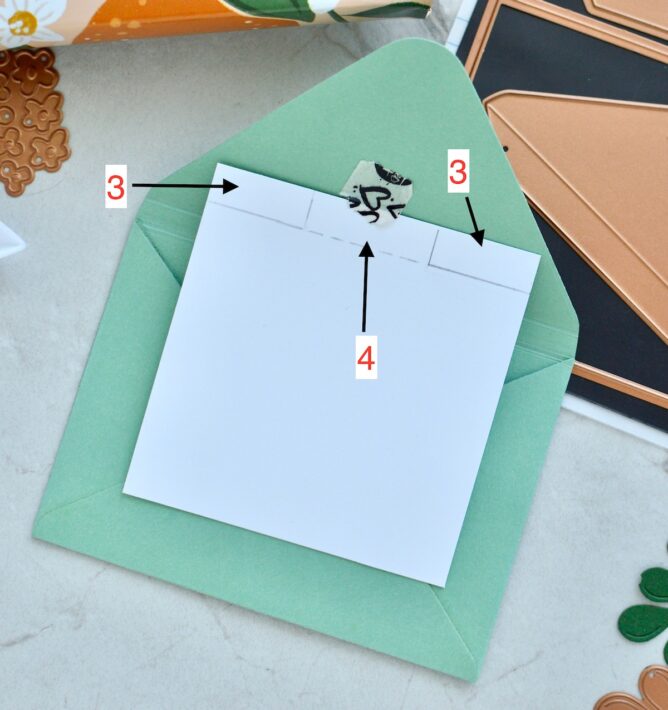
- Create a message insert by cutting paper to size. Then draw a line 1/2” from the top of the message insert. Split this into thirds and cut both the left and right sides (number 3 in the photo) and score along the centerpiece (number 4 in the photo).
- Foil a sentiment onto the message insert and attach embellishments.
- Glue message insert (only the center piece) to the envelope near the base envelope crease and tuck the insert end into the envelope. TIP: If the message insert is too long and the envelope won’t close properly, cut the message insert down accordingly.
- OPTIONAL: Write a message on the message insert (i.e. TO and FROM or a special message for your recipient).
- Punch two holes and attach pop-up envelope onto your card box using twine.
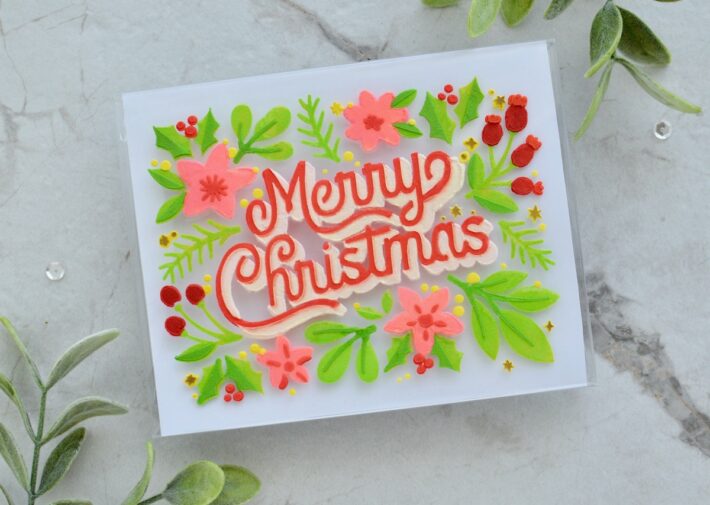
BONUS: Stenciled Box
This is more of a detailed and layered box top, but the end result will really amaze the recipient.
TIP: Be sure to let each layer dry before moving on to the next stencil and layer of colored paste.
- While card box is flat, attach stencil to card box using washi tape.
- Create paste with your favorite paste mediums and paint or ink.
TIP: Only create one colored paste at a time and per layer.
TIP: You can create an ombre paste for a stencil layer by mixing part of the paste with one drop of ink and the other half of the paste with two drops of ink.
- Use colored paste for each stencil layer on the box top to create the final image.
Other ideas: If you know me, then I have MORE ideas to share than can fit in one blog post. LOL! Here are a few more ideas that will use the same supplies:
- Insert and Die Cut Sentiment– add an embossed paper to the top of your stack of cards and die cut a sentiment (such as the Stylish Merry Christmas die) to place on the top of the card box with a bow attachment.
- Build A Scene– use your Spellbinders goodies to build a scene on the top of the card box. This will be the focal point and really shine with more and more details in the scene!
- Dancin’ Card Box– attach one of the Dancin’ animals, persons, snowman, or Santa to the top of the box. This is a fun way to make your gift interactive. TIP: add multiple Dancin’ friends on the box for a real dance party!
- Matching Card Box and Cards– create a top of the box that matches your cards. For example, use the Gnome Drive bundle dies to create various card themes and then gift them by packaging them in the clear boxes and adding the Gnome Drive Holiday die set as your topper.
- Ribbon Focused– make a fun gnome topper for your box using the Gnome Hugs dies and several of the silver twines/ribbons as his beard!
- Shaker Card Box– create a shaker toper that fills the entire top of the box, another interactive gift!
- Stitched Topper– die cut one of the Stitched Christmas Sweater dies right onto the box! This might be more difficult as the opening to the box isn’t too big—but the end result of a stitched sweater as the topper will look AWESOME and worth every effort!
- Foiled Card Box– foil a sentiment onto the card box itself. This will add glamour to your gift!
Spellbinders Supplies:

WOW! That’s a lot of different ways to use Spellbinder goodies and Crystal Clear Boxes to wrap your handmade cards!!
THANK YOU, Spellbinders, for allowing me to share my creations and ideas with all of your friends and fans!
And THANK YOU so much for stopping by and checking out my card box gift ideas!! I hope you were inspired and try some of these wrapping techniques for your gifts this year. Please visit my Instagram page, Savannahland2 or my blog, Savannahland2, for even MORE crafty inspiration.

4 Comments
Shelly
Amazing gifts/projects, Savannah!! So beautiful!
MaryH
Great makes and Tips! I keep forgetting to foil the ribbon – you reminded me of how elegant and personal it makes a gift. You have such an inventive, creative mind!!!
Travis O
Great Job as always- such refined, elegant looking gifts.
Jackie Firestone
Wonderfully creative and beautifully executed Savannah!