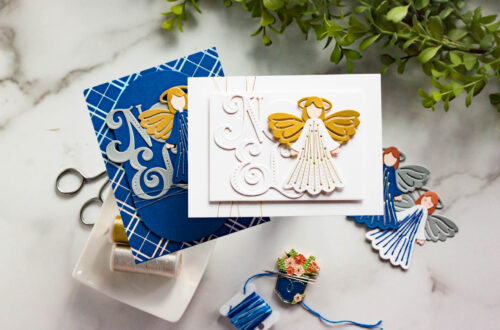
Double Up Your Focal Points
Hi everyone. Alanna Moses from EmbellishCraftLove.com and I’m happy to be back on the Spellbinders blog. I have three super fun cards to share with you today using the new Simon Hurley stamp and die collection for January 2024. This collection has three large stamp sets and coordinating dies are available for them. You will see repetition in each of my cards using embossing folders, Mica Stains, and a doubled-up focal element.
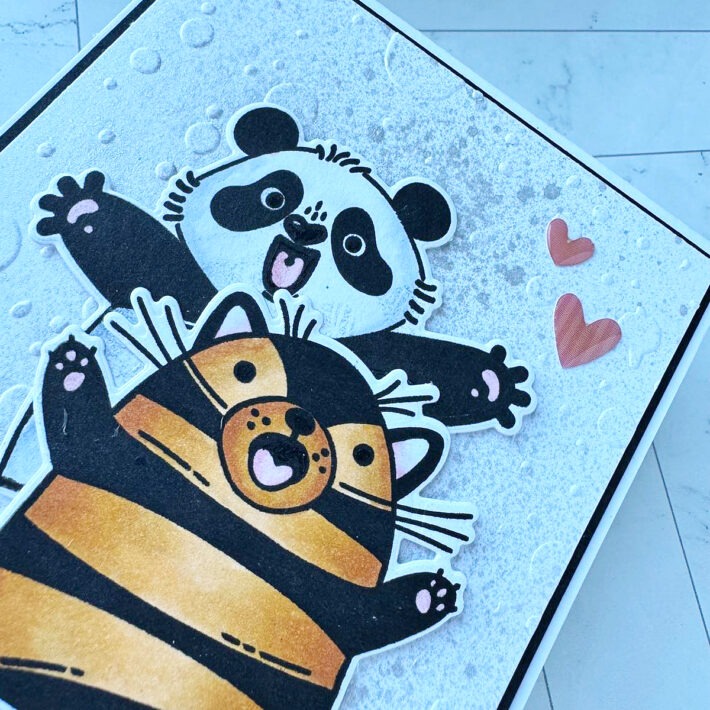
SENDING BIRTHDAY HUGS
For my first card, I used the new Monster Hugs stamp set and coordinating dies. I stamped out two of the cute animals with Copic-friendly ink and then colored them in with my Copic markers. I used my Misti to do the original stamping and left the images inside my Misti. After they were colored, I put the panel back inside my Misti and used some deep black ink to stamp over the images to really make the black portions pop. I used the coordinating dies to cut them out. I then took the Splatter 2D Embossing Folder and ran it through my Platinum 6 die-cutting machine with some white cardstock. I then took some Frozen Fog Distress Mica Stain and added some splatter with that. It gives a nice shimmer effect and a bit of dimension.
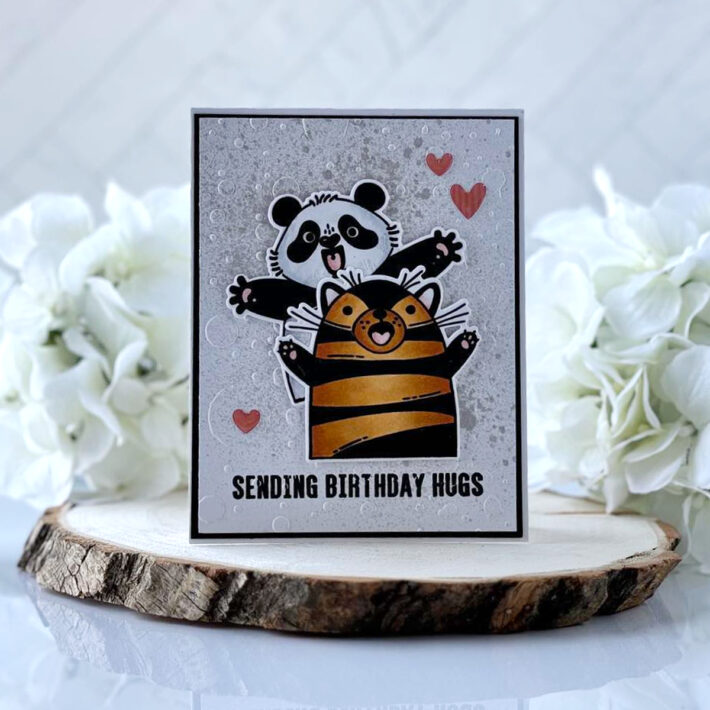
I then took one of the sentiments from the Monster Hugs stamp set and stamped it directly over the top of my embossed panel with black ink. I used my Misti stamping tool to stamp it repeatedly since I was stamping over the top of the texture. I trimmed this panel down to 4×5.25 inches and then added it to a slightly larger panel of Onyx cardstock. I added this panel to a white A2 notecard. I then adhered my cute animals together and then added foam tape behind them. Enamel hearts from my stash finish off this card.
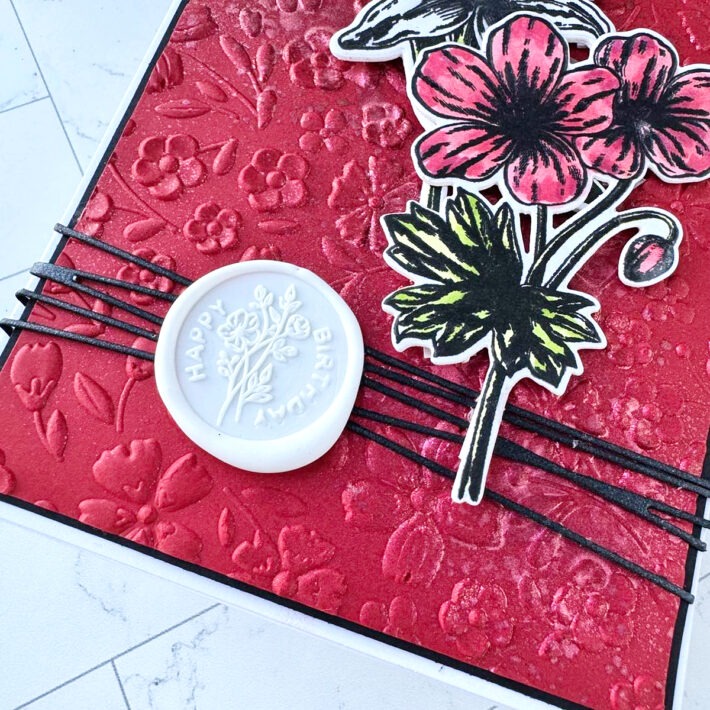
HAPPY BIRTHDAY
For my second card, I am using the new Beautiful Blooms stamp set and coordinating dies. I stamped out two of the floral images with Copic-friendly black ink and then used my Copic markers to color them. After they were colored, I again took a darker black ink and stamped over the images again. I love how this intensifies the black and the stamping. I die-cut my images using the coordinating die set and die-cut two more of each of the florals. I added my colored image on top of the other two die cuts for a dimensional look. For now, I sat these aside.
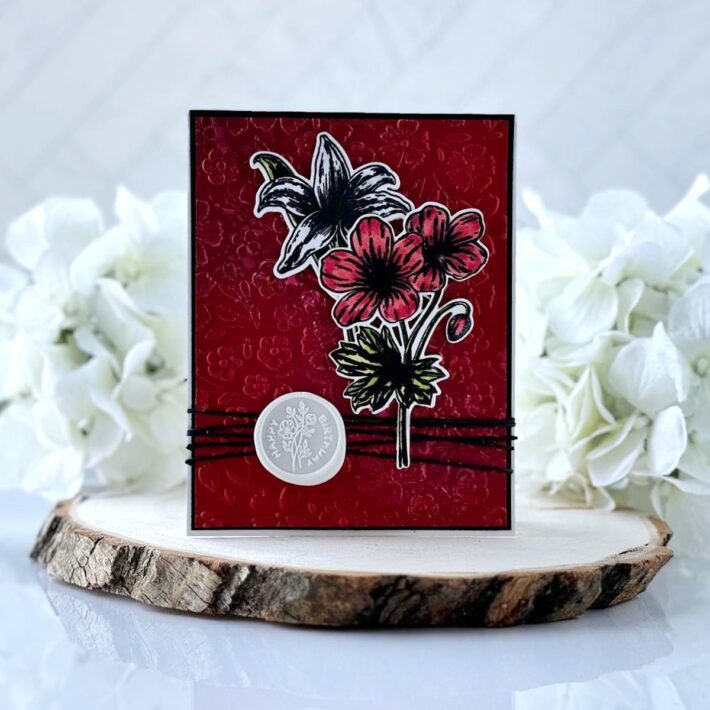
I then took the Floral Frenzy 3D Embossing Folder and ran it through my Platinum 6 die-cutting machine with Pomegranate cardstock. I trimmed it down to 4×5.25 inches and then added some Peppermint Stick Distress Mica Stain over top of it. Like I did with my first card, I added this panel to a slightly larger piece of Onyx cardstock. I took the Sealed Twine die set and die cut it twice from Onyx cardstock. I adhered the center circles together with liquid adhesive and then wrapped the “twine” portions around either side of my card. I then added my floral die onto my card panel and added the entire panel to a white A2 notecard. I then finished off the card by adding a wax seal made using the Wax Seal Starter Kit, the Wild Flower Happy Birthday wax seal, and White wax beads.
HOPPY EASTER
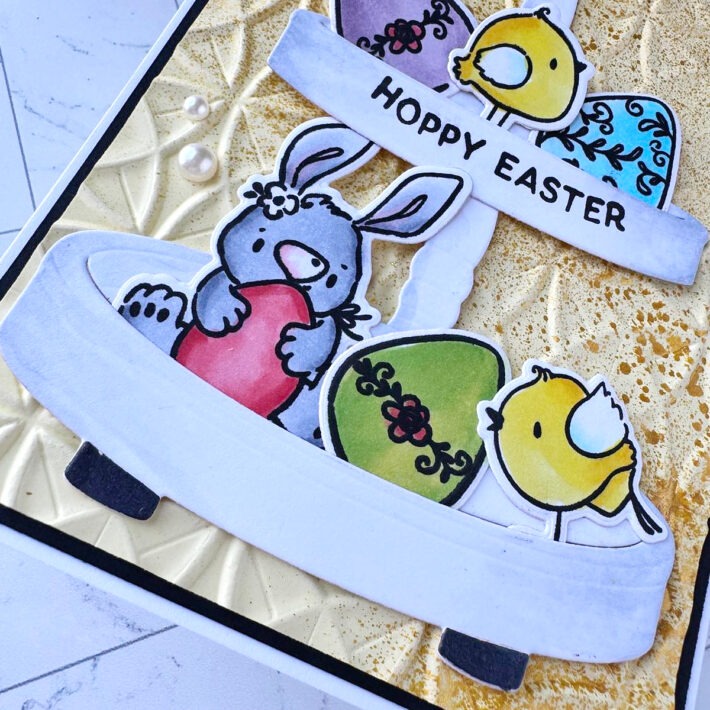
For my final card, I am using the adorable Easter Bunnies stamp set and coordinating dies. I stamped out several of the images with Copic-friendly black ink and then used my Copic markers to color them. After they were colored and like I did on the first two cards, I took a darker black ink and stamped over top of the images. I die-cut my images using the coordinating die set and set them aside.
I took a piece of Chamomile cardstock and embossed it with the Origami Folds 3D embossing folder. I sprayed some Flickering Candle Distress Mica Stain onto the panel. Once it was dry, I trimmed it down, and like I did with my first two cards, matted it onto some black cardstock. The panel was then added to a white A2 notecard.
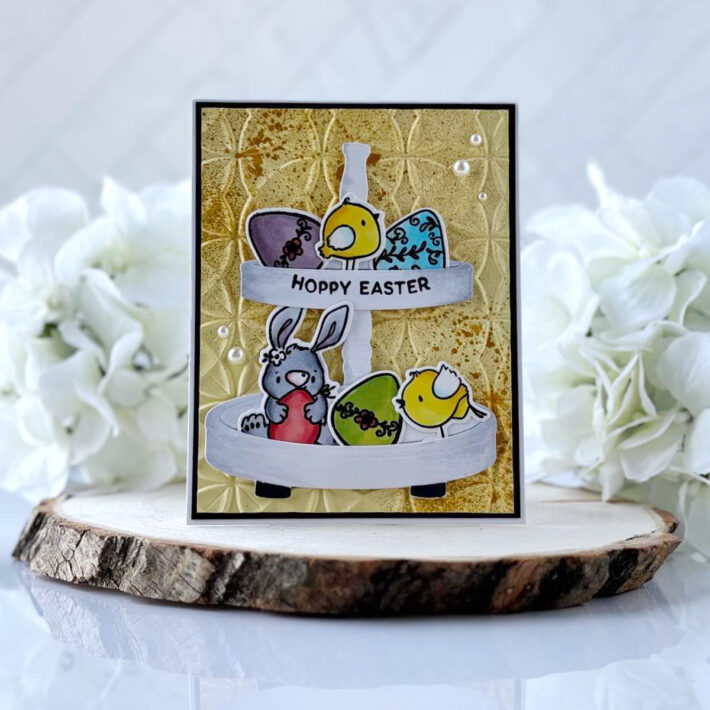
I took out the previously released Tiered Tray die set and die-cut the pieces from white cardstock. I added some grey Copic markers to add a bit of shading. I assembled the try and added in my die-cut elements. I then stamped the Hoppy Easter image included in the Easter Bunnies set. I added foam squares to the back of all of it and added it on top of my embossed background. I finished off the card by adding in some Fashion Oyster Self-Adhesive Embellishments.
Spellbinders Supplies:

Other supplies
Copic markers, liquid adhesive, foam tape, enamel hearts, Distress Mica Stains in Flickering Candle, Peppermint Stick, Frozen Fog, Versafine Claire Nocturne ink, Memento Tuxedo Black ink, white cardstock
I hope you’ve been inspired by my projects today. I appreciate you visiting the Spellbinders blog today. I would love it if you would come find me on my blog, FaceBook or Instagram.
Happy crafting! ~ Alanna
July 2019 Large Die of the Month is Here – 3D Fun Time Cruiser
12 Days of Stitchmas Advent Calendar | Day 12 with Marie Heiderscheit