Ink and Impress: Crafting Dynamic Backgrounds with BetterPress Plates
Hi there my Spellbinders’ friends! My name is Jaycee Gaspar and I’m so excited to share four cards featuring the Cheers to You BetterPress Collection. This collection features a mix of BetterPress Press Plates, standard-size Ink Pads, and replacement BetterPress materials. If you have been waiting for a chance to get started with the BetterPress system, now is your chance to get almost everything you need!
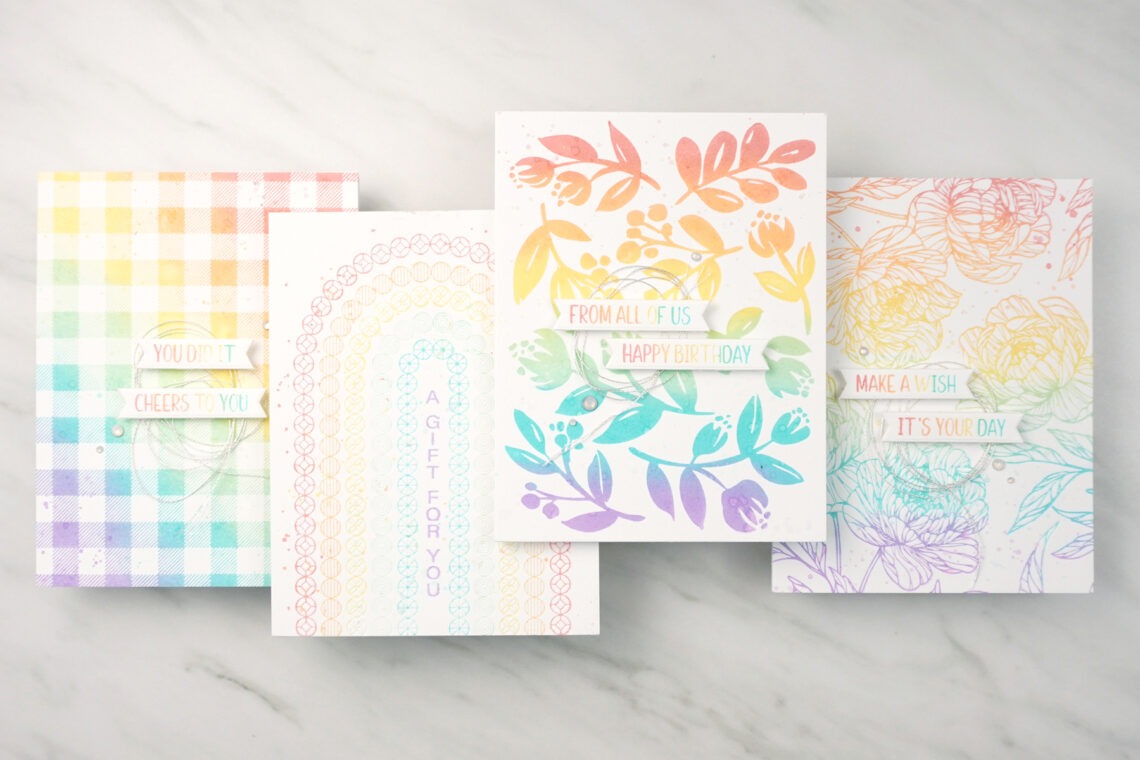
My main focus on these card projects was making a multitude of dynamic backgrounds. These backgrounds perfectly frame the easy-to-make sentiment banners from Cheers to You Sentiments. All you have to do is pick your favorite palette. In the case of these cards, I grabbed a rainbow dye ink pad set to color all my cards. Find out how easy it is to craft these eye-catching backgrounds!
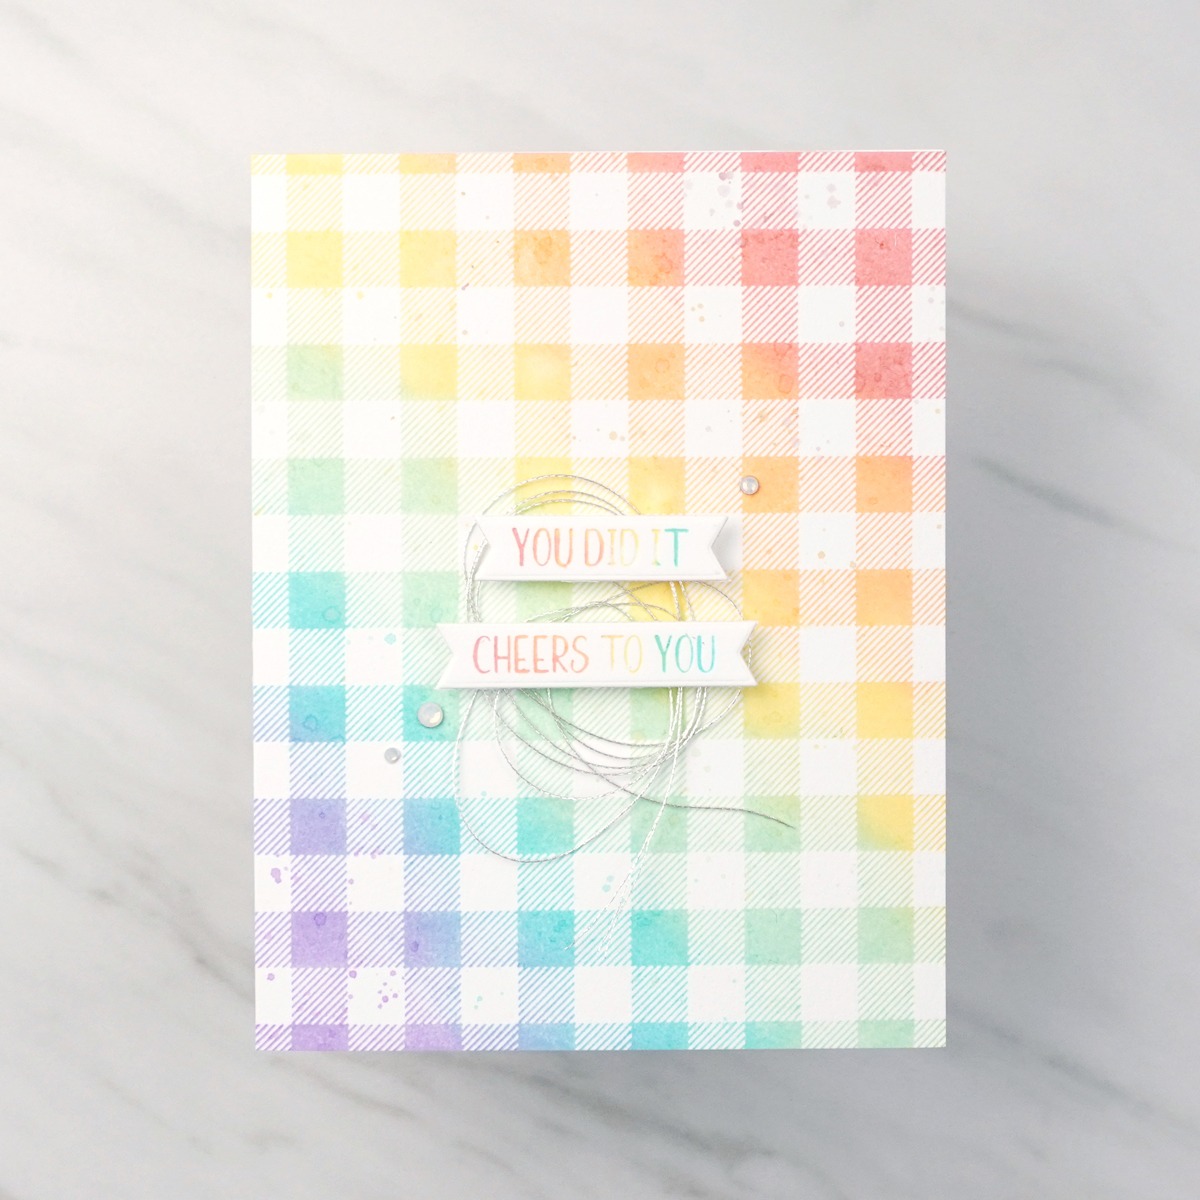
My first card uses the Buffalo Plaid BetterPress Plate. I decided on a diagonal gradient of rainbow inks to counteract the 90-degree angles characteristic of plaid patterns. I think it breaks up the symmetry and gives the background just a little bit more interest. Like the rest of my projects in today’s feature, I am able to ink all the colors directly on the press plate and make a single pass in the Spellbinders Platinum. In order to get a smooth blend between colors, I gently rubbed the surface of my smaller ink pads over colors to diffuse hard edges. I added sentiment banners from Cheers to You Sentiments and embellished the card with metallic thread and a Crystal Mix of jewels.
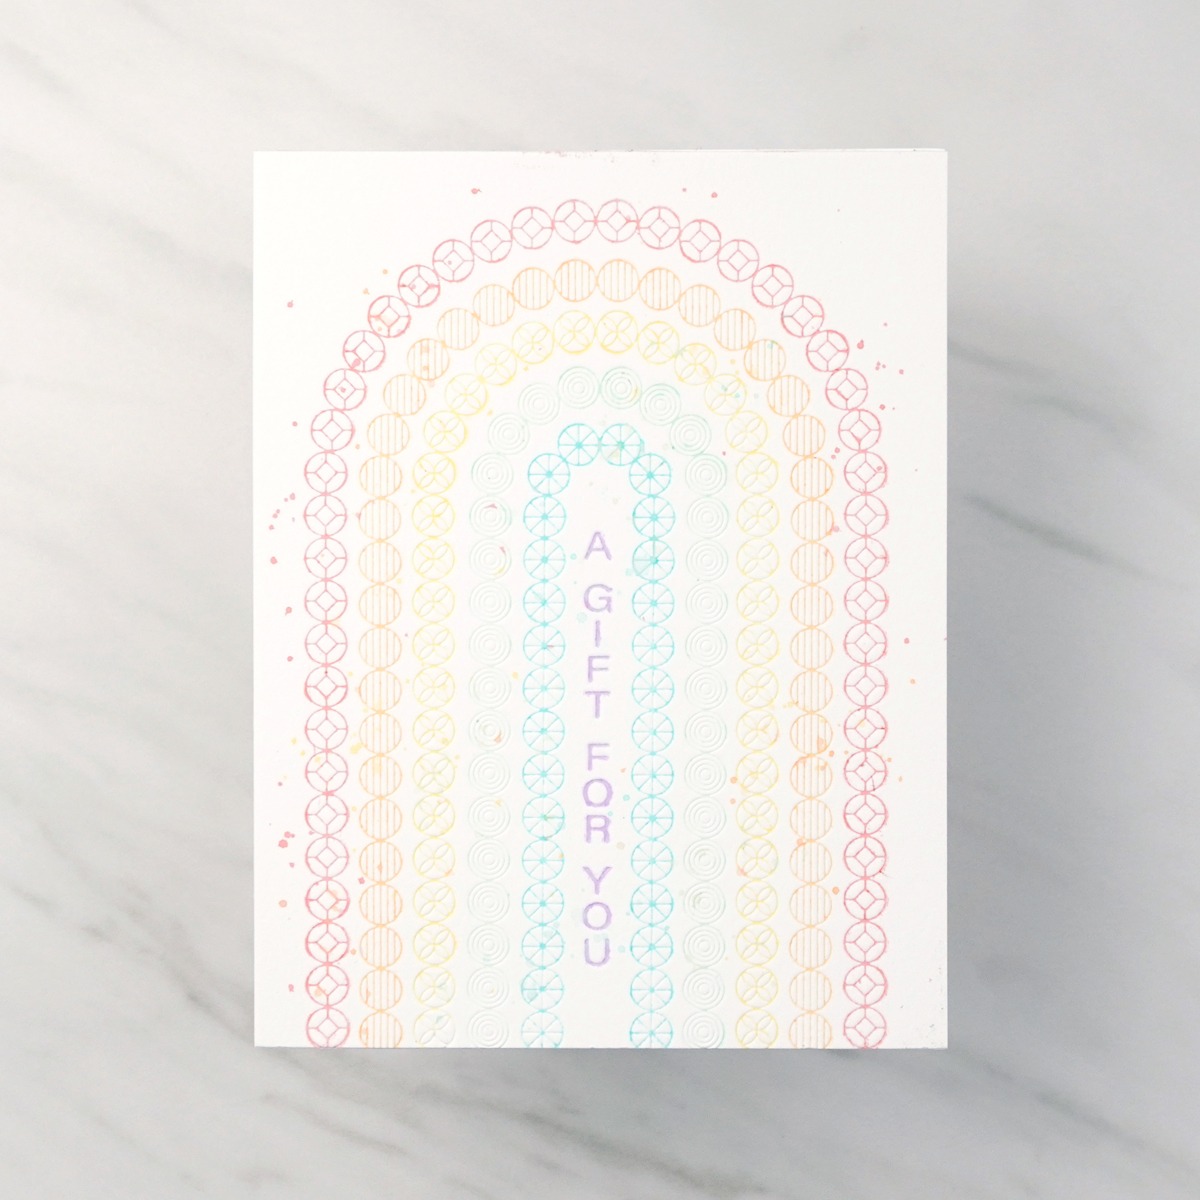
The Arched Messages Press Plate comes with a registration template. These registration templates allow you to perfectly position and layer the press plates so that each component is a different color. I used a rainbow palette for the second time to color all of the five arches in the set, followed by a purple sentiment. I love that you can easily fill a background with this set, and there’s even a designated space for a sentiment. An expert tip I have for these Spellbinders sets that have a Registration Template is to temporarily tape your acetate Registration Template to your magnetic chase. This way you’ll be sure that all your individual plates are in their exact position as you change plates between colors.
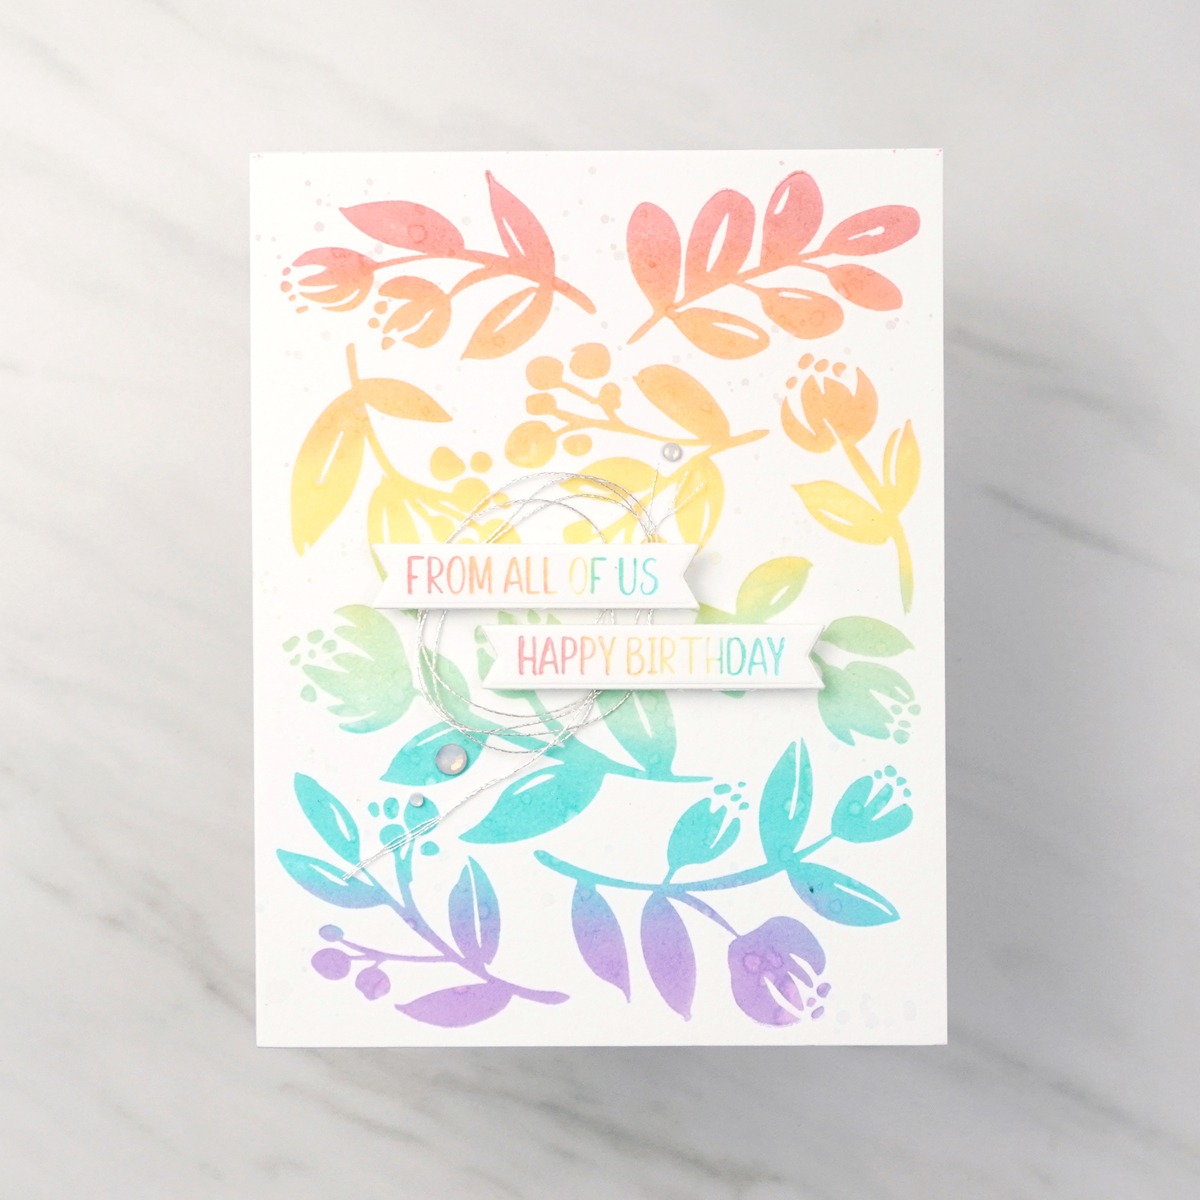
For my third card, I focused on Sprigs. This set contains a Registration Template, 11 Press Plates and their coordinating dies. Ten of those Press Plates align with the Registration Template—perfect for a dreamy rainbow background with solid brushstroke-like motifs. I arranged these 10 dies on the Registration Template and then colored all the plates with my rainbow assortment of inks. I followed similar techniques to the Buffalo Plaid card to get smooth gradients. Then I did a single pass of the BetterPress system to transfer the ink to a cotton card panel. I arranged a few Cheers to You Sentiments banners. Then embellished the card with metallic thread and Crystal Mix of jewels.
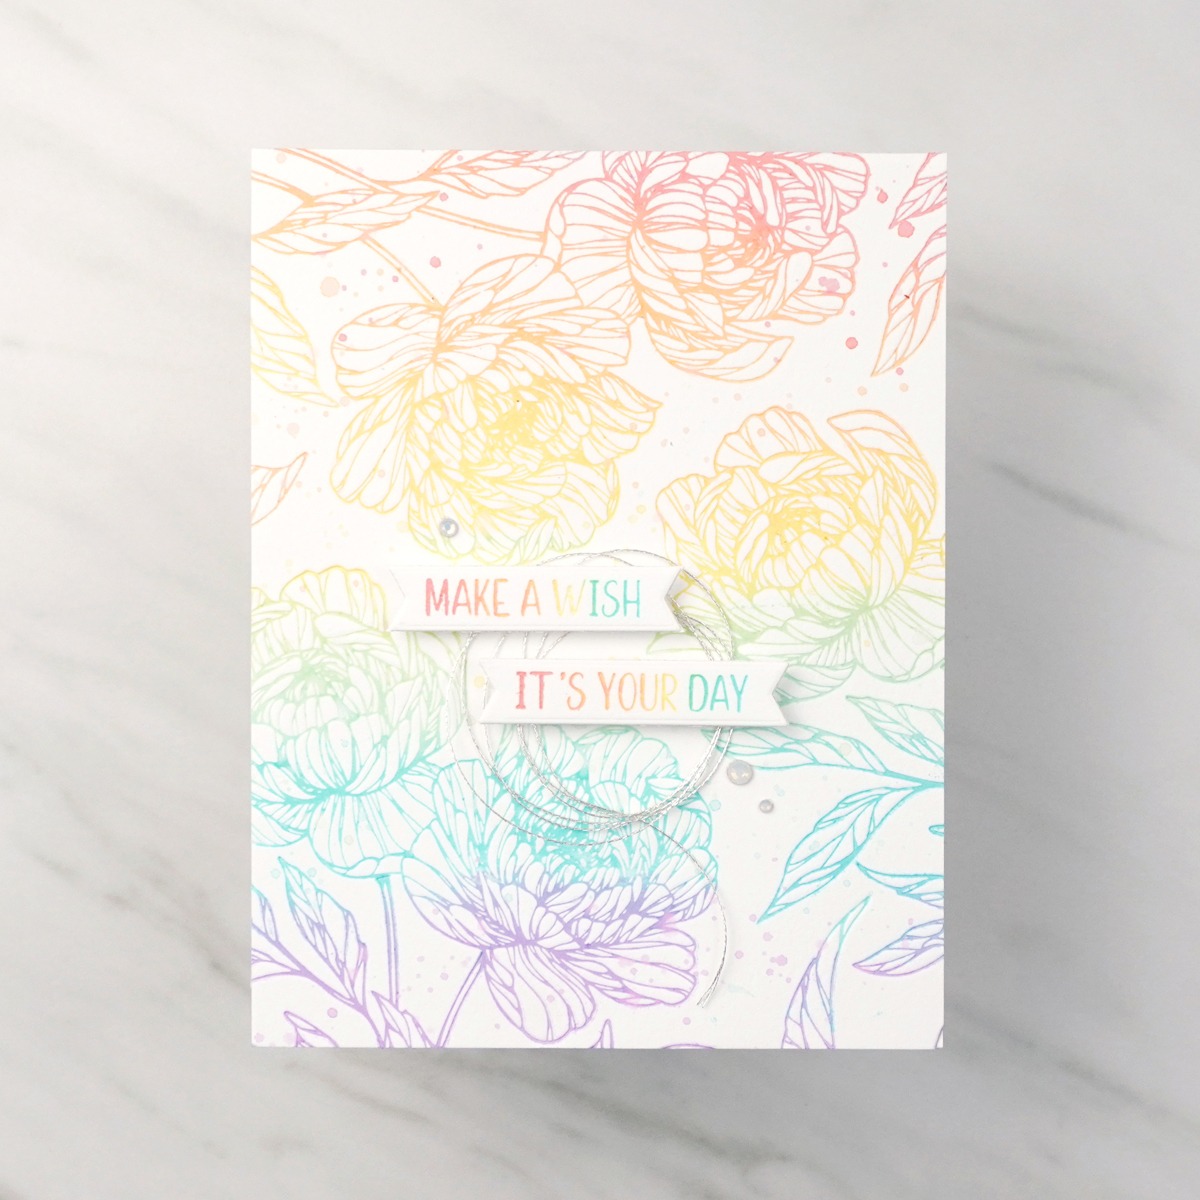
The Peony Perfection Press Plate and Registration Template to no surprise is my favorite of the collection. Getting this repeat peony pattern required a little bit more tracing and positioning to get perfect spacing between images. The Registration Template made getting an idea of where my images were going to sit on my cotton card panel much easier. I also horizontally subdivided my rainbow palette on this card by estimating the top sixth to be red, the second sixth to be orange…and so on. Anywhere I had color overlap, I made sure to gently scrub the ink pad directly on the press plate to diffuse the transition of colors. Once I filled the panel with Peony Perfection images, I added the remainder of the Cheers to You Sentiments I had die cut. Then just like the rest of the projects, I added the same metallic thread and Crystal Mix Jewels.
Spellbinders Supplies:

Huge thanks to the Spellbinders team for letting me share these three hot-foiled Spring Sampler projects with you all! You can find more of my card projects on YouTube, Instagram, and my blog. I hope to see you all again very soon!
BetterPress Christmas Collection – Card Inspiration with Annie Williams
May 2024 BetterPress Plate of the Month Preview & Tutorials – Wild & Free