Betterpress Halloween: Watercolor Backgrounds
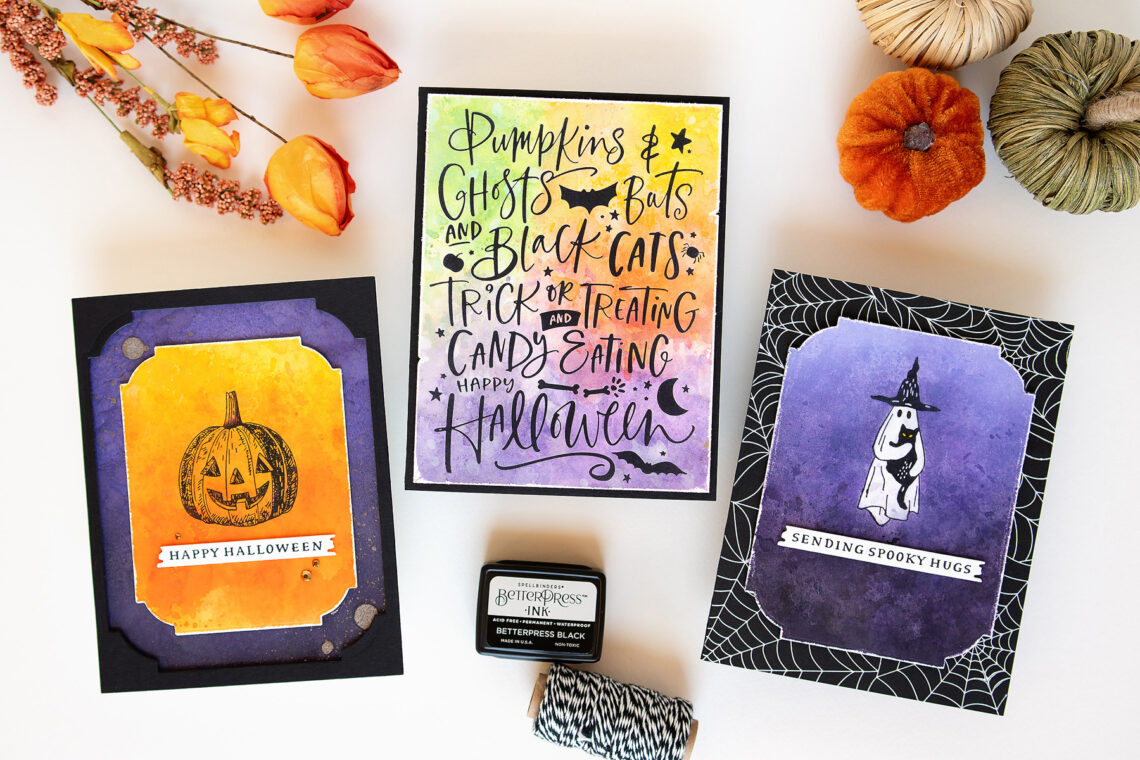
Hello crafty friends! It’s Jung here, and I am back with another guest post on the Spellbinders blog. For my projects today, I’m working with the Betterpress Halloween collection. I made fun watercolor backgrounds playing with Distress inks and Distress Oxide inks. I love how they compliment the Betterpress plates.

For my first card, I used the Pumpkins & Ghosts Background Press Plate.
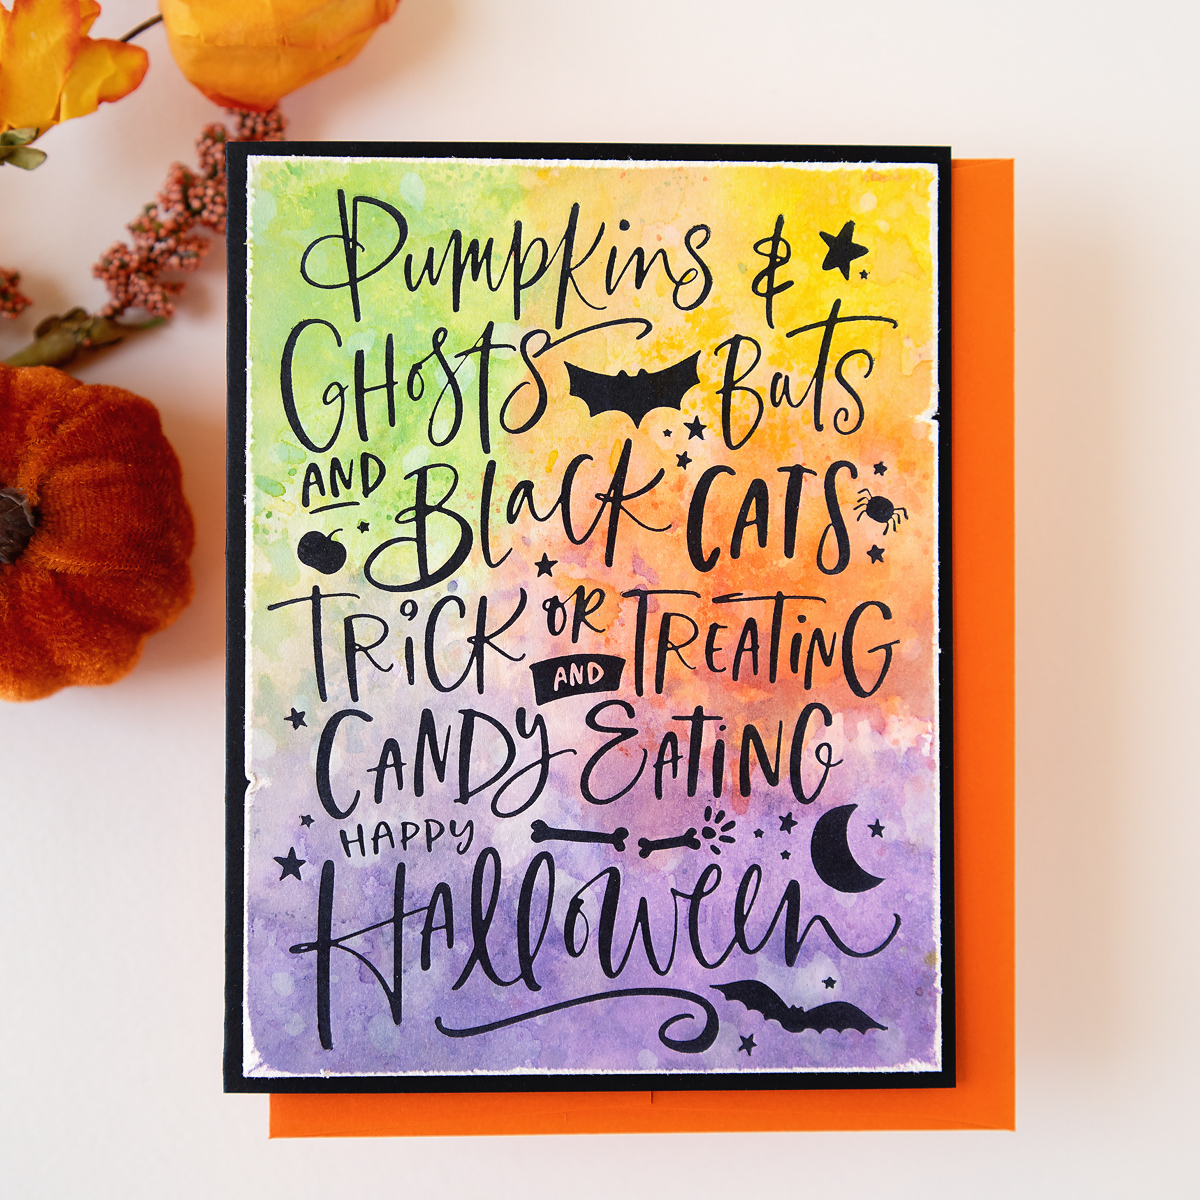
I started by adding some color to an A2 Bisque cotton card panel. I used several techniques on the background. First I wanted to add a base layer wash of color. I smooshed mini Distress ink cubes onto my glass mat and sprayed generously with water.
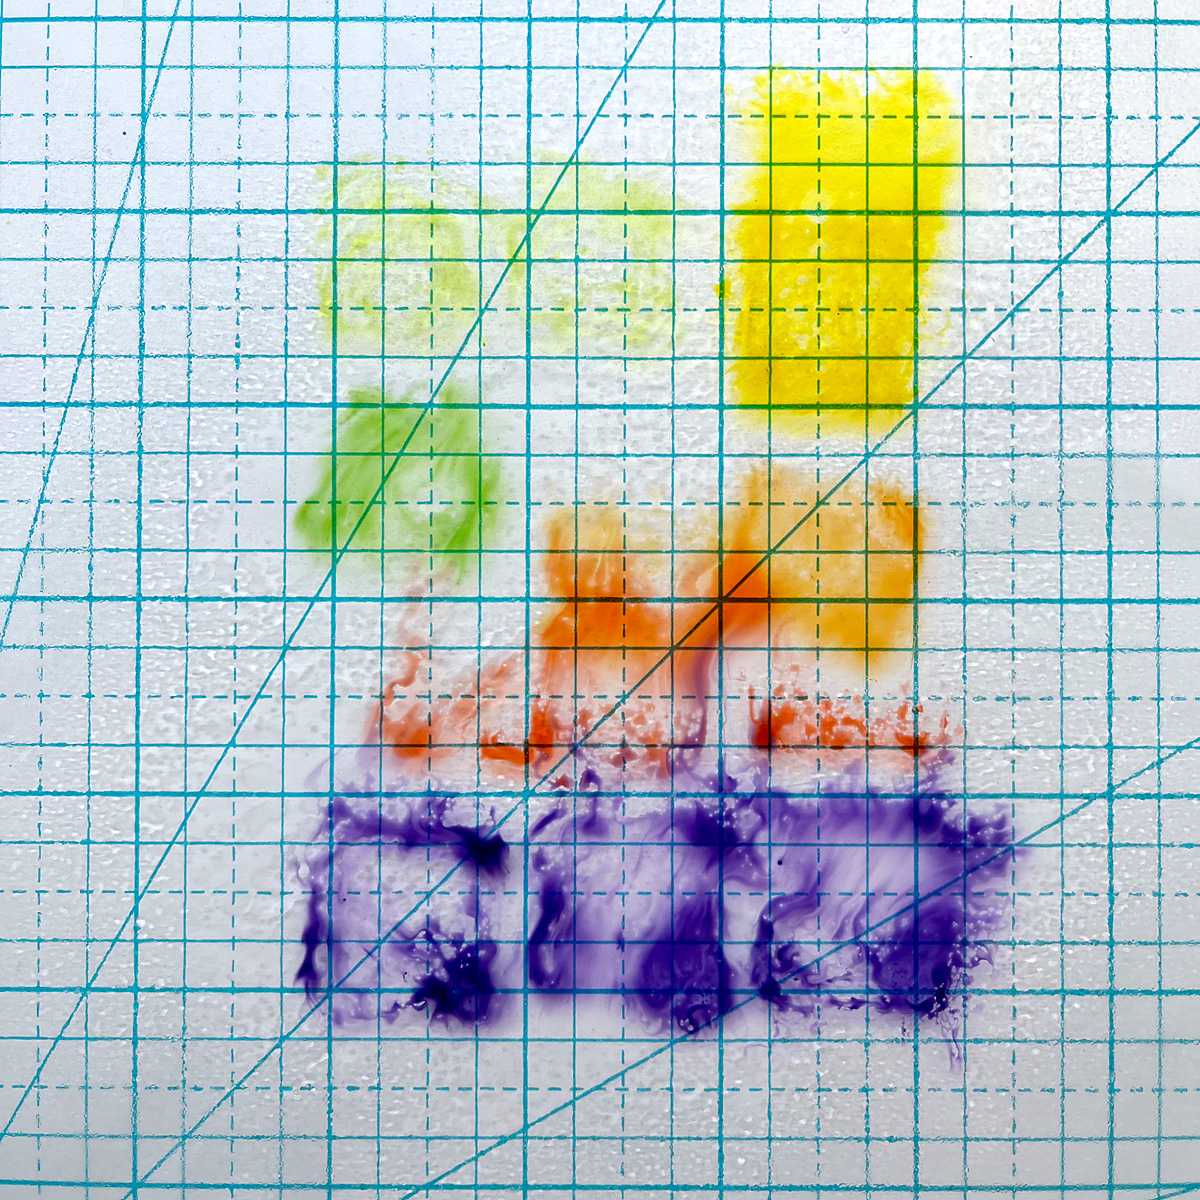
Then, I laid the cotton card panel on top, letting the color soak it. I flipped the panel over and used a heat tool to completely dry the panel. Next, I wanted to create depth and more watercolor layers, so I used the “packaging technique.” I used some thin flexible plastic packaging (this one is the outer packaging for a Spellbinders Embossing Folder). I smooshed the Distress ink pad to the packaging, sprayed it with water, then smooshed it on top of the panel that I just dried.
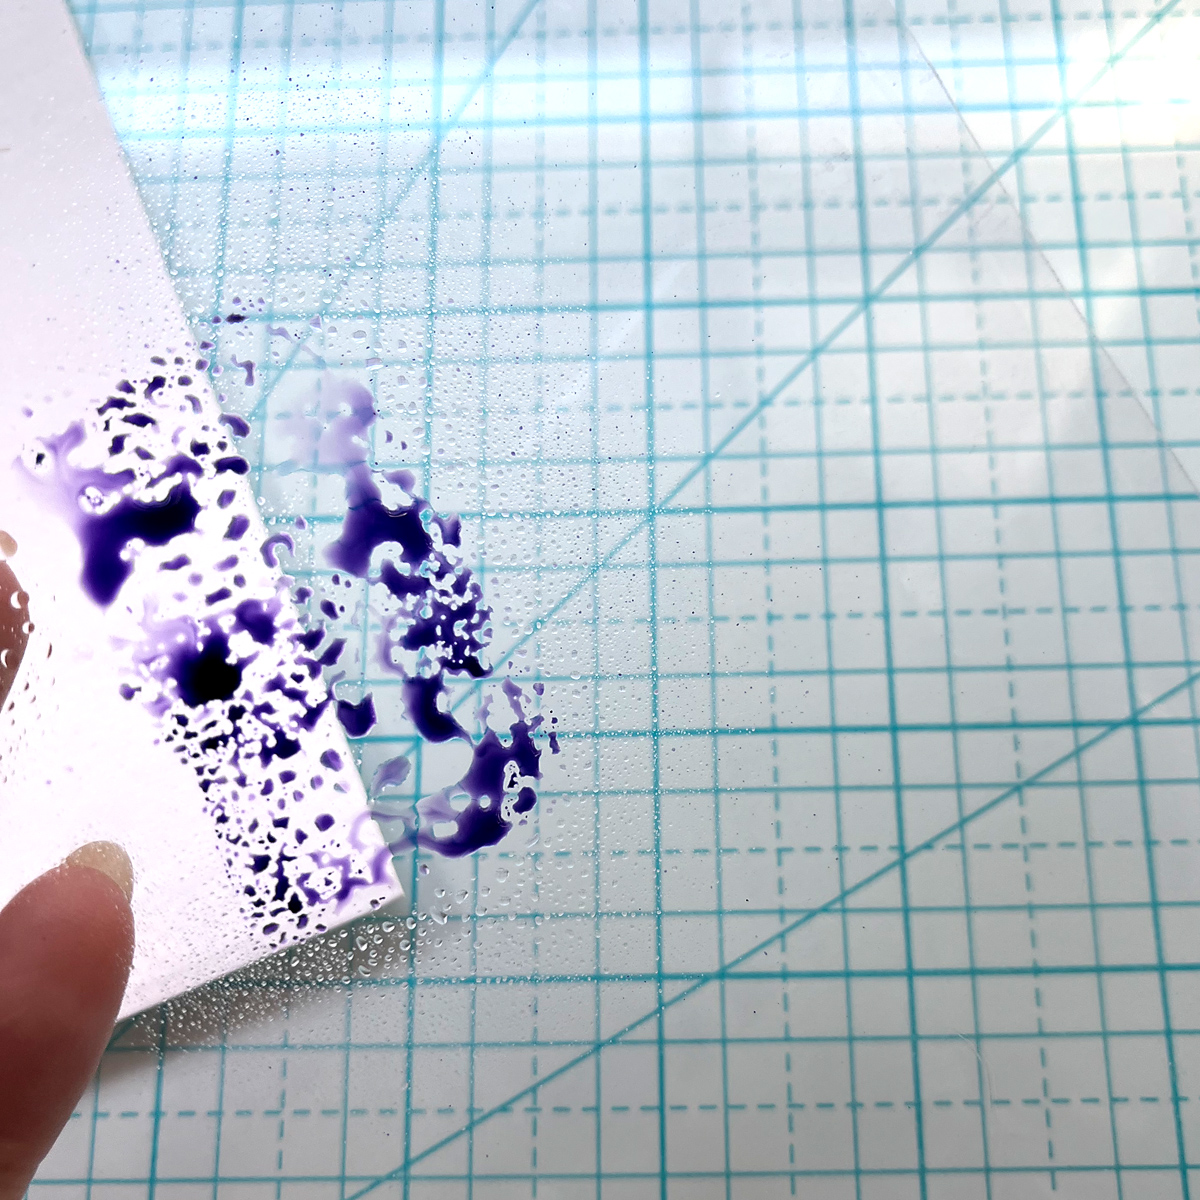
I did this with each of the colors separately. Since I am able to see through the packaging, I was able to smoosh the color where I wanted, for the most part. I made sure to dry between colors, so the colors didn’t just bleed together. I also experimented with layers of Distress inks and layers of Distress Oxide inks. The key to these backgrounds is to dry between the layers of inks so you get the fun watercolor edges.
I didn’t want to go too dark with the inks, because I wanted the Betterpress plate to be the star of the show. Once I had the cotton panel colored how I wanted, I used the Pumpkins & Ghosts betterpress plate with black ink.
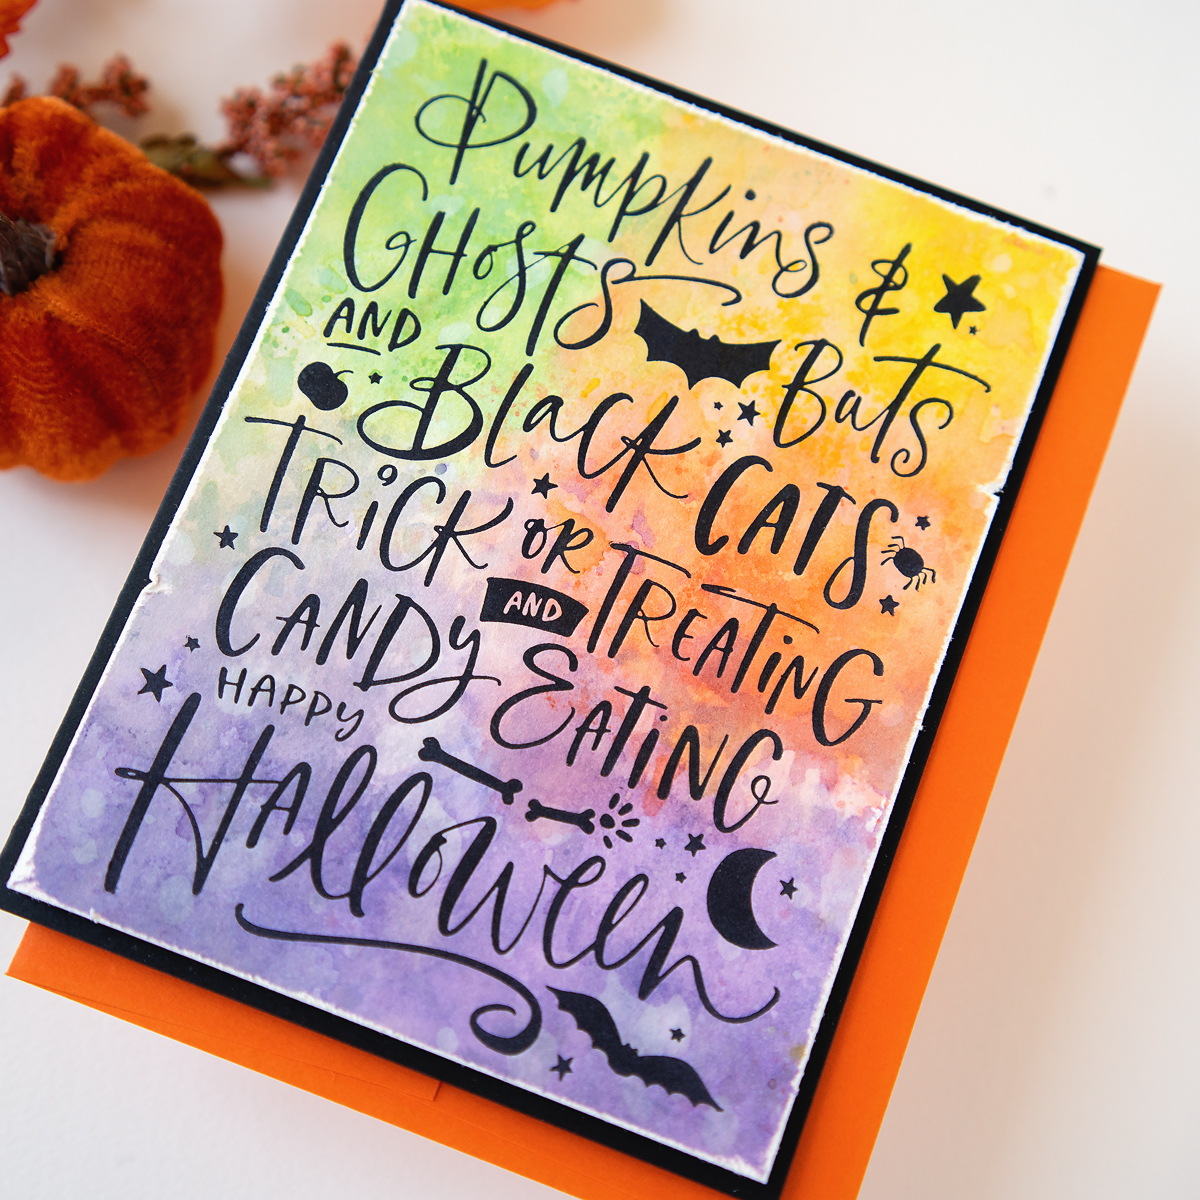
I trimmed the panel, then used my scissors to roughen up and distress the edges. Then, I adhered the panel with foam tape to a black A2 card base.
For my second card, I used the Halloween Icons Betterpress plate & die set, as well as the Spiderweb background press plate.
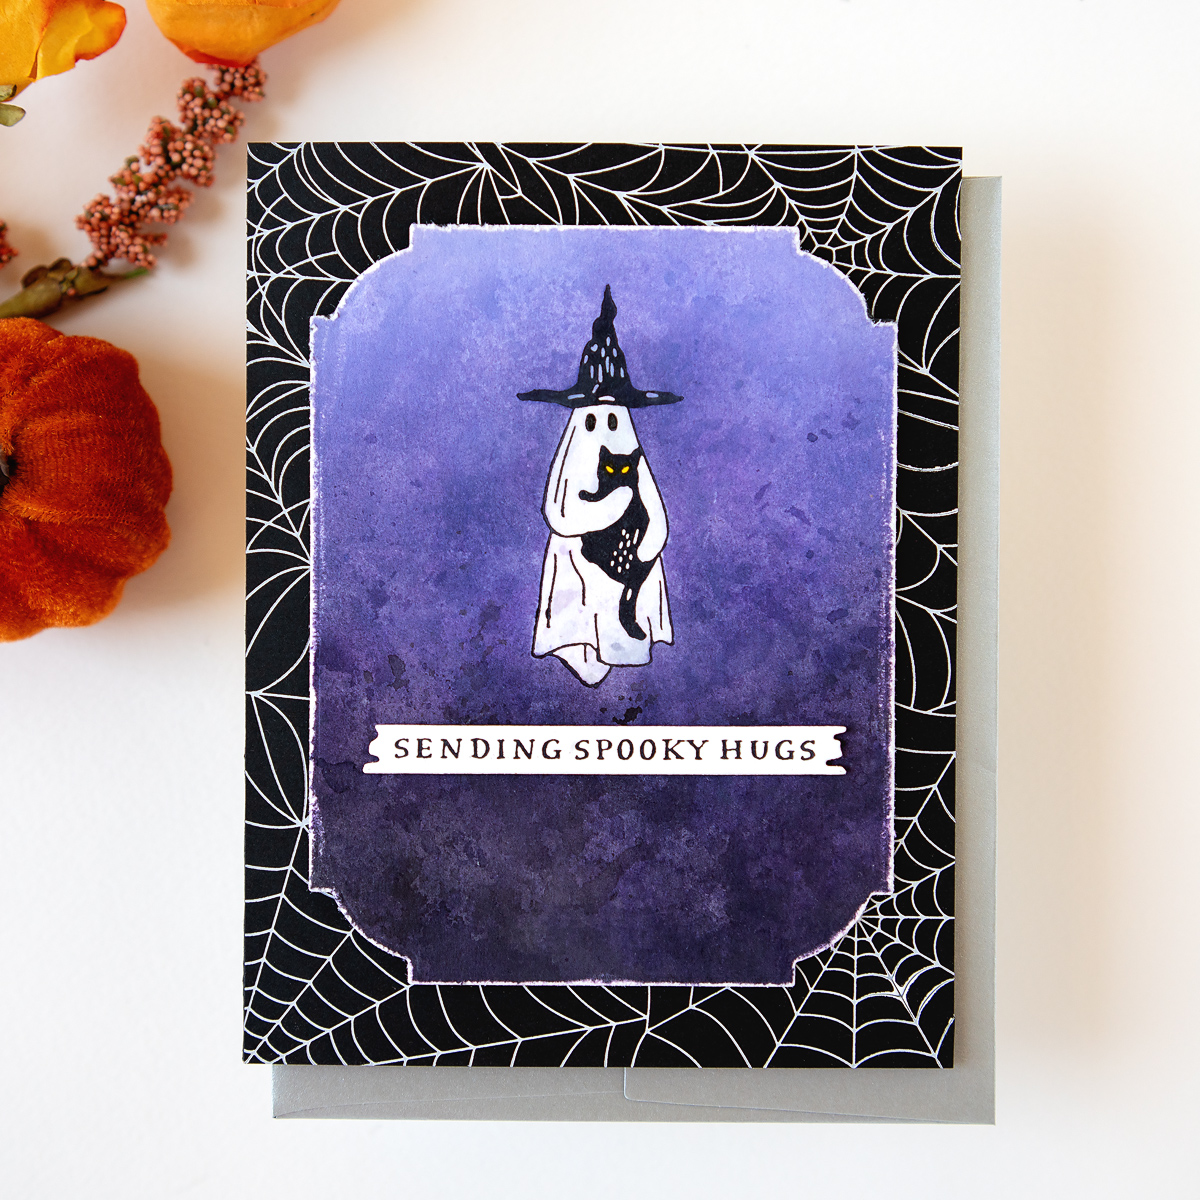
This time, I pressed my images first. On one bisque cotton A2 panel, I used the ghost witch with a kitty press plate and black ink. I positioned the ghost towards the upper center of the panel. On another bisque cotton panel, I used the sentiments. I used the coordinating die to die-cut the sentiments. I love the fun edges of these sentiments.
Next, I used the same techniques as the first card to add color to the panel. I added a base layer of light color. I wanted the ghost to have just a little bit of color to look see-through, and not white. Then, I used the packaging technique to strategically add color around the ghost. If a little color got on the ghost, I used a paper towel to quickly soak up the liquid. I really wanted this card to be dark and spooky. To deepen the color of the panel, I added more color by ink blending some Distress inks right on top; I made sure to mask the ghost with a few strips of Post-it tape.
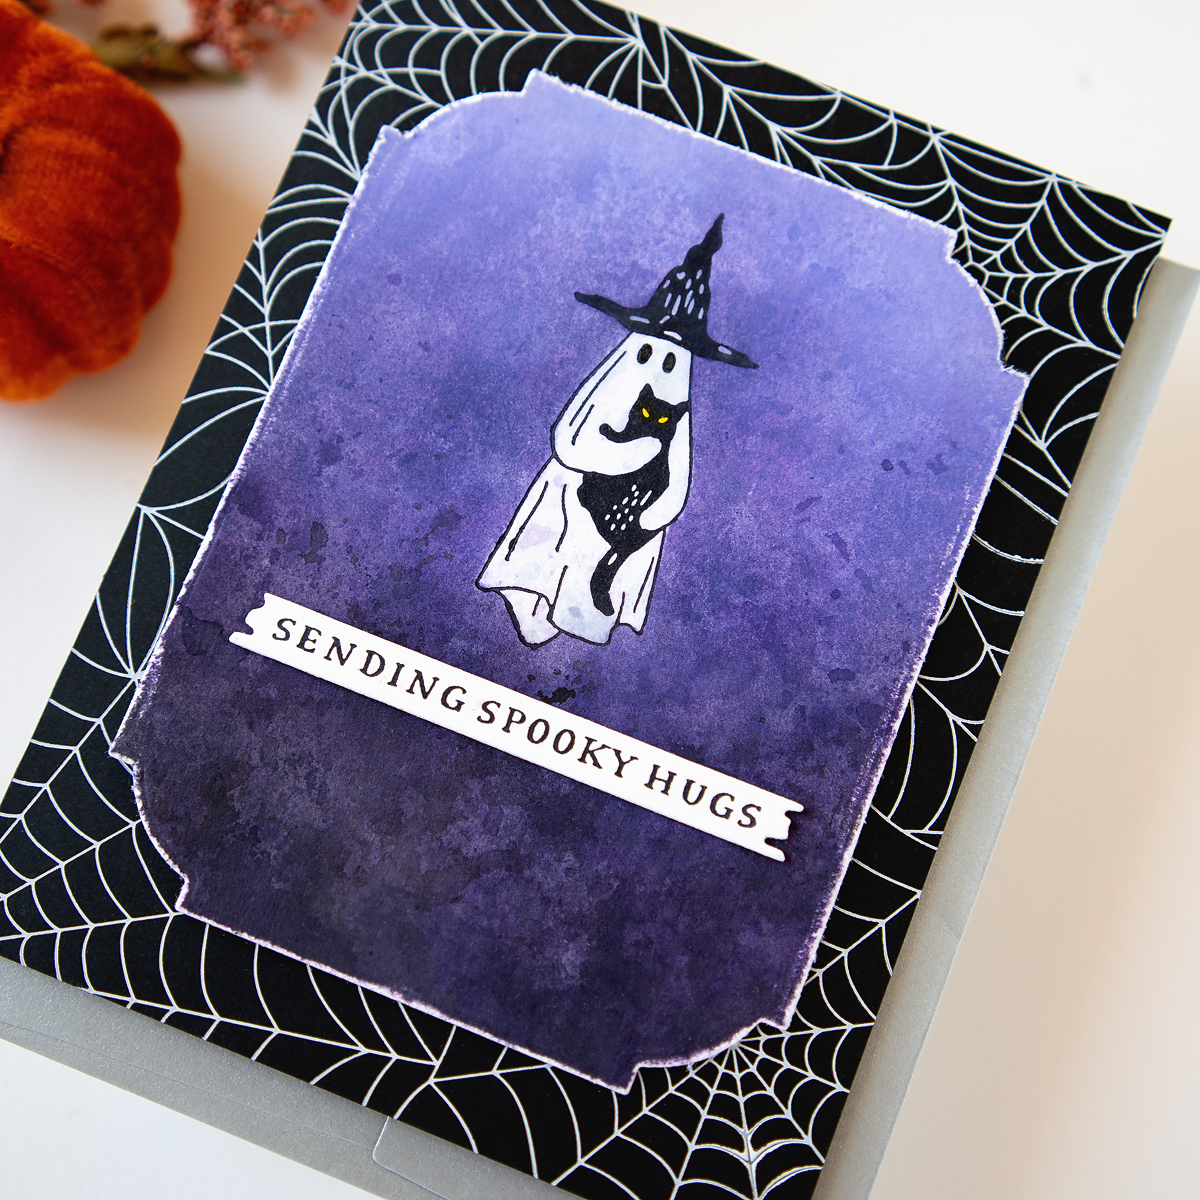
I used a Notched Corner Frame to die-cut the panel and then distressed the edges with scissors. Next, I worked on the background. I used the Spiderweb background press plate with my Glimmer system. I used white foil to foil the spiderweb on a black cardstock panel. I adhered the spiderweb panel to a black A2 cardbase. I adhered the ghost panel on top with thin foam tape. Then, I chose the “Sending Spooky Hugs” sentiment and adhered it under the ghost with more thin foam tape. I also used a yellow marker to color in the cat’s eyes.
For my third card, I used the Halloween Icons Betterpress plate & die set.
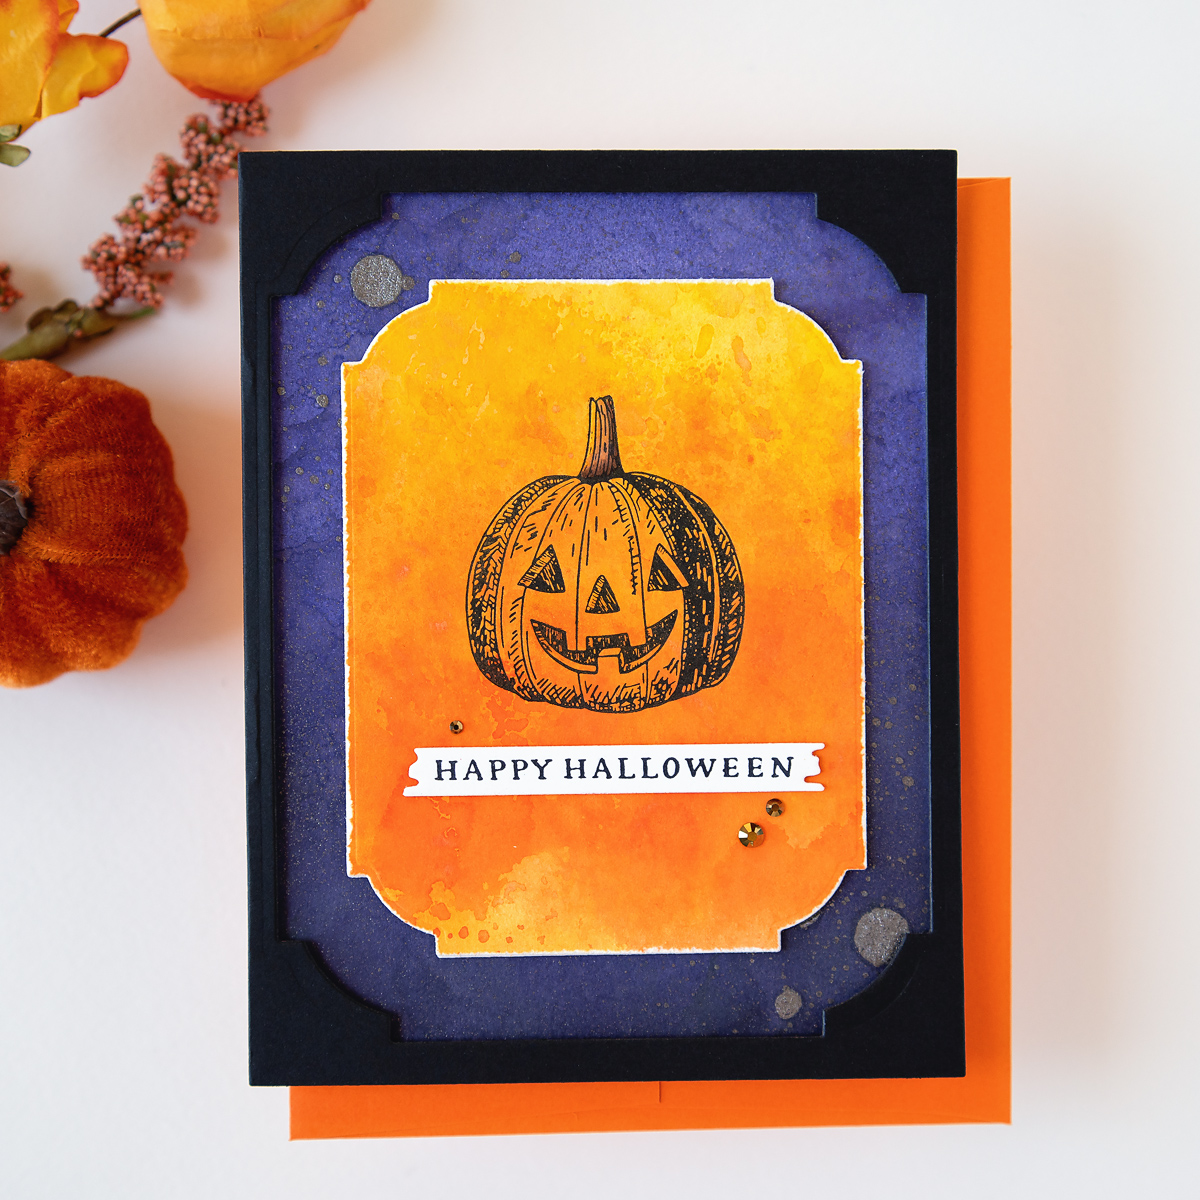
For this card, I watercolored the cotton panel first and then used the pumpkin press plate with black ink. I die-cut the panel using another Notched Corner Frame, again, distressing the edges with scissors. I decided to make another watercolor panel for the background. I used the same techniques, but I also used a Distress Mica spray to add some shimmer on top. I adhered the purple background panel to an A2 card base. Then, I adhered the pumpkin panel on top with thin foam tape. I chose the “Happy Halloween” sentiment, then adhered it under the pumpkin with thin foam tape.
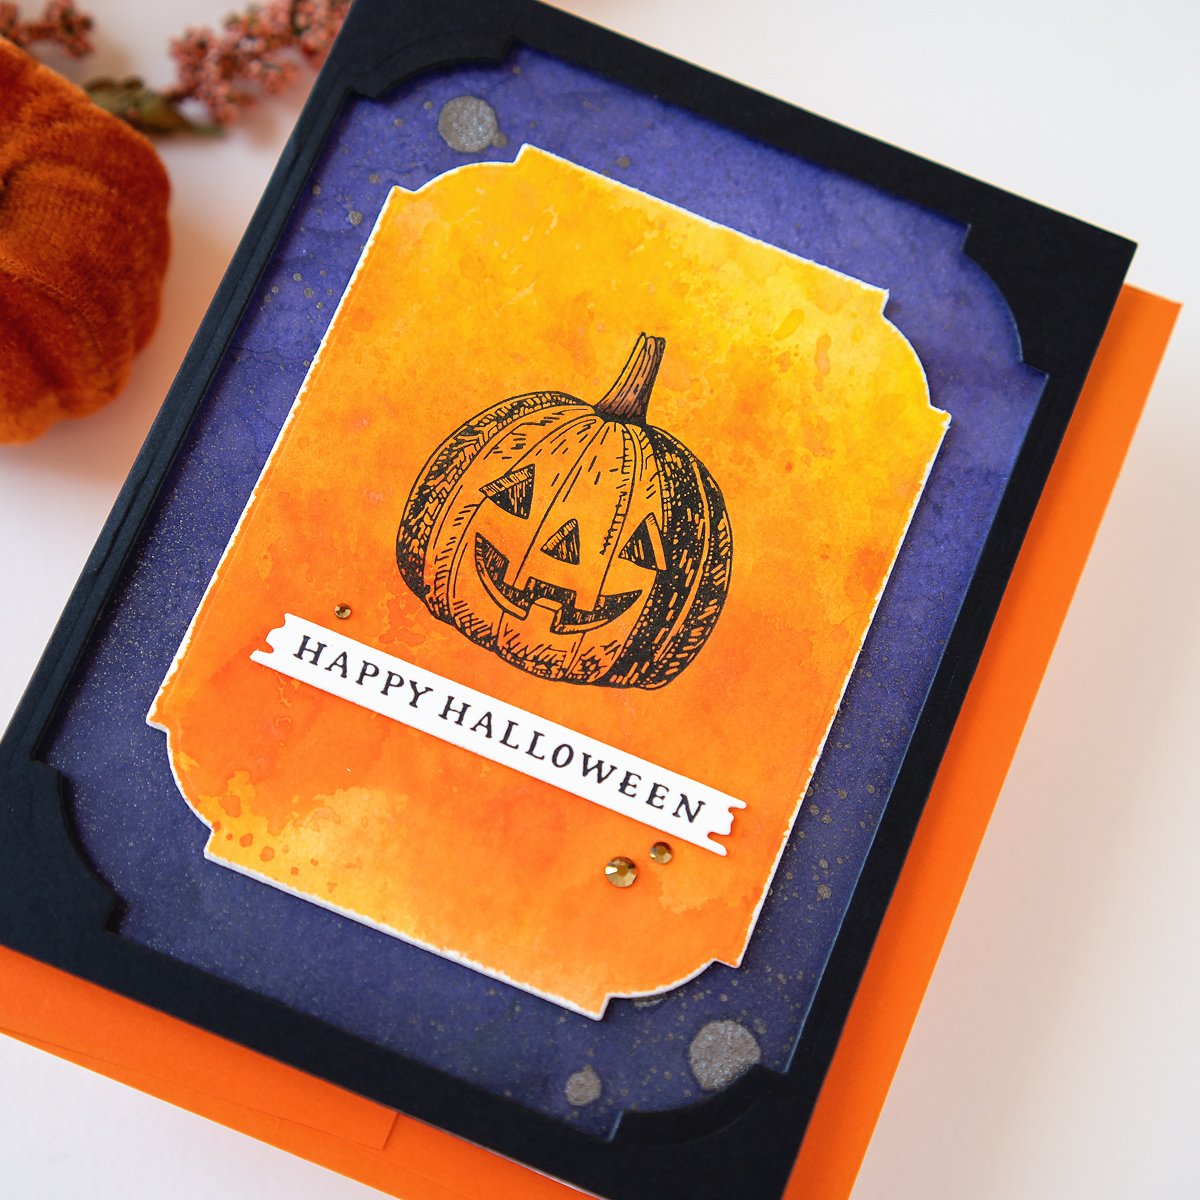
I decided that the card needed just a little something extra. I diecut a Notched Corner die from the center of a black cardstock panel. I adhered it on top of the cardbase with foam strips. I love the framed look it created. To finish off the card, I added a little brown color to the stem with a brown marker and then added some gold gems.
I had so much fun making these cards! I used to use these techniques a lot when I was scrapbooking, but it’s so fun to play with these techniques on cards as well. I hope you were inspired to get out your inks and experiment with watercolor backgrounds.
Spellbinders Supplies:

Other Supplies
Distress Ink pad, in colors: fossilized amber, twisted citron, mowed lawn, ripe persimmon, villainous potion, black soot; Distress Oxide Ink pad, in colors: villainous potion, fossilized amber; Distress Mic Spray in color Iron Gate
One Comment
Chrystal'sChreationsWycoff
You did a Spooktacular amazing job on your three cards that you made. Love all three the same. I am definitely going to have to get the other mini BetterPress ink cubes.