
Jane Davenport NEW Artomology | Get Creative with Mayline
Hello everyone! This is Mayline and I am honoured to be guest designer for Spellbinders! Today I have three projects to share with you using the Jane Davenport NEW Artomology collection. As always, this collection is incredibly beautiful and amazing, so I truly enjoyed to make all projects.
DREAM MIXED MEDIA PIECE
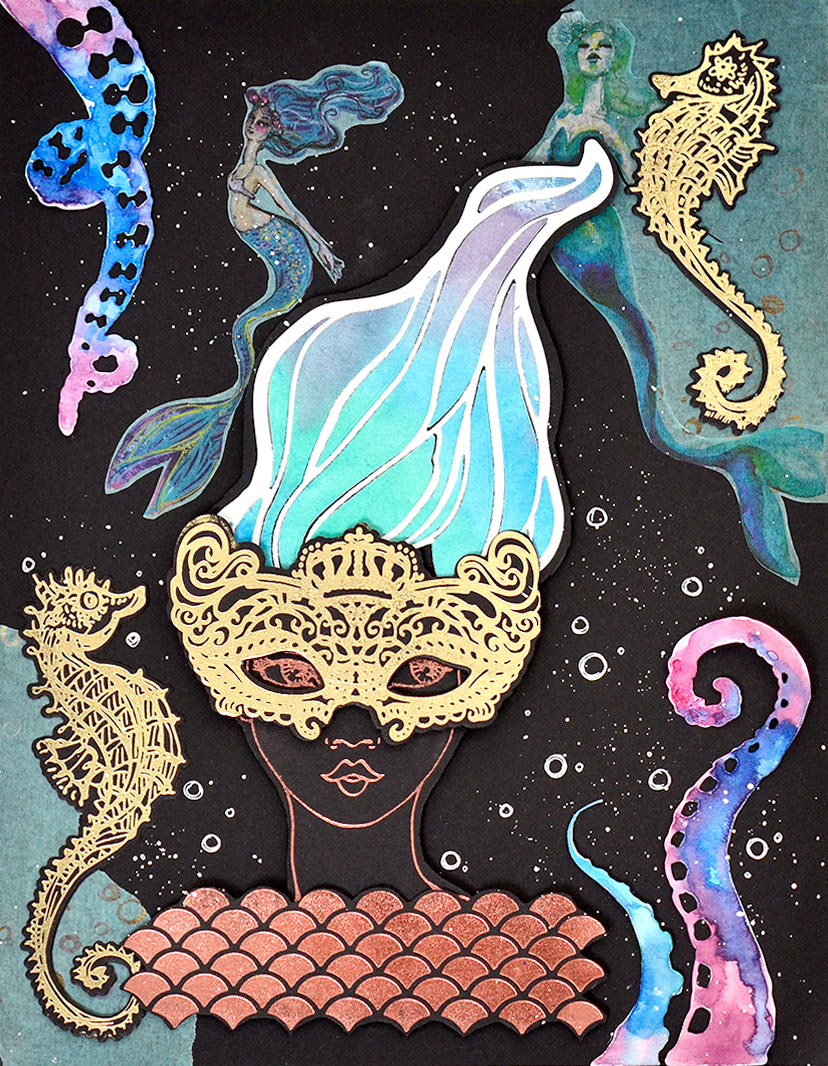
It’s an 8.5×11 sized mixed media piece. It was a challenge for me to combine various images, and use a different kind of colouring tools in the large area. So, it would be more of a process than my usual card designs but, I did it and it was worth it! And it turned out beautifully.
INSTRUCTIONS:
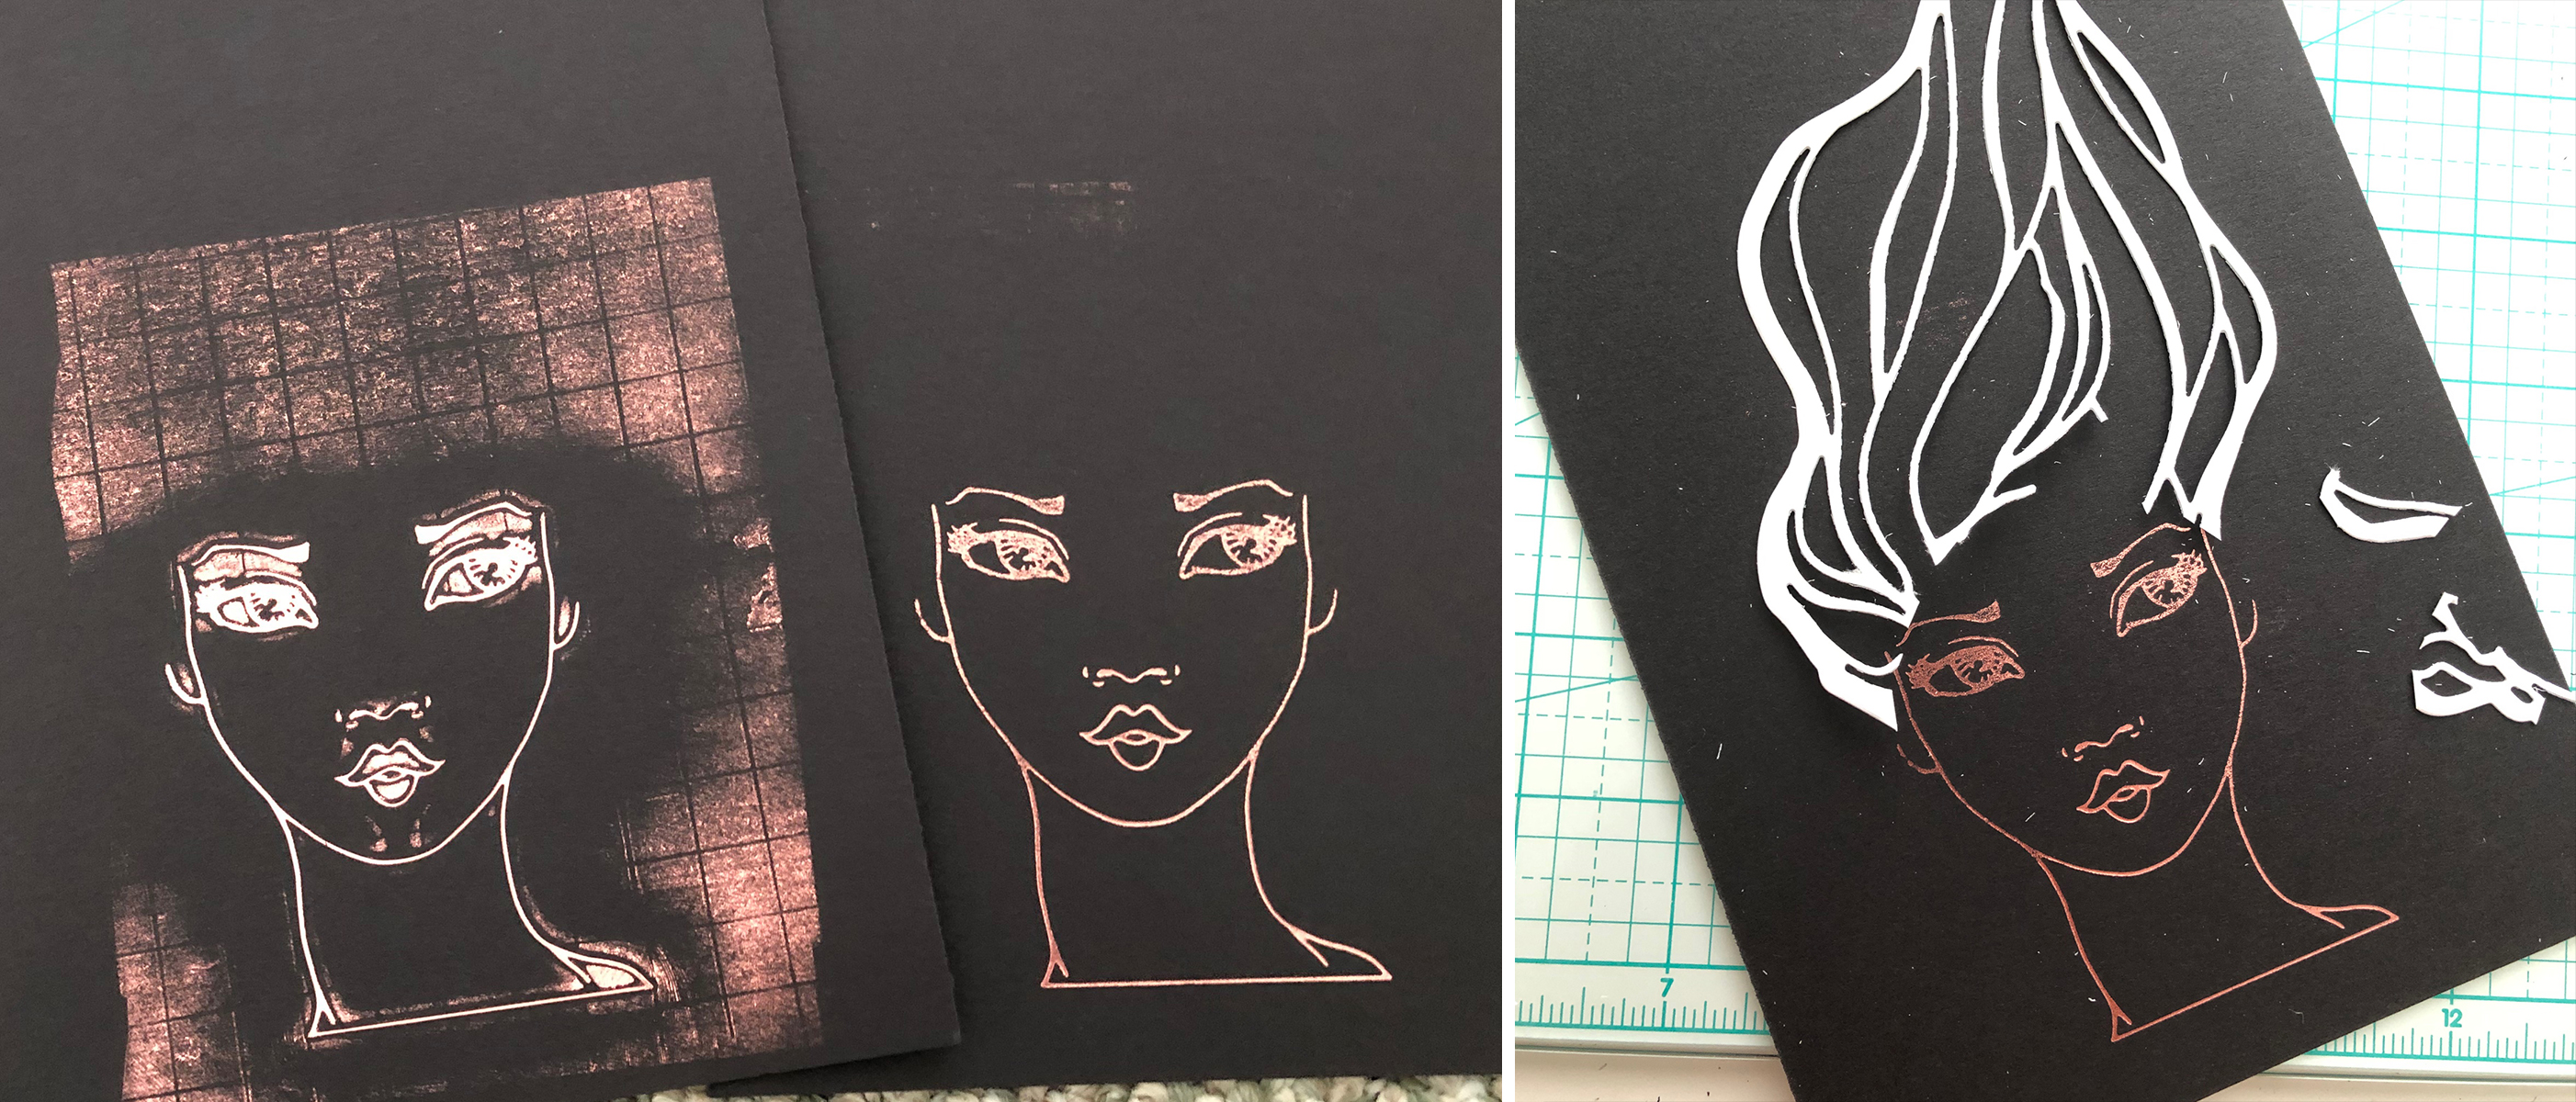
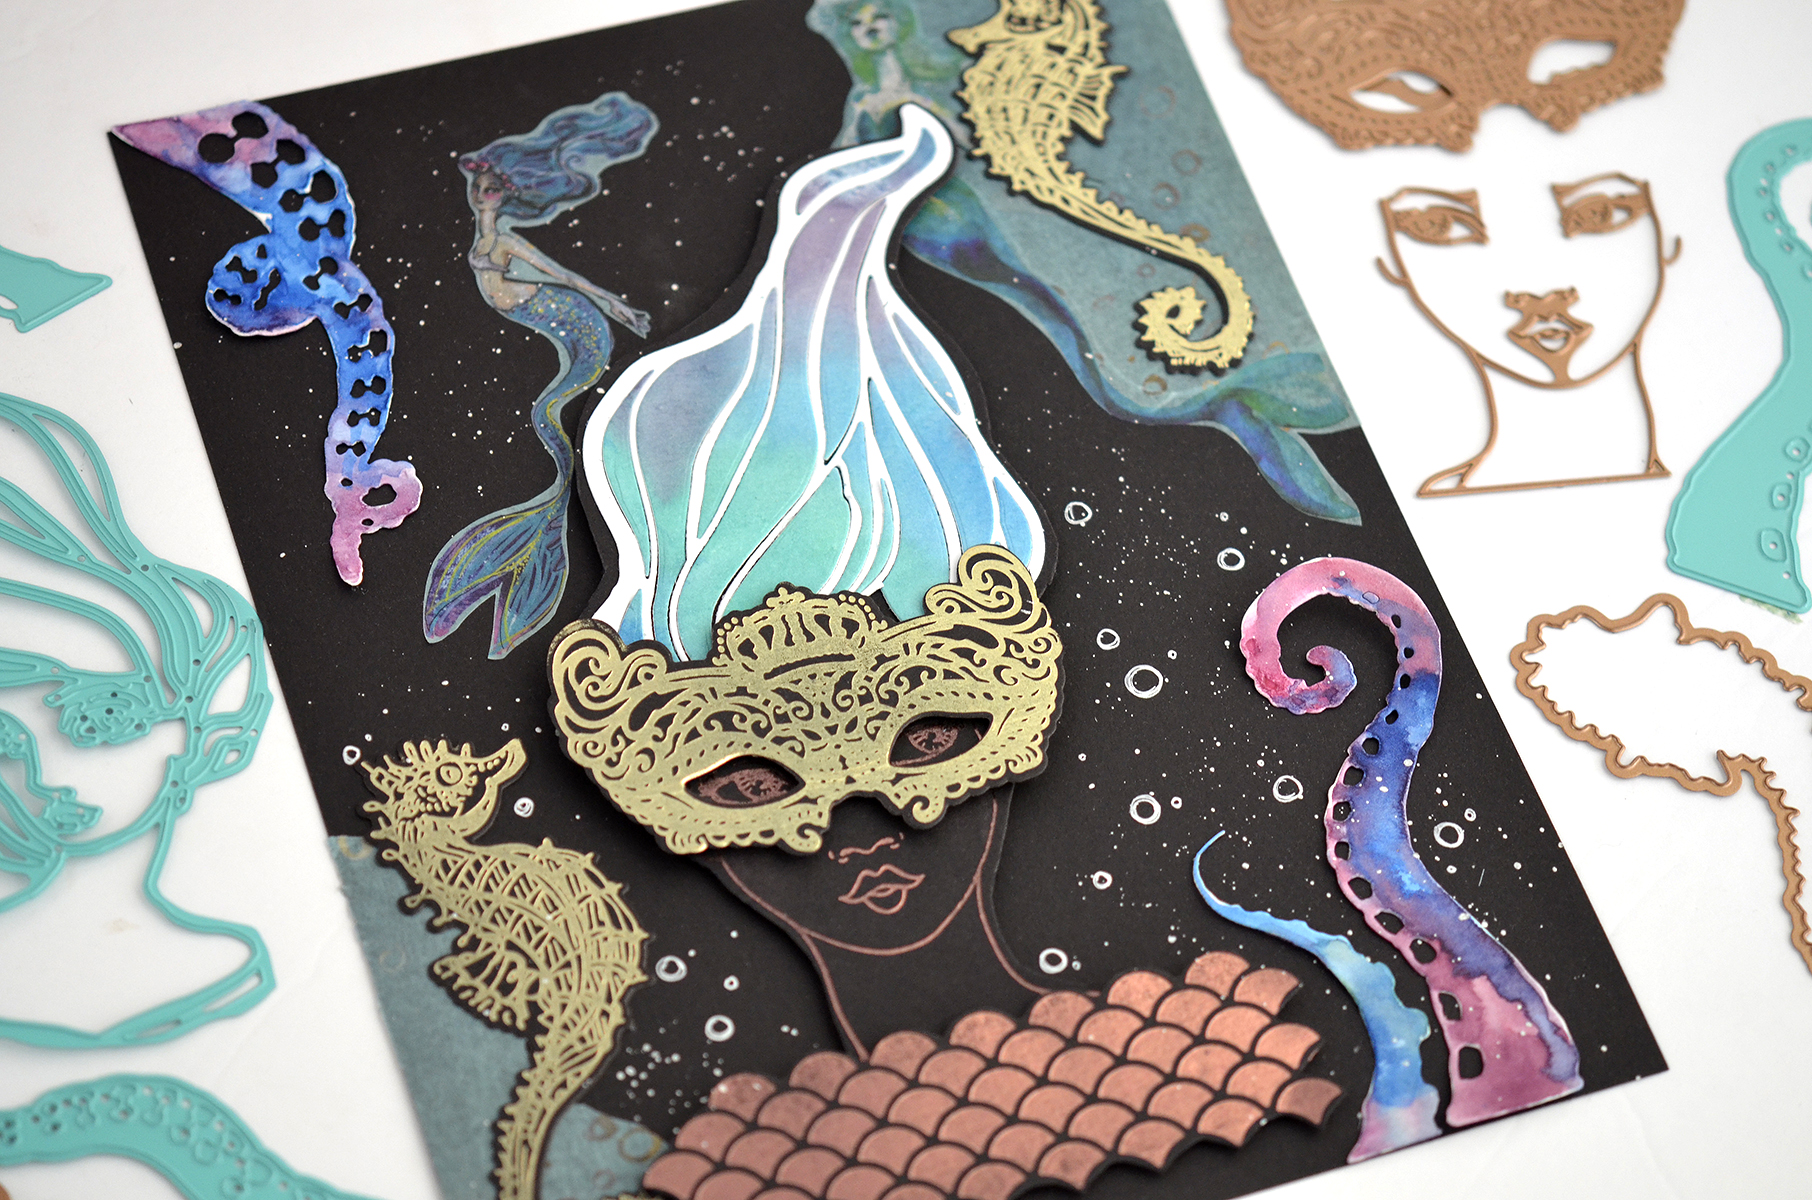
To start off, I used a Glimmer Hot Foil System with Charisma Glimmer Hot Foil Plate, Rose Gold foil roll, and 300g black card stock. Before I used the machine I read and watched other reviews and some of them were suggesting to add few cardstocks to make a solid image result. The face on the left, I added many papers so it comes out like this. Hahaha… I tried it again (of course less pressure) and it comes out beautifully. Also, I tried not to add paper and it comes out the same as the second-time result. It was a fun experiment for me. First try makes it difficult to get a perfect outcome however, once I learn how to use it properly and then the outcome turned out nicely as always.
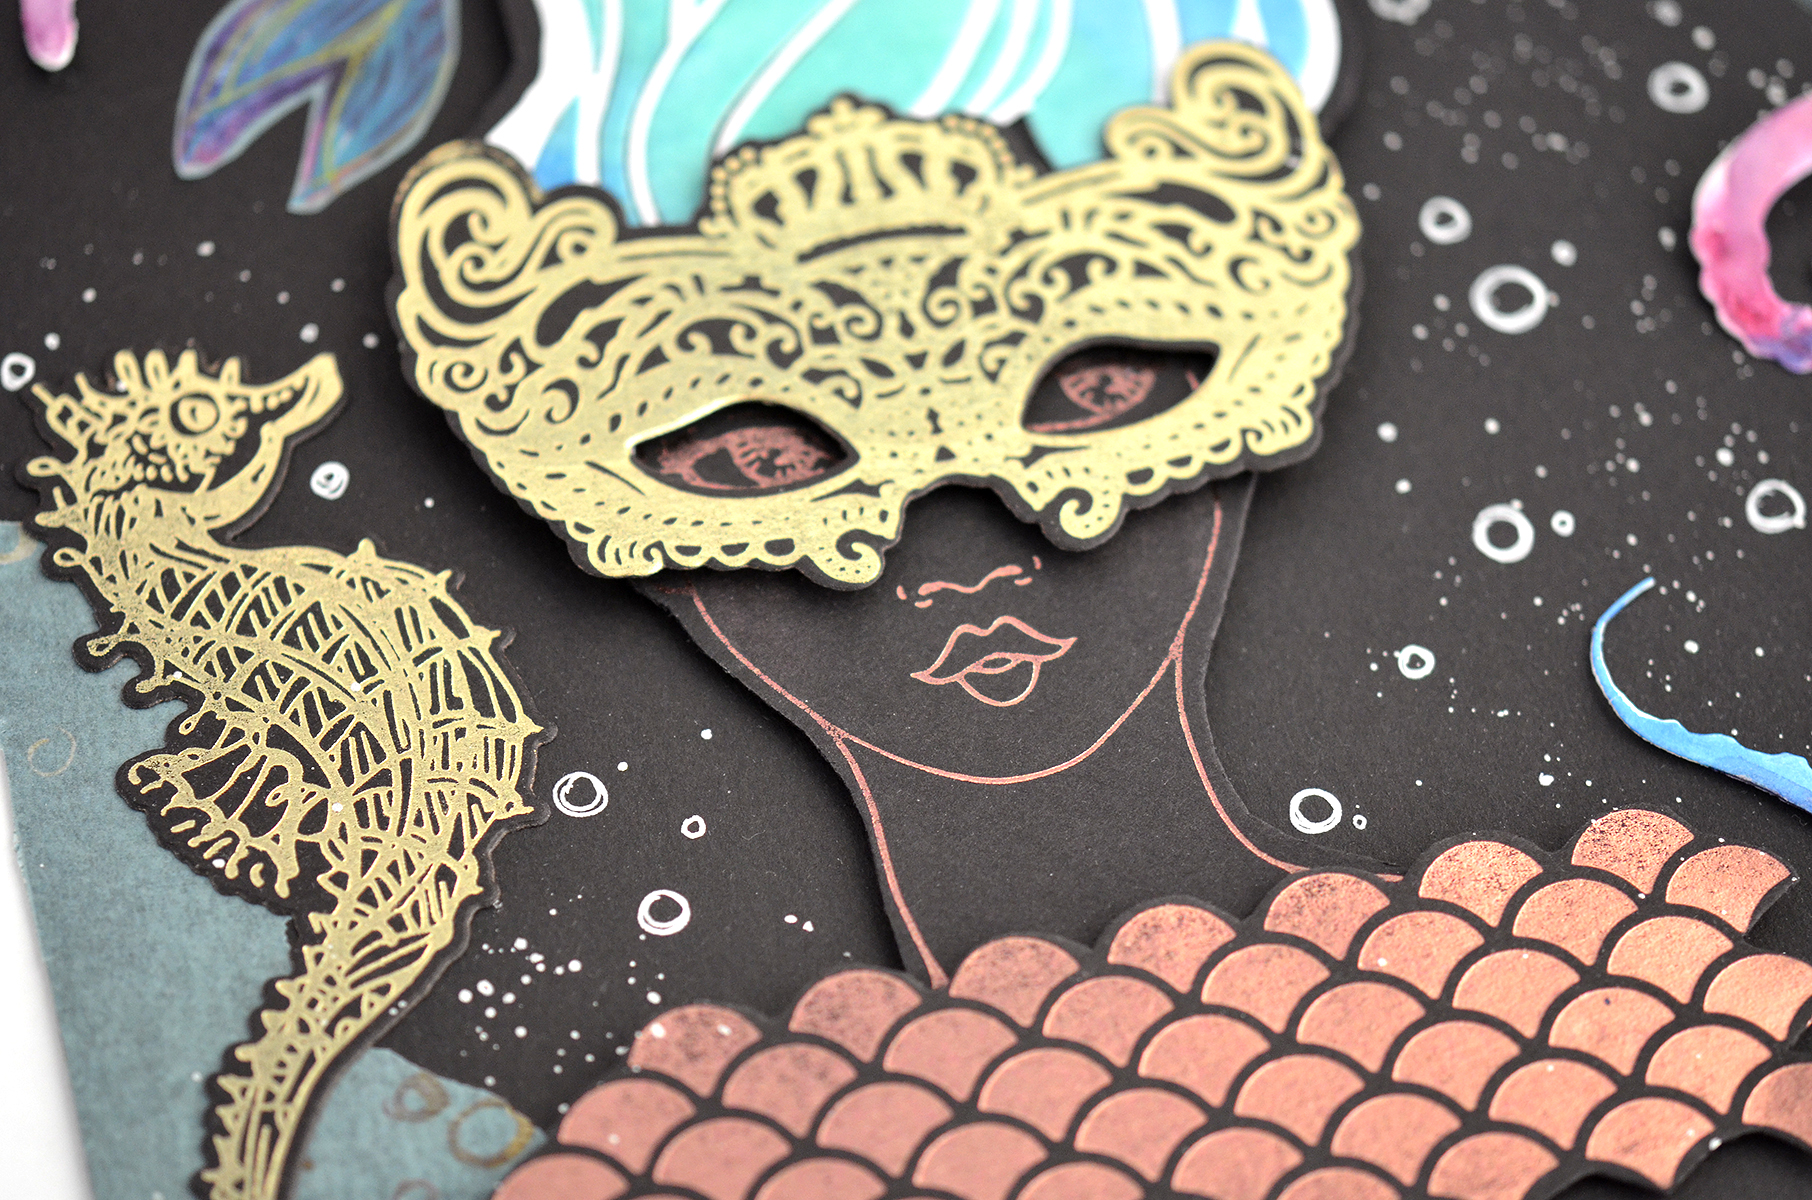
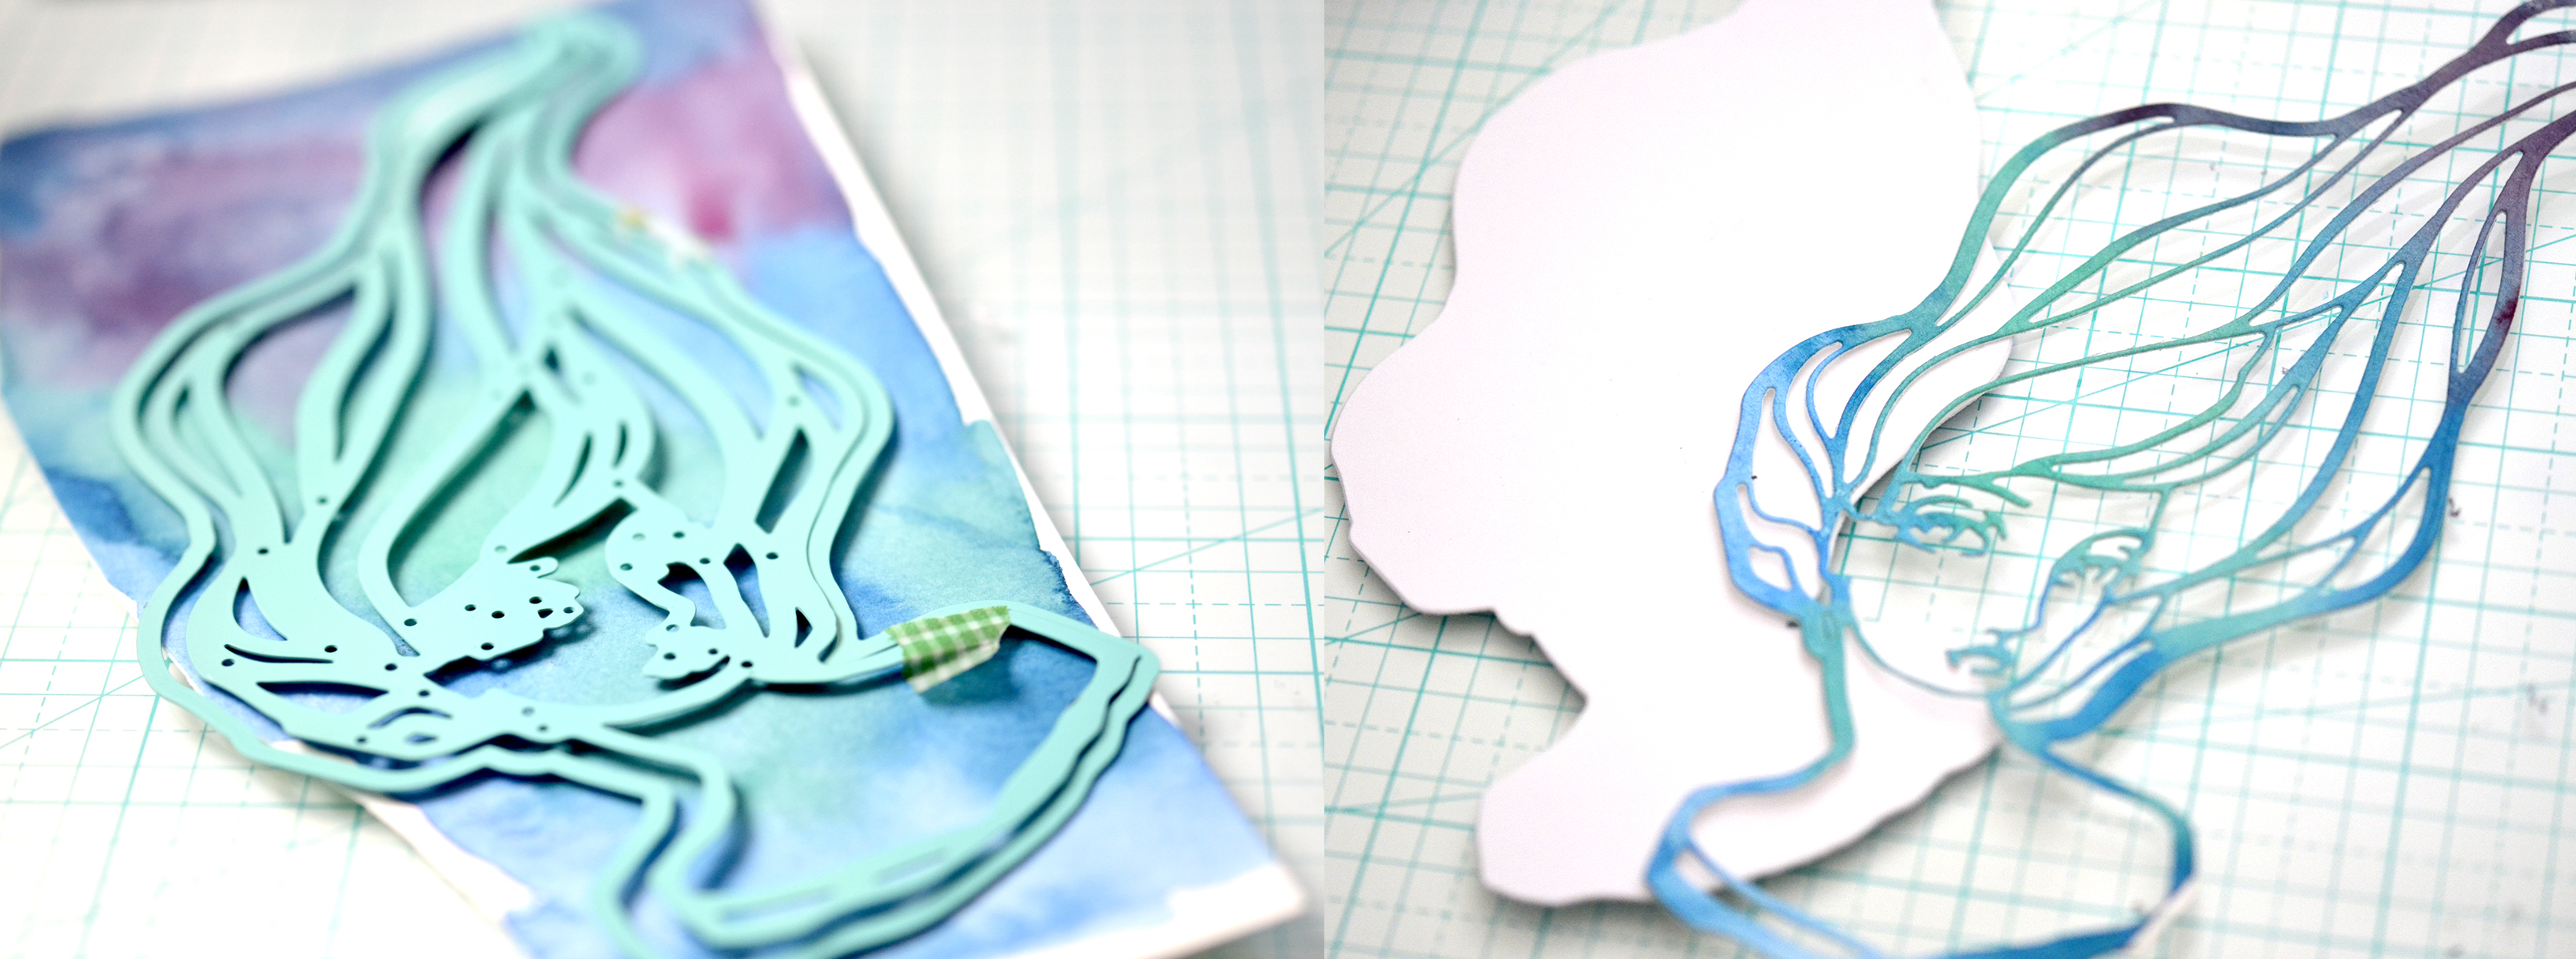
Next, I die cut Marcia Makeover Etched Dies to get the Marcia’s outline pieces with white cardstock. And then I remove face shape and leave hair part as the photo shown above. I glued it on the black panel. After that, I made a watercolored background panel using blue, green, purple colors and cut the panel with the same Marcia Makeover die. I set aside an outlined-piece (I used it my third project) and used solid pieces to insert the white outlined hair area.

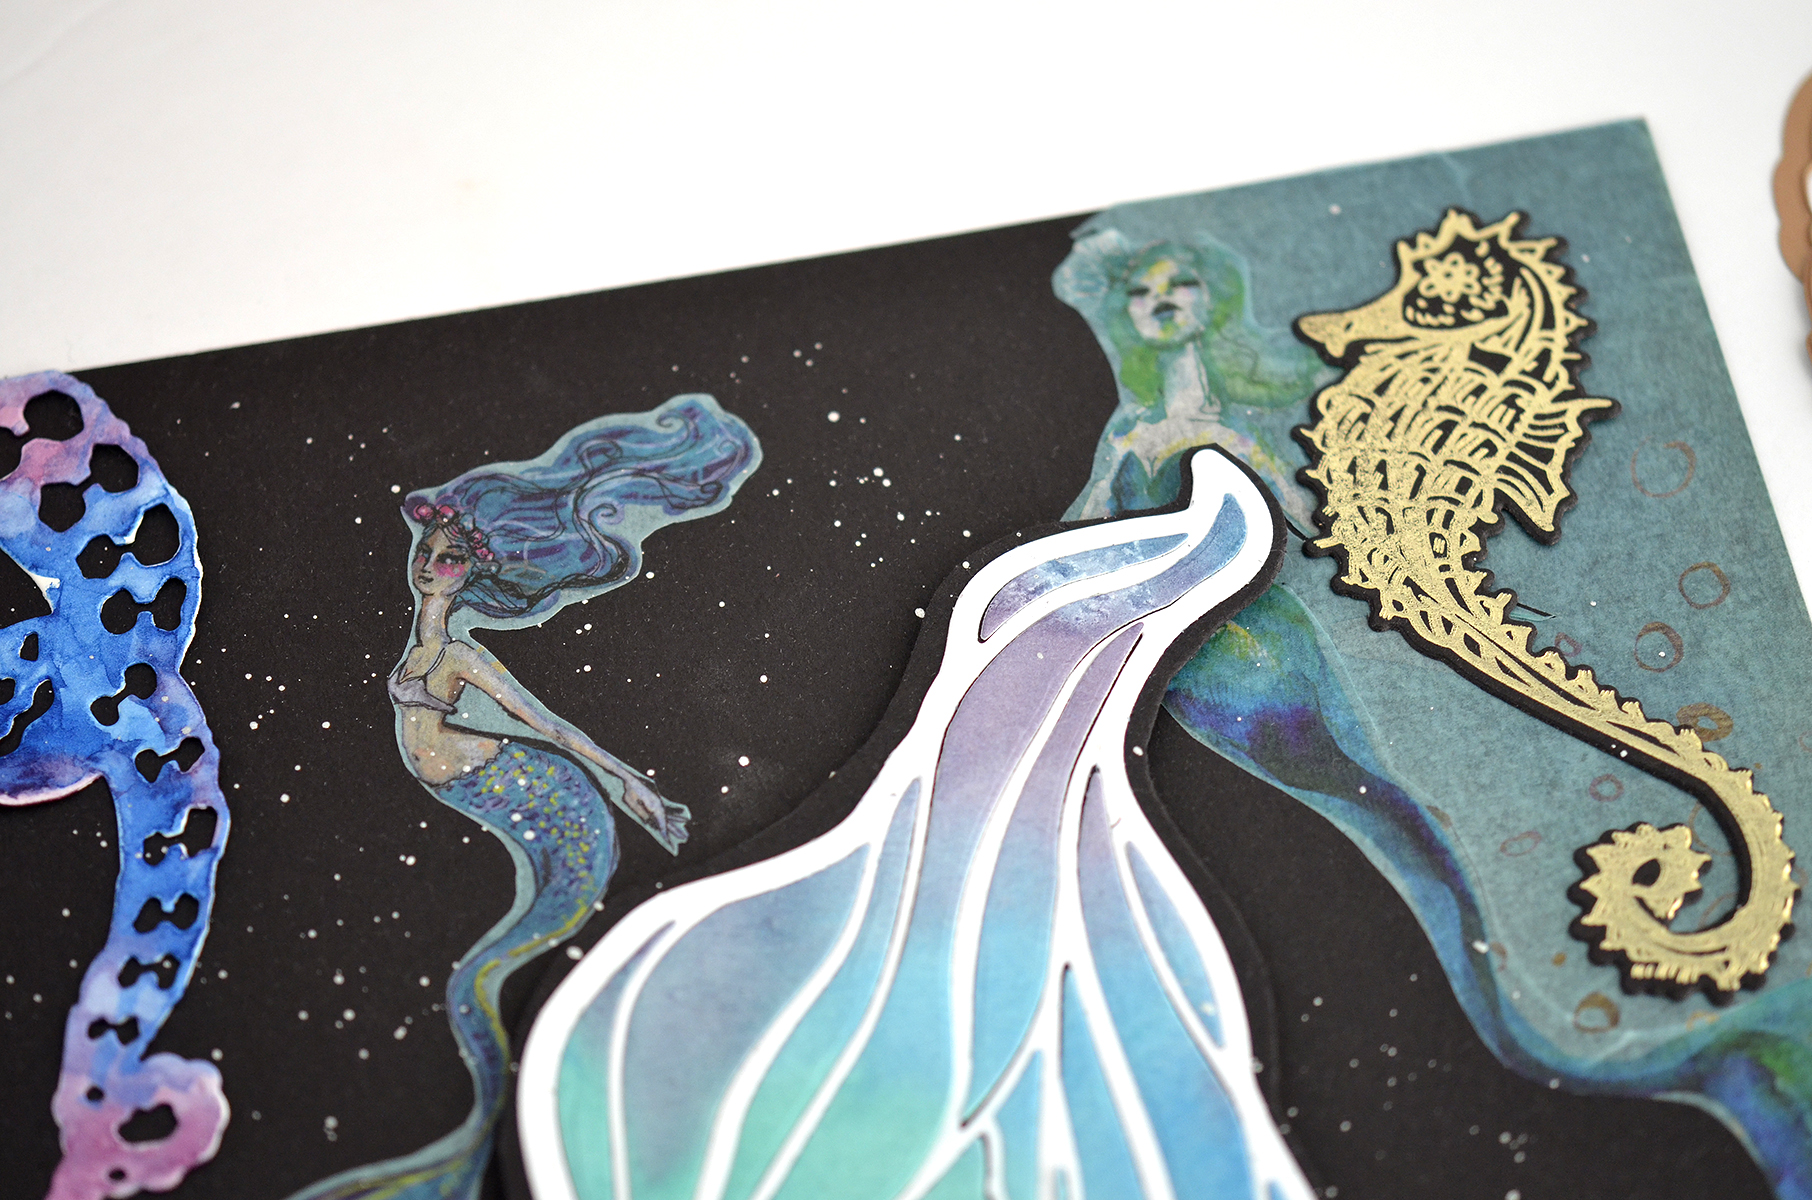
To make the foiled image, I used Mermaids Forever Glimmer Plate (six rows of solid waves), Show Ponies Glimmer Plate (seahorses), Le Mystere Glimmer Plate (mask) with Rose Gold, Champagne and Polished Brass foils.
Before I placed all pieces I prepared 8.5 x 11 sized black cardstock to make a background panel. I applied a Washi Mermaids sheet on the panel. And then I felt like I wanted to add something more, so I added tentacles die-cut pieces using Tentalicious Etched Dies and coloured them with watercolour paints. After that, I placed all of the foiled images on the panel.

To finish the project I drew bubbles using white pen and applied silver colour splashing on the panel to give more bubble effect like an under the water/ocean.
Spellbinders Supplies:
Other Supplies:
Black cardstock, White pen, Silver paints, paint brush, glue, 3D tape, watercolor paper, watercolour paints
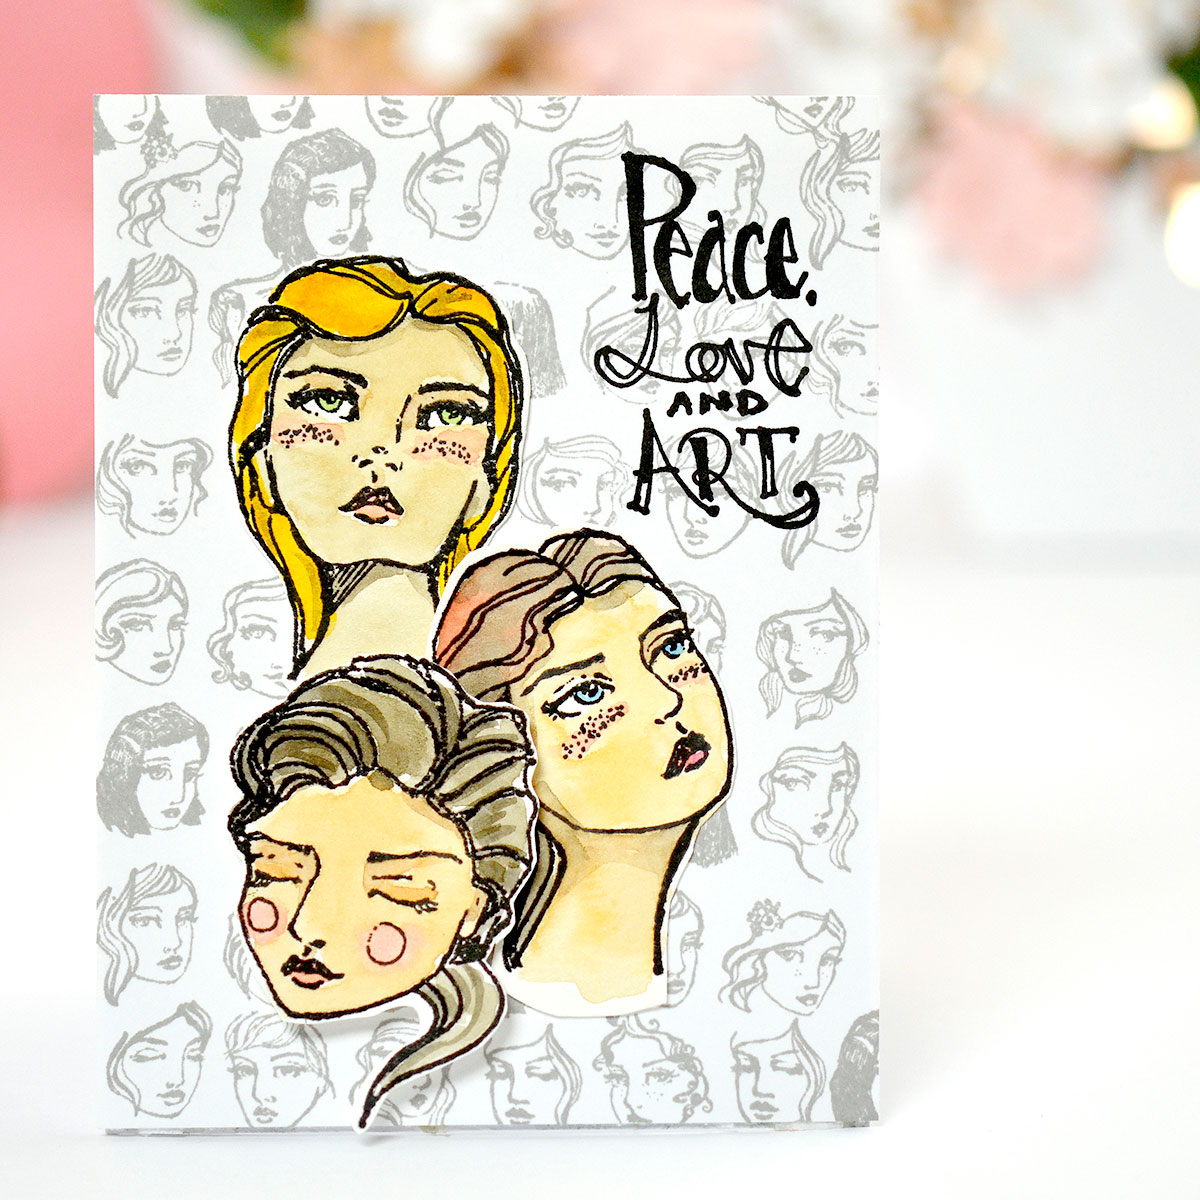
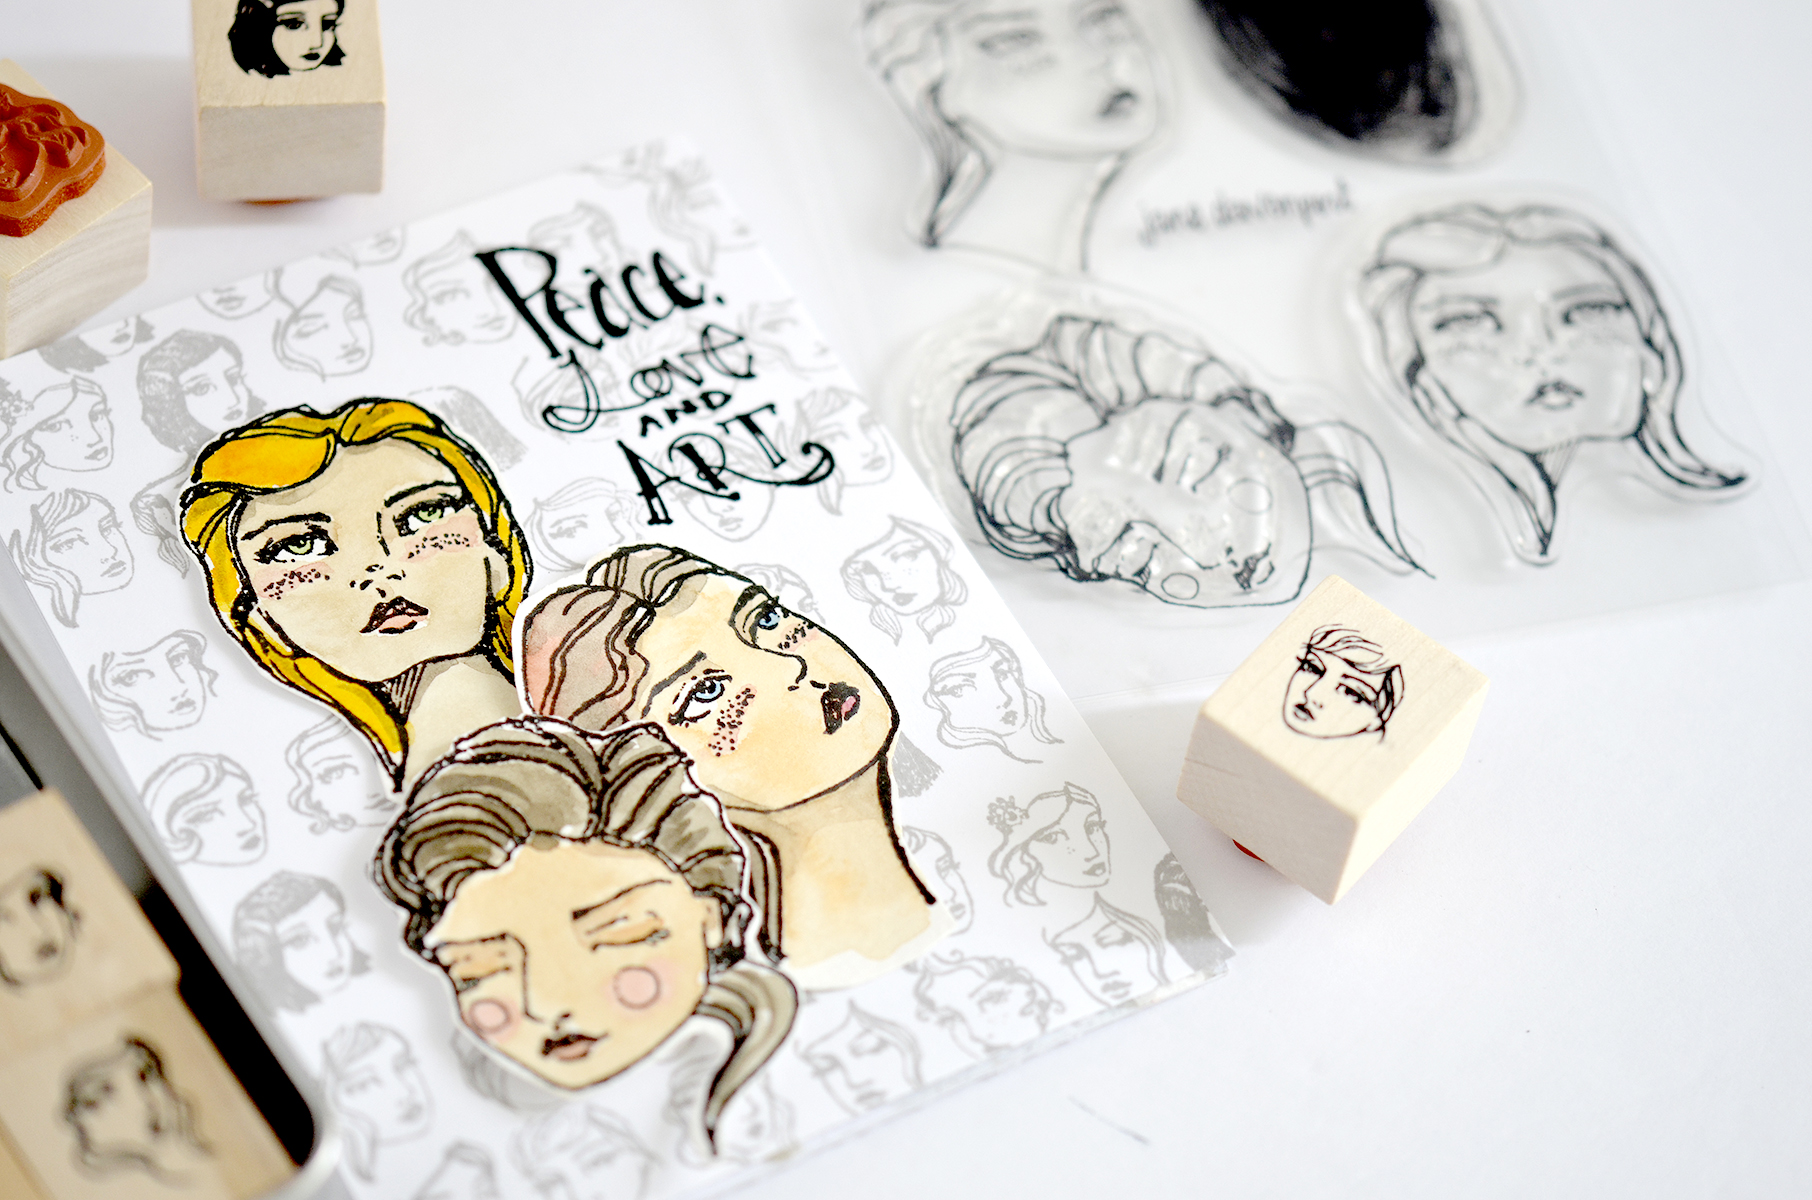
CLEAN & SIMPLE STAMPED CARDS
Here is my second project. I have created two cards using Tin of Friends Wood Mount Stamps and Mix & Match Clear Stamp, and Life Sparkle Clear Stamp.
Instructions:
- Create an A2 sized panel from some white cardstock.
- To make a background pattern, stamp imaged from Tin of Friends Wood Mount Stamps using grey ink on the entire panel.
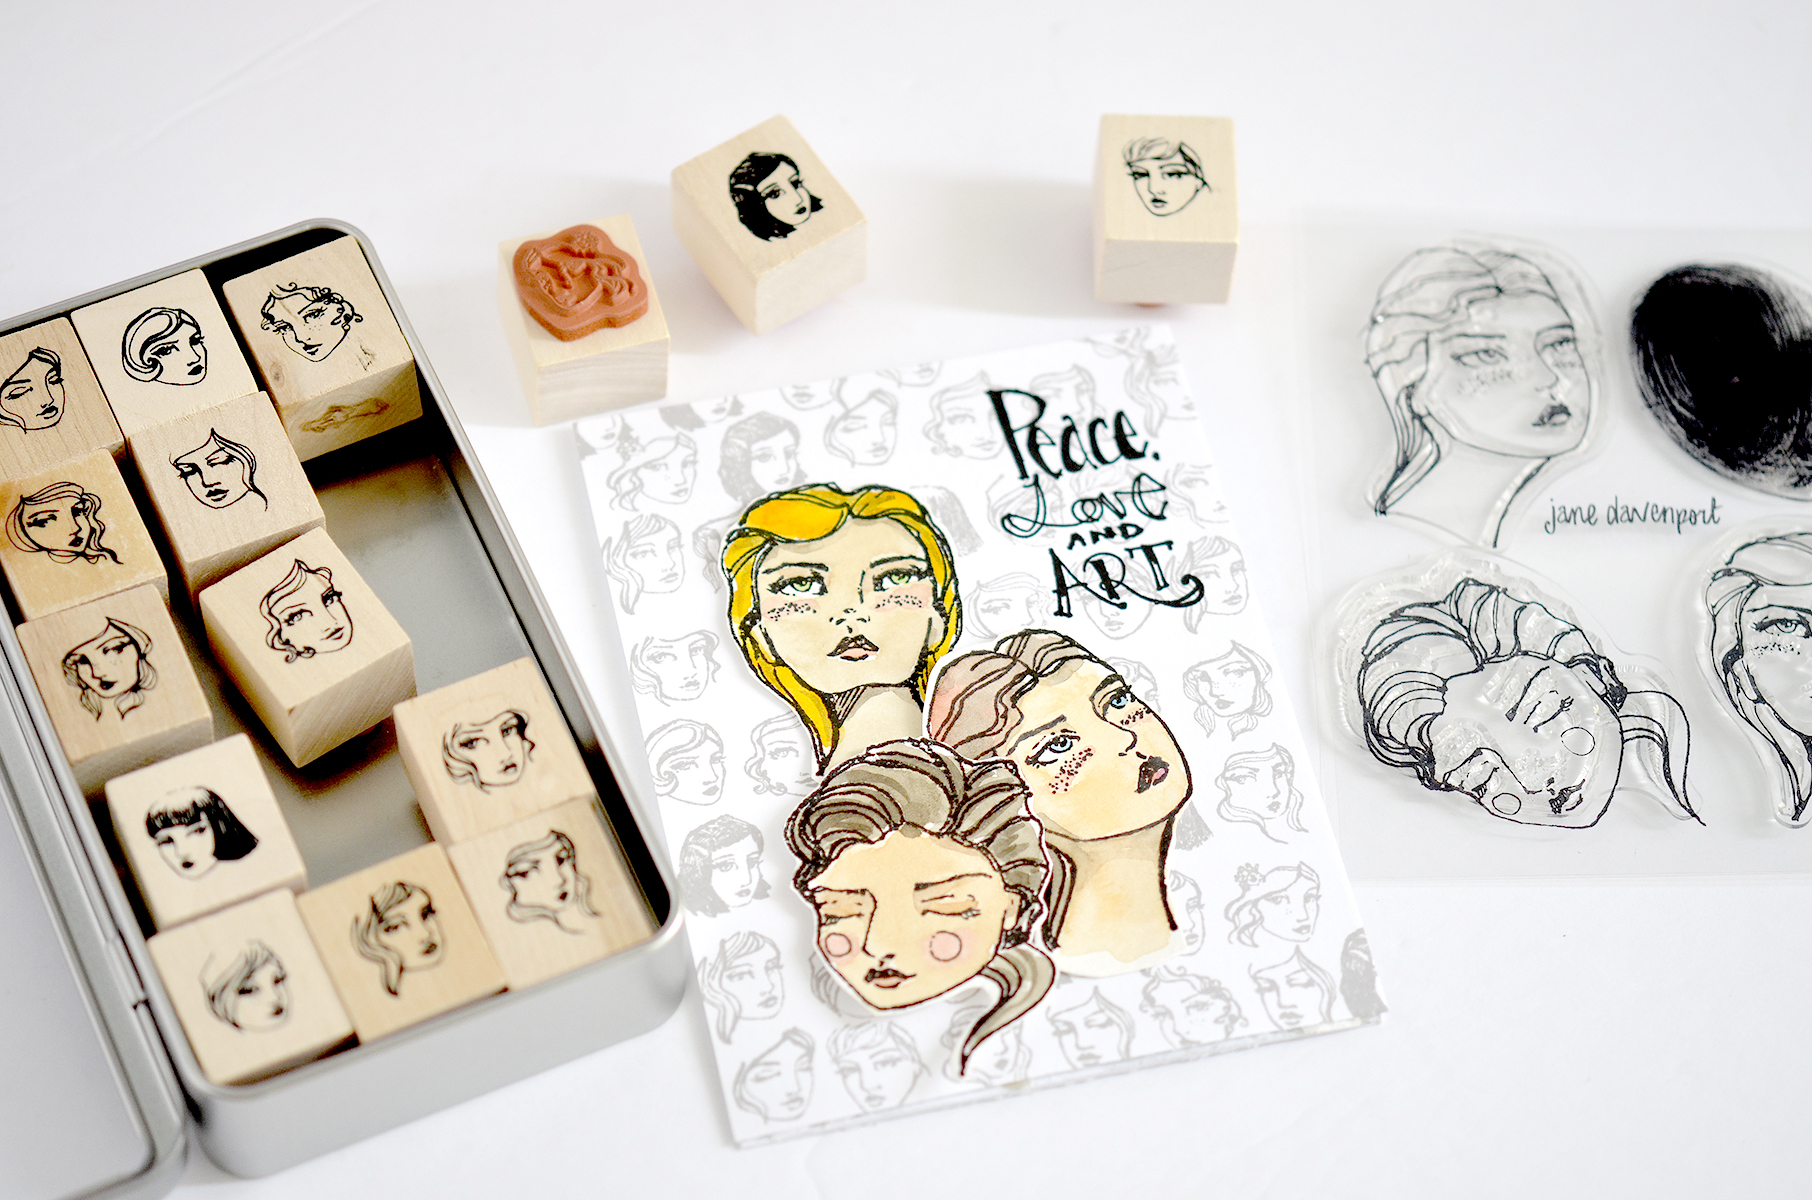
- Stamp three face images (looking up, looking to the left and closed eyes) using Squid ink Cave black ink on some watercolour paper.
- Colour images using watercolour paints and fussy cut these images. And then adhere them to the panel using 3D tape and double-sided tape.

- Stamp a sentiment from Life Sparkle Clear Stamp with Squid ink Cave black ink on the panel.
Spellbinders Supplies:
Other Supplies:
White cardstock, glue, 3D tape, watercolor paper, watercolour paints, paint brush
ONE LAYER COLOUR IS HAPPINESS CARD
Here is my second card and it’s one layer card.
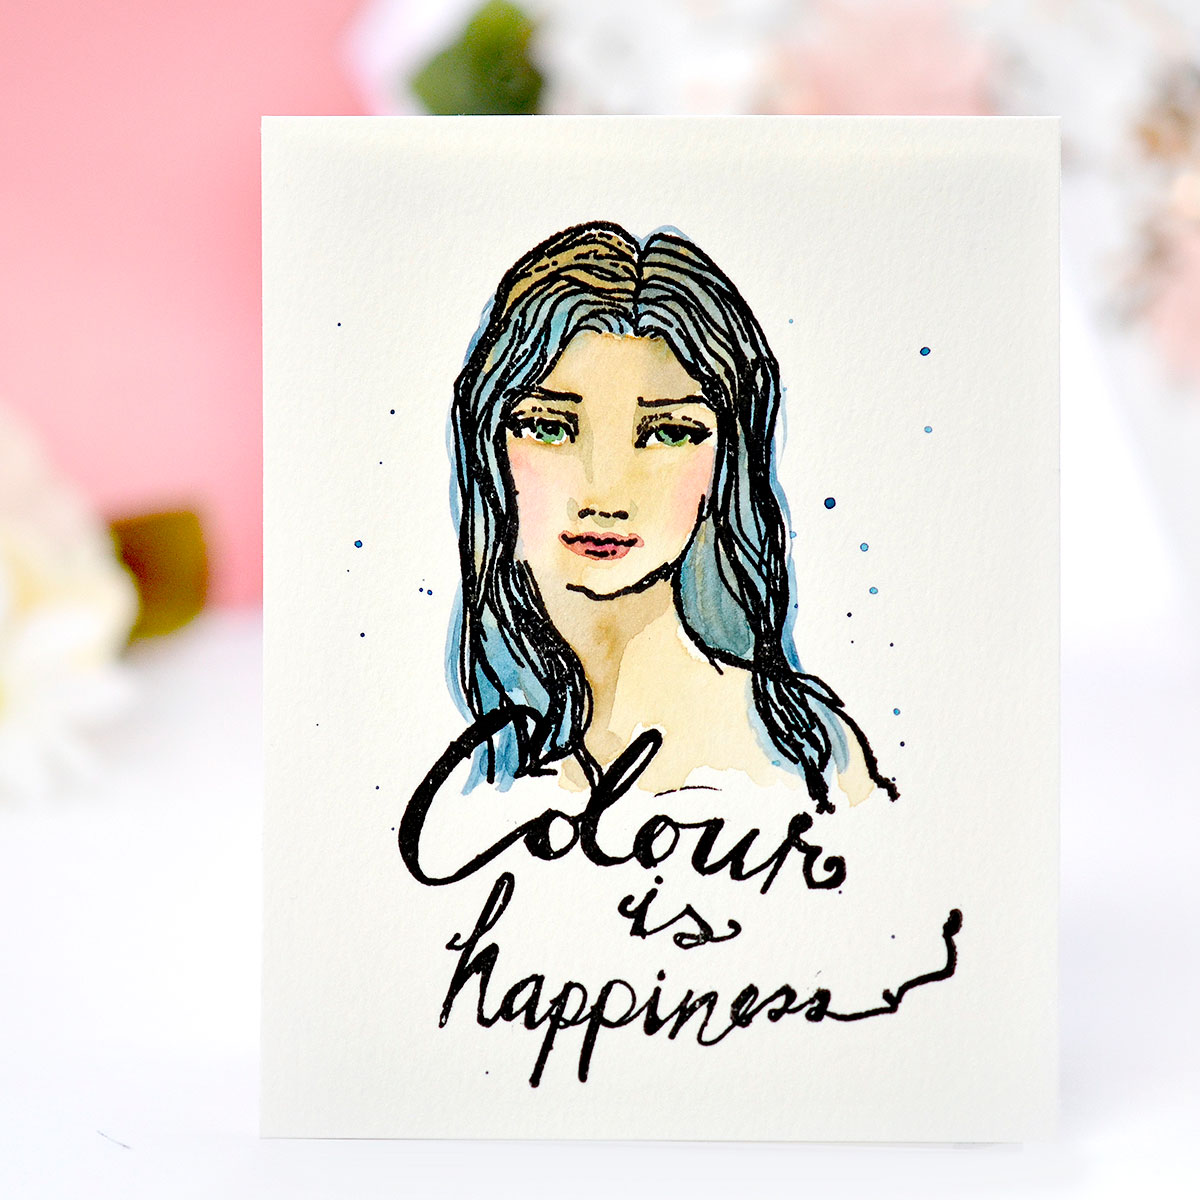
Instructions:
- Create an A2 sized panel from watercolour paper.
- Stamp a beautiful girl from Colour is Happiness Clear Stamp using Squid ink Cave black ink on the panel.
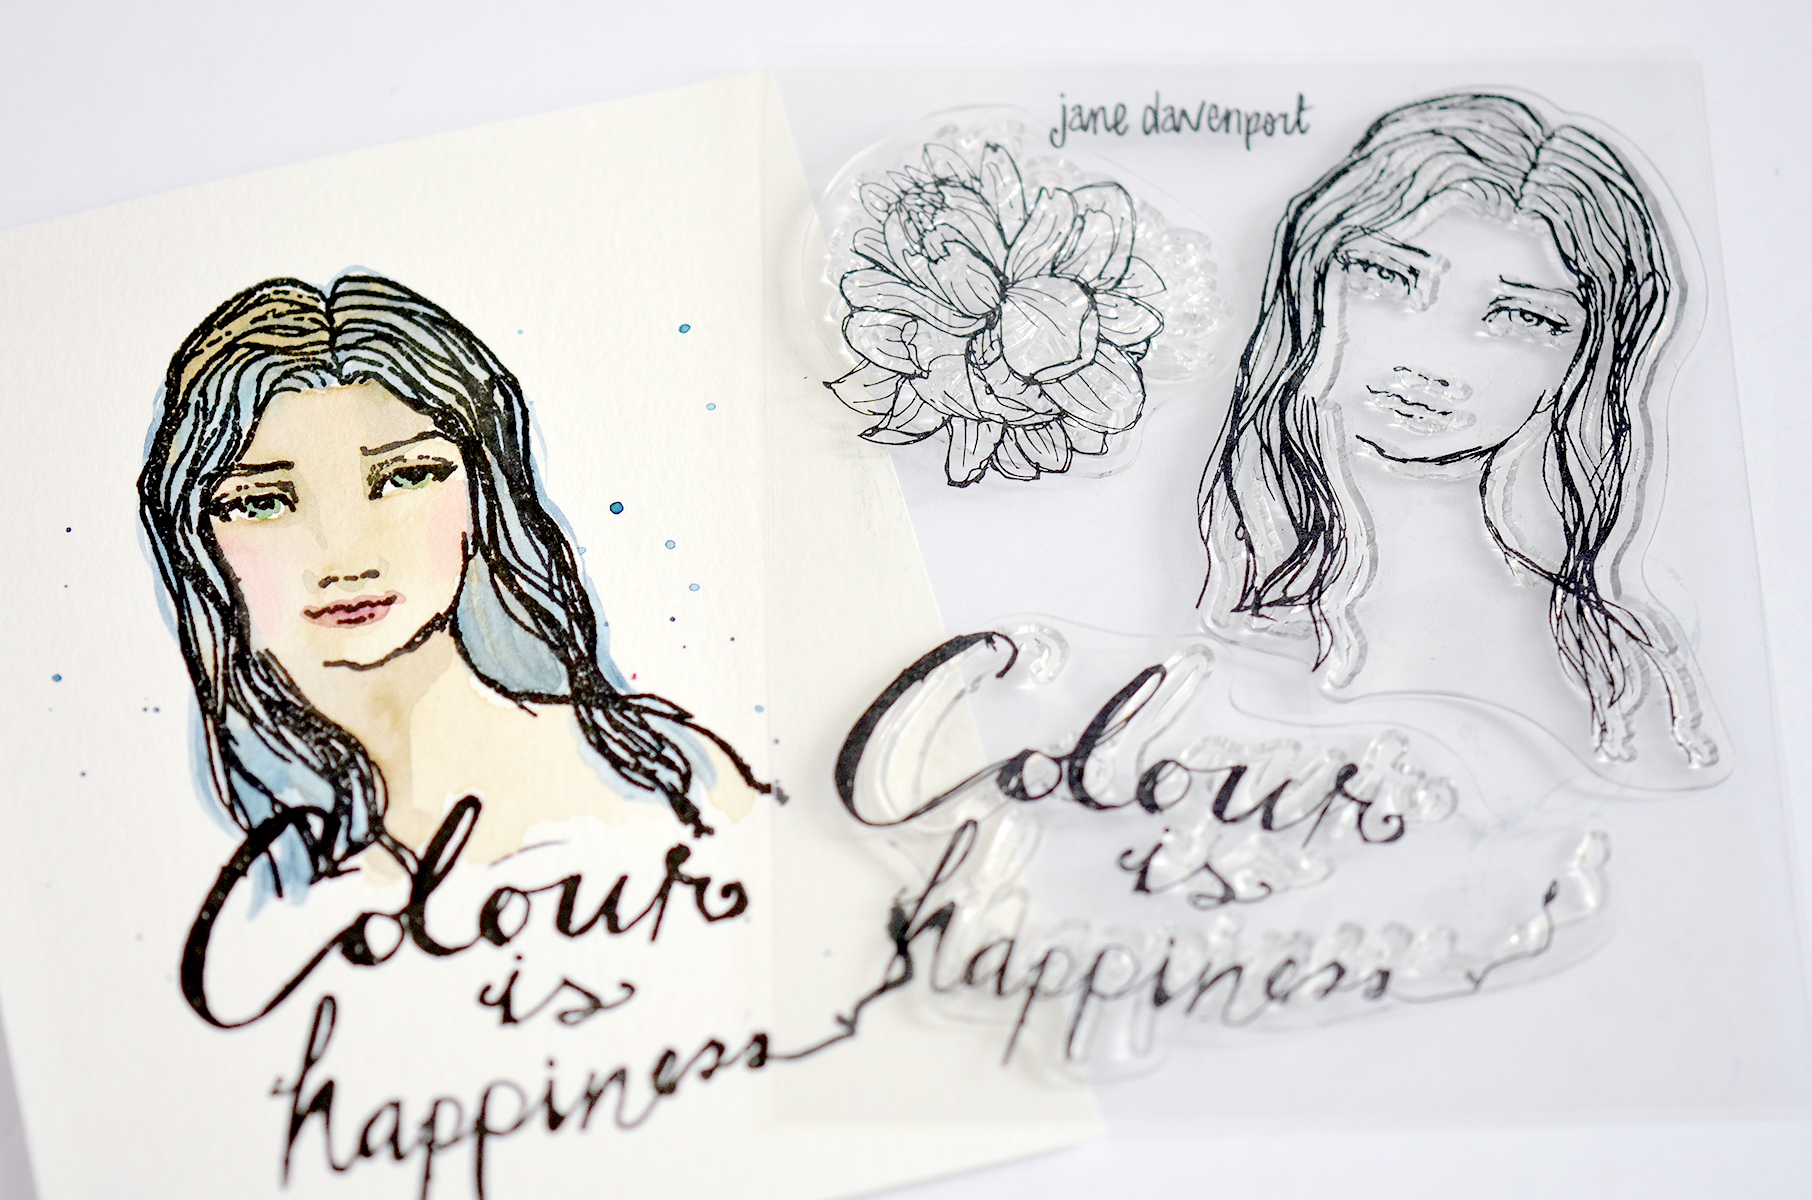
- Colour the image using watercolour paints and stamp a sentiment from the same stamp set.
- Add silver colour splashing.

Spellbinders Supplies:
Other Supplies:
Watercolor paper, watercolour paints, paint brush
COLOUR IS HAPPINESS MIXED MEDIA PIECE
Here is my last project. It is also a mixed media.
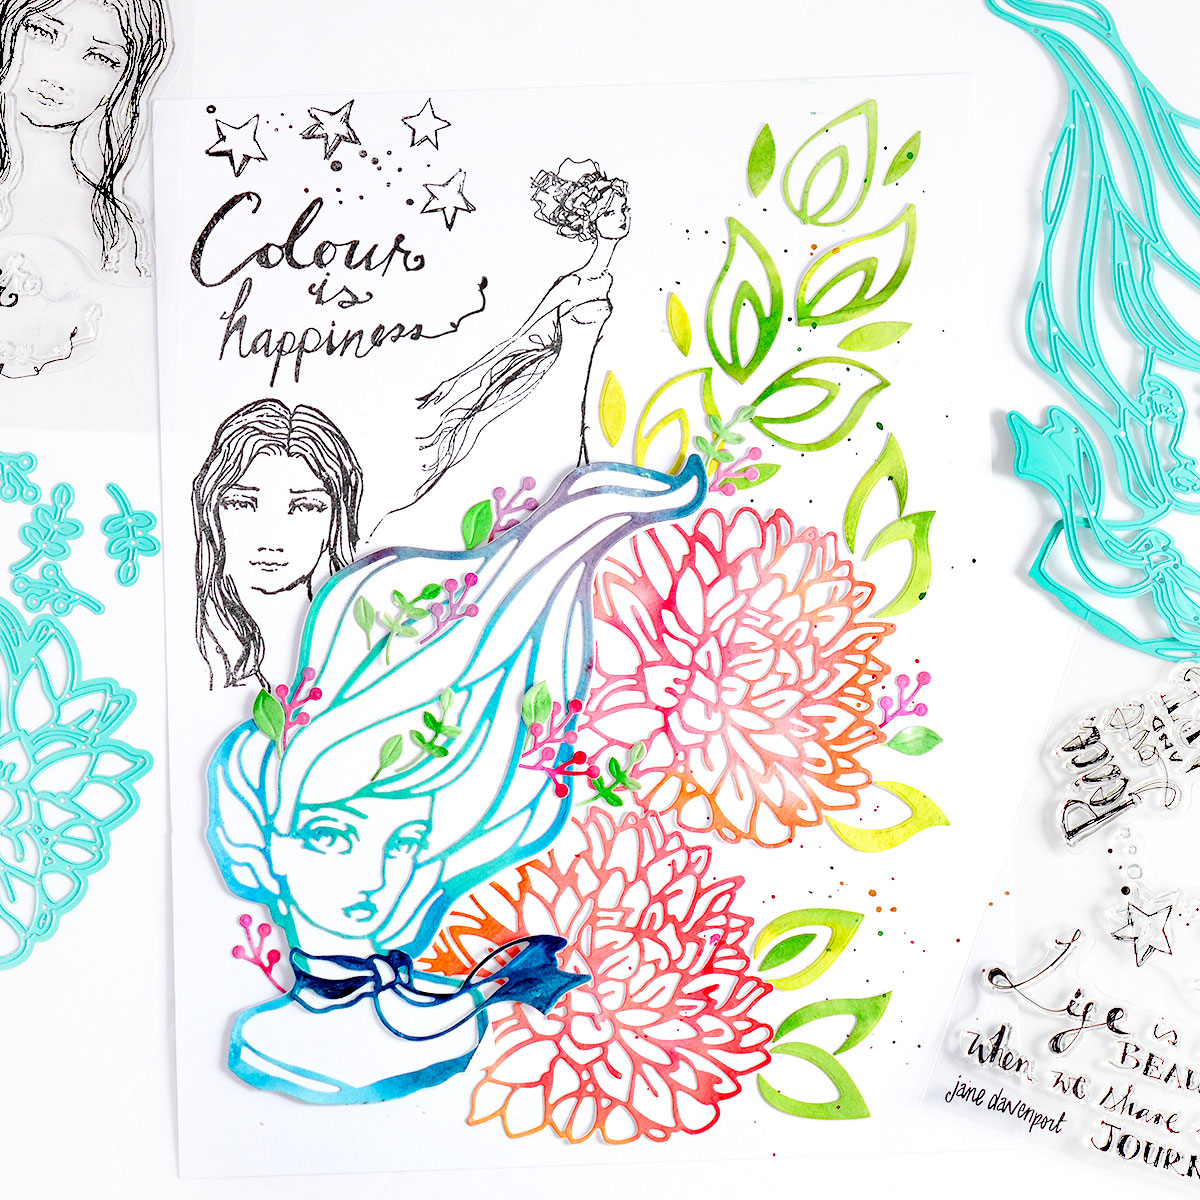
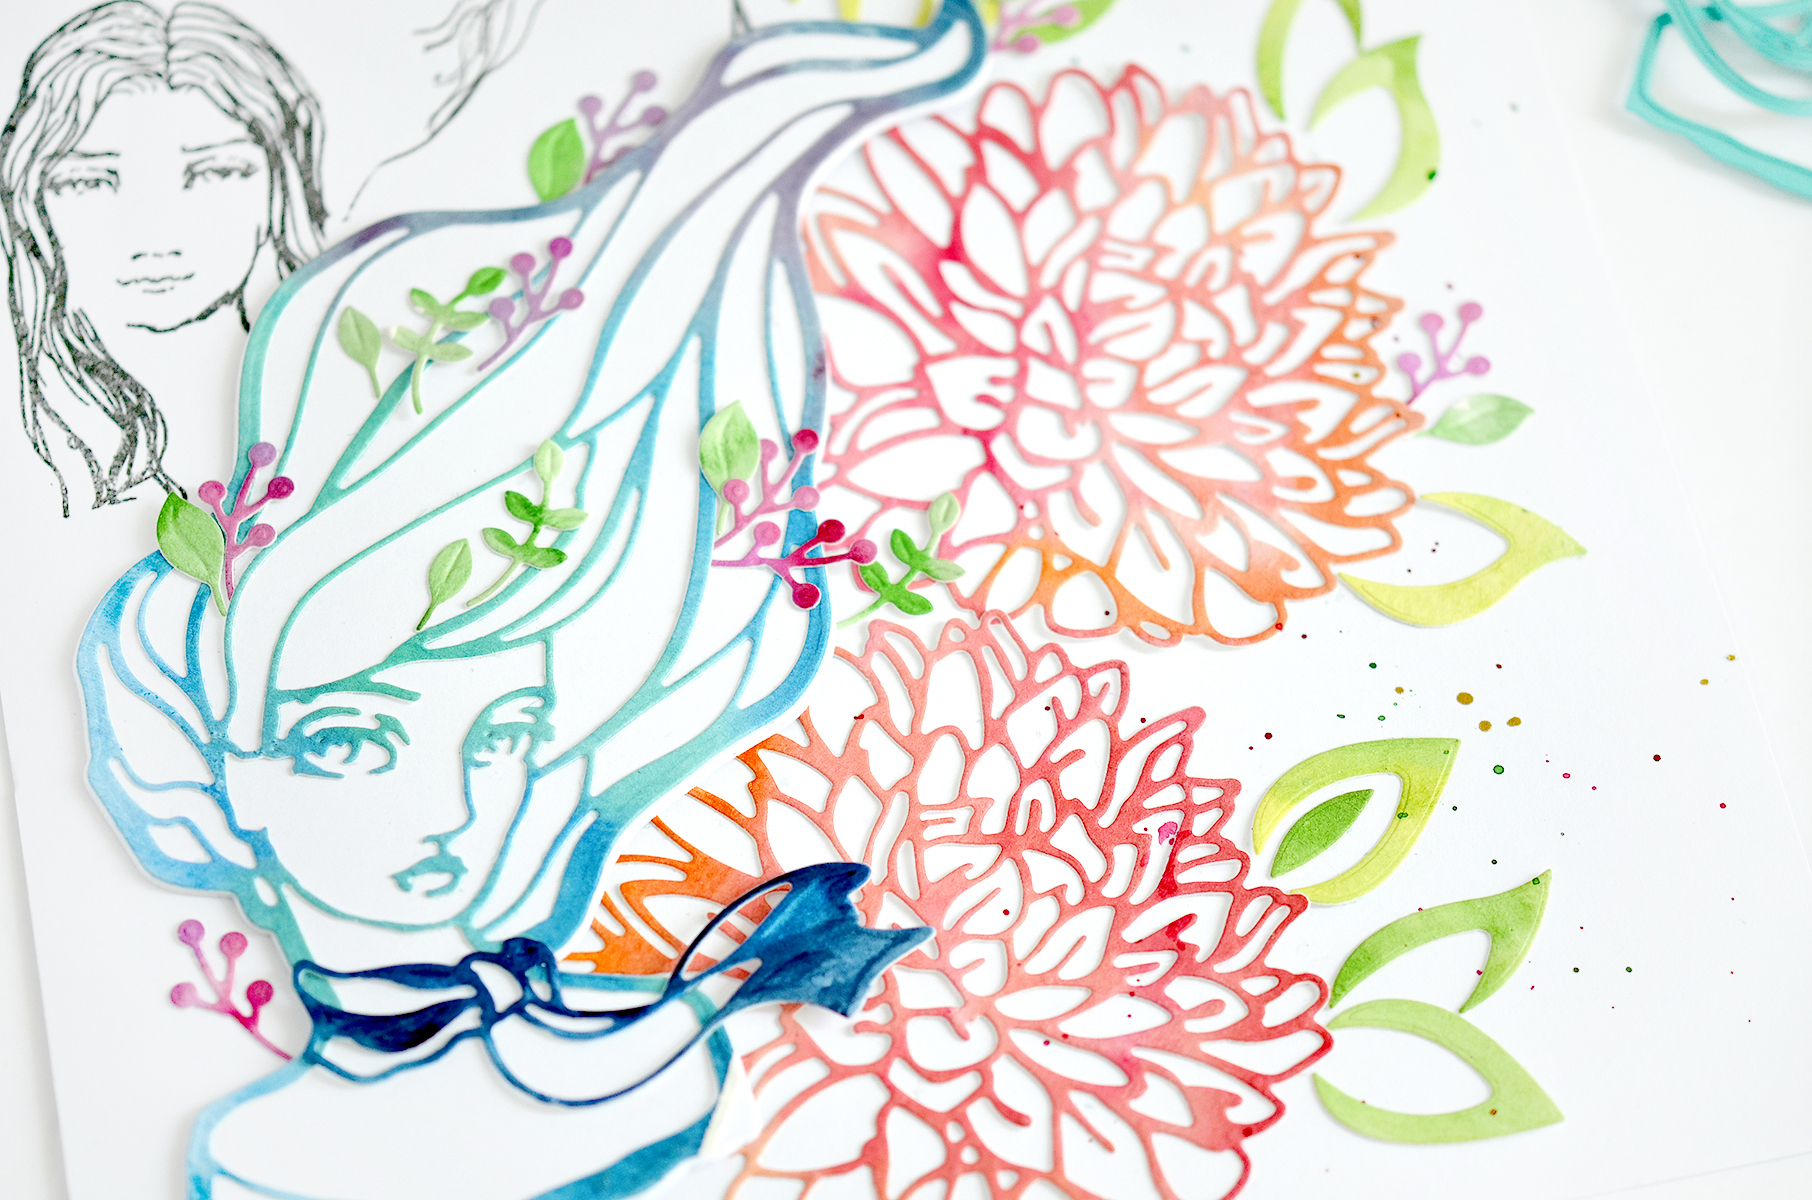
As I mentioned earlier, I used leftover outlined pieces for the last project. I cut some white cardstocks four times with the same Marcia Makeover die. I overlapped these white cardstock using glue and then I adhered the Marcia’s outlined shape to the solid panel.
Next, I made two watercolored panels using red, orange, yellow, green paints to get flowers, berries and large/small leaves die-cut pieces using Mums the Word Etched Dies. And I prepared 8.5 x 11 sized white cardstock for the journal panel.
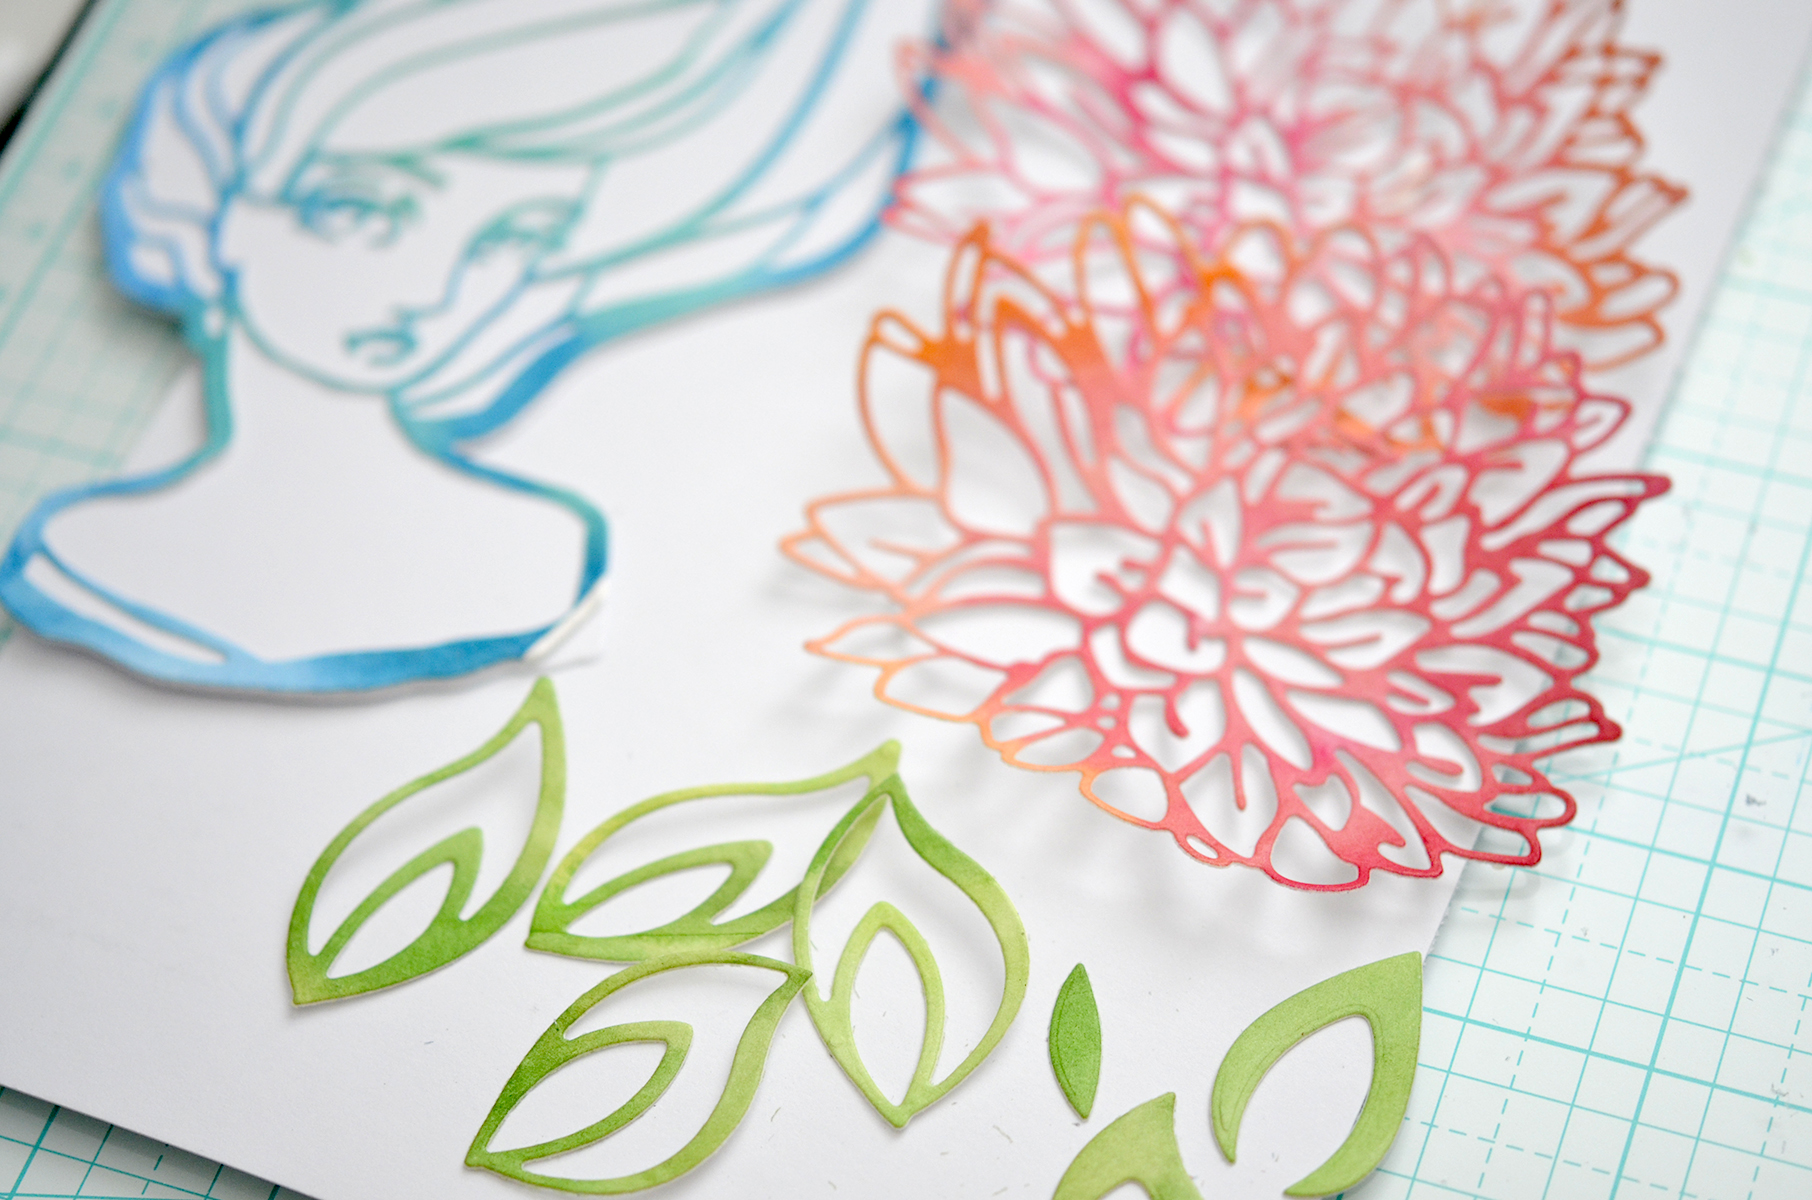
After that, I stamped images from Colour is Happiness Clear Stamp (girl’s face & message), Life Sparkle Clear Stamp (stars), Free Spirit Clear Stamp (woman) using Squid ink Cave black ink on the panel.
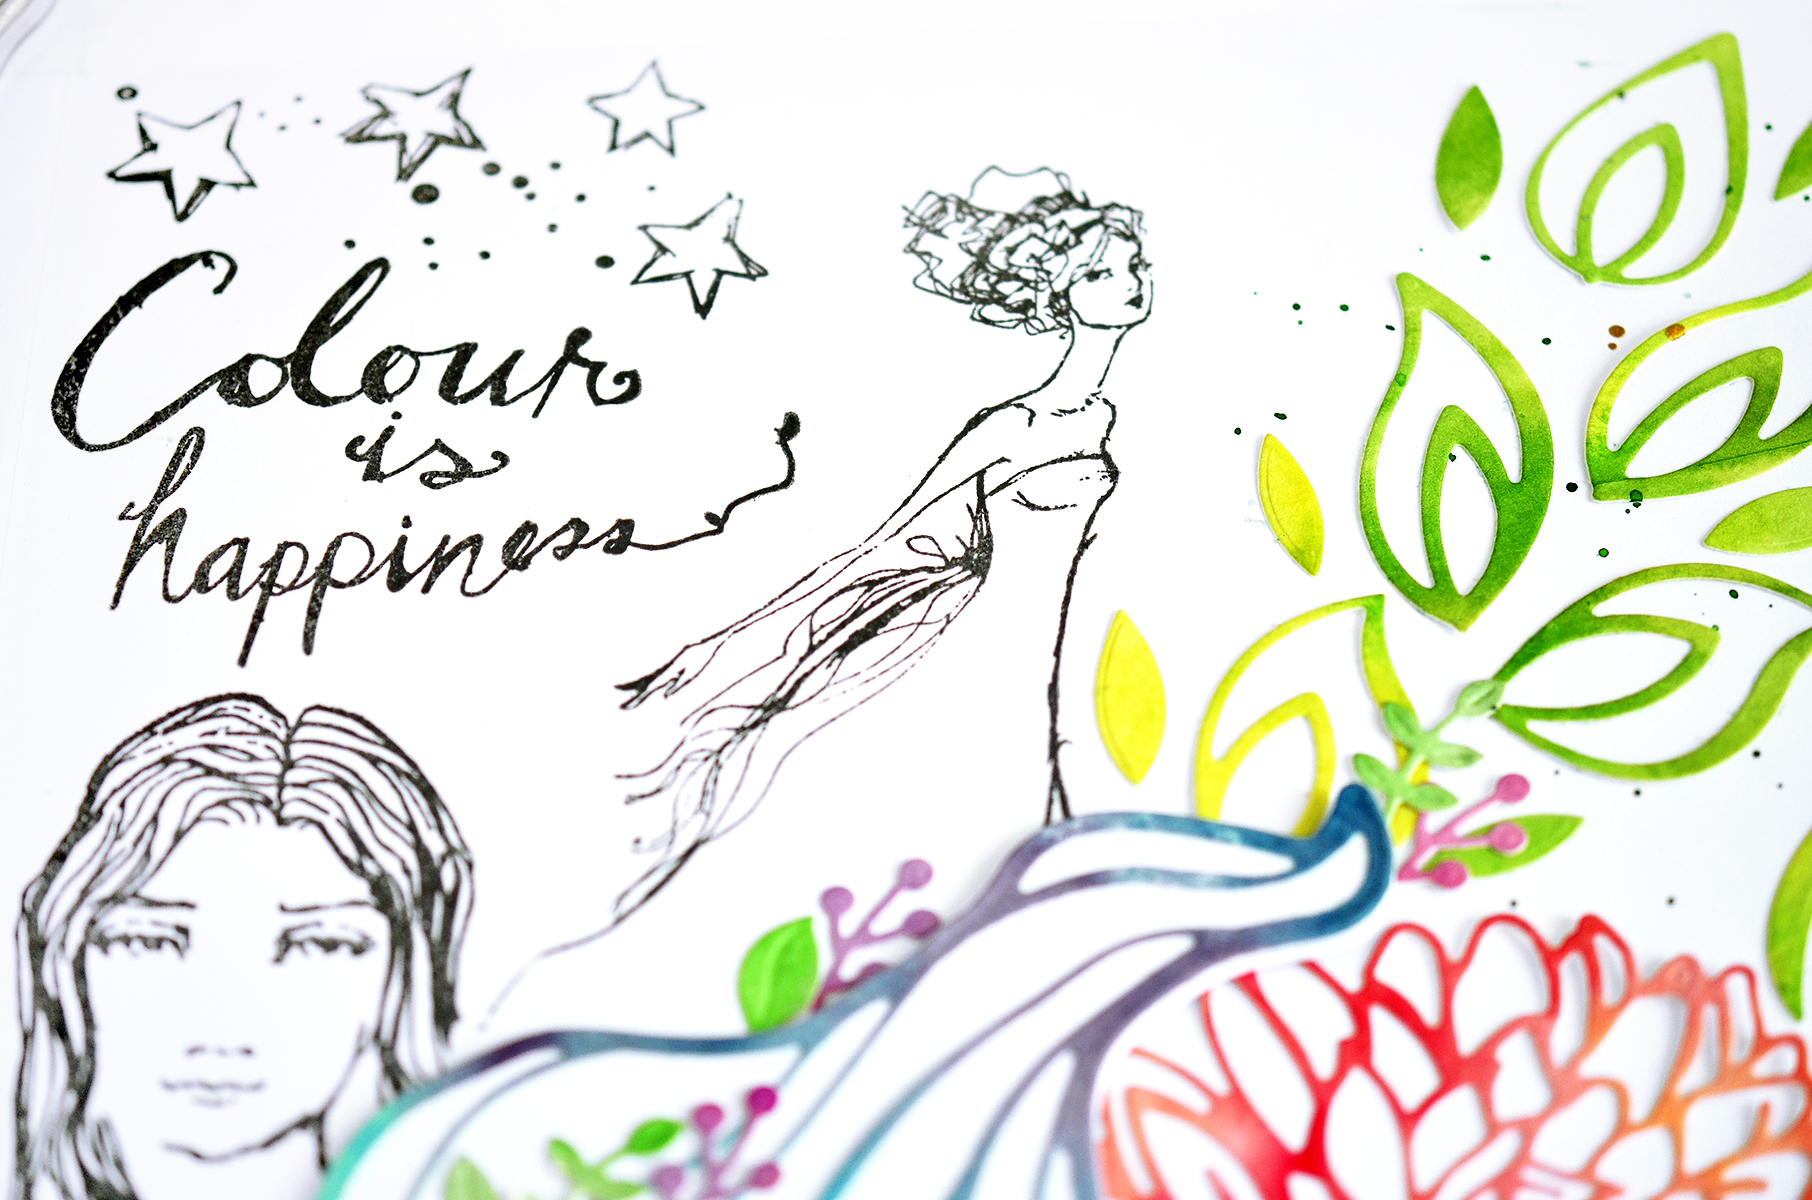
Next, I placed all the die-cut pieces on the panel with glue. After that, I added water splashing using gold, green, red colour. And then I wanted to add something else. I wasn’t sure what I wanted to add. I thought “adding some stamp images?” But when I look through the Marcia Makeover Etched die I noted that there is a scarf shape die-cut! So, I cut and coloured it, and adhered to her neck. And it looks perfect!
I hope you enjoyed my today’s projects. Thank you for stopping by!
Spellbinders Supplies:
Other Supplies:
Watercolor paper, cardstock, watercolour paints, paint brush, glue, 3D tape
One Comment
BrendaLea Abbott
Wow! Beautiful pieces. I just love Jane’s faces! And you did a fabulous job using her supplies.