Simply Perfect Collection – Springtime Card Inspiration with Annie Williams
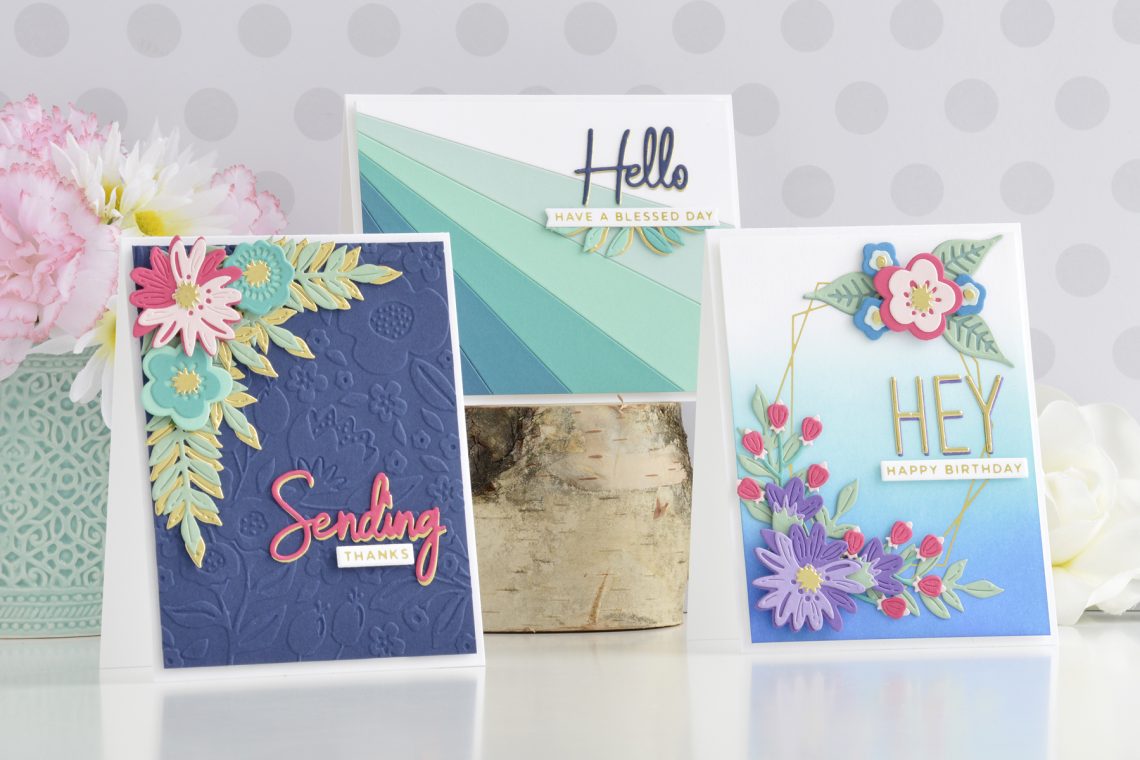
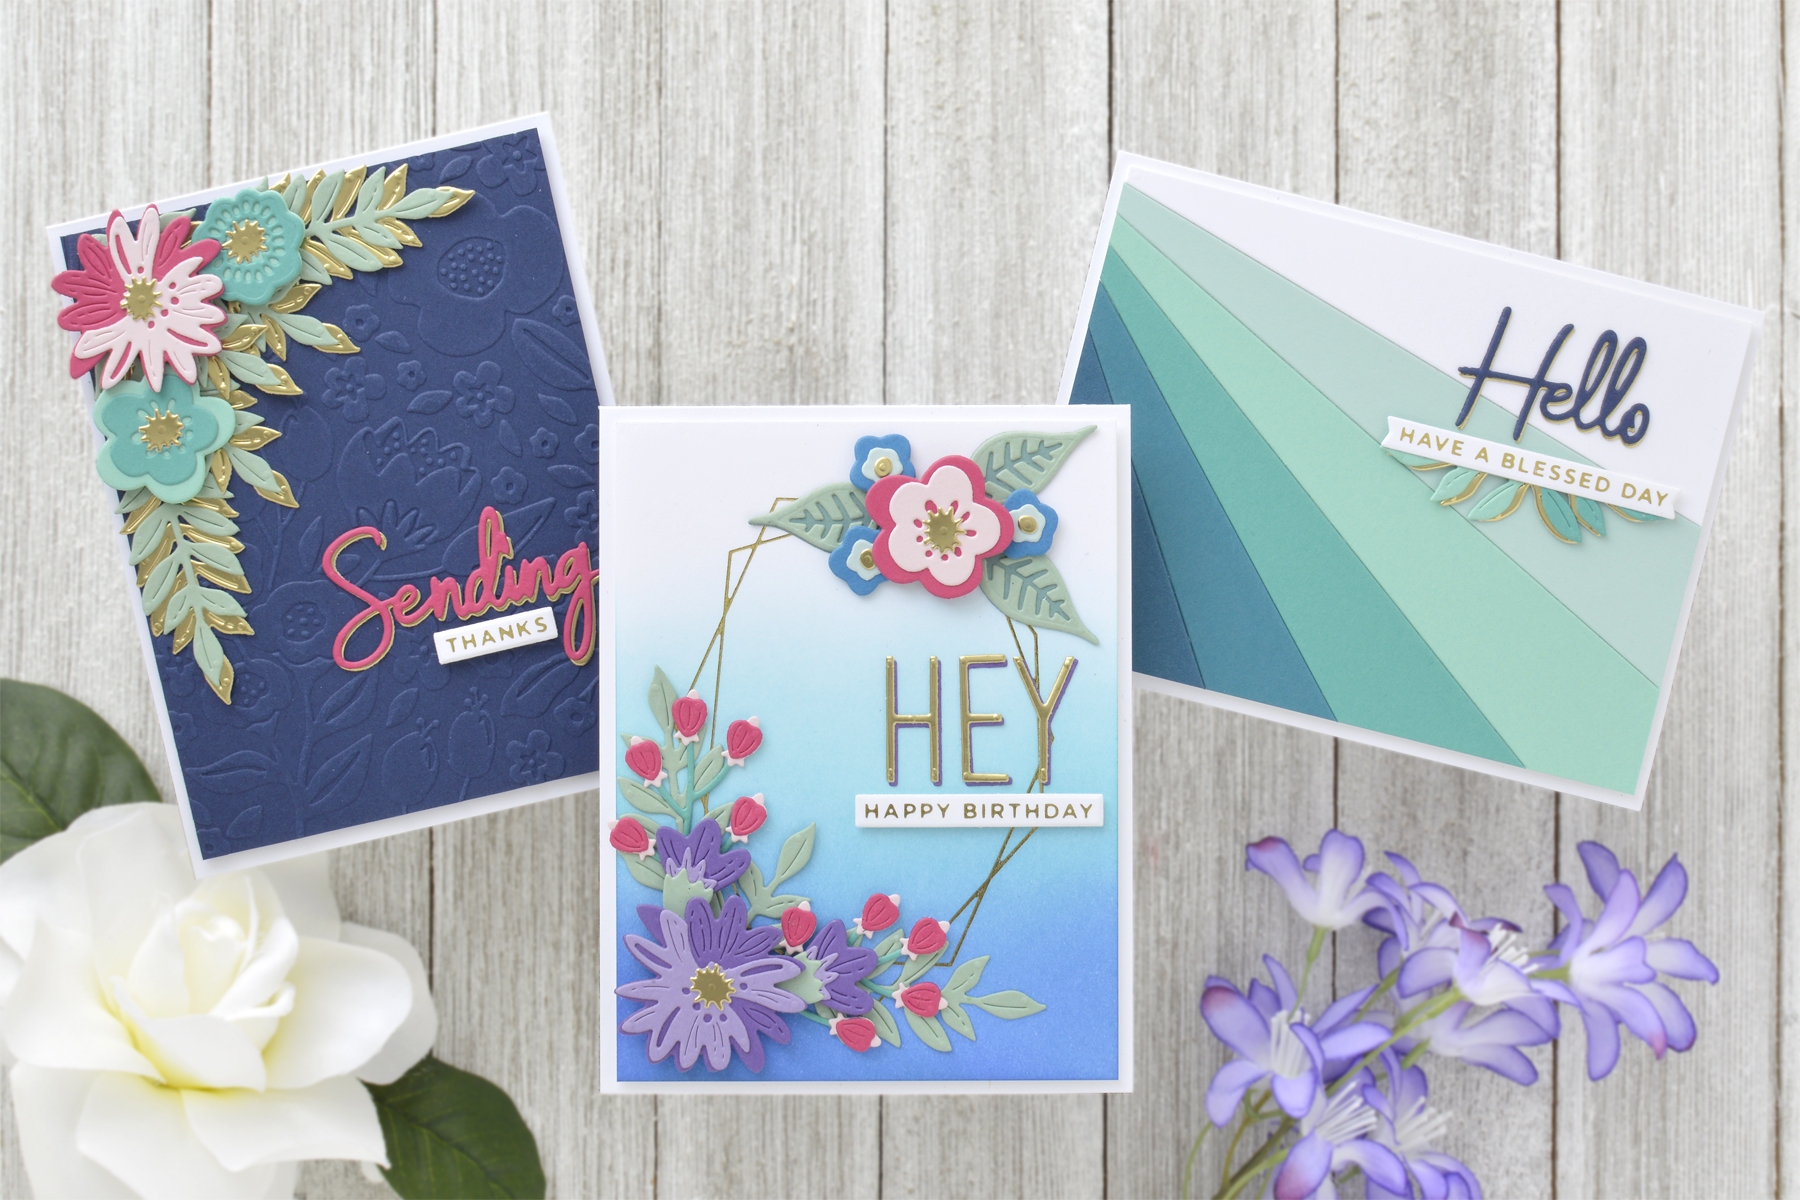
Hi there, this is Annie Williams and I’m thrilled to have the opportunity to share a couple of projects using the new Simply Perfect Collection. The effortless backgrounds, beautiful florals, and versatile sentiments inspired me to create three bright and cheery springtime cards for a variety of occasions.
Color Blocked Hello Card
The Color Block Slices Die Set is perfect for making easy and beautiful backgrounds for any type of card. I used it to cut tons of teal and blue cardstock scraps for a crisp and clean hello card.

- Trim a piece of scrap paper or lightweight cardstock to 4.” x 5.25” and cover it completely with tape runner or double-sided adhesive.
- Die cut white, teal, and blue cardstock with the Color Block Slices Dies.
- Starting with the white die-cut at the top and ending with the darkest blue at the bottom, adhere the color block slices to the scrap paper so that they cover the entire panel.
- Trim off any overhanging cardstock with scissors or a paper trimmer.
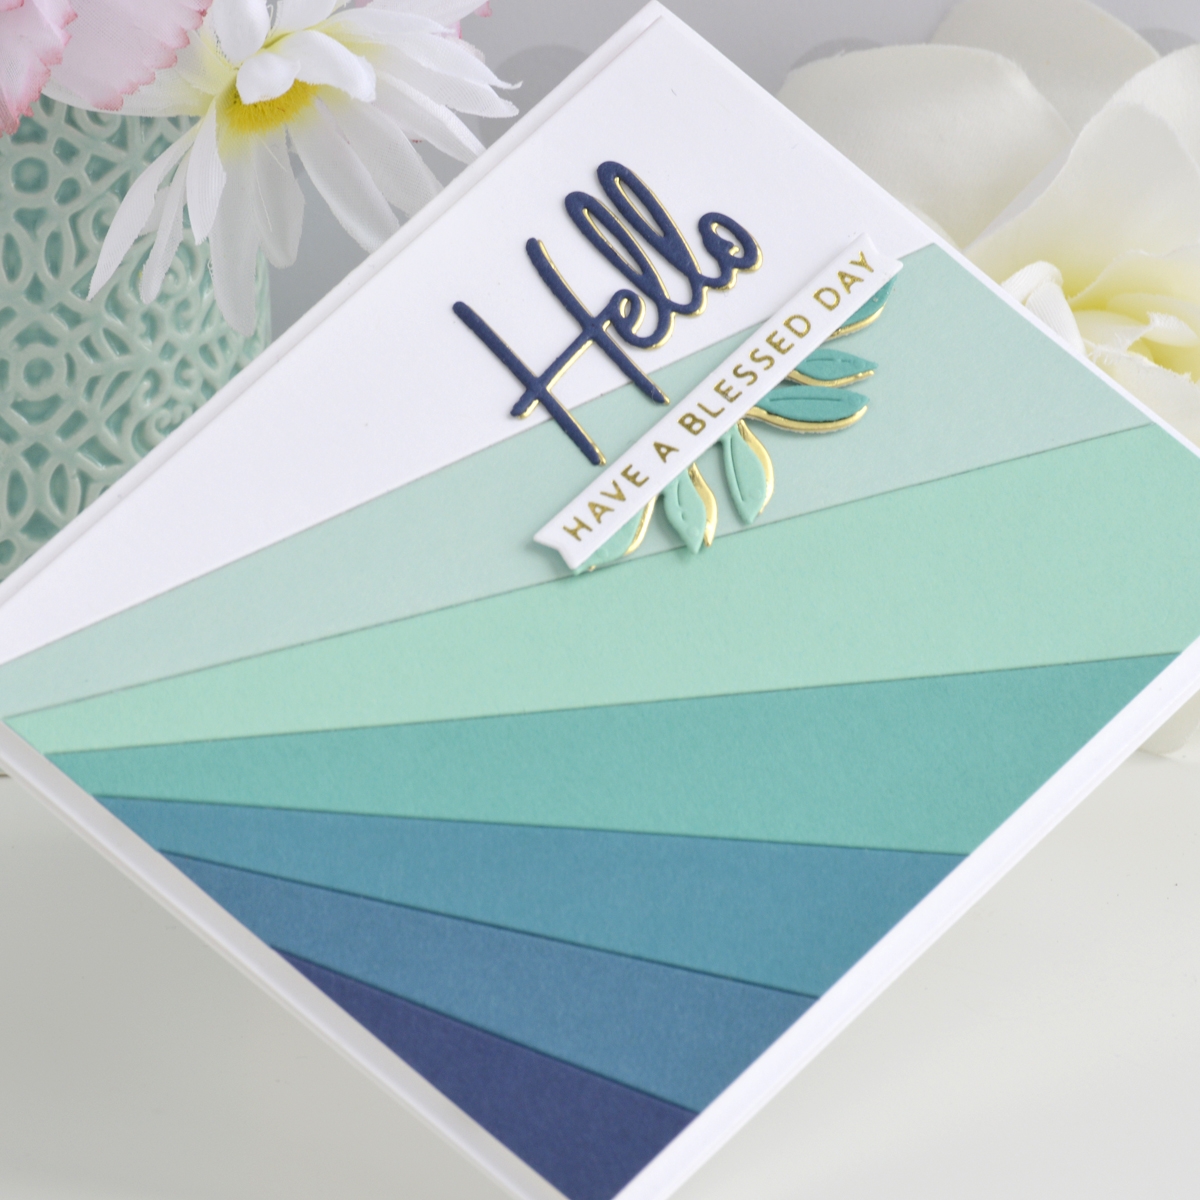
- Apply Gold Hot Foil to white cardstock using one of the sentiments in the Mini Everyday Sentiments Foil Plate Set and the Glimmer Hot Foil Machine.
- Die cut it out using the banner die from the same foil plate set.
- Cut navy blue and gold cardstock using the Hello die from the Simply Perfect Mix & Match Sentiments Die Set. Adhere the blue layer on top of the gold layer with liquid glue.
- Cut teal and gold cardstock using the leafy branch die from the Simply Perfect Layered Blooms Die Set. Trim one side of the leaves off of each die-cut and adhere the teal layers on top of the gold layers with liquid glue.
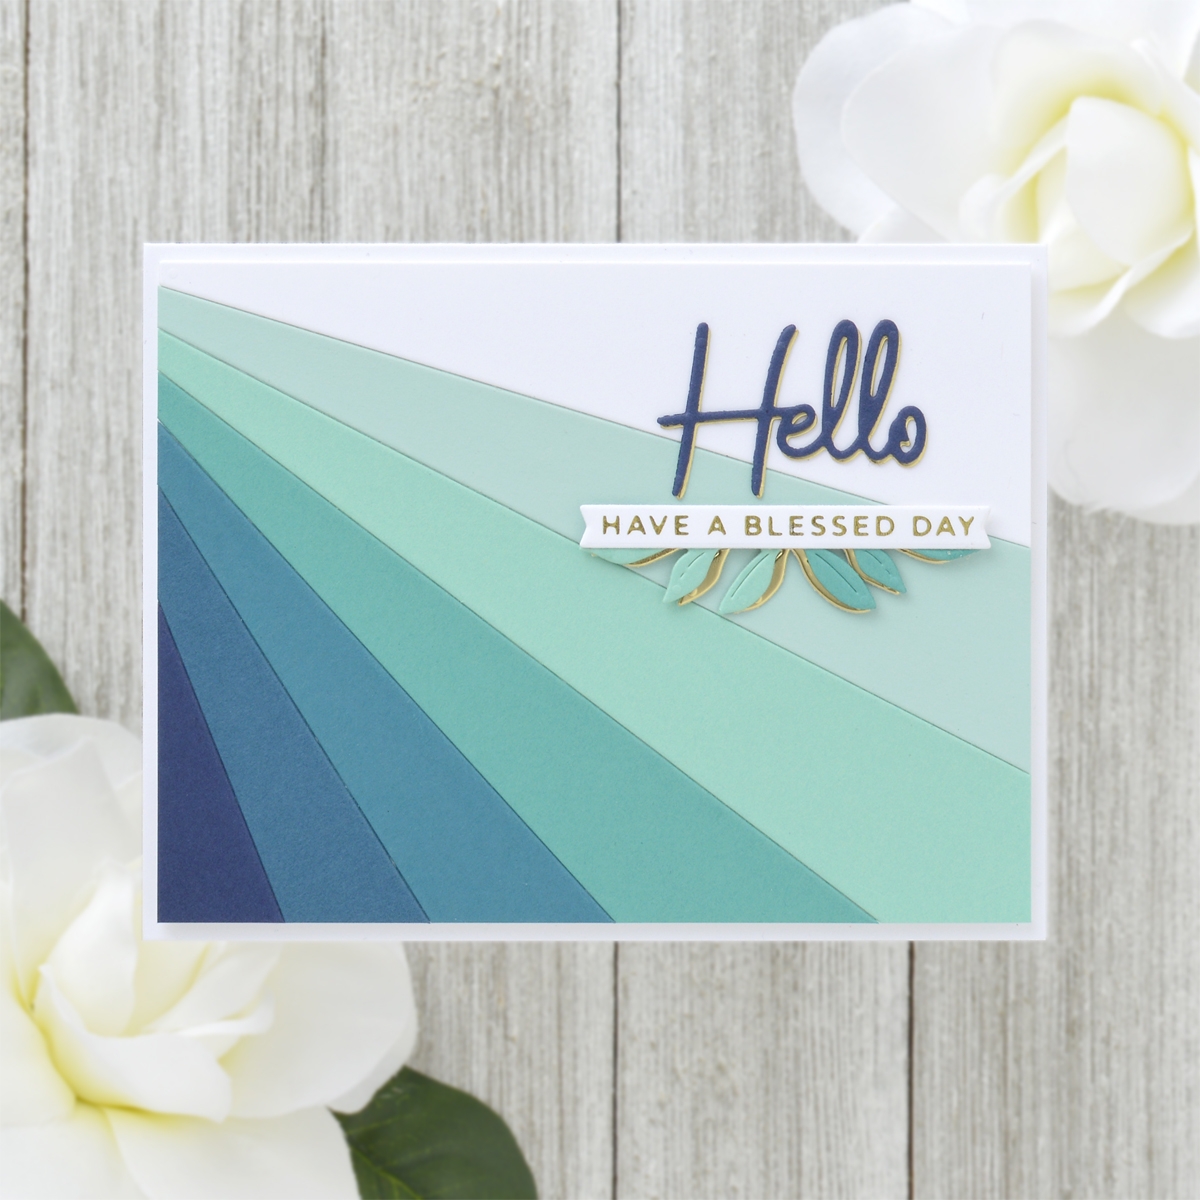
- Adhere the background panel to a top-folding A2-sized white card base with foam adhesive.
- Adhere the leafy branches behind the foiled sentiment banner and attach to the card front with foam adhesive.
- Adhere the Hello sentiment above the banner with liquid glue.
Spellbinders Supplies:
Other Supplies:
heavyweight white cardstock, gold cardstock, various blue and teal cardstocks, tape runner, liquid glue, foam adhesive.
Embossed Sending Hugs Card
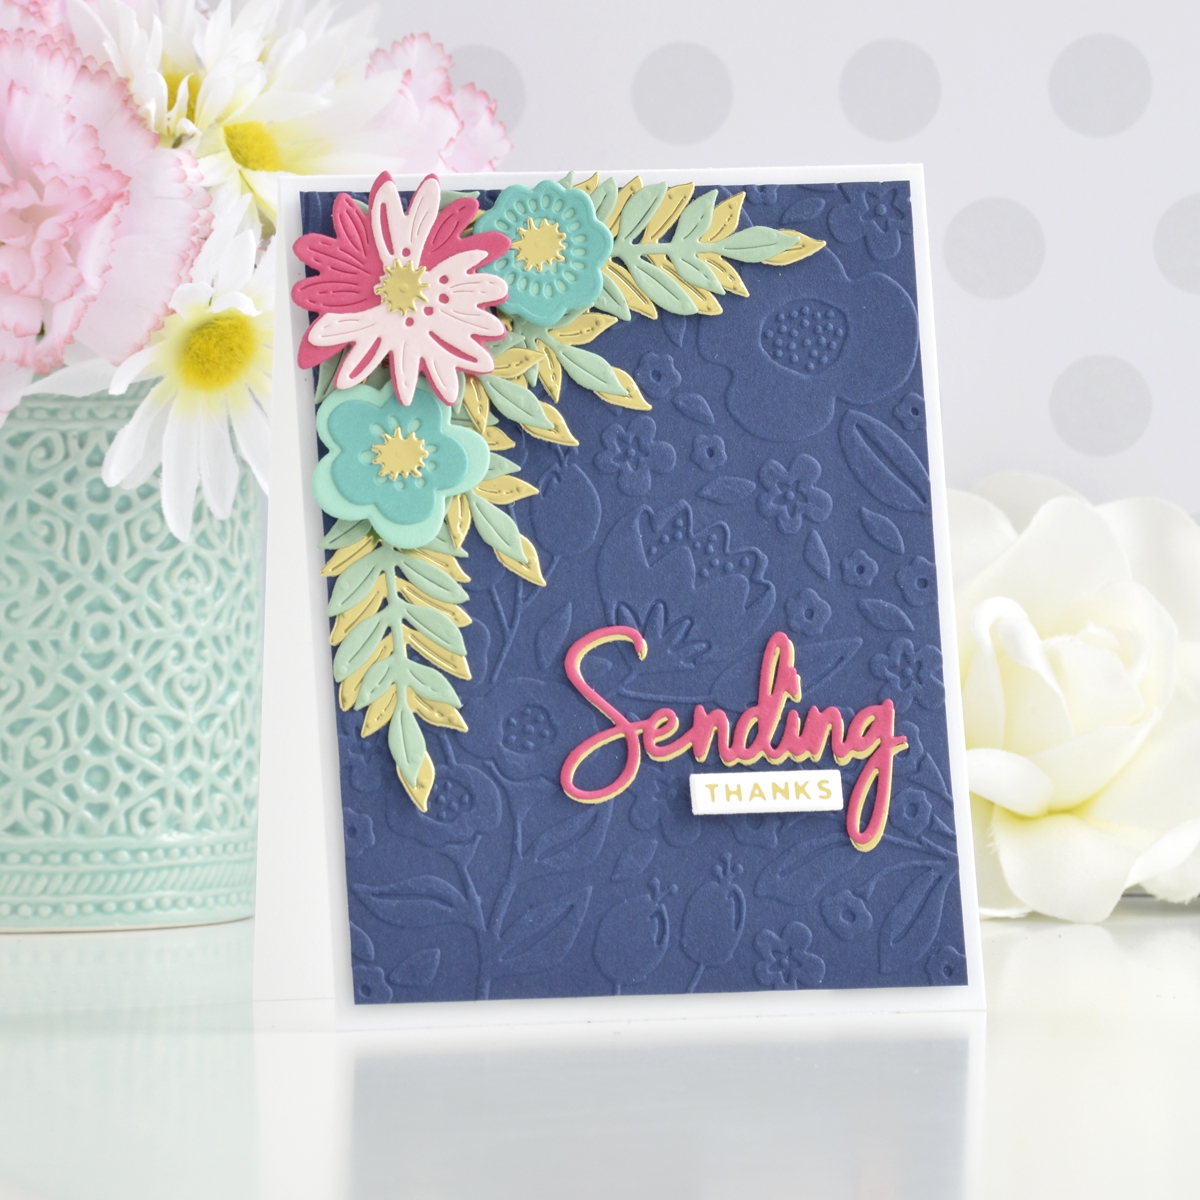
The Simply Perfect Florets Embossing Folder creates a beautiful modern floral background that is perfect for spring. Coordinating perfectly with the Simply Perfect Layered Blooms Die Set, I used it as a subtle backdrop for the brightly colored flowers on this fun thank you card.
- Trim a piece of navy blue cardstock to 5.25” x 4”. Emboss the panel using the Simply Perfect Florets Embossing Folder.
- Apply Gold Hot Foil to white cardstock using the “Thanks A Million” sentiment in the Mini Everyday Sentiments Foil Plate Set and the Glimmer Hot Foil Machine.
- Die cut just the “thanks” out using the large strip die.
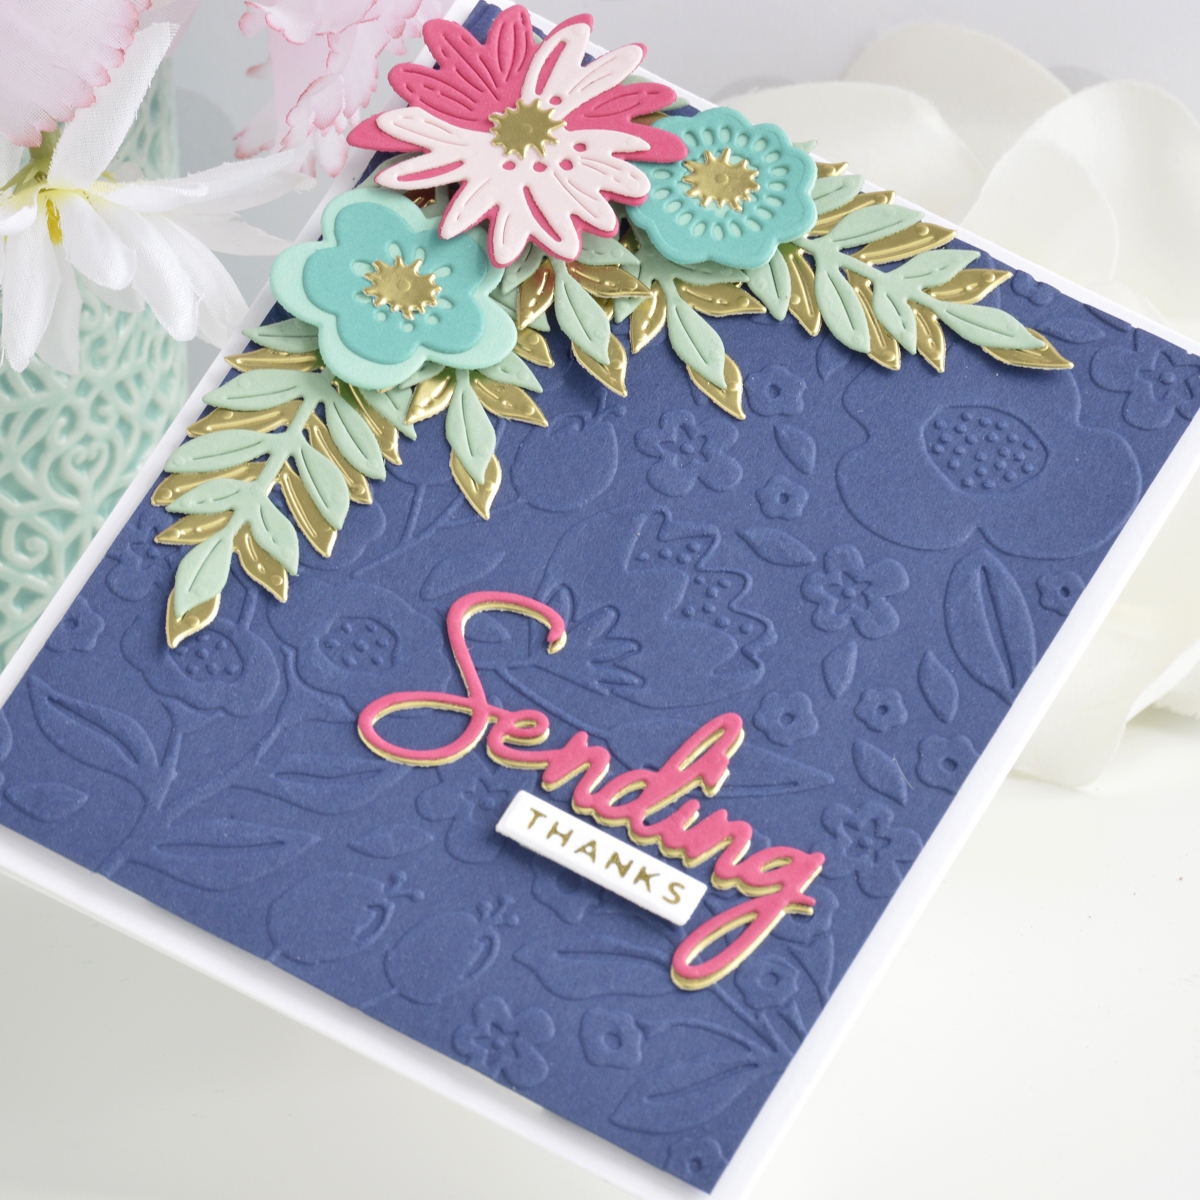
- Die cut various shades of pink, teal, and gold cardstock using the Simply Perfect Layered Blooms Die Set. Adhere the layers together with liquid glue.
- Die cut bright pink and gold cardstock using the “Sending” die from the Simply Perfect Mix & Match Sentiments Die Set and adhere together using liquid glue.

- Adhere the embossed background panel onto a top-folding A2-sized white card base with foam adhesive.
- Arrange the leafy branches and flowers in the top left corner of the card and adhere down with liquid glue and foam adhesive for tons of layers and dimension.
- Pop the foiled sentiment strip up on the lower right corner of the card front and adhere the layered sentiment die-cut above it with liquid glue.
Spellbinders Supplies:
Other supplies:
white cardstock, gold cardstock, various pink, navy, and teal cardstocks, liquid glue, foam adhesive
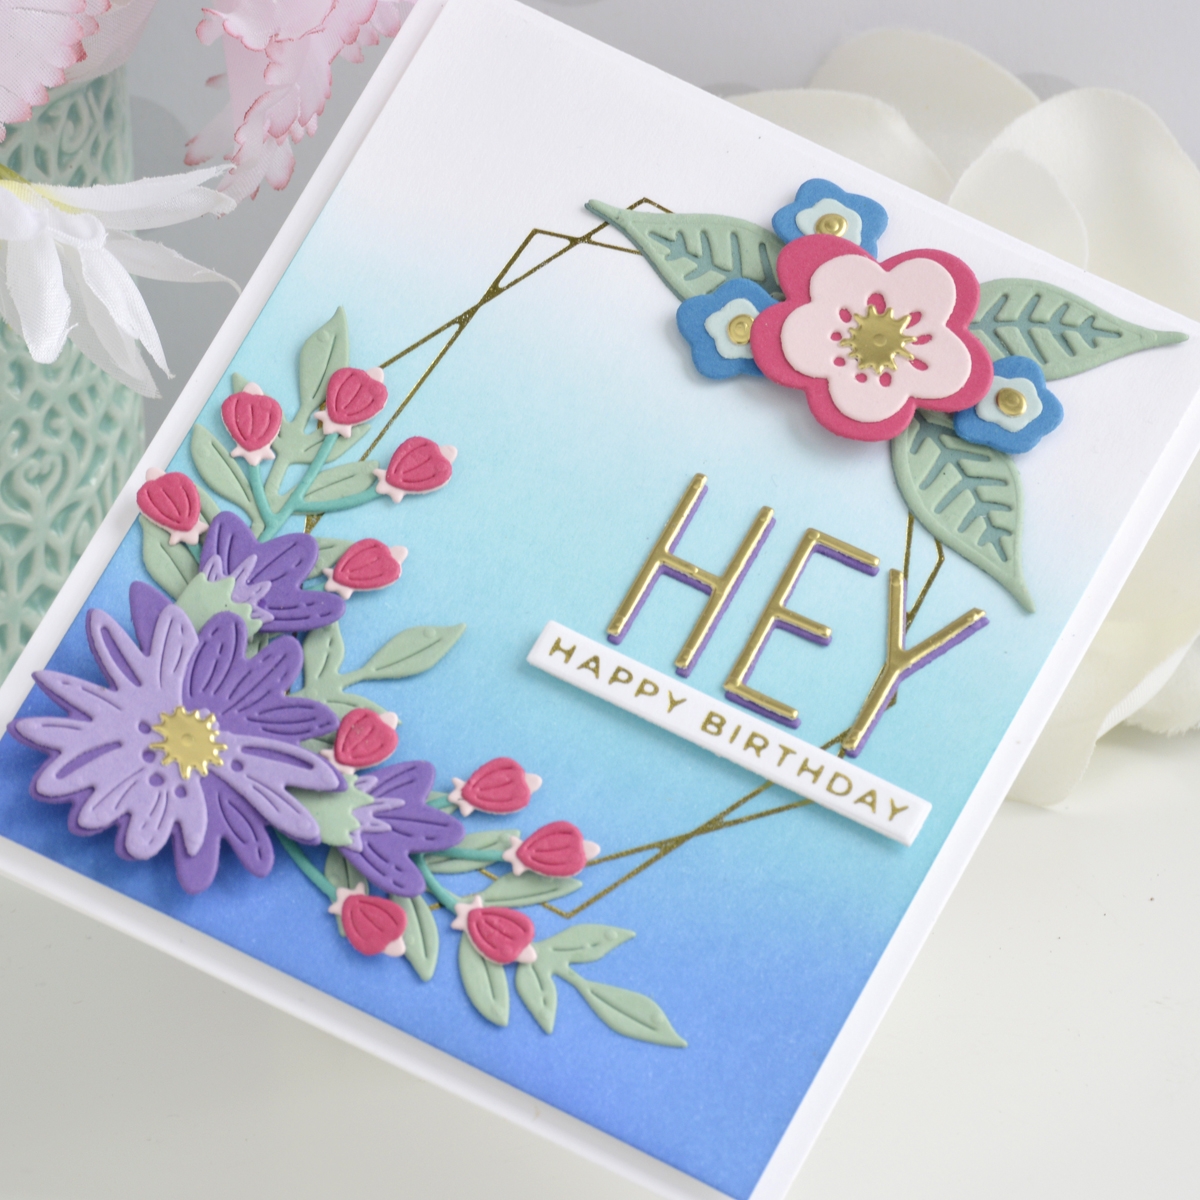
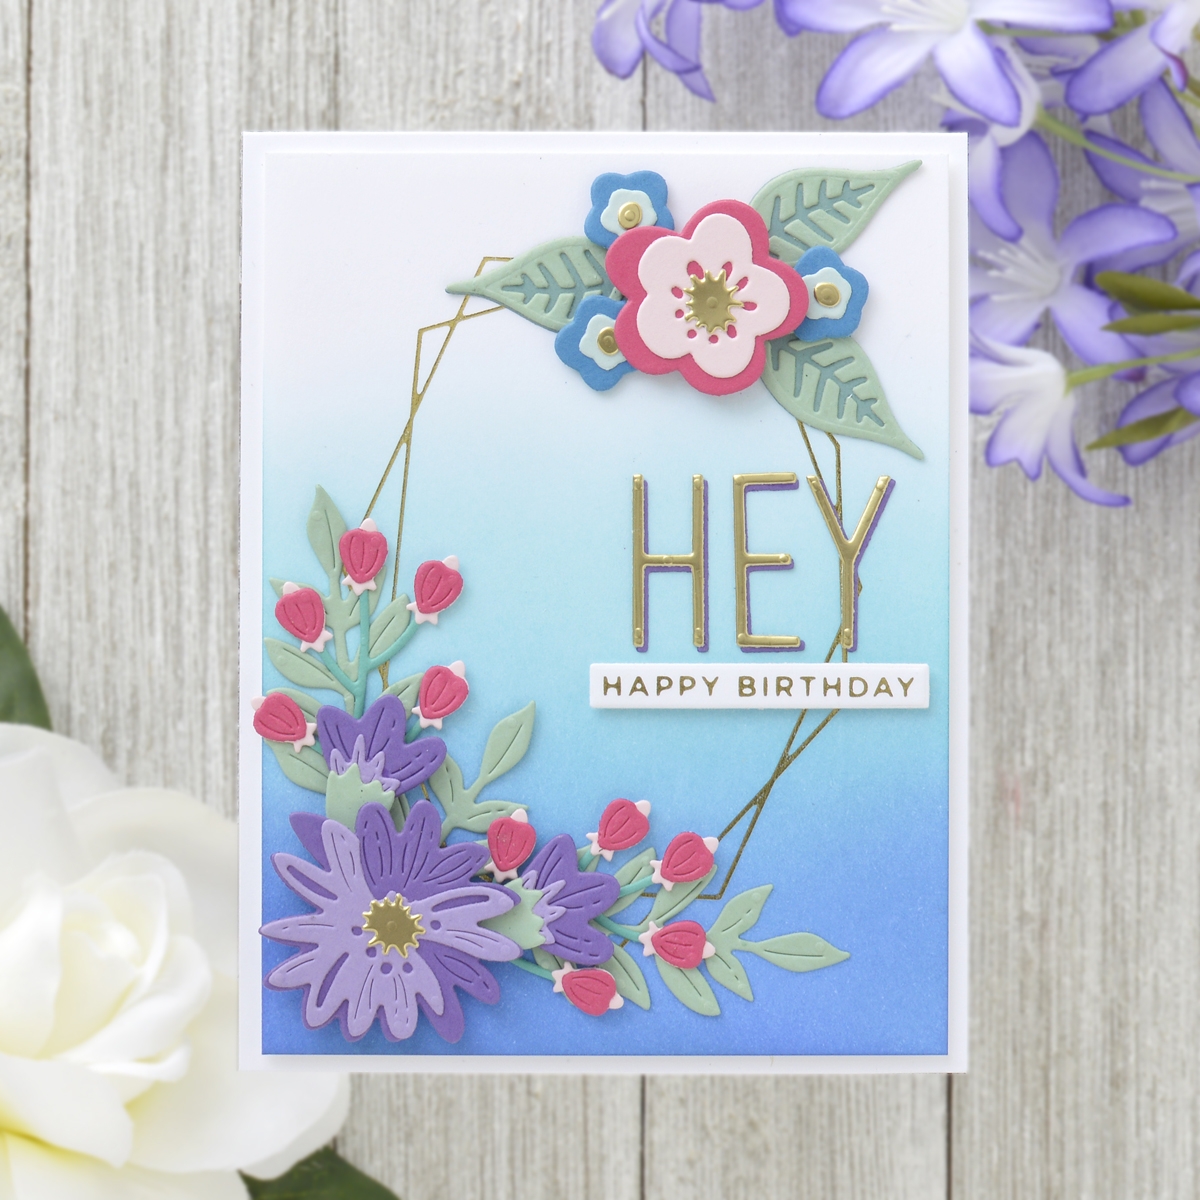
Floral Happy Birthday Card
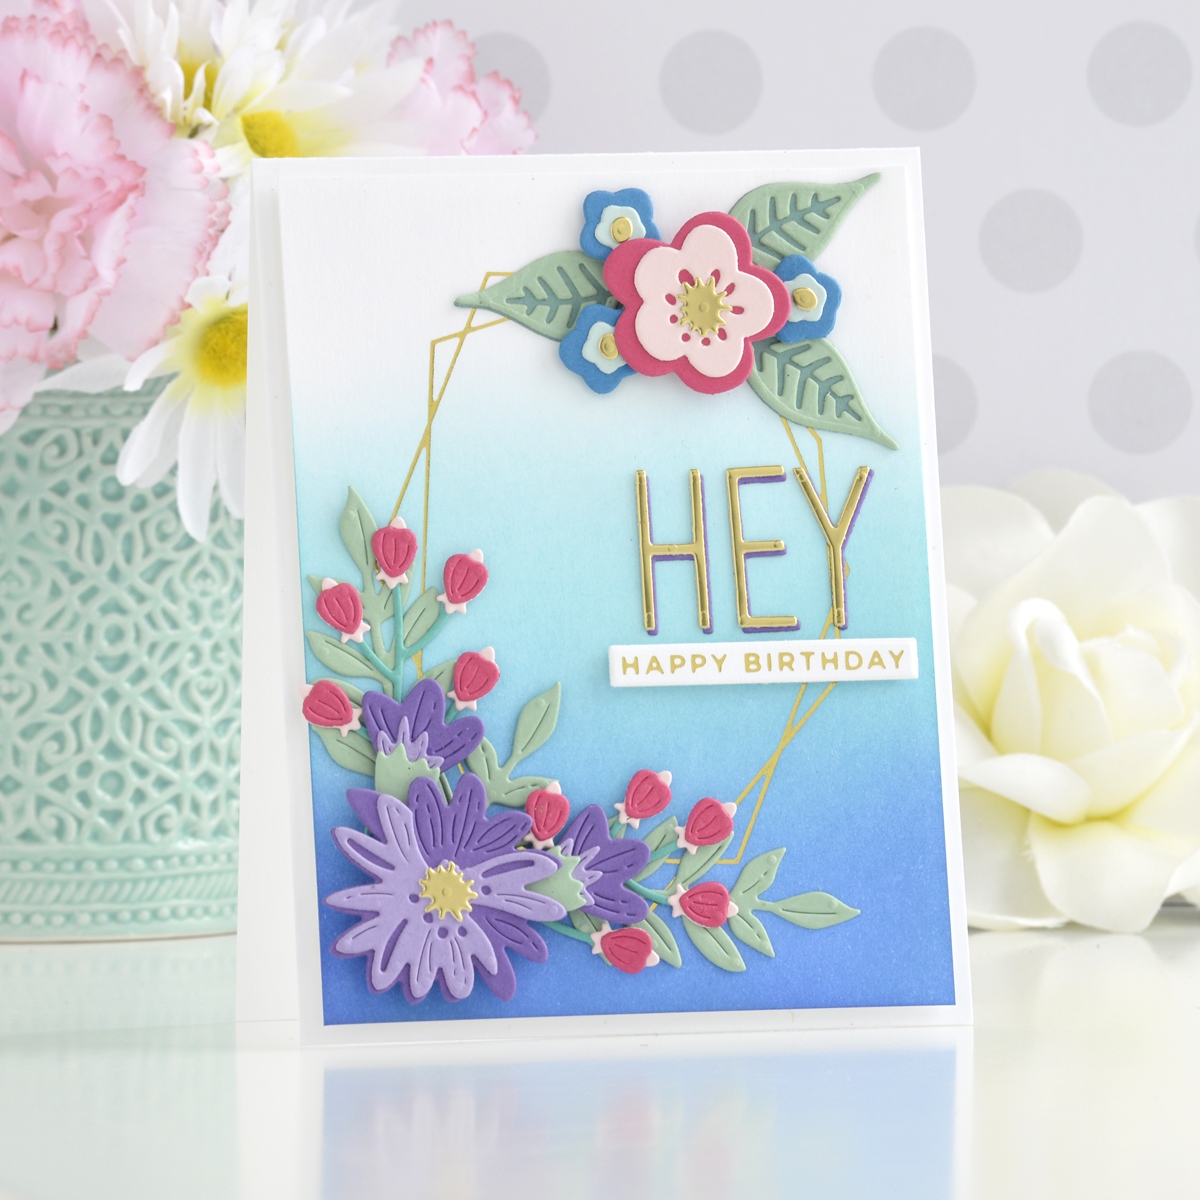
With so many different flower options in the Simply Perfect Layered Blooms Die Set, I had to make another card featuring some beautiful arrangements. Using the same bright color scheme, my final card is a fun birthday card with a custom sentiment.
- Trim a piece of white cardstock to 5.25” x 4”.
- Apply Gold Hot Foil to the center of the panel using the frame from the Geometric Floral Foil Plate Set and the Glimmer Hot Foil Machine.
- Blend Blueprint Sketch and Peacock Feathers Distress Ink up from the bottom with a blending brush to cover about two-thirds of the panel, leaving some white at the top.
- Die cut various shades of purple, pink, blue, teal, and gold cardstock using the Simply Perfect Layered Blooms Die Set. Adhere the layers together with liquid glue.
- Die cut purple and gold cardstock to spell “Hey” using the Simply Perfect Alphabet Die Set and adhere the two layers together using liquid glue.
- Apply Gold Hot Foil to white cardstock using the “Happy Birthday” sentiment in the Mini Everyday Sentiments Foil Plate Set and the Glimmer Hot Foil Machine. Die cut it out using the large strip die.
- Adhere the foiled and inked background panel onto a top-folding A2-sized white card base with foam adhesive.
- Arrange the leafy branches and flowers in the bottom left and top right corners of the foiled frame and adhere down with liquid glue and foam adhesive.
- Pop the foiled sentiment strip up on the right side of the card front and adhere the layered die-cut letters above it with liquid glue.
Spellbinders Supplies:
Other supplies:
white cardstock, gold cardstock, various purple, pink, blue, and teal cardstocks, Blueprint Sketch and Peacock Feathers Distress Ink, blending brushes, liquid glue, foam adhesive
I hope you enjoyed this trio of bright and cheery spring cards and thanks so much for stopping by today. You can find more inspiration over at my blog AnnieBWills.com.
One Comment
Natasha Vacca
Wow!!!!!!! These are gorgeous!!!!!!! Love the colors ❤️❤️❤️❤️❤️