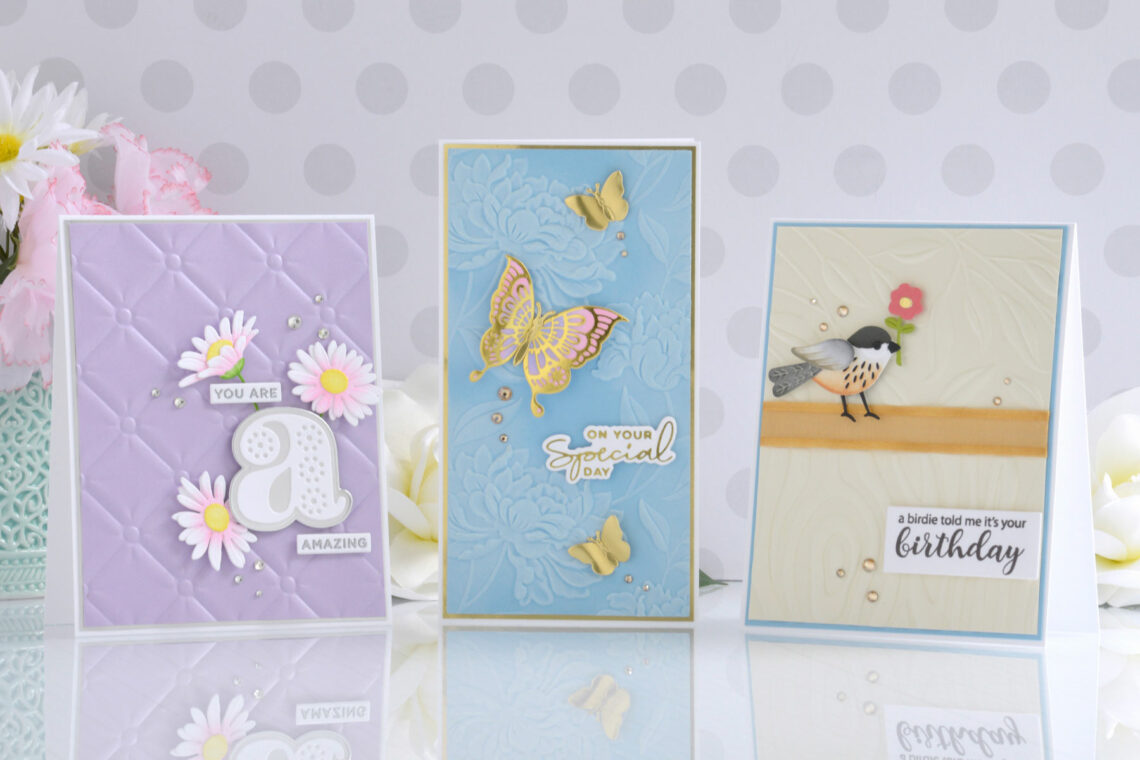
3D Embossing Folder Collection – Card Inspiration with Annie Williams
Hi there, this is Annie Williams and I’m thrilled to be back on the blog today to share a couple of projects using the new 3D Embossing Folder Collection from Spellbinders. The gorgeous three-dimensional designs in this collection inspired me to create three soft and pretty cards for a variety of occasions.
Tufted 3D
The elegant Tufted 3D Embossing Folder caught my eye first. Here I added a couple of dainty flowers to a fun custom sentiment for this pretty card for a friend.
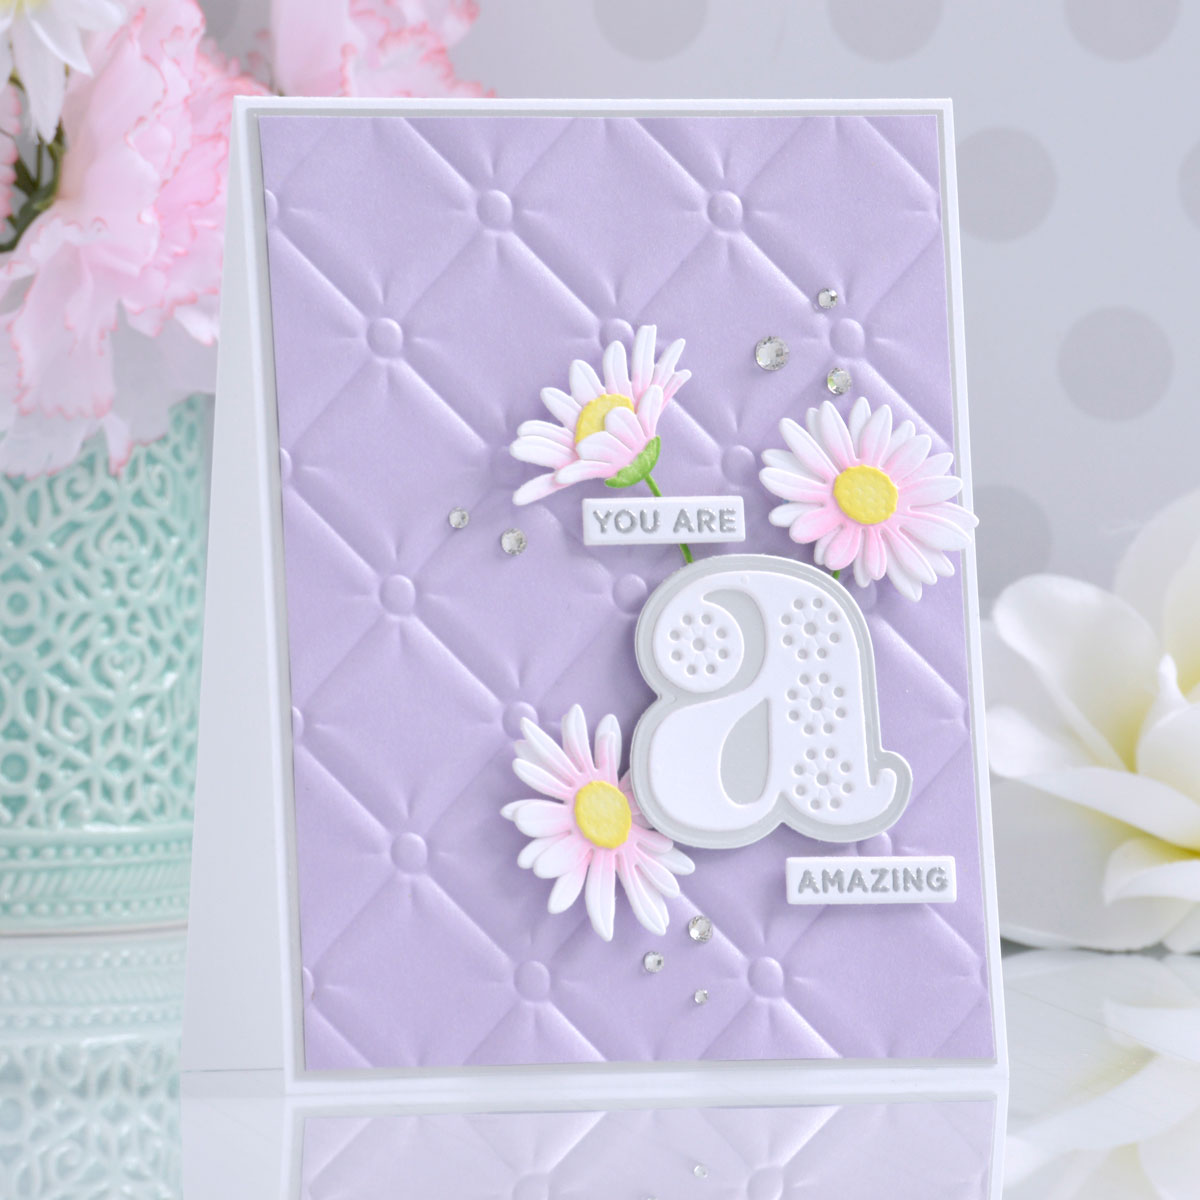
- Trim a piece of purple shimmer cardstock to 4” x 5.25” and emboss it using the Tufted 3D Embossing Folder.
- Mat the embossed panel with Mirror Silver Cardstock and adhere it to a top-folding A2-sized white card base.
- Die-cut white and Mirror Silver Cardstock using the Stitched A Die Set and adhere the layers together with liquid glue.
- Stamp sentiment with the Stitched Alphabet Descriptors Sentiments Stamp Set using embossing ink, add silver embossing powder and melt with a heat tool. Die-cut the sentiments out into strips.
- Die-cut white cardstock using the flower and stem dies from the Daisy Delight Garden Shutters A2 Card Base Die Set.
- Shade the die-cuts with sponge daubers using Kitsch Flamingo, Squeezed Lemonade, and Mowed Lawn Distress Inks. Assemble with liquid glue.
- Add the flowers and letter to the card front with foam adhesive and then pop the sentiment strips up around them with more foam adhesive.
- Embellish with Silver Mix Gems
Beautiful Blooms 3D
The Beautiful Blooms 3D Embossing Folder reminded me of vintage pottery, so I decided to emulate the look on a card next. Here I added some white ink to bring out the pretty design more for a soft and pretty mini slimline card.

- Die-cut Raindrop Cardstock using the largest die from the Precision Layering Mini Slimline A Die Set and then emboss it using the Beautiful Blooms 3D Embossing Folder.
- Apply white pigment ink over the embossed areas of the panel to bring the design out even more.
- Mat the embossed panel with a piece of Mirror Gold Cardstock and adhere it to a side-folding white card base measuring 3.5” x 6.5”.
- Apply Gold Hot Foil to white cardstock using the Glimmer Edge Butterflies Plate Set and the Yana’s Special Sentiments Glimmer Plate Set.
- Apply Shaded Lilac and Kitsch Flamingo Distress Inks to the butterfly with a sponge dauber and then cut the butterfly and sentiment out using the coordinating dies.
- Die-cut and assemble the smallest butterfly from the So Many Butterflies Die Set using Mirror Gold Cardstock.
- Curl the butterfly wings with your fingers and adhere to the card front with liquid glue.
- Add the sentiment to the card front with foam adhesive.
- Embellish with Gold Mix Gems.
Knock On Wood 3D
Lastly, I wanted to combine two different embossed designs to create a fun nature-inspired birthday card.
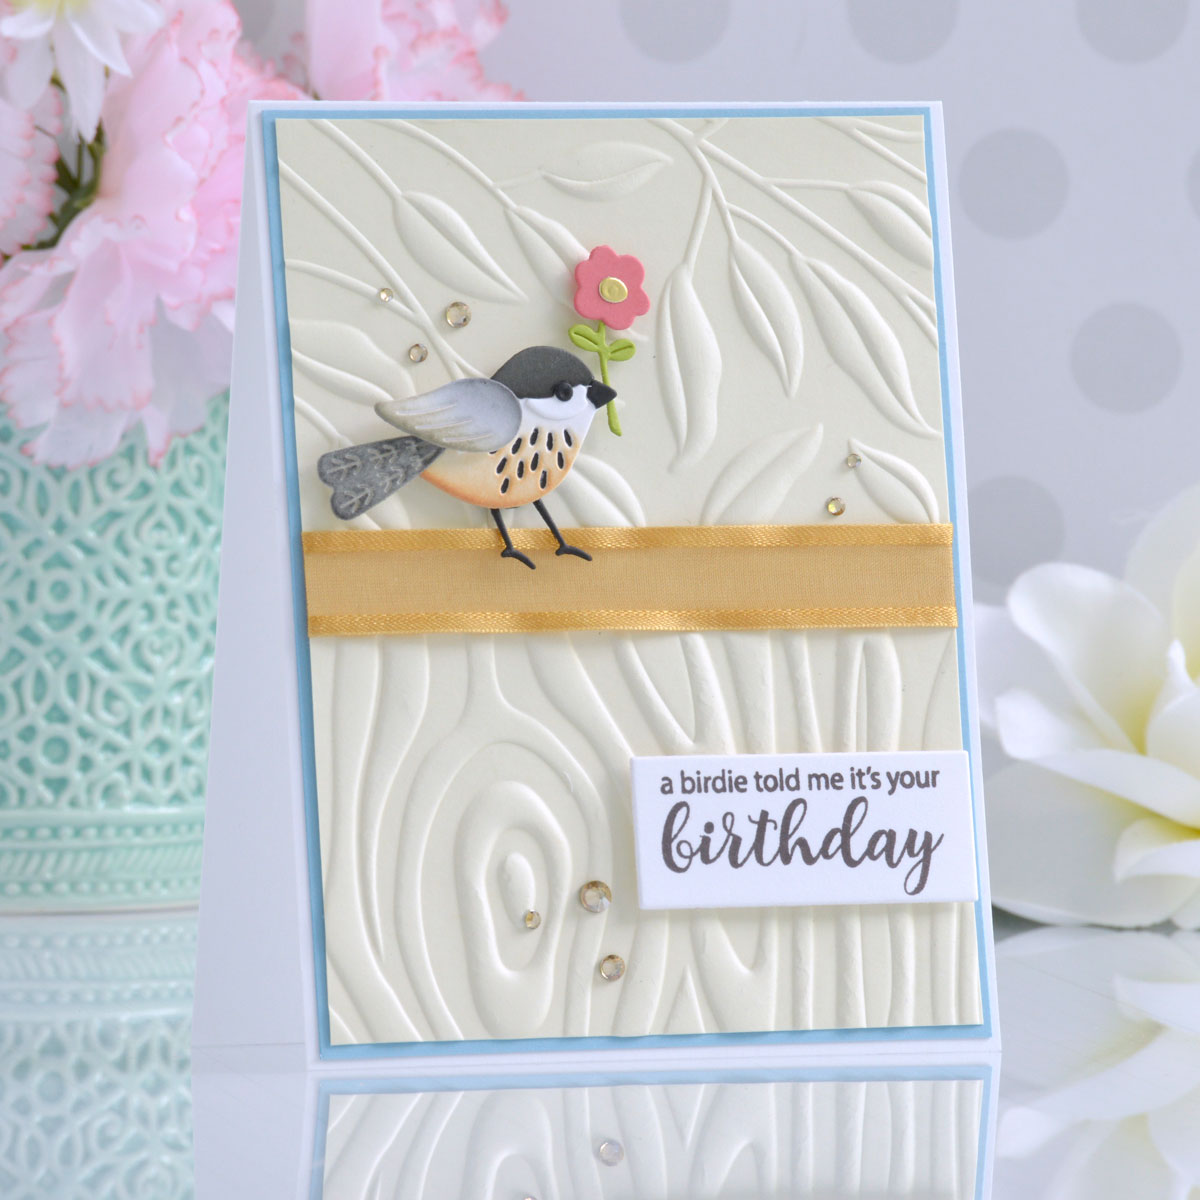
- Trim a piece of Alabaster Cardstock to 4” x 5.25” and emboss half of it using the Leafy 3D Embossing Folder.
- Turn the panel around and emboss the other half using the Knock On Wood 3D Embossing Folder.
- Wrap a small length of ribbon around the center to cover the seam and adhere it to the back with adhesive (you can use a strip of cardstock for this as well).
- Mat the embossed panel with Raindrop Cardstock and adhere it to a top-folding A2-sized white card base with a tape runner.
- Die-cut white, Graphite, and Onyx Cardstock using the Little Chickadee Die Set.
- Shade some of the pieces with Tea Dye, Pumice Stone, and Black Soot Distress Ink using a sponge dauber and assemble with liquid glue.
- Die-cut Dahlia, Rainforest, and Mirror Gold Cardstock using the Be Bold Blooms Die Set, assemble a single stem and adhere behind the bird’s beak with liquid glue.
- Stamp a sentiment from the Tweet Sentiments Stamp Set in brown ink onto white cardstock, trim out into a small strip and adhere to the card front with foam adhesive.
- Add the bird to the center strip on the card front with more foam adhesive.
- Embellish with Gold Mix Gems.
Spellbinders Supplies:

Other supplies
White heavyweight cardstock, Tea Dye, Pumice Stone, Kitsch Flamingo, Shaded Lilac, Squeezed Lemonade, Mowed Lawn, Black Soot Distress Inks, sponge daubers, Versafine Clair Pine Cone Ink, copper organza ribbon, tape runner, foam adhesive, Stardream Metallic Amethyst Cardstock, white pigment ink, blending tool.
I hope you enjoyed these soft and pretty cards and thanks so much for stopping by today. You can find more inspiration over at my blog AnnieBWills.com.
One Comment
Cindy
Sometimes I forget about using embossing folders. Thank you for sharing these beautiful cards.