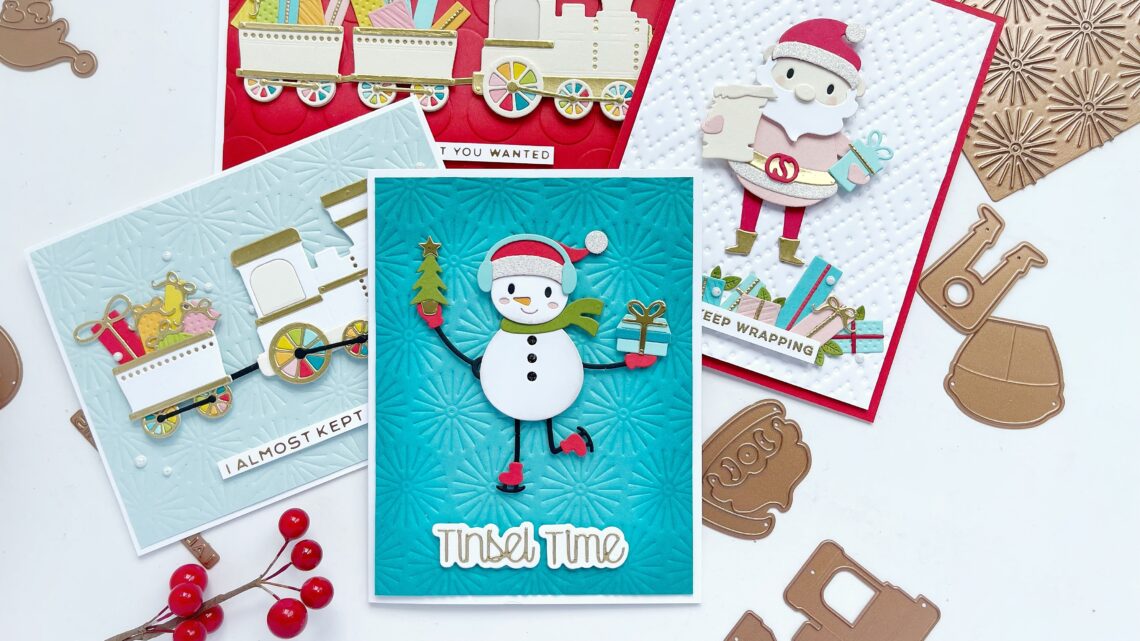
Tinsel Time Christmas Cardmaking with Raquel Arribas
Hello crafters! This is Raquel Arribas, I’m so happy to be here today to share with you some inspiration with the Spellbinders Tinsel Time Collection. This is such a versatile, fun and gorgeous release and I’m sure you are going to love it as much as I do.
Dancing Nick Card
My first project features the Dancin’ St. Nick die set. I wanted to create a fun yet nontraditional Santa Klaus as my focal point… For me, color is the key when creating so every time I start any design I take my time until I have decided the right color combination.
For this set, I decided to pair the color of the hat and the legs. I thought a dark pink would look nice as my idea was to use a white background so it would create some contrast. My front panel is a 4 ¼ x 5 ½ but I had envisioned my final layout with a small border that had the same colors of my Little St. Nick, so I trimmed my panel to 4 inches x 5 ¼ inches. I used a light pink for the body, some cream for the Wish List, and light teal for the small gift.
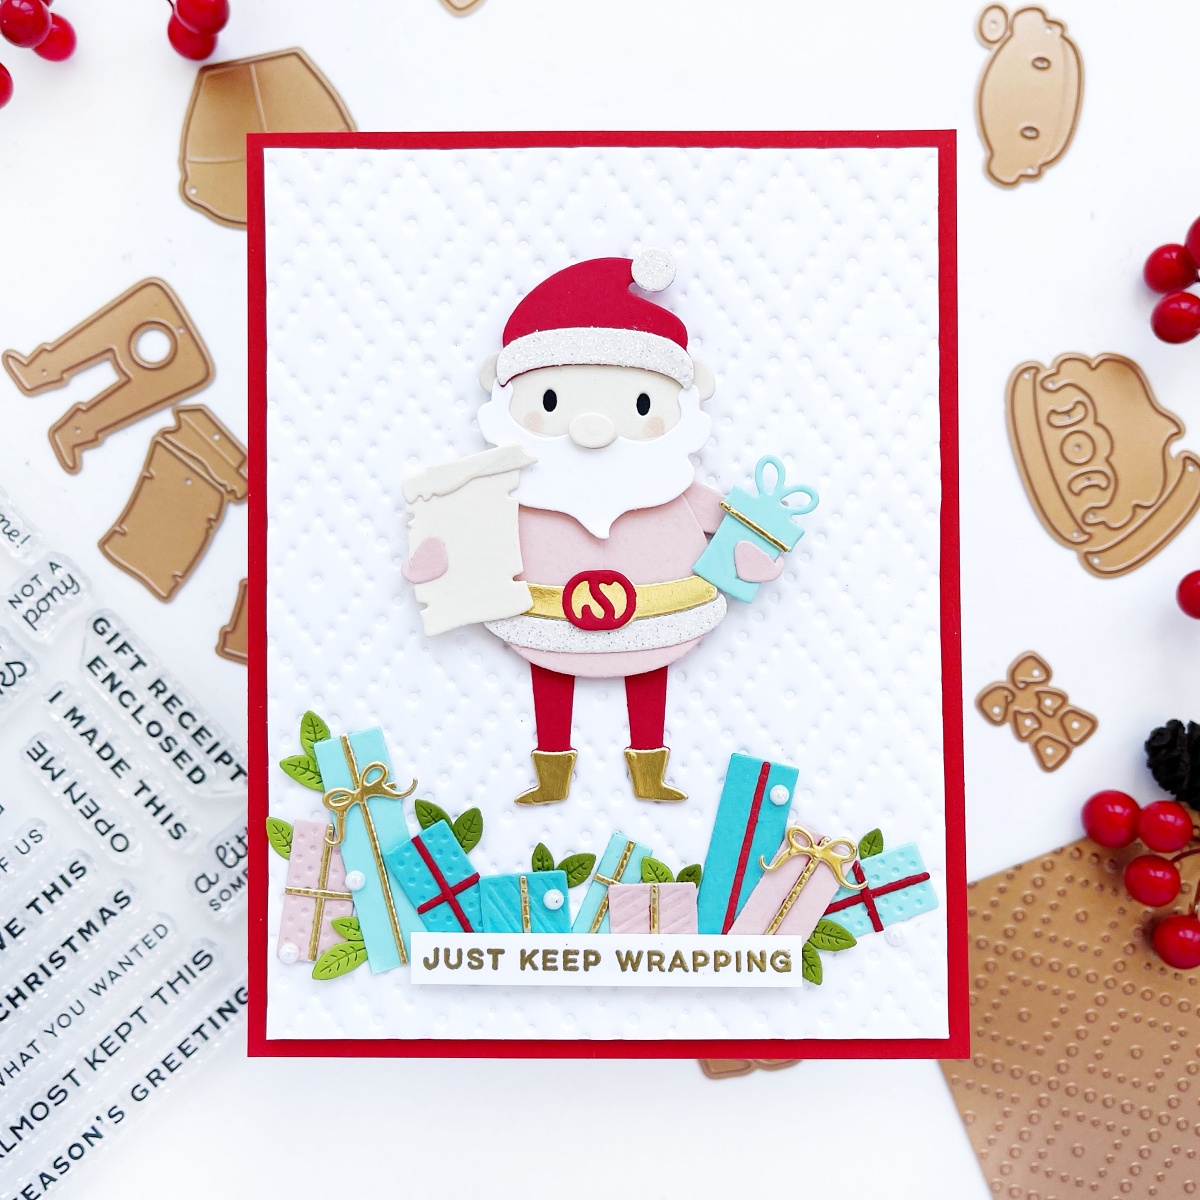
I also planned to have a small pile of gifts at the bottom of the panel, so I decided to match the colors of these small gifts with the dark and light pink and with the teal from the small present he is holding in his hand.
Once I had all the guesswork done, I went ahead and die-cut all the images. These dies have been carefully designed: all the elements that go together are in just one die piece, so the die-cutting part it’s so much easier and fast.
Once all the die cutting was done, I created my background using the Dazzling Diamond Hot Plate. I did not use this plate to foil this time, I decided to dry emboss a white heavy cardstock cut to 4 by 5 ¼ so as to mimic some snow.
Then, I just had to glue all the small pieces of my St. Nick to this panel adding foam under the head and body for some dimension. The legs are designed to swing back and forth, so I added one foam adhesive circle inside that die-cut piece so the legs can really move.
Lastly, I arranged all the small gifts at the bottom of the card. To die cut these gifts, I use a die from the Holiday Express Die Set and some leaves from the Mini Blooms and Sprigs Die set for a nice green touch. For the sentiment, I gold heat embossed the “Just Keep Wrapping” from the Christmas Memories Enclosed Stamp Set.
Dancing Snowman Card
My next project features the Dancing Snowman. This is a very straightforward design that came together very quickly. When I envisioned this project, I pictured the Snowman against a colorful background that provided a great contrast.
I decided to use the Starburst Hot Foil Plate to create some volume in my background. Instead of using this plate to foil, I decided to dry emboss an A2 panel. Once the panel was embossed, I started ink blending it with Distress Oxide Peacock Feather. I tried to apply more ink on the edges of this panel leaving the center lighter.

Once my background was done, I did all the die cutting using red, green, and light, and dark teal cardstock. I also used some gold foil cardstock for the star of the tree and the bow of the gift and white glitter cardstock for some parts of the hat.
The legs of this adorable Snowman move as well, so to adhere it to my background I used a double layer of foam adhesive to the head and body and a single foam adhesive square to the opening of the legs that goes right under the body.
For my sentiment, I decided to use the “Tinsel Time” words from the set Tinsel Time. Each word has to dies, the shadow layer, and the word die itself. I die cut the shadow layer out of plain white cardstock and the inner word out of gold foil cardstock.
Holiday Express Card
For my third project, I wanted to use the Holiday Express Set. This is such a fun and adorable design!!! I always pay close attention to the color combos of my projects and this one is no exception. For the color of this design, I decided to use white for the trains so I could use a light teal on the background to spice it up. I also had in mind this idea of adding colorful details to that white train to spice it up.
This touch of color I just mentioned are the wheels. I die-cut seven pieces of these wheels so I could have seven different colors to fill the seven spaces of each wheel.
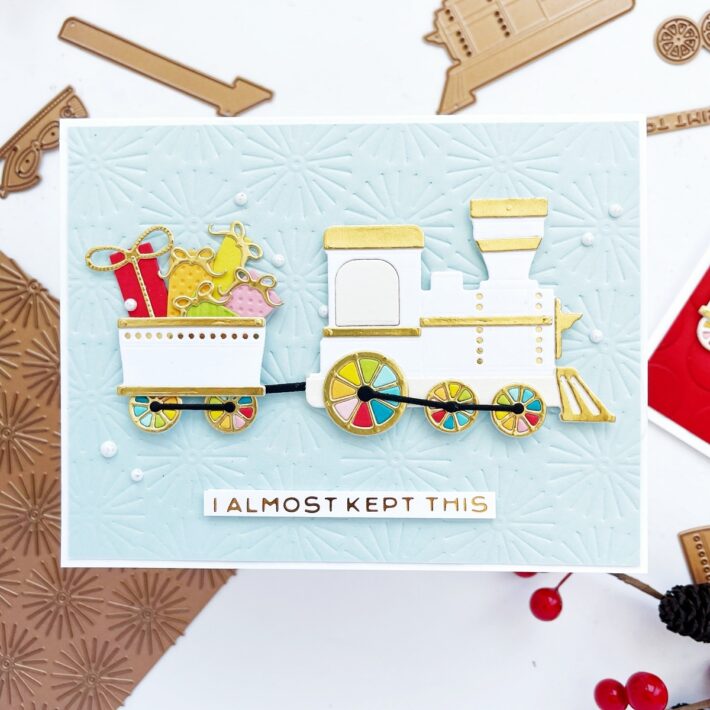
I went in a rainbow mood, so I picked: red, pink, light orange, lime green, light teal, medium teal, and dark teal. I wasn’t too sure about the color of the wheels; I knew I didn’t want to use too many black elements on this design, so I tried white and gold. I went with gold and that defined the rest of the detail die cuts that come in this set.
So basically, I made a white and gold train with colorful wheels. To add some interest to the design, I filled the wagon of the train with presents and of course, I used the same colors of cardstock that I had used for the wheel’s inserts. I added some bows to the presents cut out of gold foil cardstock.
For the background, I used once again the gorgeous Starburst Hot foil Plate. I decided to dry emboss it an A2 size panel of Sea Glass Cardstock and add some pearls for some interest. Lastly, all I had to do is adhered the sentiment. I used the Christmas Magic Hot Foil plates and hot foiled the “I almost kept this” phrase in gold Glimmer Foil.
Since I had the white wheels laying around, I quickly adhered the colorful insert pieces to these wheels and made a quick and easy bonus project.
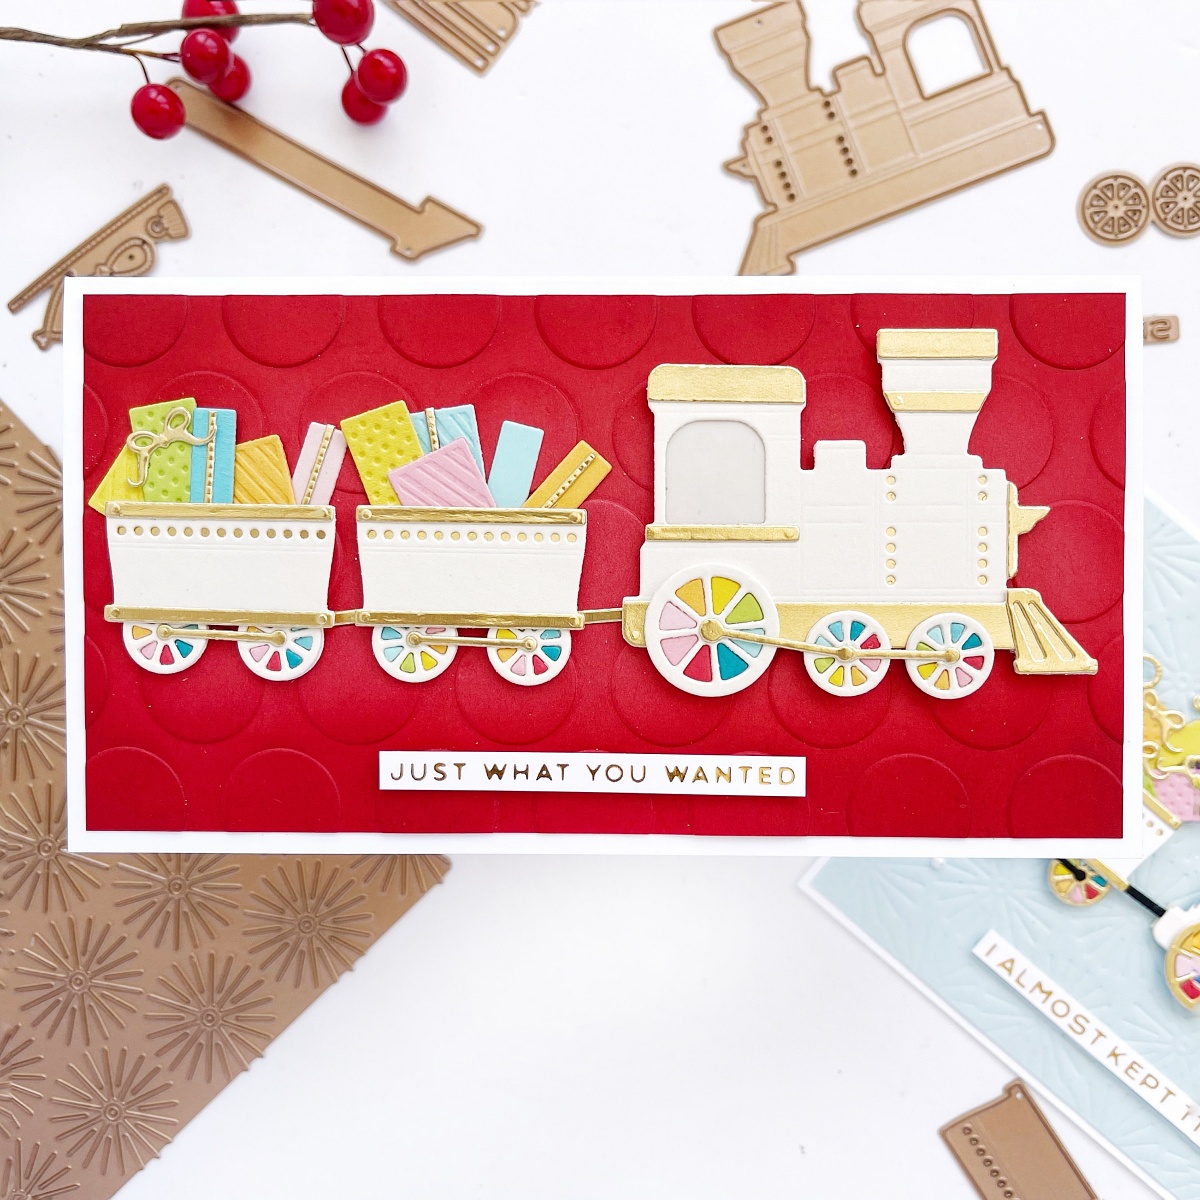
I had already used a white train, so I thought I’d make a cream one this time so in the end, I ended up die-cutting cream wheels. The design is basically the same as the previous project, I just changed the color of the presents and the background.
I used the Big Dot Slimline Embossing Folder to emboss a 6 ¼ by 3 ¼ piece of red cardstock and ink blended the edges to add more dimension to the panel.
Then I just adhered all the decorative elements of the train in gold foil cardstock and used a Just what you wanted foil sentiment, which is also from the set Christmas Magic Hot Foil Plate.
I hope you like these designs and inspire you to create with these fun and unique gorgeous products from Spellbinders.
Spellbinders Supplies:

2 Comments
Jyoti Adhikari
Beautiful cards Rachel. The last one is my favorite out of all four. I also love the rainbow wheels of the 3rd card. ❤️
Joan Bardee
oh wow these are absolutely gorgeous!