
Magical Deer: Christmas and Beyond with Joan Bardee
Joan Bardee here and I am honored to share 3 ways to use the gorgeous Magical Deer Etched Dies from the Winter Tales Collection. They were designed by the talented Zsoka Marko and fit beautifully with the rest of that Collection.
The first thing I thought of when I saw this die set was folk art. After looking at dozens of folk-art designs on Pinterest, I was inspired to make a few cards with dark backgrounds. After years of making white-only backgrounds, it’s fun to try something new. For these cards, I used black, but any dark background, particularly a deep cranberry, green, or navy would be awesome.
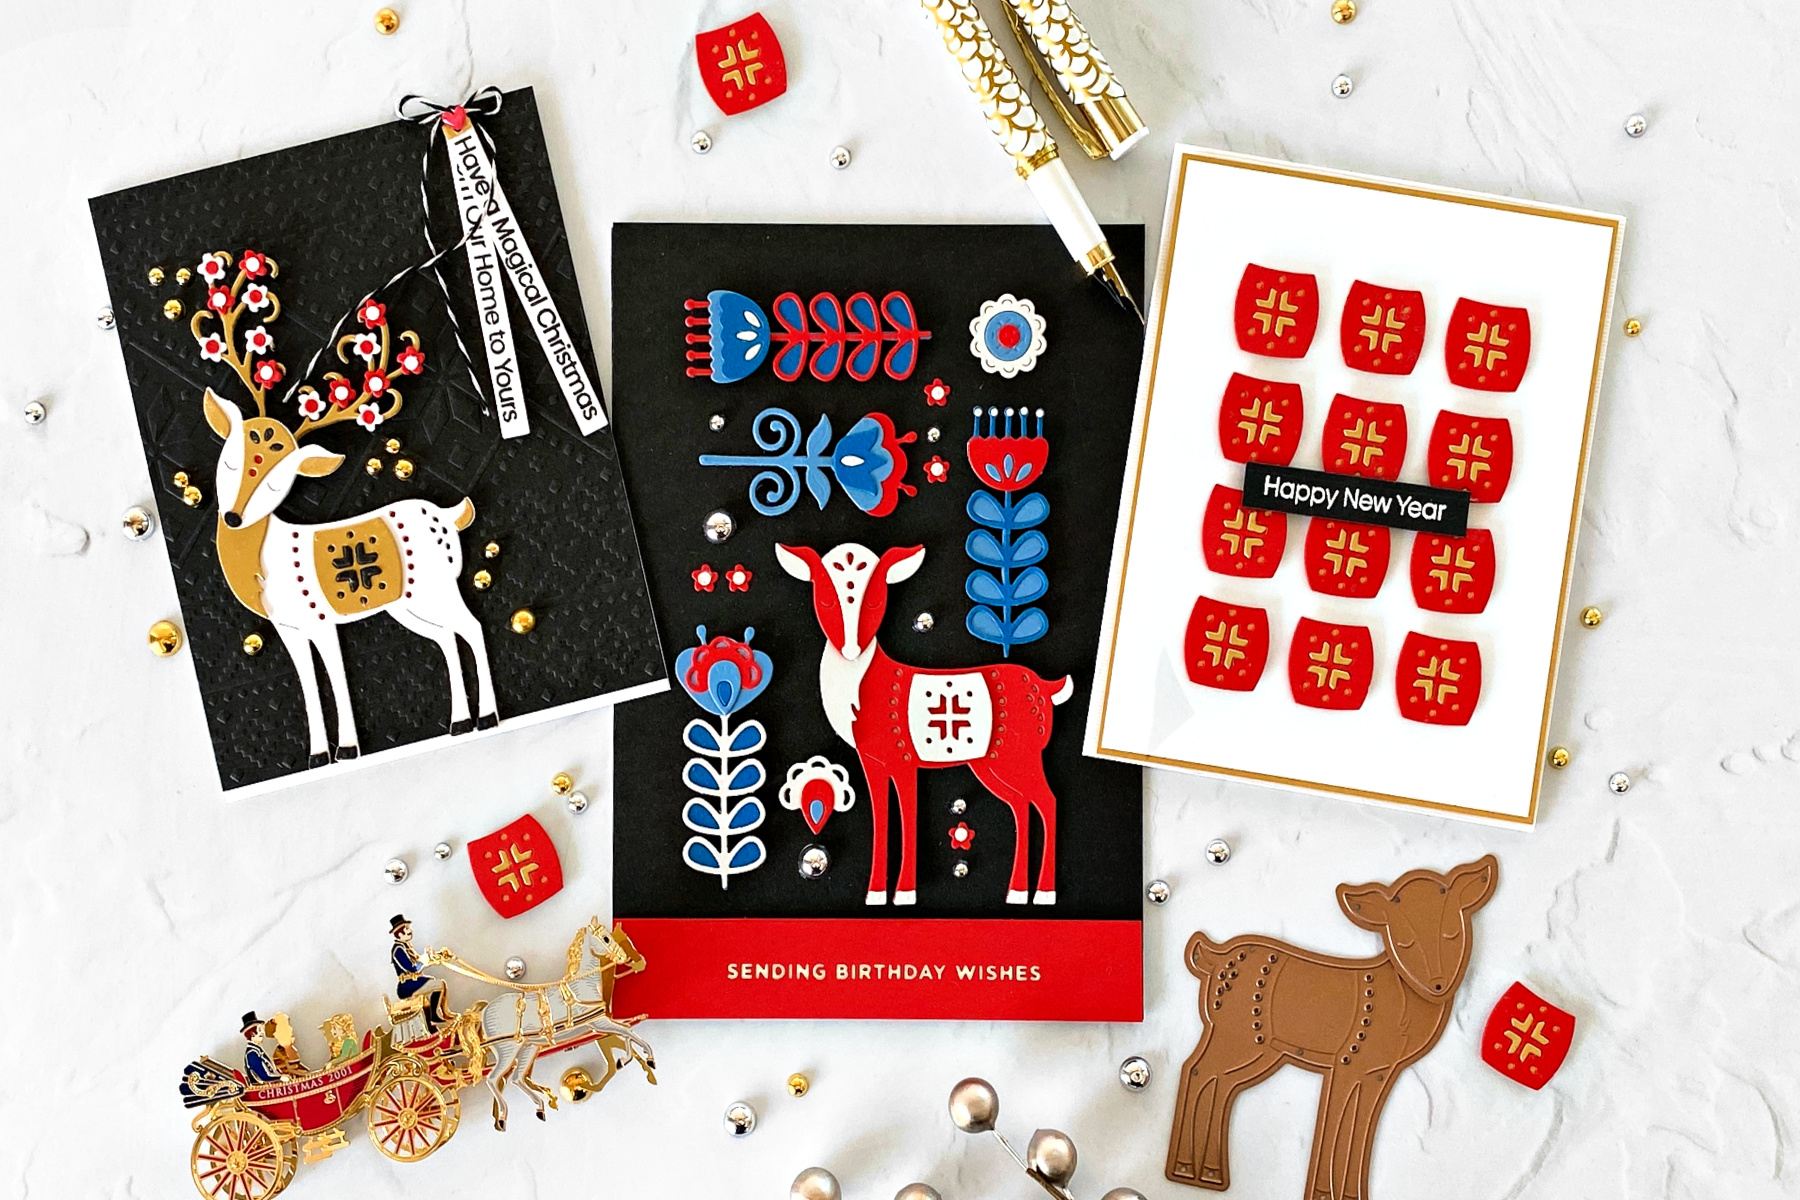
Magical Christmas
Black and gold is such an elegant combination. Add a bit of red and it sings Christmas. I’ve made a grand total of no cards using this color combination until now, and I am so glad I tried it.
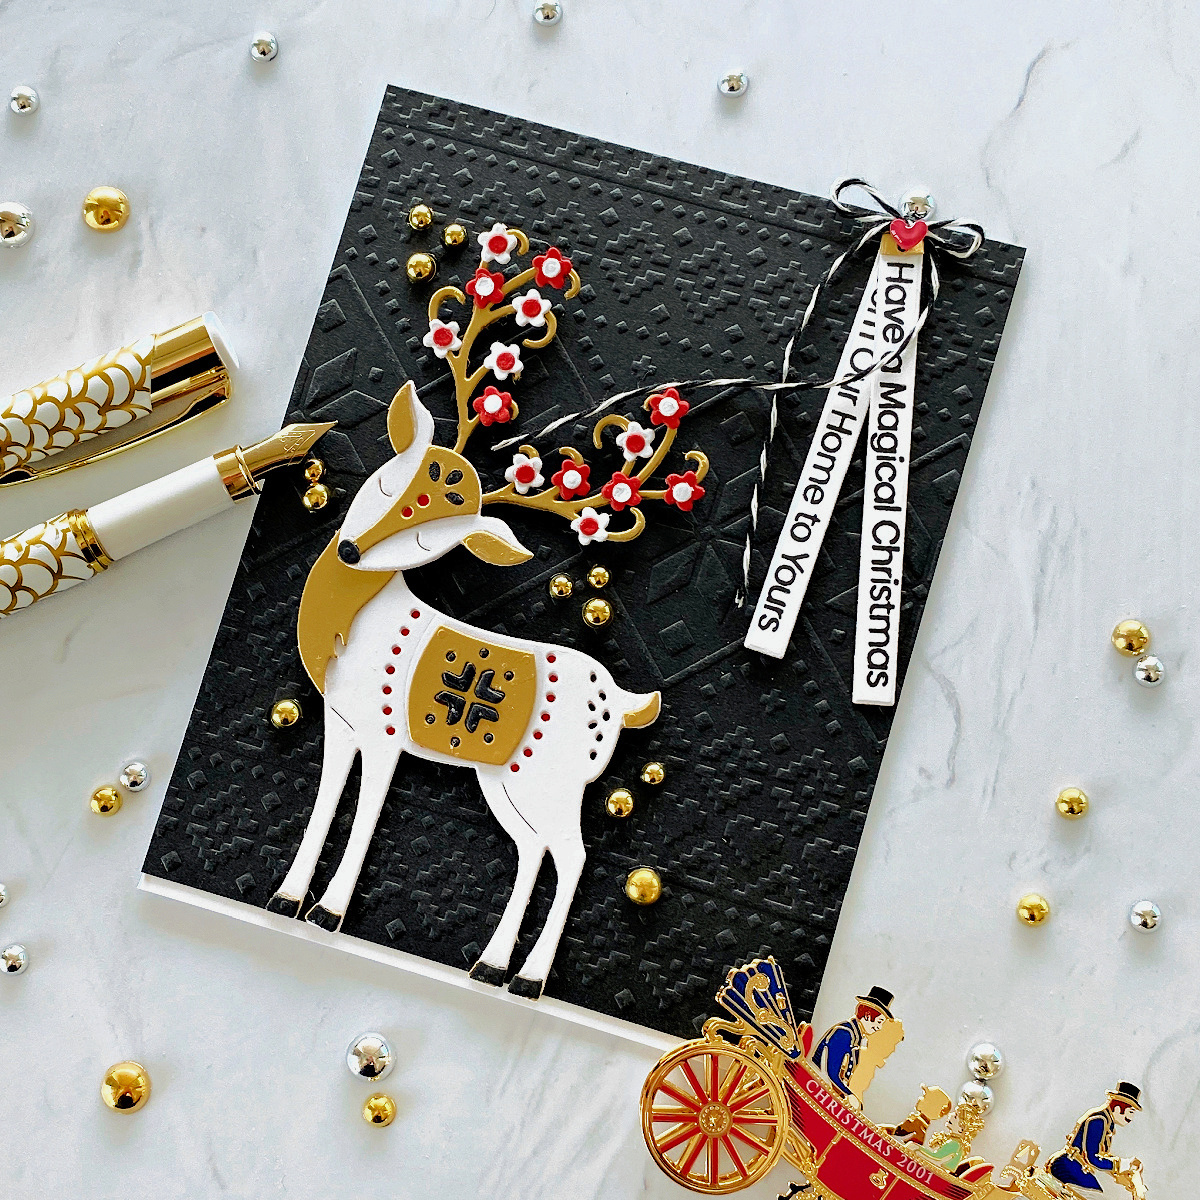
Used the Ski Lodge 3D embossing folder to enhance the black background and I love how it came out. Tilting the deer’s head provides space to place the deer on the side of the card, where I wanted it, and made room for the flower-filled antlers. The space in the upper right was the perfect place for some sentiment strips.
Tip: Tilting the deer’s head makes the dear look even sweeter – it would be great for a baby card.
5” x 7” Birthday Card
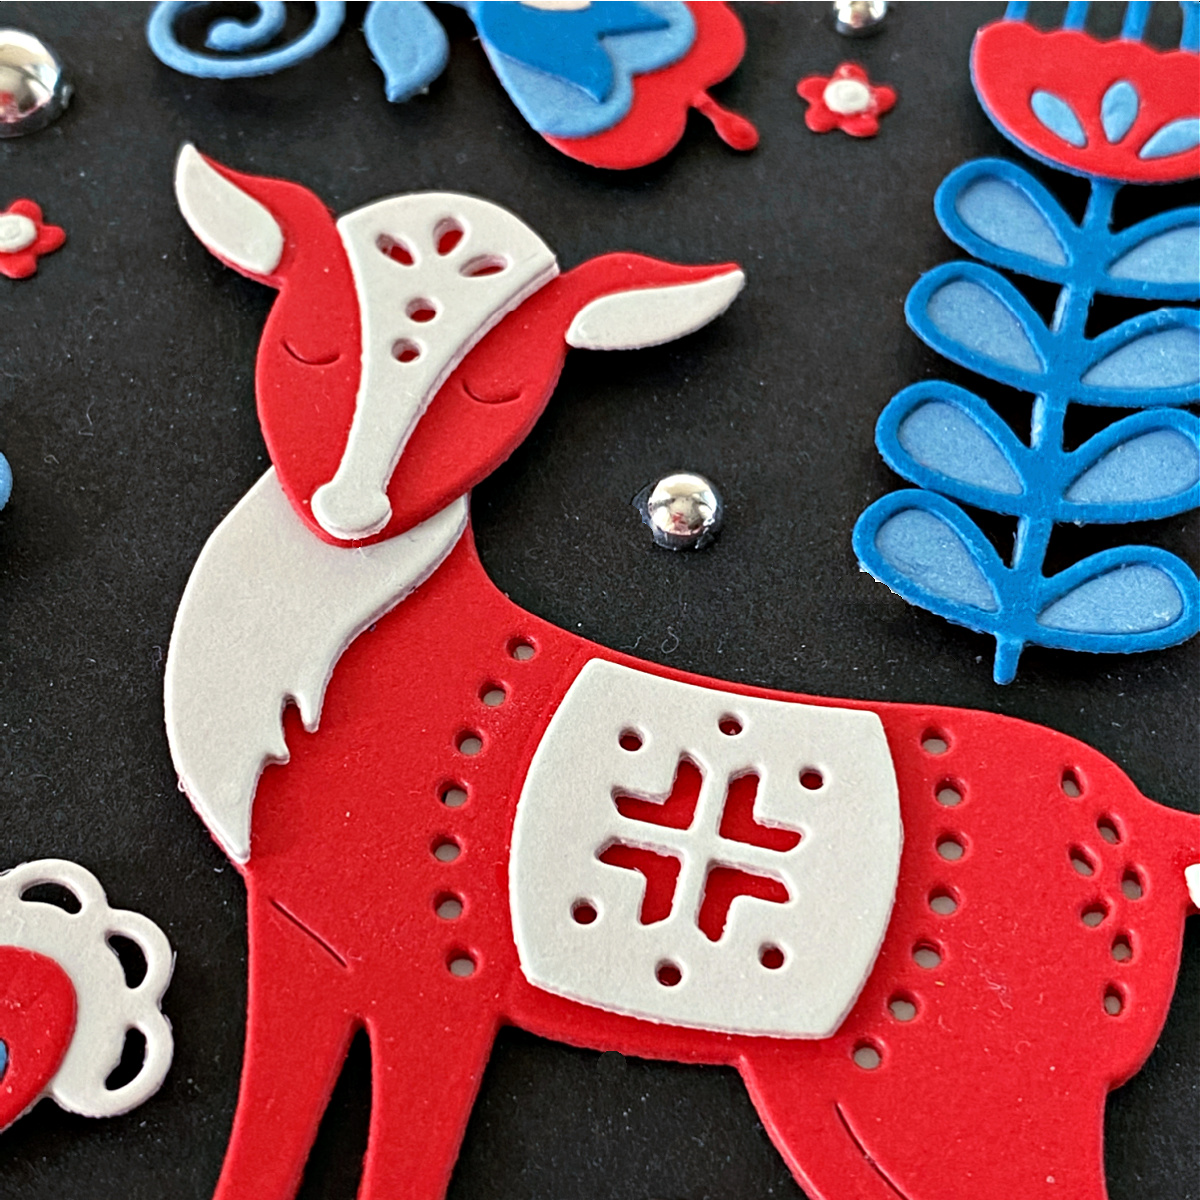
Can I say how much I love this card? I think it is my favorite from years of cardmaking. Supersized from my usual A2 to an A7 (5’’x 7”) to make room for the deer and lots of the flowers from the Enchanted Garden Etched Dies set. That set, also designed by Zsoka and part of the Winter Tales collection, is the bomb.
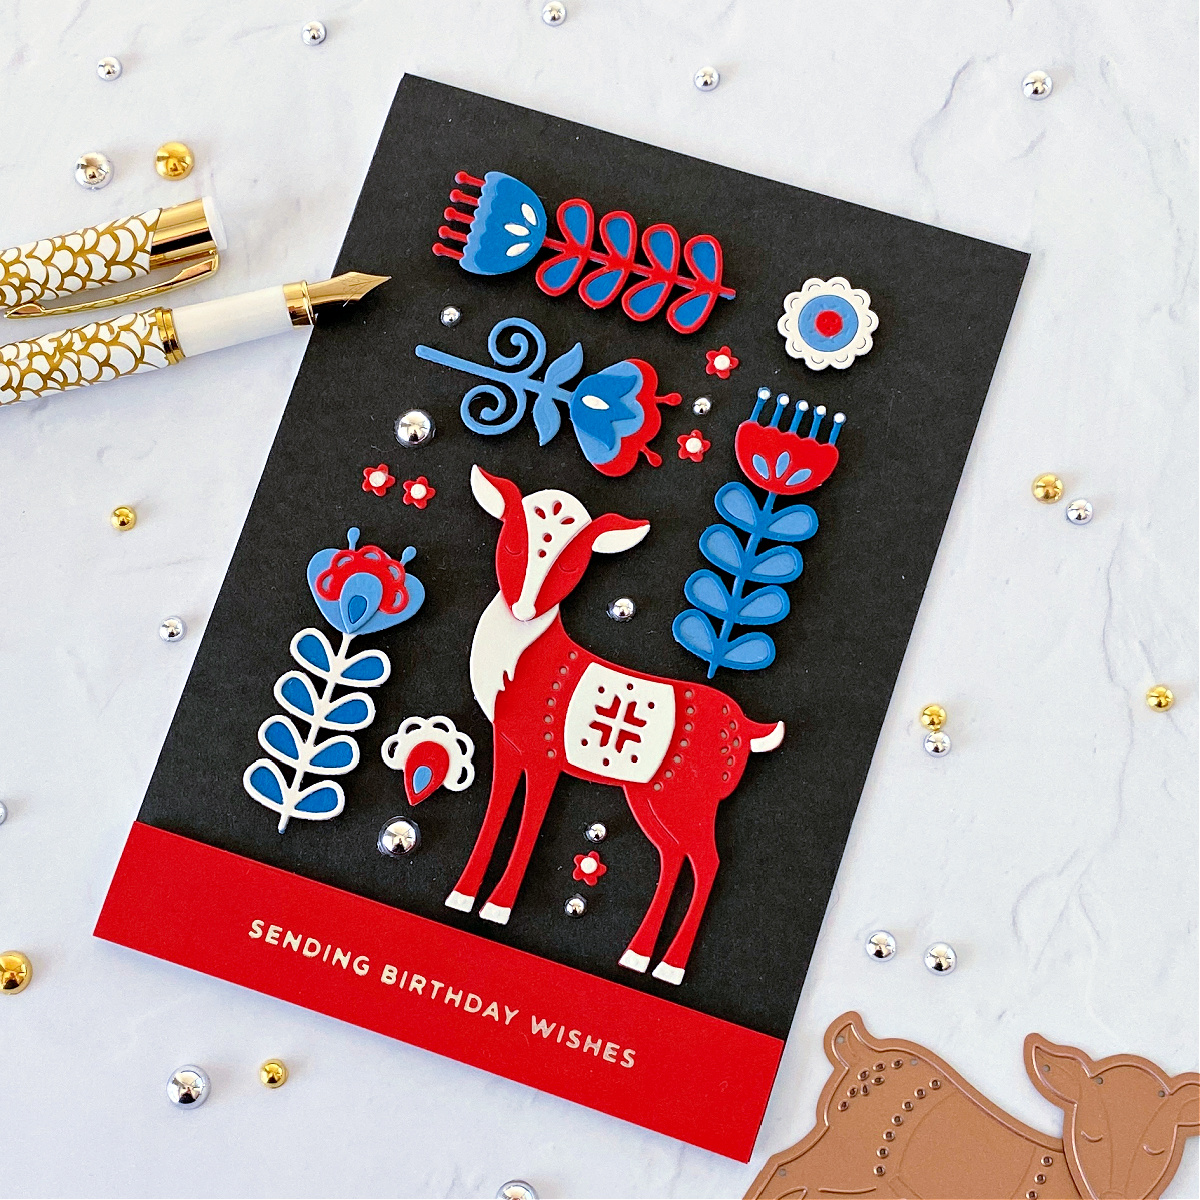
For this card, I kept the deer’s head straight because it works better with the pattern of the flowers. I didn’t use the antlers because I wanted more space for the flowers, and I thought the antlers would take away from the straight lines in this design. The border of plain black around the design is an added element that adds no bulk and is approximately the same size as the red strip on the bottom. I love geometry!
Tip: Each of the die cuts is adhered with foam tape. It’s a little more time-consuming than glue but the dimension makes a big difference.
Happy New Year
While the beautiful deer and all its pieces are the focal point of the set, why not use just one of the smaller dies on its own? I love to stretch sets that way, and a grid pattern is my go-to technique for doing so! You can see a lot of grids on my IG page.
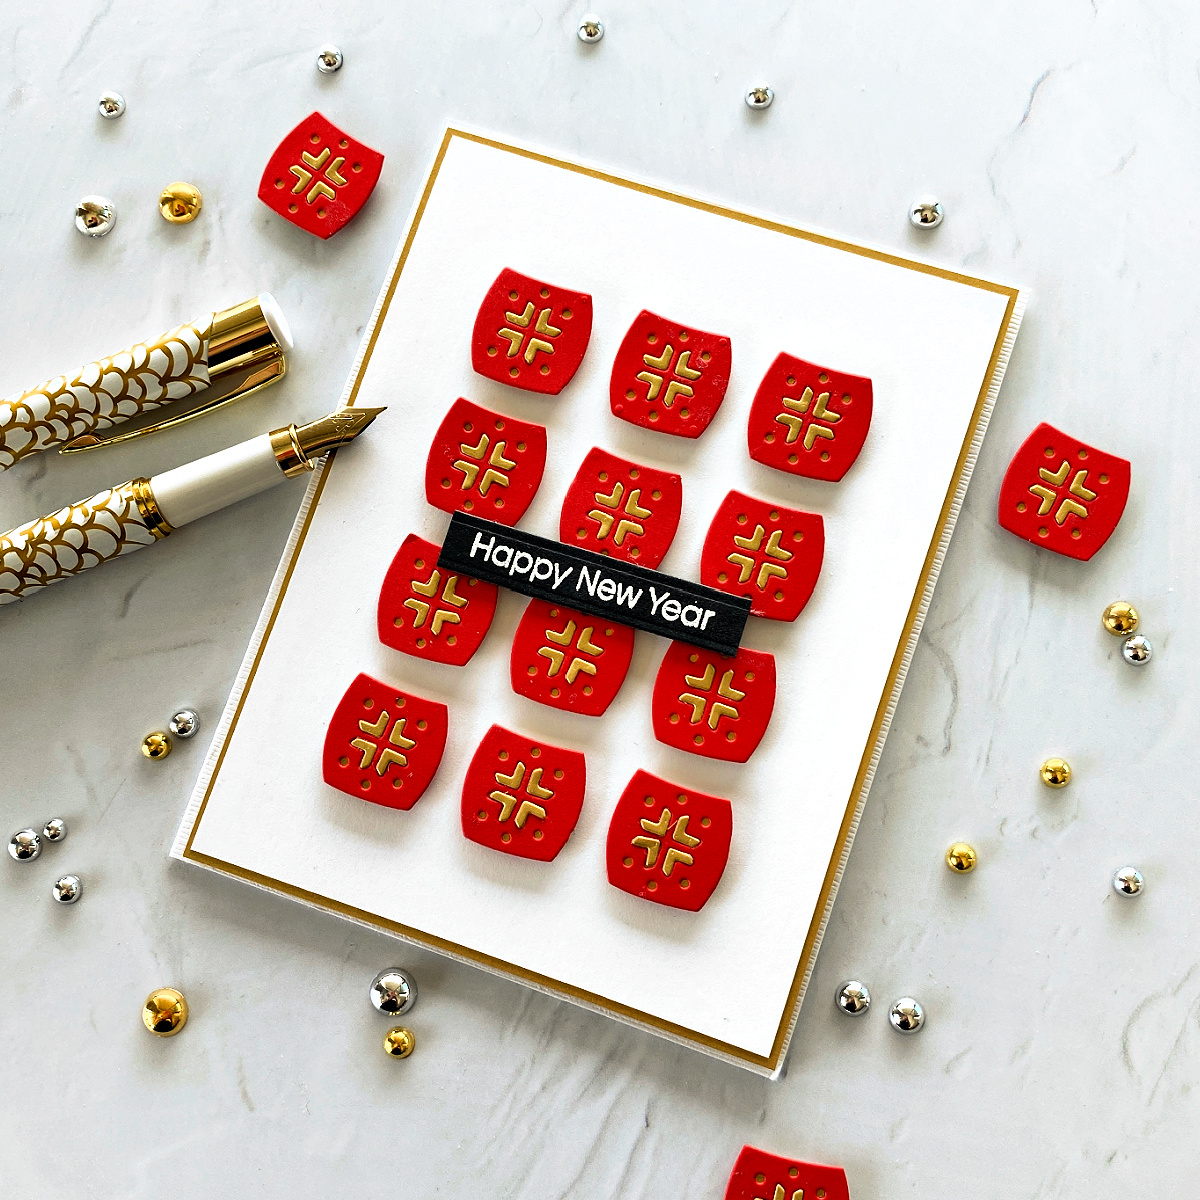
The red and gold plates evoke Chinese New Year, so I added a new year sentiment from the Peace & Joy set. Since I don’t know anyone who celebrates Chinese New Year, I’ll use this card for a traditional New Year’s Card. (By the way, the Spellbinders Brush Gold cardstock is the best!)

Tip: Adhere a piece of cardstock to the back of each plate. That will provide a “landing spot” to adhere any inserts, such as the gold ones in the center of these plates.
Thanks so much for checking out this post and thank you to Spellbinders!
Spellbinders Supplies:

Other Supplies
Gold and silver embellishments, heart sticker, cardstocks, 3M foam adhesive, Tim Holtz guillotine paper trimmer, Versamark ink, Wow fine white embossing powder, scissors, Japanese screw punch, black and white twine.

5 Comments
Carly Minner
Gorgeous cards Joan! I love your work so much!
KatiC
I love your “deer” cards. The colors are beautiful and I love the designs. Great job!!!
I also love that (diecut?) (pin?) of the people riding in an old fashioned car. Is that for sale anywhere?
Joan Bardee
Katic – thank you so much. The old fashioned car is actually a Christmas Ornament from the White House Christmas collection. They put out an ornament every year. Here is the link. https://shop.whitehousehistory.org/products/the-2001-white-house-christmas-ornament-presidential-carriage-honoring-andrew-johnson-17th-president-of-the-united-states-1869-1877
Lori Spitzer
Beautiful, Joan!! TFS
Albert White
Can I just say how awesome your cards are!!! I love the out of the box thinking for the Chinese New Year!!