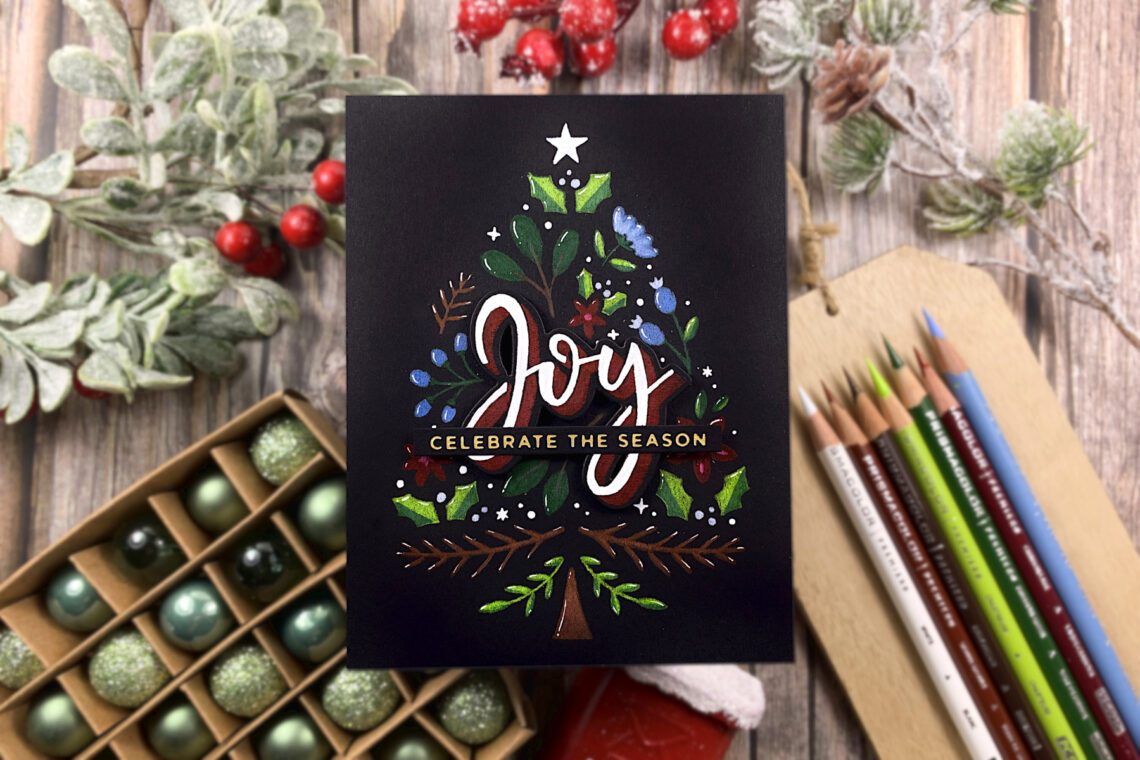
Not the Usual Stencils!? Coloring using a Spellbinders Layered Joy Tree Stencil
Hello crafty friends! This is Jennifer Rustioni from @armieritagli! I’m so happy to be here again as a guest on the Spellbinders Blog! Today I share with you a step-by-step tutorial of the card I realized featuring the new amazing Spellbinders Layered Joy Tree Stencils from the Layered Christmas Stencils Collection! I so do love these Christmas stencils! They’re perfect to create a lot of beautiful (and very easy to do!) Christmas cards!

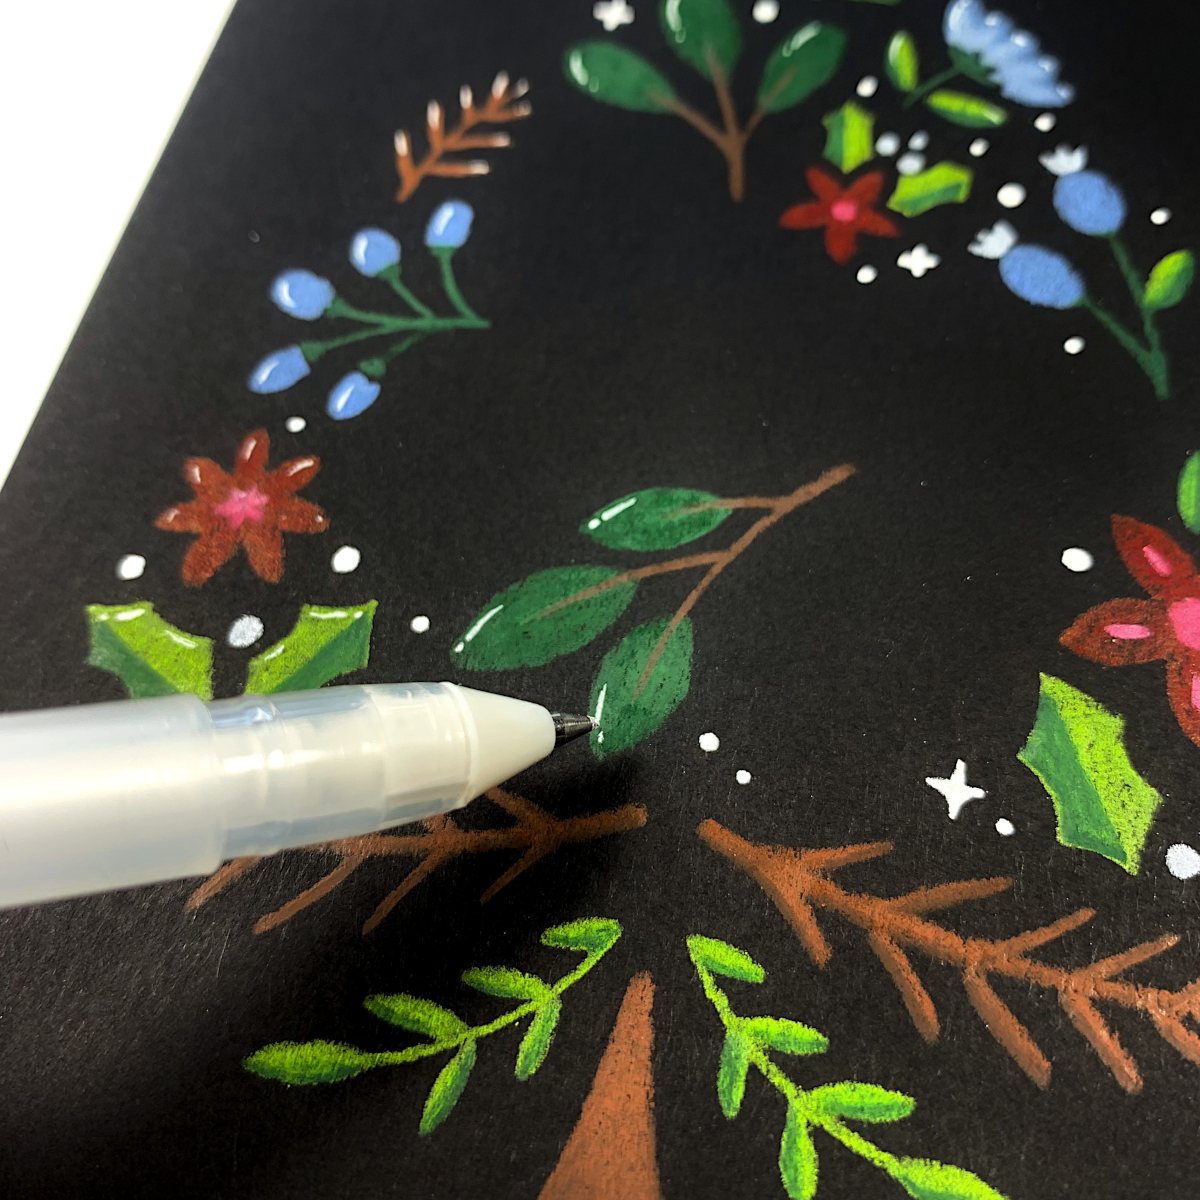
I chose to use these stencils in a different way. In fact, I used them as templates to draw and color the various parts of the Christmas tree on a black cardstock with colored pencils! Special tip: use a good pencil sharpener to get very long points. This will make it easier to make even the smallest details!
Step By Step Instructions
- The first thing I did, was to choose a color palette and to fix the paper and the stencil n°1 with the masking tape.
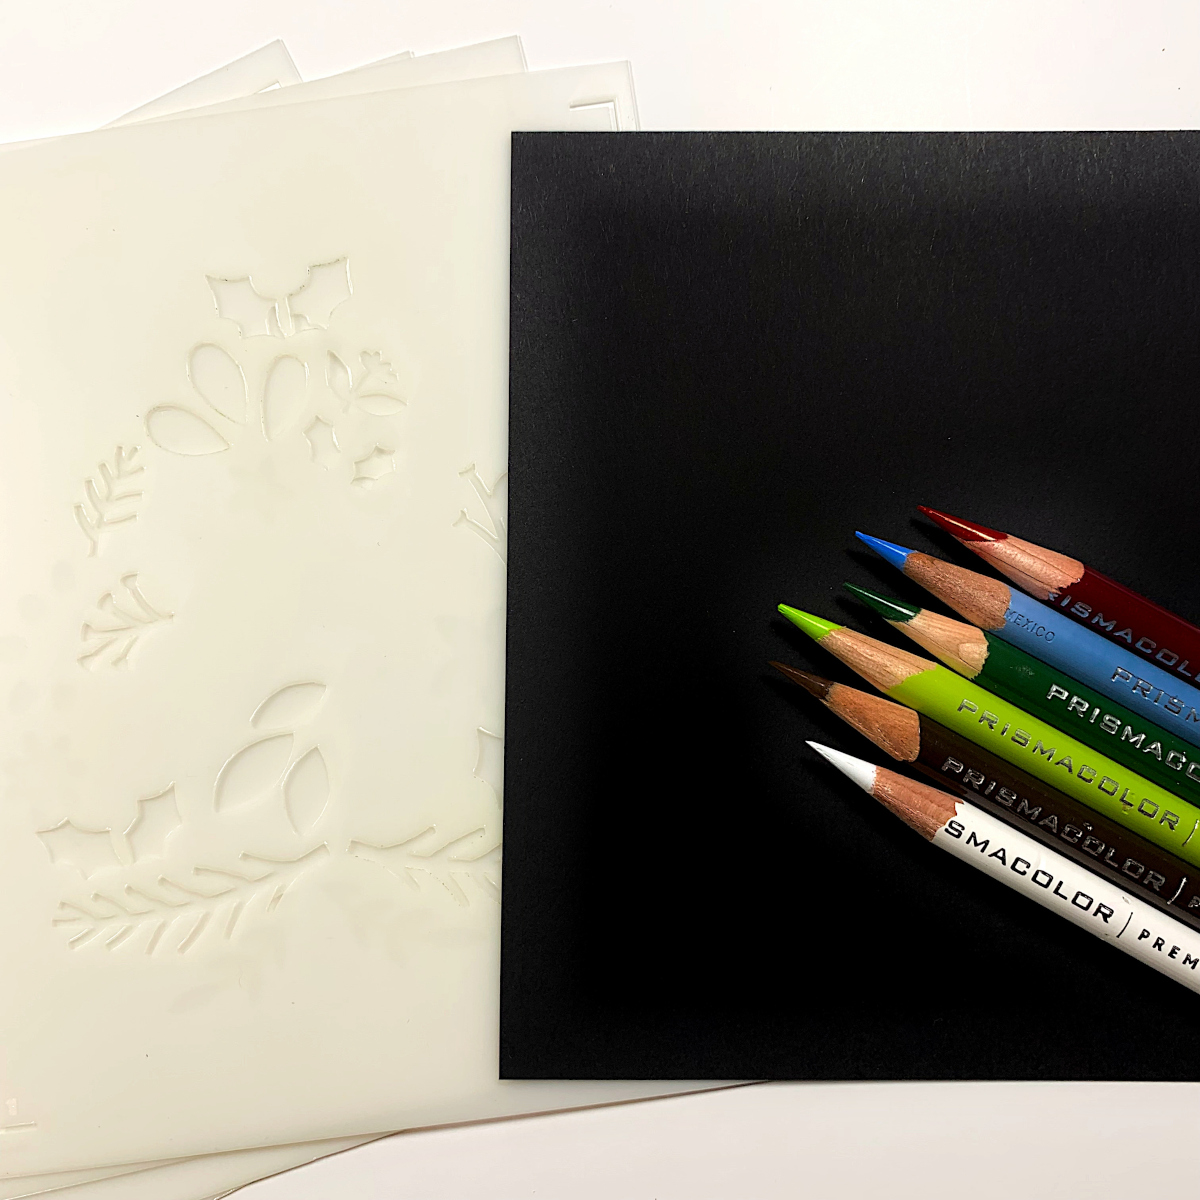
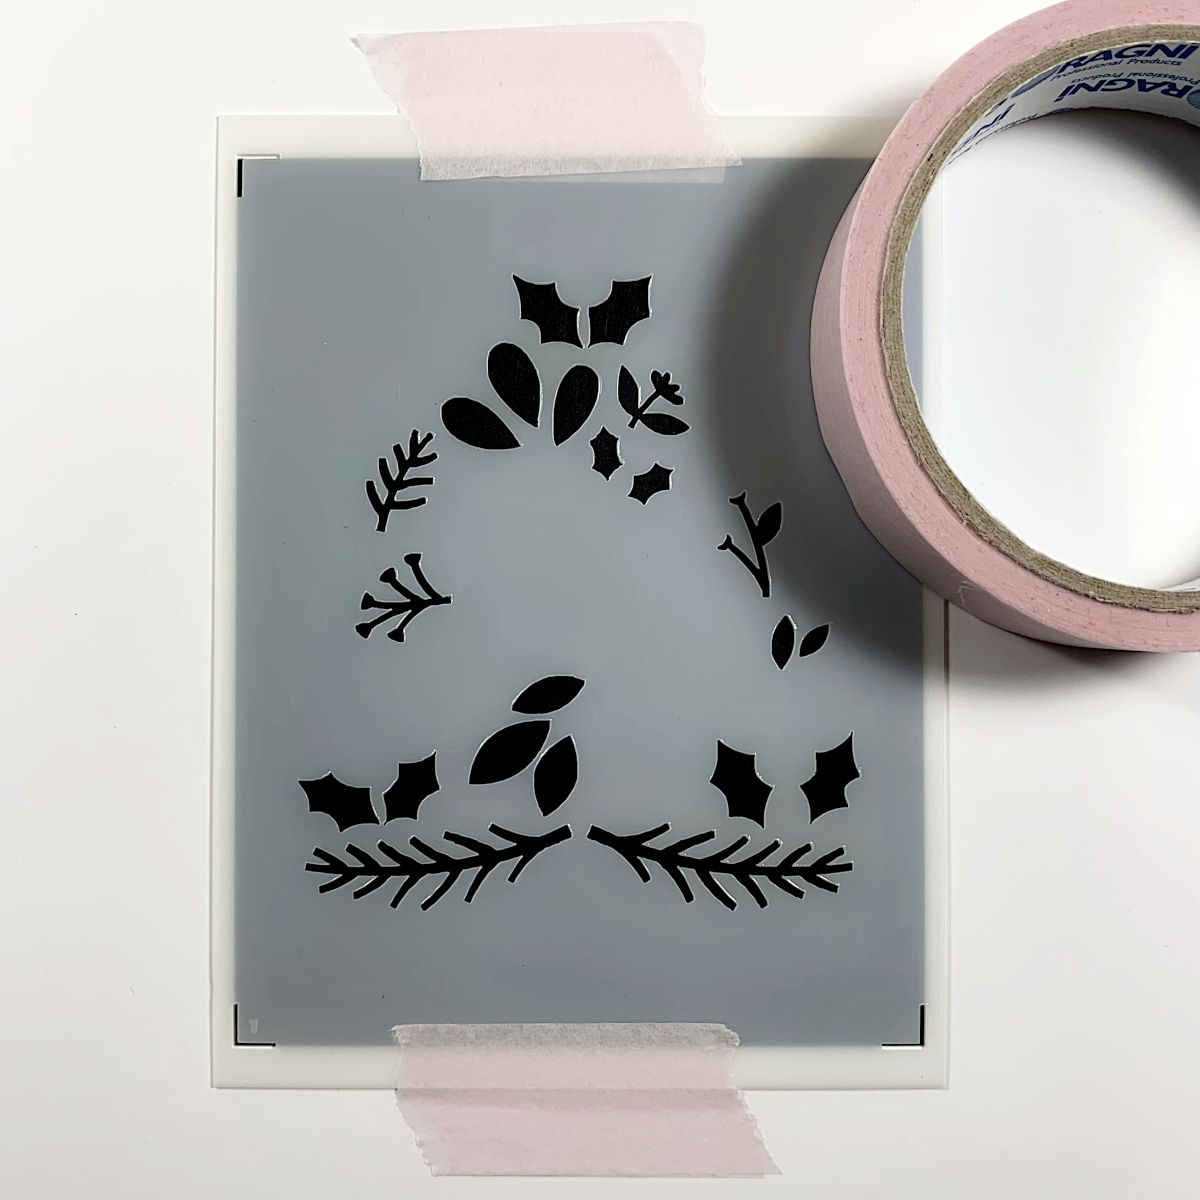
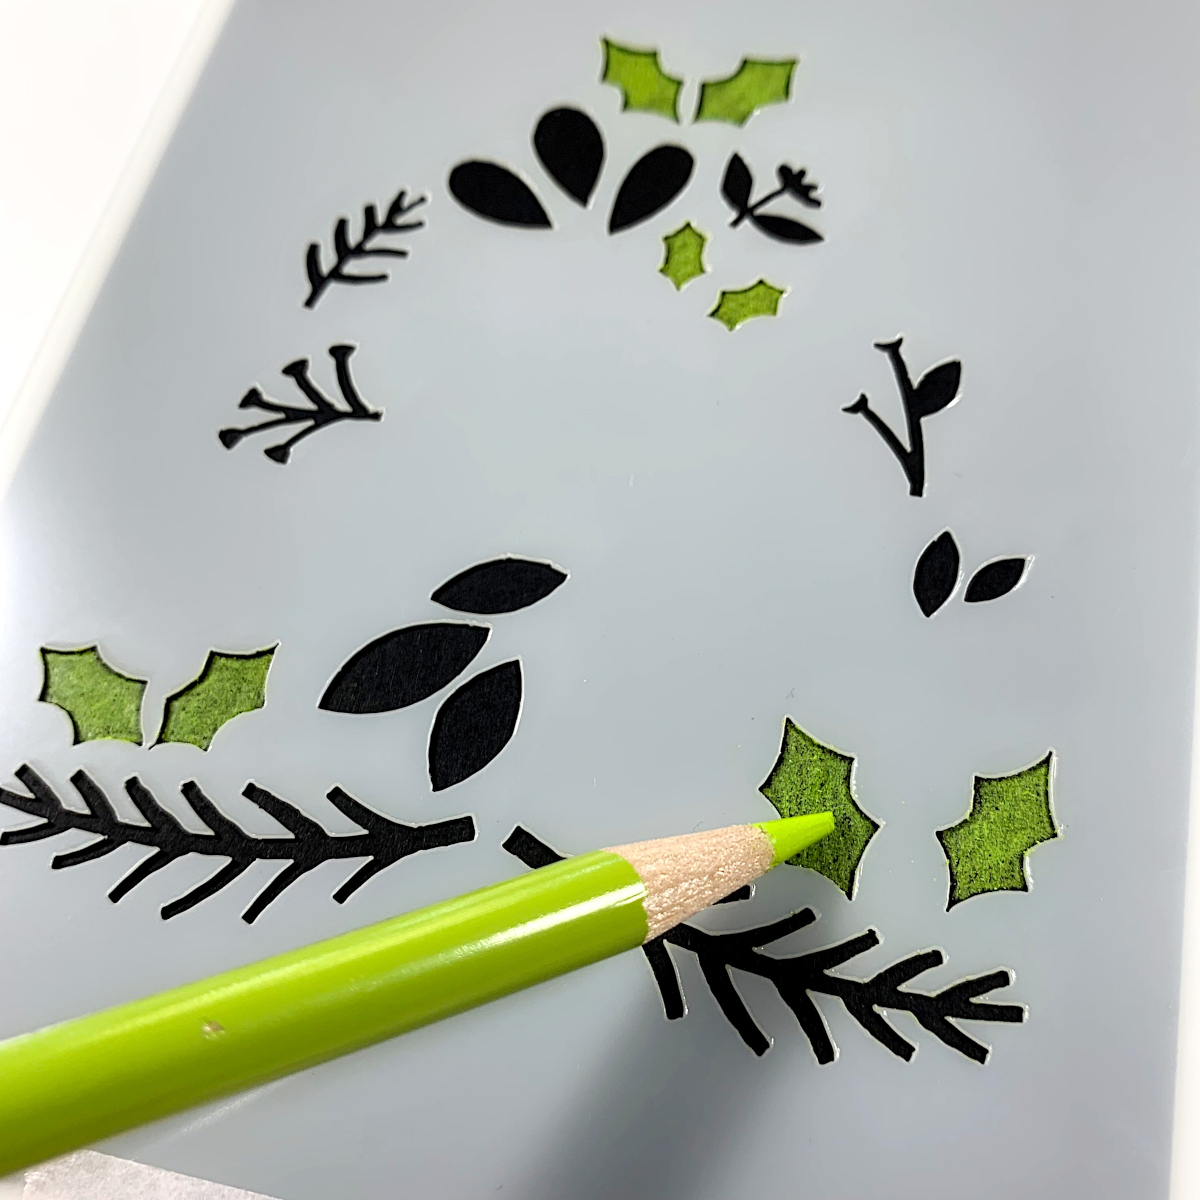
- I started to color the leaves and the branches using the Prismacolor Premier Colored Pencils in shades of light green and brown.
- I fixed the stencil n° 2 and continued to color flowers in shades of red and light blue. After that I removed the stencil n° 2, fixed the stencil n° 3, and proceeded to color the shadows of the leaves, other small branches, and the tree trunk.
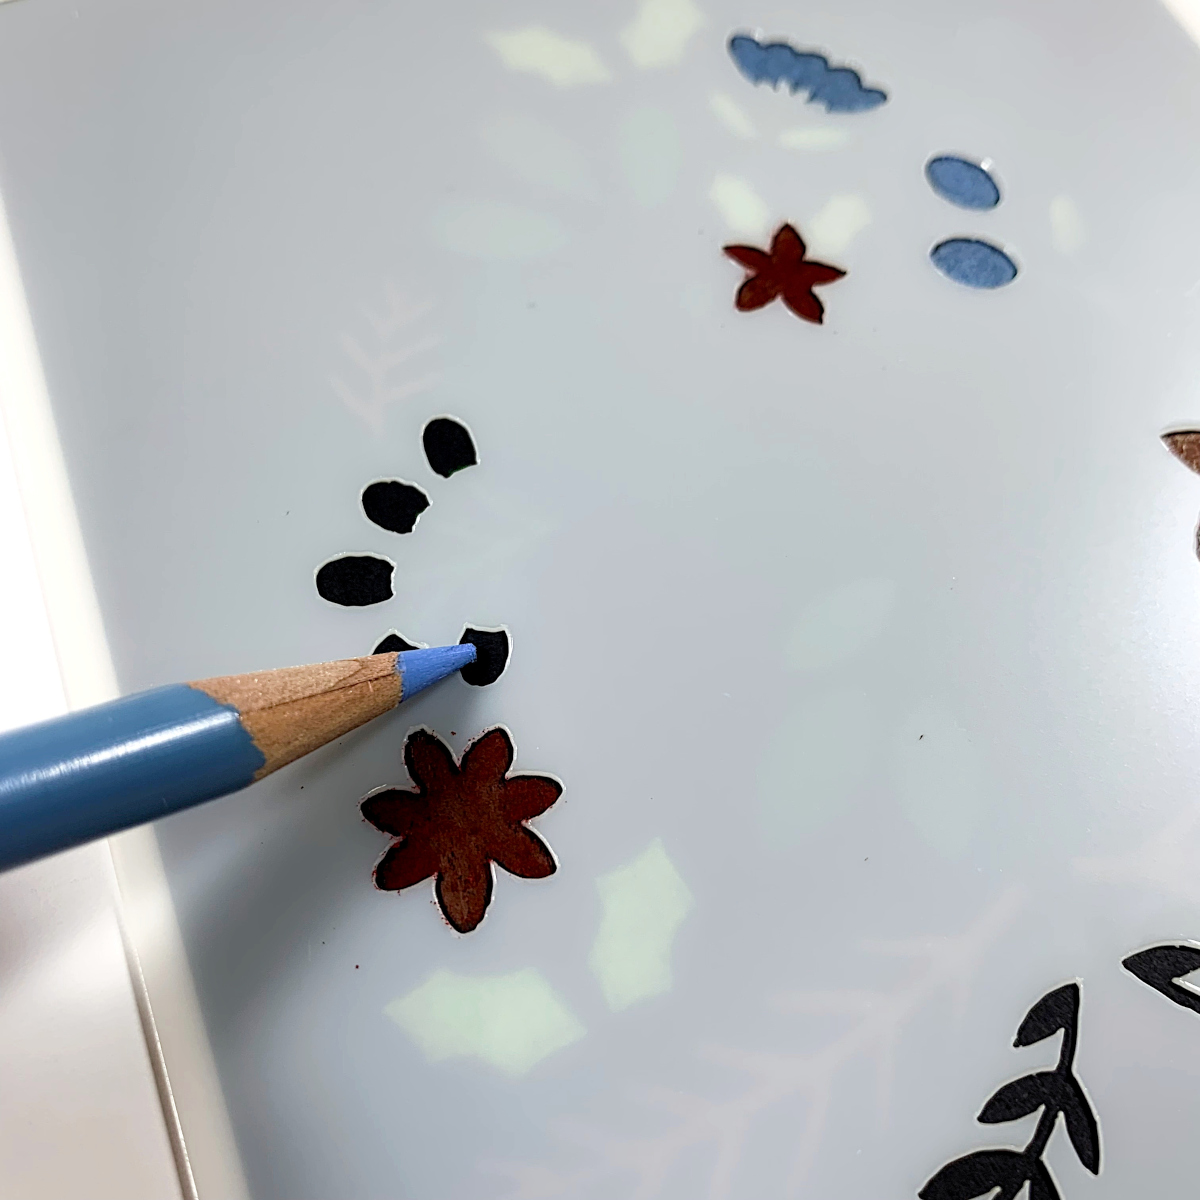

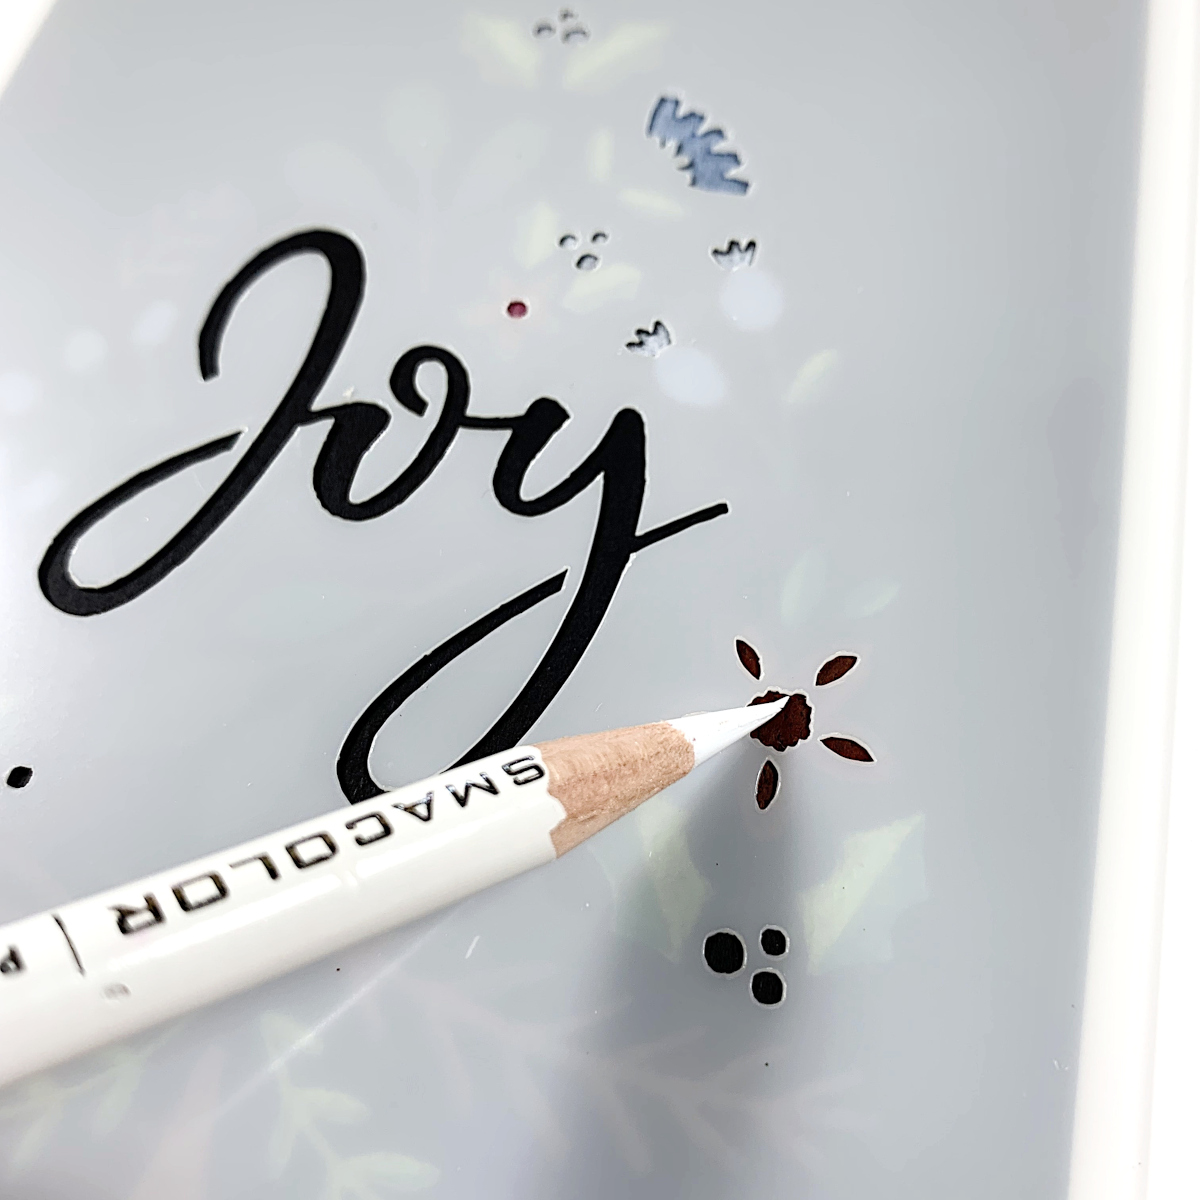
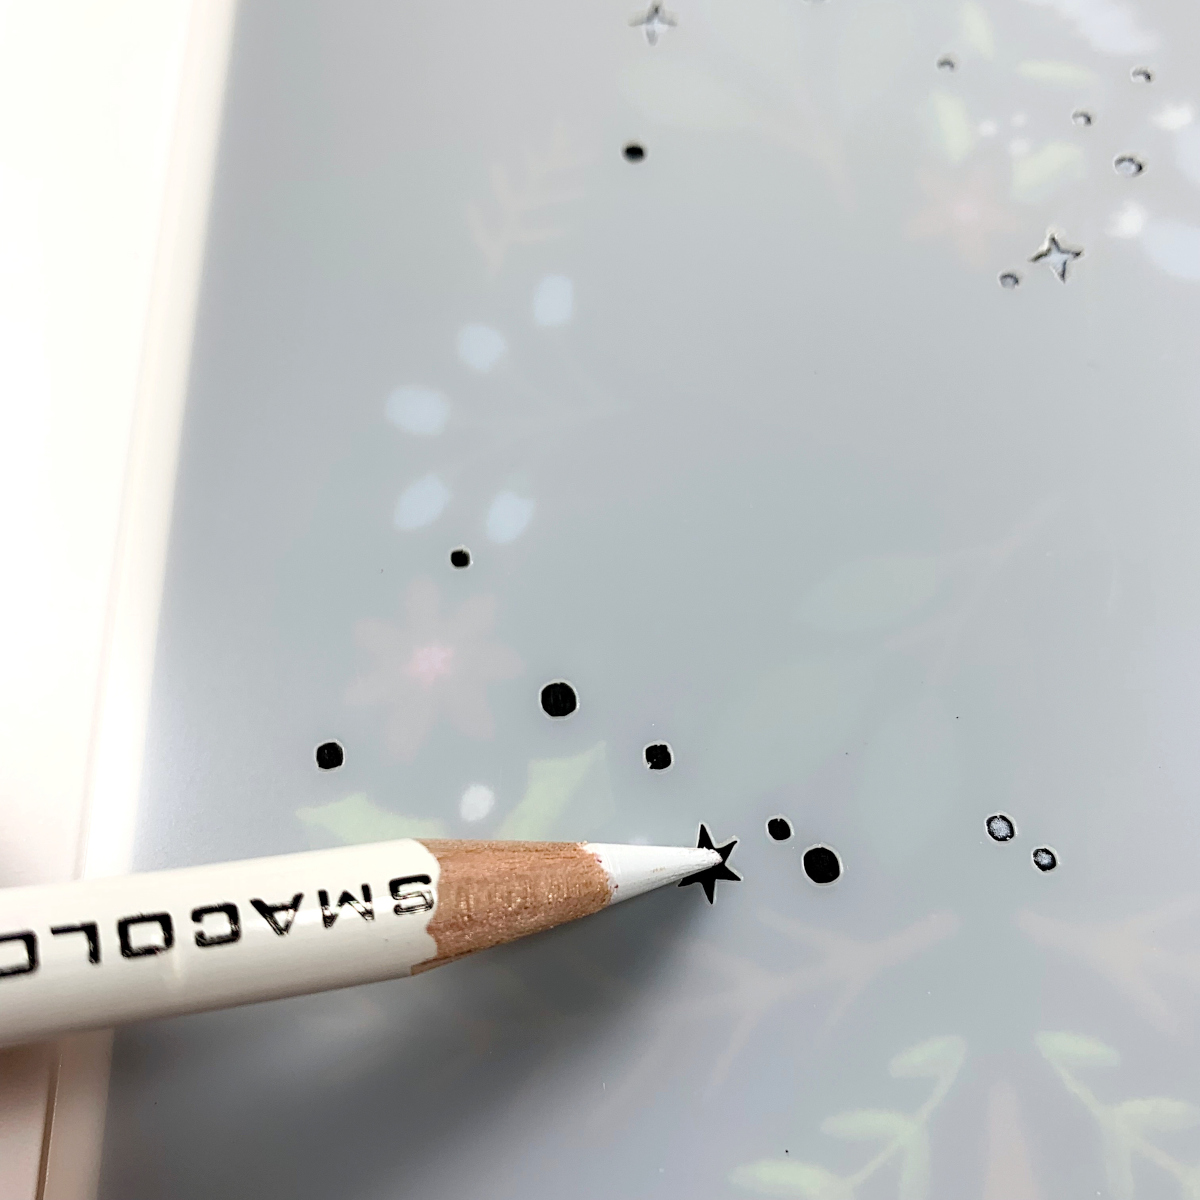
- Then, I fixed the stencil n° 5 (don’t worry, I don’t miss the stencil n° 4! I’ve just preferred to use it later) and colored the details of the flowers and the berries with a white colored pencil. At this point, I used the stencil n° 4 and realized the star and the highlights using again a white colored pencil.
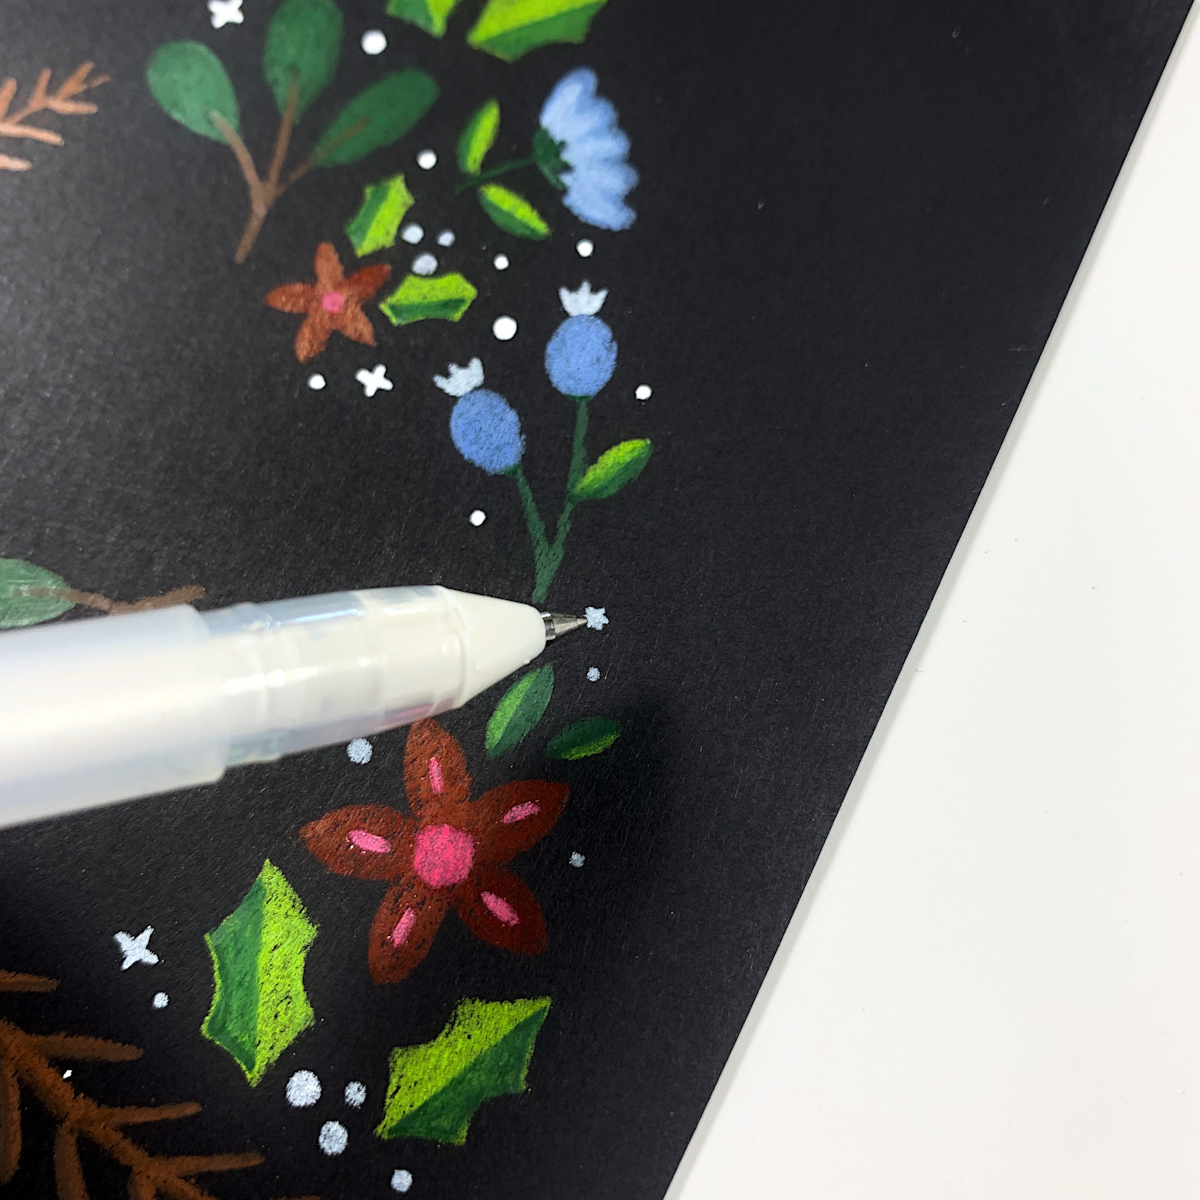
- After that, I used a white gel pen to accentuate the highlights and create other highlights on leaves and flowers.
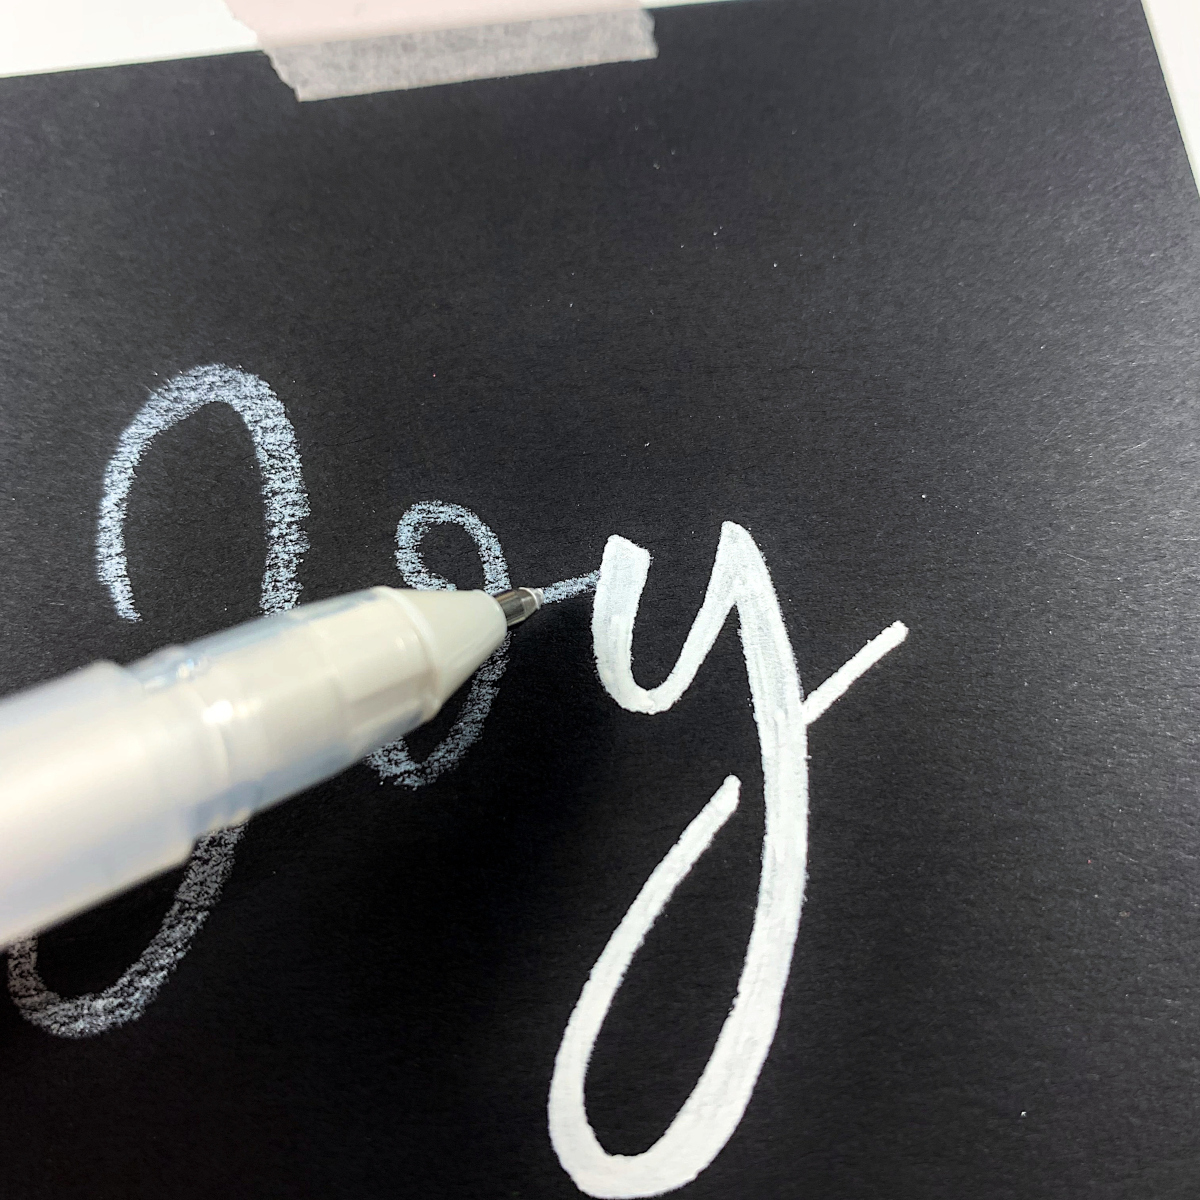
- At this point, I trimmed another piece of black card stock to realize the main sentiment. I fixed again the stencil n° 5 and used a white colored pencil to color the word “Joy”. I went over it with a white gel pen to give more contrast. I created the shadow of the word using the stencil n° 6 and a red colored pencil. Then, I die cut the word with the coordinate die.


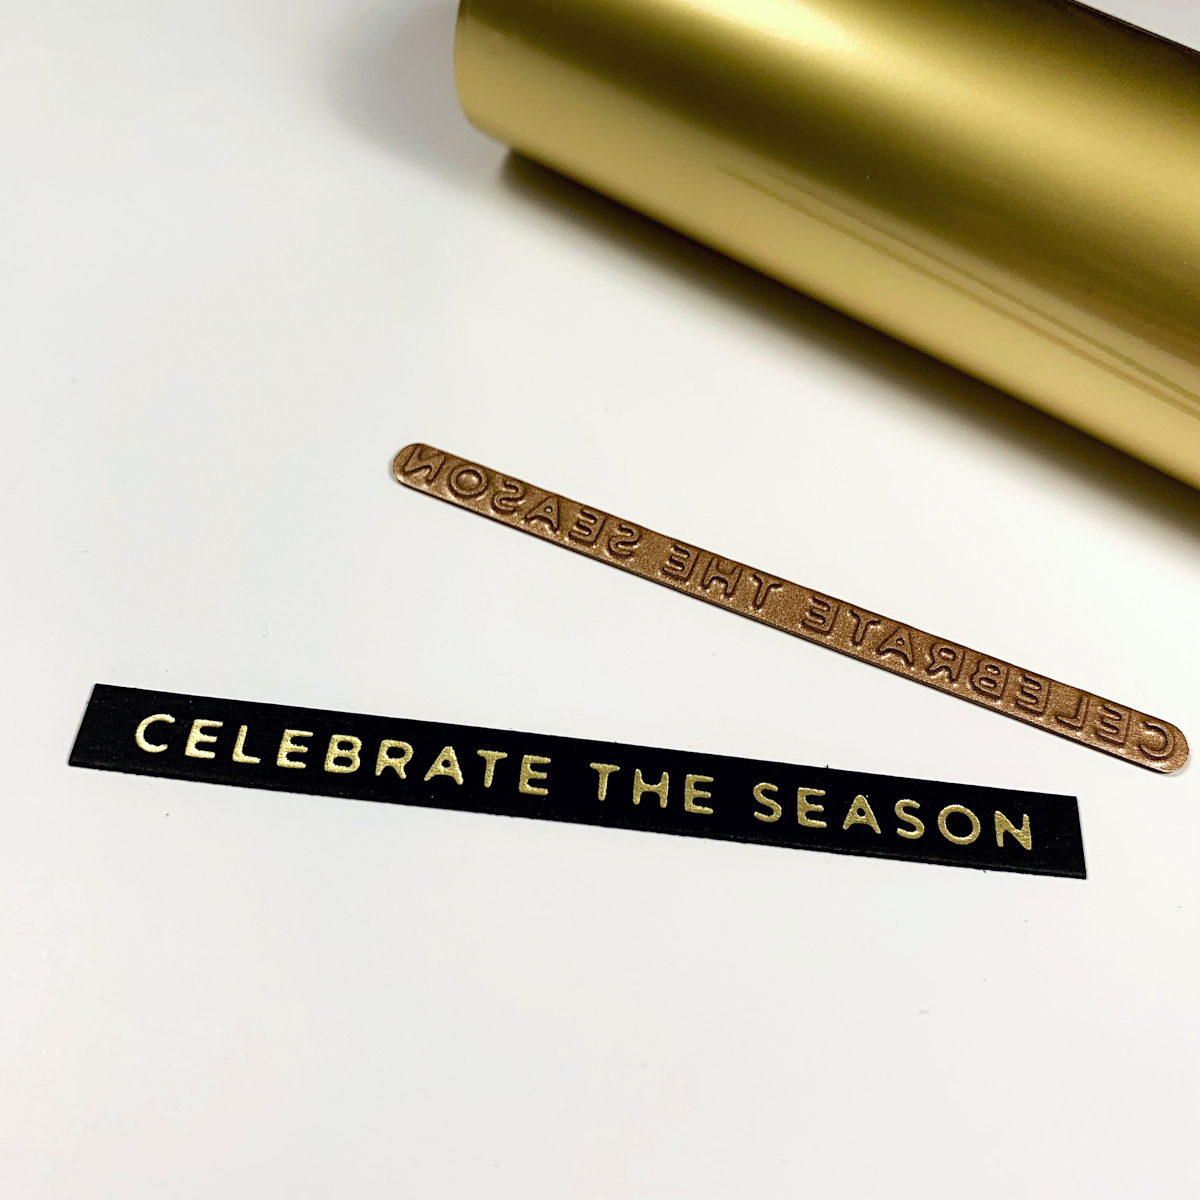
- I realized a small gold foiled banner with the secondary sentiment, using the Spellbinders Glitter Wishes Glimmer Hot Foil Plate & Die Set.
- At last, I glued the sentiment on my card using a white foam adhesive.

Spellbinders Supplies:

Other supplies
Prismacolor Premier Colored Pencils: PC 938, PC 989, PC109, PC 925, PC 1024, PC 945, PC 946, Sakura Gelly Roll Bright White Pen
Thanks for reading! I hope you’ll like this tutorial and my project will inspire you! Wish you all a colorful day!

4 Comments
Dee Wilkes
Absolutely beautiful. Love it 😊
Nancy
Very pretty. Love your work.
Marilyn Conley
What a beautiful card!!
MaryH
Stunning card – colors you picked are vibrant and really make the message standout too. Hope to see more of your work.