How To Dress Up Your Paper Flowers With Prills
Add interest effects and accents to any paper crafting project, especially paper flowers with Prills from USArtQuest. We are welcoming a quest artist Rachel Alvarado as she shares her favorite ways to use prills.
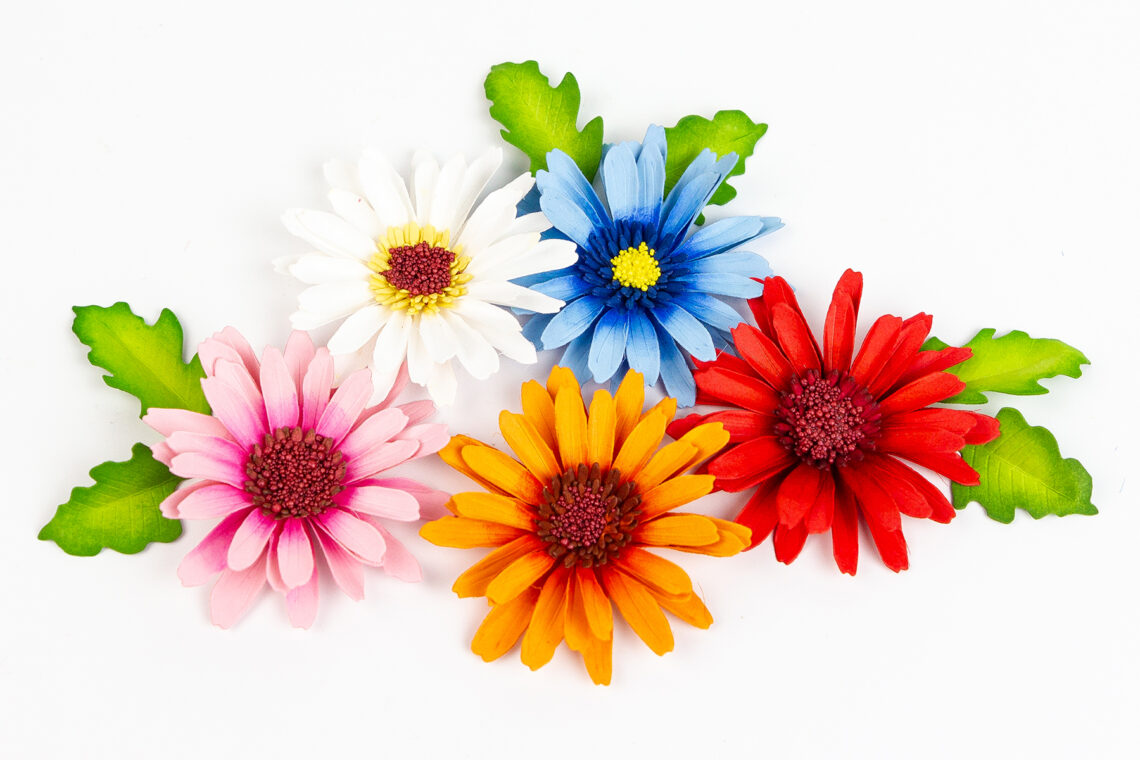
Hello crafty friends! It’s Rachel Alvarado from RachelAlvaradoDesigns.com, and I wanted to share a few ways that you can use Prills to dress up your paper flowers. Prills are super easy to use and add so much detail and realism to your projects! They come in a variety of colors, giving you many options to choose from.
Gerber Daisies
My first project features some Gerber Daisies from the Gerber Daisy and Ladybugs Etched Dies designed by Susan Tierney-Cockburn. You can find a detailed video by Susan HERE that shows you a step-by-step process on how to make these gorgeous flowers.
For all of my flowers, I used Susan’s Garden Ultimate Tool Kit to shape them. This kit is absolutely fabulous and helps to give your flowers the shape and detail necessary to help them look more realistic.
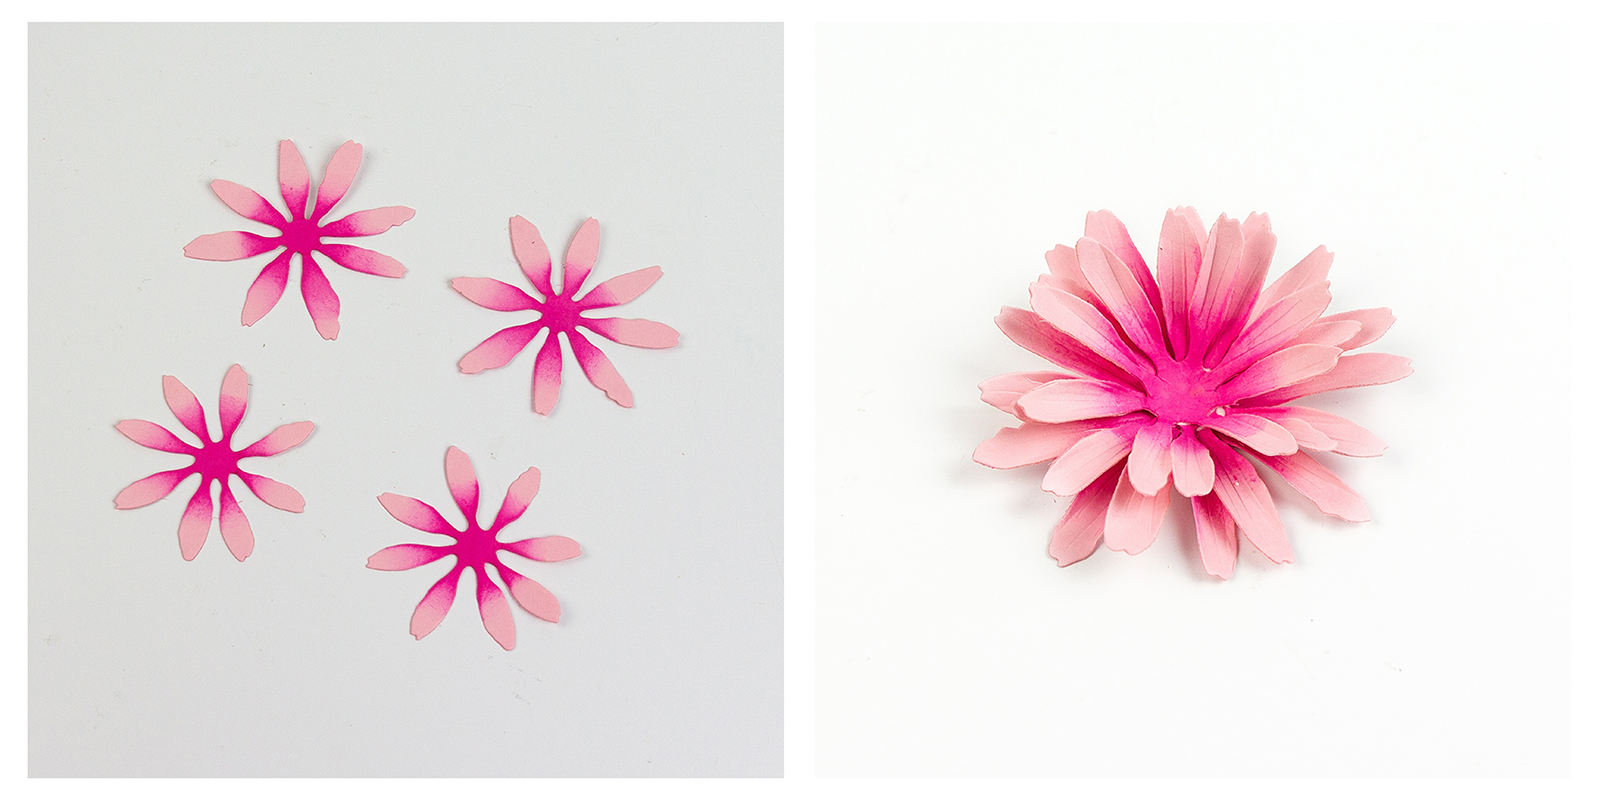
If you want to add Prills to your daisies, you will first need to cut the 4 base petal pieces. For my pink flower above, I used some Pink Sand Card Stock and blended the centers of my petals with some Picked Raspberry Distress Ink. I quickly shaped my petals and then glued them together, placing the two larger-sized petal pieces at the bottom.
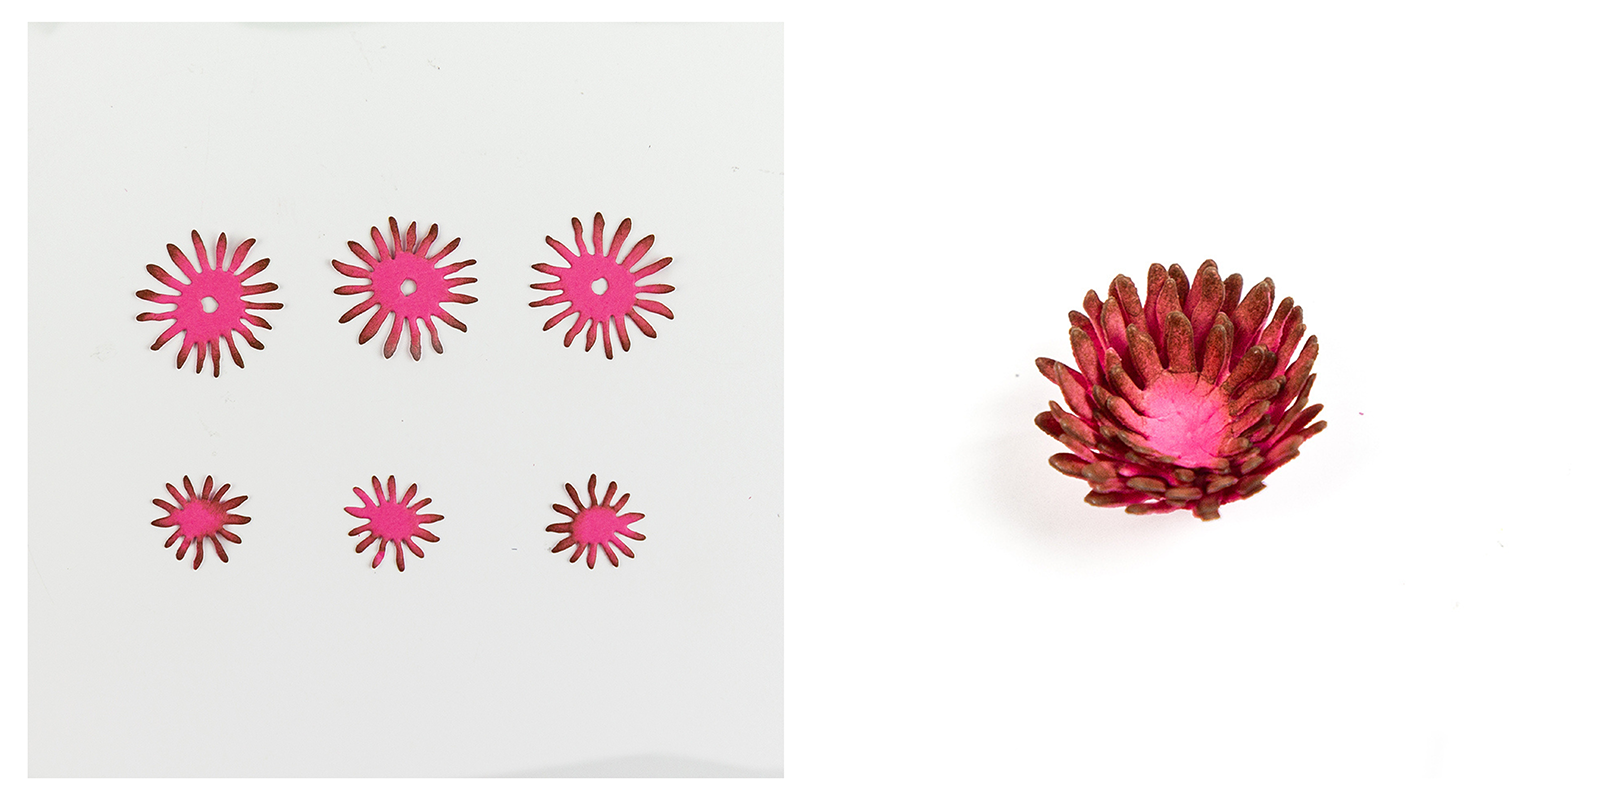
For the inner petals, I die-cut my pieces from some Fruit Punch Card Stock and lightly blended the tips of the pieces with some Ground Espresso Distress Ink to give them some quick shading and added dimension.
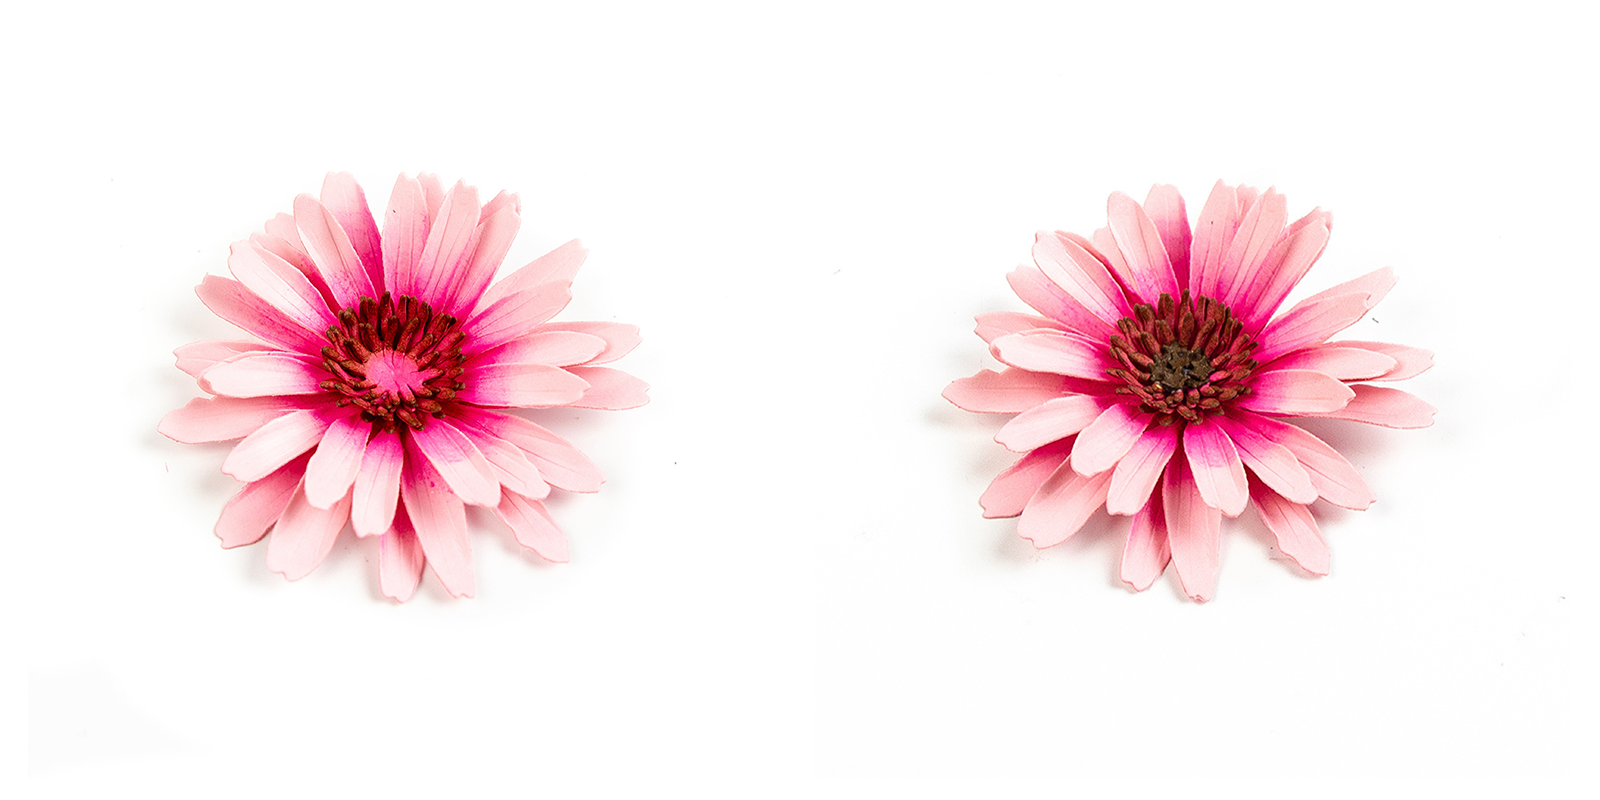
I attached these pink inner petals to my larger petals with some liquid adhesive (I used Bearly Art Precision Craft Glue for all of my flowers). I then added some inner florets that I had cut from some brown card stock. This is the spot where you will add your Prills if you want to. If you look at the picture on the right above, this is what a finished flower would look like without the Prills.
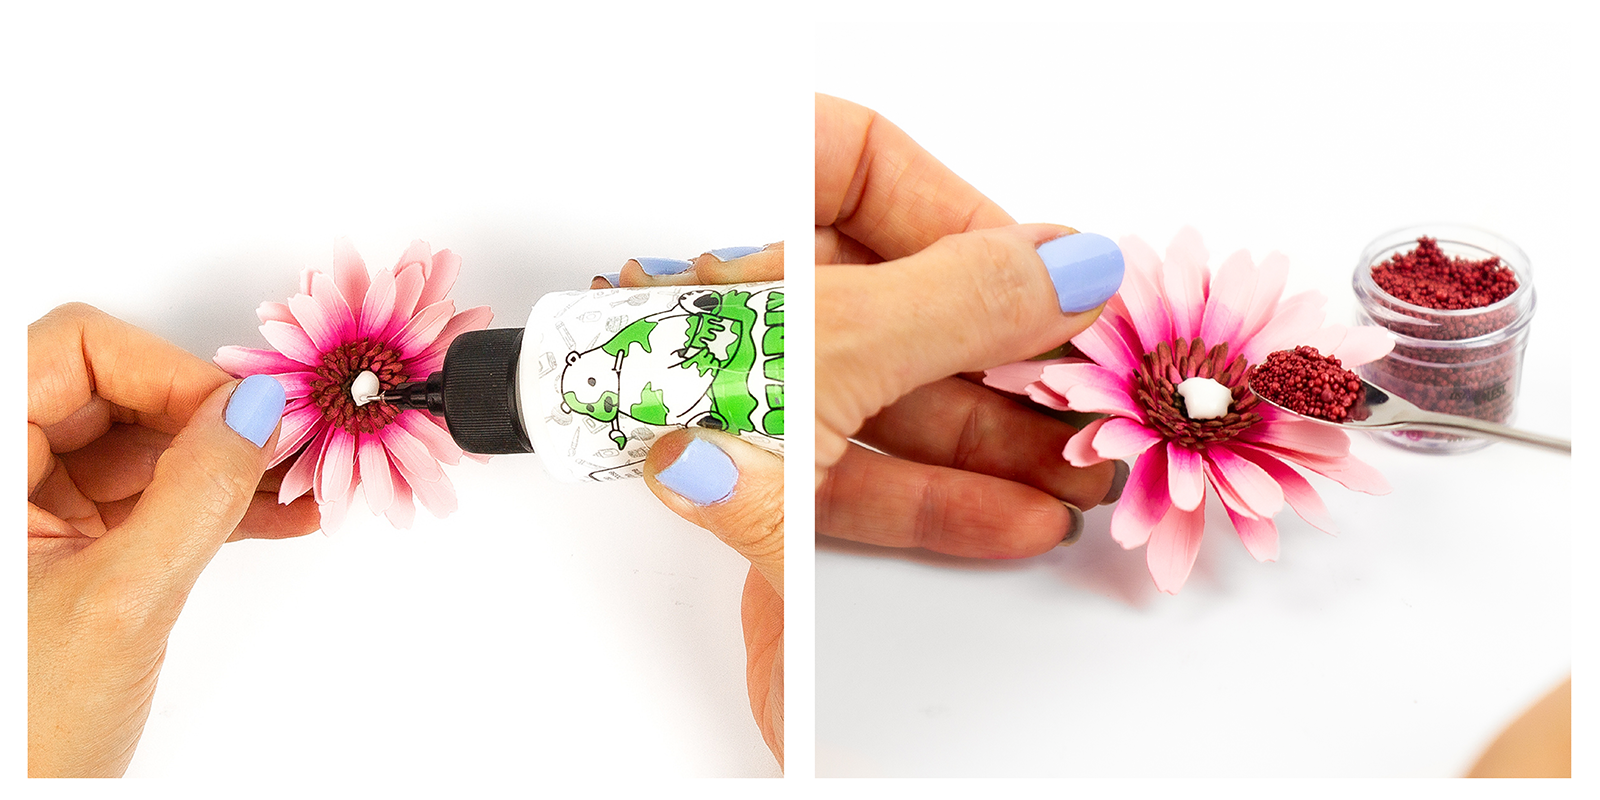
Adding your Prills is super easy! All you need to do is add some glue, scoop up some Prills (I used the color called Stop Whining) and then lightly dump them on top of the glue.
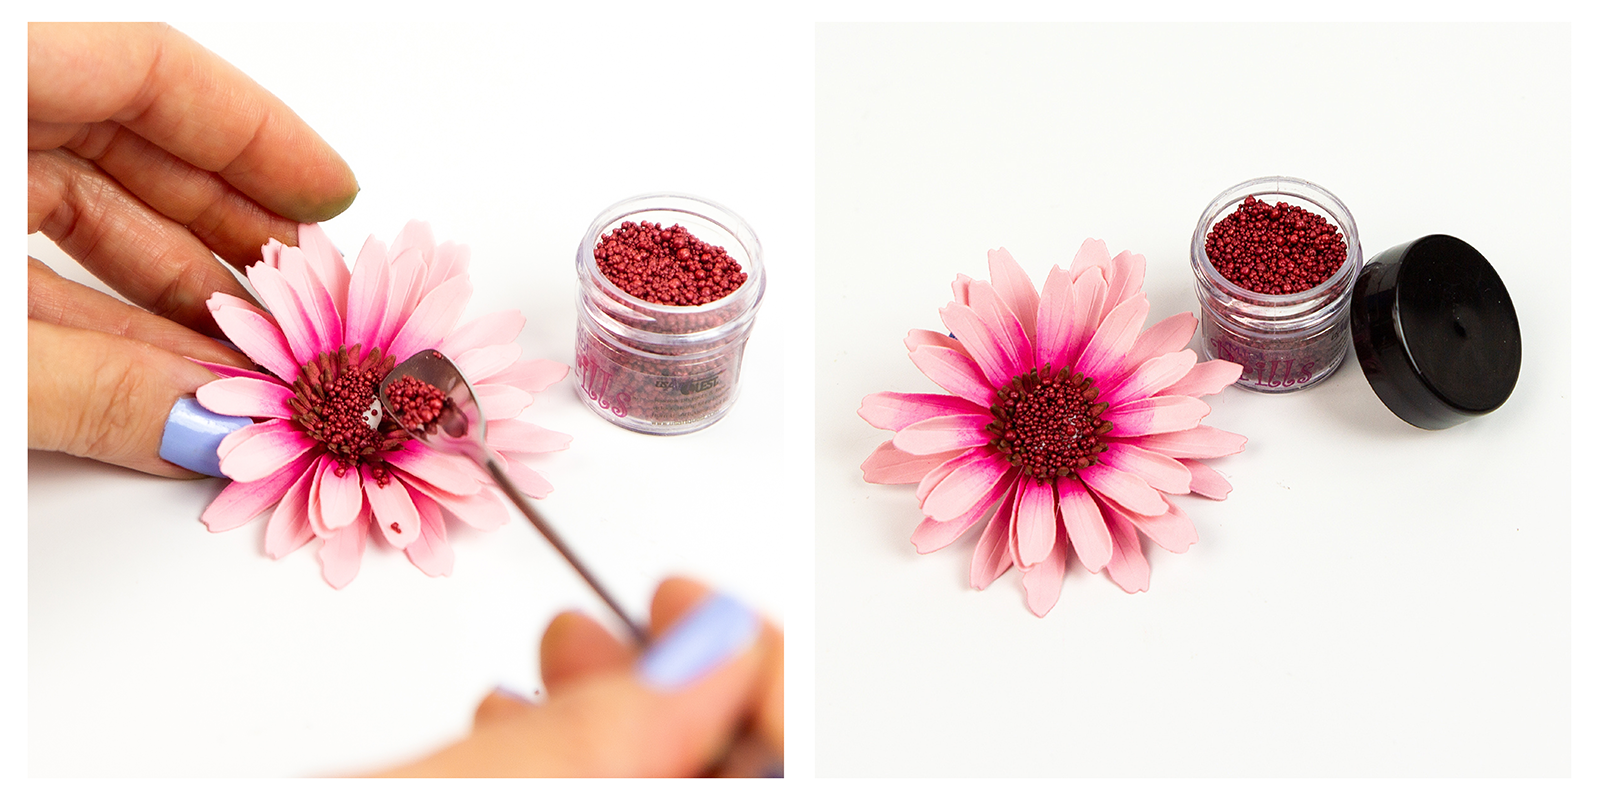
Once this part is finished, you can lightly pat them down and let the glue dry. Once it’s dry, simply tap off any excess into a coffee filter or into the garbage and you’re done! I love how the Prills look like actual seeds!
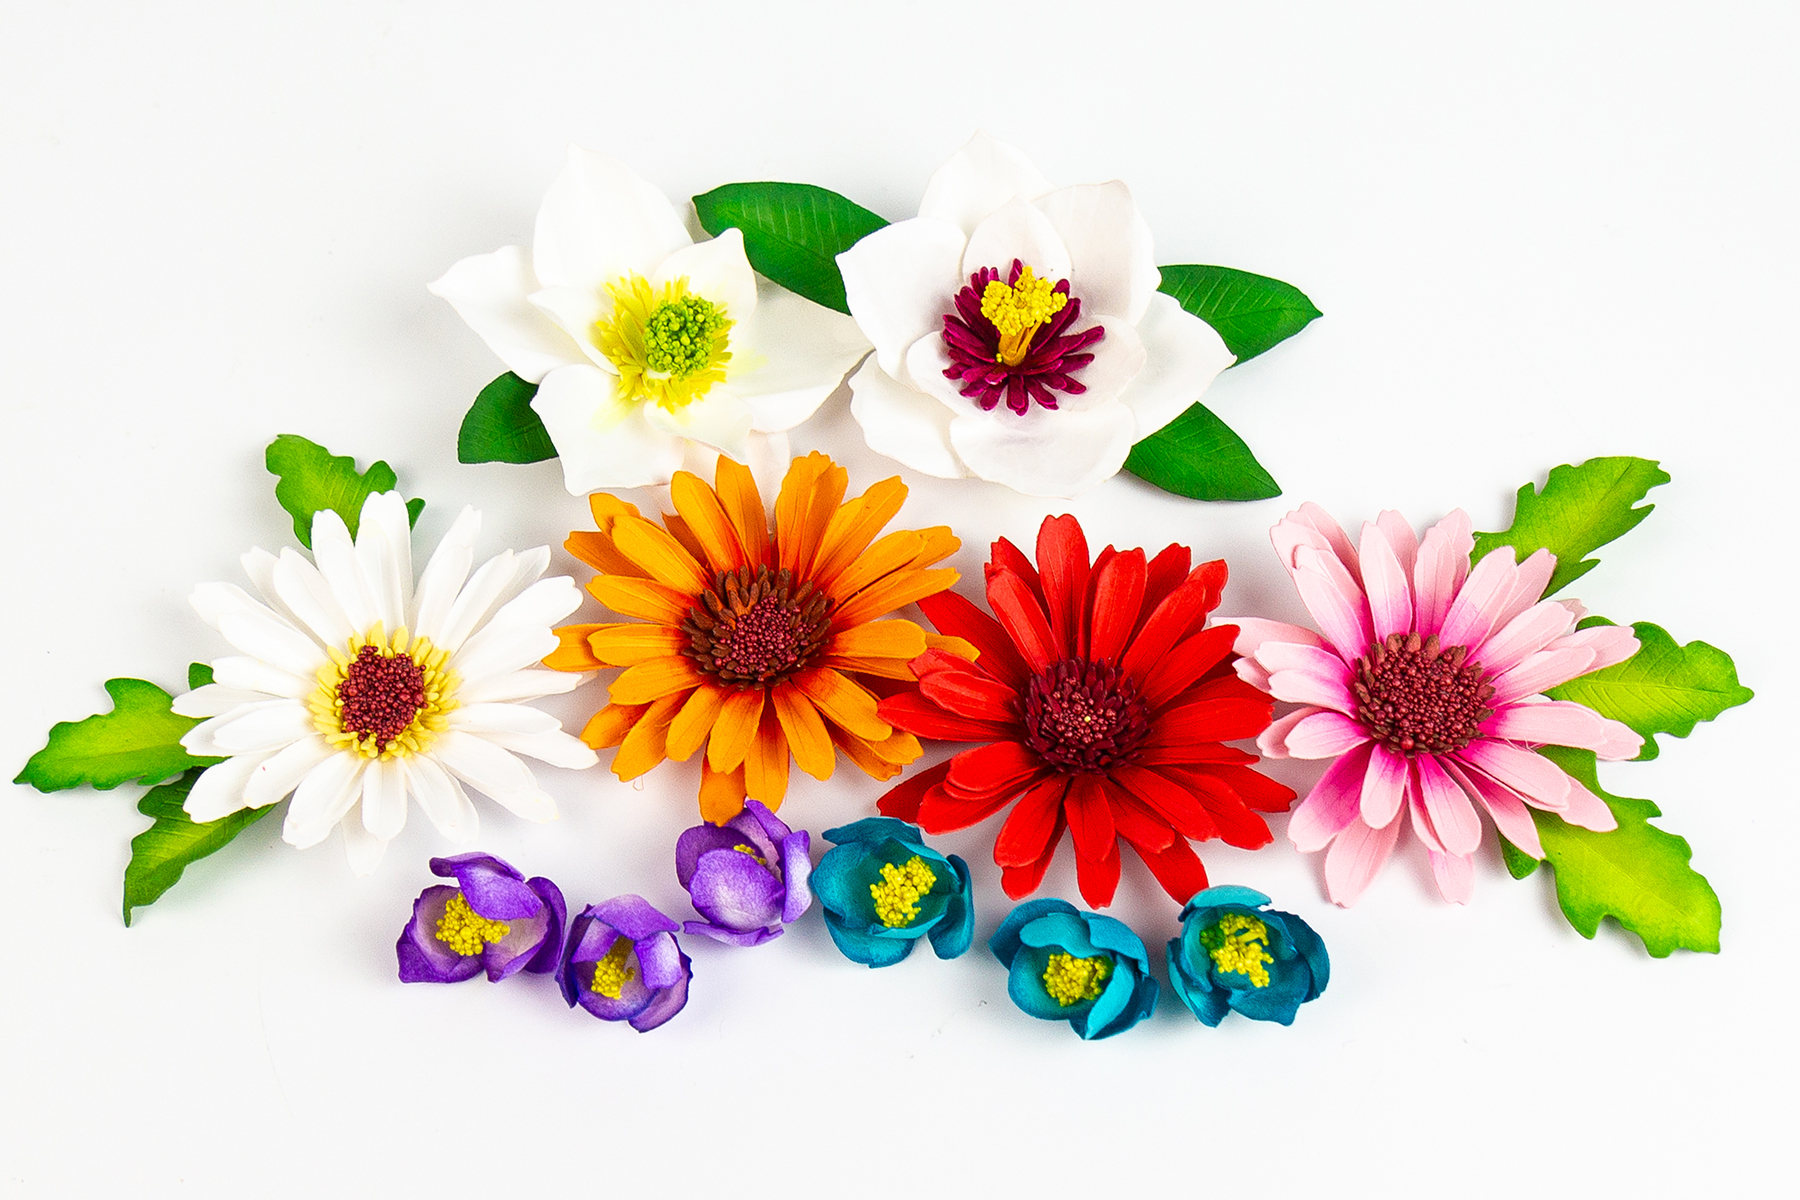
Southern Magnolias
The second way that you can add Prills is by adding them directly to the carpels (very center) of the flower.
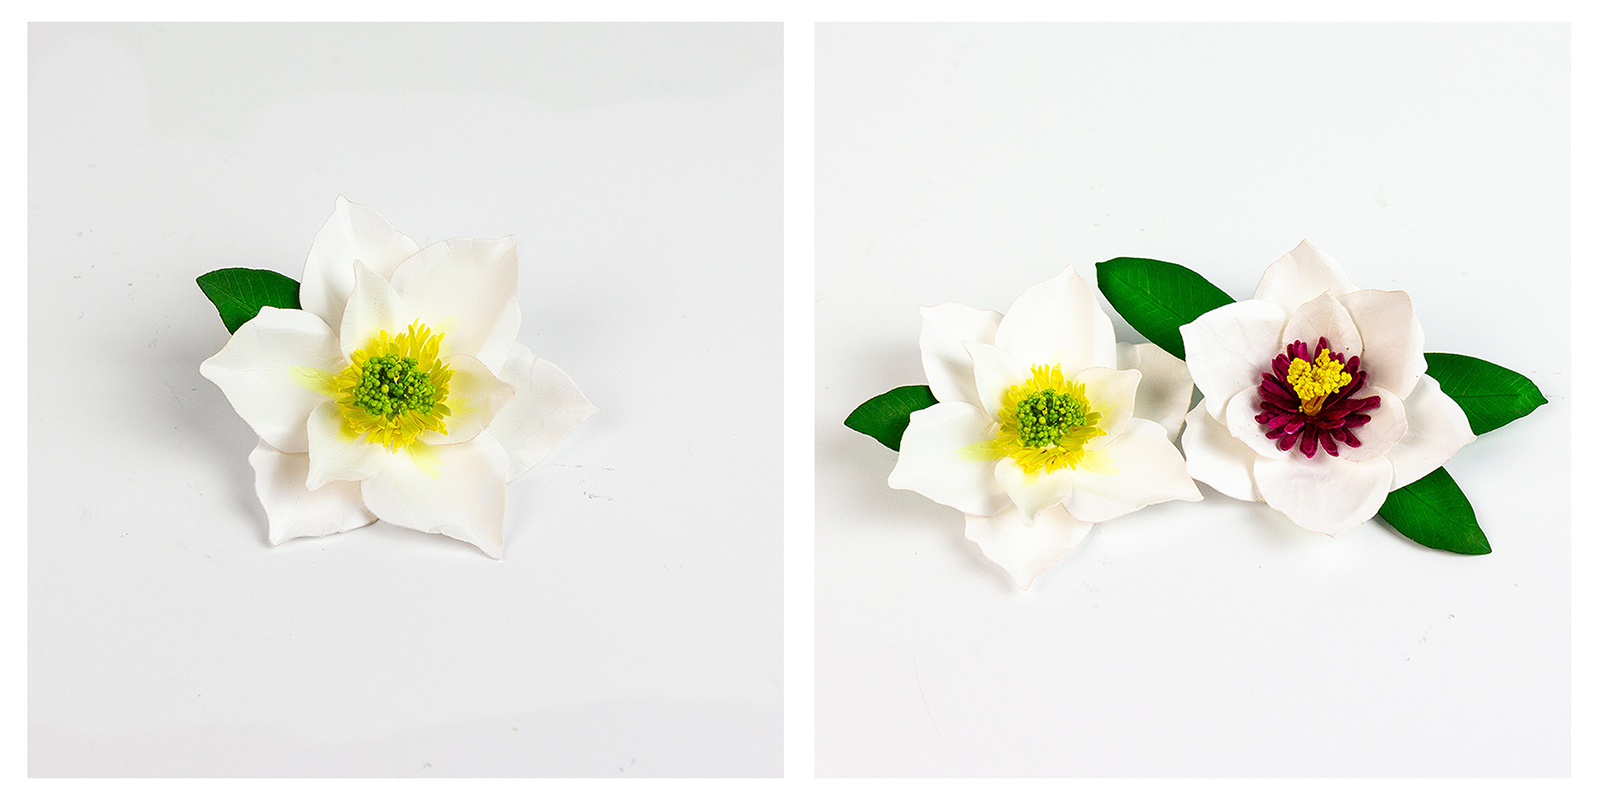
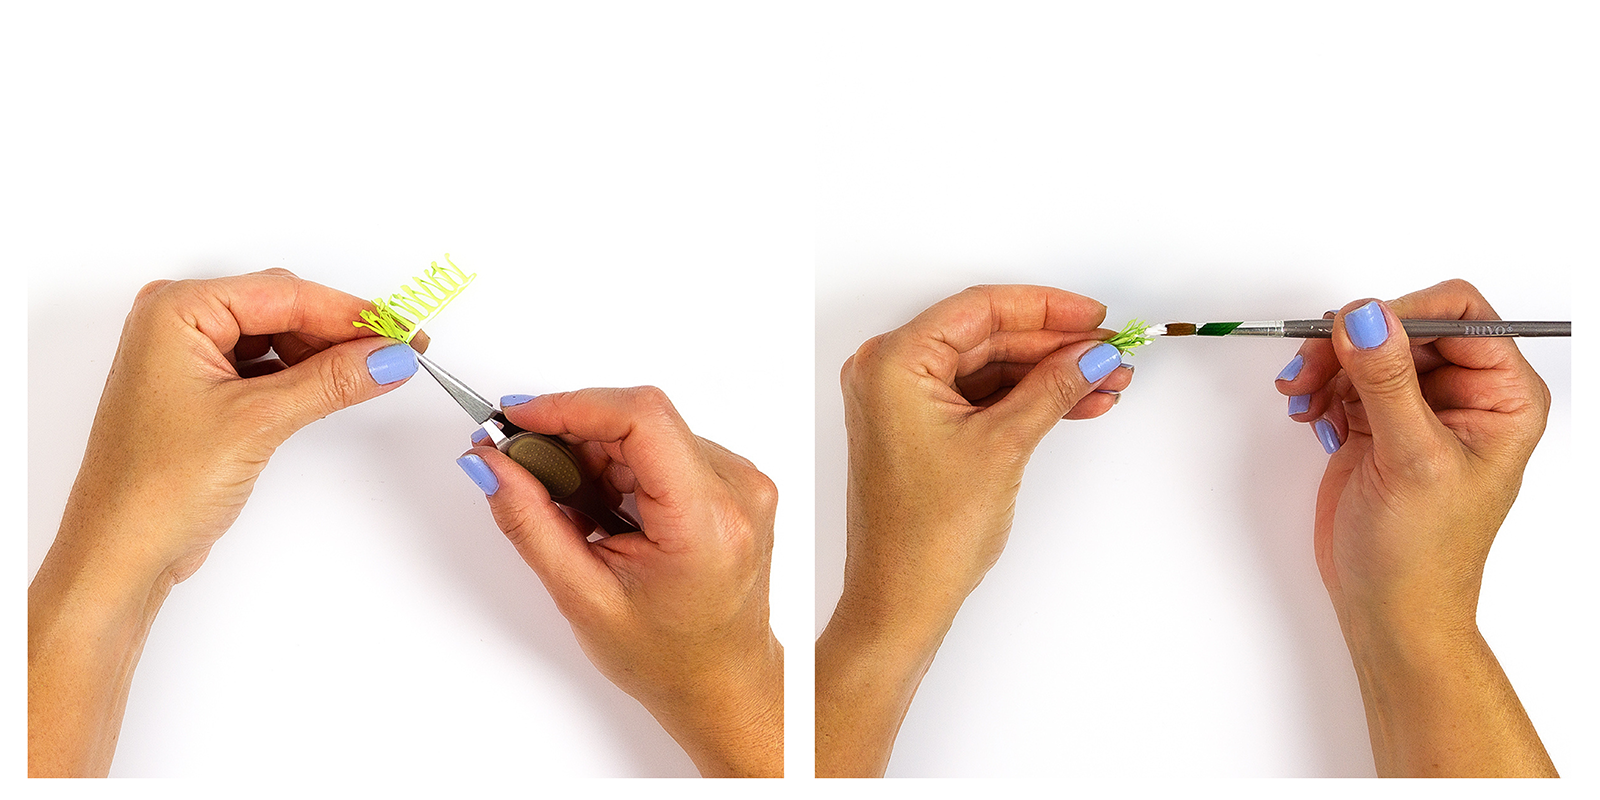
For my next example, I made a Magnolia using the Southern Magnolia Etched Dies also designed by Susan Tierney-Cockburn. I kept my flower simple by using Susan’s Garden Specialty Card Stock and adding just a small section of yellow to the center of each piece with a Copic Marker (I used Y11). To add your Prills, you first need to create your flower base. Susan has a step-by-step video HERE on how to create this gorgeous flower. Next (shown above) you will need to die cut the inner frilly part of the flower six times. You don’t have to follow this next step, but if you cut each little stem piece partway down the center (as shown in the photo above on the right) you get more dimension and “frill” to the inside of your flower.
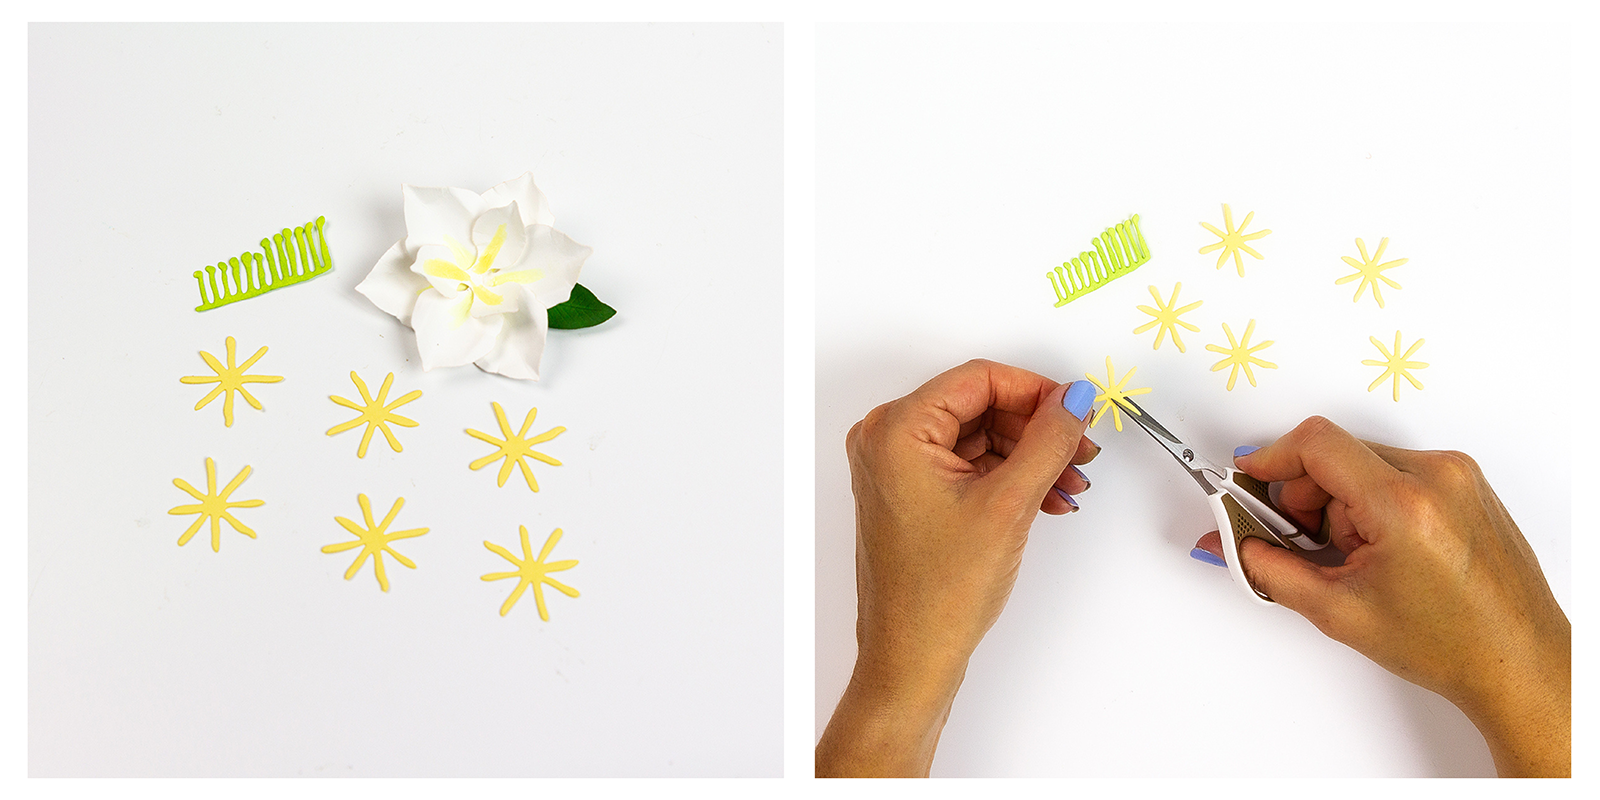
If you end up doing this step, this is what the stamens will now look like. Next, you can shape them, attach them all together with some liquid adhesive, and then adhere them to the inner center of your flower.
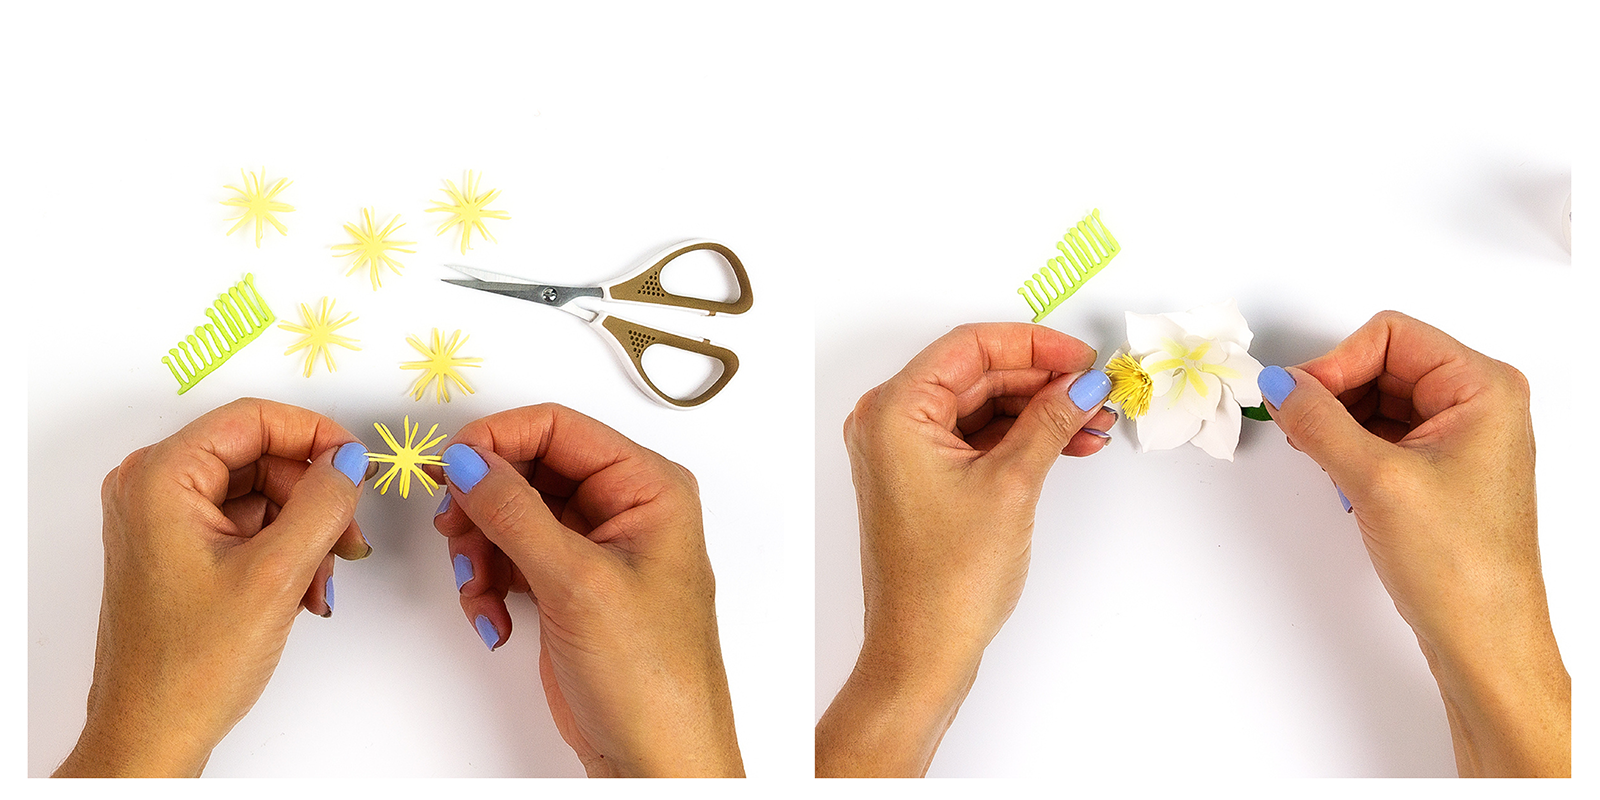
You can also do the same to the very centerpiece of the flower by cutting each little “stem” of the paper in half. I find that by doing this, more Prills can attach to each section of the paper. Once finished, add a small strip of glue to the bottom of this strip on the backside.
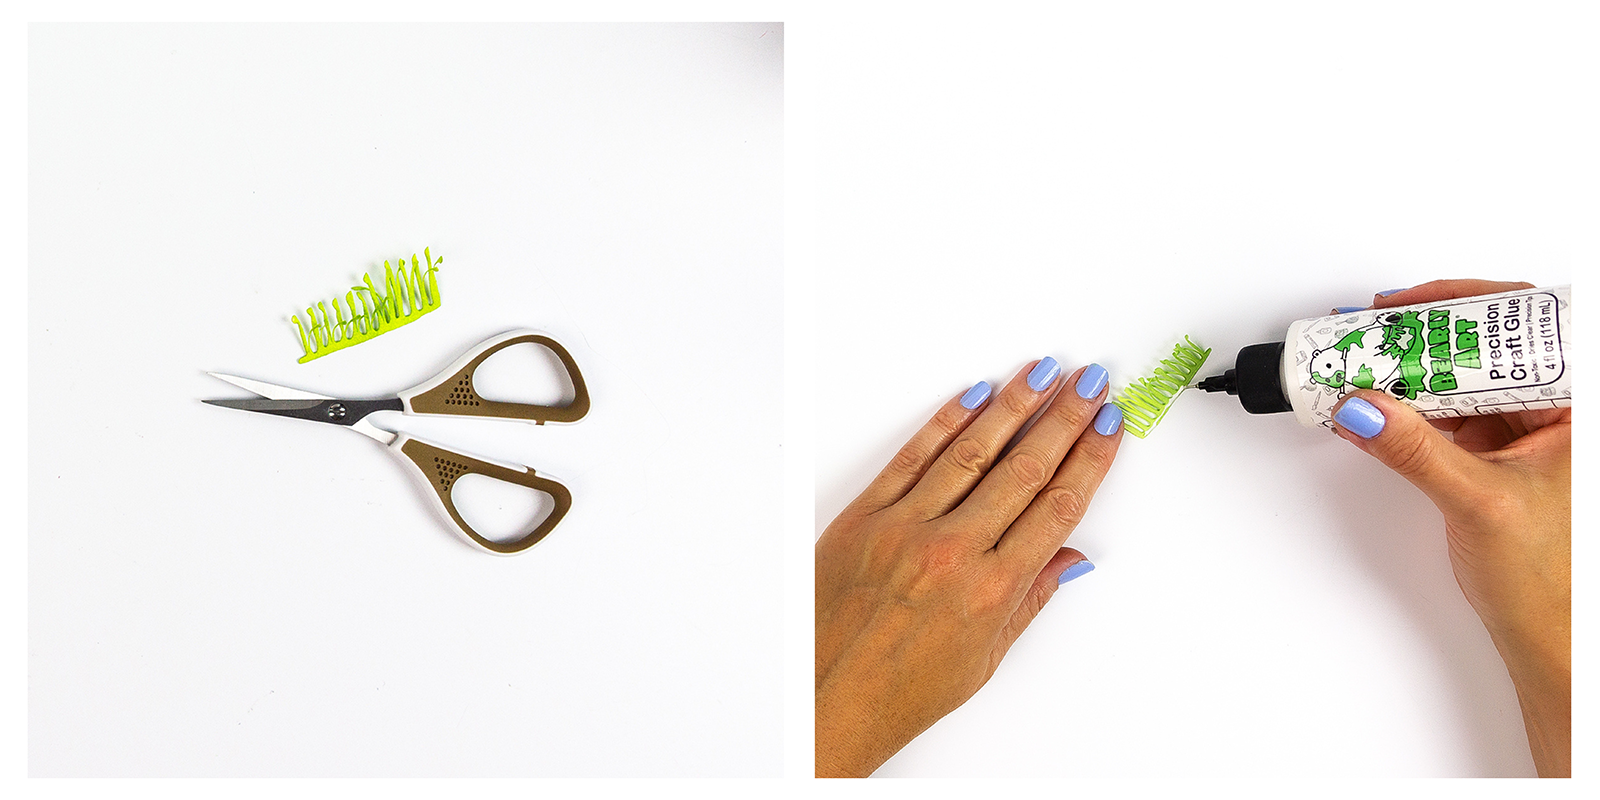
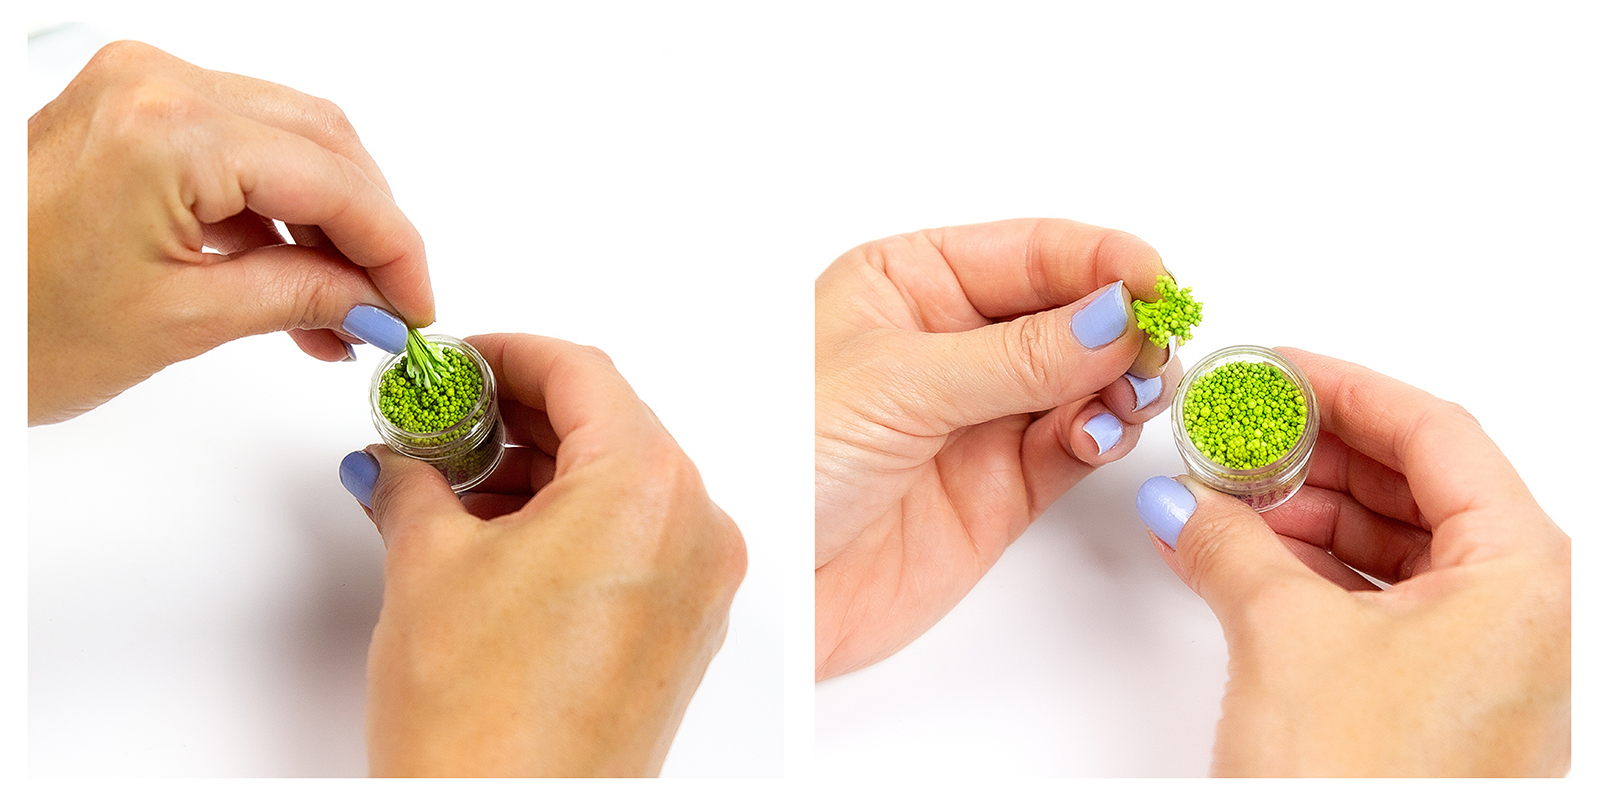
Once your glue is added, you simply need to roll this piece up until the bottom strip lays flat against itself. To add the Prills, you can easily brush on a light layer of glue with an old paintbrush or glue brush to each section of the paper.
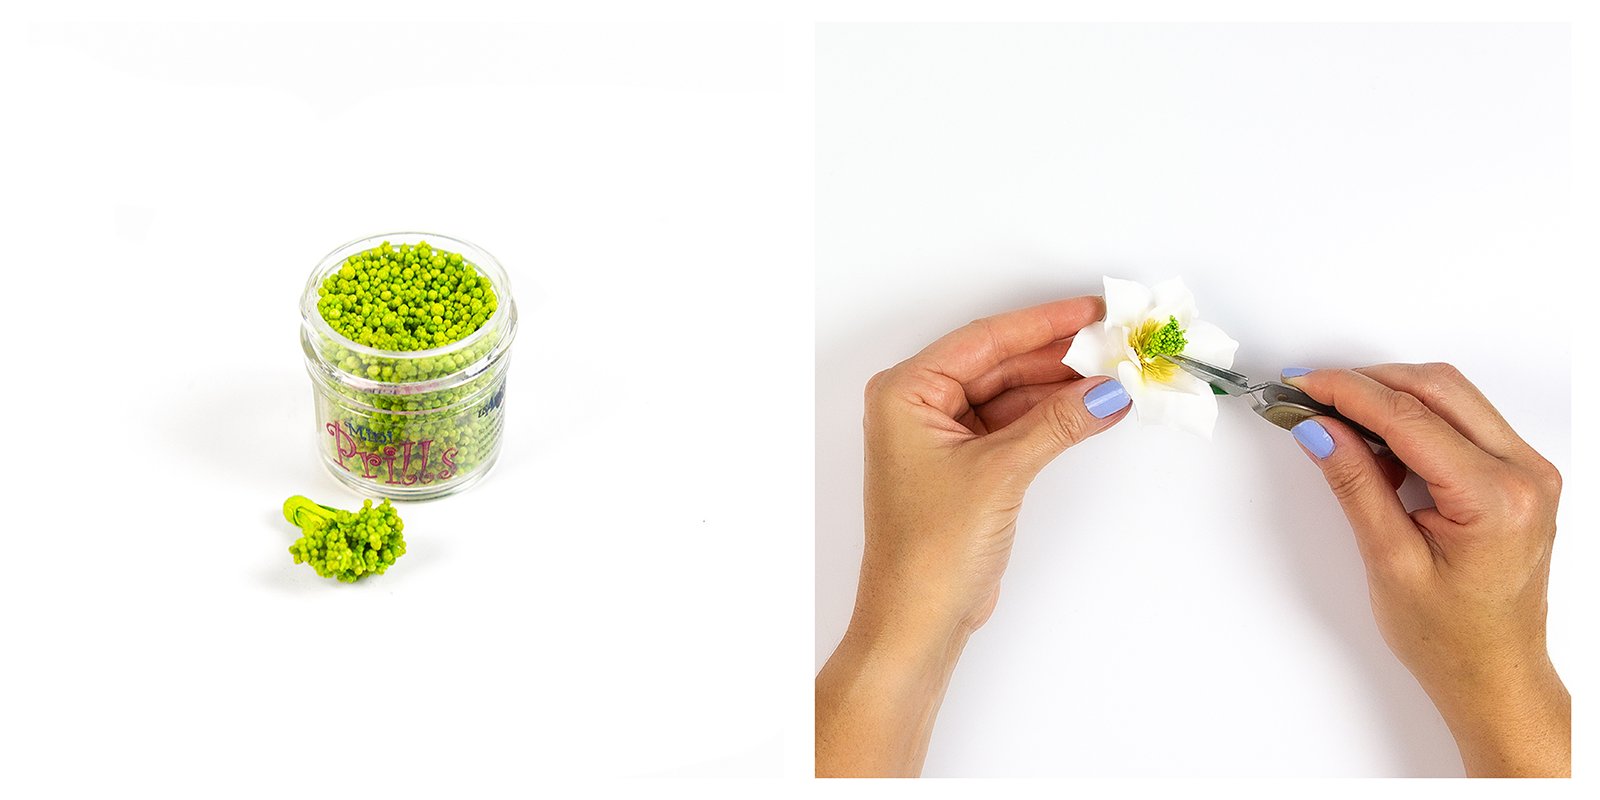
Once that’s done, simply dip your floral centerpiece into the Prills and lightly roll it around. Voila! Your piece should be covered in Prills and look amazing! For my piece above, I used the color Ribbit.
Lastly, add a good amount of glue to the center of your flower and attach the piece with the Prills.
Here are two different examples with some different colored Prills. For the flower on the far right, I used the color You Had Me at Yellow.
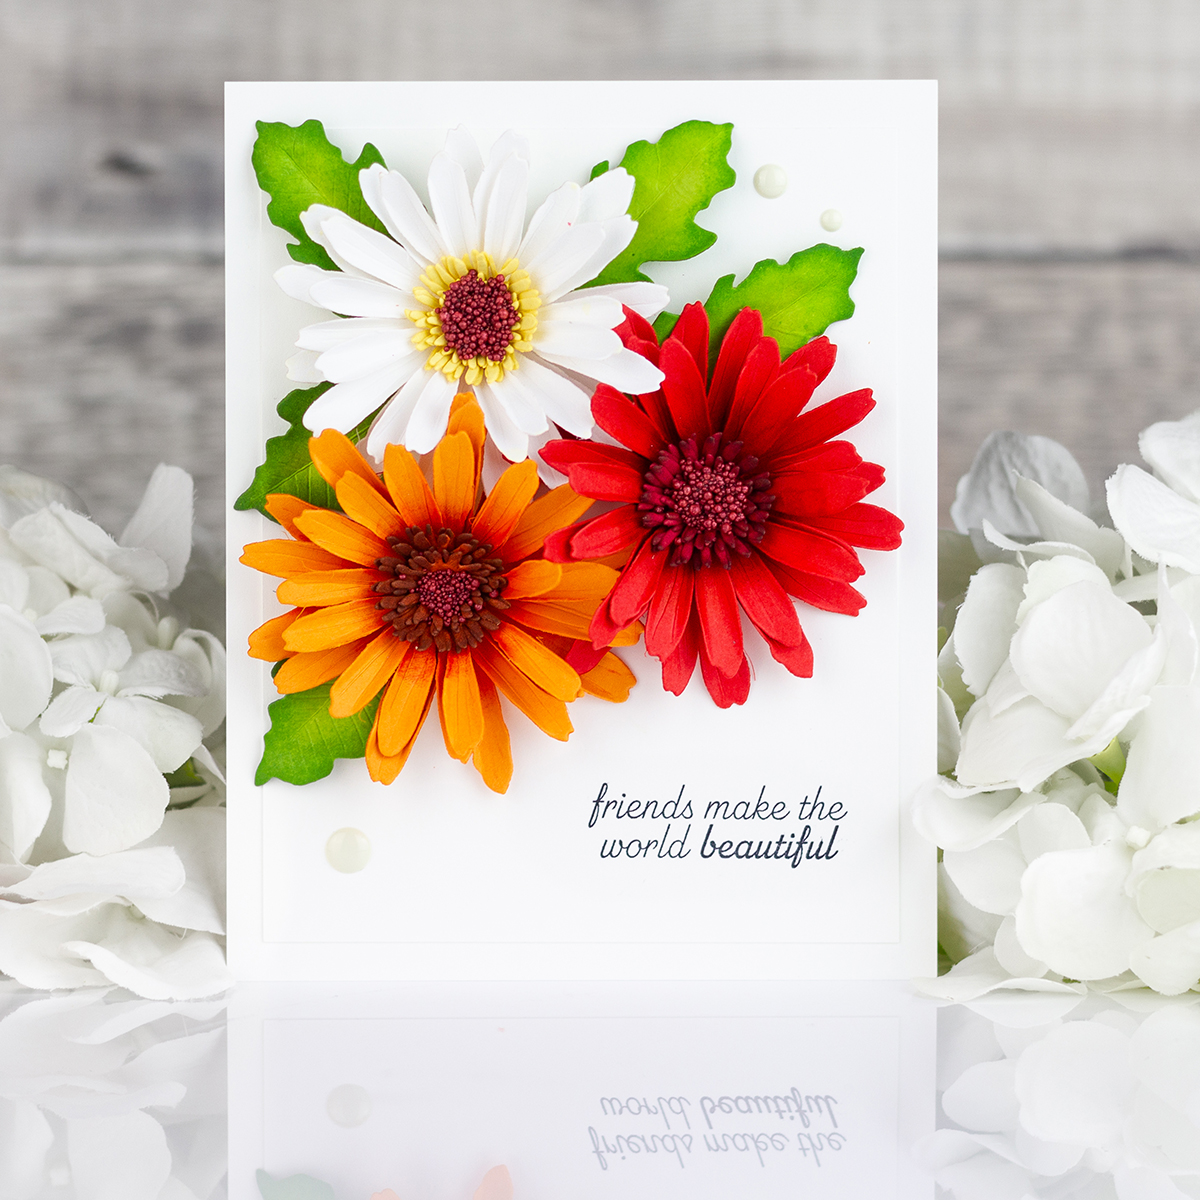
I love the gorgeous detail on these flowers! Dressing them up with Prills adds such a WOW factor.
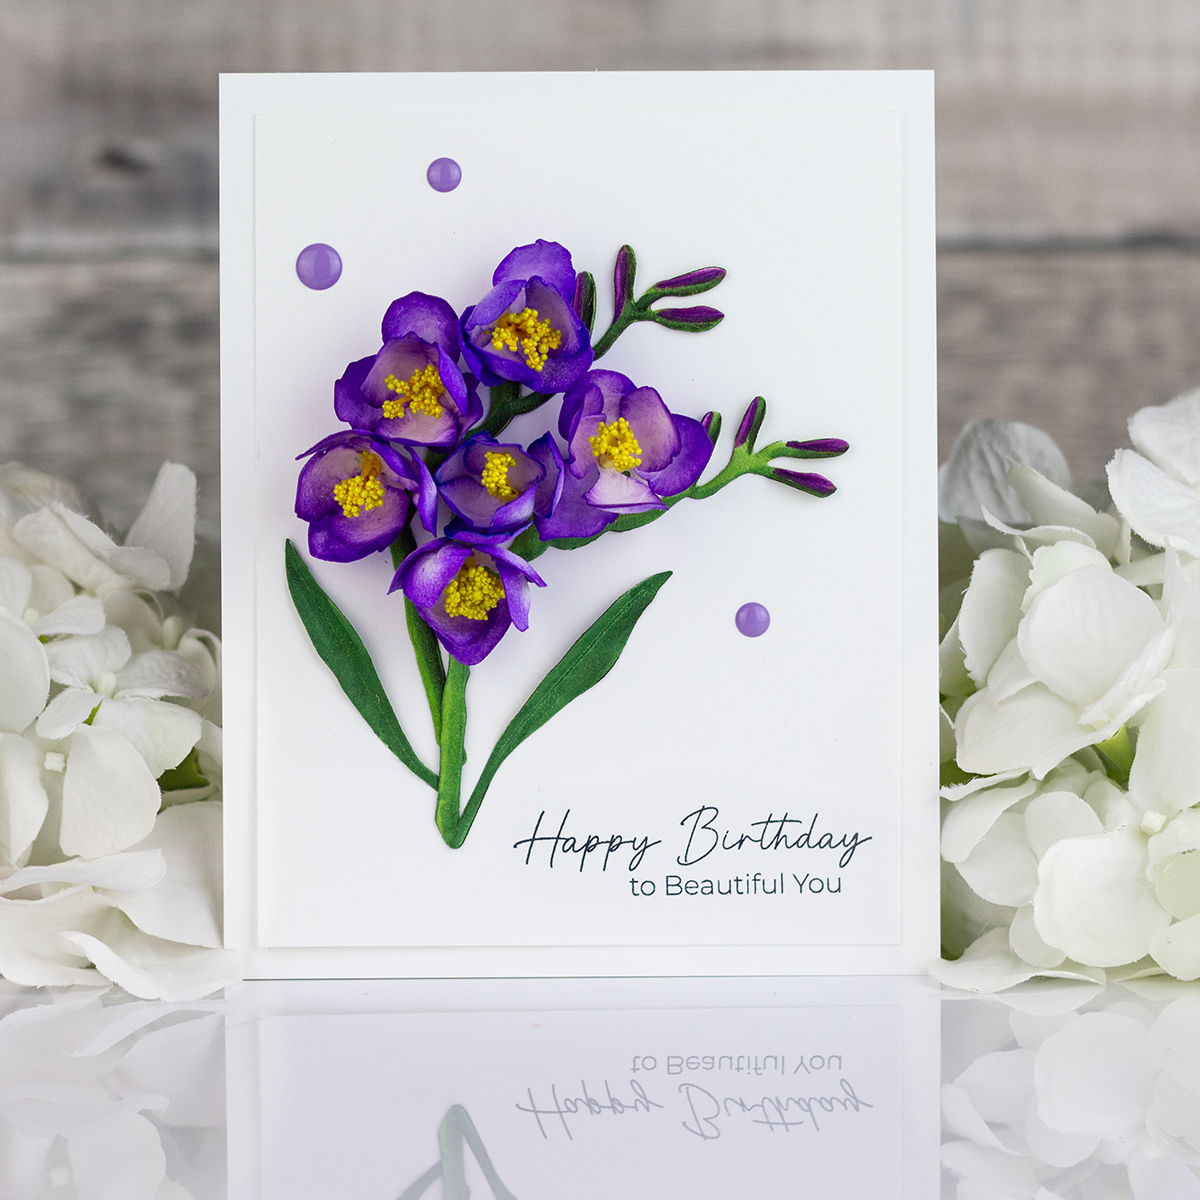
I made one last project featuring some beautiful Freesias using the Freesias Etched Dies. I used the same method to add Prills that I used for my Magnolias. If you’d like a detailed video on how to make the flower itself, click HERE.
Thank you all so much for taking the time to drop by! I hope you enjoyed my cards and flowers today! I also hope that you will be inspired to try using Prills yourself.

If you liked these cards and want some more inspiration, feel free to check out my INSTAGRAM page.
Rachel
Spellbinders Supplies:

Other supplies
Memento Tuxedo Black Ink, Picked Raspberry Distress Ink, Ground Espresso Distress Ink
2 Comments
Janet
How beautiful, the added Prills really make a difference. Thank you, for such marvelous inspiration
Anne Sturgeon
These are so beautiful. I did not know about the pollen or prills from Spellbinders! Definitely going to check them out. Lovely job Rachel and TFS