Crafting With Doodlebug – Cardmaking Ideas You Need To Try
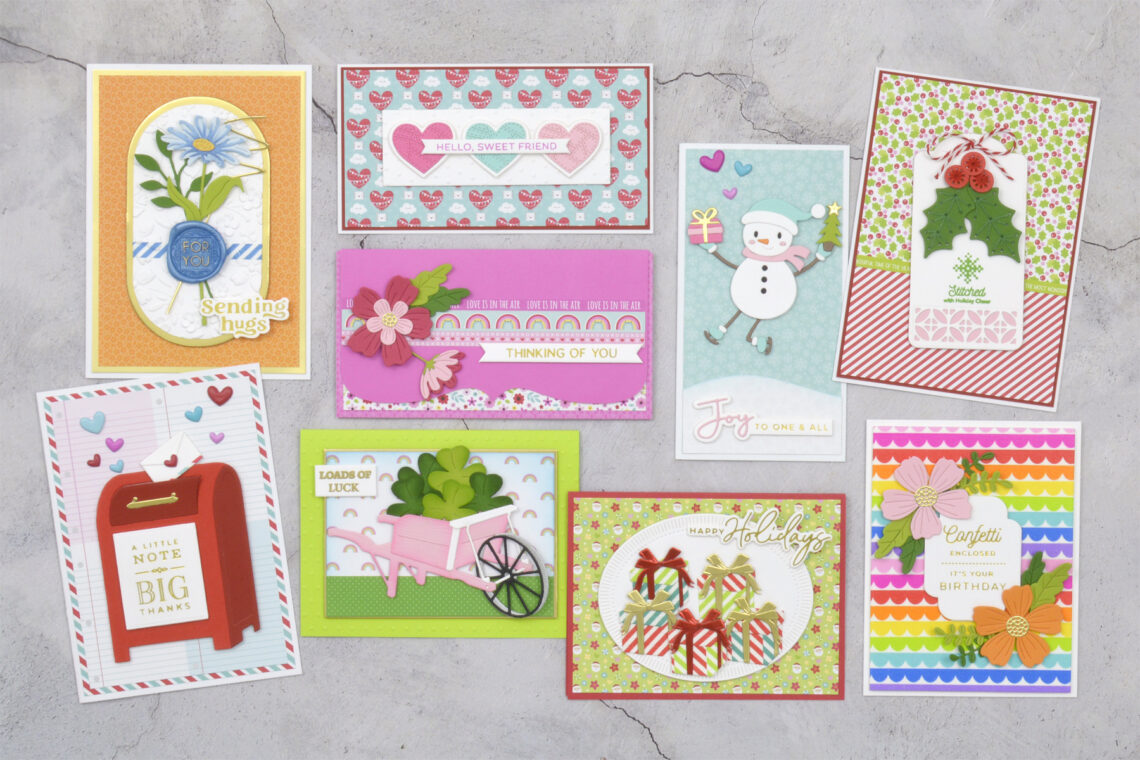
Hi there, this is Annie Williams and I’m excited to be back on the blog today to share a bunch of cards made with some of the beautiful Doodlebug products available in the Spellbinders shop. I paired many of the brightly colored cards and envelopes, sweet patterned papers, and fun washi tapes and embellishments with some of my favorite Spellbinders dies to create cards for many different kinds of occasions.
Mailbox Thank You Card
I hear a lot of crafters say that they love patterned paper, but struggle to use it on their projects sometimes, especially those with bolder colors and patterns. Here I turned a bright stripe pattern into just the border on this otherwise simple and cute thank-you card.
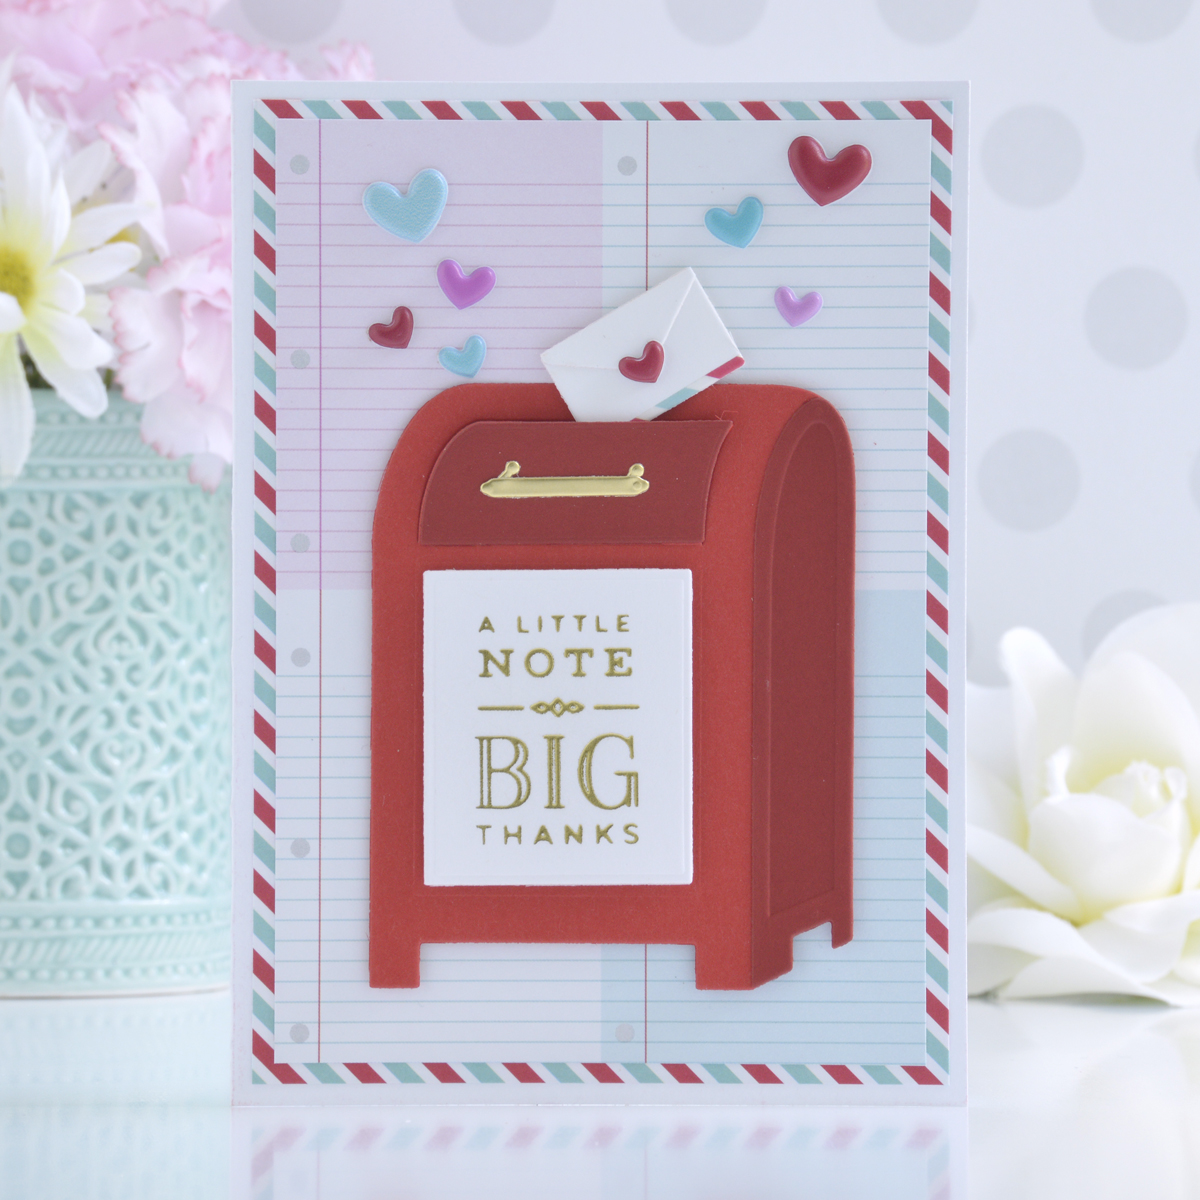
I started by trimming the striped paper from the Lots of Love Paper Pad to 4.25” x 6” and added it to one of the white A6 card bases from the Fall Cards & Envelopes pack. To tone down this bold pattern, I trimmed a piece of notebook paper from the same pad to 4” x 5.75” and added it to the center. Now I have the perfect little border for my card!
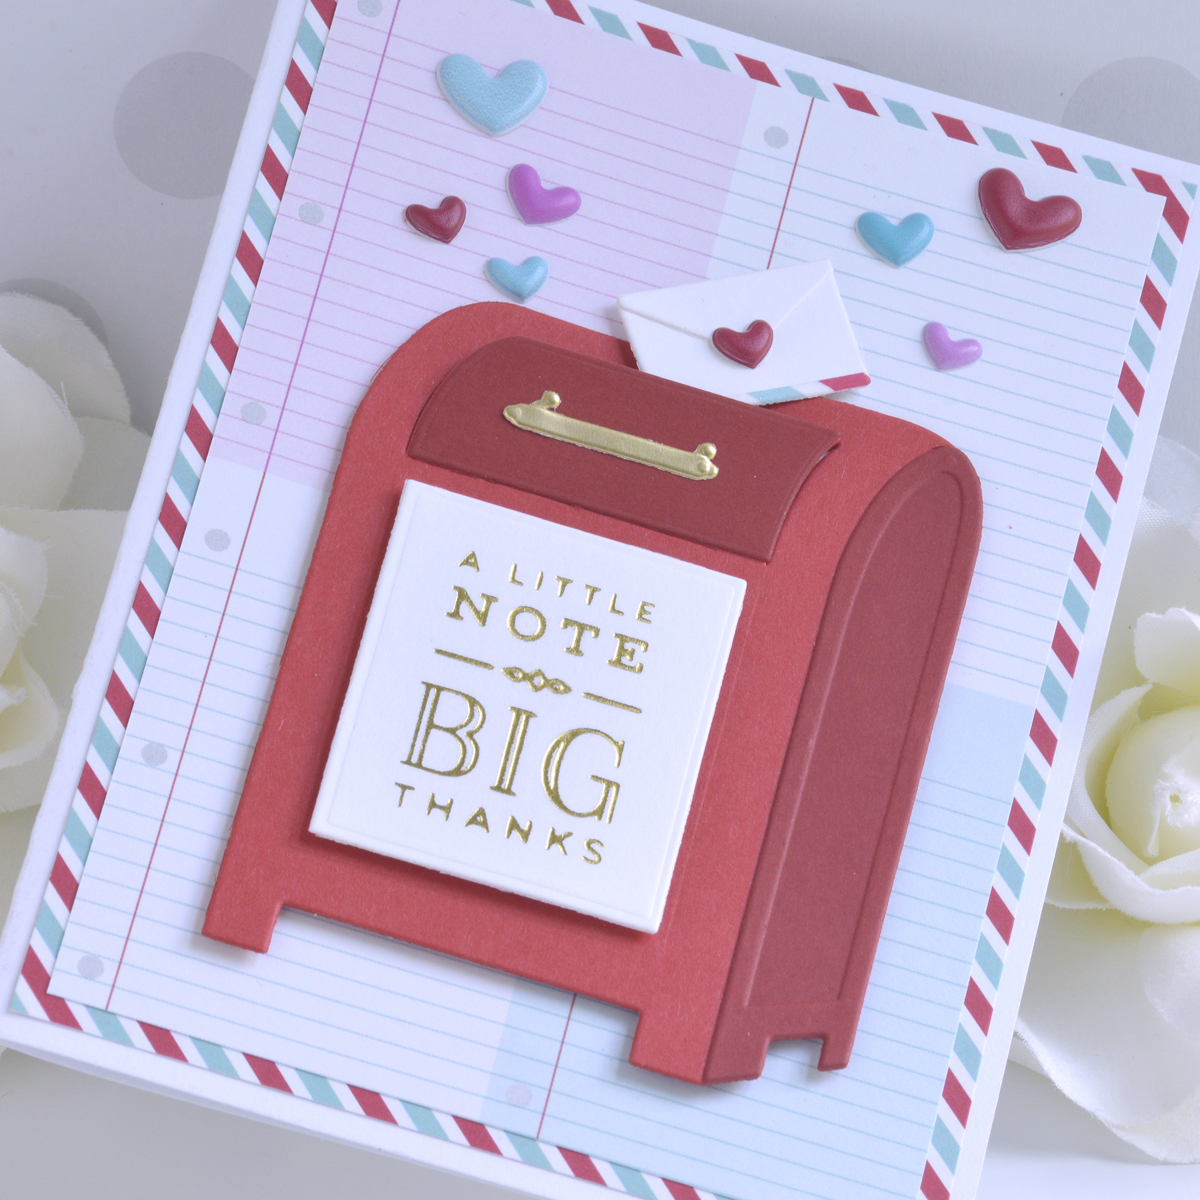
The mailbox theme in this paper pad inspired me to break out one of my favorite die sets from Spellbinders – Parcel & Post Mailbox. I cut the pieces from Poppy Field, Mirror Gold, and Pomegranate Cardstock and added a sentiment foiled in Gold Hot Foil using the All Occasion Mailbox Greetings Glimmer Plate Set.
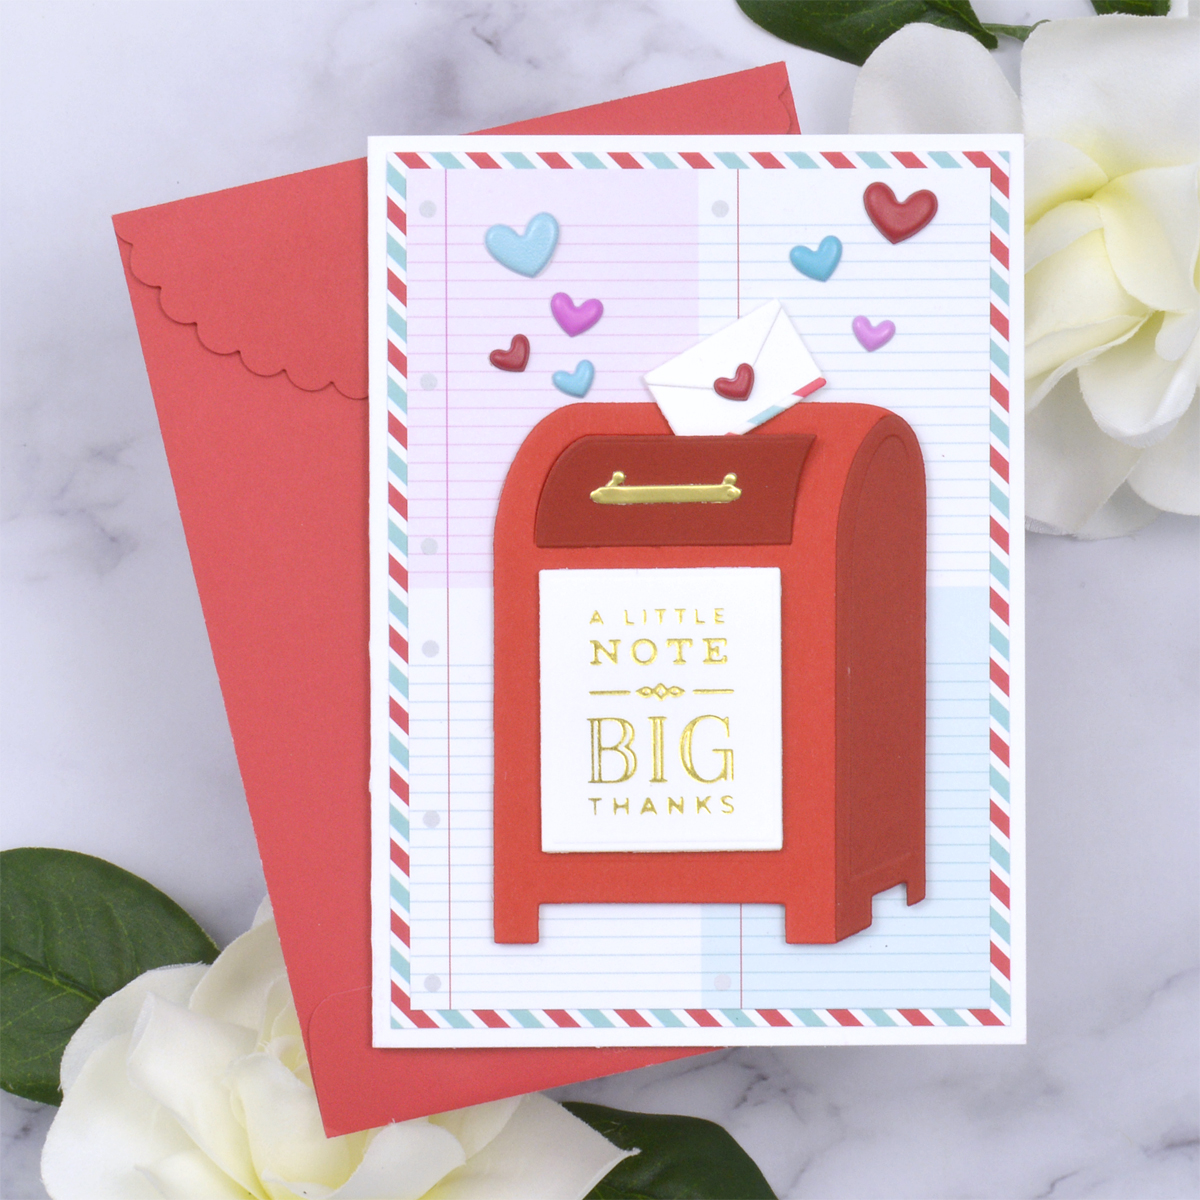
To finish off the card, I added some Doodlebug Airmail Washi Tape to white cardstock and die cut the envelope from the Parcel & Post Mailbox Die Set from it, positioning the die so that only a tiny sliver of stripes would end up on the bottom of the envelope. Then I added Ladybug, Bubblegum, and Swimming Pool Puffy Hearts to the envelope and bursting from the mailbox.
Stitched With Holiday Cheer Card
Now we can get a little braver with our backgrounds! For this cheerful card, I chose some busy patterned papers for my card front but balanced it a bit with a simpler focal image.
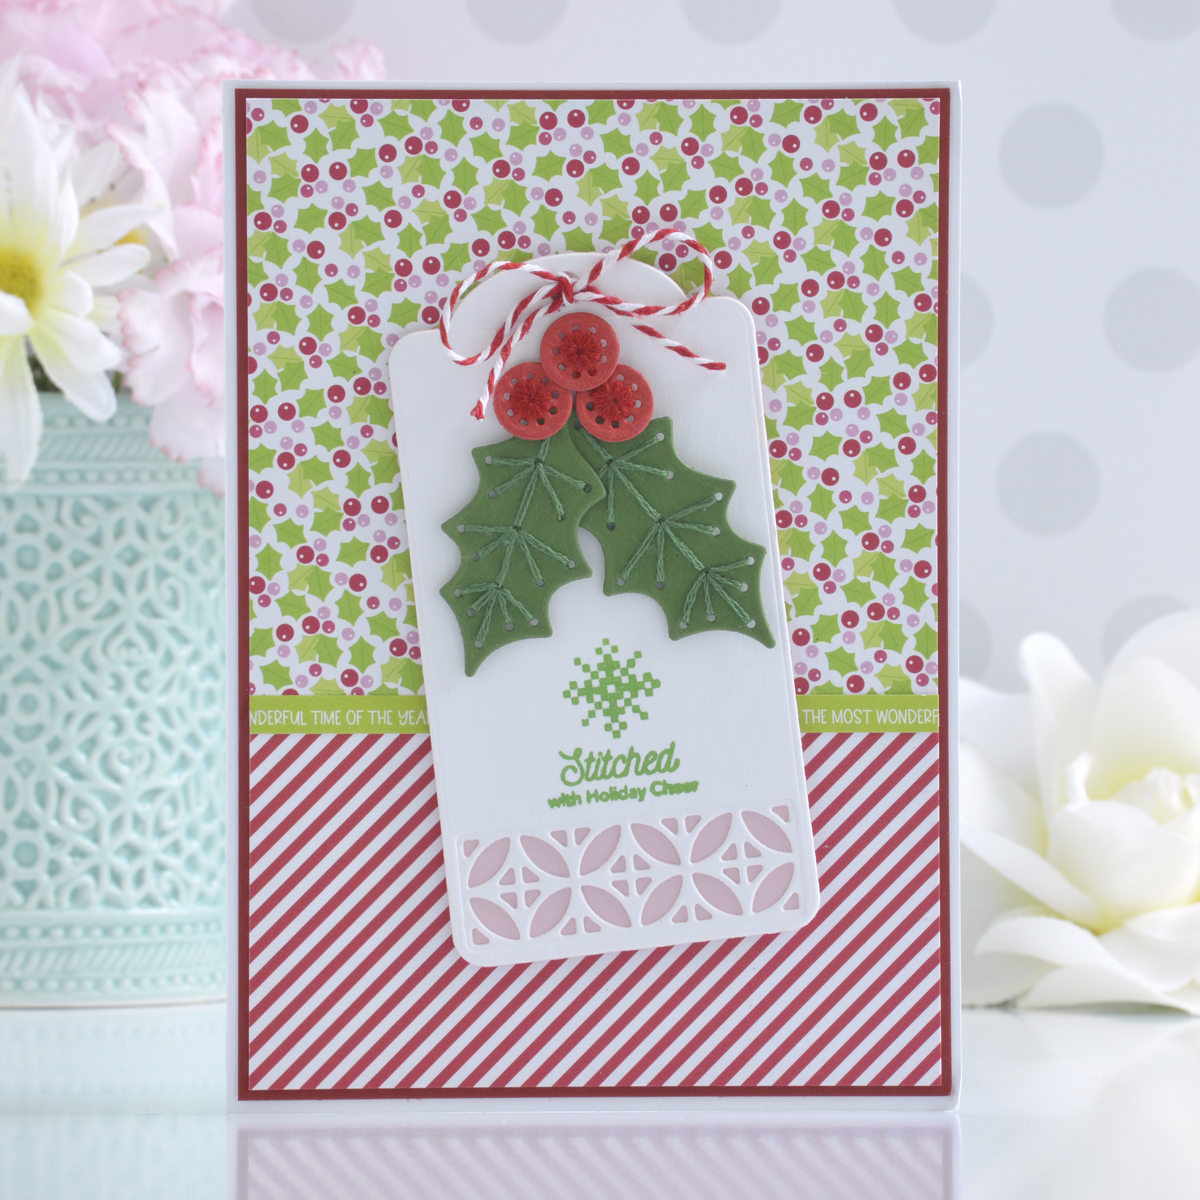
I started by trimming some of the holly patterned paper from the Candy Cane Lane Paper Pad to 4.25” x 6”. After adding a smaller piece of red striped paper from the pad on top (about 4.25” x 2.25”), I adhered a tiny sentiment border (trimmed out of one of the pages in the pad) on top of where the two patterns met. Then I matted this whole background with Pomegranate Cardstock and adhered it to one of the white A6 card bases from the Christmas Cards & Envelopes pack.
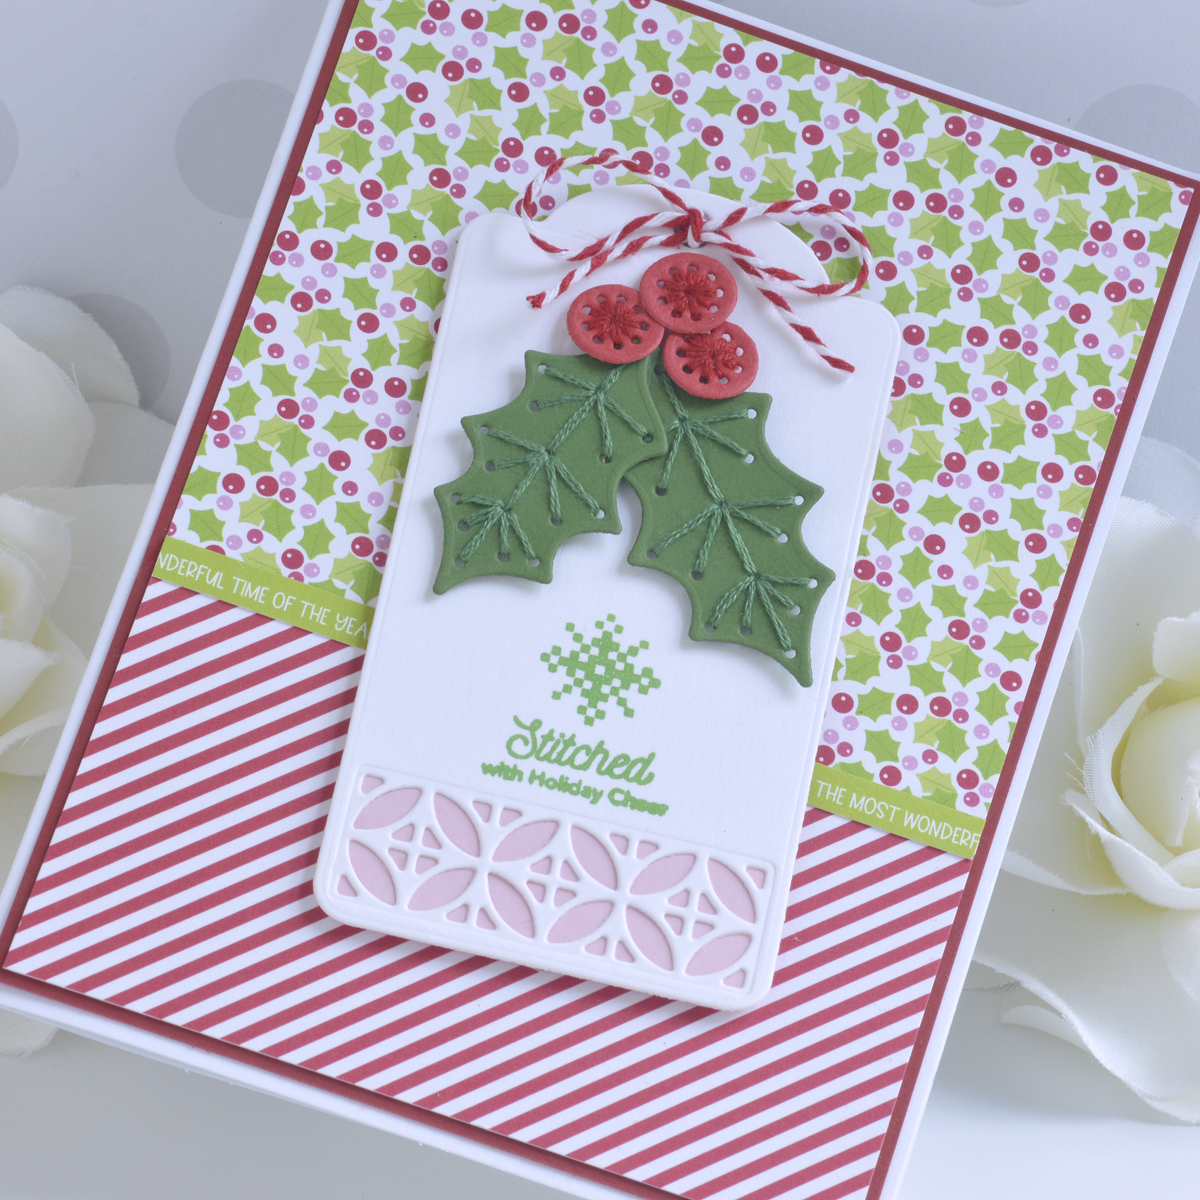
With all of that color in the background, I next cut a simple tag out of white and Pink Sand Cardstock using the Create A Decorative Tag Die Set…this gives the eye someplace to rest. The sentiment was stamped in green ink using one of the greetings from the Handmade Gift Tags Stamp Set.
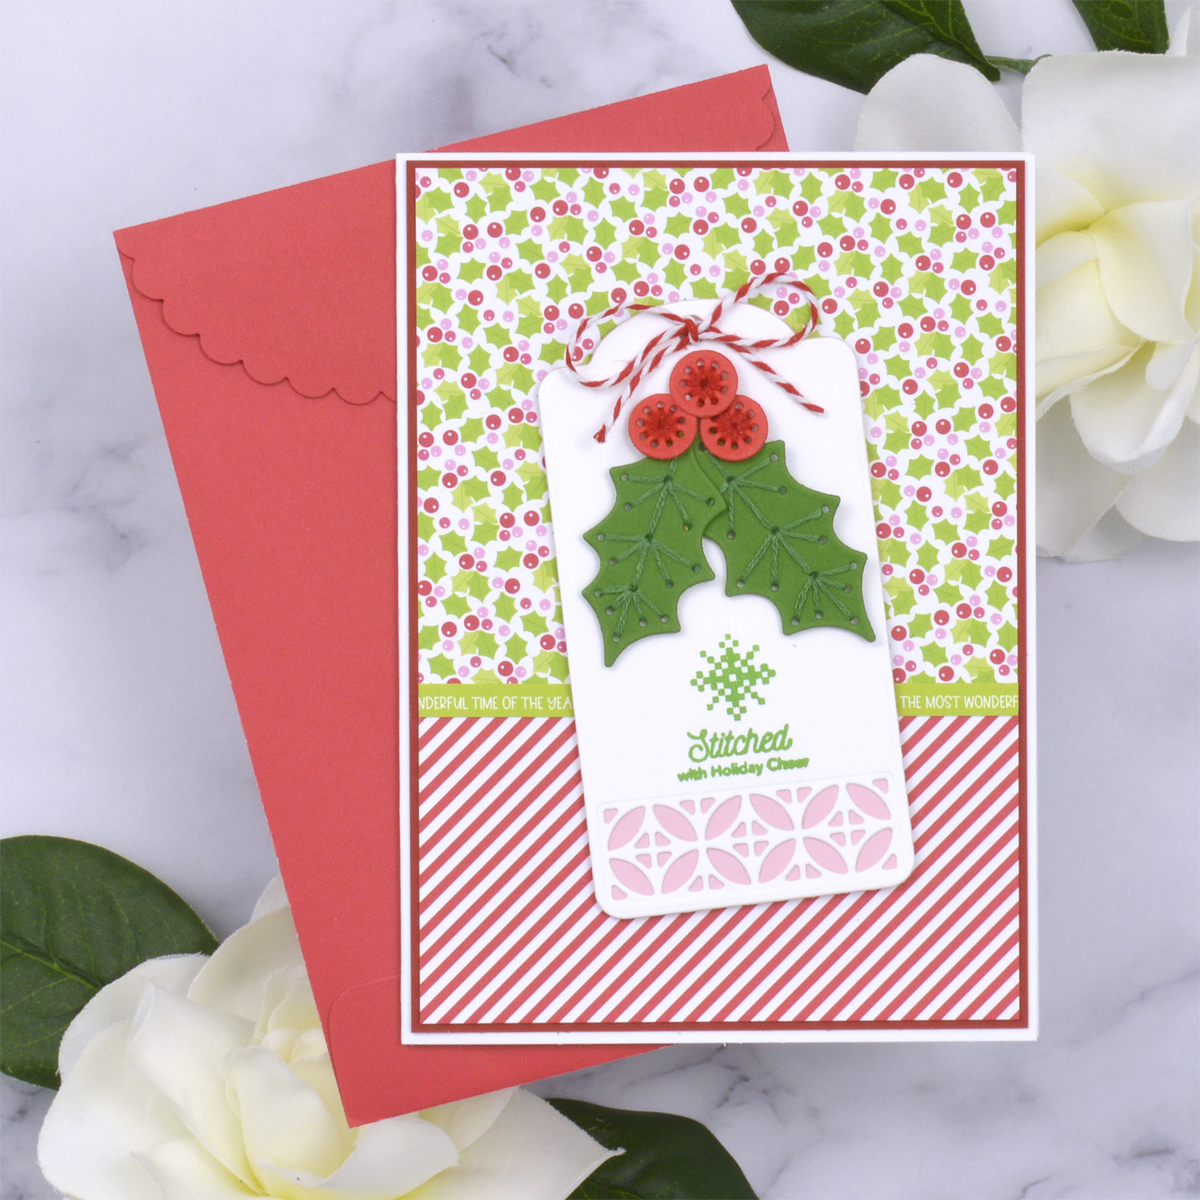
For a simple focal point, I cut Fern and Poppy Field Cardstock using the Stitched Poinsettia & Holly Die Set and stitched them up with matching thread for a tone-on-tone look. After adhering them to the tag with foam adhesive, I added some red baker’s twine from Vivant to the tag.
Sending Hugs Wax Seal Card
Let’s talk about how to use washi tape on cards in fun or unexpected ways. I’m starting out easy with this pretty floral hugs card where I add a single strip in place of some twine, but we’ll be working up to full backgrounds soon!
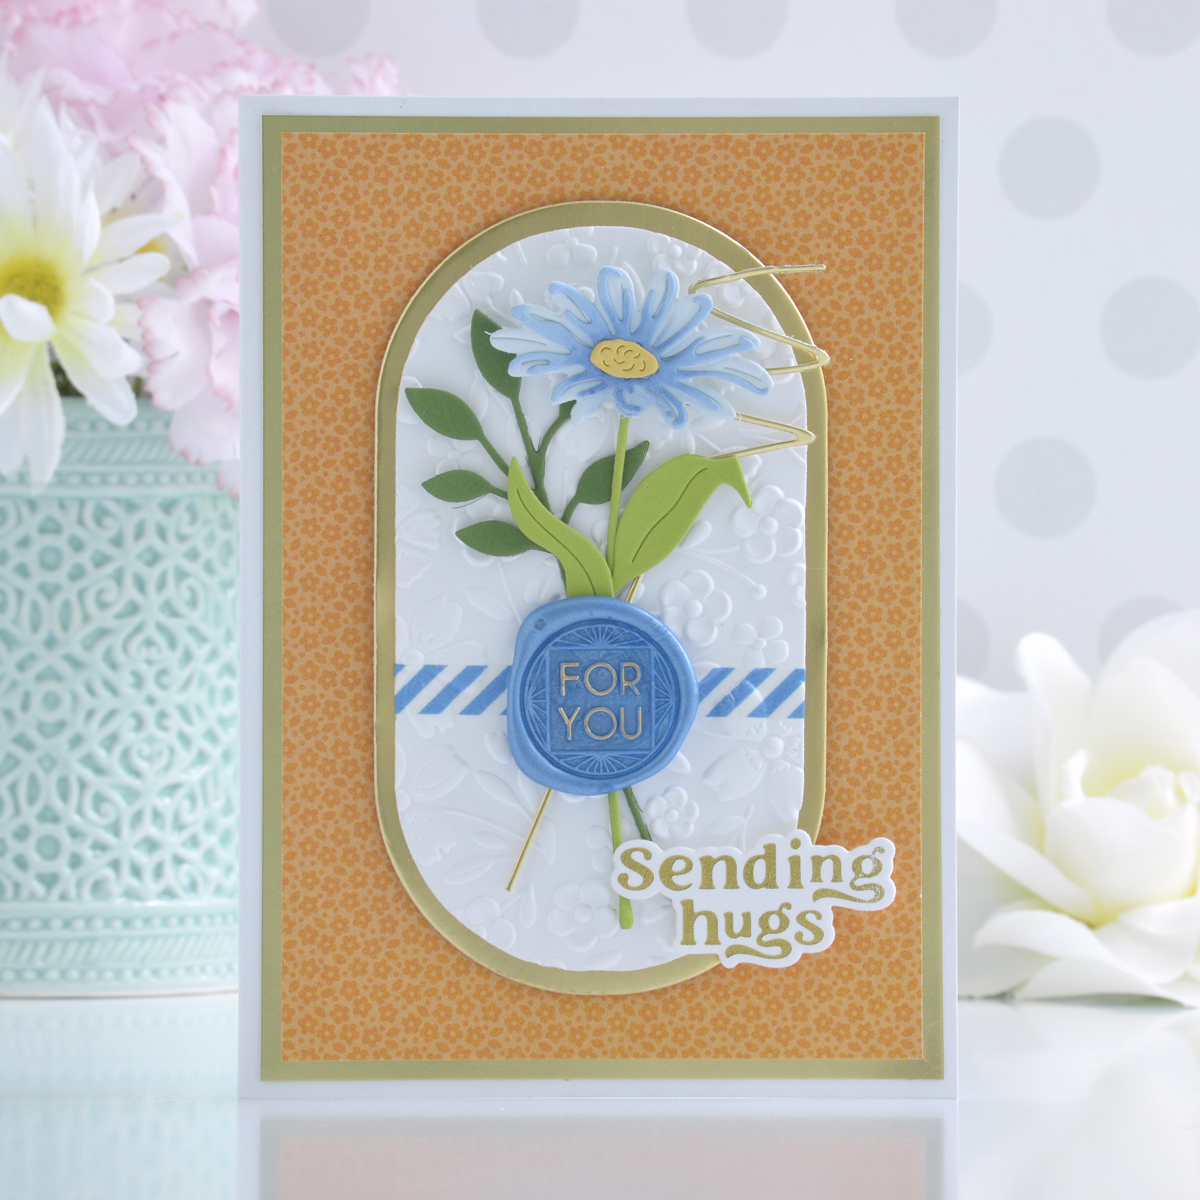
To begin, trim a piece of orange floral paper from the Over The Rainbow Paper Pad to 4” x 5.75”, mat it with Mirror Gold Cardstock, and adhere it all to the A6 white card base from the Rainbow Cards & Envelopes Pack.
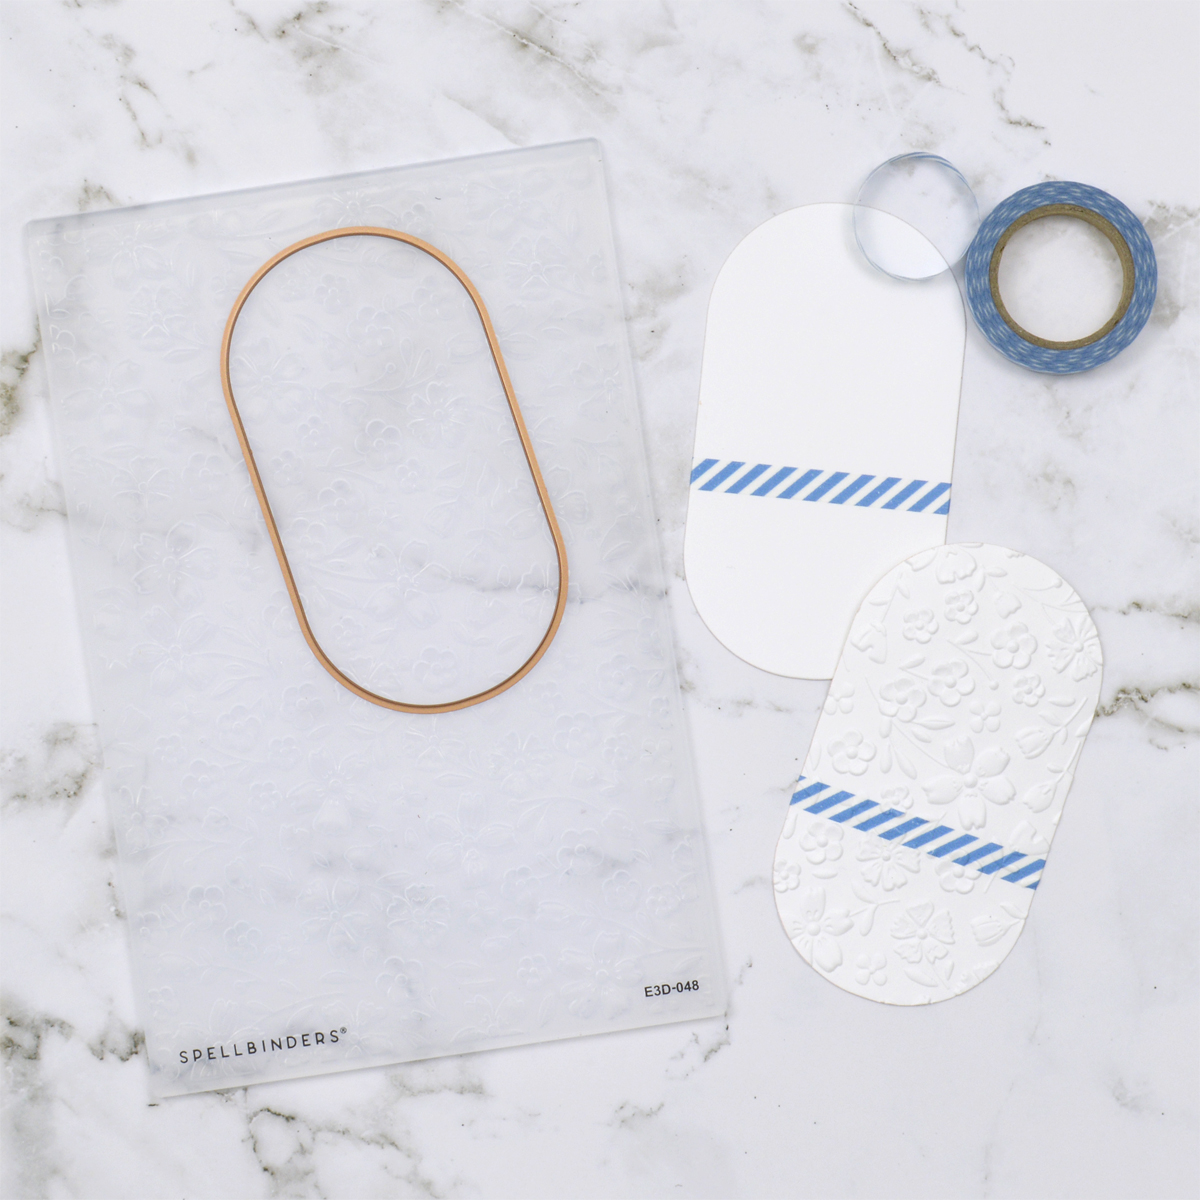
Next, cut white cardstock using one of the dies from the Essential Modern Ovals Die Set, and Mirror Gold Cardstock using the next larger die in the set. Wrap a piece of blue striped washi from the Candy Stripes Washi Tape Assortment around the white oval and then emboss it with the Flower Frenzy 3D Embossing Folder to make it blend into the shape seamlessly.
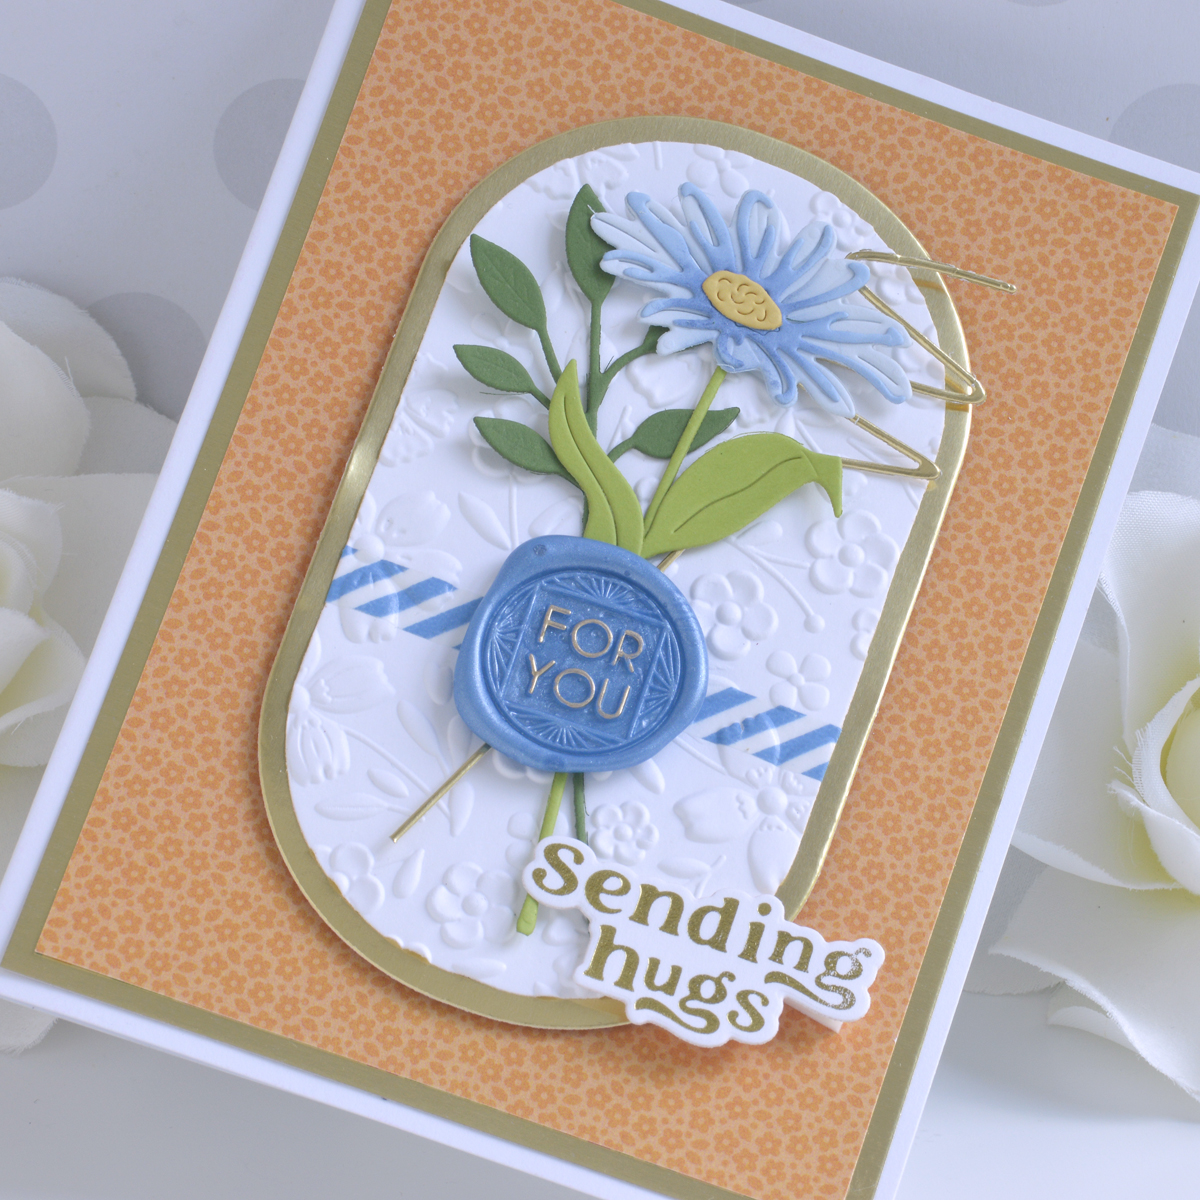
Die cut the daisy and leafy sprig from the Floral Stems Die Set and a zigzag squiggle from the Sealed Squiggles Die Set and adhere on top of the oval. Melt Mystic Blue wax beads and stamp them using the Deco For You Wax Seal Stamp before highlighting just the words with a gold metallic marker. Add an additional sentiment to the bottom of the card foiled in gold using the Must-Have Sentiments Glimmer Plate Set.
Happy Holidays Gift Box Card
You can use washi tape to create your own patterns for diecutting too! Here I create my own “wrapping paper” for tiny gift boxes on this bright and cheery holiday card.
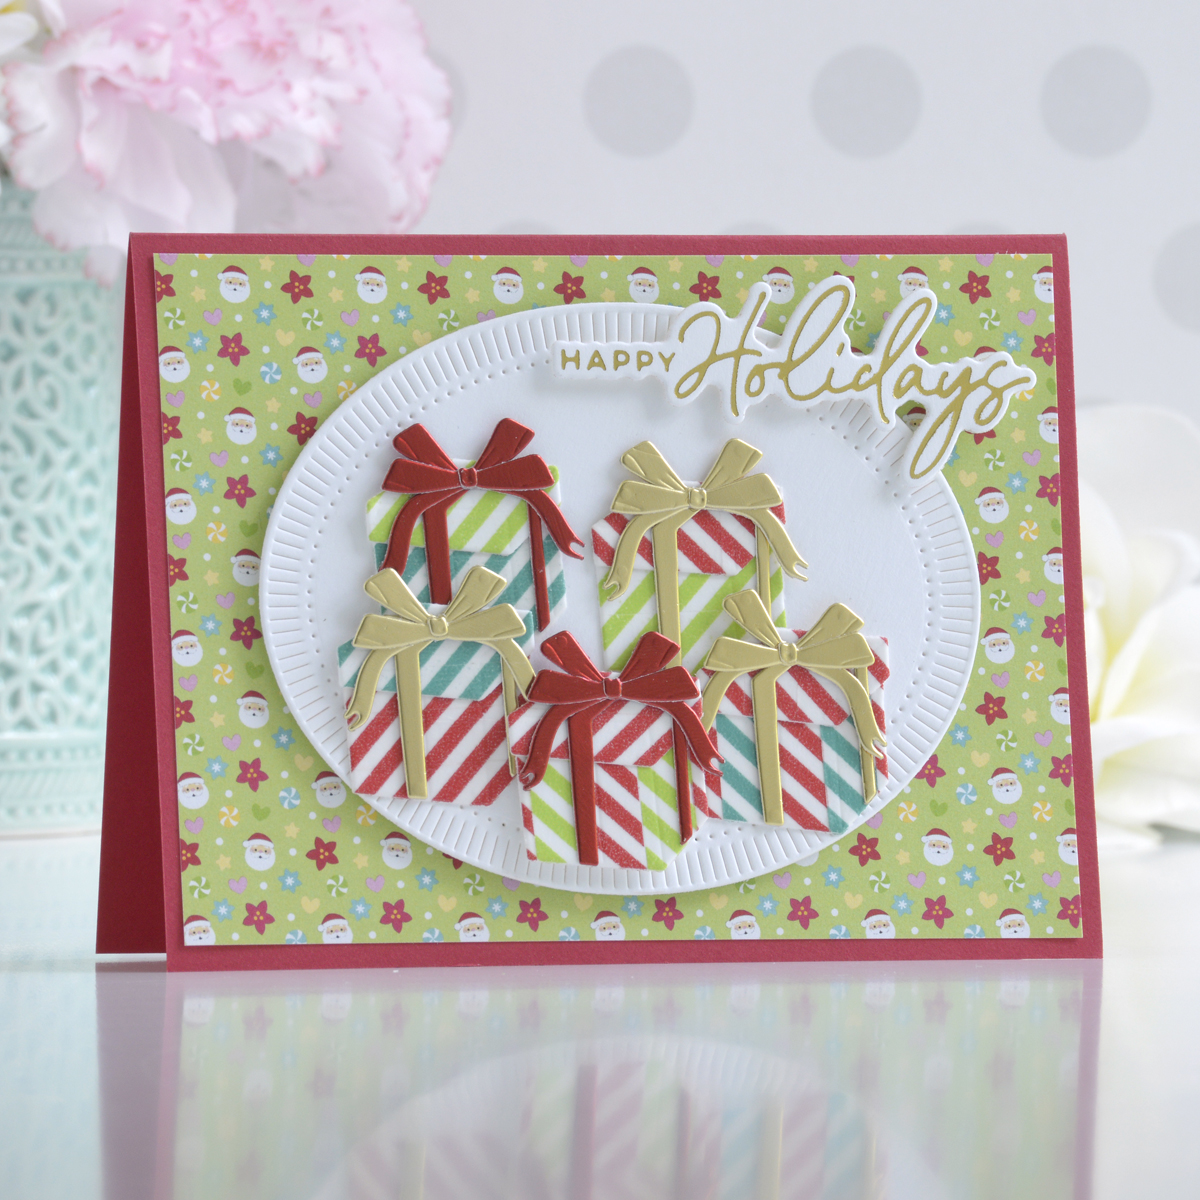
Start by trimming a piece of cute patterned paper from the Candy Cane Lane Paper Pad and adhering it to the front of the red A2-sized card base from the Christmas Cards & Envelopes Pack. Then die cut white cardstock using the Fluted Classics Ovals Die Set and adhere it to the center of the card front with foam adhesive.
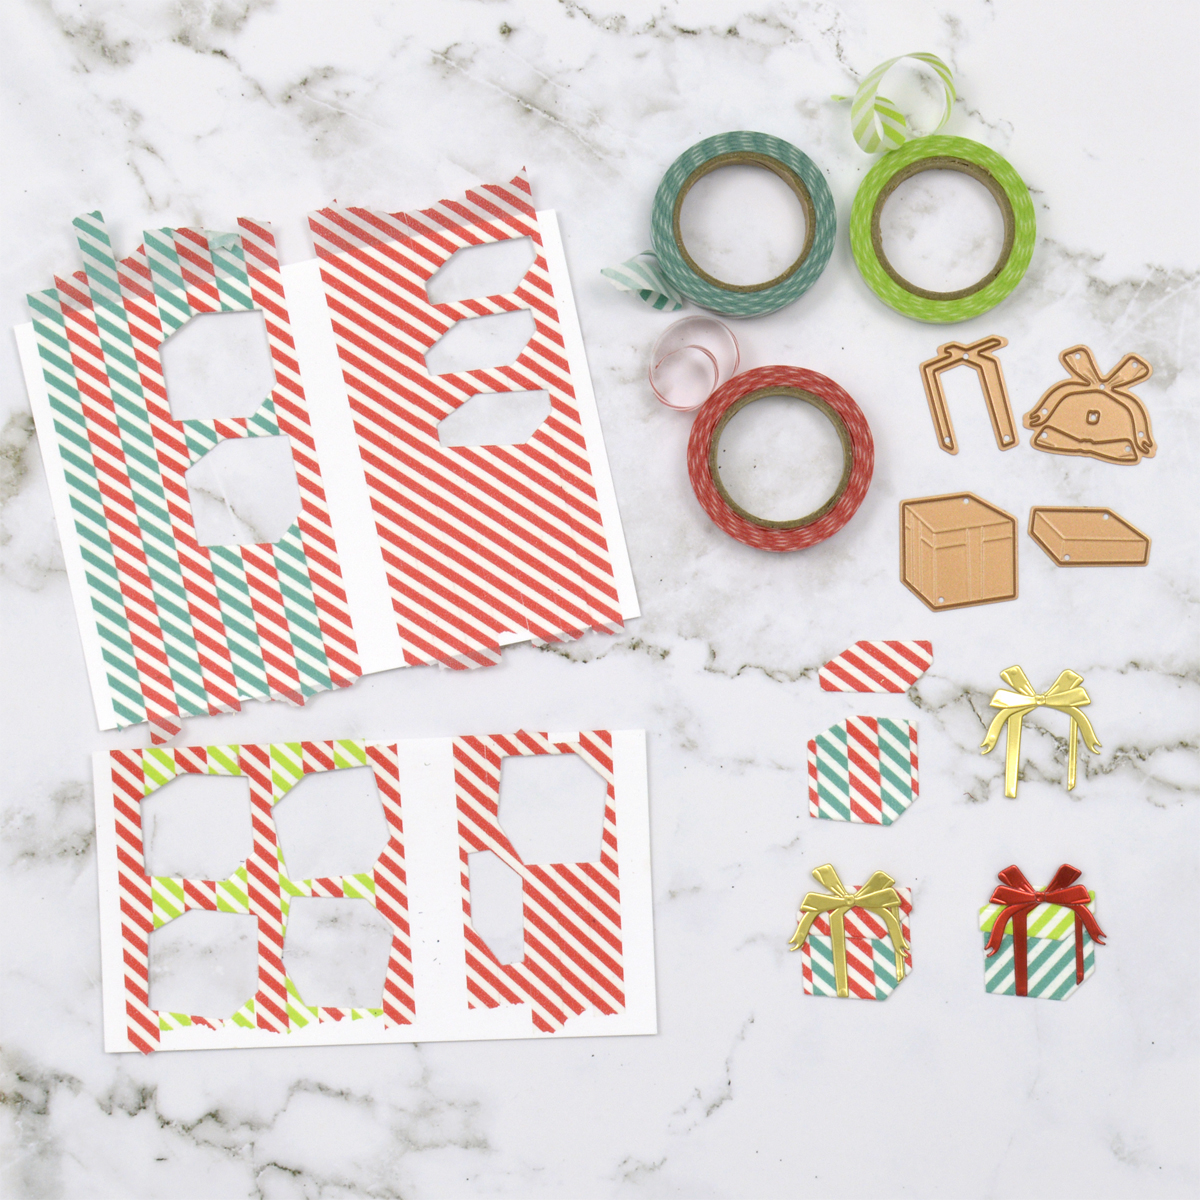
Now take the red, green, and teal tapes from the Candy Stripes Washi Tape Assortment and adhere them to white cardstock in different combinations and patterns. Die cut these patterns using the gift boxes from the Seasonal Décor Die Set and add bows cut from the Mirror Gold and Mirror Red Cardstock.
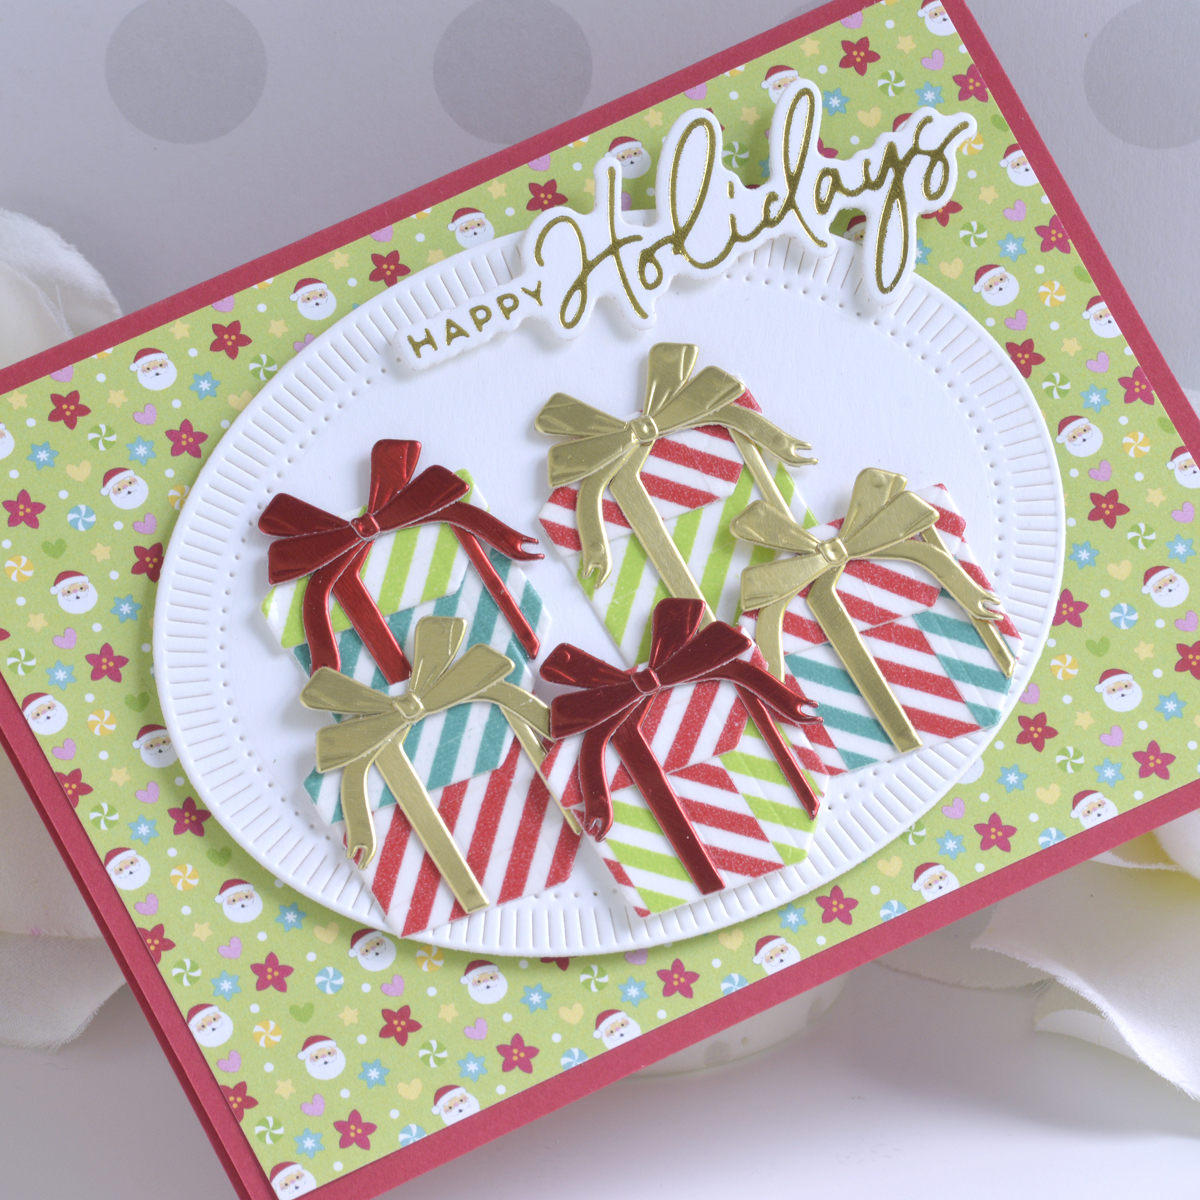
Adhere the gift boxes to the front of the card with a combination of liquid glue and foam adhesive for lots of dimension. To finish off the card, add a sentiment foiled in Gold Hot Foil using the A Merry Little Christmas Sentiments Glimmer Plate Set.
Rainbow Floral Birthday Card
Now we’ll create an entire background panel for this bold and bright birthday card with the Scallop Washi Tape Assortment.

I started by trimming a piece of white cardstock to 4.25” x 5.5” and then added strip after strip of colorful washi tape from the Scallop Washi Tape Assortment down the panel in rainbow order. Once it was completely covered, I die cut it down to 4” x 5.25” using the Precision Layering A2 Die Set A. (You can just use a trimmer to cut this panel down, but I like how the pressure from a diecutting machine during this step really makes sure the washi tape stays adhered.)
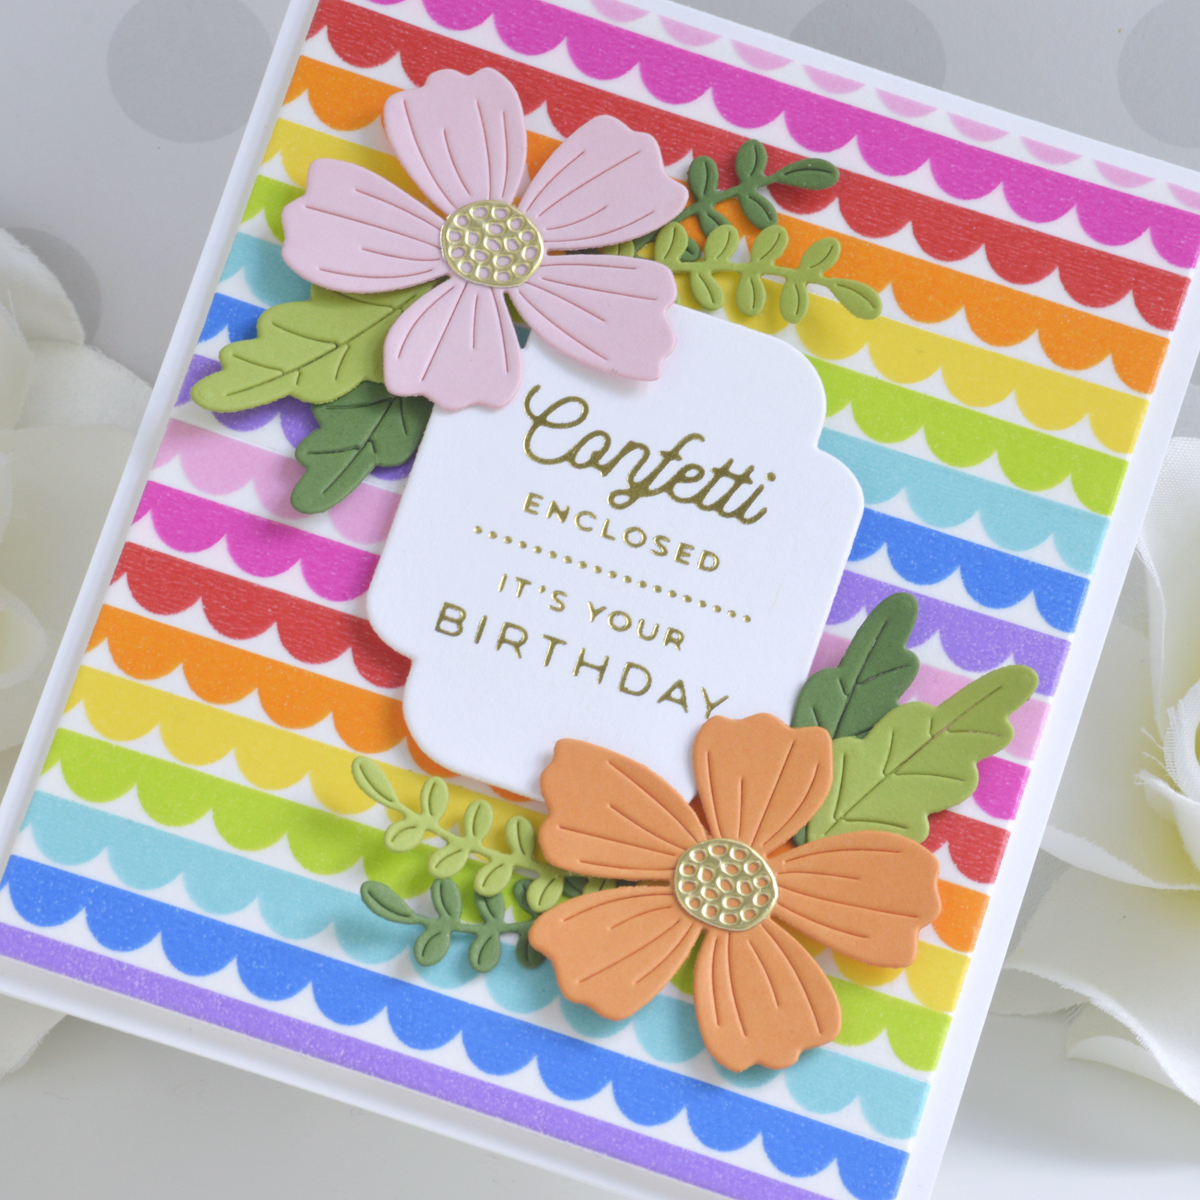
After adding the background panel to a top-folding A2-sized white card base with foam adhesive, I applied Gold Hot Foil to white cardstock using the All-Occasion Mailbox Greetings Glimmer Plate Set. Cutting this out with one of the Essential Four Petal Labels Dies, I added it to the center of the card with foam adhesive.
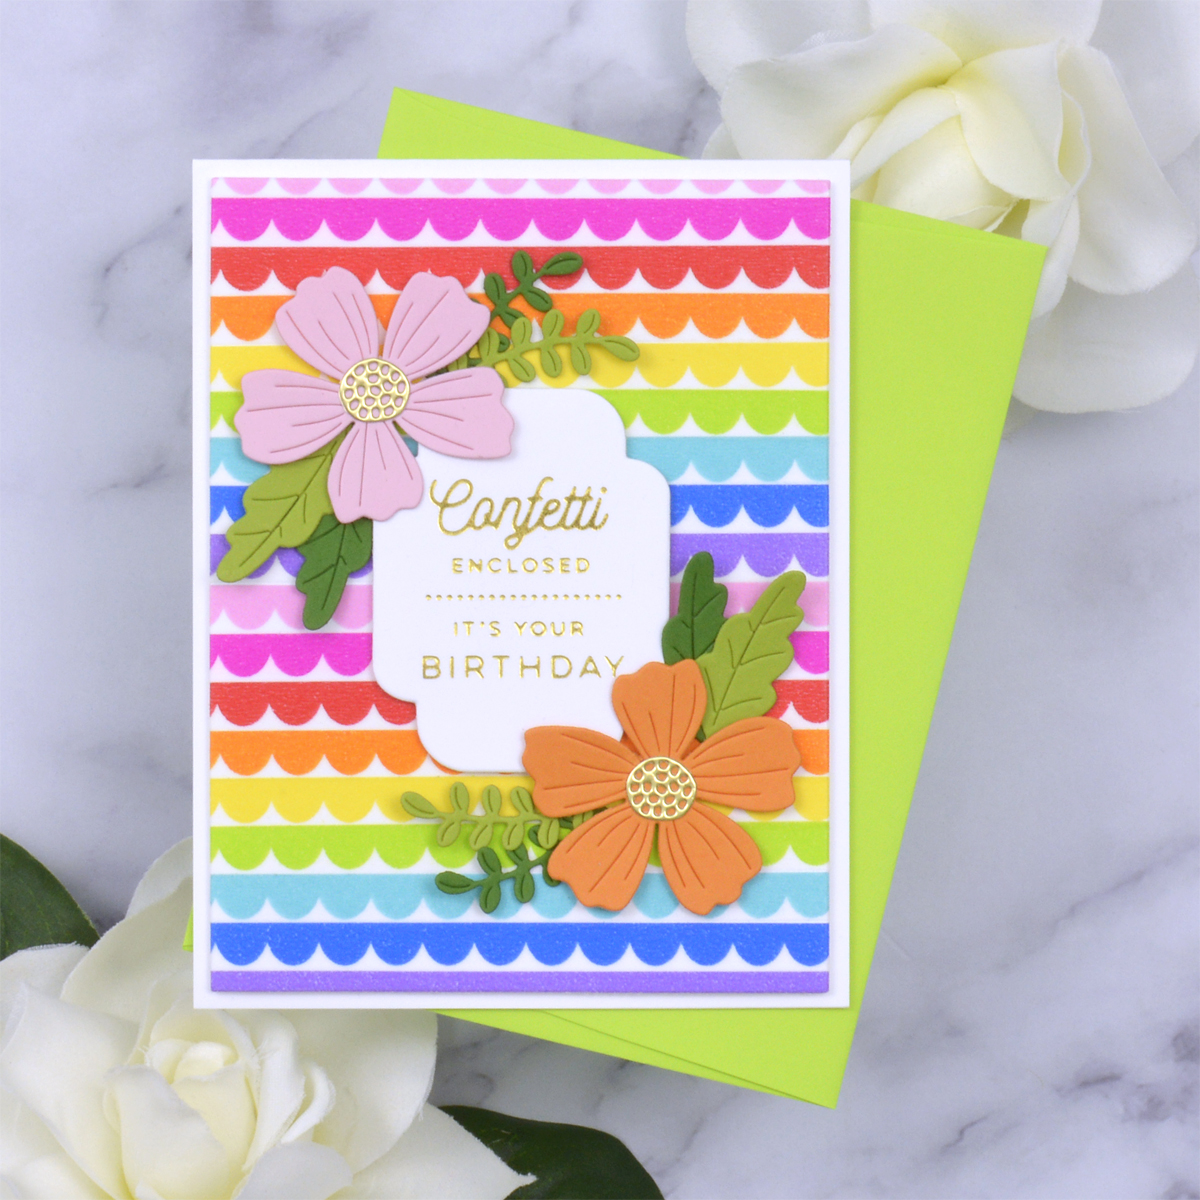
I didn’t want to add too much more to this bold card, so I just cut a few flowers and leaves with the Be Bold Blooms Die Set in coordinating colors and framed the sentiment.
Joyful Snowman Mini Slimline Card
Patterned paper can be used to add a touch of texture to scenic backgrounds as well if you pick some of the more subtle or tone-on-tone patterns. Here I built a simple snowy scene out of white and blue snowflake paper for this adorable snowman.
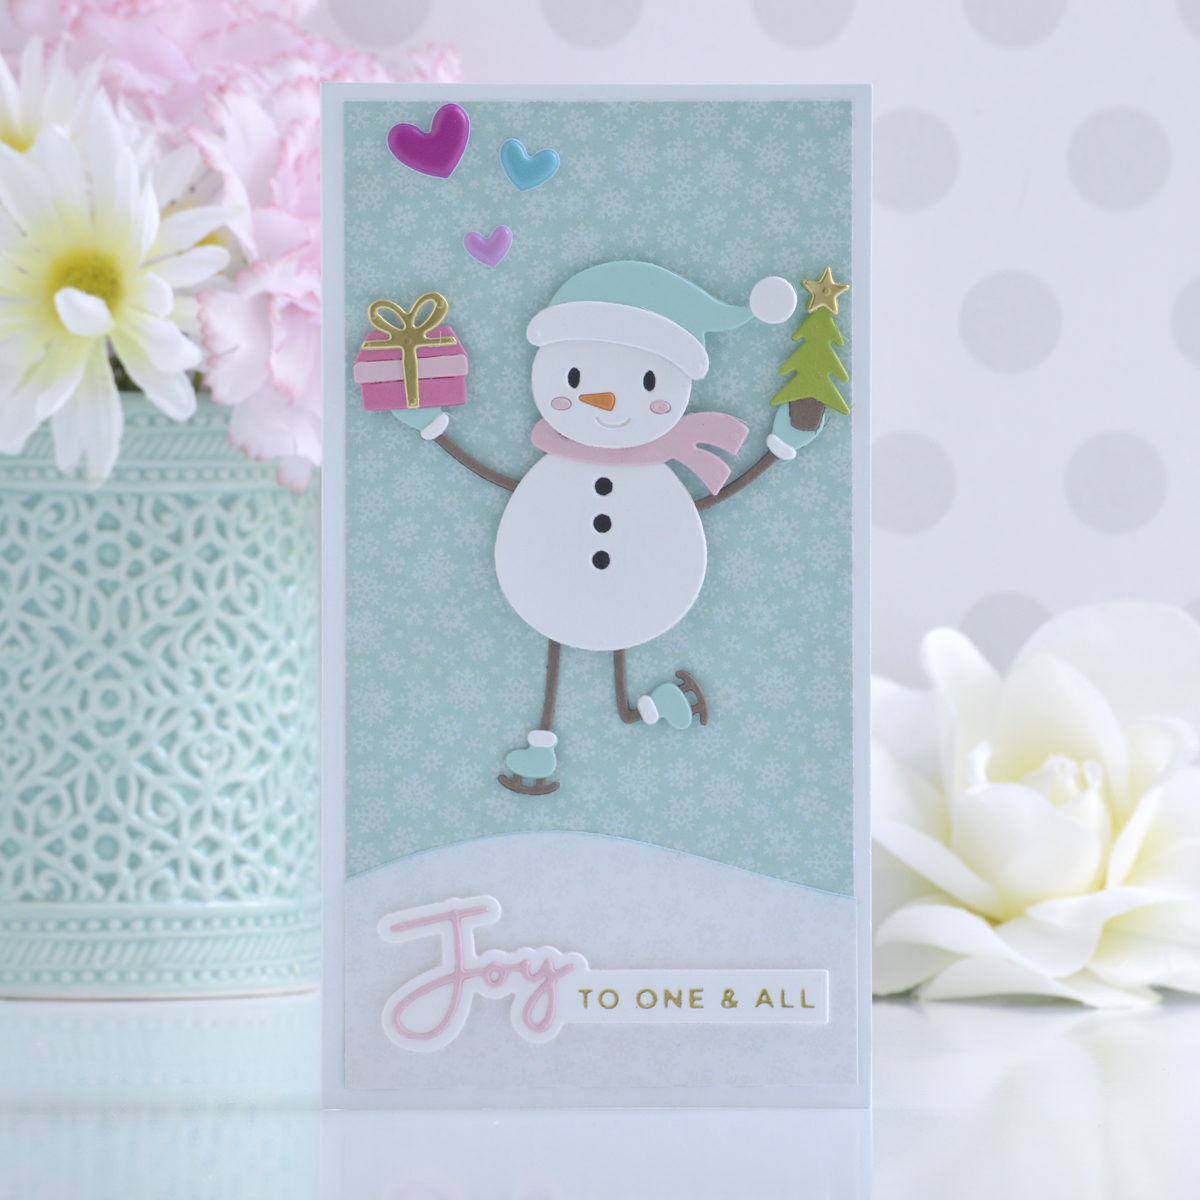
Start by trimming the blue snowflake paper from the Candy Cane Lane Paper Pad to 3.125” x 6”. After trimming the white snowflake paper to about 3.125” x 1.5”, die cut the top of it using one of the dies from the Color Block Scenic Scape Die Set. Blend a bit of Tumbled Glass Distress Ink around the edges of the papers before adhering together to give it a frosty look.
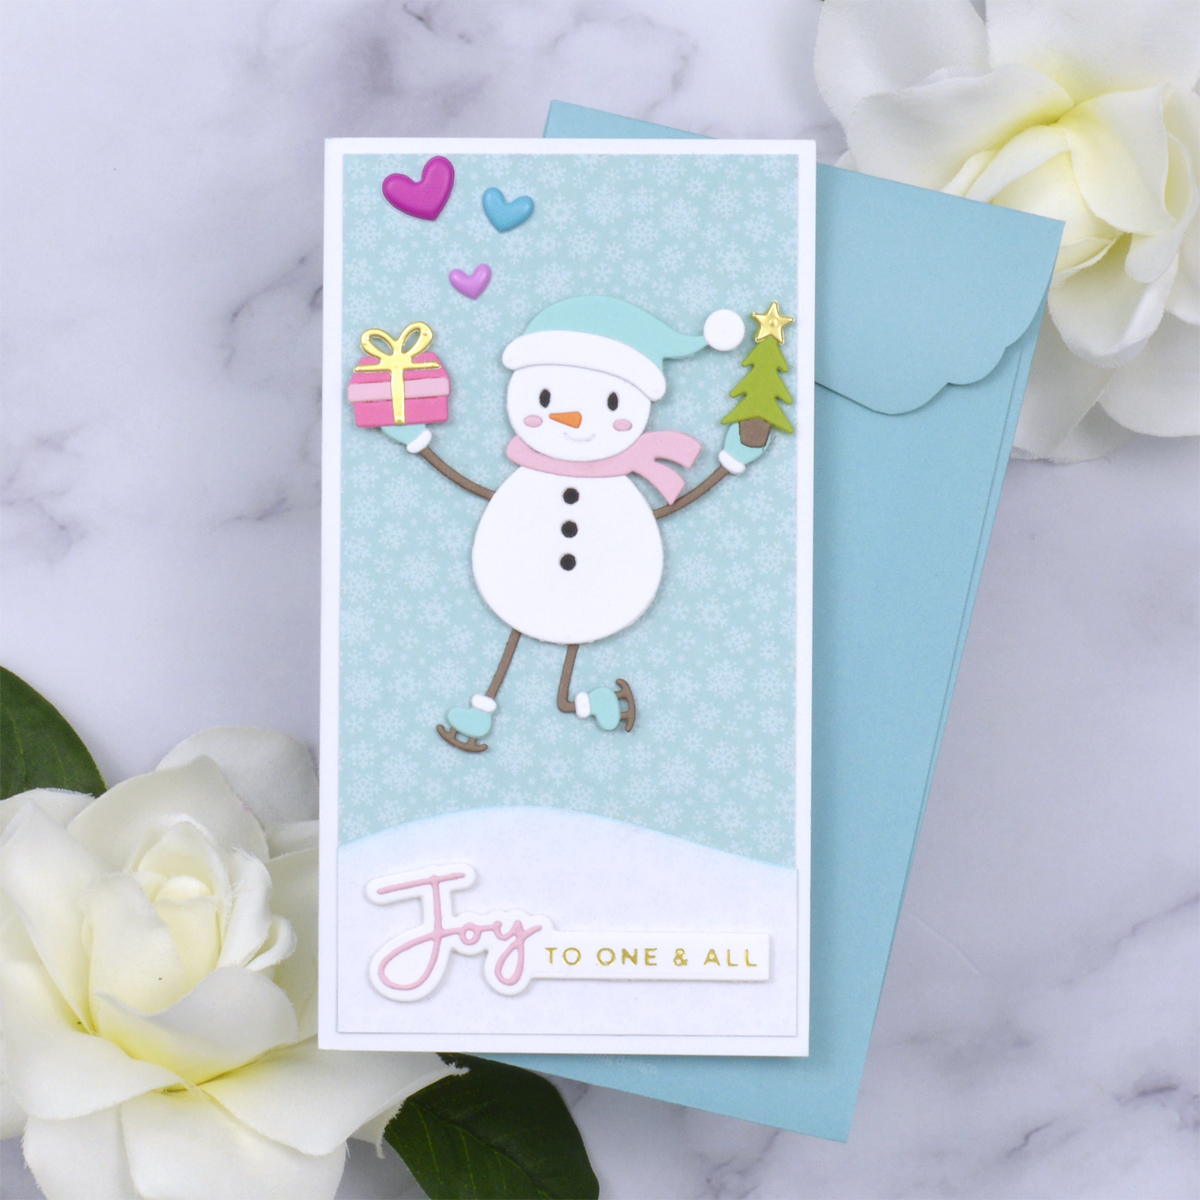
Adhere the background scene onto one of the white mini slimline card bases from the Christmas Cards & Envelopes Pack. Then die cut the adorable snowman from the Dancin’ Snowman Die Set using light and bright colors and assemble him above the snowy hill.
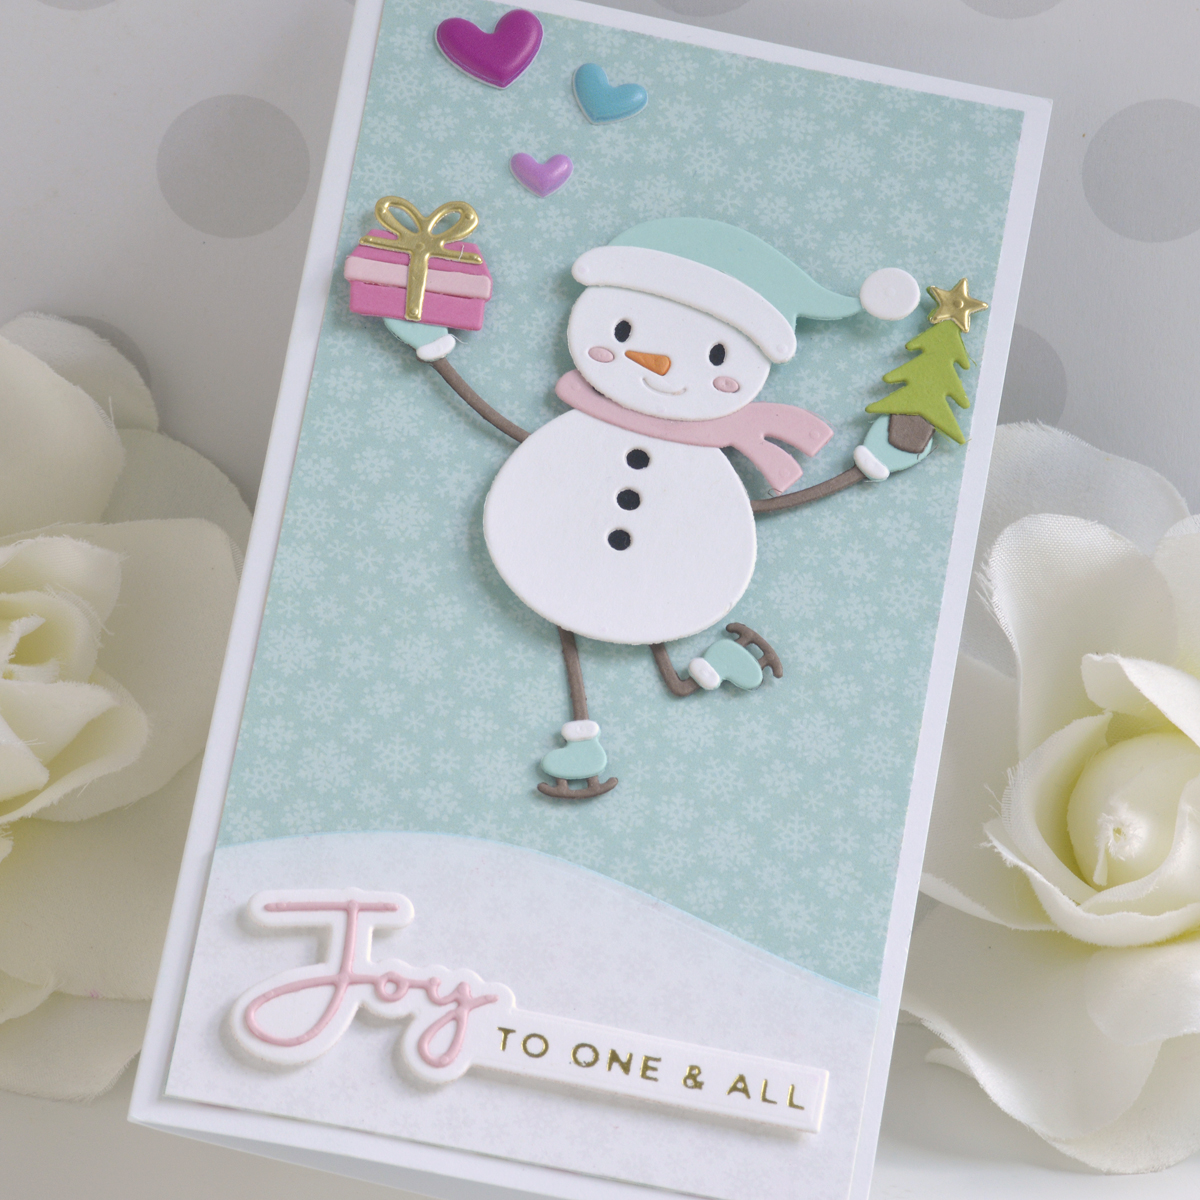
To finish off the card, I foiled and die cut a sentiment using the Christmas Die & Glimmer Sentiments Plate Set and popped it up beneath the snowman with foam adhesive. Then I added a couple of Bubblegum and Swimming Pool Puffy Hearts to the sky above him.
Loads Of Luck Card
Let’s try another card with patterned paper as a scenic background! This time I got a little braver using tiny rainbows in the sky behind this cute load of shamrocks.
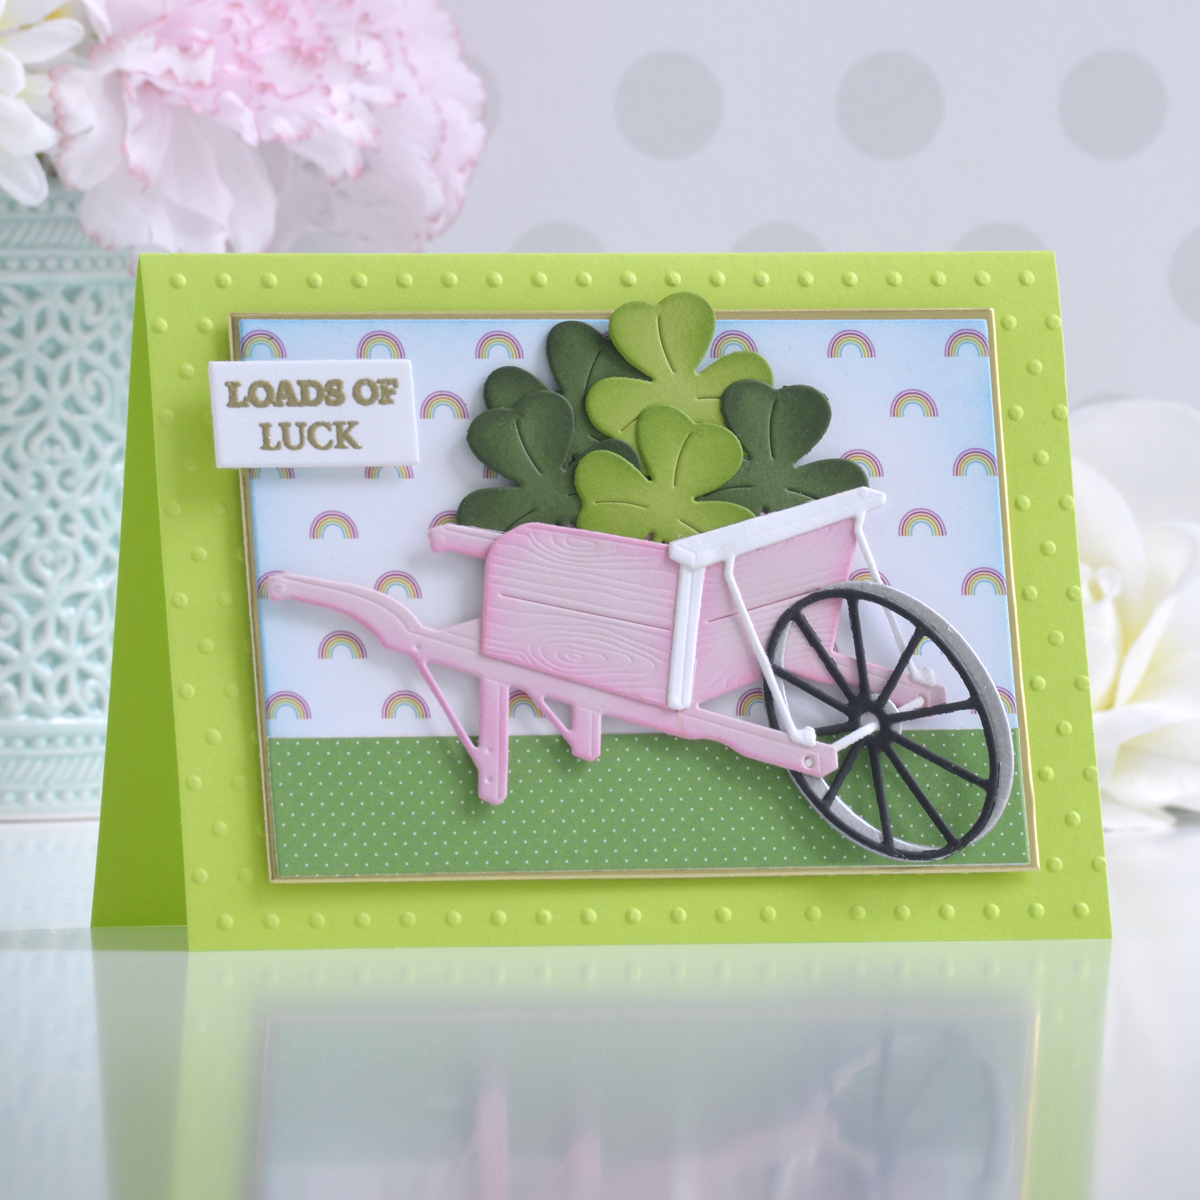
Start by trimming the rainbow patterned paper from the Over The Rainbow Paper Pad to 3.25” x 4.5” and adding a strip of the green polka dot paper to the bottom. Blend some Salty Ocean Distress Ink liberally around the top of the panel to create a blue sky and mat it with Mirror Gold Cardstock.
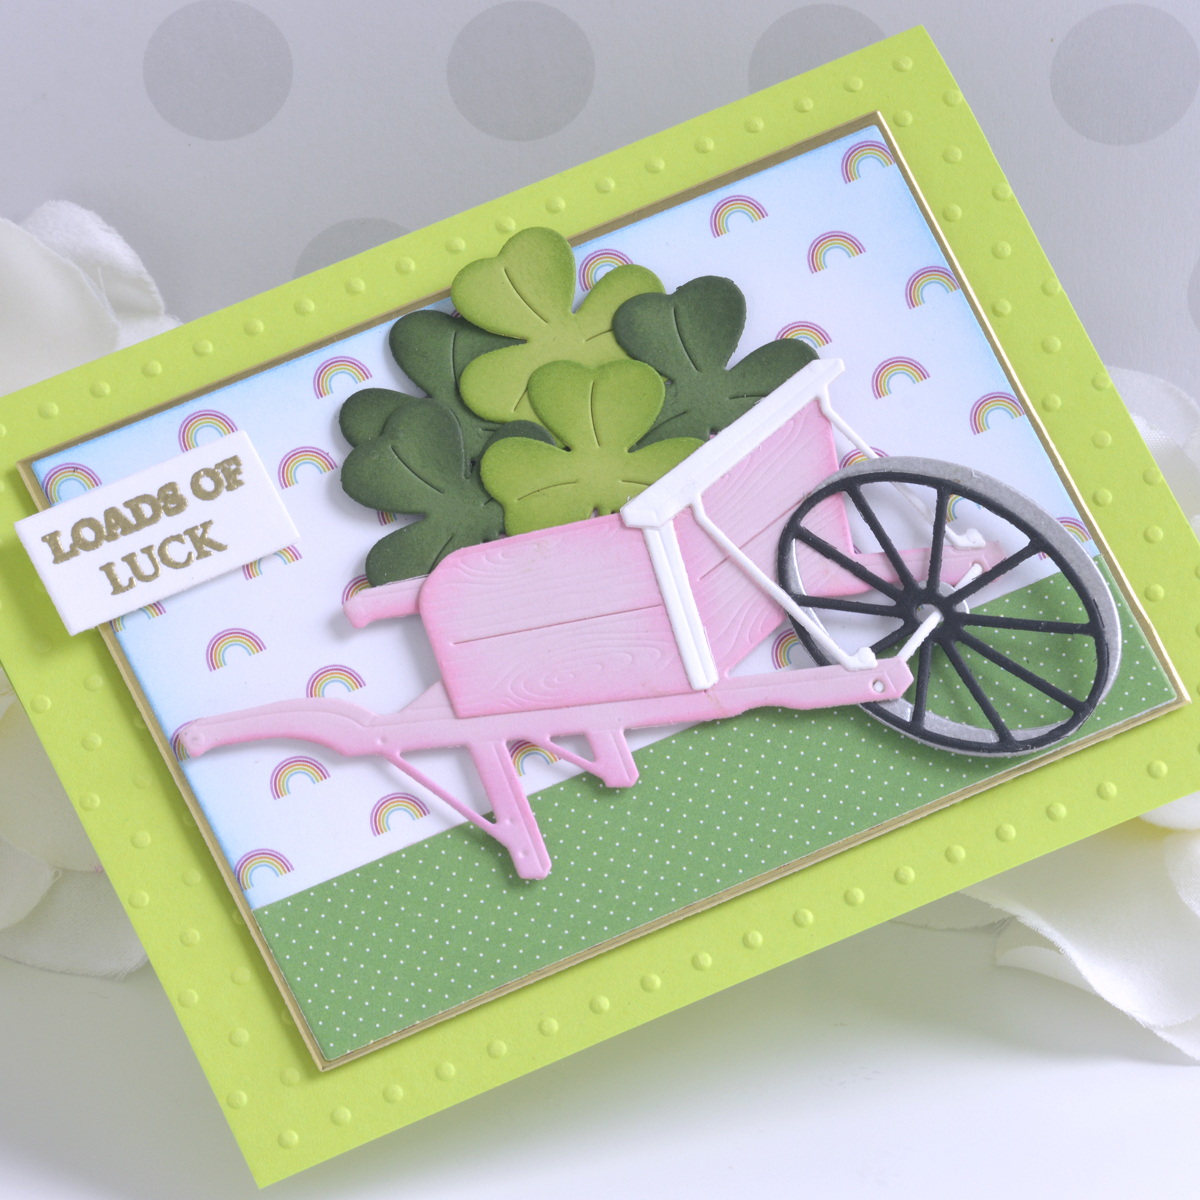
Emboss the front of one of the green A2-sized card bases from the Fall Cards & Envelopes Pack using the Tiny Dots Embossing Folder and add the background scene to the center of the card front with foam adhesive.
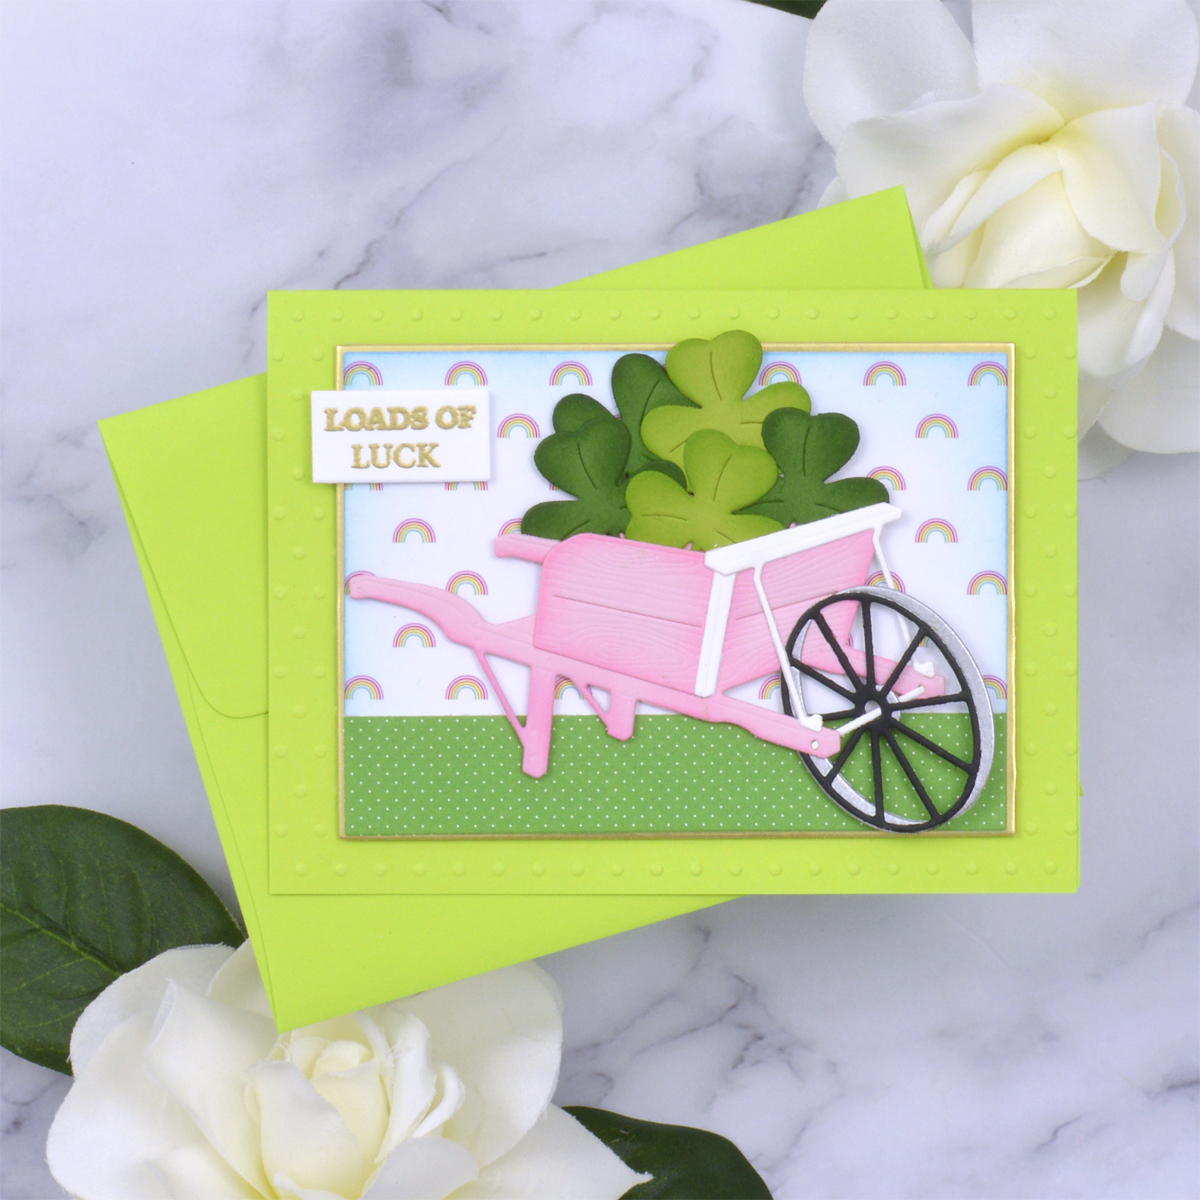
Die cut Pink Sand and white cardstock using the Country Wheelbarrow Die Set, add some Picked Raspberry Distress Ink around the edges, and assemble with liquid glue. Cut the shamrocks from the Seasonal Décor Die Set out of Fern and Rainforest Cardstock to fill the wheelbarrow. To finish off the card, emboss the sentiment in gold using the Welcome Sign & Sentiments Stamp & Die Set.
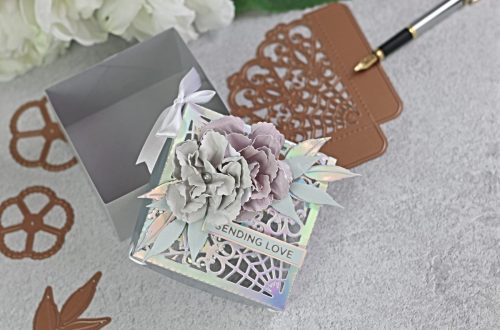
Thinking Of You Wallet Card
The Cards & Envelopes Packs contain lots of traditional sizes of cards, but they have a couple of fun shapes and styles too! Here I take the bright pink wallet-style card base and add just a few elements for cute thinking of you card.
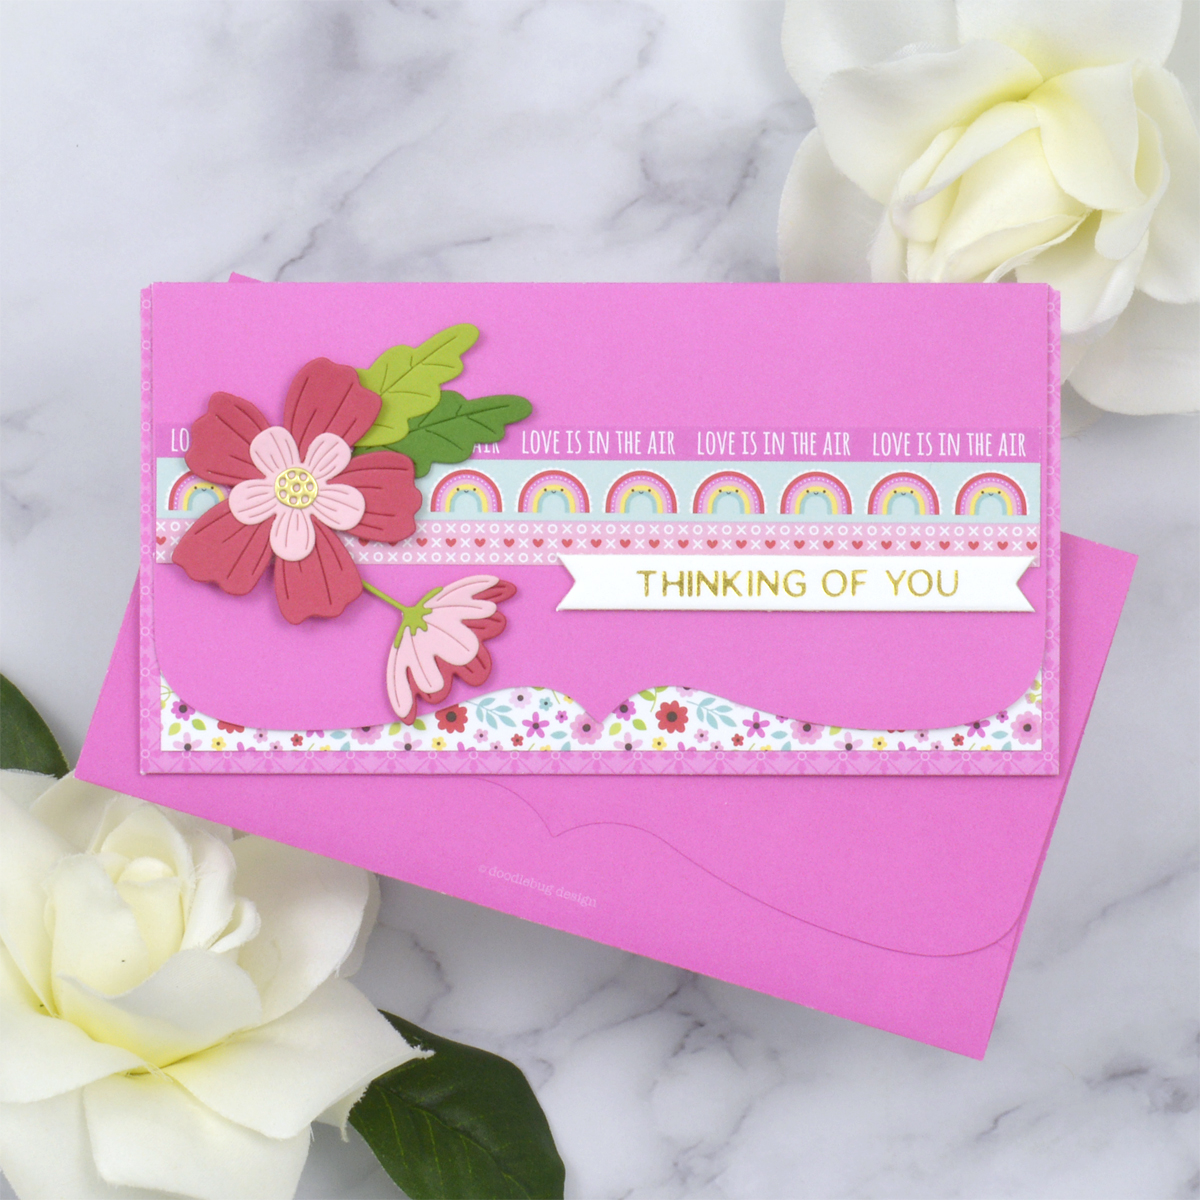
It can be hard to figure out how to decorate an unusual shaped card base like this one, but I knew I wanted to use flowers with this gorgeous pink color. I cut some more petals and leaves using the Be Bold Blooms Die Set and assembled a little floral bunch with liquid glue.
To ground the floral bunch on the front of the card, I decided to add a strip of paper. You can just choose a simple pattern from the pad, but there are so many fun border styles in the Lots Of Love Paper Pad, so I trimmed out a group of three and adhered it in the middle of the front panel. For a little peek of some more color, I added a panel of floral paper to the bottom of the card base as well (this panel will be behind the front of the card when folded).
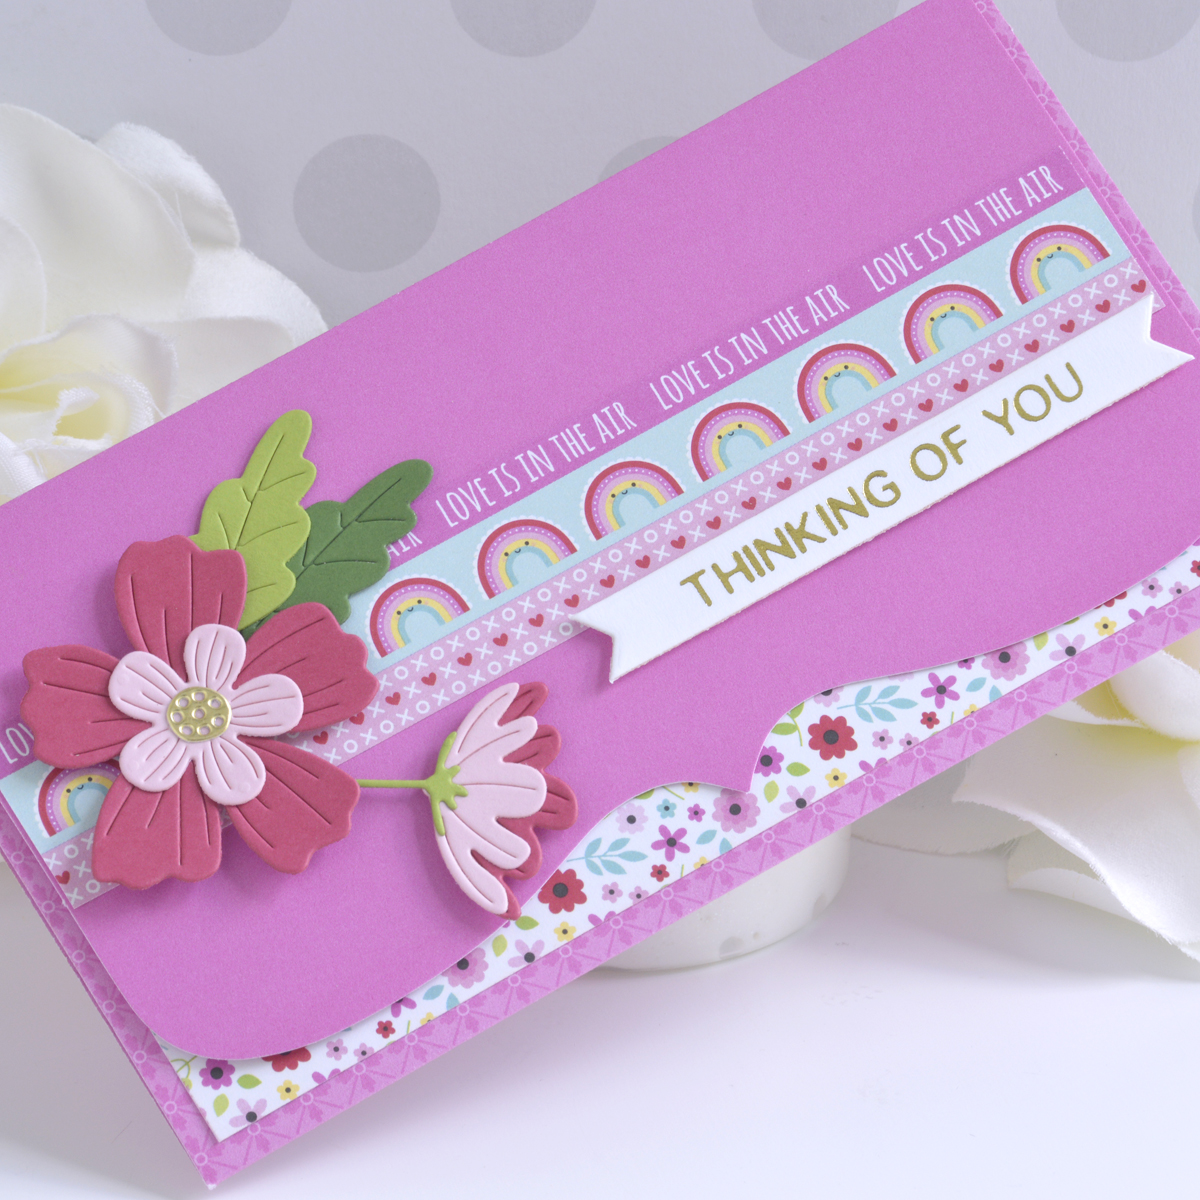
To finish off this card, I added the floral bunch to the front with foam adhesive and foiled a sentiment in gold using the Hexi-Gem Sentiments Glimmer Plate Set. This card style is perfect for tucking a check or a small note inside!
Patchwork Heart Card
Lastly, I have one more tip when working with the fun patterns from Doodlebug in your card designs…take your color inspiration from the experts who design these gorgeous papers! Here I pull the pinks and teals from the Lots Of Love Paper Pad into my focal image on this sweet card for a friend.
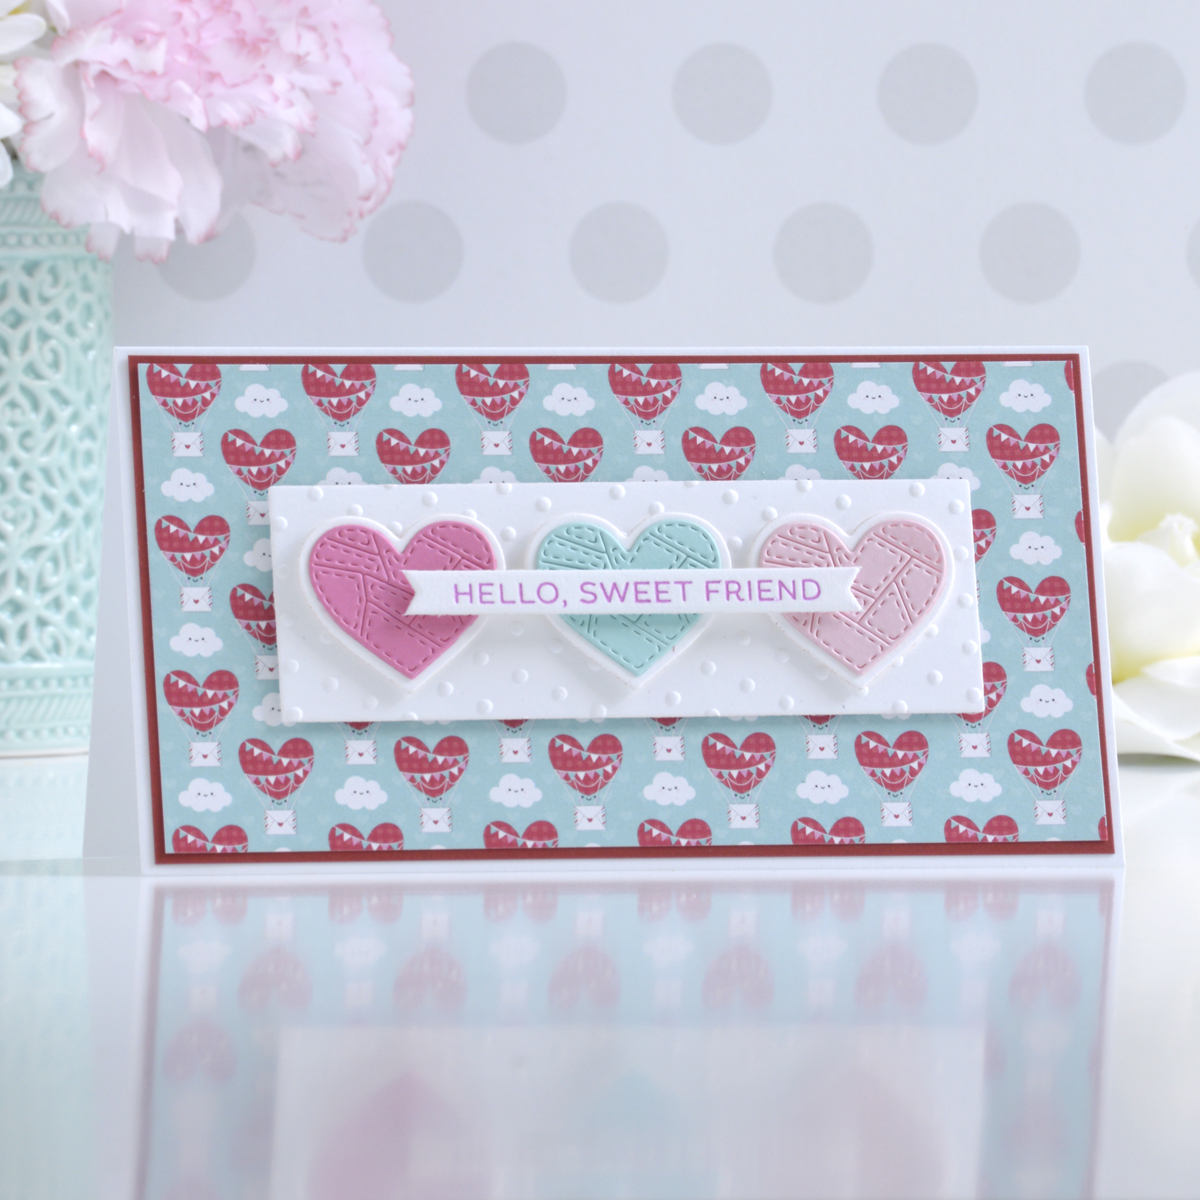
I started by trimming a piece of the heart balloon patterned paper from the Lots of Love Paper Pad to 3.125” x 6”, matted it with Pomegranate Cardstock, and adhered it to one of the white mini slimline card bases from the Rainbow Cards & Envelopes Pack.
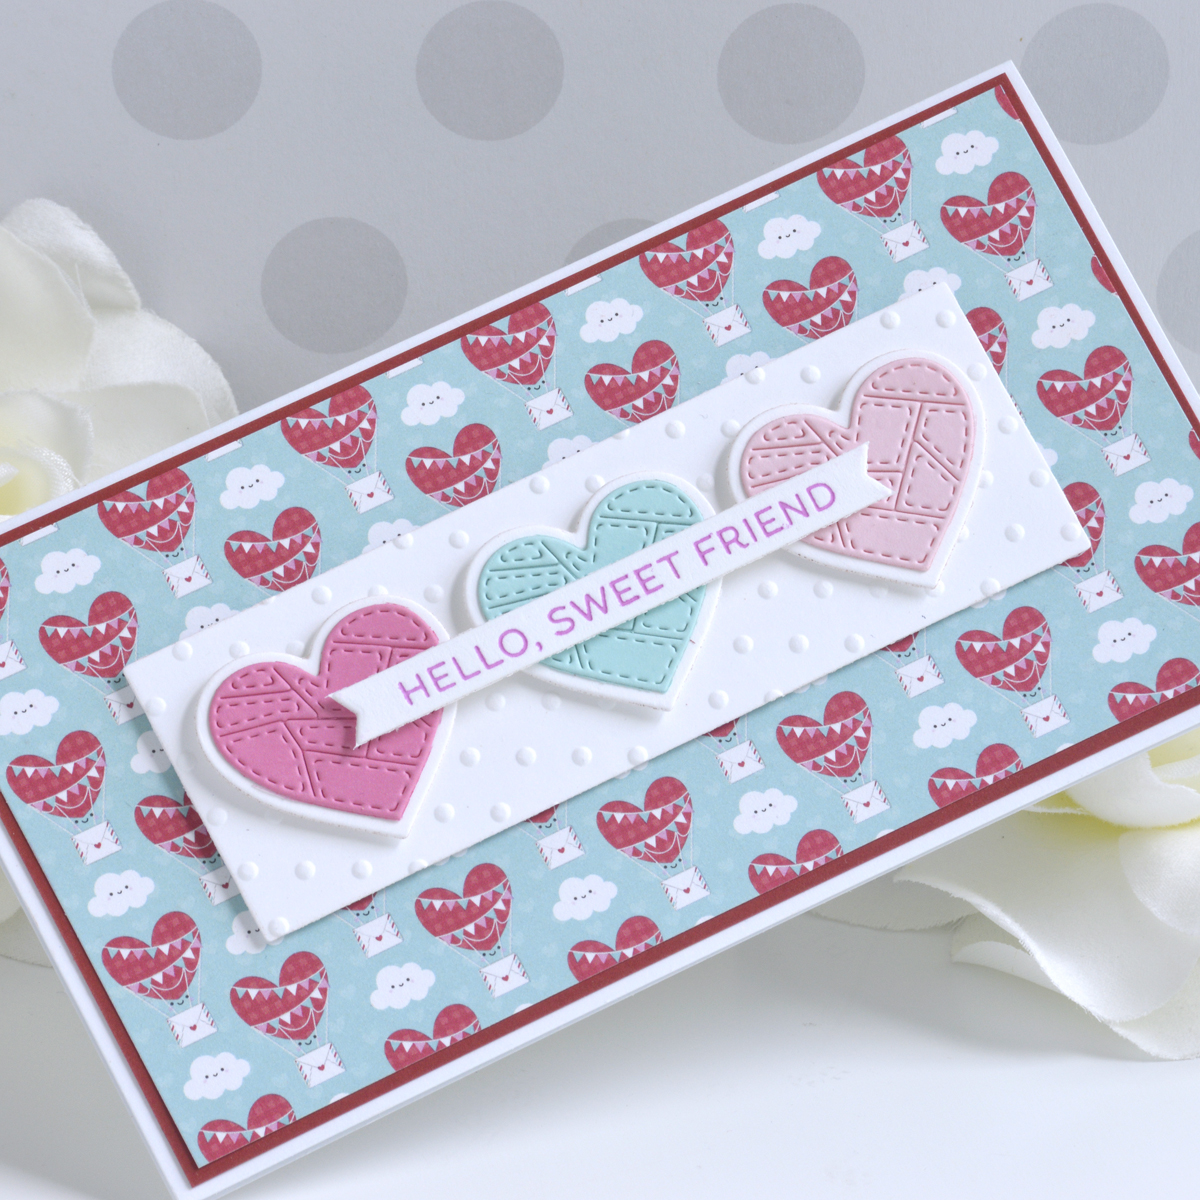
Next, I die-cut Fruit Punch, Waterfall, Pink Sand, and white cardstock using the patchwork heart dies from the Seasonal Décor Die Set. To ensure the hearts didn’t disappear into the background pattern, I trimmed a piece of white cardstock to 1.5” x 4.5”, embossed it with the Tiny Dots Embossing Folder, and adhered it to the center of the card front with foam adhesive.

I then used Wild Berry Ink to press a sentiment from the Always & Forever Sentiment Strips Press Plate & Die Set into Porcelain Cotton Cardstock. Once cut out, I added it on top of the three hearts with foam adhesive.
Spellbinders Supplies:

Other Supplies
red and green embroidery thread, Green Oasis Versafine Clair Ink, Tumbled Glass, Salty Ocean, Picked Raspberry, Mowed Lawn, Rustic Wilderness Distress Ink, heavyweight white cardstock, foam adhesive, tape runner.
I hope you enjoyed these fun cards for all occasions and thanks so much for stopping by today. You can find more inspiration over at my blog AnnieBWills.com.
One Comment
Maryanne
I LOVE every card in this post!! How fun and creative!!