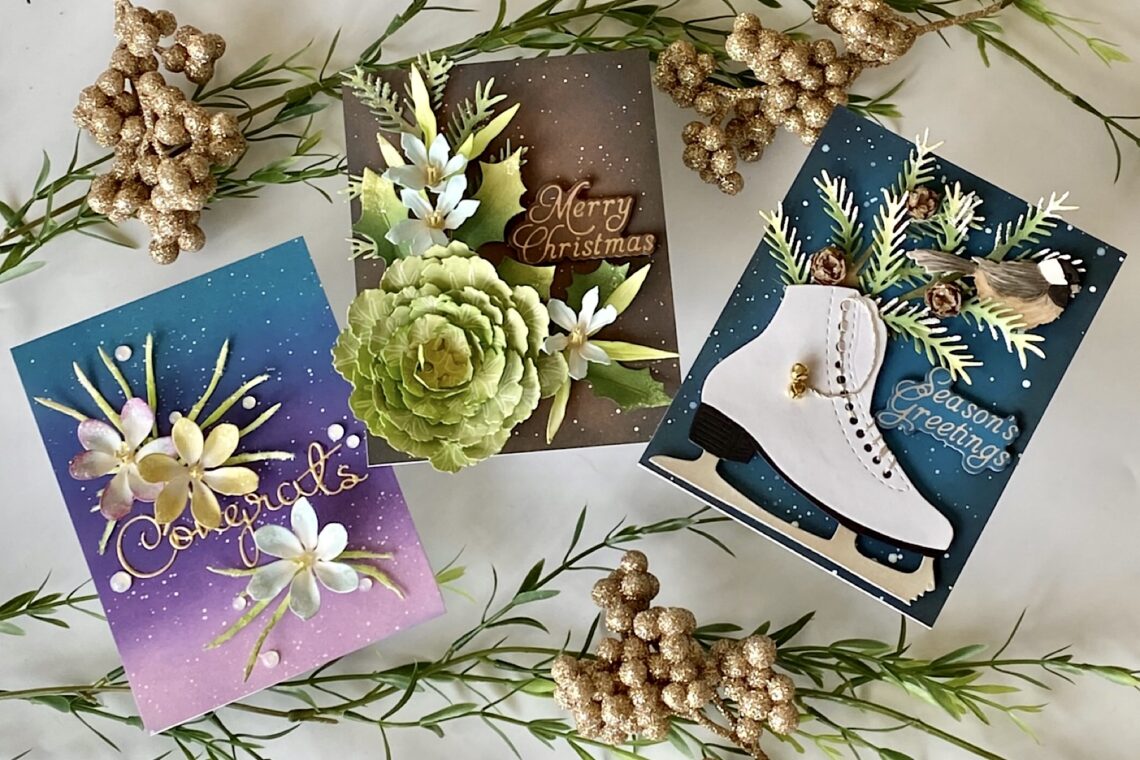
The Snow Garden Cards with Bonnie!
Hello, fellow cardmakers! Bonnie here from Bonniecarollee Makes Cards. As an avid gardener, I appreciate the beauty of the garden during all four seasons. In my region, the Winter garden is draped in snow with some of the evergreen foliage providing a muted backdrop. As the snow begins to fade, brave early bloomers like the crocus and glory of snow add little splashes of color. Winter gardens have a beauty all their own and these cards featuring THE SNOW GARDEN COLLECTION celebrate that!

Hemlock, Cones & Chickadee
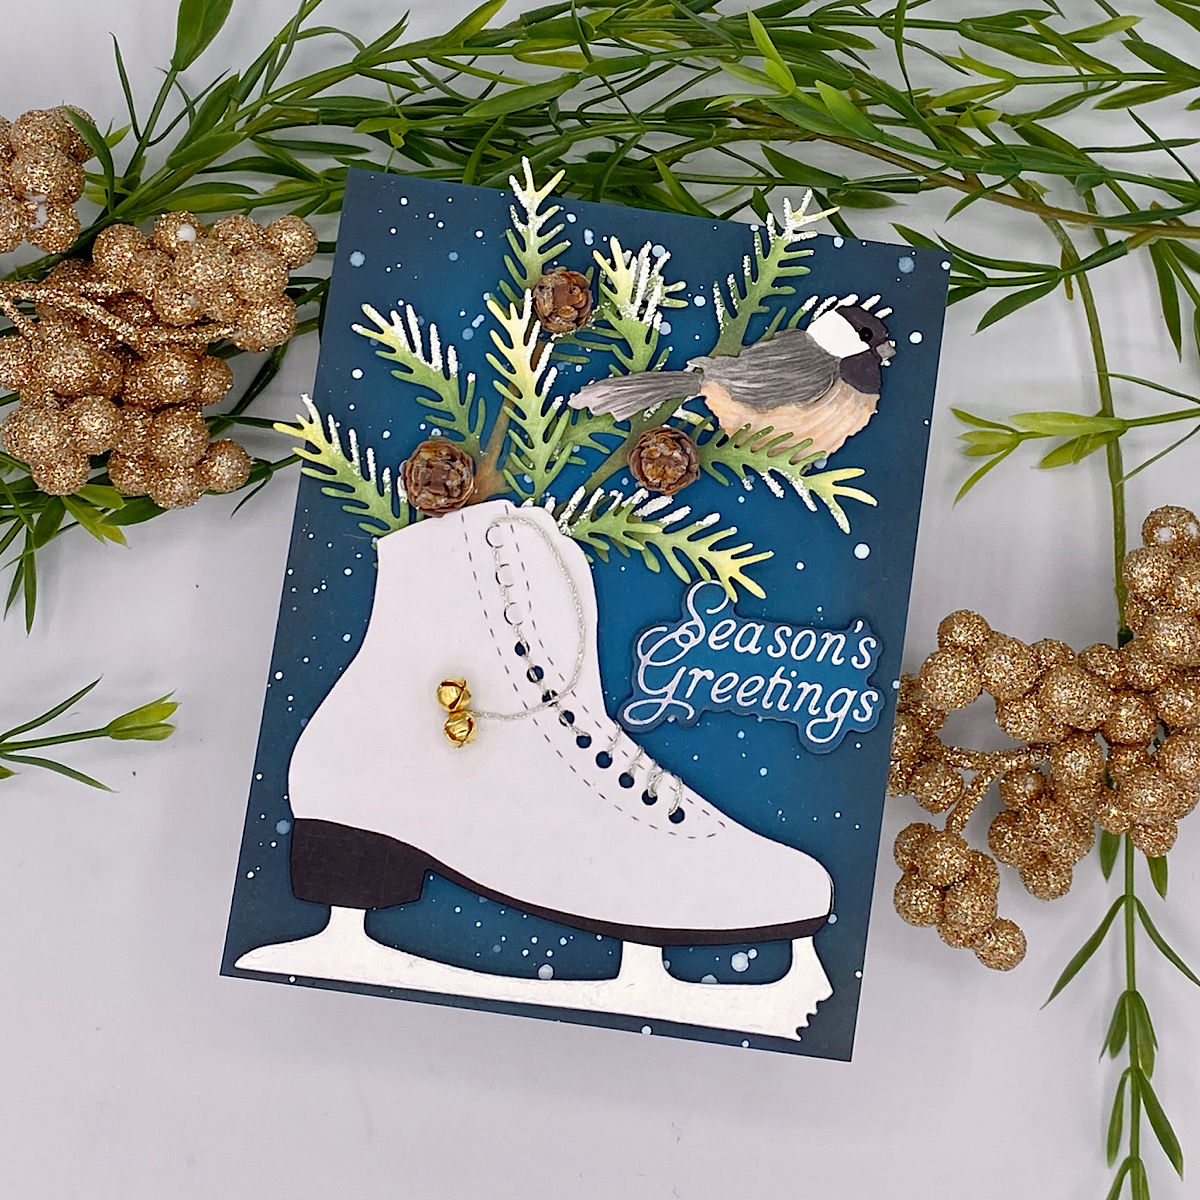
- A panel 4 1/4’ by 5 1/2” Bristol Smooth was ink blended with Distress Oxide Inks applying Unchartered Mariner in the center and radiating out to the edges of the panel with Black Soot.
- The panel was spattered with PH Martin’s Bleedproof White.
- An extra piece of card stock was inked for the sentiment from The Snow Garden Sentiments. The sentiment was foiled with Matte Silver. The sentiment and black foam were cut with the coordinating die. the sentiment was stacked.
- The Hemlock, Cones, and Chickadee consist of three dies that were used to cut Bristol Smooth card stock. The chickadee was cut once and the hemlock twice. For each cone, the die is cut twice. I made three cones so I had six sets of die cuts.
- Distress Oxide inks, Walnut Stain, Shabby Shutters, and Rustic Wilderness, were applied to the hemlock branches. Rustic Wilderness was also applied to the back of the die cuts.
- When the ink was dry, the tips of the needles were rubbed onto a Versamark ink pad and puffy embossing powder was applied. The embossing powder was melted creating a snowy texture.

- Working on the leaf mat, the smallest leaf tool from Susan’s Garden Ultimate Tool Kit was used to crease the center of each branch creating dimension by lifting the needles up.
- To create each cone there are 6 large/medium die cuts and 6 small ones. The layers were inked with Walnut Stain on the front and back.
- Using the medium-sized ball tool from the Tool Kit, the layers were cupped. The die cuts were placed right side up on the foam molding mat and the ball tool depressed in the center.
- To assemble the cones, the six larger die cuts were stacked by applying glue in the center and offsetting the next layer. The ball tool was used to depress the center after each layer was added. The same procedure was followed for the small die cuts. The small stack of die cuts was then adhered to the larger one.
- When the adhesive was set, additional glue was added to the edges of some of the cone scales. The cones were then dipped into chunky, clear glitter.
- The chickadee was colored with Copic markers; 100 (black),E30, W3 and W5. Additional texture was added with a white and black colored pencil.
- The Ice Skate was cut from white and black card stock and Mirror Silver card stock. The bottom of the boot and blade was trimmed off the white skate and it was adhered to the black one. The black blade was trimmed off the skate and the skate adhered to the silver one. The skate was laced with Silver Metallic Embroidery Floss and the end finished off with two small jingle bells.
- The hemlock branches were adhered to the card front along the central branch. Foam squares were used to attach the skate and the chickadee. After the stacked sentiment was adhered, the card was finished off with the three cones using a good dollop of liquid adhesive!
Ornamental Cabbage & Kale
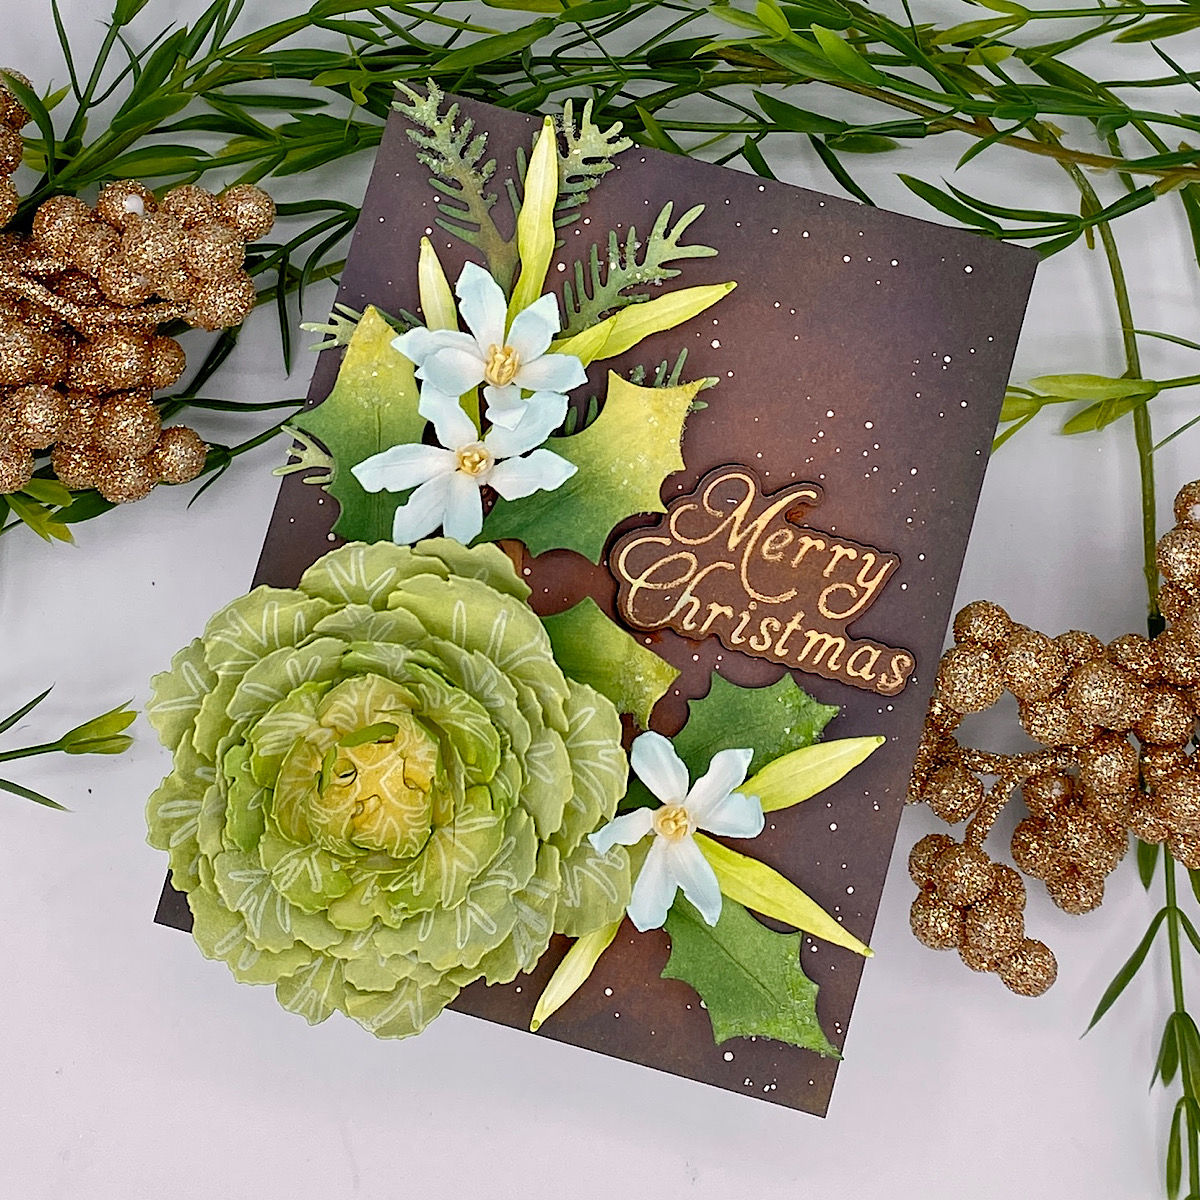
- A panel 4 1/4’ by 5 1/2” Bristol Smooth was ink blended with Distress Oxide Inks randomly applying Walnut Stain and Vintage Photo. Black Soot was applied to the perimeter of the panel. It was adhered to an A2-sized card base.
- The panel was spattered with PH Martin’s Bleedproof White.
- An extra piece of card stock was inked for the sentiment from The Snow Garden Sentiments. The sentiment was foiled with Gold. The sentiment and black foam were cut with the coordinating die and the sentiment stacked.
- The Ornamental Cabbage and Kale is made up of 4 layering dies. Two of each of the three smaller sizes and three of the largest were cut from Bristol Smooth card stock. Using a clear block, each of the layers were stamped with the coordinating stamps with Versamark ink and clear embossed.
- The smallest layers were inked with Distress Oxide inks Shabby Shutters and Scattered Straw. The back of the die cuts and edges of the leaves were inked with Mowed Lawn. The larger die cuts were colored with just Shabby Shutters and Mowed Lawn.
- The medium-sized ball tool and the foam molding mat from Susan’s Garden Ultimate Tool Kit were used to shape the leaves. Using a circular motion, the ball tool was applied to the edges of each leaf giving it a wavy texture. The center of each layer was depressed to cup it. The die cuts were stacked largest to smallest by applying glue in the center and offsetting the leaves. The ball tool was used to depress the center after each layer was added.

- Glory of Snow was cut from Bristol Smooth card stock to create two flowers. The flower petals, front and back, were inked with Distress Oxide Ink Tumbled Glass fading to white in the center. The stamens were inked with Scattered Straw and the leaves with Mowed Lawn and Shabby Shutters on the tips.
- To shape the flower petals, the small leaf tool was applied down the center of each petal. The tweezers were then placed at the base of each one and creased upwards. Two of the layers were adhered together offsetting the petals. Using the tweezers, adhesive was applied to the base of the stamens and it was curled around the tweezer nose. The stamen adhered to the flower center. The leaves were creased in the center at the base using tweezers.
- American Holly was also cut from Bristol Smooth and inked front and back with Rustic Wilderness, Scattered Straw, and a touch of Black Soot on the base of each leaf.
- To shape the holly, I simply used the leaf tool down the center of each leaf and then creased it with the tweezers at the base.
- The Hemlock branch was colored and shaped in the same manner as the previous card.
- The adhesive was applied to the tips of the needles on the hemlock and holly leaves and clear, chunky glitter was sprinkled on.
- The elements and stacked sentiment adhered to the card front. The hemlock branches adhered to the card front along the central branch and the leaves just at the base. Foam squares were used to attach the skate and the chickadee. A good dollop of liquid adhesive was used to position the ornamental cabbage and flowers!
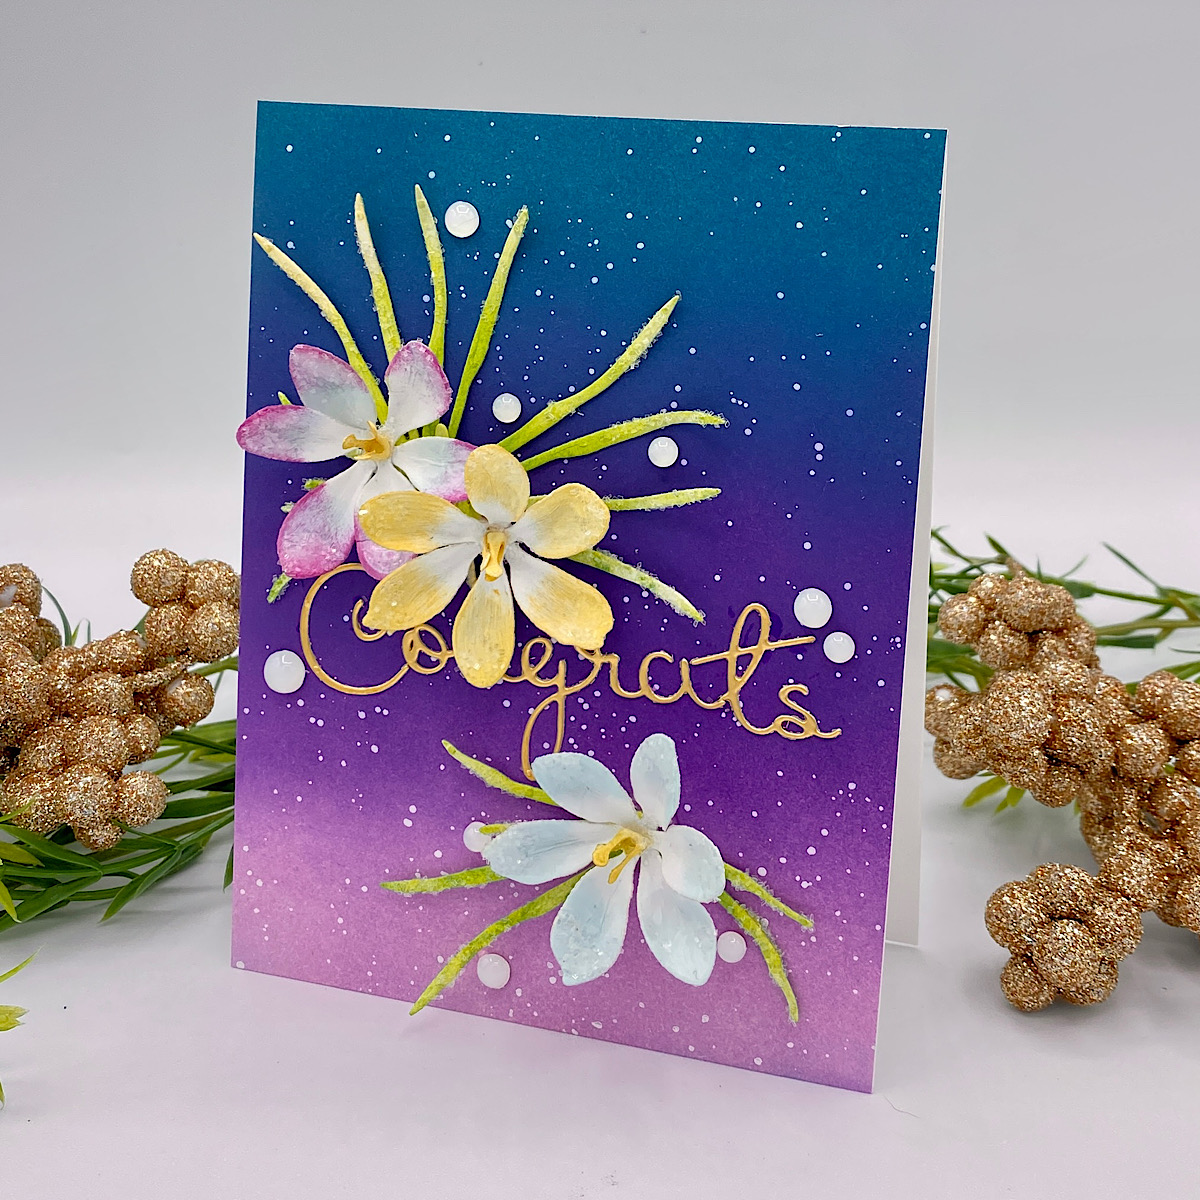
Crocus

- A panel 4 1/4’ by 5 1/2” Bristol Smooth was ink blended with Distress Oxide Inks beginning with Spun Sugar at the bottom and working towards the top with Villainous Potion and Unchartered Mariner.
- The panel was spattered with PH Martin’s Bleedproof White.
- The petal layers, stamens, and multiple leaves were cut from Bristol Smooth card stock. Two petal layers are required for each crocus.
- The crocus petals, front and back, were inked on the petal tips fading to white toward the flower center using Distress Oxide Inks Seedless Preserves, Scattered Straw, and Tumbled Glass. The leaves were colored with Mowed Lawn and the stamens with Scattered Straw.
- The petals were shaped with the medium-sized ball tool on the foam molding mat. Facing right side up, the ball tool was applied in a circular motion in the center of each petal. Tweezers were used at the base of each petal and it was creased upwards. Using the ball tool, the center of the petal layer was depressed. One layer was adhered to the other offsetting the petals. Using the tweezers, adhesive was applied to the base of the stamens and it was curled around the tweezer nose. The stamen adhered to the crocus center. The leaves were creased in the center at the base using tweezers.
- The adhesive was applied to the tips of the crocus petals and leaves and clear, chunky glitter was sprinkled on.
- A sentiment from Outlined Sentiments was cut from gold card stock and adhered to the card front.
- Using a glue dot, the leaves were positioned to fan out from the central point. The crocuses were adhered with a dollop of liquid adhesive.
- Aura Opalescent Sequins were used to embellish the card. The sequins were finished off with Morning Crystal Drops Morning Dew.
Spellbinders Supplies:

Other supplies
Bristol Smooth Card Stock, Distress Oxide Ink Villainous Potion, Distress Oxide Ink Unchartered Mariner, Distress Oxide Ink Walnut Stain, Distress Oxide Ink Shabby Shutters, Distress Oxide Ink Rustic Wilderness, Distress Oxide Ink Tumbled Glass, , Distress Oxide Ink Seedless Preserves, PH Martin’s Bleedproof White, Chunky Clear Glitter, Puffy Embossing Powder, Copic markers; 100 (black),E30, W3 and W5, Silver Metallic Embroidery Floss. Small Jingle Bells
I hope these cards featuring the Snow Garden Collection inspire you to make Christmas and all occasion cards that pay homage to the winter garden …. beauty to be appreciated! Thank you very much for your visit!
Crafty hugs,
Bonnie

2 Comments
MaryH
Love your coloring and layouts. My favorite was the ice skates – loved the detail of adding those little bells!!!
Bonnie
Oh thank you for your kind words, Mary!