Coloring With Olo Markers on X-press It Blending Card
Hi everyone! This is Jennifer Rustioni from @armieritagli! Today I share with you a step-by-step tutorial of the card I realized featuring the wonderful Olo Markers! These alcohol markers are truly fantastic and have very bright colors! I’m in love with them!
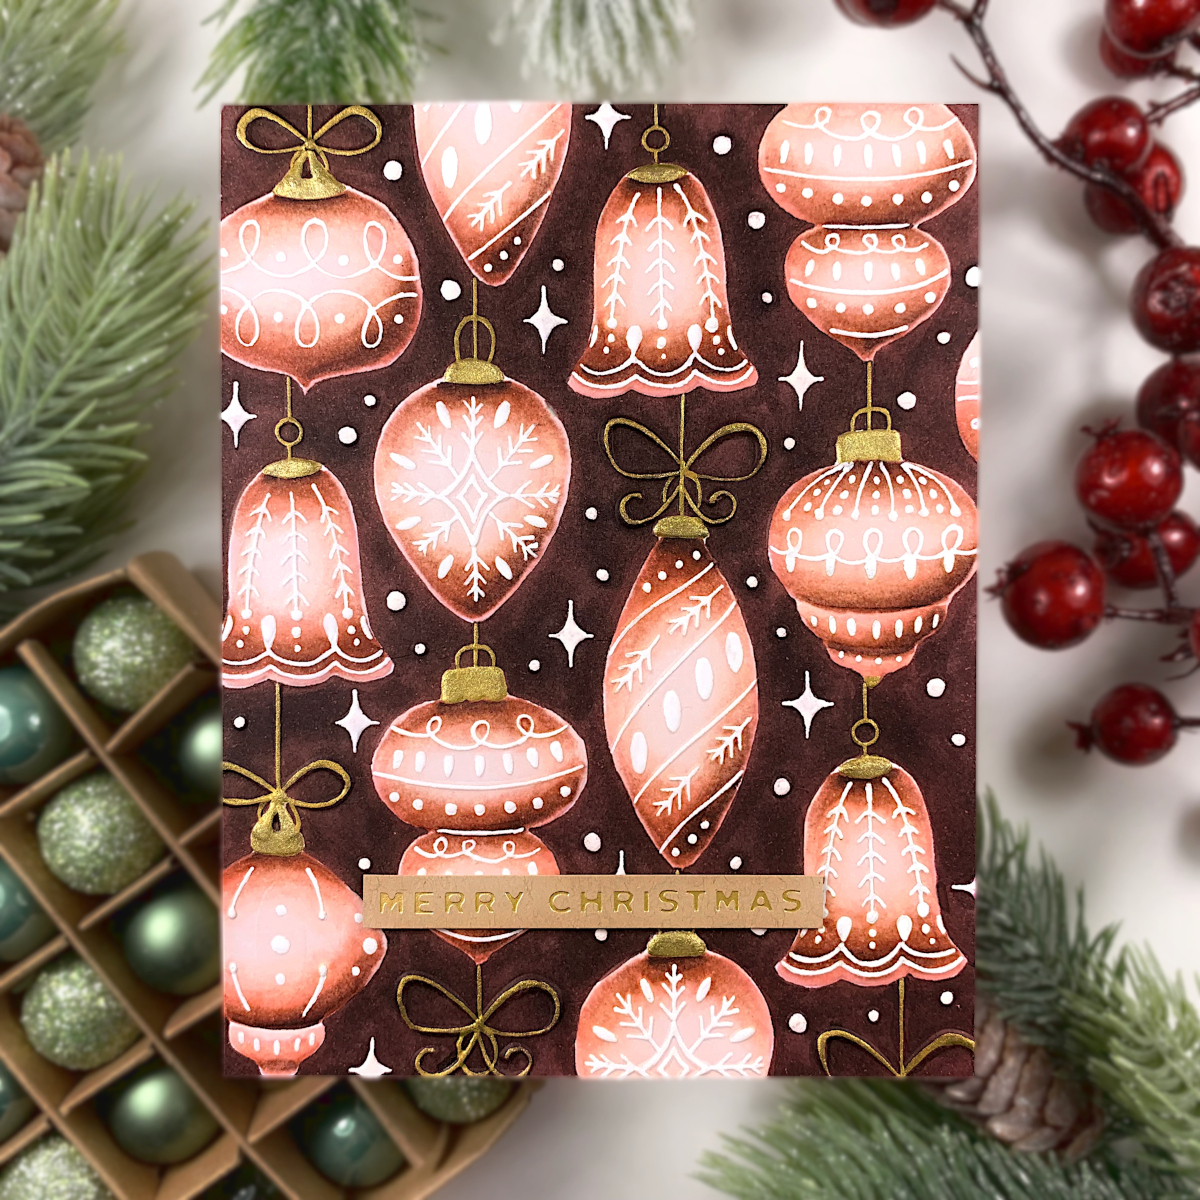
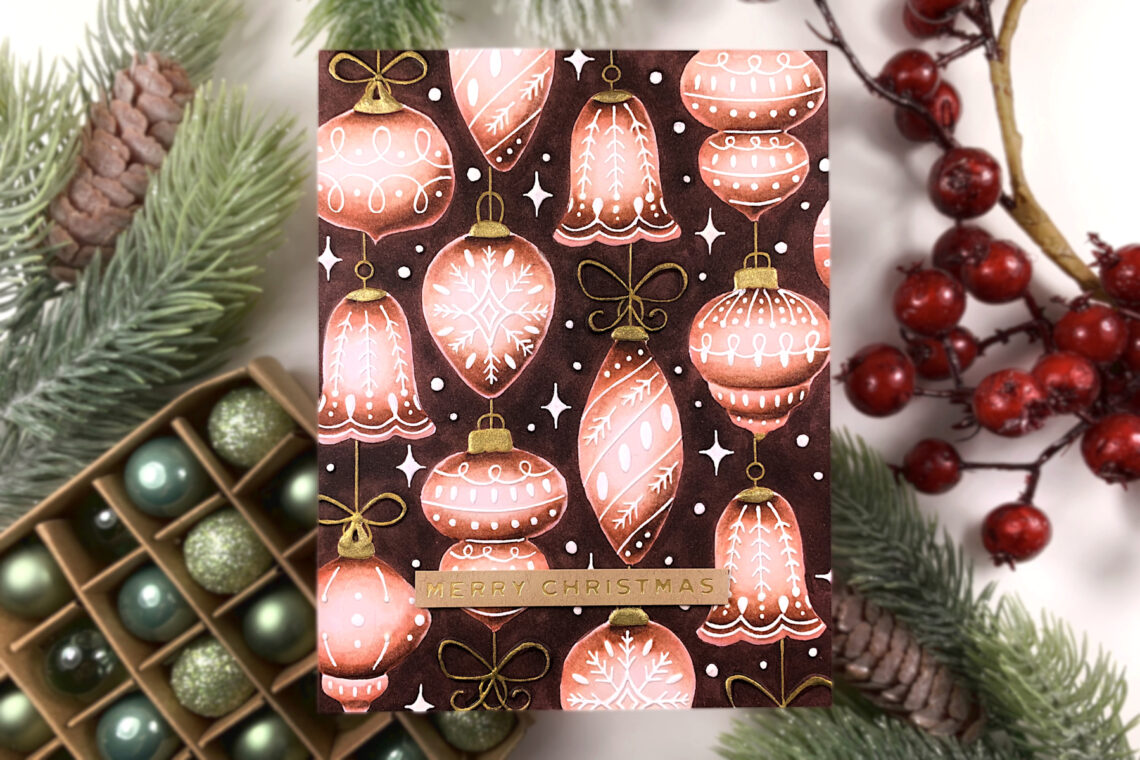
I chose to use the Olo Markers to create a Christmas card. I realized a coloring different from my usual, using an embossing folder instead of a stamp.
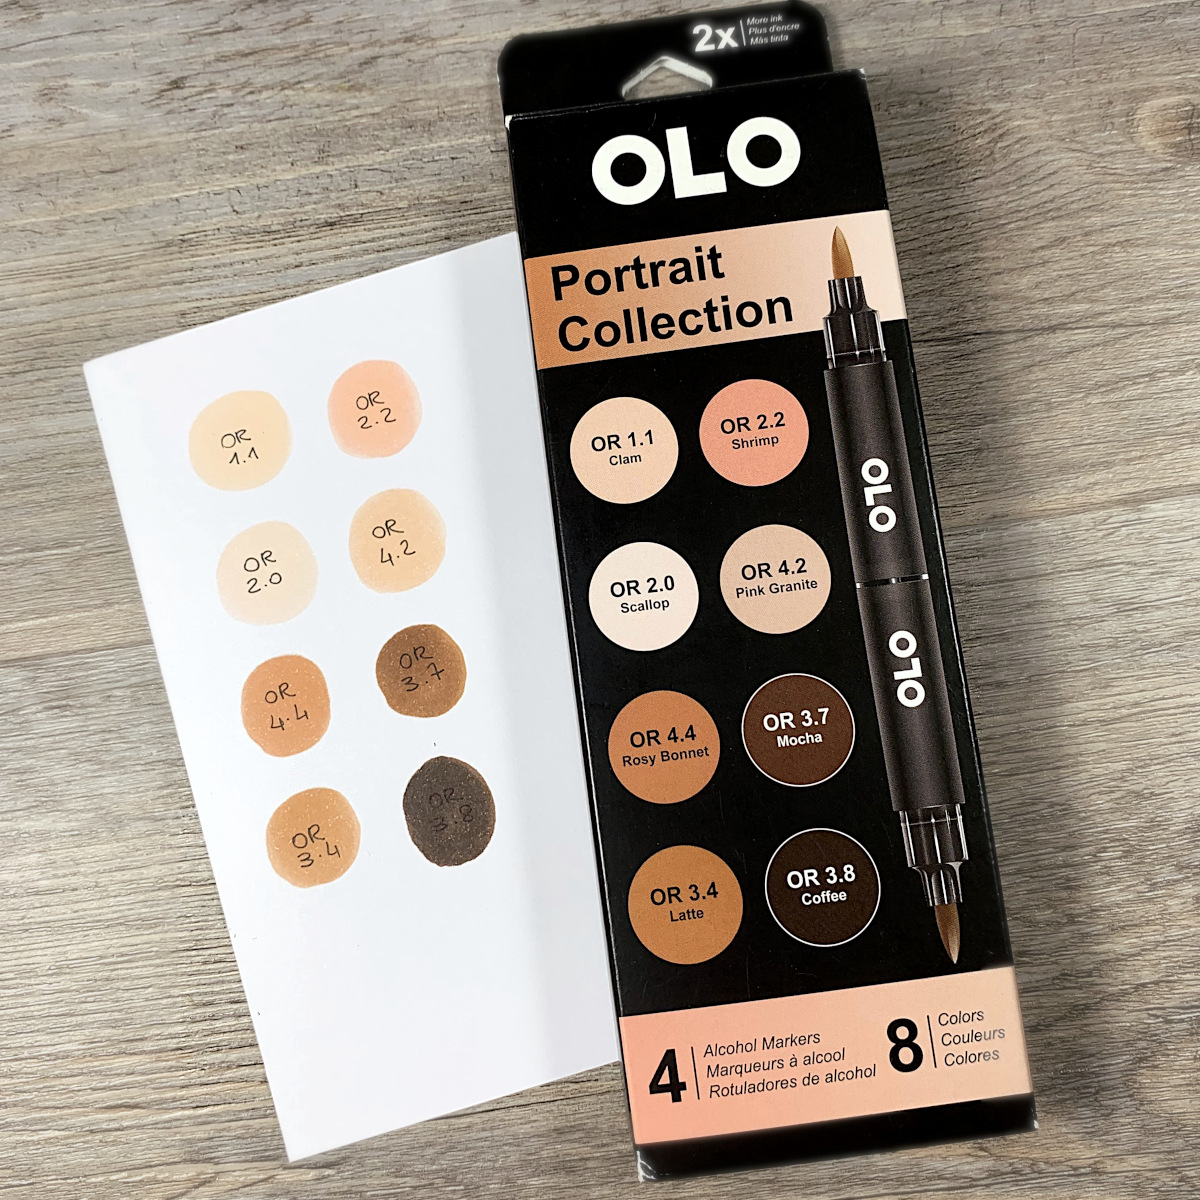
When using brand new colors (every type of color) for the first time, I always recommend you to create a color chart. This is really important because the real colors are often very different from the colors on the packaging. This way you’ll always know which color corresponds to a specific name or code. As you can see, I used the Portrait Collection and these shades are really beautiful and vibrant! When you use alcohol markers, I recommend using a specific paper for this type of coloring. I used the X-Press It Blending Cards which is very smooth and perfect to use with alcohol markers.
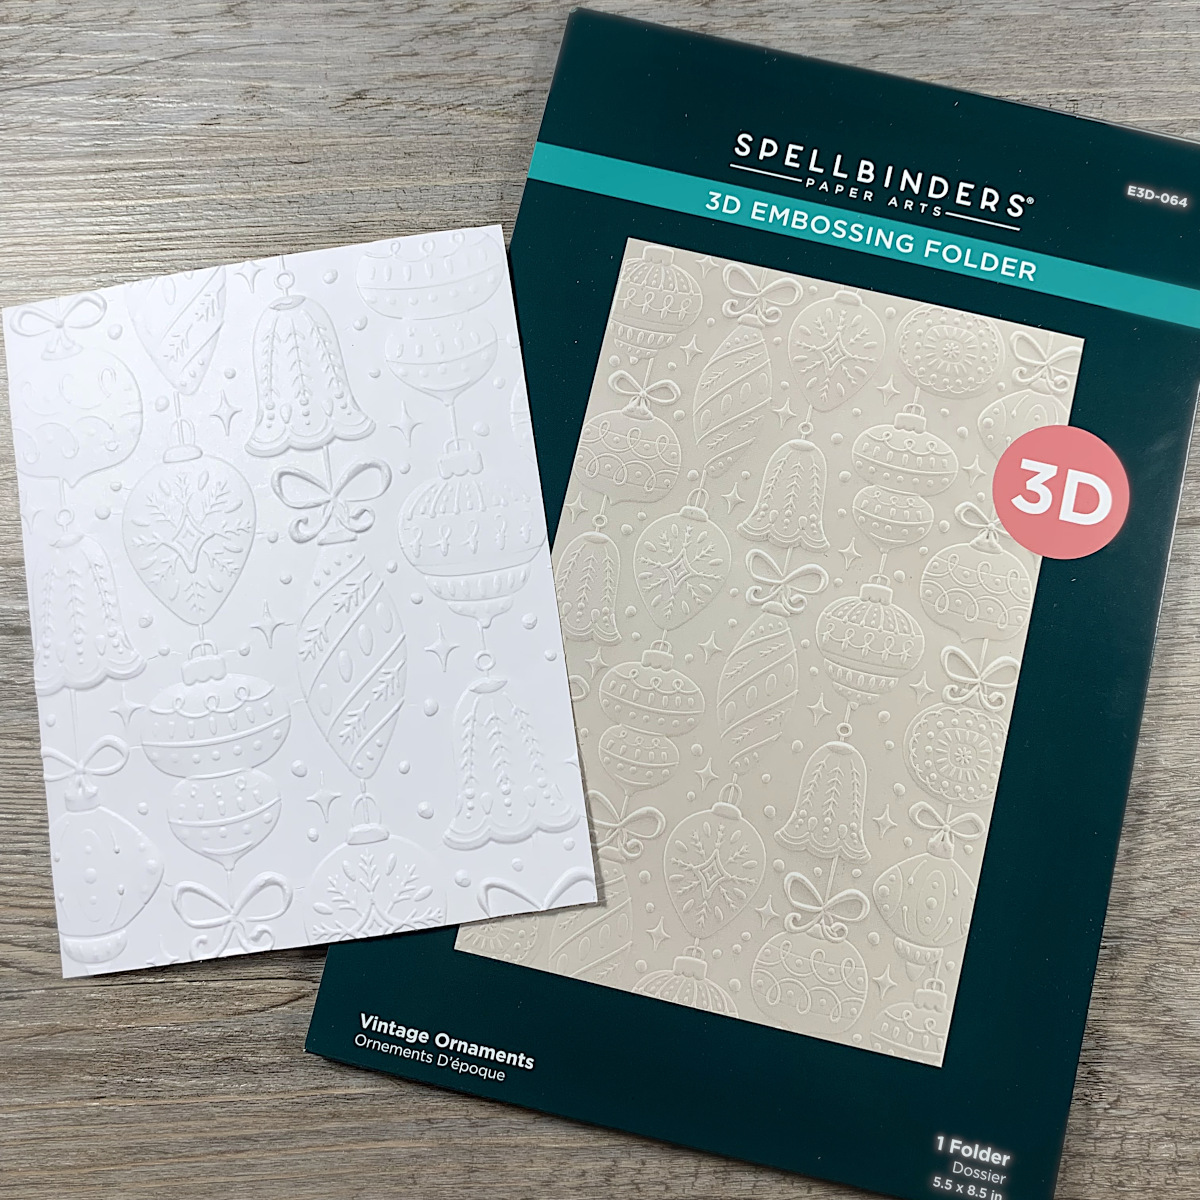
After making the color chart, I embossed an X-Press It Blanding Card. In this case, I recommend you to DON’T WET the paper before embossing it because this specific paper is not made to use it wet. Indeed, if you wet it, you’ll definitely ruin it. However, you’ll have a very good result by embossing it dry.
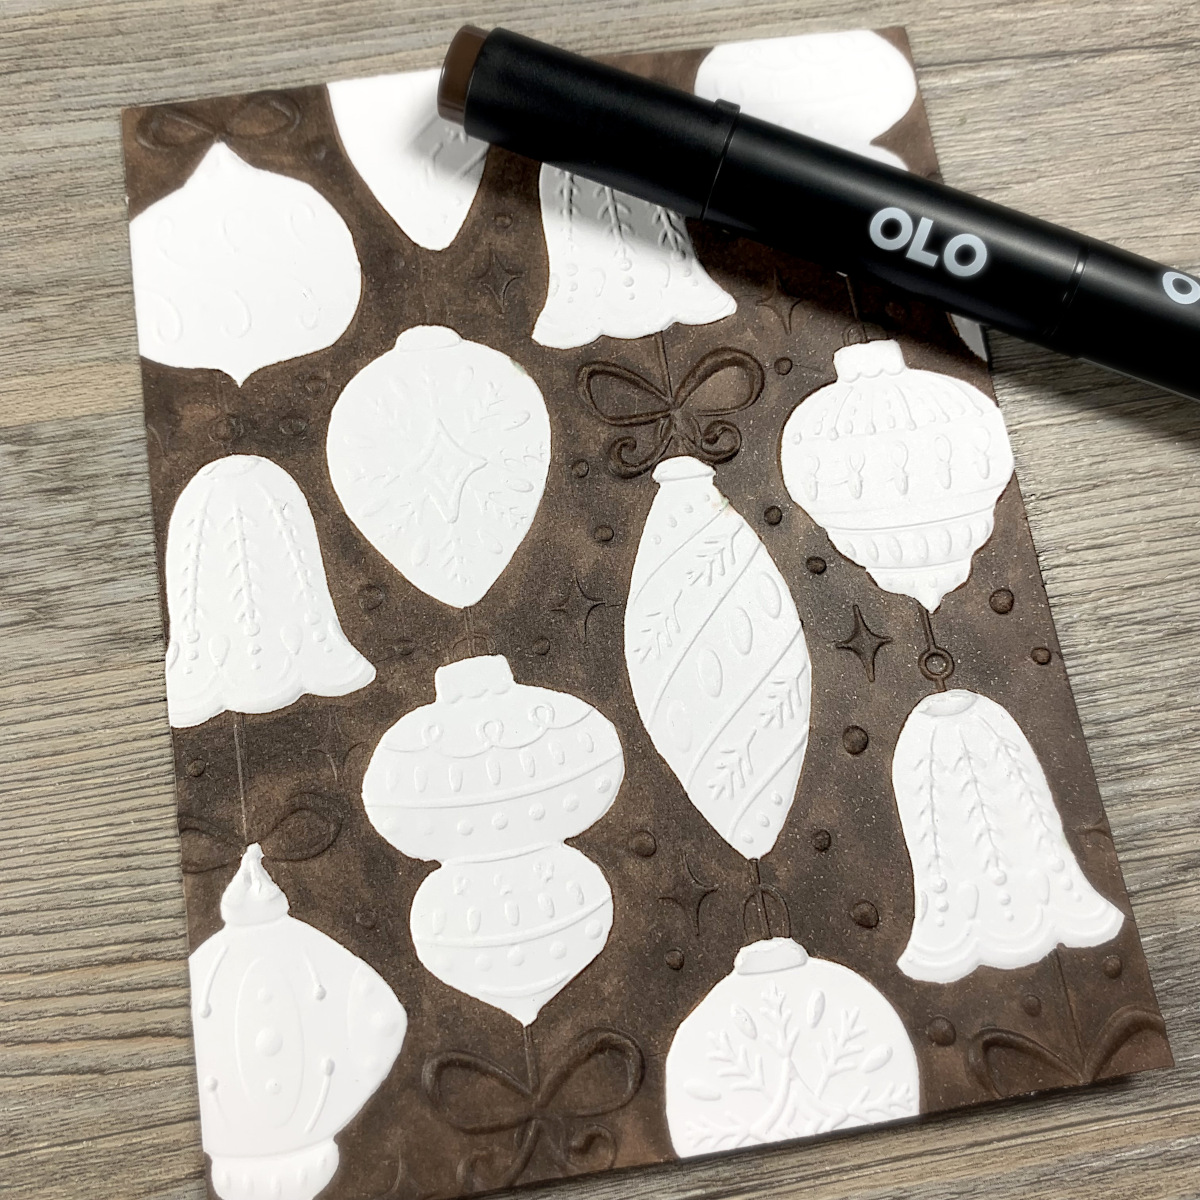
At this point, I started to color my embossed paper. I realized a uniform brown background using the OR 3.8 Coffee Olo Marker. I also went over the sparkling details and the ribbons.
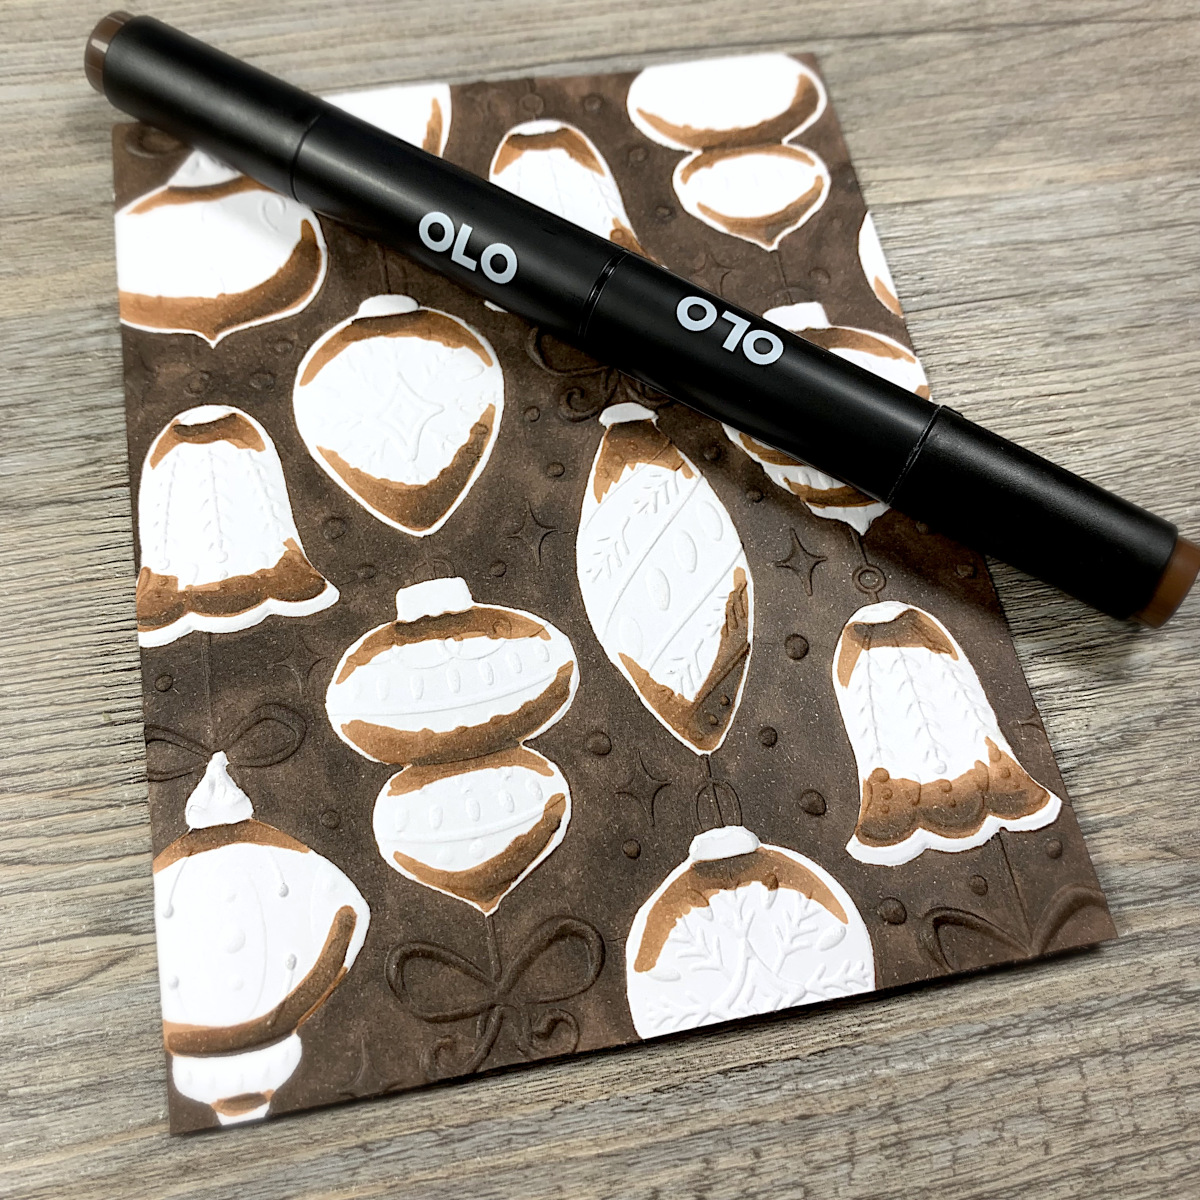
I started coloring the ornaments, starting from the shaded areas using the OR 3.8 and OR 3.7 Olo Markers. When I make a coloring with alcohol markers, always prefer to start with the darker colors and gradually proceed with the lighter ones.
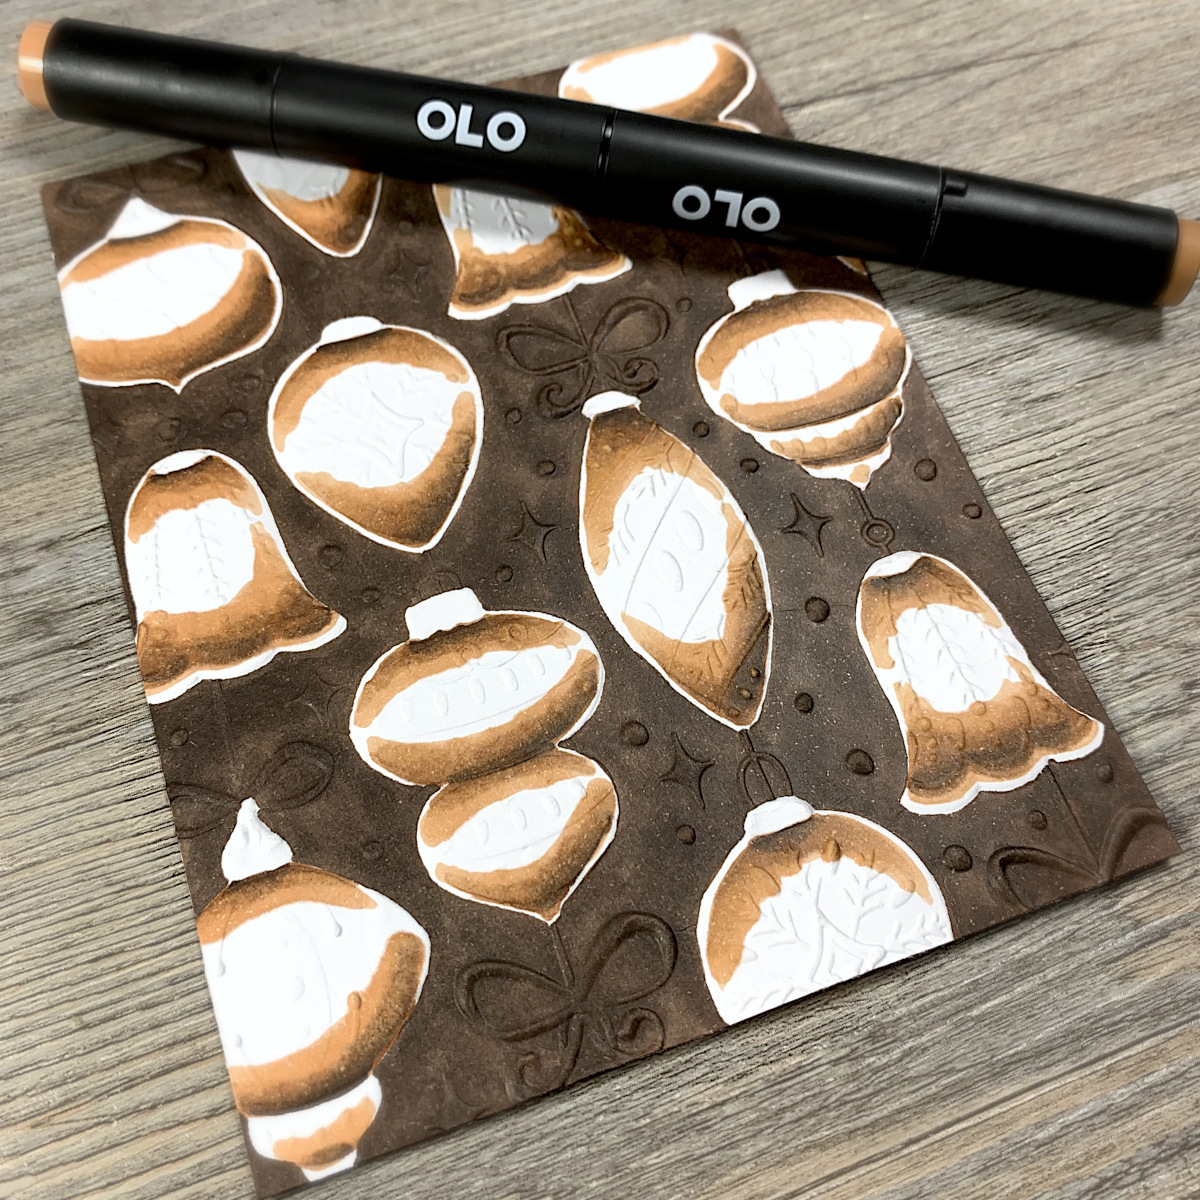
Then, I proceed with the medium shades. For this Step, I used the OR 4.4 and the OR 2.2 Olo Markers.
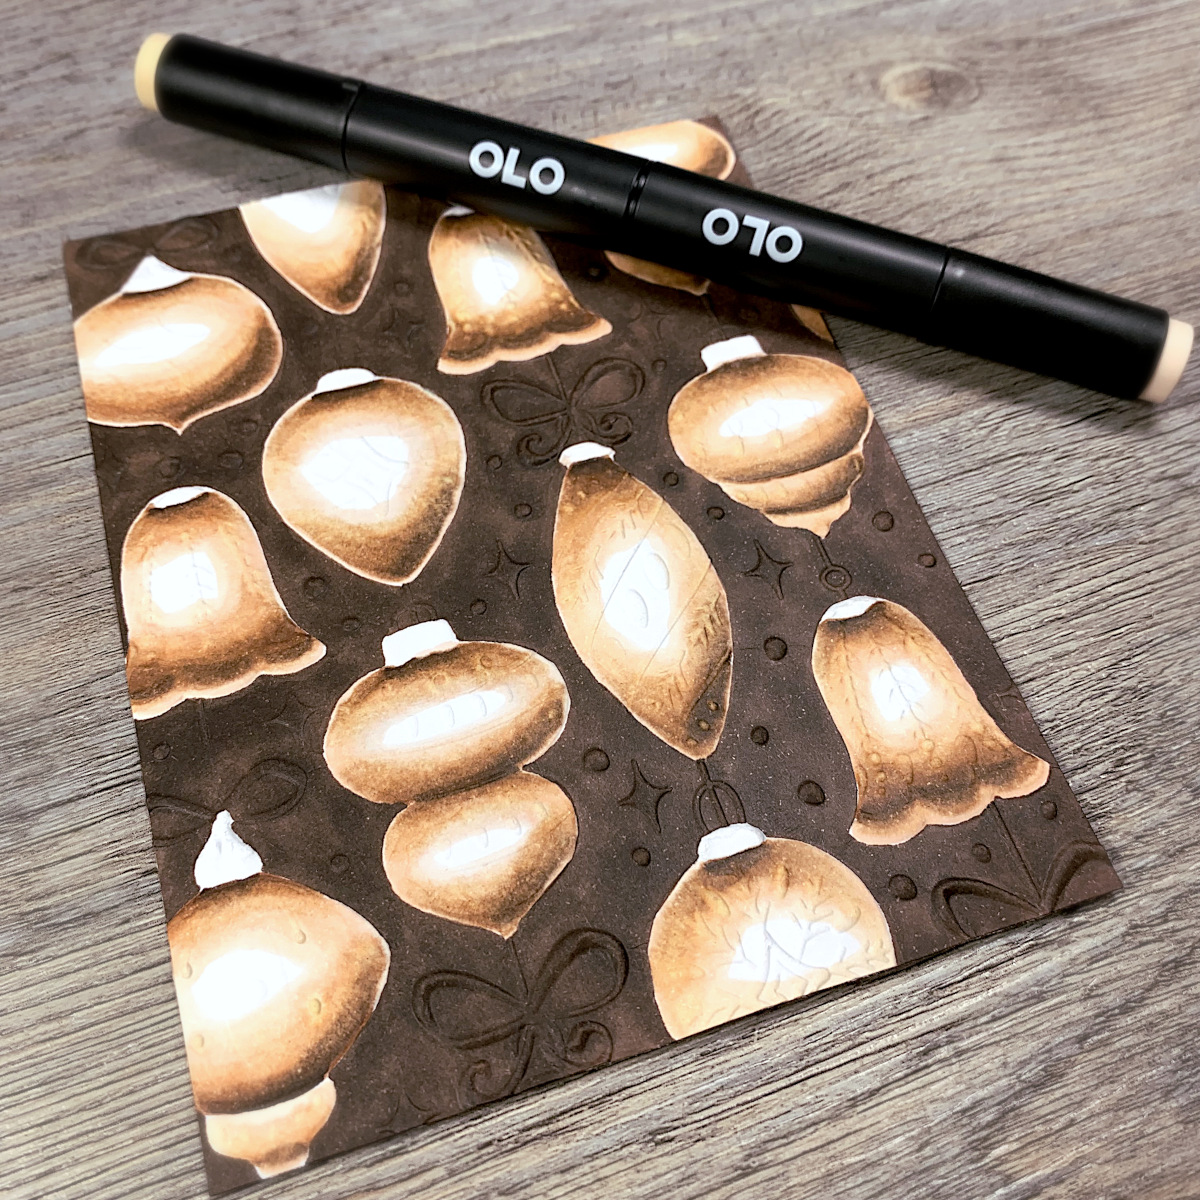
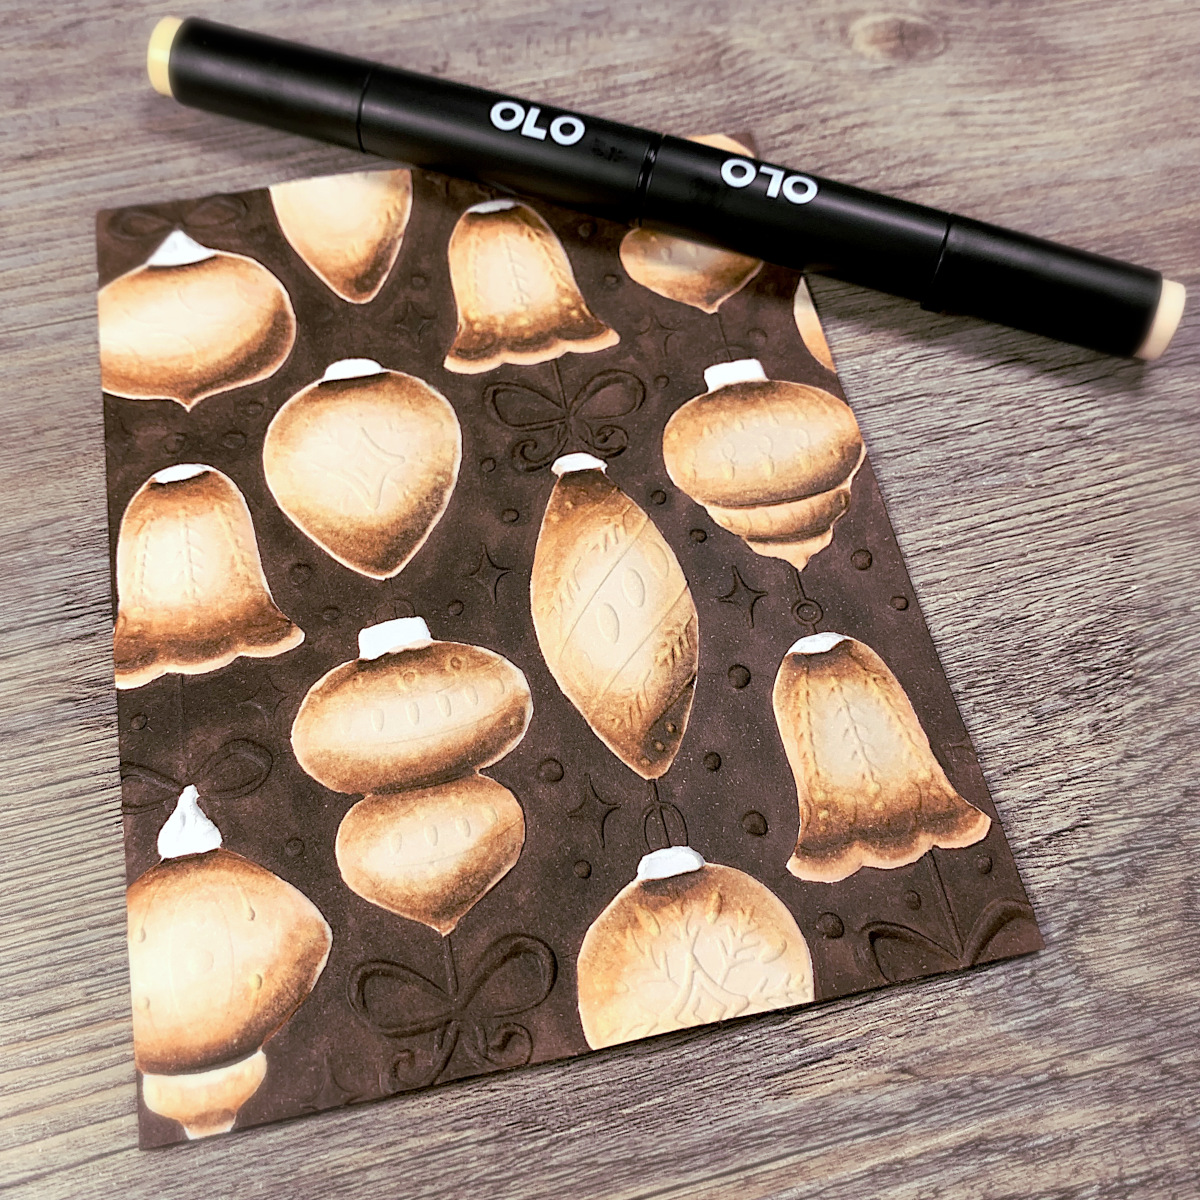
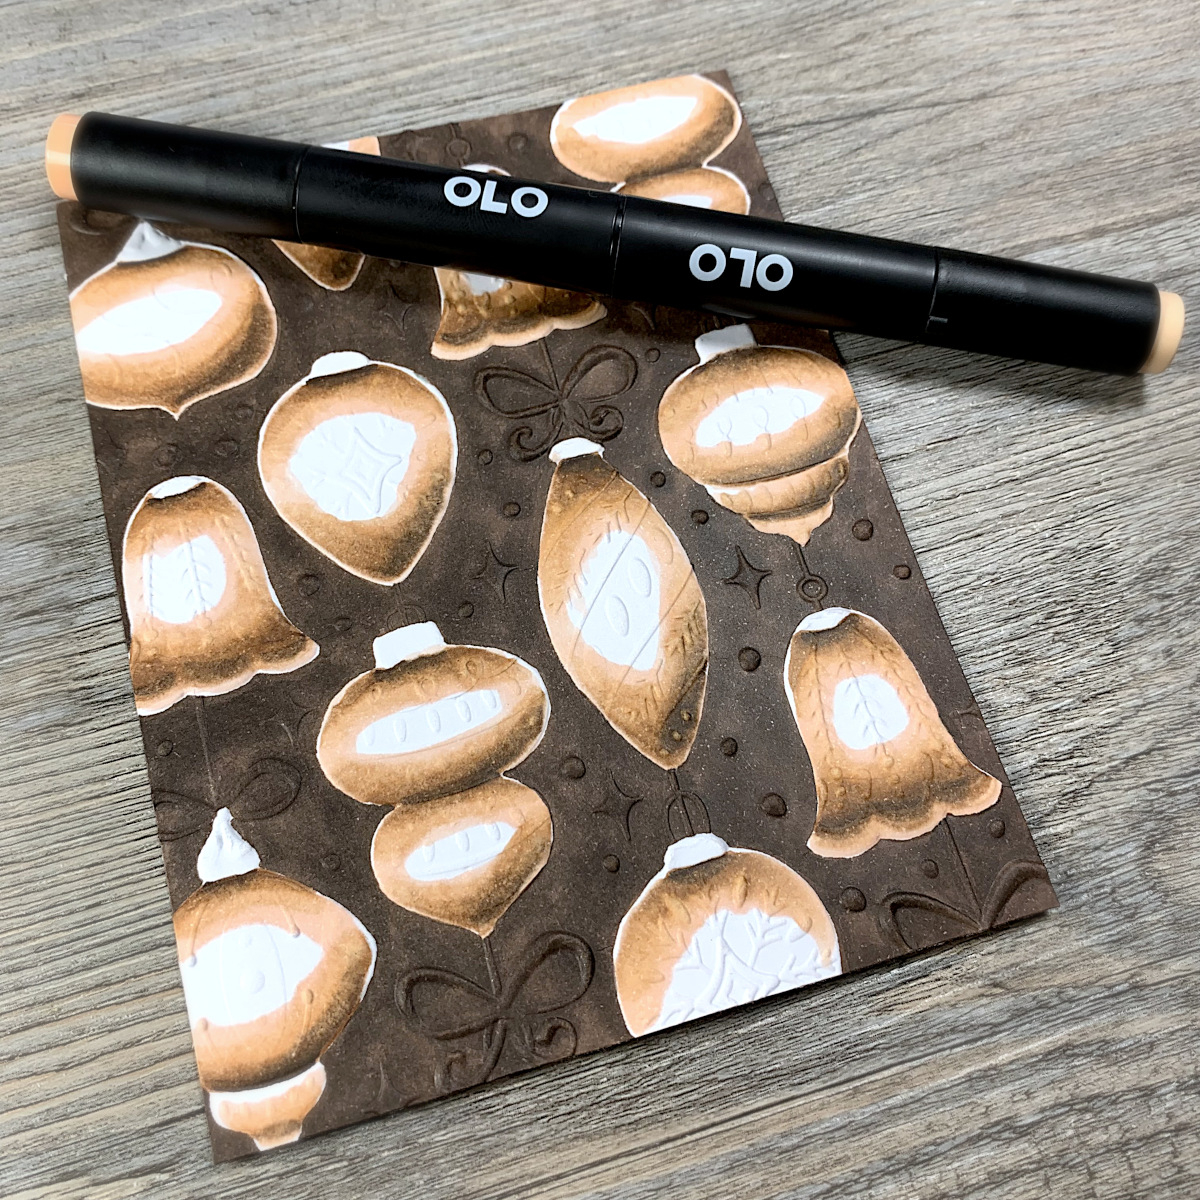
I finished coloring the ornaments with the lighter shades, OR 1.1 and OR 2.0 Olo Markers.

At this point, I colored the details of the ornaments and the sparkling on the background with a white gel pen. Then, I colored the ribbons with a gold metallic marker.
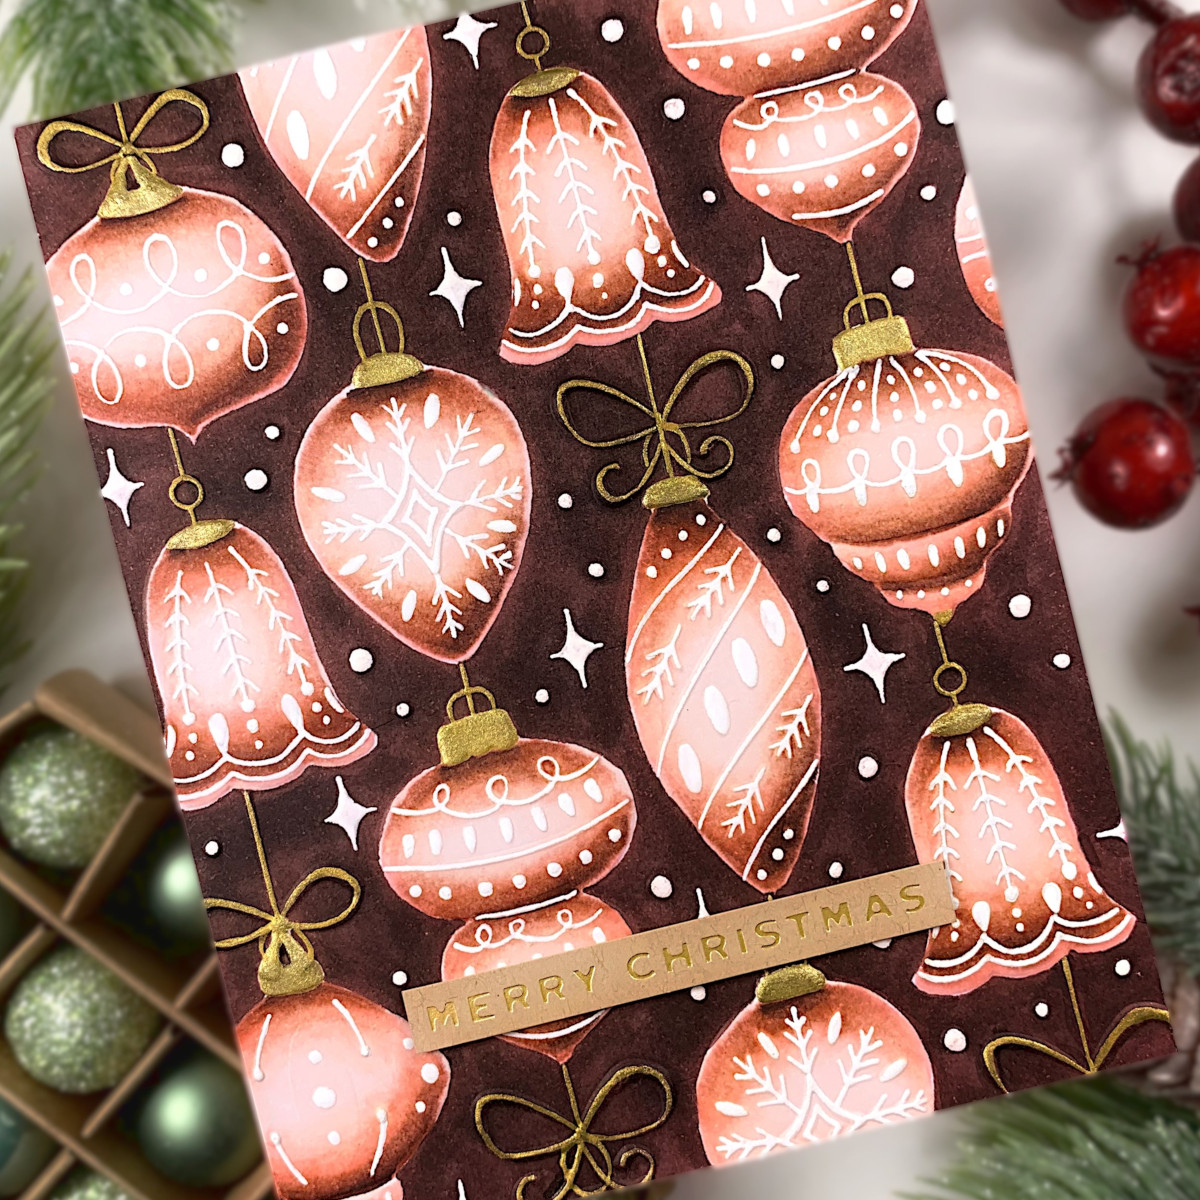
At last, I gold hot foiled a sentiment from the Spellbinders Christmas Magic Glimmer Hot Foil Plate from the Tinsel Time Collection to create a small banner and glued it on my card.
Spellbinders Supplies:

Other supplies
Deco-color By Uchida Premium Gold Metallic Marker.
Thanks for stopping by! I hope you’ll like my project and it will inspire you! Wish you all a wonderful day!

3 Comments
Darlene Rolls
Just absolutely stunning.
dtoledo56
Beautiful card!
Stephanie Clapper
Thank you so much for the step by step coloring, including all your tips and information. I’ve never been proficient with marker coloring but I may just give it a try. Thanks to you! Absolutely amazing post!