‘365 Moments Like These’ Mini Album by Angela Tombari
Hi dear Spellbinders friends! It’s Angela here and today I have a cute mini album to show you. I made it using Noteworthy collection from Simple Stories combined with several Spellbinders products like dies, hot foil plates, wax seal, and more. I had so much fun creating it and I hope you like it too!
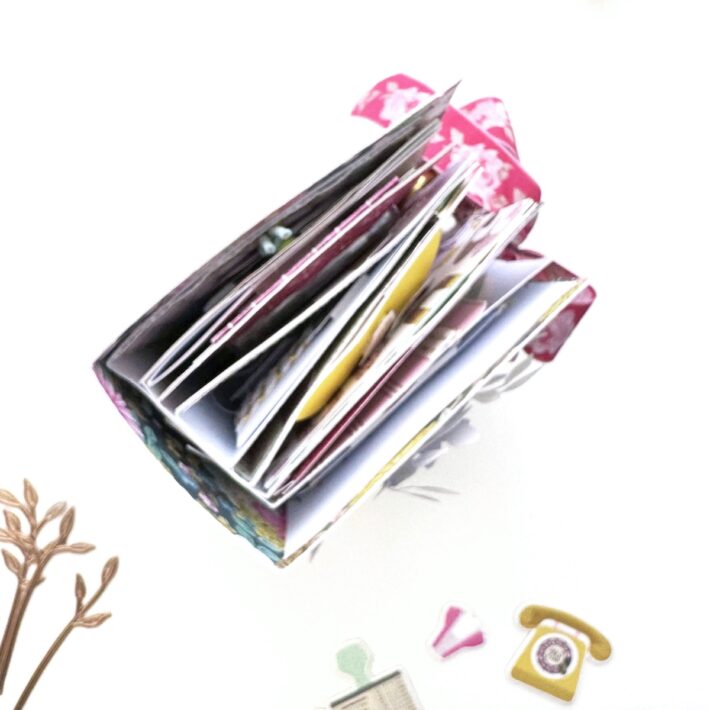
I will start by giving you some measurements. The mini is 8 inches tall and 4,75 inches wide, while the pages are 7 x 4,25 inches. There are 8 pages in total plus several inserts and flaps that can accommodate photos.
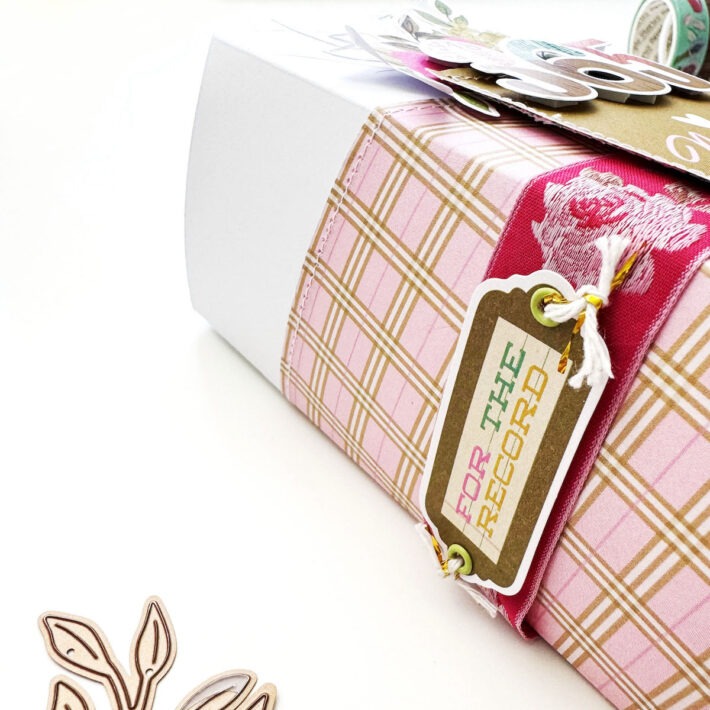
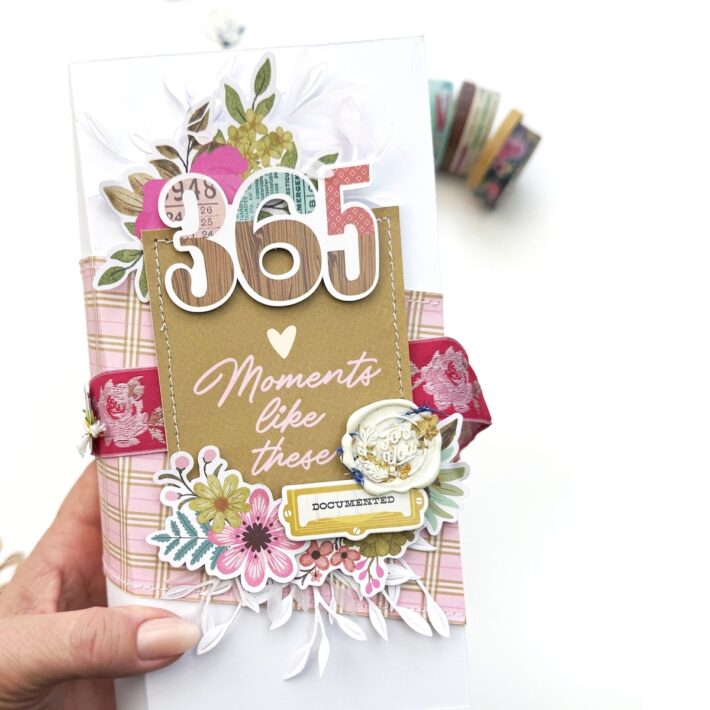
The closure of the mini is made with a ribbon that wraps around the cover and is long enough to tie a scenographic bow on the side.
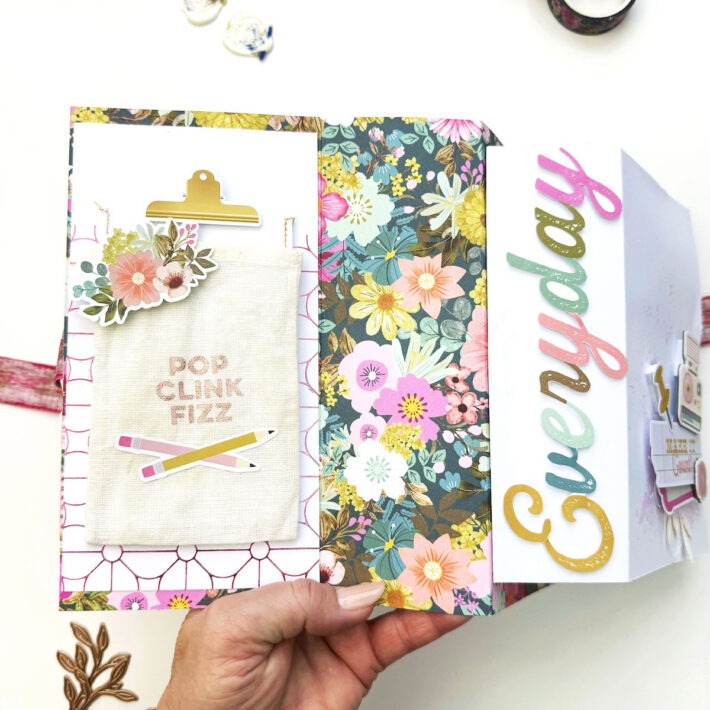
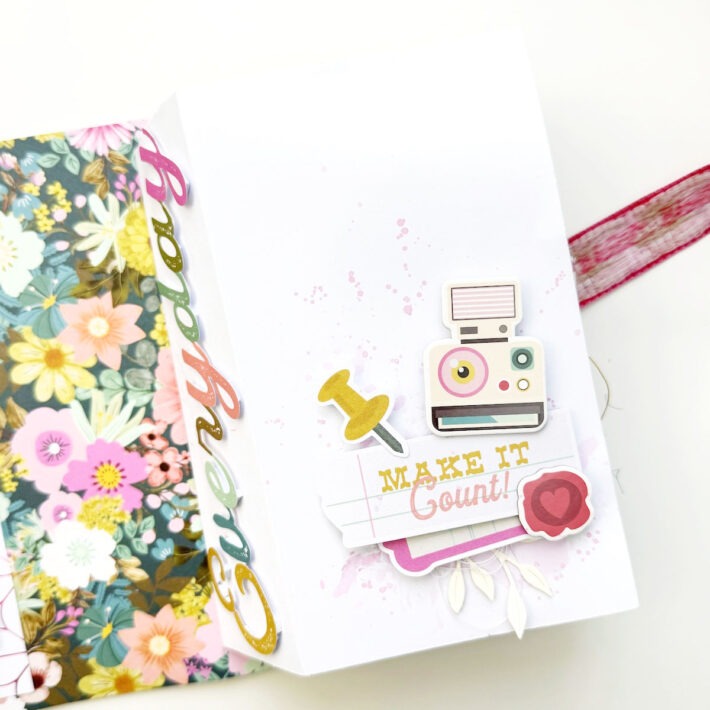
For the mini’s skeleton, I mainly used white cardstock covered with beautiful patterned papers from Noteworthy collection. There are a lot of pretty embellishments in the collection, especially die cuts of different sizes, like the Big Bits & Pieces pack from which the Everyday die cut of the spine comes from.
Opening the cover, on the left, I did an experiment using hot foil on fabric and it worked! The best type of fabric to use is smooth cotton or linen because they can withstand the high temperature of the foiling process. The shiny effect of foil on the fabric is absolutely gorgeous, you must try it.
To decorate the pages of the mini I played a lot with die cuts, chipboards and stickers combined with Spellbinders die cuts. For example, I created a soft layer of leaves dies underneath the die-cut cluster.
Noteworthy collection has coordinated washi tapes too. I particularly love the one with the typewriter font. I used it as is, in a long stripe glued to the side of a page and I even cut out a few phrases to decorate another page further on.
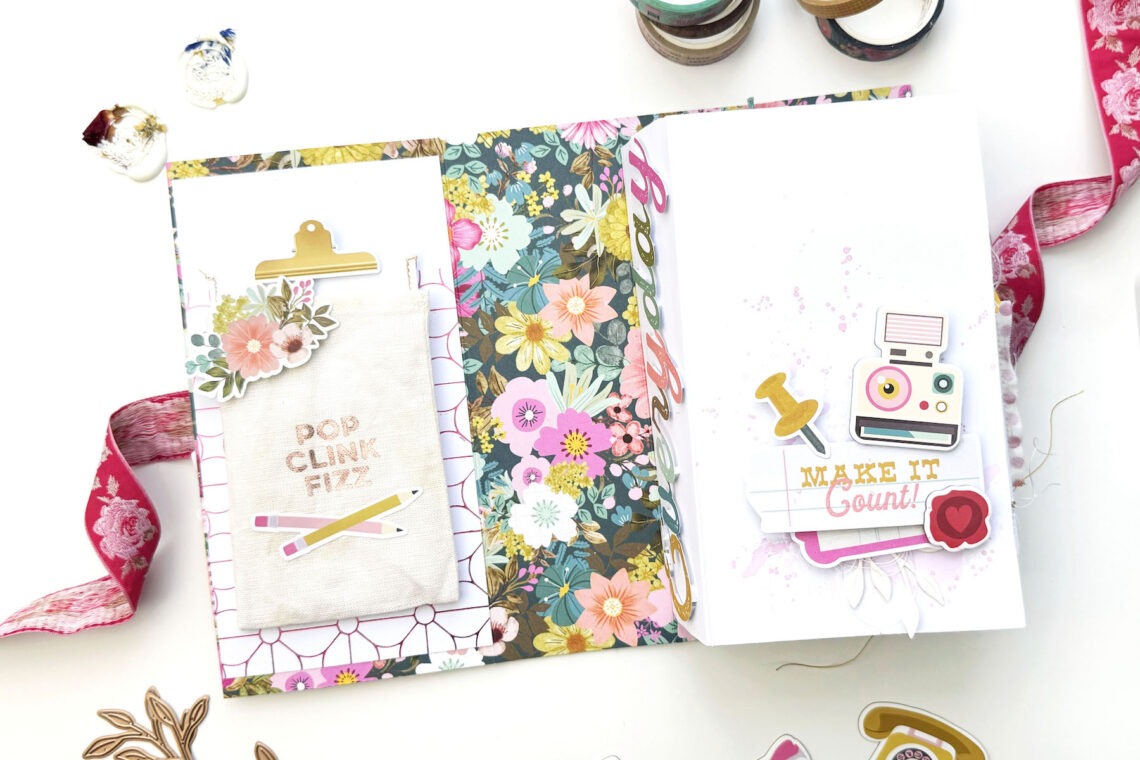
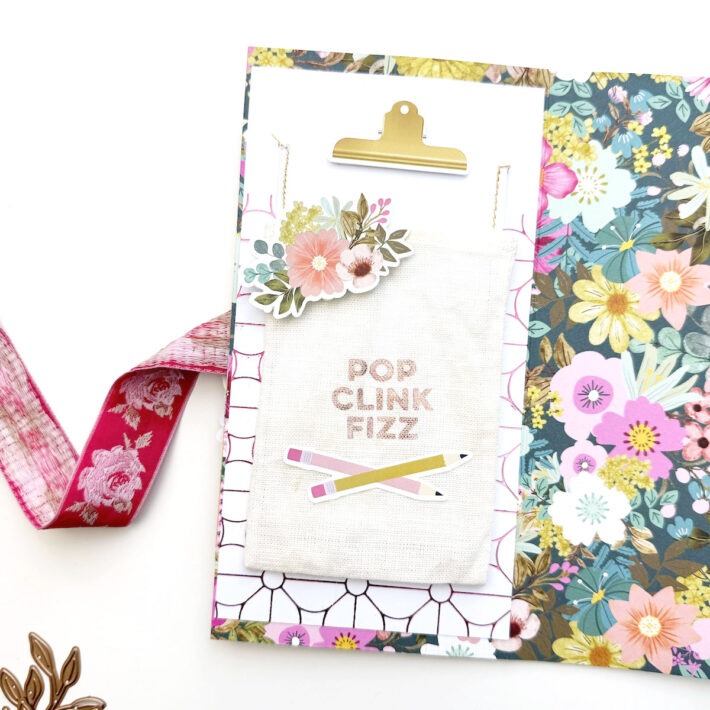
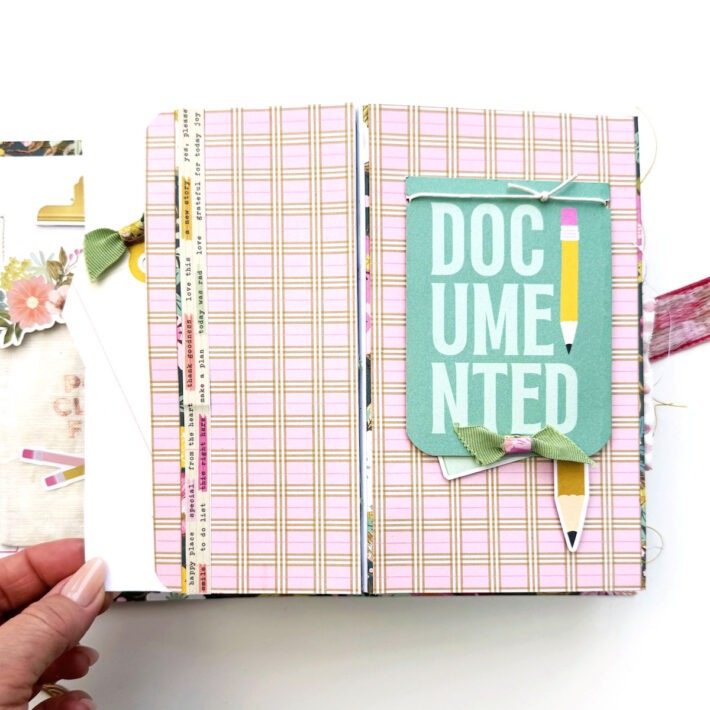
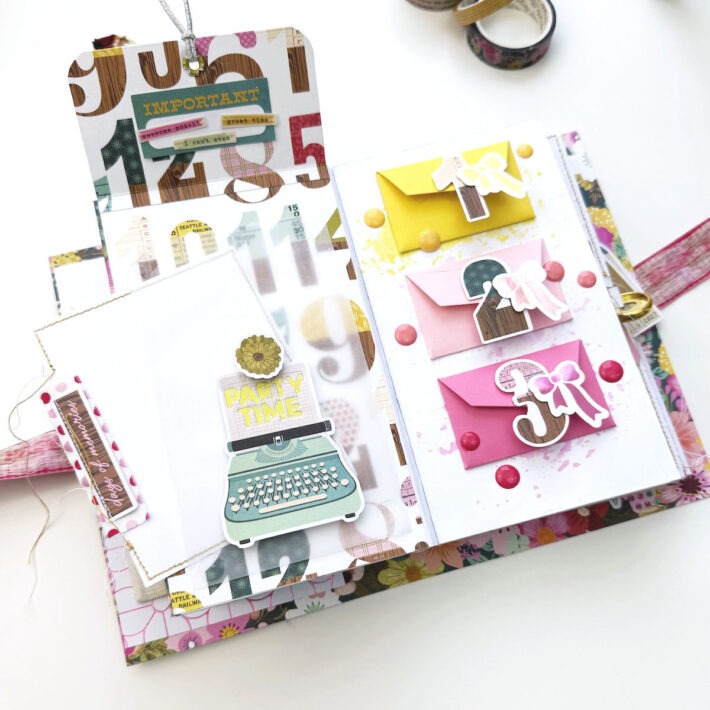
As I said at the beginning, in the mini, there are many interactive pages with flaps and pockets like in these two pages. A pocket on the left with a tag inside and a flap on the right, made with a journaling card cut out from one of the patterned papers.
There is another little flap with a vellum pocket also in the following page. The flap is held closed by an elastic band. Underneath it, a piece of vellum creates a pocket that holds a card in place.
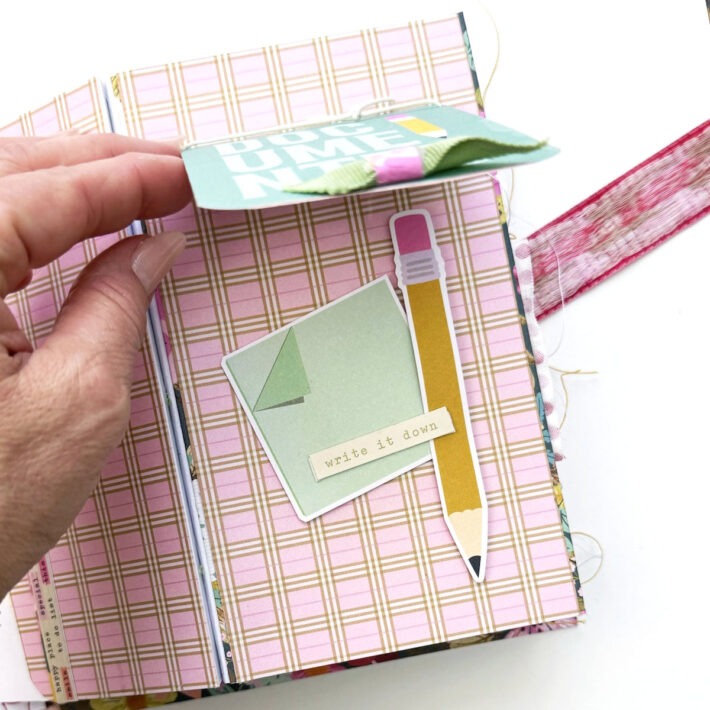
Here, I experimented with foiling on a die cut. It’s easier than foiling on fabric because the die cut is made of paper. Just look for small foiling plates. I used the Party Time glimmer foil plate on the cute typewriter die cut. Isn’t it fun?
This is how the page appears with the flap open. Can you spot the washi tape phrases that I fussy cut?
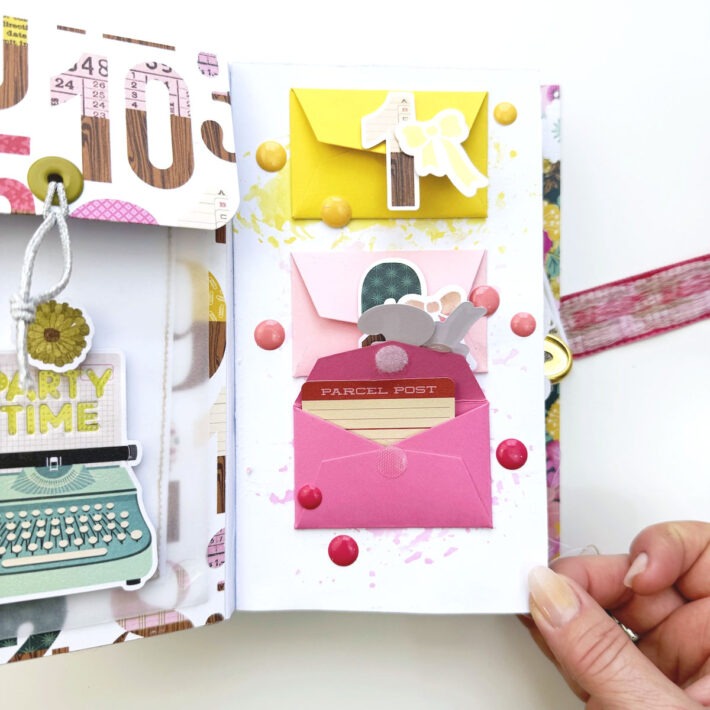
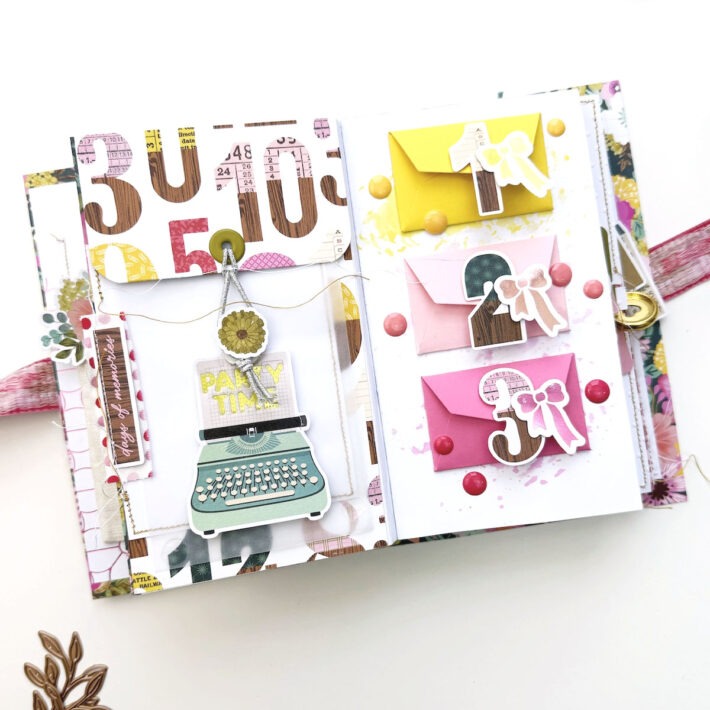
On the opposite page, I created three small envelopes using Spellbinders Mini Envelope 2 dies and Bright Color Essentials cardstocks. Inside each envelope, I placed a little journaling card and on the outside, I embellished it with a number and a pretty bow that I foiled in coordinated color.
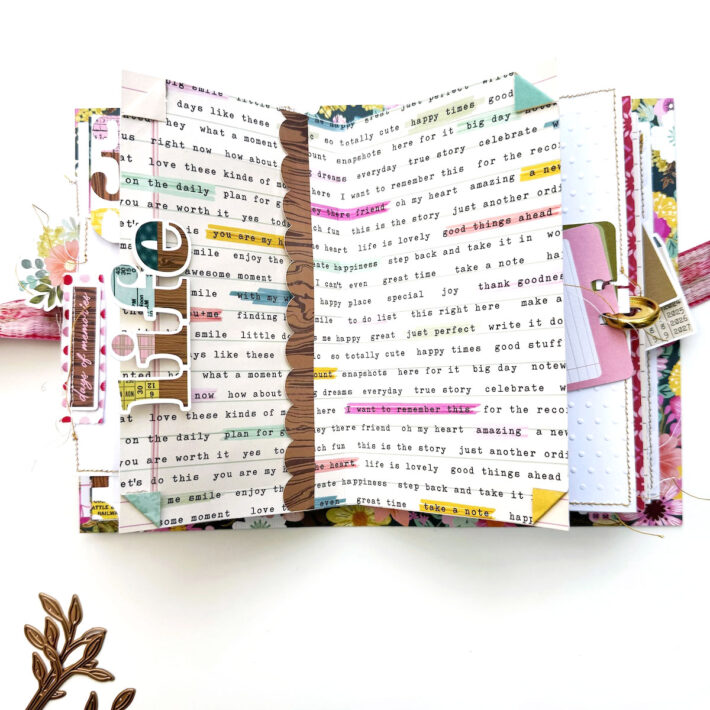
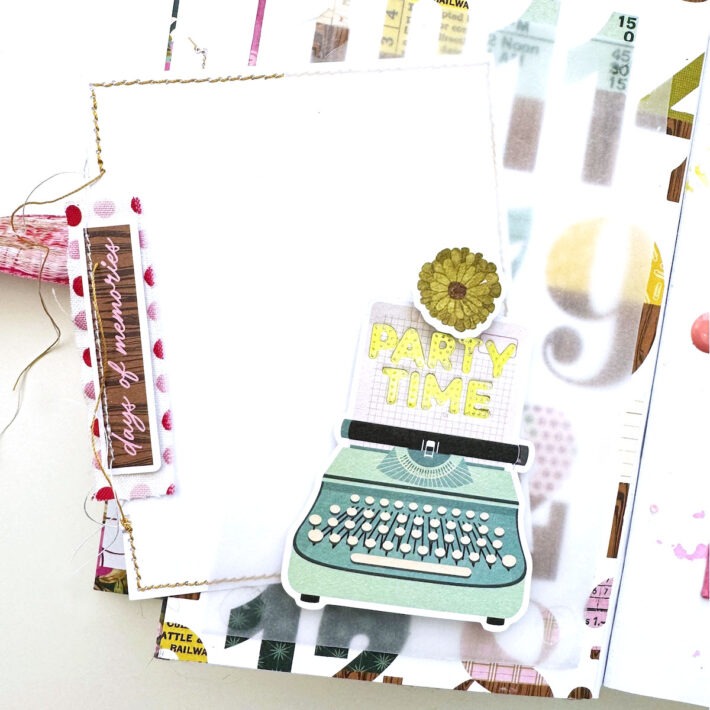
The following pages are made with patterned paper. There is a hidden pocket with a transparent card inside. It is hard to spot it. I wanted to recreate an intriguing see-not-see effect.
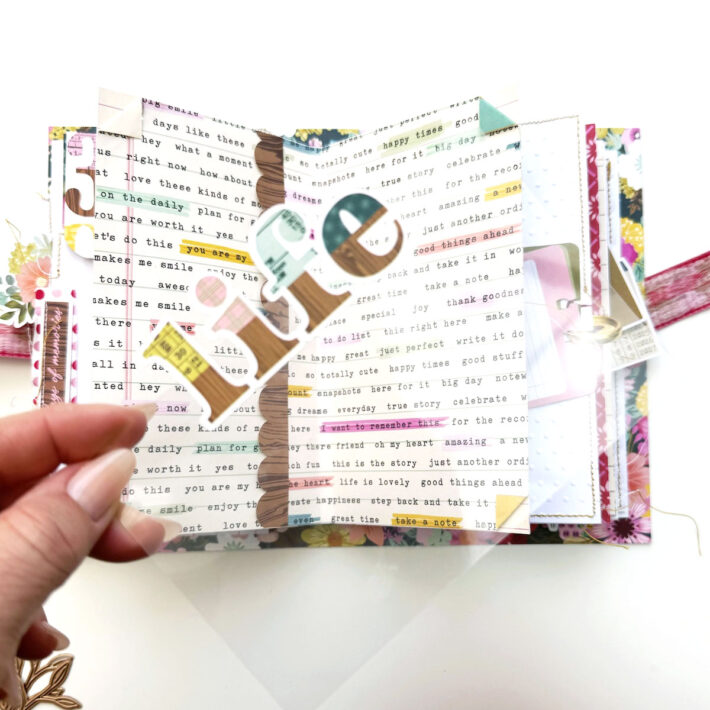
The card is made of acetate and on the side, I stuck the sticker Life. I would say that this is one of my favorite pages, simple and colorful!
Next is a fun spread.
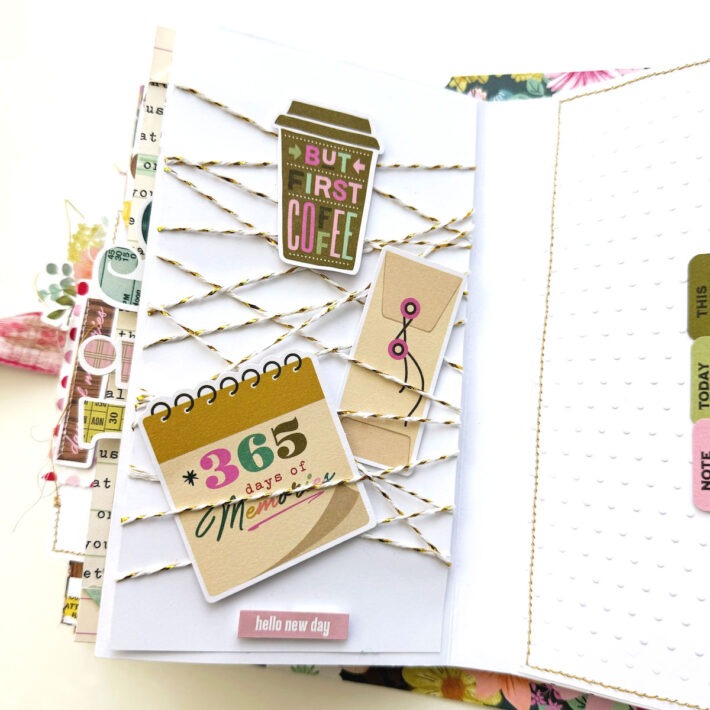
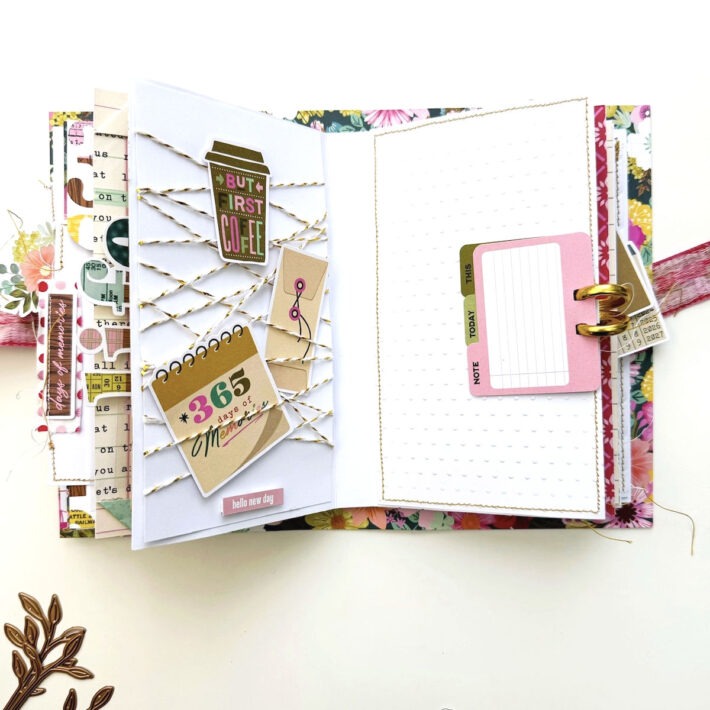
On the right page, I wrapped some white and gold twine around a piece of card stock slightly smaller than the page. I placed a few die cuts between the twine and you can easily add some small photos too.
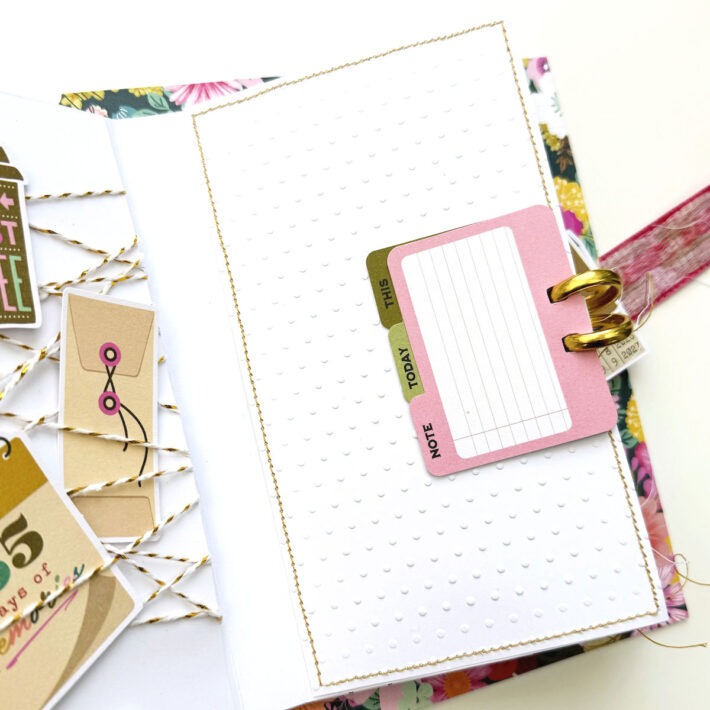
On the opposite page, I used a polka dots embossing folder as a background. By the side, I used the three die cuts from the Journal Bits & Pieces pack to create a mini within the mini. They already had holes for ring binding, so I grabbed two ring disks from my stash and attached them to the side of the page.
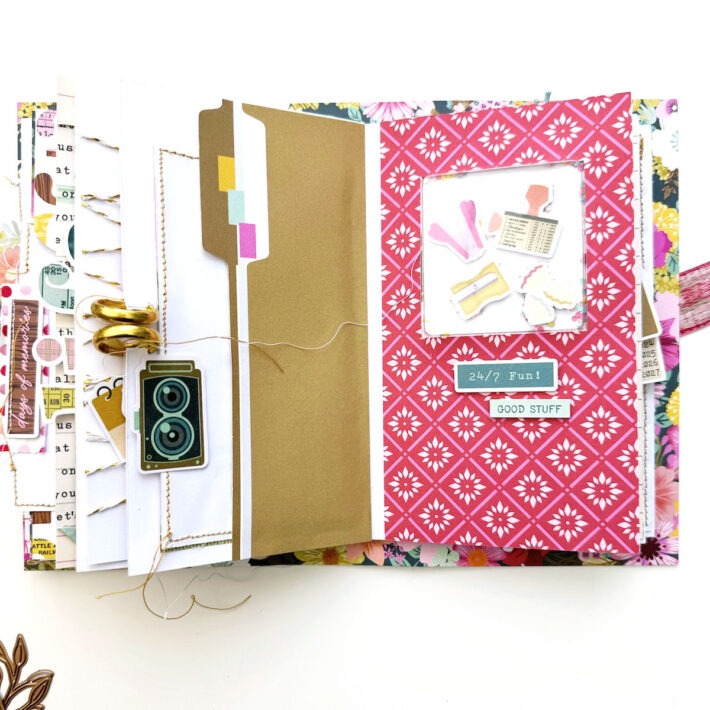
Then, another pocket page that I created fussy cutting a file folder image from one of the patterned papers and I paired it with a playful shaker page on the right side.
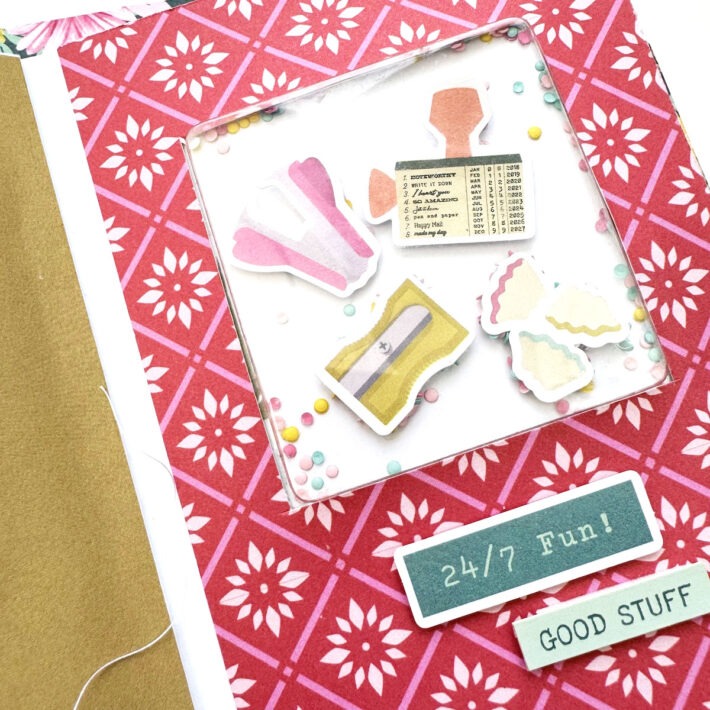
Instead of using sequins, I filled in the shaker with a few die cuts and some paper confetti. They are die-cut with Spellbinders Tiny Confetti die.
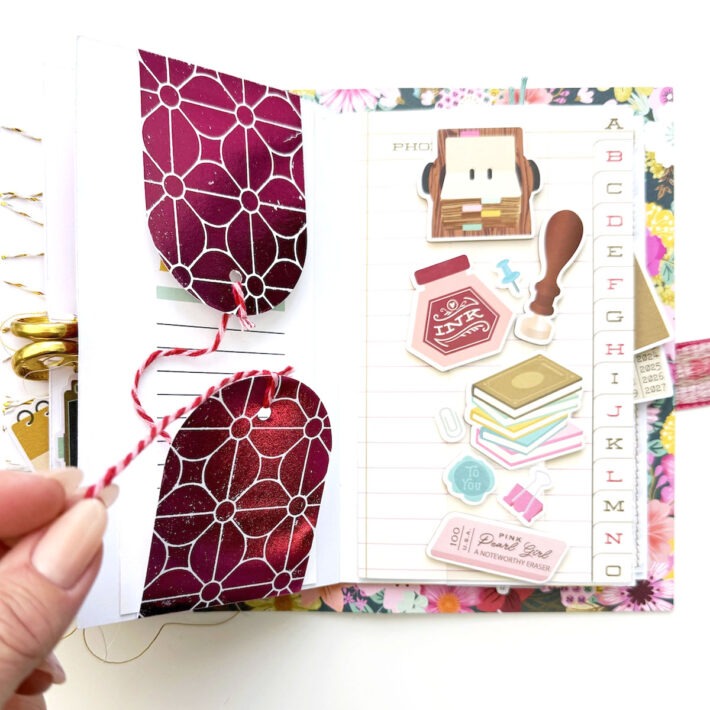
At the beginning of the album underneath the little fabric pouch I foiled, I used the Layered Geometric Flowers plate to create a background. Using the negative part of the foil and the plain foil plate, I made two beautiful fuchsia flaps to hide a journaling card.
On the opposite page, an acetate band embellished with chipboards and stickers holds in place a card.

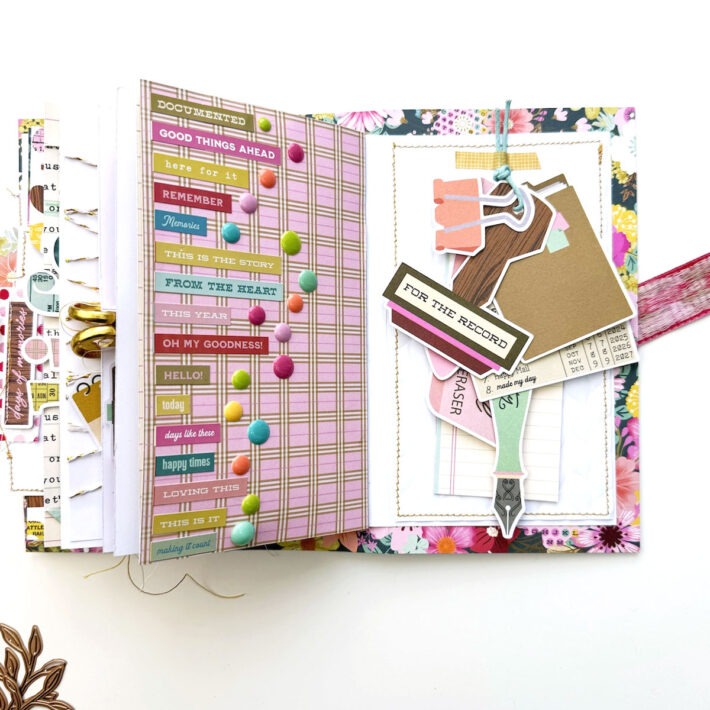
The last spread is colorful and fun, with all the little sticky phrases glued on the left and a set of die cuts gathered together with some string and hung on the page with a piece of washi.
That’s all for today, my dear friend. Thank you so much for stopping by the blog today. I really hope you enjoyed the mini album I created with Noteworthy collection. If it inspired you to create your own version, please share it with us and tag me, I would love to see your interpretation.
I hope to see you back here soon.
Love, NG
Spellbinders Supplies:

Other Supplies
Ribbon, elastic, twine, ring disks, enamel dots, sewing machine, cotton or linen fabric, liquid glue, paper trimmer, scissors, foam tape.
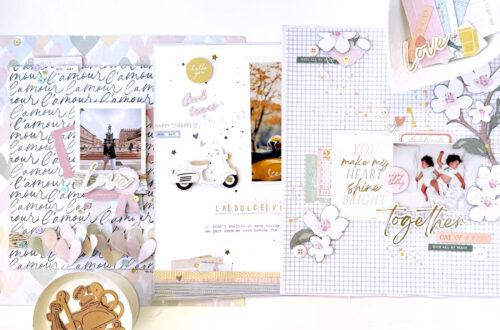
Interactive Travel Album Using Simple Stories’ Fresh Air
Three Stories, One Collection