Stitched Alphabet Inspiration with Karen Yagel
Hello crafty friends! My name is Karen Yagel from Yes Please Papercrafts. I’m excited to be back on the Spellbinders blog for the new Spellbinders Stitched Alphabet collection.
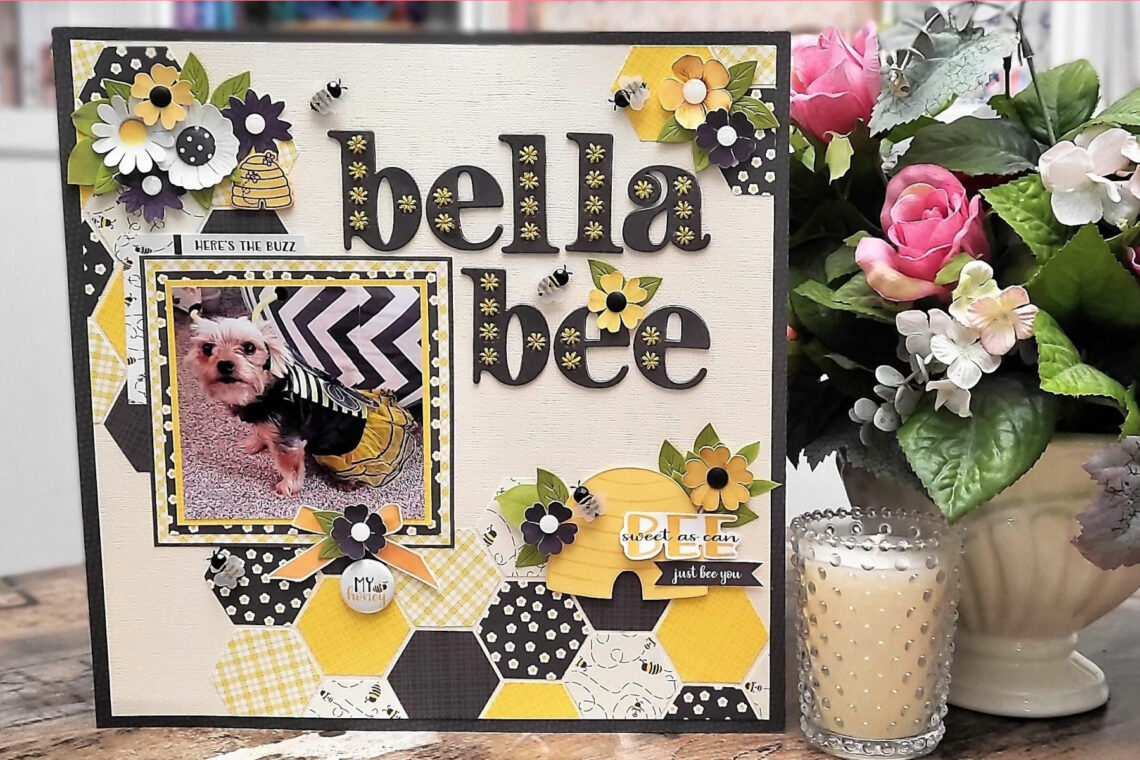
For my project today, I created a super cute 12×12 scrapbook layout featuring pictures of my dog Bella. The Stitched Alphabet dies are the perfect size to create titles for scrapbooking. The dies are very pretty without stitching but just so stunning with the added stitching.
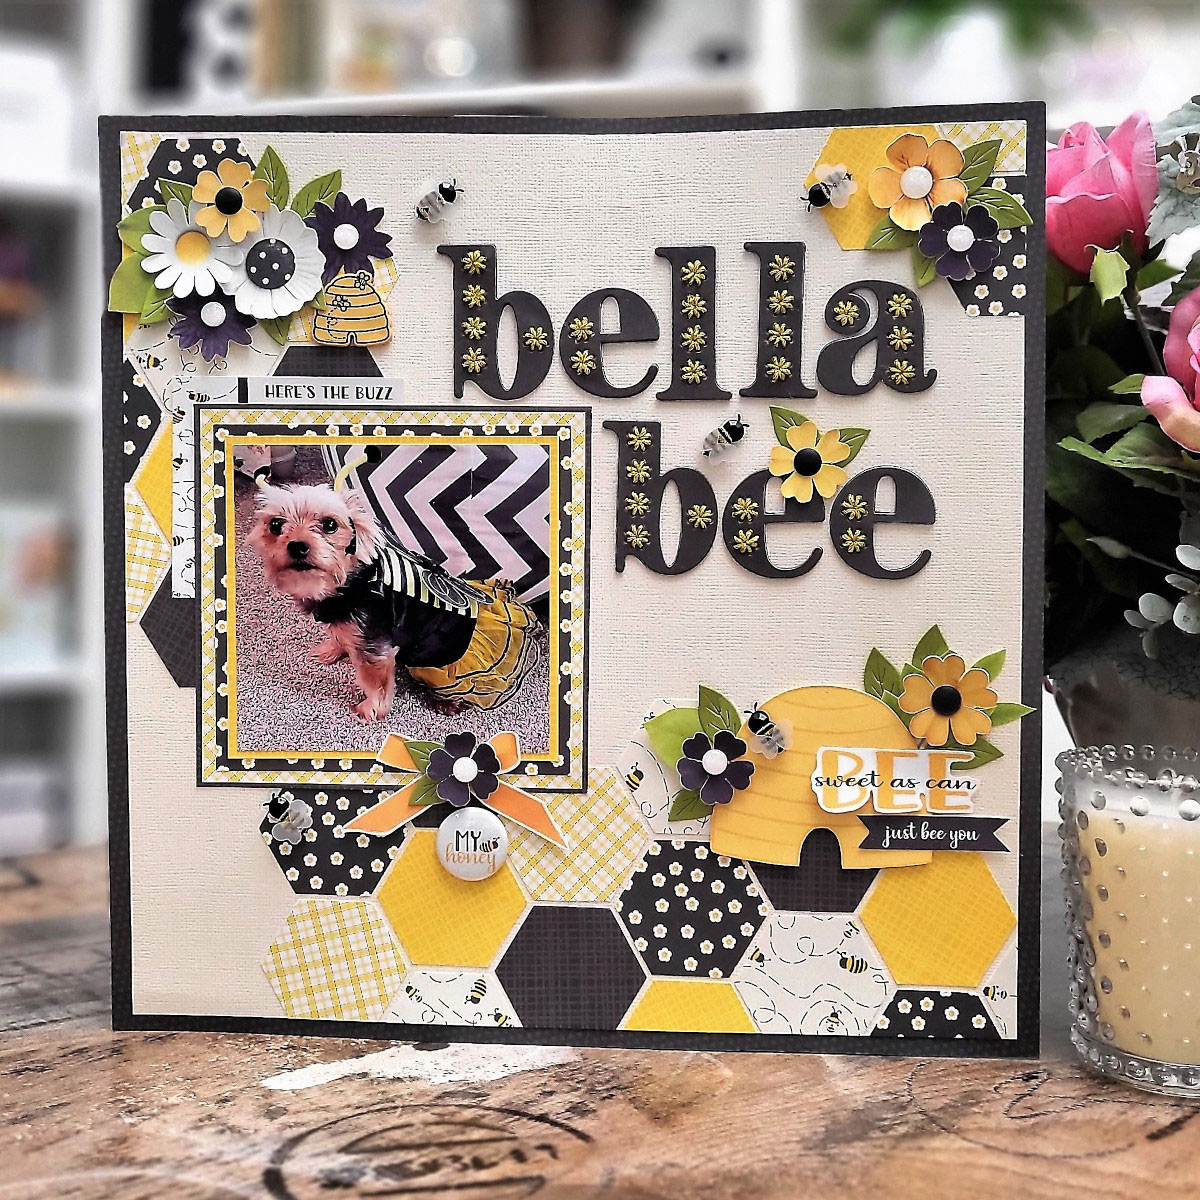
The pictures of Bella that I used for my layout are from a few years ago when I dressed her up in a Bee costume. It was Easter weekend and I bought a super cute bunny costume for my dog LilyBelle who loves to dress up. Bella does not like to get dressed up but she was very upset that LilyBelle got a bunny costume and she didn’t. Bella turned her back to me and she pouted all day long and I could tell that she was not happy. So, I asked her if it would make her happy if I let her wear one of her Halloween costumes. She didn’t reply but she seemed so unhappy, that I decided to get out a bee costume and put it on her. Needless to say, that did not make her happy. She only wore the costume for a few minutes but it was super funny and I will always treasure the memory of that day and the looks that my “Bella Bee” gave me after I dressed her up. Here’s a link to my little Bella Bee’s video, if you would like to see it.
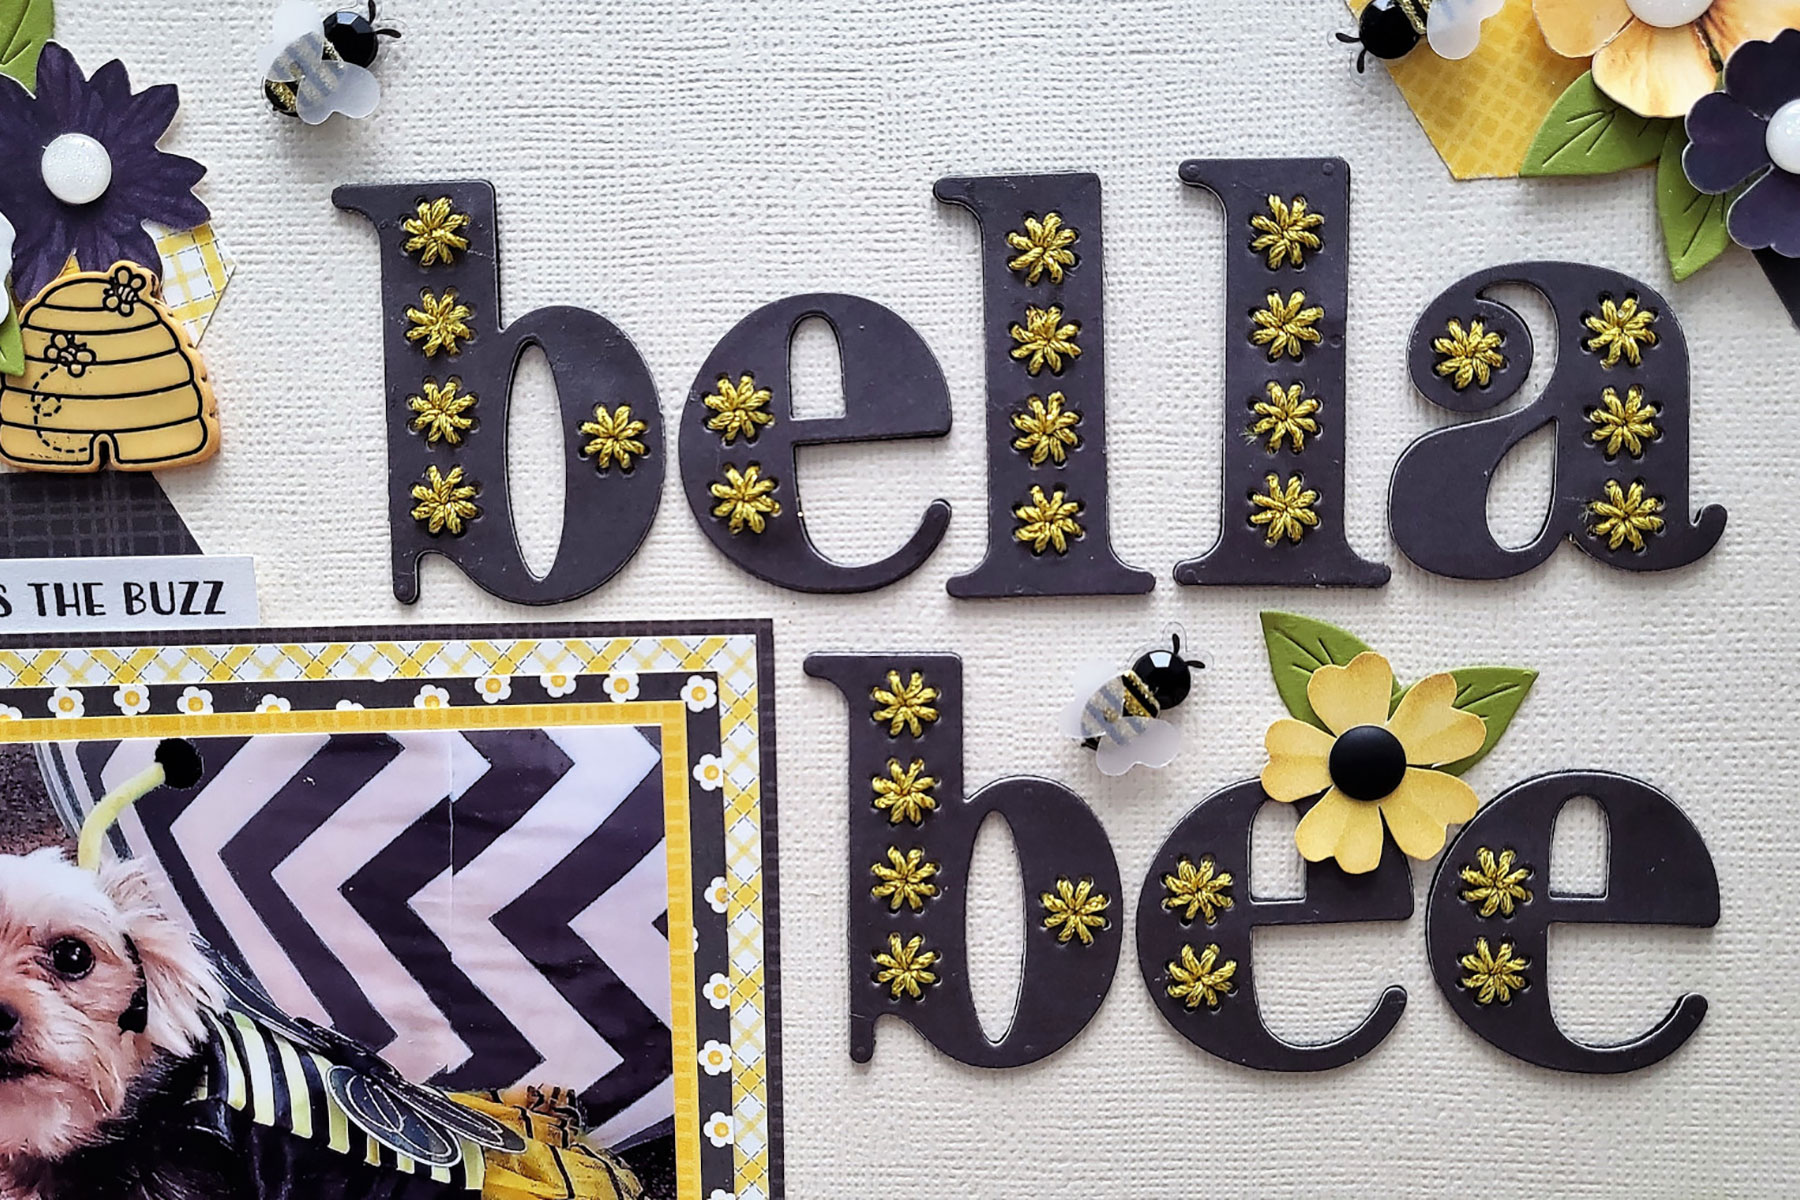
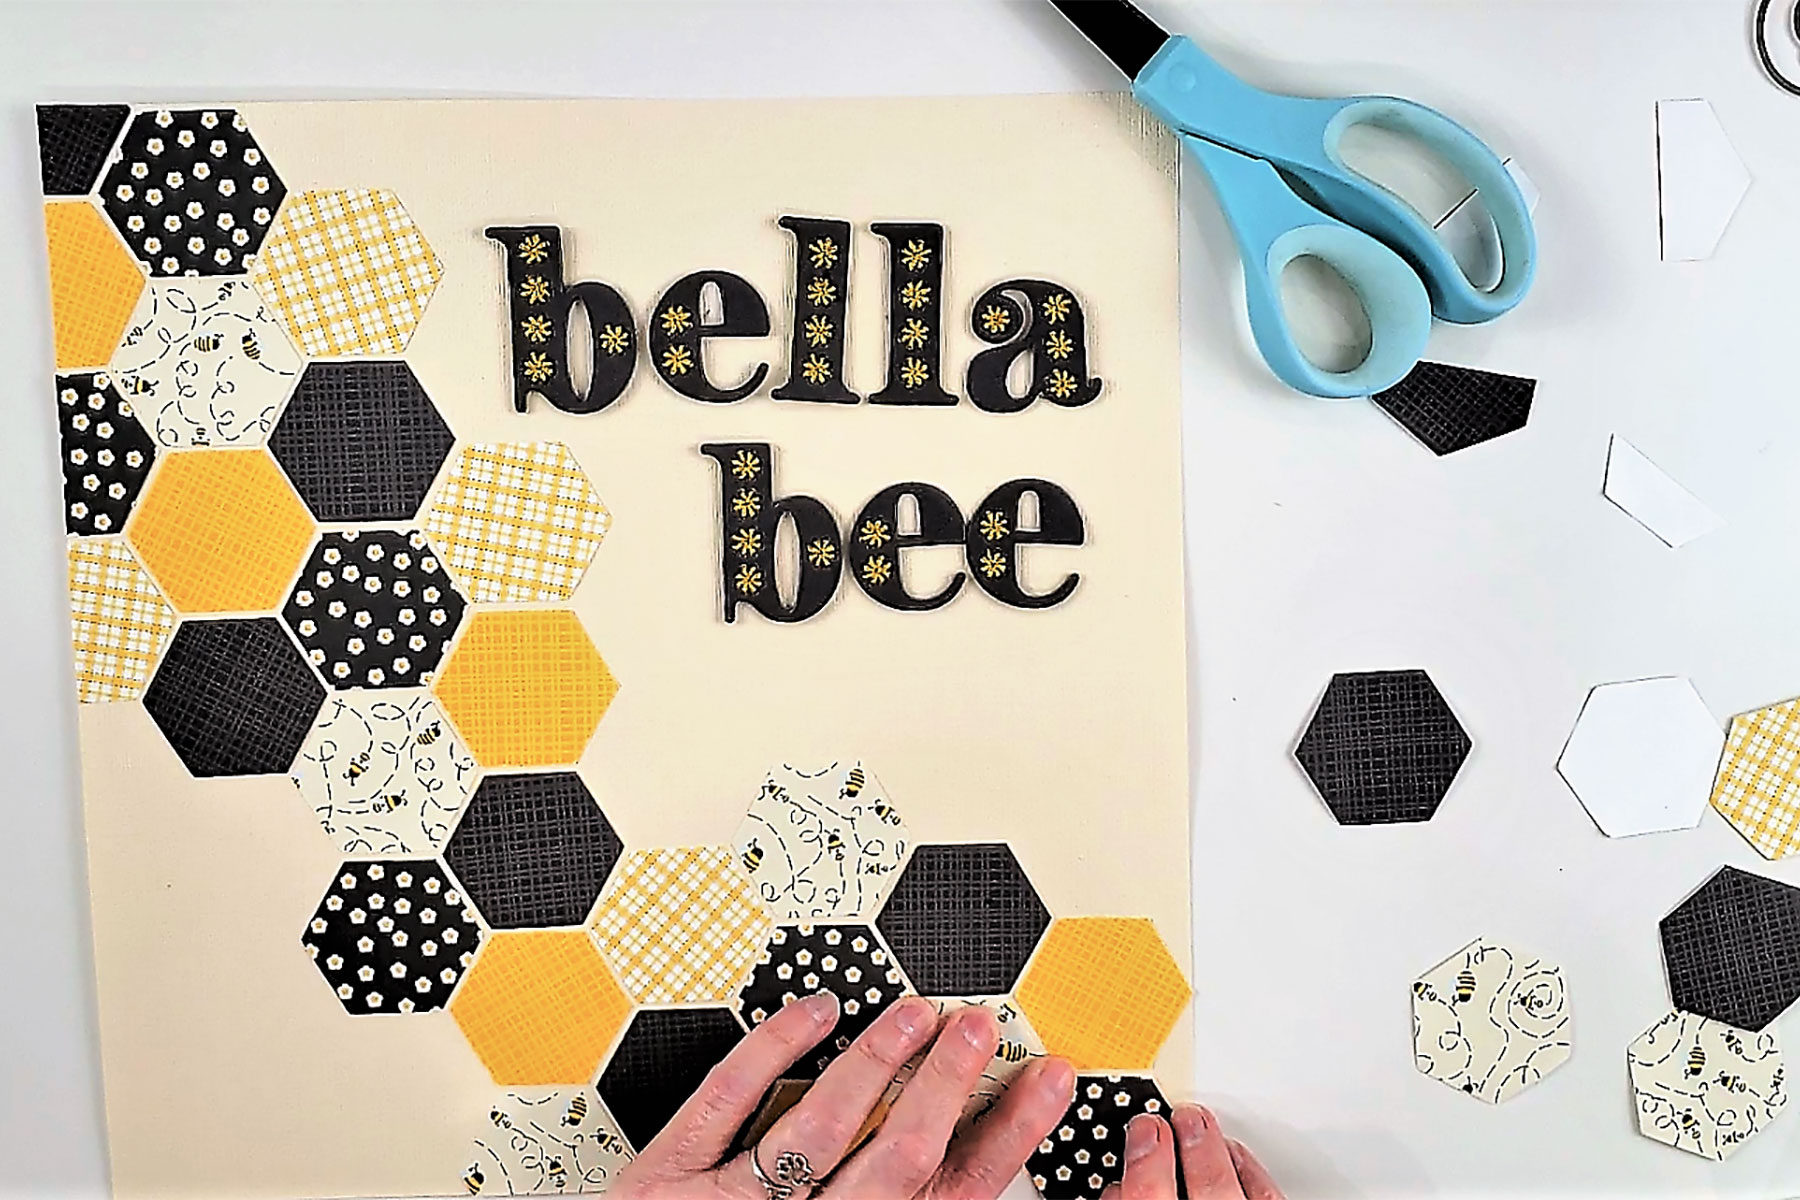
I choose to use papers and embellishments from Meredith Cardall’s “Sweet as Can Bee” digital collection. I selected a dark grayish brown paper and I cut out the alphas for my title. I stitched each alpha using the “Sew Easy Fancy Gold Glitter Floss” from We-R-Memory Keepers. The floss was thicker than the size recommended by Spellbinders to use with the Stitched Alphabet dies but I really loved the gold color and the metallic sparkle in the floss and decided to give it a try.
The thread was a bit bulky behind the letters which made the letters a bit wobbly on my layout, so I decided to add some support under the letters. I die cut out 3 more of each letter from black cardstock. I then used a 3/8” circle punch and punched out the stitched areas on the dies to leave room for the stitching. I layered the black cardstock letters together using liquid glue and then glued the stitched die on top.
I love creating dimension on my layouts and especially the title, so I loved how chunky my title turned out.
Because my layout had a bee theme, I thought using a hexagon shape would be fun. I used a punch to create hexagons from 5 different patterned papers from the “Sweet as Can Be” collection. I created a fun pattern using the hexagons, starting from the top left corner and going down and across the page to the bottom right corner. I also added a few hexagons to the top right corner.
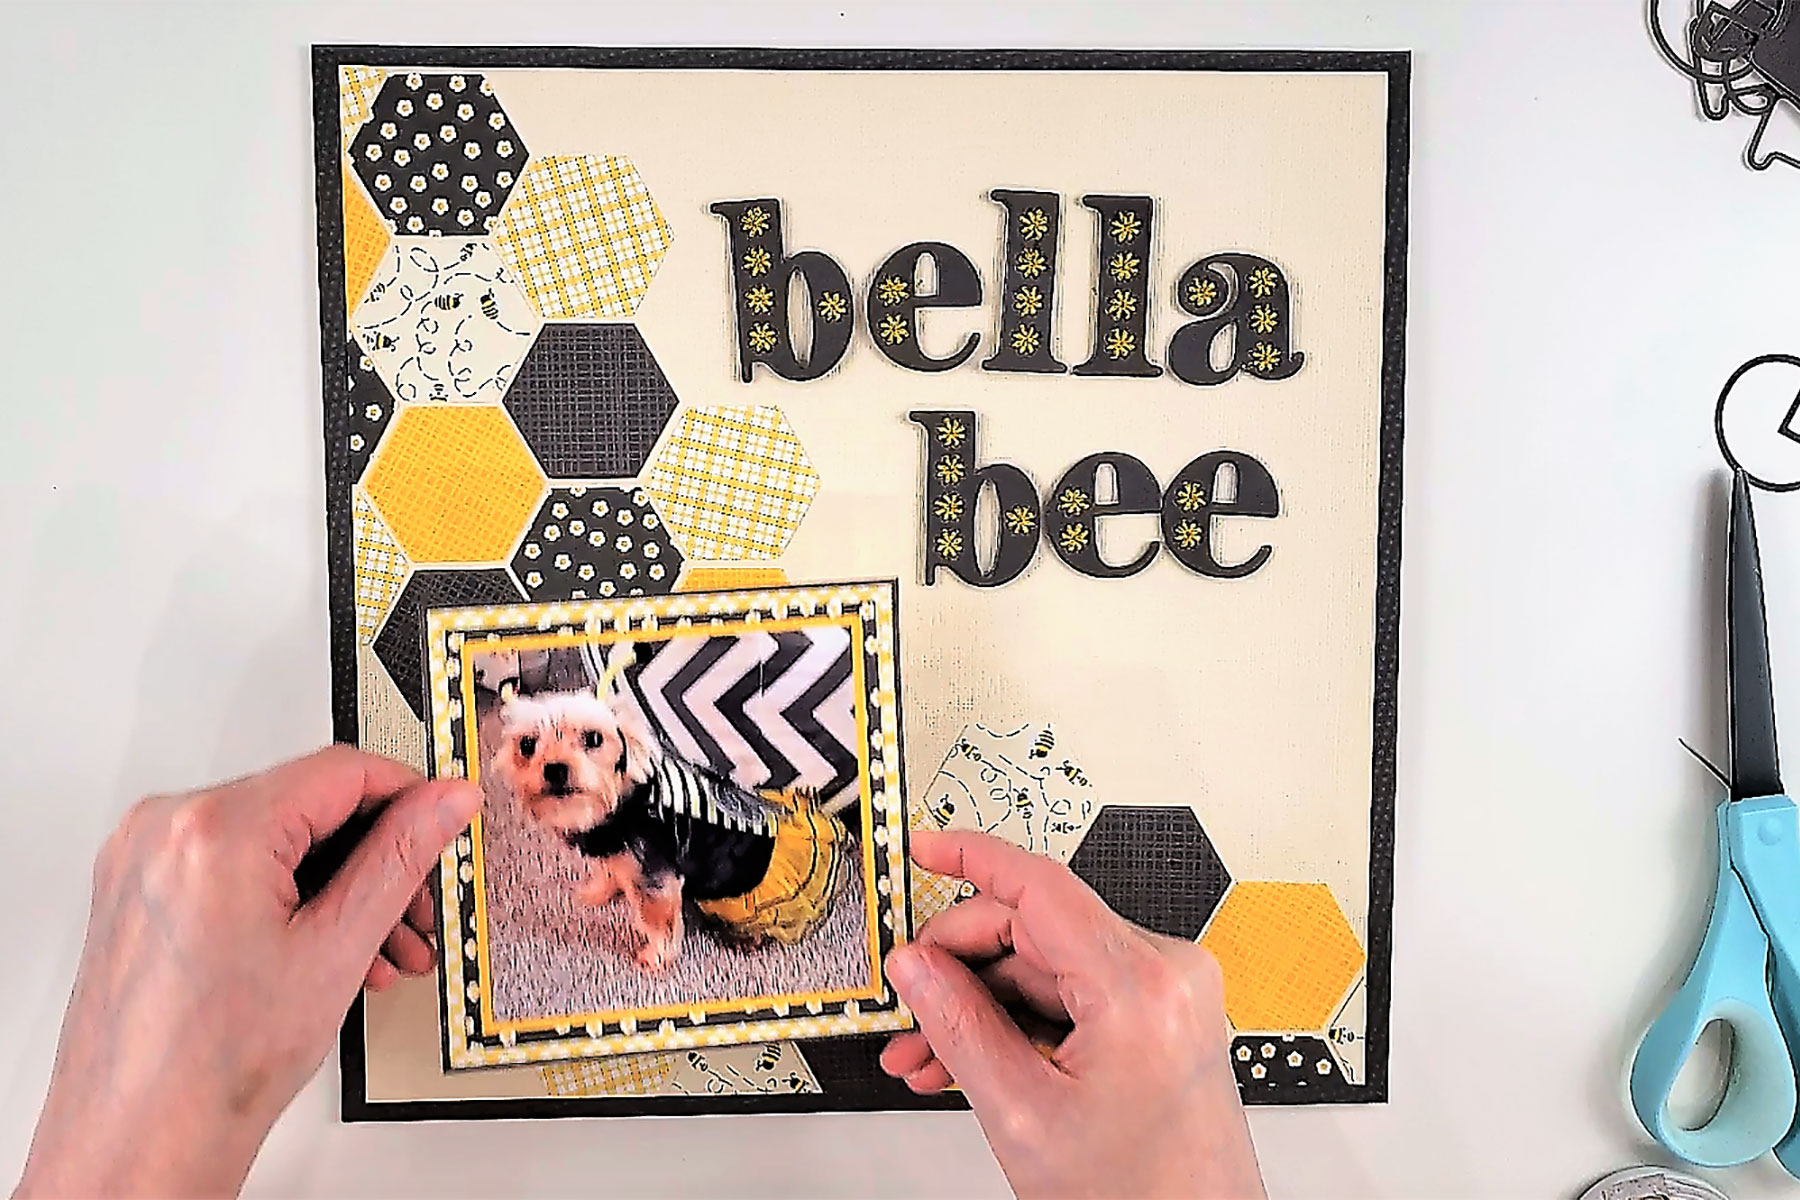
I trimmed off ½ inch from two sides and then matted the layout with a dark grayish brown polka dot paper. Next, I matted my photo using 4 different patterned papers and then added it on top of the hexagons. I adhered the “Bella Bee” title above and next to the photo using some liquid glue.
I wanted the stitched alpha title to be the star of my layout and I made sure that it would fit in the space that did not have any hexagons.
I created 3 embellishment clusters (one at the top left corner, one on the bottom left, and a small cluster above the title). The ephemera included with the “Sweet as Can Bee” digital collection is so cute!
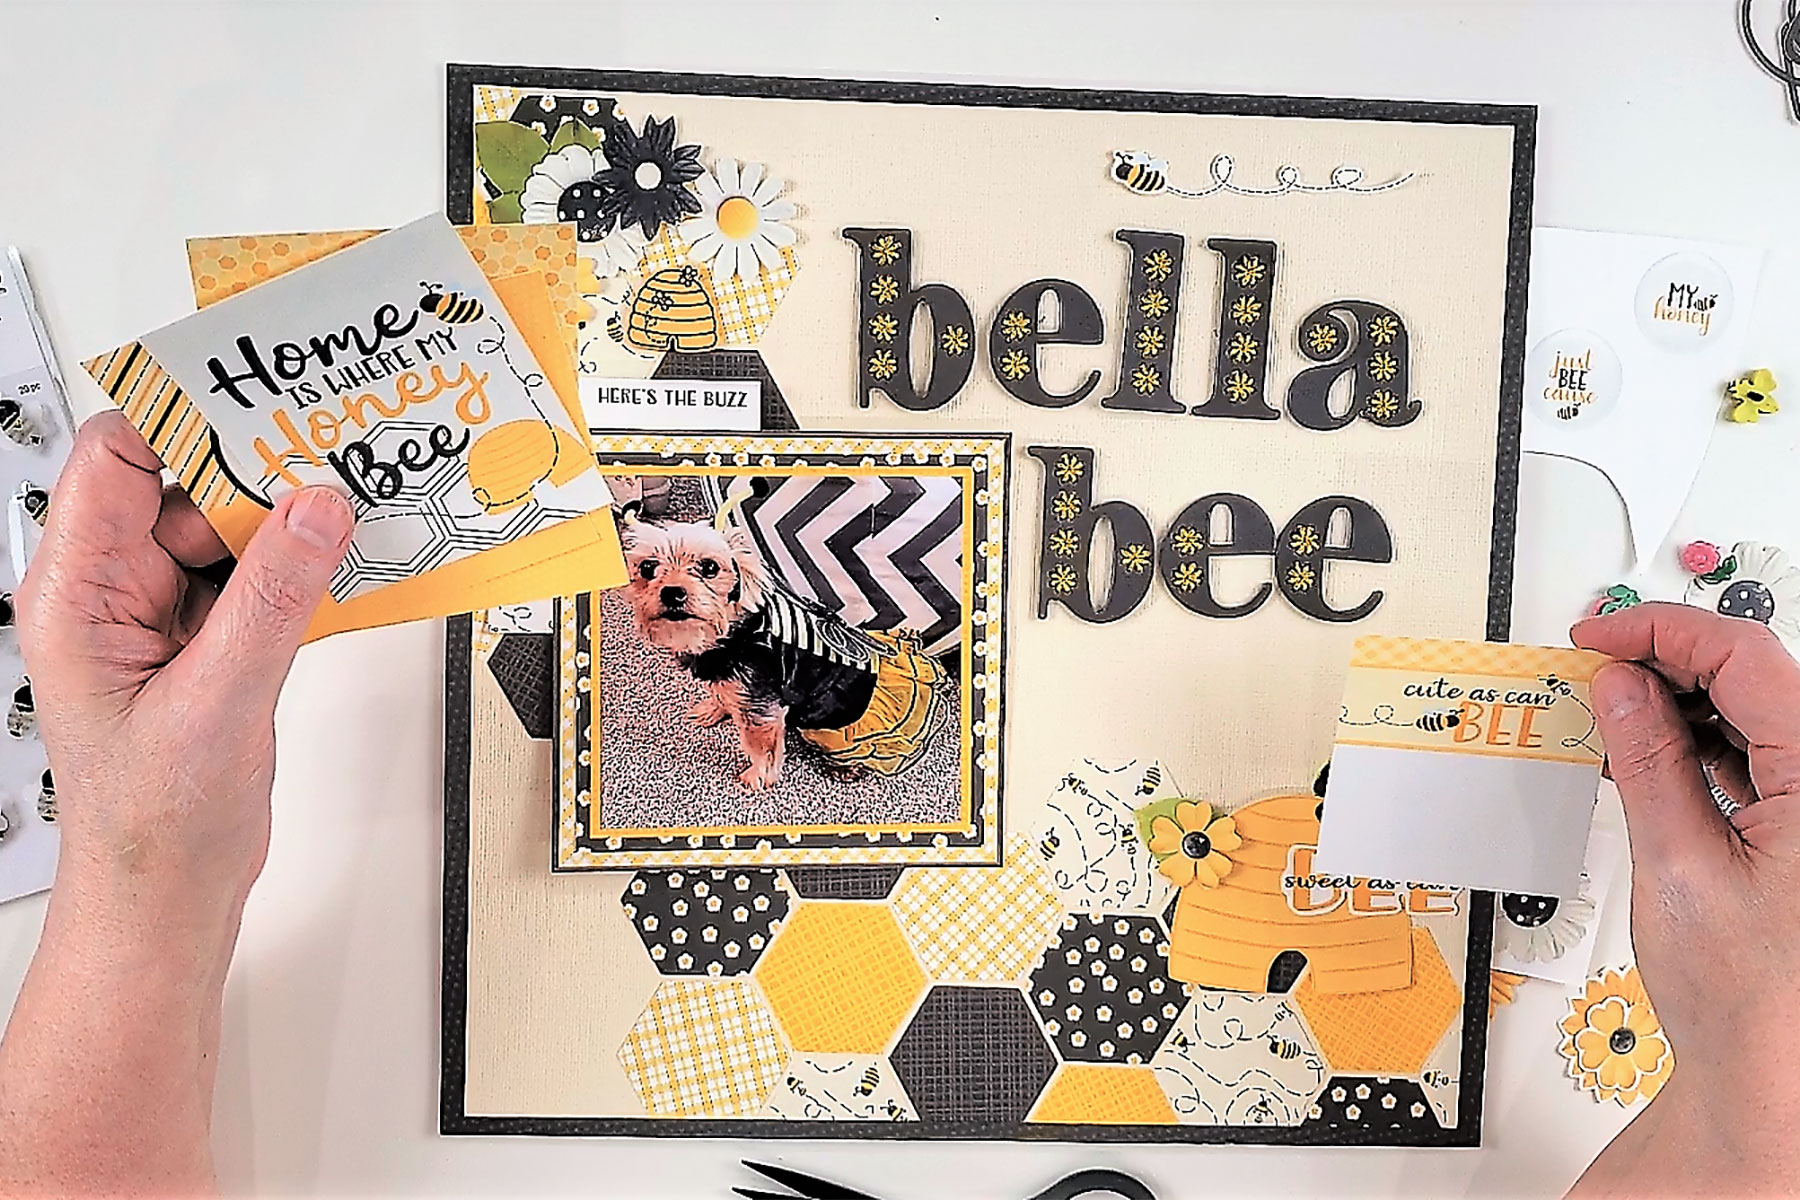
I added a large Bee Hive die cut and popped it up with some foam tape to add dimension, I tucked some leaves and flowers around the bee hive and added a few word quotes.
Next, I created floral clusters in several places on the layout and popped up some of the flowers with foam tape to add dimension. To add a bit more interest to the floral clusters, I used some of the green leaf dies from the “Sweet as Can Bee” ephemera and also cut out some more leaves from some green cardstock using the leaf dies from the Spellbinders Create a Flutter & Flower Bow dies. I love the pop of color that the green leaves added and the contrast of the green with the yellows, golds, blacks and browns in the layout.
A yellow bow die cut and a flair button that I created with my button maker were added just below the picture. I also added a bee hive from the “Bee Happy” buttons from Flair Originals to the cluster at the top of the layout.
To finish off this layout, I added enamel dots to the centers of a few of the flowers and then scattered little bees from The Paper Studio 3D Bee Stickers around the layout. The bees had gold glitter stripes with vellum wings and were the perfect touch to finish off this layout.
Spellbinders Supplies:

Other supplies
American Crafts 12×12 Vanilla Cardstock, Meredith Cardall’s “Sweet as Can Bee” Digital Collection, The Paper Studio Bee 3D Stickers, Flair Originals “Bee Happy” Buttons, enamel dots, liquid glue, tape runner, foam adhesive.
I hope that you enjoyed seeing the project that I created featuring the new Spellbinders Stitched Alphabet collection and I hope that I’ve inspired you to create something beautiful using these amazing stitched dies. Thanks so much for stopping by! If you would like to see more of my layouts and other projects, please join me over at Yes Please Papercrafts blog, YouTube channel and Instagram.
January 2021 Large Die of the Month is Here – Slimline Kaleidoscope Hearts
Destination China Inspiration | Floral Greeting Cards with Elena