Stampendous Hugs With Brenda Noelke
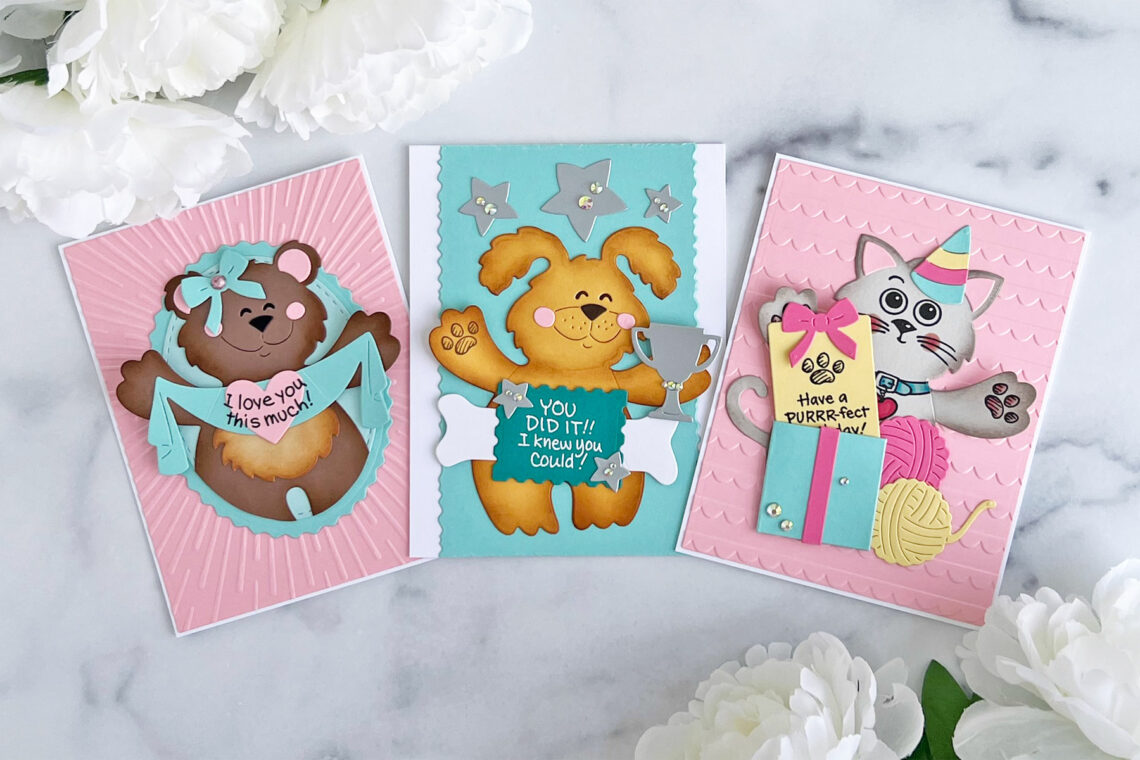
Hello, crafty friends!! Brenda Noelke here from My PaperCut Creations! I’m super excited to be guest posting on the Spellbinders blog again today! I’m sharing three cards using the Stampendous Hugs Collection!!! This collection is soooo adorable!! There is the most darling bear, kitten, and puppy included with so many different options for personalizing them for your specific occasions!!
I LOVE YOU BEAR
For my first card, I die-cut the largest bear from the Bear Hugs Die Set from Latte, Alabaster, Onyx and Pink Sand cardstock. I blended a bit of Distress Oxide Inks around the outside of the die-cuts for dimension, then adhered all of the pieces together with liquid glue. Next, I die-cut the banner, heart, and bow from Pink Sand and aqua cardstock using the Hugs Accessories Die Set. I stamped a sentiment from the Hugs Sentiments Stamp Set onto the heart and banner with Versafine Onyx Black Ink. The banner adhered to the front of the bear with liquid glue.
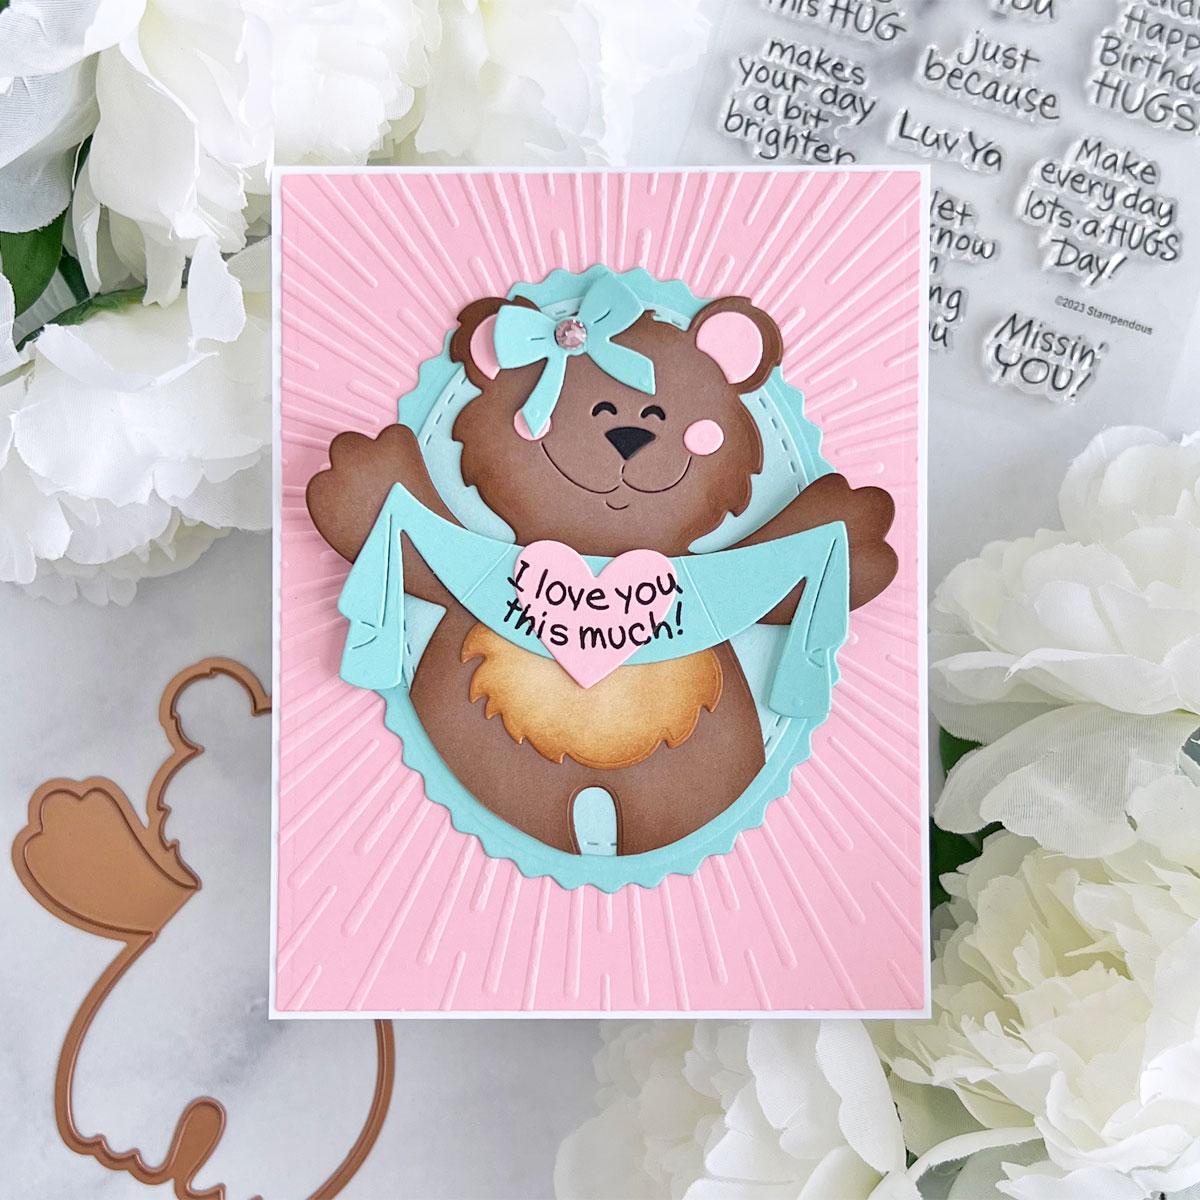
For the background, I die-cut a panel of Pink Sand cardstock from the largest die in the A2 Matting Basics A Die Set and embossed it with an embossing folder from the Embossing Folder of the Month Kit from April 2022. The two ovals are from Fran’s Frames Die Cut Set. They were die-cut from Waterfall and aqua cardstock. The bear was adhered to the inner oval, leaving the arms free of any adhesive, and the excess was trimmed from the legs. All of the layers were adhered together and a single Pink Color Essentials Gem was added to the center of the bow for a little bling.
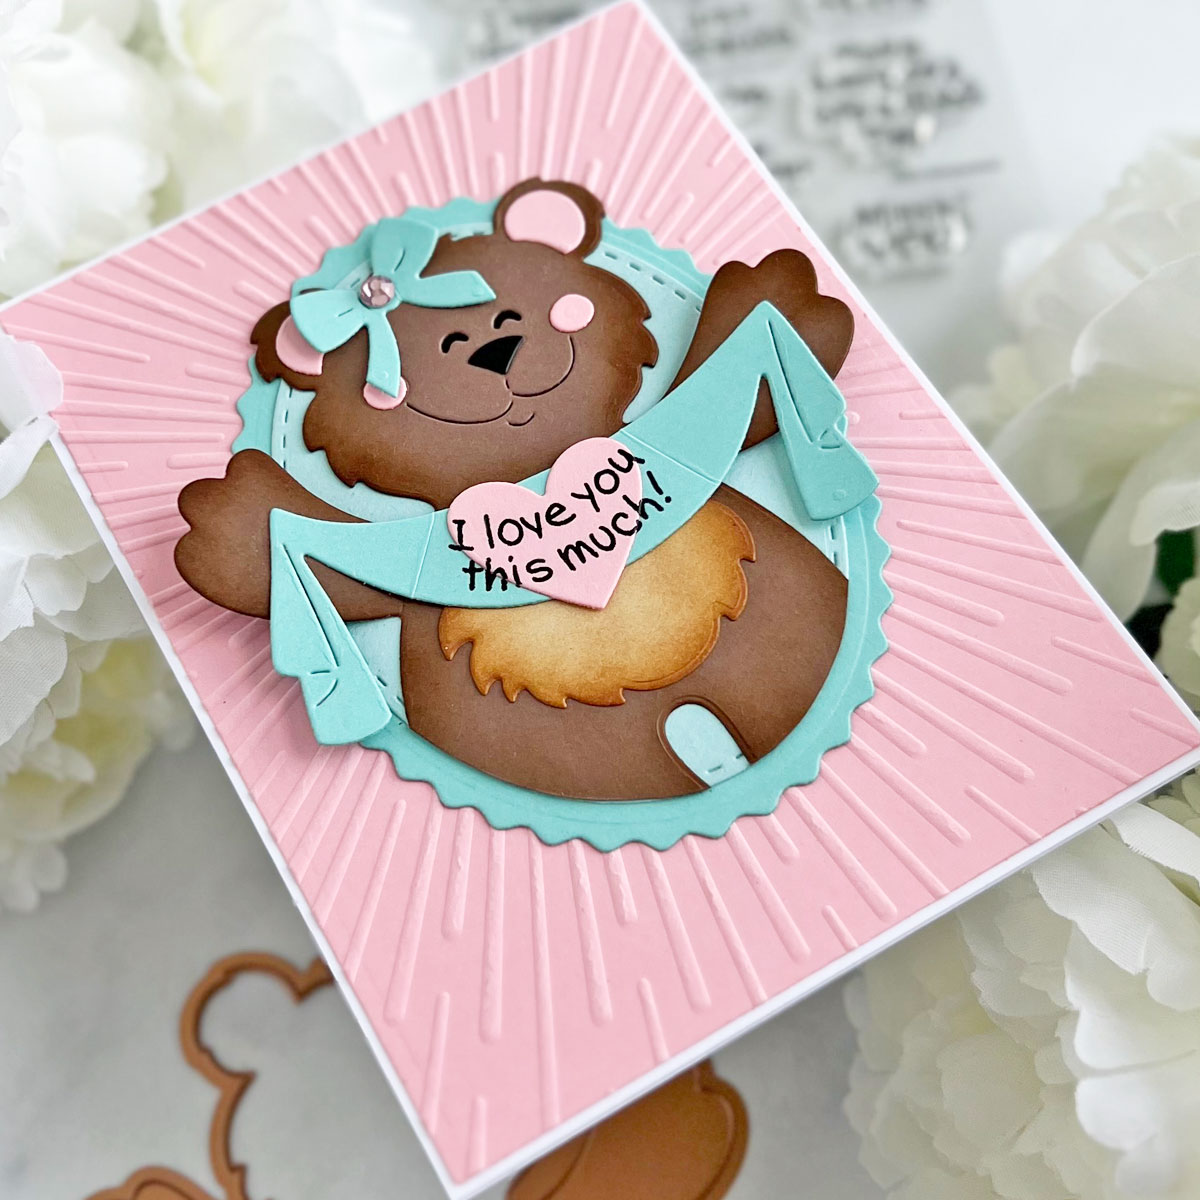

I love how the arms pop up from the card base!! So cute!!
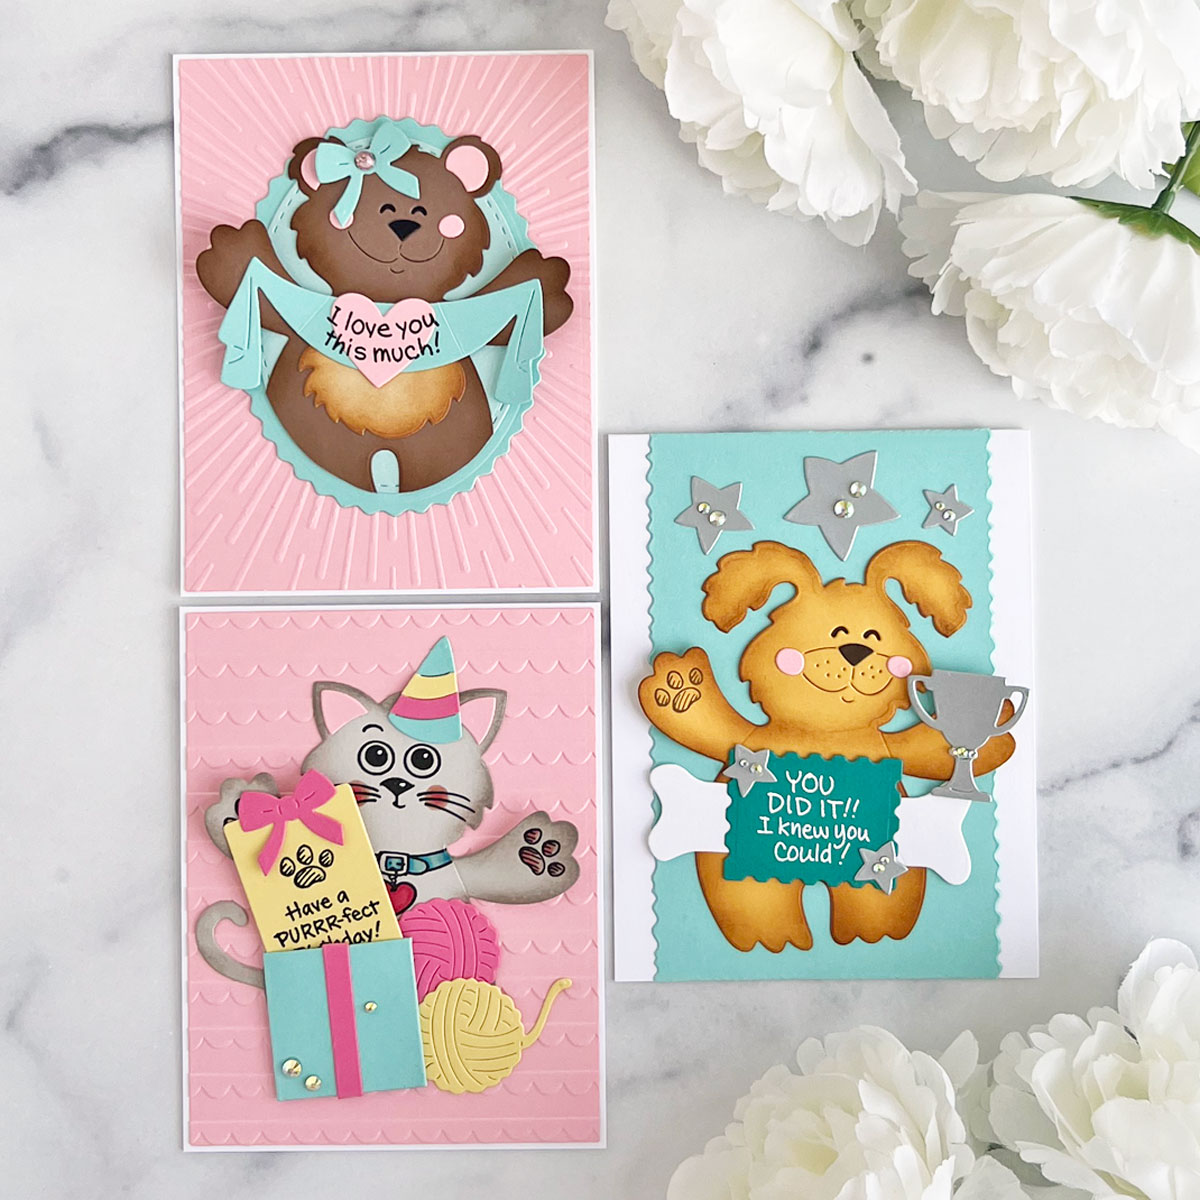
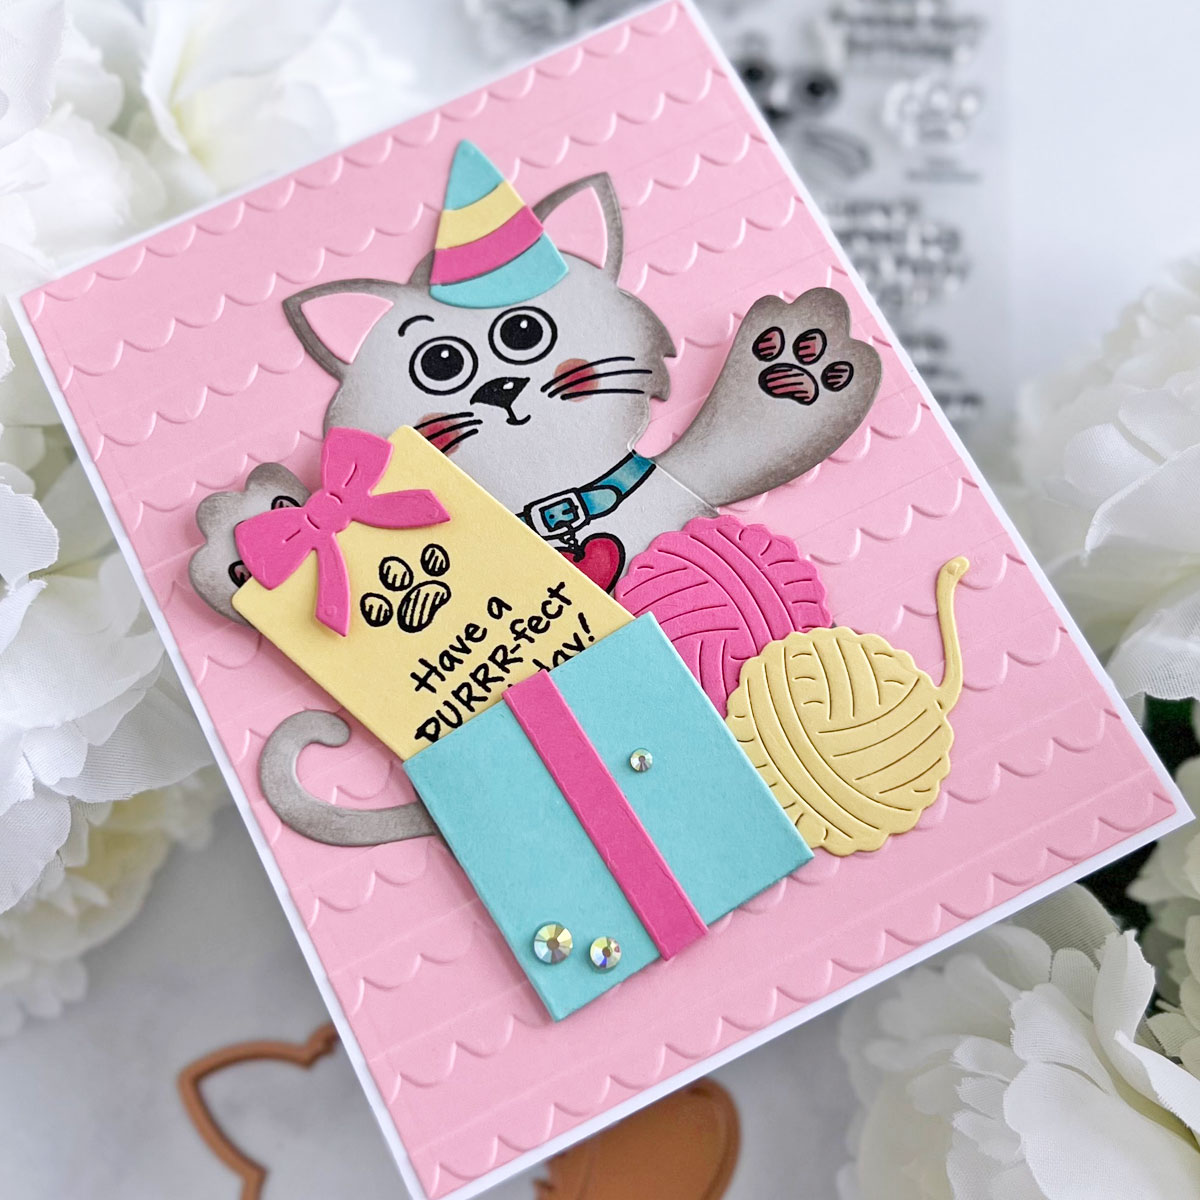
Have A Purrr-fect Birthday Kitty
I started by die-cutting all of the pieces for the kitten, yarn balls and party hat from Silver Fox, Pink Sand, Fruit Punch, Waterfall, and Chamomile cardstock using the Kitty Hugs Die Set. I added some Distress Oxide Ink shading to the outside edges, stamped the details onto the kitten with the Kitty Hugs Faces and Sentiments Stamp Set using Copic-friendly black ink, and added color with Copic markers.
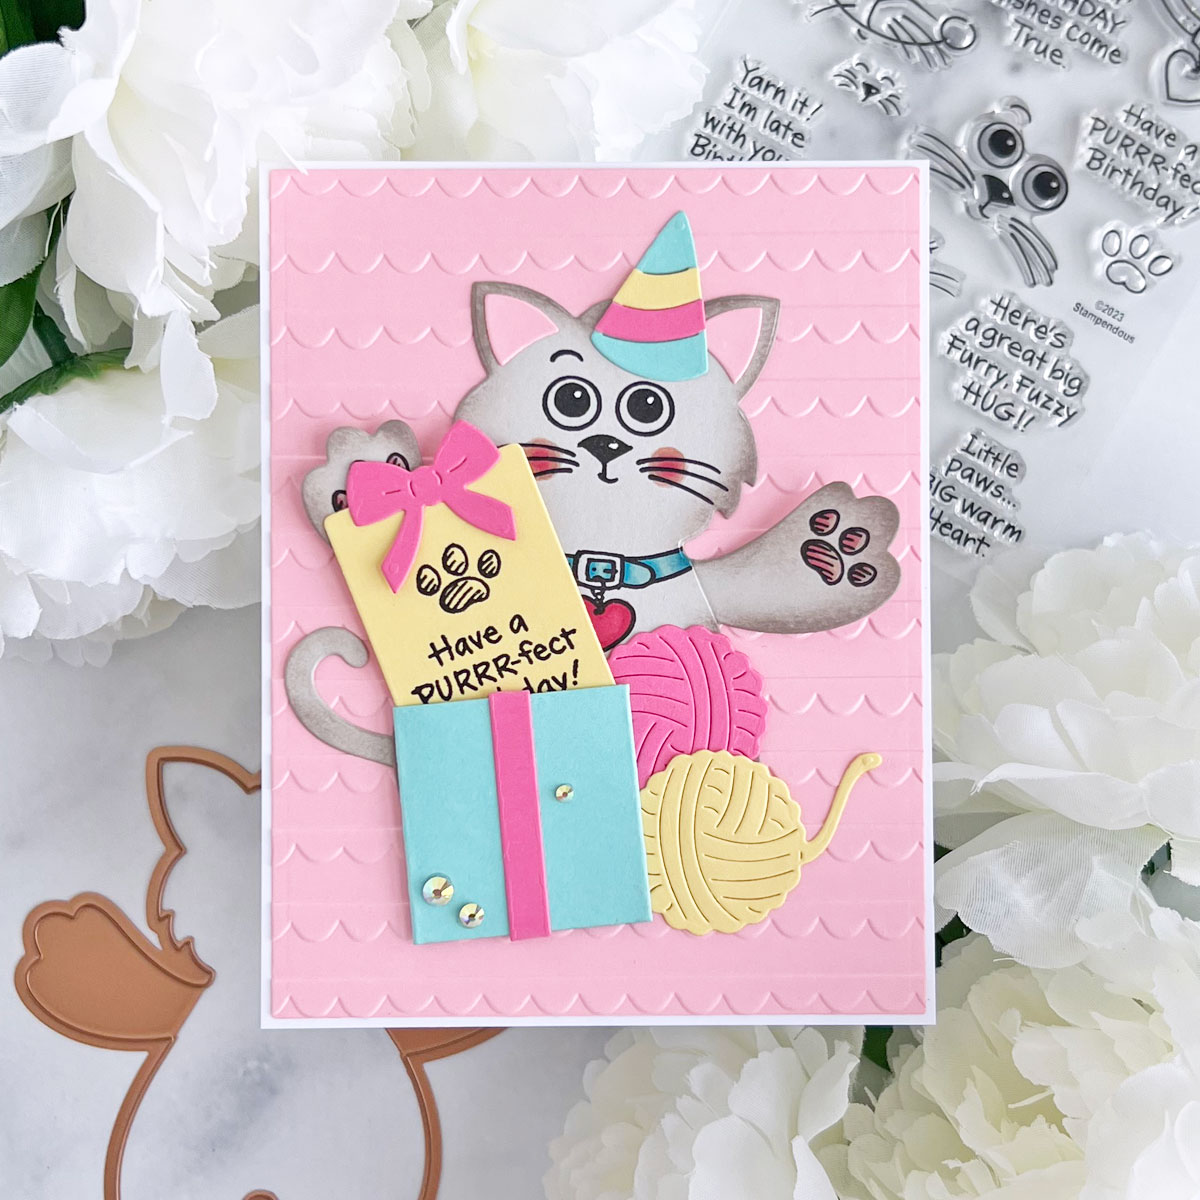
The box, bow and insert were die-cut from the same color of cardstock using the Hugs Accessories Dies. The sentiment and paw print are from the Kitty Hugs Faces and Sentiments Stamp Set. The background panel was die-cut from Pink Sand cardstock using the largest A2 Matting Basics A Die and embossed with the Hand Drawn Scallops Embossing Folder. A trio of Spectrum AB Color Essentials Gems adhered to the outside of the box were the perfect finishing touch.

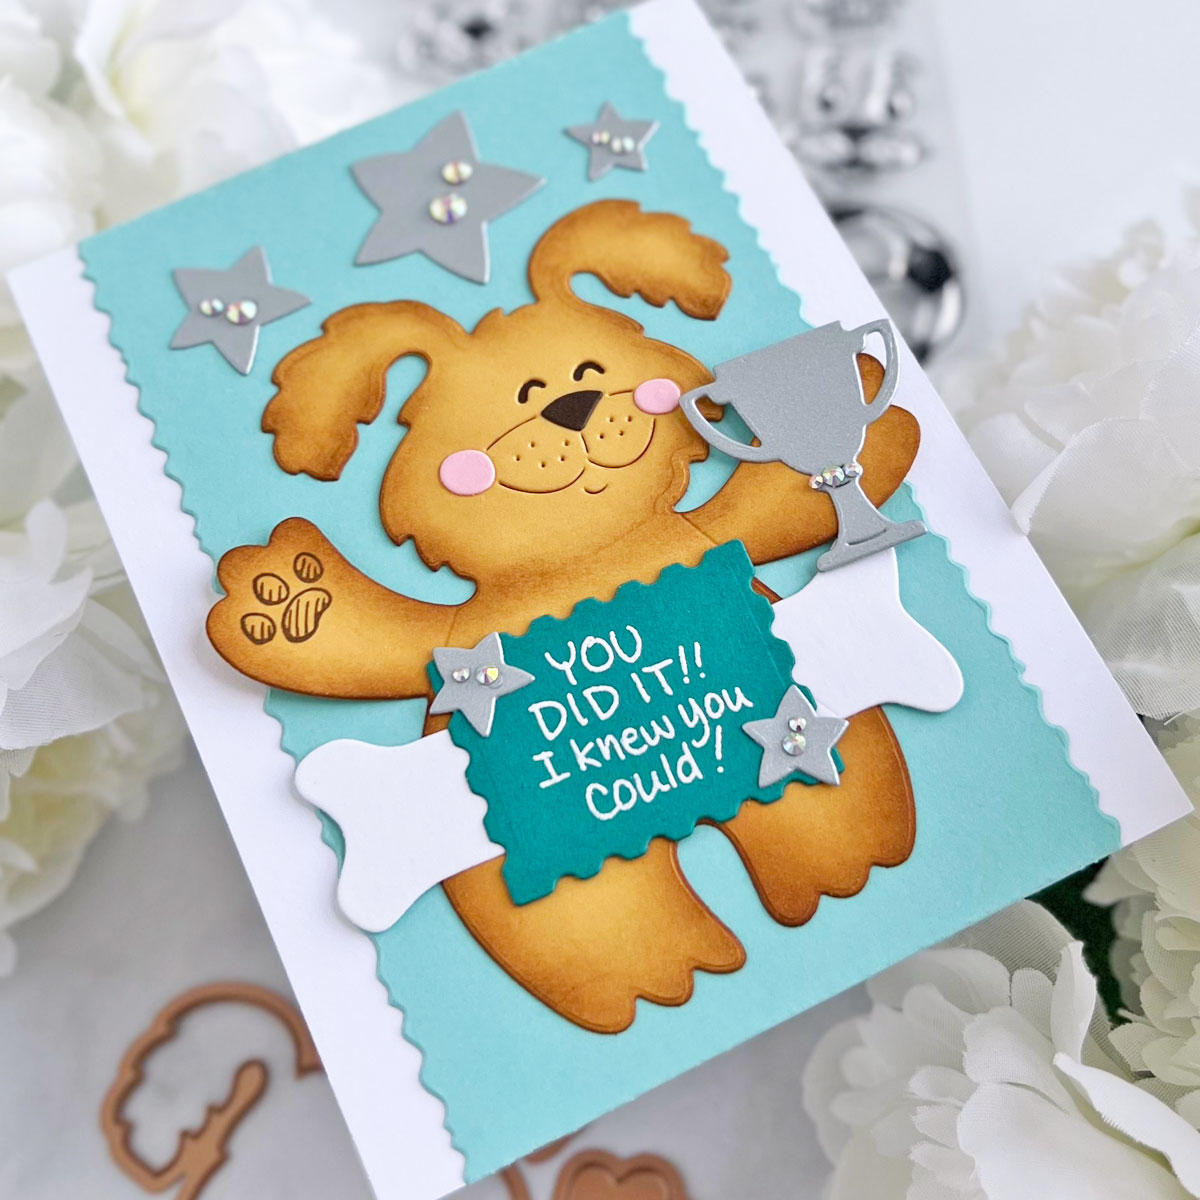
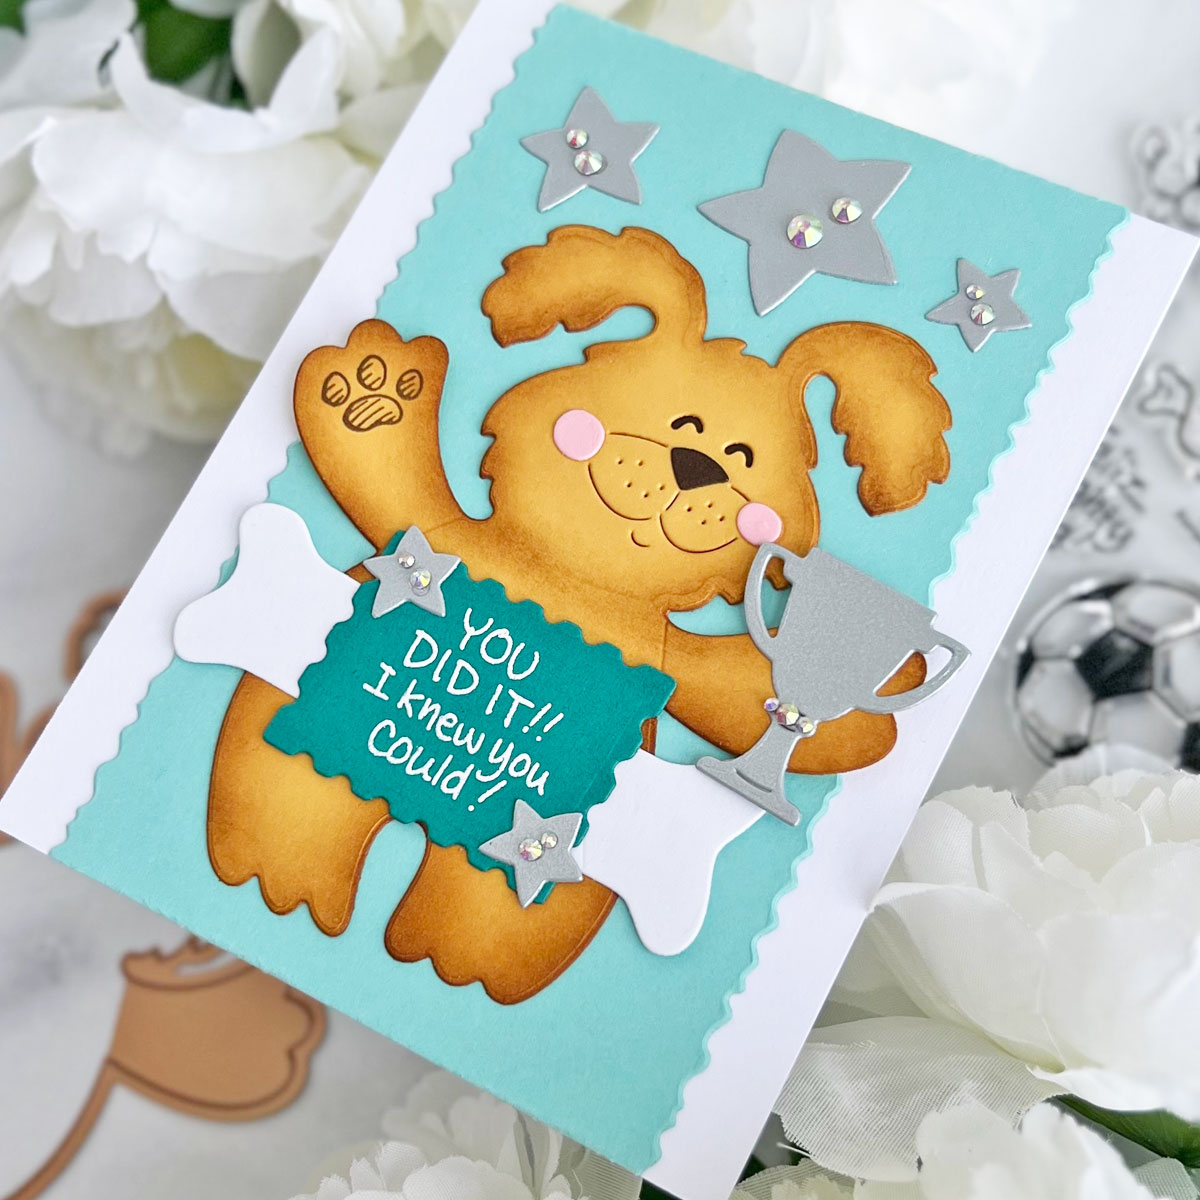
CONGRATS PUPPY CARD
I started this card by die-cutting the puppy, bone, stars and trophy from dark yellow, Snowdrift, Brushed Silver, Timber and Pink Sand cardstock using the Puppy Hugs Die Set. I added a bit of ink around the outside edges and stamped the paws in the Puppy Hugs and Sentiments Stamp Set with brown ink. The sentiment, also from the Puppy Hugs and Sentiments Stamp Set, was white heat embossed onto Lagoon cardstock and cut out with a die from the Fran’s Frames Die Set.
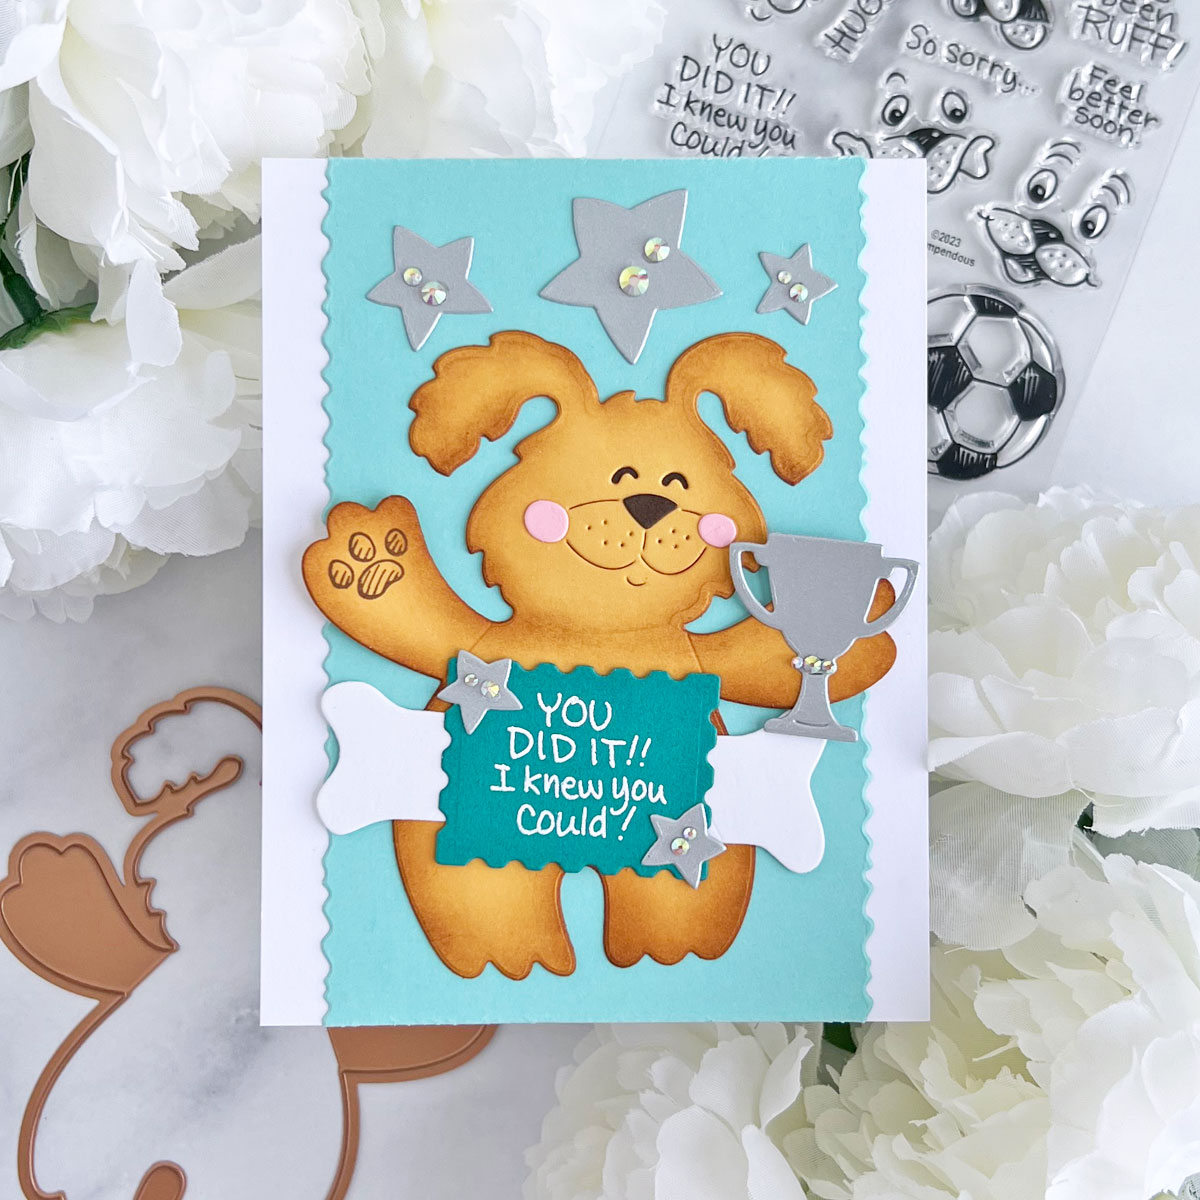
For the background on this one, Waterfall cardstock was die-cut with the slimline die in the Puppy Hugs and Sentiments Stamp Set and adhered to the center of a white card base, trimming the excess from the top and bottom. All of the die-cuts were adhered to the background, making sure to leave the arms of the pup free of adhesive so they can pop-up. Spectrum AB Color Essential Gems add lots of sparkle.
I often struggle with cute cards for children and this collection is perfect (or should I say purrr-fect?) for that!!!
Spellbinders Supplies:

Other supplies
Liquid glue, 110 lb. white cardstock, black ink, Copic markers, aqua cardstock, Antique Linen, Vintage Photo & Hickory Smoke Distress Oxide Inks, Versamark, white embossing powder, brown ink, dark yellow cardstock
Thank you so much for stopping by today!! Happy crafting!
How to Wax Seal, Tips and Ideas for beginners with Angela Tombari
Paint Your World with Vicky Papaioannou