Wax Seals Handmade Cards with Jyoti
Hello from Jyoti to all my crafty friends. First of all, a big woohoo!! to Spellbinders for coming out with this brand-new idea of the wax seal system. I am delighted to be sharing some of my inspirations here on Spellbinders Blog today. I created three cards with the Sealed By Spellbinders Collection release. Wax seals are new to me but I have always been intrigued by the look of wax seals on wedding cards and envelopes. So I was doing a happy dance at the opportunity to design some of the cards featuring the products from this new release.
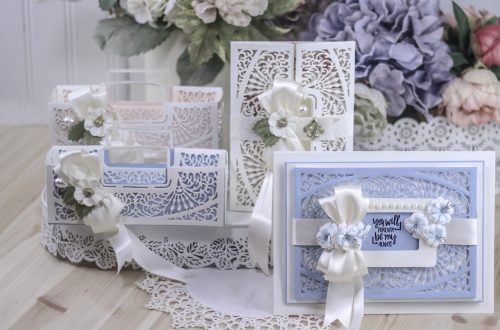
Wax Sealed Just Because Card
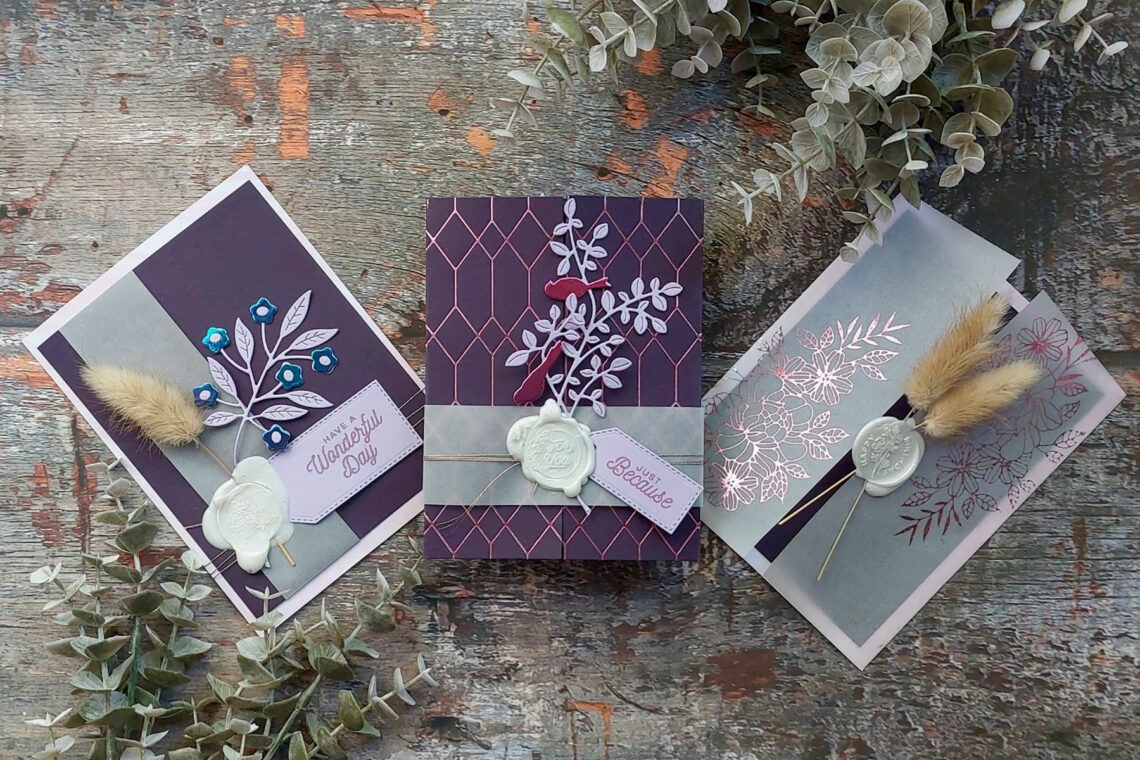
Wax seals look beautiful when used on a belly band around the card. My first inspiration is this gatefold Just Because card with a belly band that shows off this white wax seal.
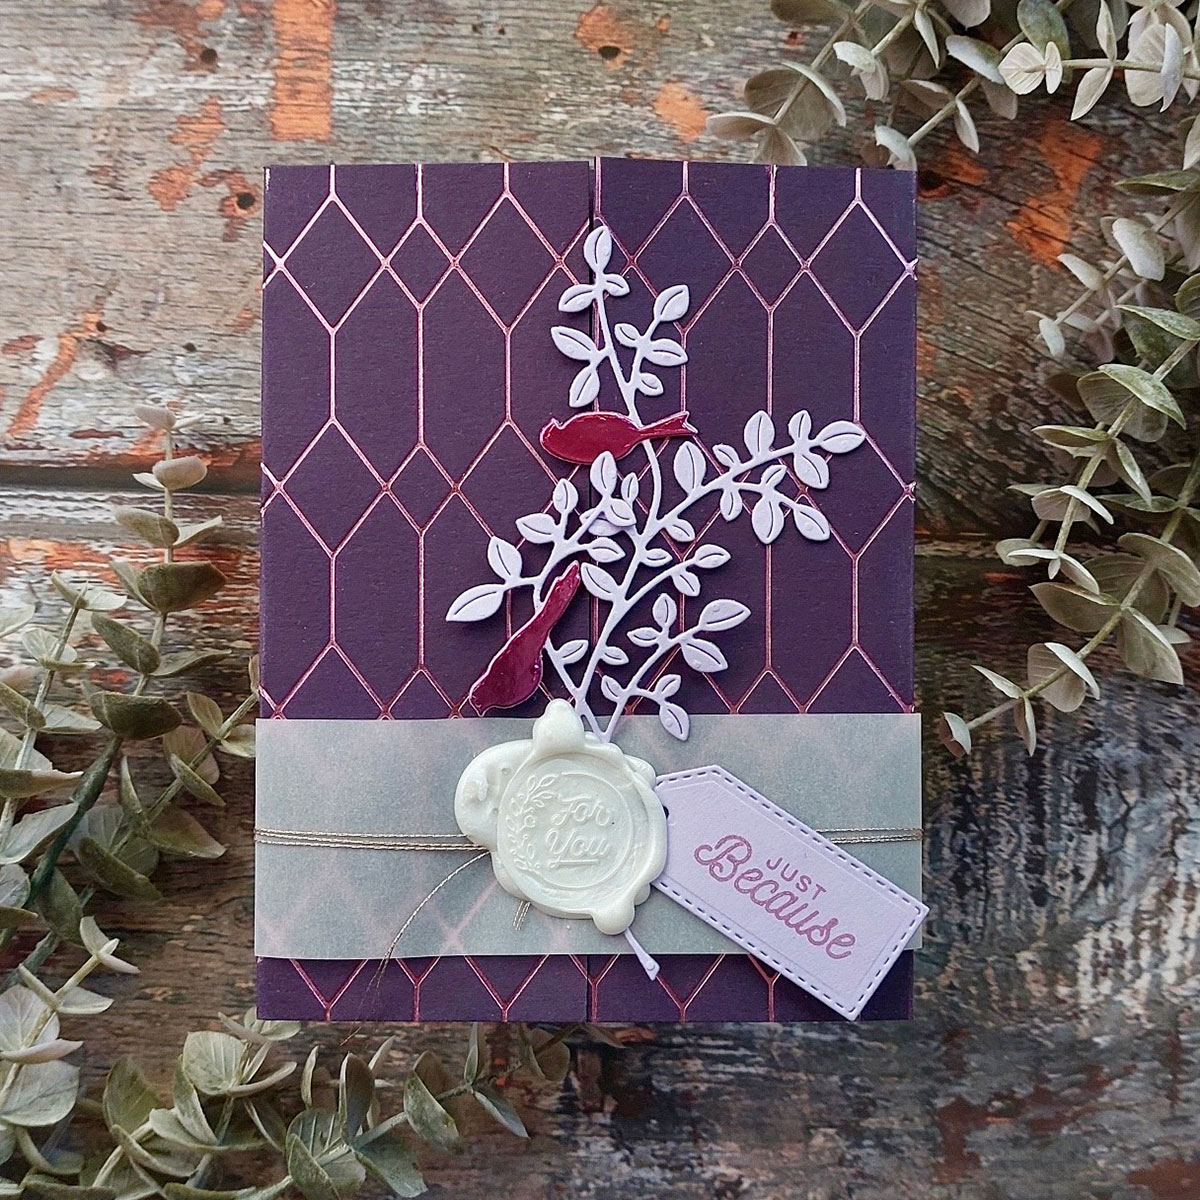
- I used a half sheet of Plum Color Essential Card-stock and scored at 2 and 1/8th inches from both sides to create a gatefold card base.
- I carefully foiled just the two front flaps using Geometric Diamond Background Hot Foil Plate and Pink Glimmer Hot Foil.
- I created two inches, wide belly band, using Vellum joining the ends at the back with strong double-sided tape.
- I cut the branch with birds using Sealed Birds Etched Die and Purple Mist Color Essential Cardstock to decorate the belly band. I wrapped some gold twine around the belly band for extra interest.
- I cut out a tag and stamped the sentiment using Sealed Sentiments Clear Stamp set and purple ink and stuck one end on the band.
- I then heated the Pearl White Wax and poured it over the center of the belly band with the die-cut branch and sentiment tag in place. Then I placed the For You Wax seal on it and left it to cool. This wax seal comes with the Sealed By Spellbinders Wax Seal Kit.
With that, my first card was done. I just added a smaller sheet of pink marble pattern paper inside later for a personal message.
Vellum Sealed Happy Birthday Card
The last time I used the Glimmer foiling, I tried foiling on vellum which in fact turned out perfect and I wanted to incorporate that idea into more foiled cards in the future. So here I am with another foiled-on-vellum card inspiration using the wax seal in the middle.

- This time, to create a gatefold card I took two pieces of vellum. I foiled both side flaps using the Glimmering Just For You Foil Plate and Pink Glimmer Hot Foil. Then scored and folded the extra flap behind a 4-and-a-half by 5-and-3-quarters piece of pink marble pattern paper creating the fold along the center front.
- I added a piece of Plum Color Essential Card-stock cut to 4 and a quarter by 5 and a half inches in the middle of the pattern paper inside. So it created a pale pink border.
- Then I placed the silicone mat that came with Sealed By Spellbinders Wax Seal Kit covering one flap and only showing one flap so when I poured the wax, the seal wouldn’t shut the card.
- I took two dried bunny tails, placed it along the center, heated the Pearl White Wax and poured it over then placed the Wildflower Happy Birthday Wax Seal Stamp and let it set.
That’s the second card done.
Have A Wonderful Day sealed card
For my last but not least inspiration I created a simple but elegant Have a Wonderful Day card.
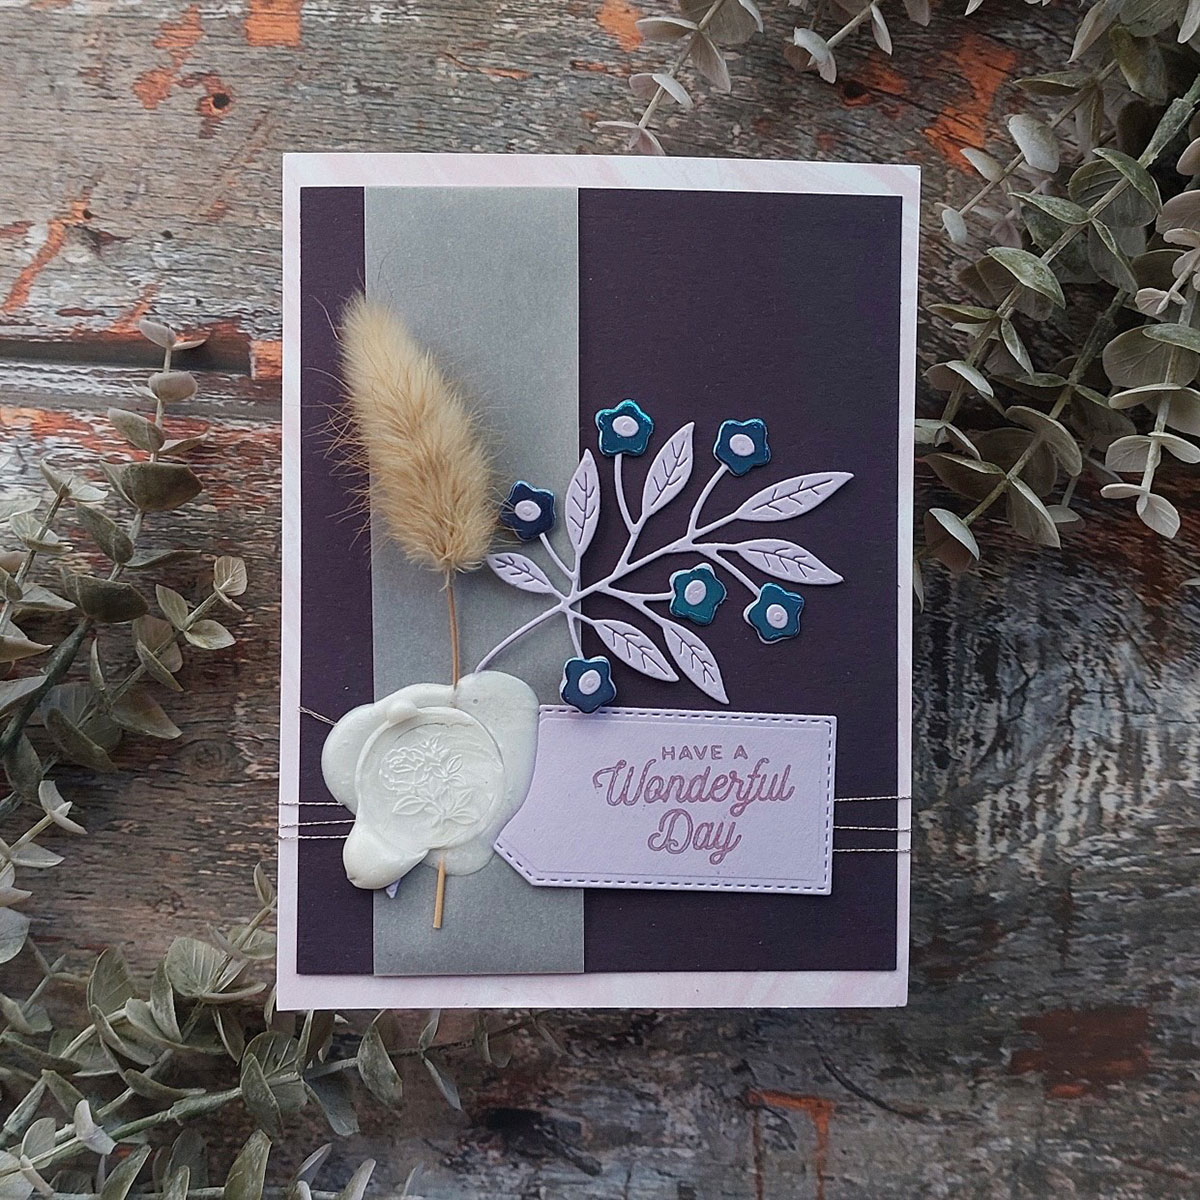
- I took a piece of pink marble pattern paper, and then added a plum cardstock piece left over from my one whole sheet after finishing the first two cards. I took a piece of vellum and wrapped it around the purple piece vertically on one side.
- I then cut the flowers and leaves with the Sealed Flowers Etched Die and added the flowers to the branch.
- I then stamped the Have a Wonderful Day sentiment using Sealed Sentiments Clear Stamp set.
- Then finally with the leaves and flowers, one bunny tail, and the stamped sentiment in place, I poured the melted Pearl White Wax and placed the Forever Rose Wax Seal Stamp (WS-011) on top, and left it to set.
- I then added this whole panel onto a 4-and-a-quarter by 5-and-a-half card base which is actually slightly smaller than my decorated panel. I think that creates some extra interest in this card.
This finished my last card for today.
As I was creating these cards I was still learning a lot about this new system. After all, it was my very first time playing with wax seals. And of course, along the way, I will figure out more efficient ways to accomplish similar works.
I hope this inspired you to try out some of the ways I have come up with to implement the new Wax Seal System. Now it’s your turn to fall in love with it just as much as I have.
Happy crafting!!
Hugs, Jyoti
Spellbinders Supplies:

2 Comments
Michele F
So beautiful, Jyoti!!
=]
Becky Green
LOVE the colors you used on your cards! And that the wax seals are NOT so perfectly round! It just adds that special hand made touch to them! 😉