Stitched For Christmas Collection – Inking Inspiration with Annie Williams
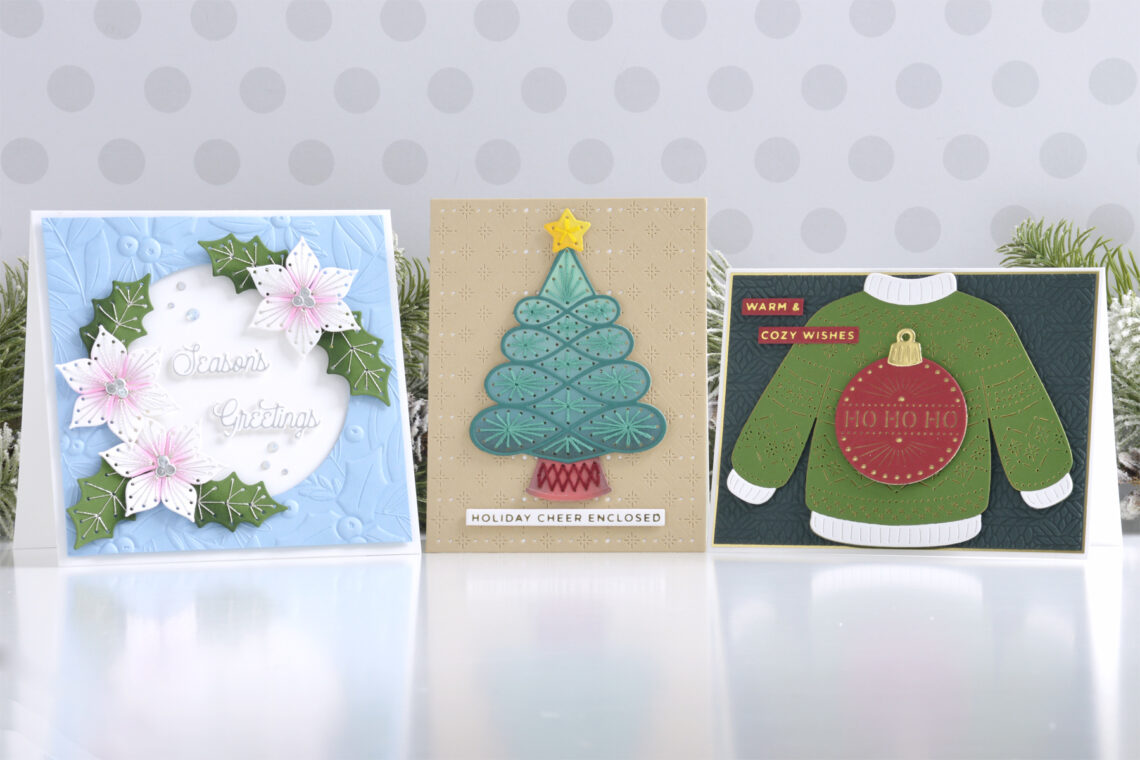
Hi there, this is Annie Williams and I’m excited to be back on the blog today to share a couple of projects using the new Stitched For Christmas Collection from Spellbinders. The beautiful new stitching designs in this collection inspired me to create three fun holiday cards with different inking techniques to create colorful die-cuts accented by more subtle stitched details.
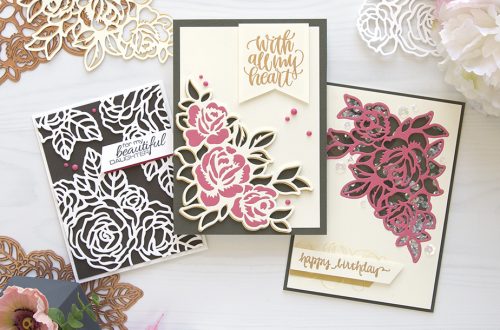
Poinsettia Window Card
I naturally gravitated towards the beautiful florals in the Stitched Poinsettia and Holly Leaf Die Set first. Here I framed a window with my pretty poinsettias and added a foiled sentiment for this elegant square holiday card.
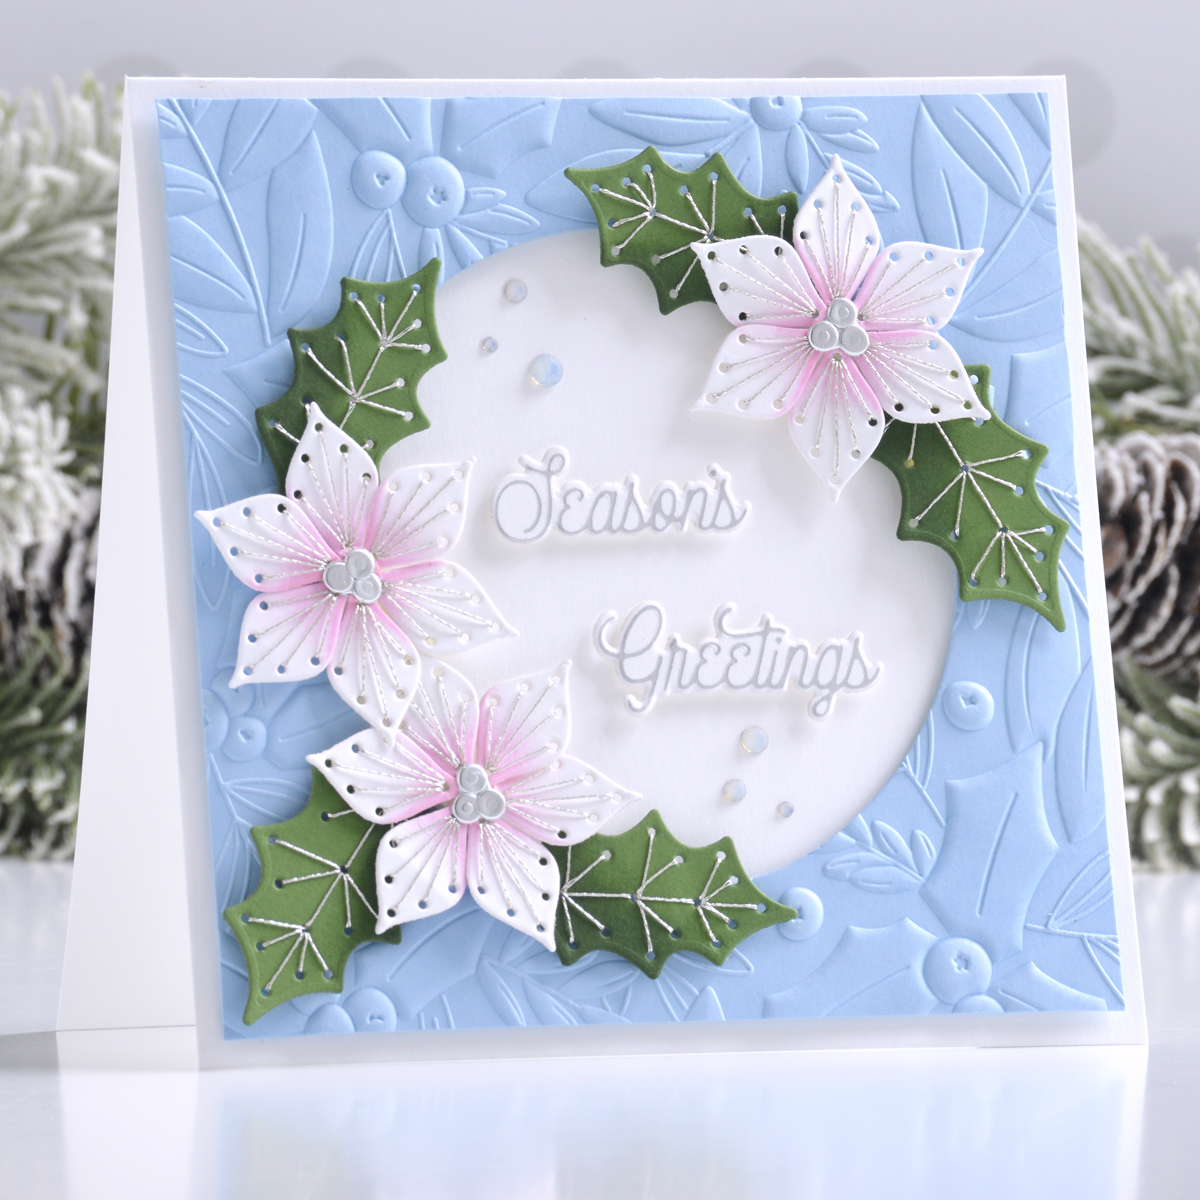
I started by cutting white and Fern Cardstock using the Stitched Poinsettia and Holly Leaf Die Set. To each petal layer, I added a bit of Kitsch Flamingo Distress Ink to the center with a sponge dauber before stitching with silver metallic thread. Similarly, I added some shading to one side of each holly leaf with Rustic Wilderness Distress Ink before stitching with silver metallic thread. I assembled the poinsettias with liquid glue, adding centers cut from Mirror Silver Cardstock.
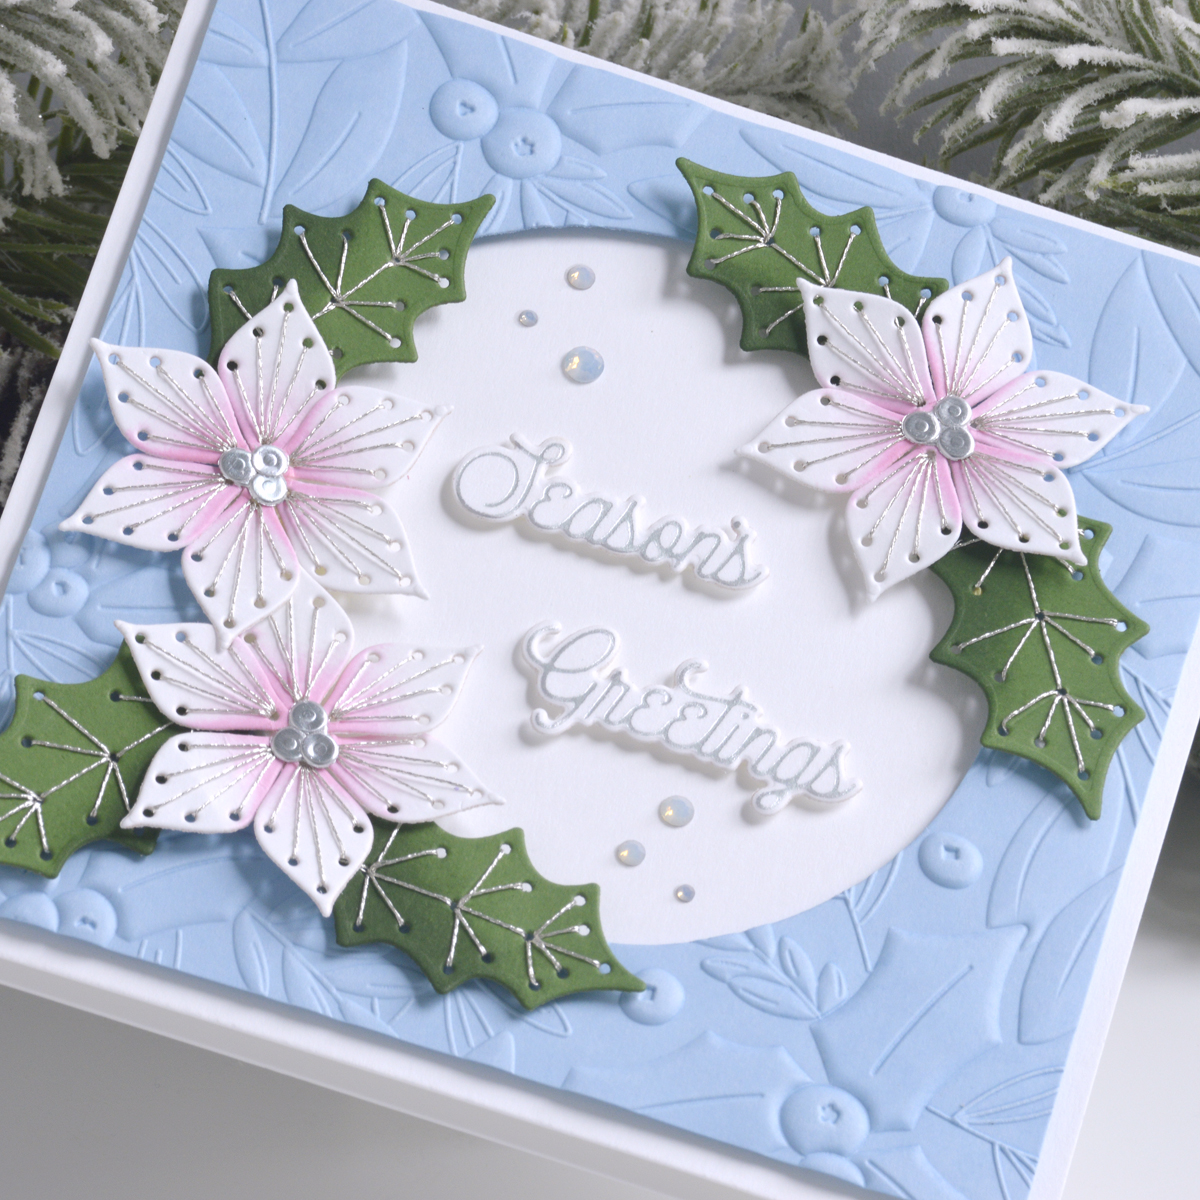
To create the card front, I trimmed a piece of Raindrop Cardstock to 5.25” square, cut the center out with one of the dies from the Fluted Classics Circles Die Set, and embossed it with the Holly & Foliage 3D Embossing Folder. I adhered this panel to a top-folding 5.5” square white card base with foam adhesive before adding my flowers and leaves around the window. For the greeting, I applied Matte Silver Hot Foil to white cardstock using the Merry Glimmer Sentiments Foil Plate Set, cut them out with the coordinating dies, and popped them up inside the window with more foam adhesive. Crystal Mix Gems were added to embellish.
Inked & Stitched Christmas Tree Card
The simple and cute design of the Stitched Christmas Tree Die Set made me want to play with bright colors, so I created several blends of Distress Oxide Inks before die-cutting and stitching all of the parts. Using the Stitched Starry Argyle Die as a pretty pierced background, this fun card is perfect for sending some holiday cheer.
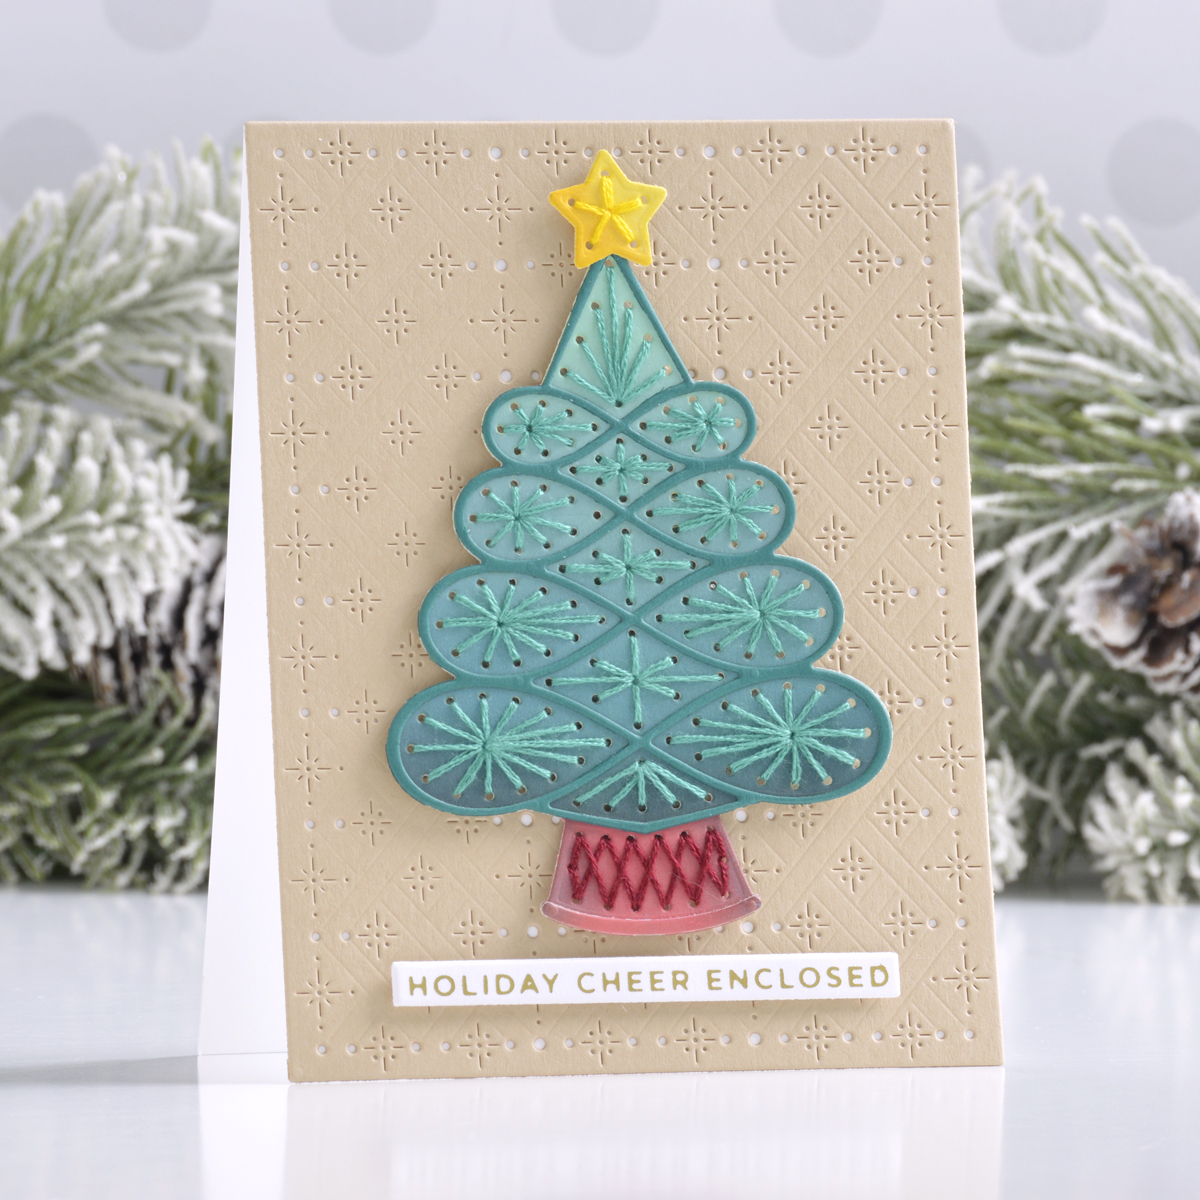
I started by applying Cracked Pistachio, Evergreen Bough, Pine Needles, and a touch of Black Soot Distress Oxide Ink to white cardstock before cutting it with the tree die from the Stitched Christmas Tree Die Set. For the tree stand, I blended Festive Berries and Ground Espresso Distress Oxide Ink onto white cardstock, and for the star I blended Squeezed Lemonade and Mustard Seed Distress Oxide Ink onto white cardstock. Once cut, I stitched each piece with a coordinating color of thread for a tone-on-tone look…I wanted the stitching to be more of a fine detail than a focal point. The swirly layer was cut from Blue Spruce Cardstock and adhered on top of the stitched tree with liquid glue.
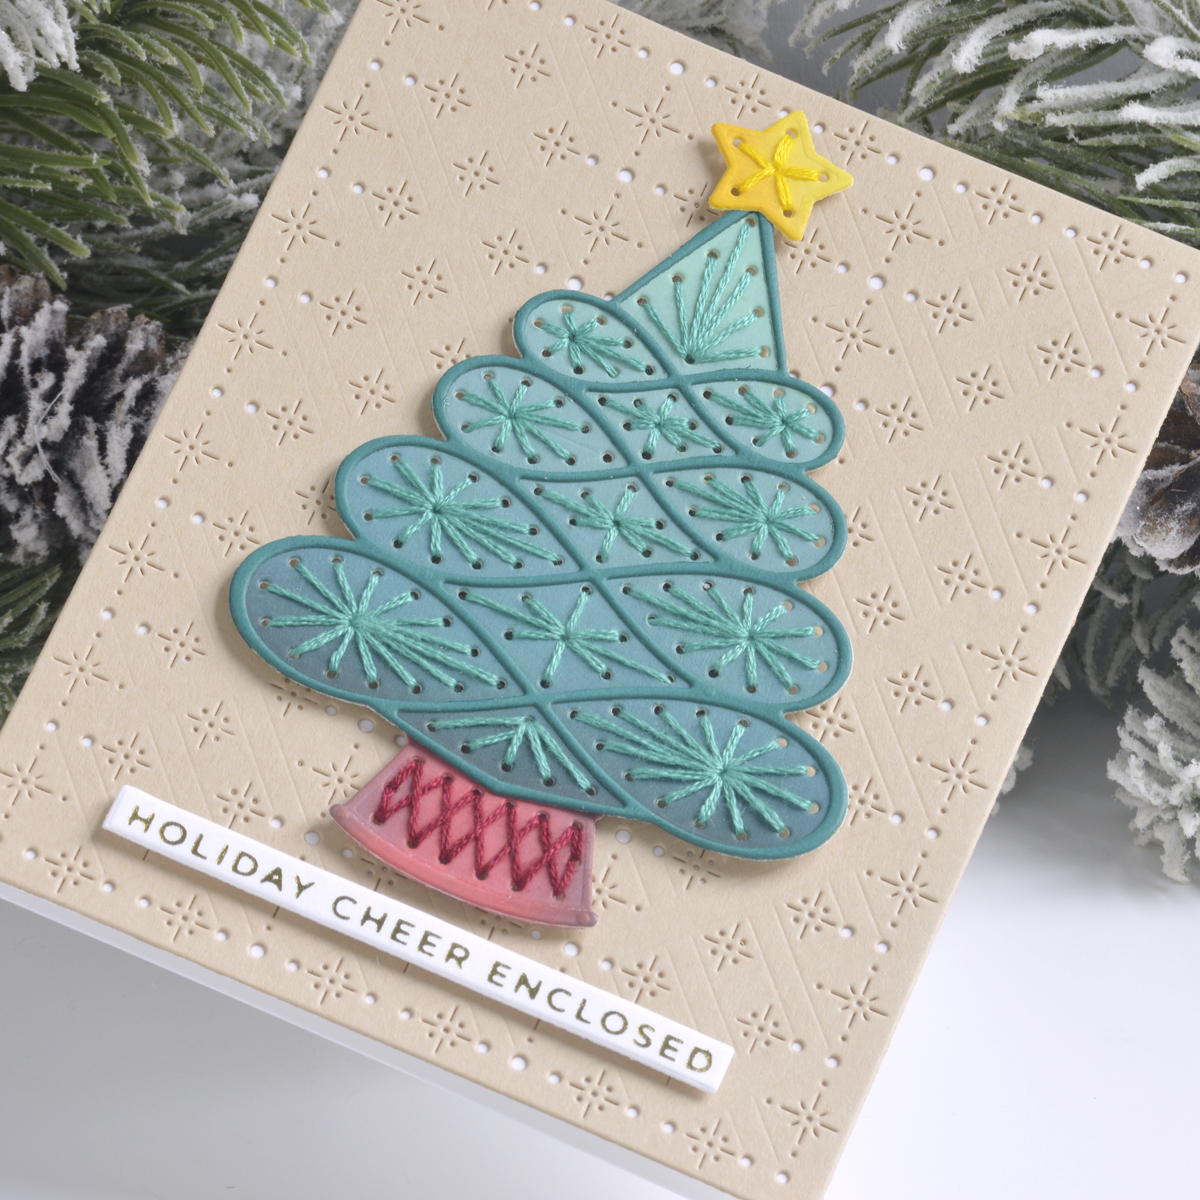
To assemble the card, I cut Dune Cardstock using the Stitched Starry Argyle Die and adhered it to a top-folding A2-sized white card base with liquid glue. I added the stitched tree to the front of the card with foam adhesive, and then I foiled a sentiment in Gold Hot Foil using the Glitter Wishes Glimmer Plate Set to pop up beneath the tree with more foam adhesive.
Warm & Cozy Wishes Card
Lastly, I created a warm and fuzzy holiday card with no stitching at all! Rather, I used a fun inking technique to accent the stitching lines on these sweet die-cuts made with the Stitched Christmas Sweater Die Set.
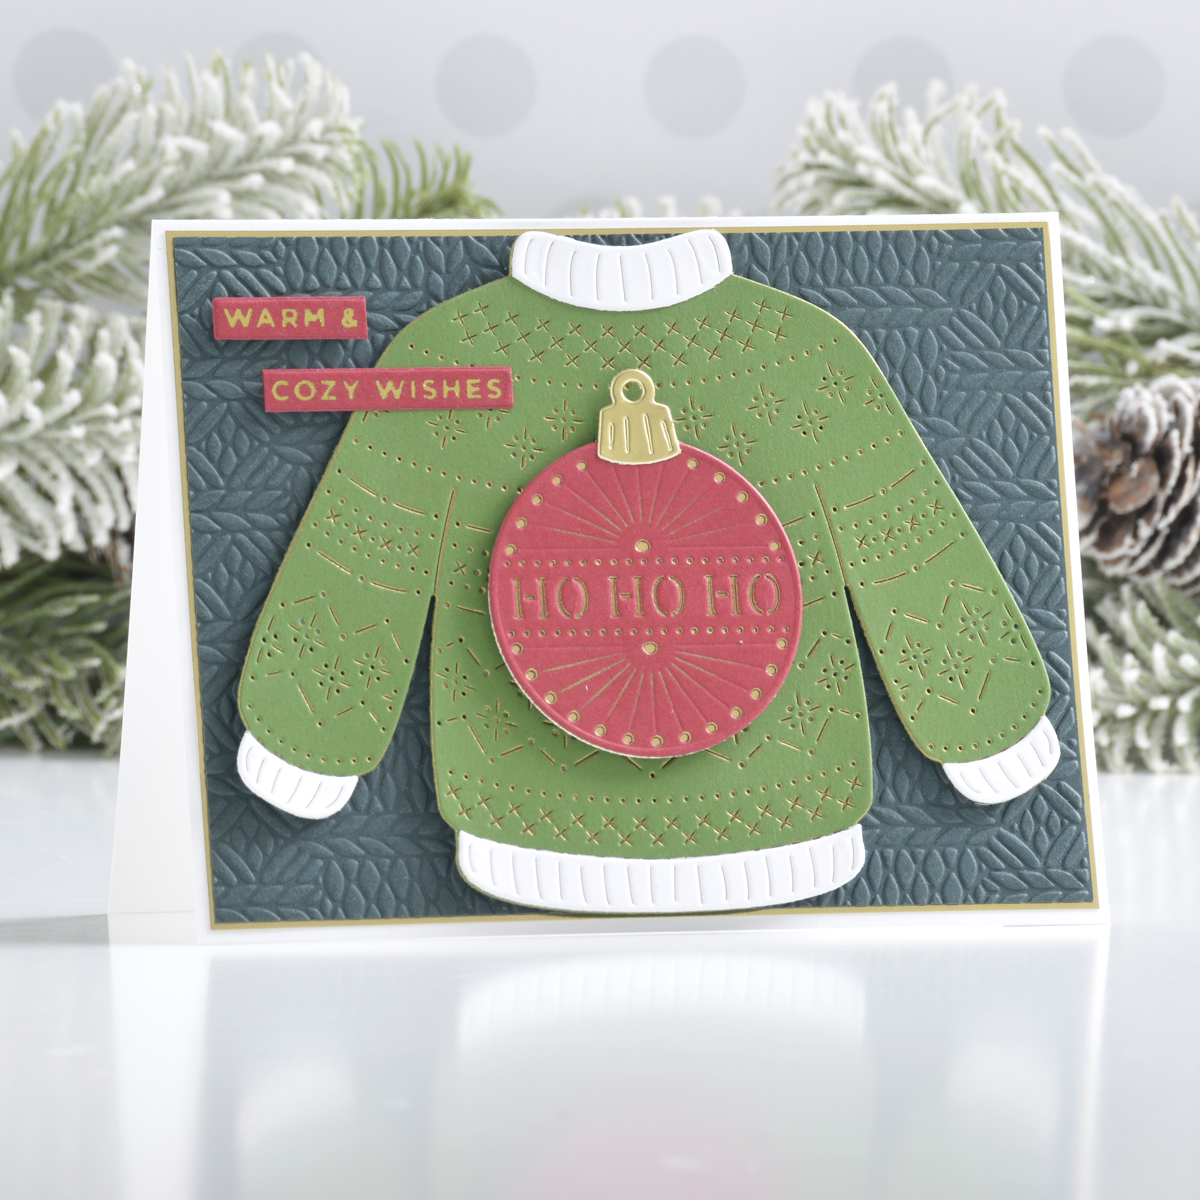
I started by applying gold pigment ink to the sweater and ornament dies from the Stitched Christmas Sweater Die Set using a brayer. Then I cut Fern and Phone Booth Cardstock with the inked dies, followed by white and Mirror Gold Cardstock with the accent dies. (Tip – I place the die onto a long strip of Best Ever Craft Tape before inking it so that I can pick up the two ends of the tape to turn the die over for cutting without rubbing any of the ink off.)
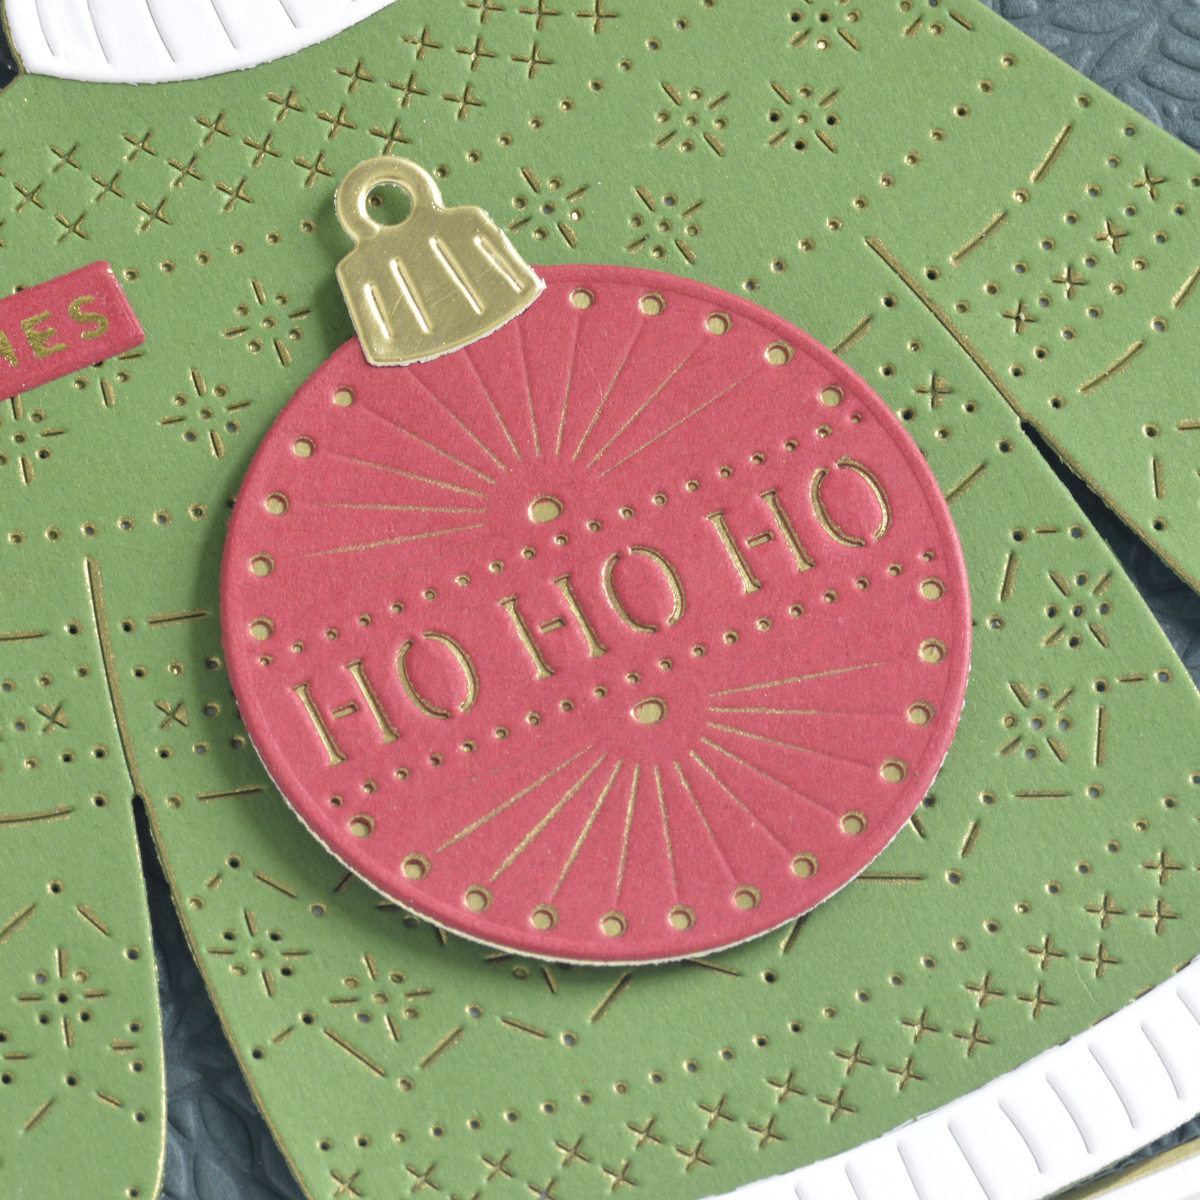
Here’s a close-up shot of what the die-cuts look like when you press the gold ink into the score and cut lines of these dies…it definitely adds a fun detail that’s a little more subtle than typical stitching!
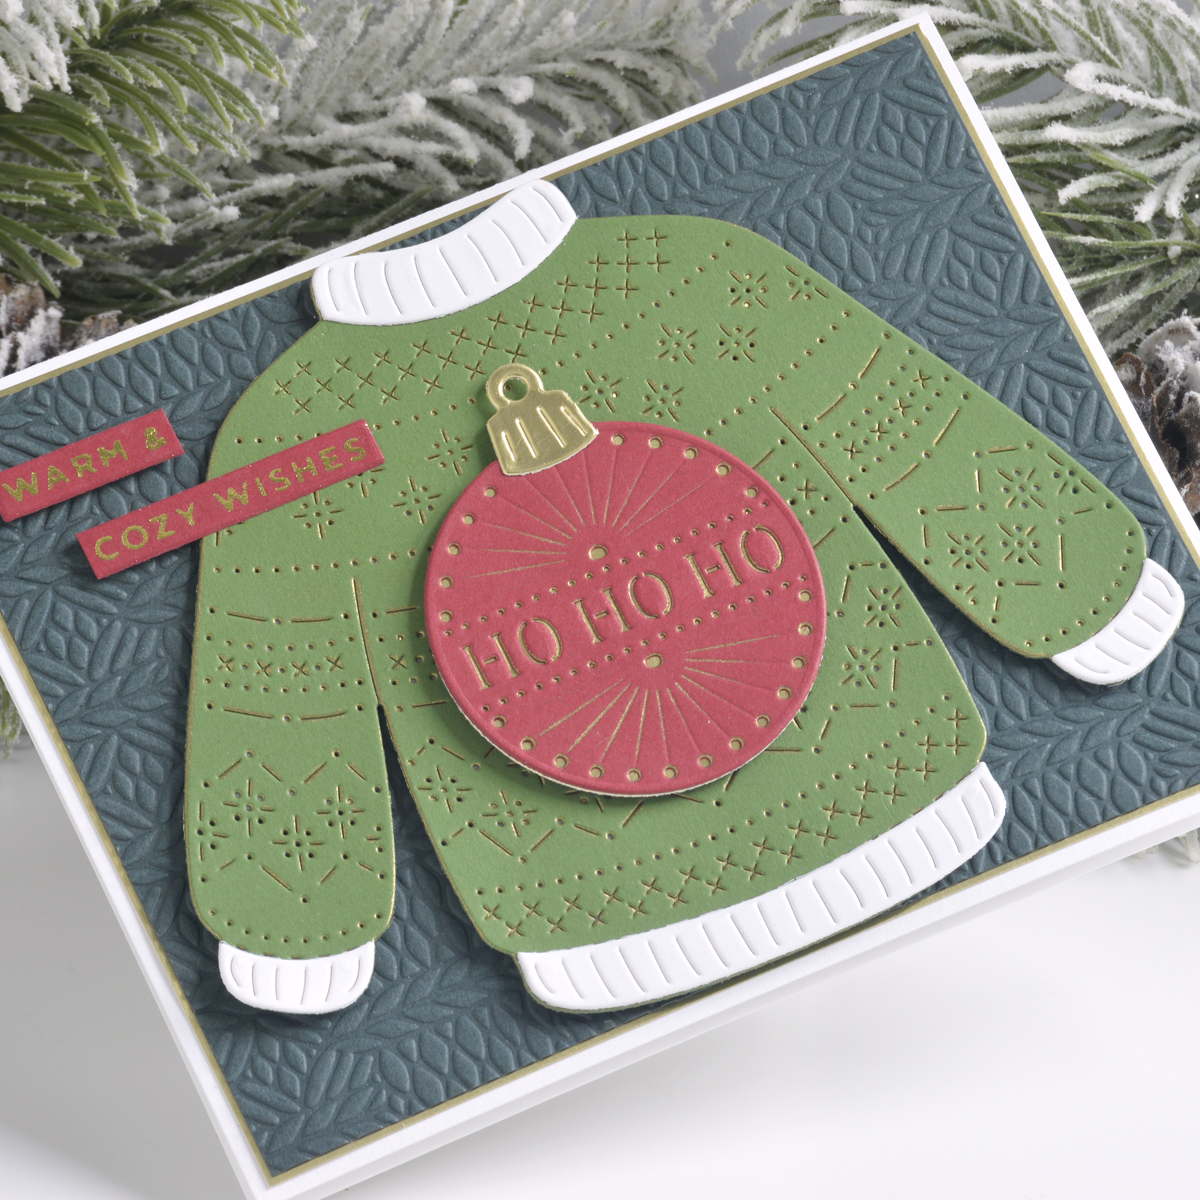
To finish off the card, I embossed Forest Cardstock using the Sweater Weather Embossing Folder, matted it with Mirror Gold Cardstock, and adhered it to a top-folding white card base. After popping the cute Christmas sweater up in the center of the card, I foiled a sentiment from the Glitter Wishes Glimmer Plate Set onto Phone Booth Cardstock in gold and added it to the top corner of the card. I love all of the “stitched” details on this card without any stitching at all!
Spellbinders Supplies:

Other supplies
White heavyweight cardstock, Kitsch Flamingo and Rustic Wilderness Distress Ink, Squeezed Lemonade, Mustard See, Cracked Pistachio, Evergreen Bough, Pine Needles, Black Soot, Festive Berries, Ground Espresso Distress Oxide Ink, gold pigment ink, yellow, teal, and red embroidery thread, sponge dauber, brayer, foam blending tools, tape runner, foam adhesive.
I hope you enjoyed these fun stitched holiday cards and thanks so much for stopping by today. You can find more inspiration over at my blog AnnieBWills.com.

One Comment
Nancy
I like all of the Christmas cards, but my
favorite is the one with Season Greetings on it. Very pretty!