-
Fun Ways To Add Beautiful Sparkle To Your Cards
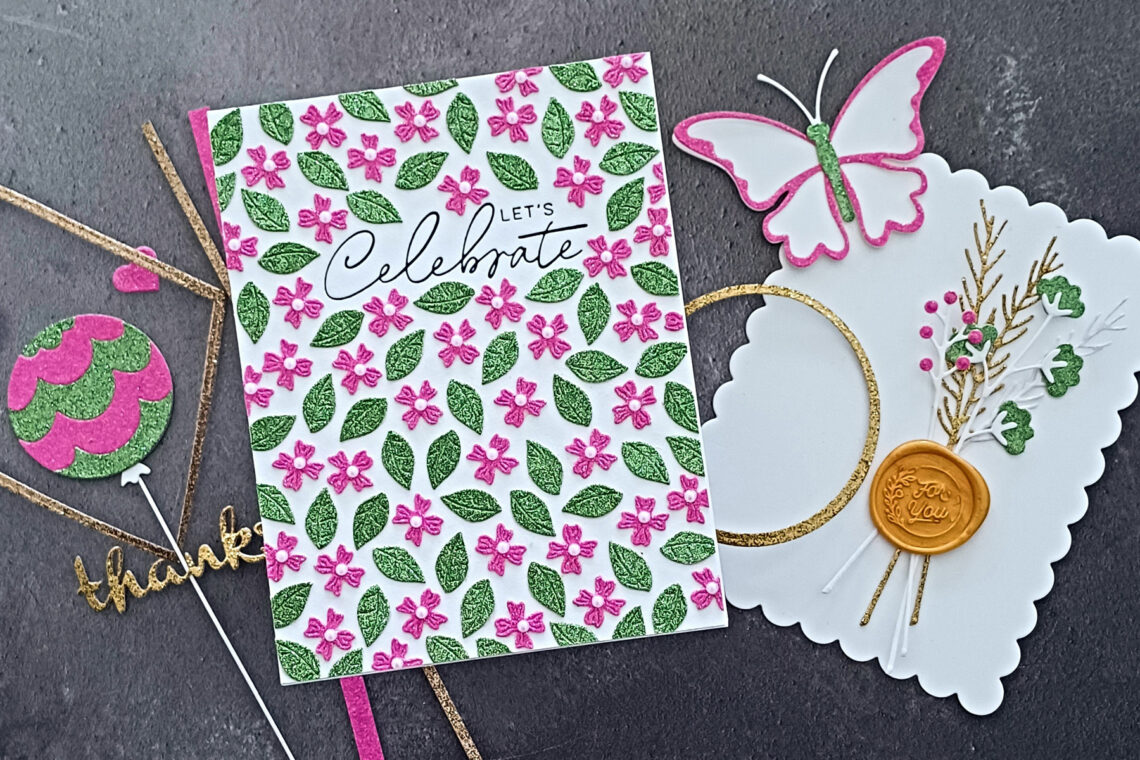
Hello there Spellbinders friends! Lisa Tilson is here with you today on the Spellbinders blog. Today we are going to be playing with glitter cardstock! I have lots of examples and ideas for you and some great tips to help you get the most out of your cardstock. I love to add glitter cardstock to my cards, often in fairly subtle ways, but there are also many ways of really showcasing the beautiful texture and sparkle. So first let’s take a look at the cardstock itself. Included in the picture are Champagne, Silver, Gold, followed by the five Spring Tones Glitter Cardstock colors, and then the five Jewel Tones Glitter…
-
Christmas Stitching in July!
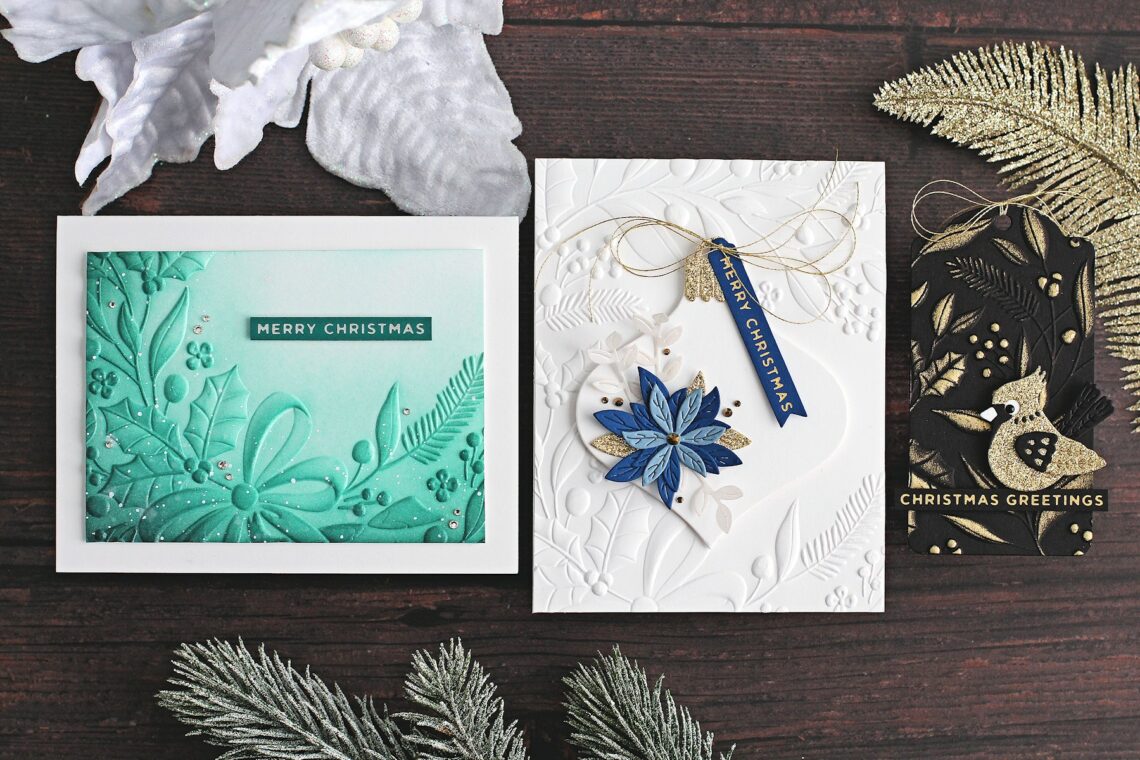
Hello there, Michelle Short here to share some projects with you using the new Stitched for Christmas Collection. This beautiful collection features lots of stitching dies to create beautiful handmade stitched projects. Not into stitching? You can also use these dies without stitching, they still make beautiful projects! CHRISTMAS POINSETTIAS My first card uses the beautiful Stitched Poinsettia & Holly Etched Dies. I die-cut the poinsettias from Poppy Field Cardstock (both the stitching layer and back layer) and the holly from Peridot Cardstock. I then added ink blending to the layers using Distress Oxide Inks and blending brushes. I stitched the poinsettias and holly leaves using DMC Color Essentials Floss…
-
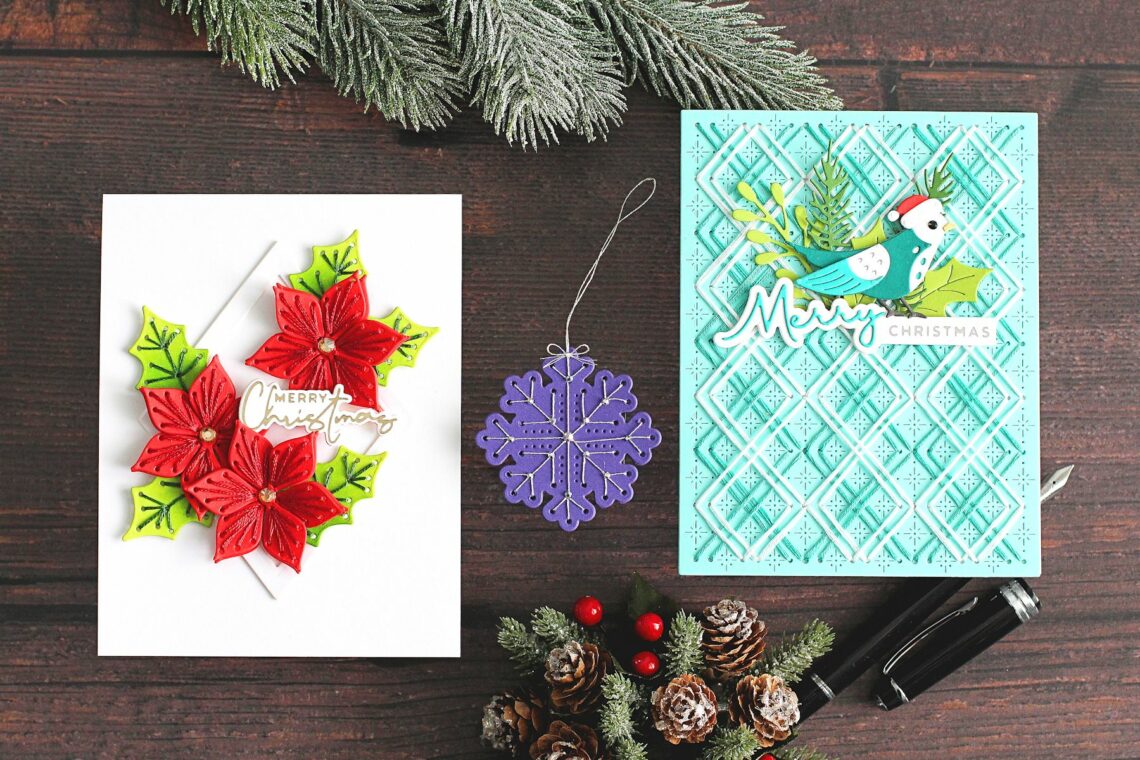
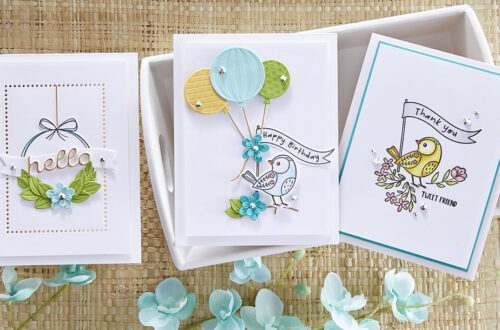
It’s Time to Get Stitching with Stitched for Christmas!
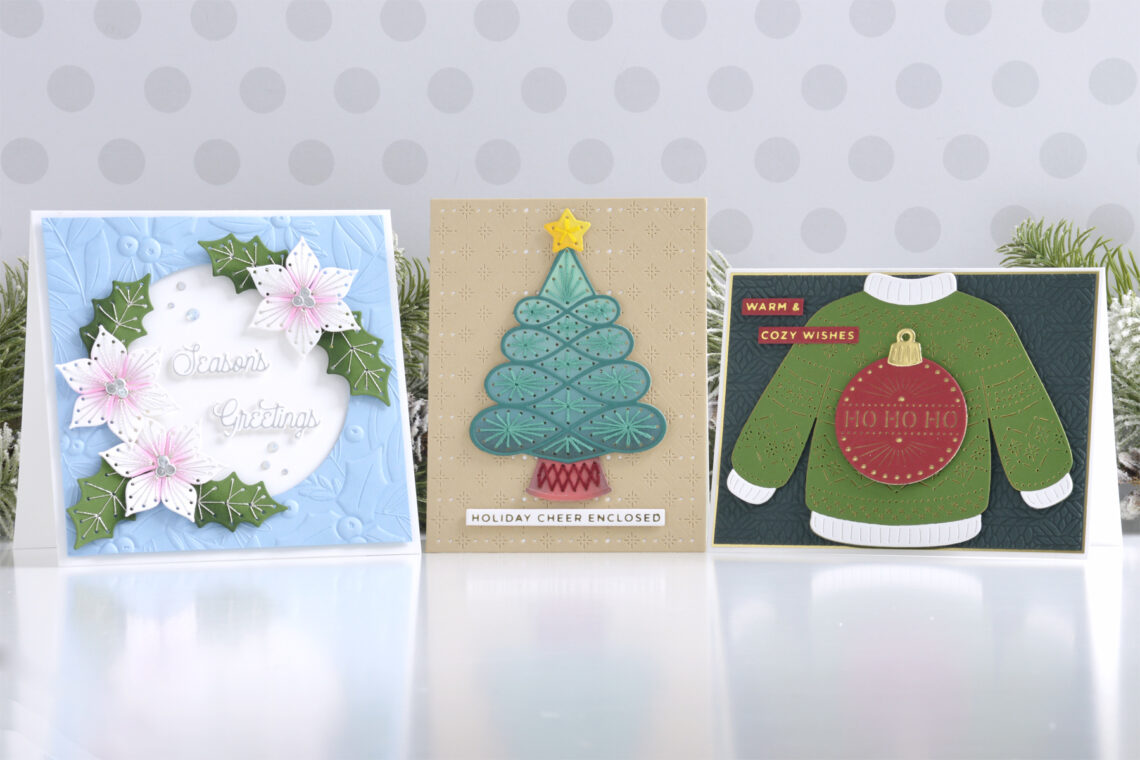
Hello crafters! Joan Bardee here and I’m happy to be back on the Spellbinders blog sharing some holiday cards using the Stitched for Christmas collection. Yes, Christmas! I’ve been crafting long enough to remember when companies would release their Christmas products in November, which never left me enough time to use them. So, I am thrilled to see Christmas in July. Chose a slightly nontraditional Christmas color palette, substituting aqua or teal for green. Note: I made these cards before the sentiments in this collection were available, so I used sentiments from last year’s collections. Warm & Cozy Sweater This card was inspired by all the sweaters my mom made…
-
Stitched For Christmas Collection – Inking Inspiration with Annie Williams
Hi there, this is Annie Williams and I’m excited to be back on the blog today to share a couple of projects using the new Stitched For Christmas Collection from Spellbinders. The beautiful new stitching designs in this collection inspired me to create three fun holiday cards with different inking techniques to create colorful die-cuts accented by more subtle stitched details. Poinsettia Window Card I naturally gravitated towards the beautiful florals in the Stitched Poinsettia and Holly Leaf Die Set first. Here I framed a window with my pretty poinsettias and added a foiled sentiment for this elegant square holiday card. I started by cutting white and Fern Cardstock using…
-
Hexi-Gems Collection – Card Inspiration with Annie Williams
Hi there, this is Annie Williams and I’m excited to be back on the blog today to share a couple of projects using the new Hexi-Gems Collection from Spellbinders. I loved playing with different ways to use this fun new shape in my cardmaking and was inspired to create a couple of pretty cards in three different styles. Sleek and Modern Friendship Card Since we’re working with “gems” here, I pulled out my favorite color of Glimmer Hot Foil to use with the new Hexi-Gem Glimmer Hot Foil Plate. Moondust Hot Foil creates an amazing iridescent finish that reminds me of blue topaz. Here I did some simple foiling for…
-
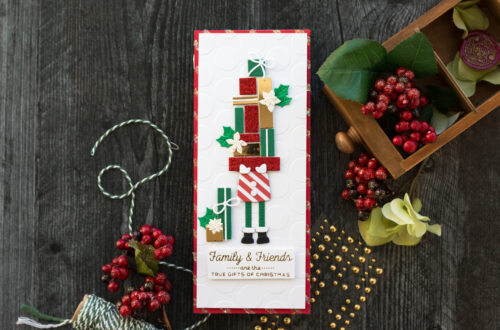
Holiday Floral Swag 3 Ways – Christmas Inspiration With Michelle Short
Hello there, Michelle Short here to share some inspiration using the Christmas Collection. My post today focuses on using Holiday Floral Swag in three different ways. WHITE-ON-WHITE ORNAMENT For my first project, I wanted to go with a simple white-on-white card. I love the look of white on white and the embossing really enhances it! I started off by running a panel of white cardstock through my Platinum 6 inside the Holiday Floral Swag 3D Embossing Folder. It was then adhered to the front of an A2 white card base. For my focal point, I die-cut the Nordic Ornament from white and gold glitter cardstock (for the topper) and adhered…