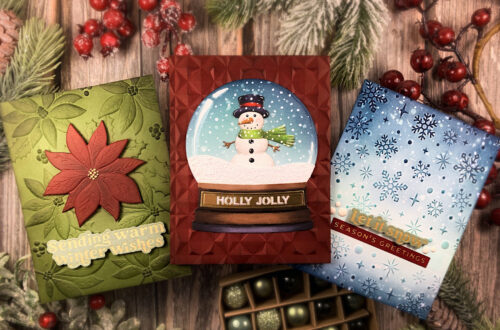
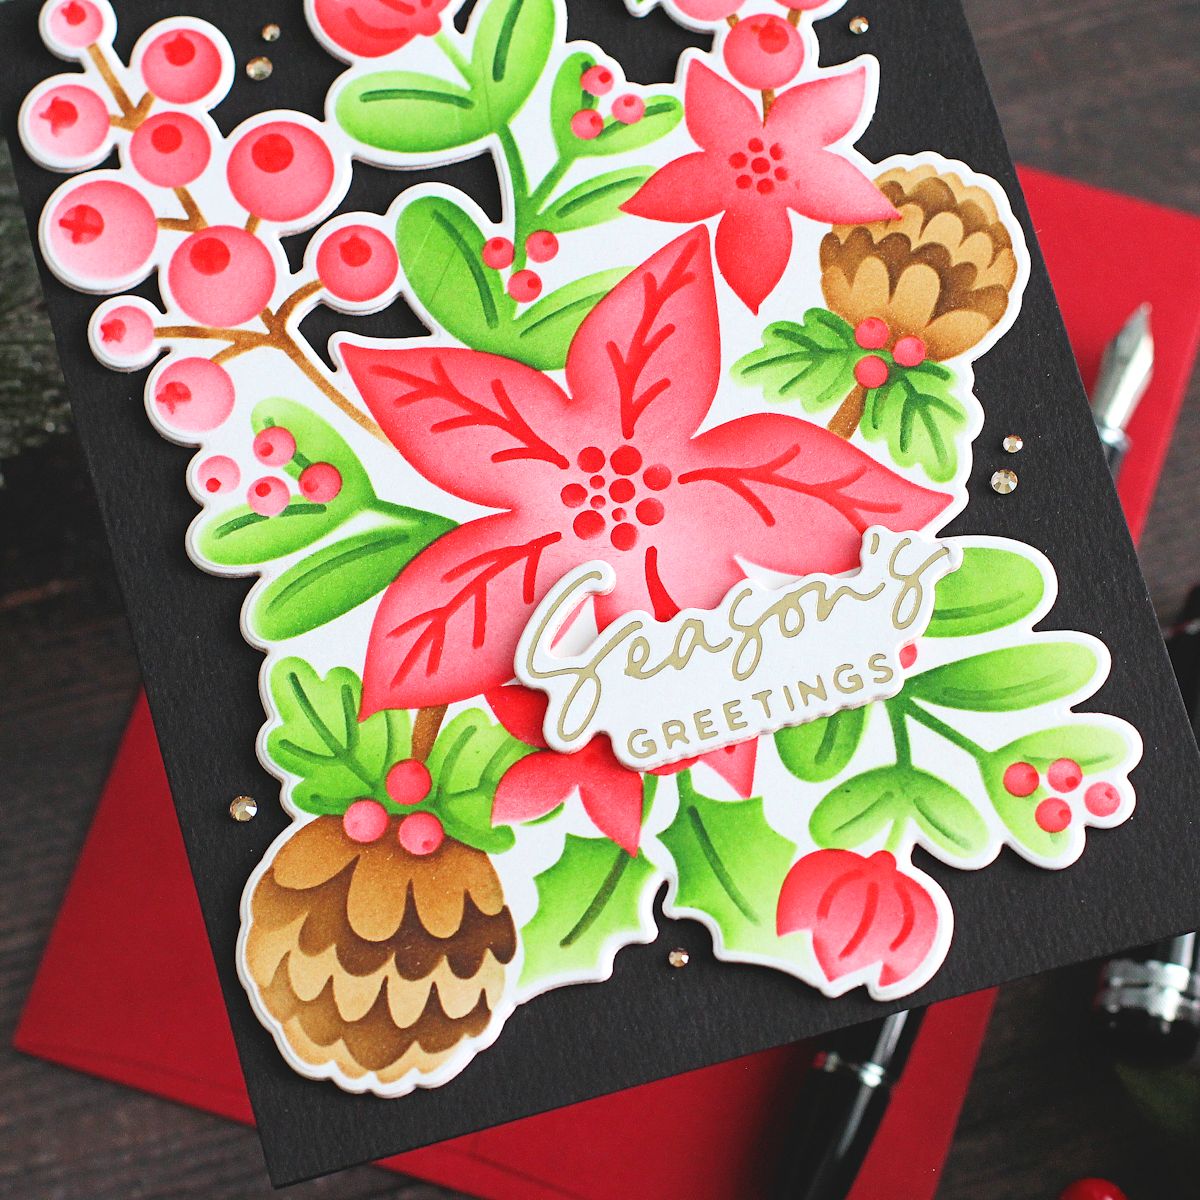
Christmas Florals Stencil How-to Step-by-step
Hello there, Michelle Short here to share a step-by-step tutorial with you using the Christmas Florals Stencil from the new Classic Christmas Collection. This is such a pretty stencil set (5 layering stencils) that creates a beautiful floral arrangement. They can be used alongside the Christmas Florals & Sentiments Etched Dies or can be used on their own. I am using both on my card today.
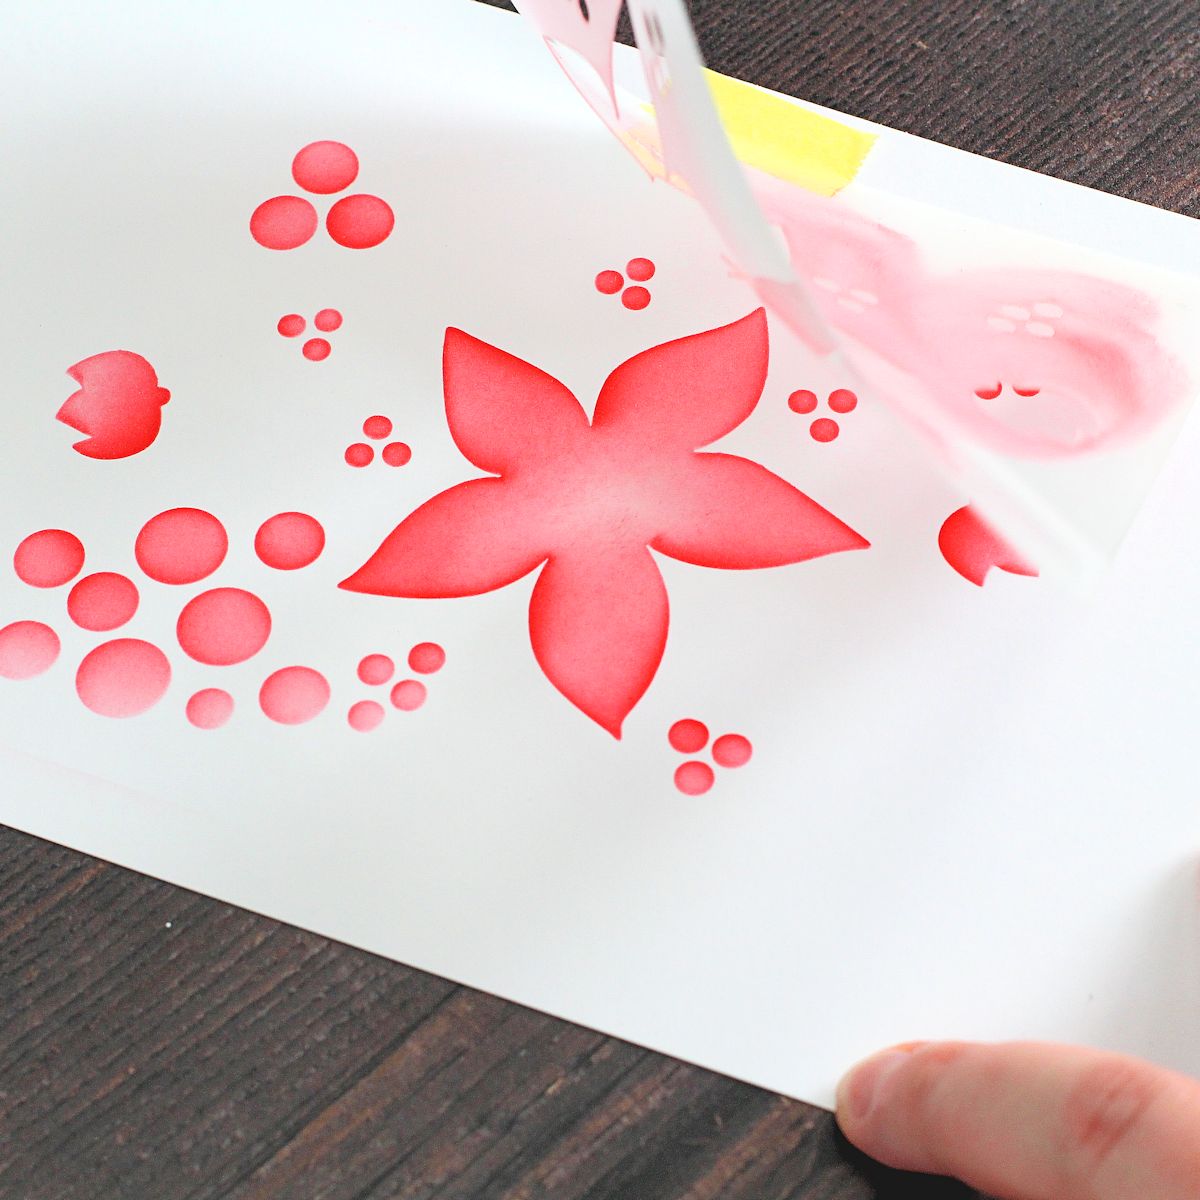
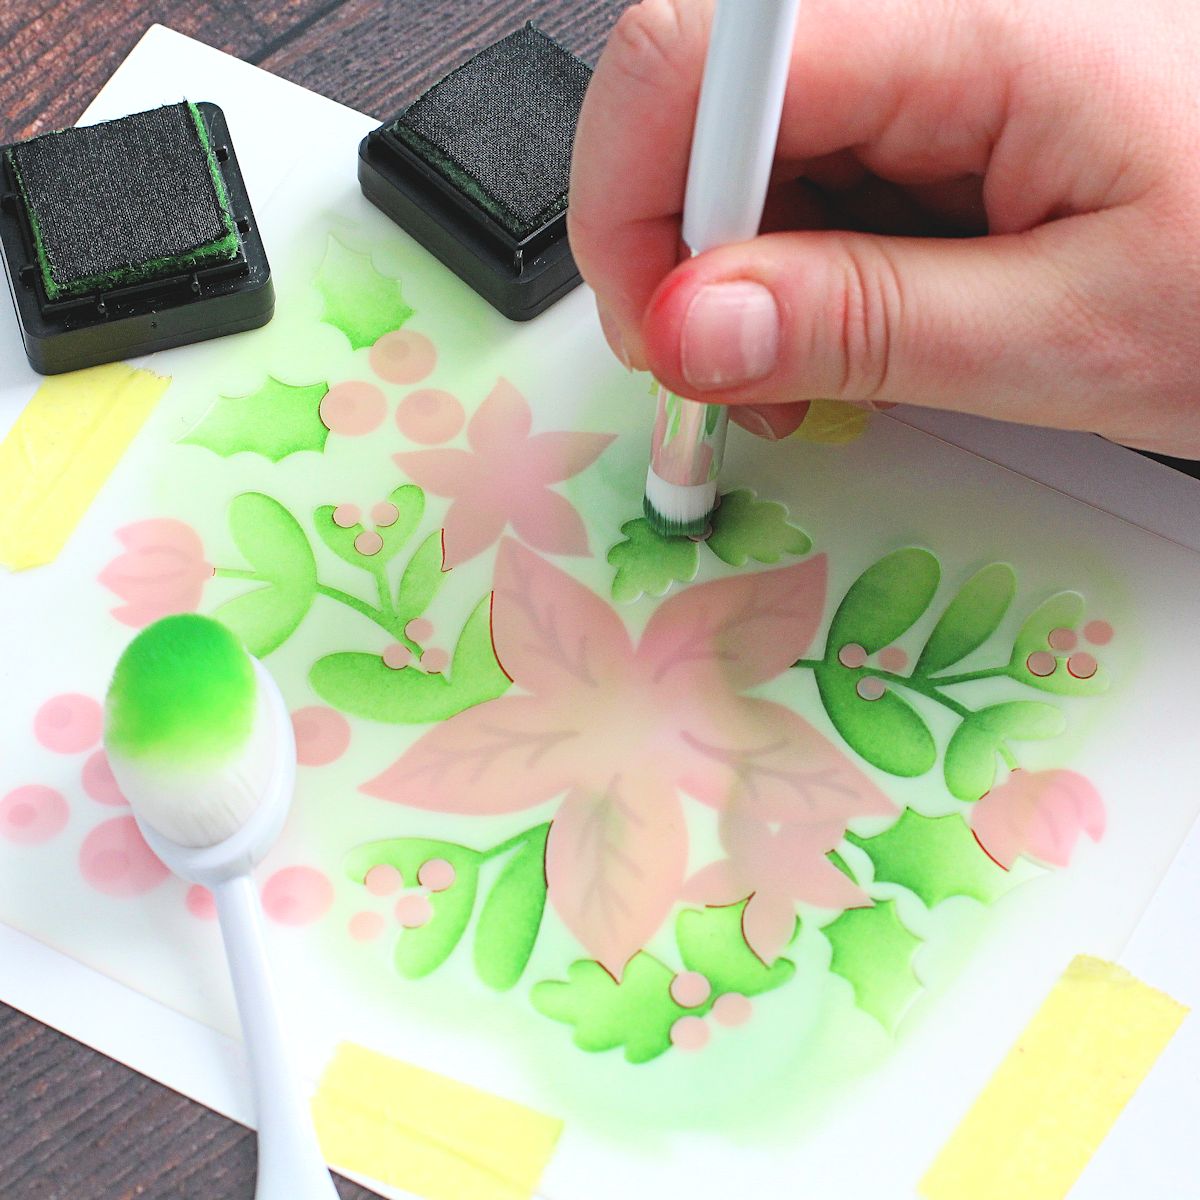
STEP 1
Start off by placing the first Christmas Florals Stencil (they are numbered in the bottom left-hand corner) onto a panel of white cardstock and secure in place with Best Ever Craft Tape. Using Blending Brushes, blend red ink on top, with a heavier hand around the edges of the flowers and berries to add some dimension.
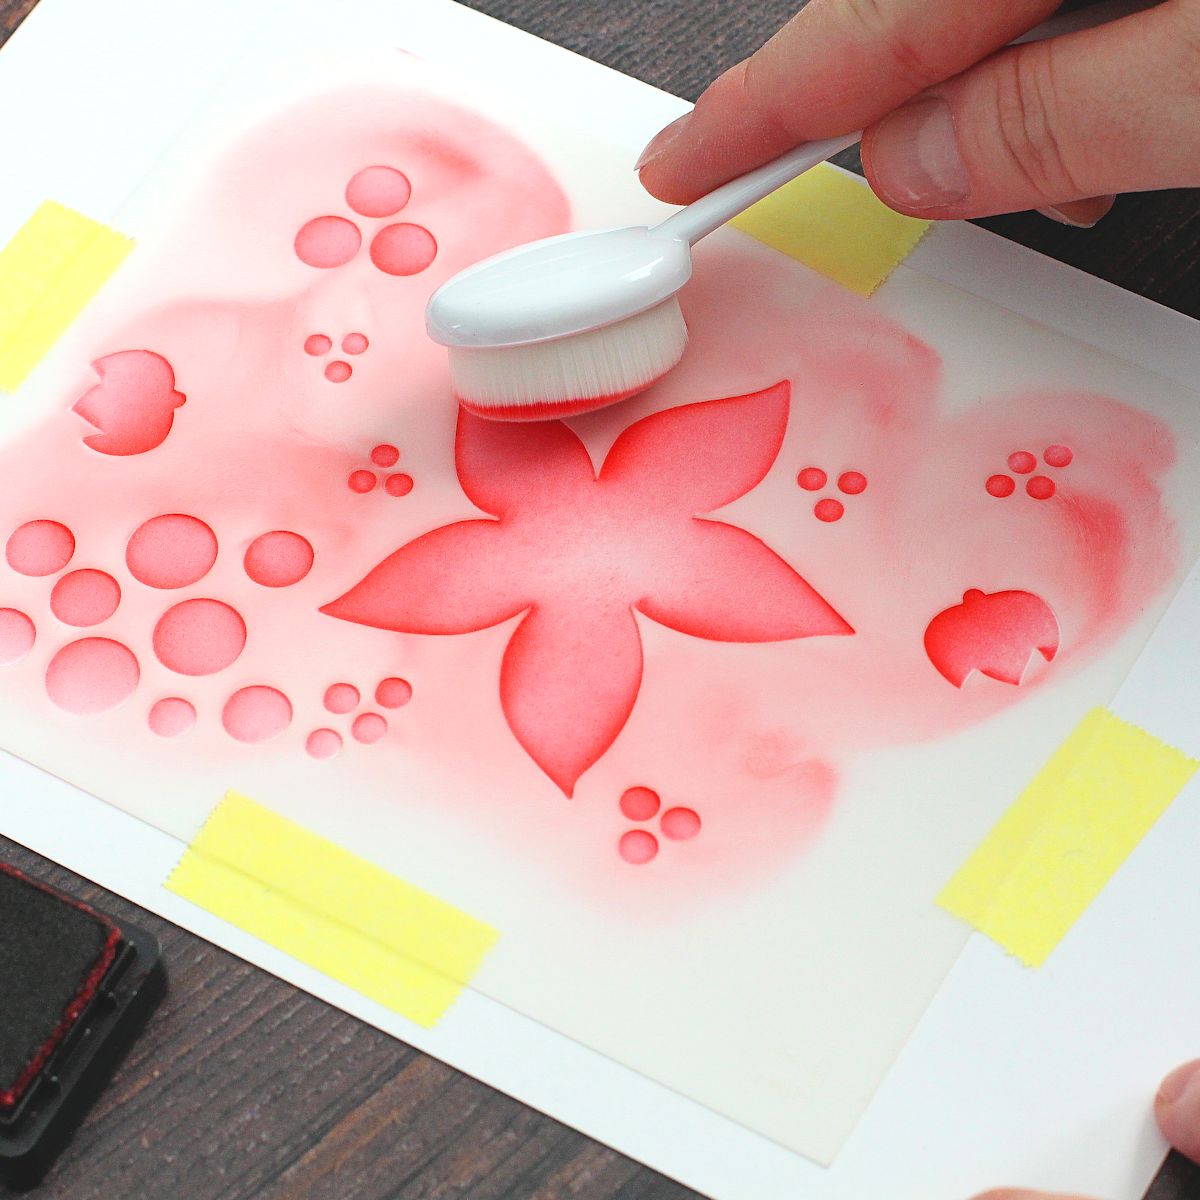
Whilst you do not need to add dimension with darker and lighter shades of ink (around the edges), I do think it adds something to the finished result. Remove the stencil and look how beautiful it is already!
STEP 2
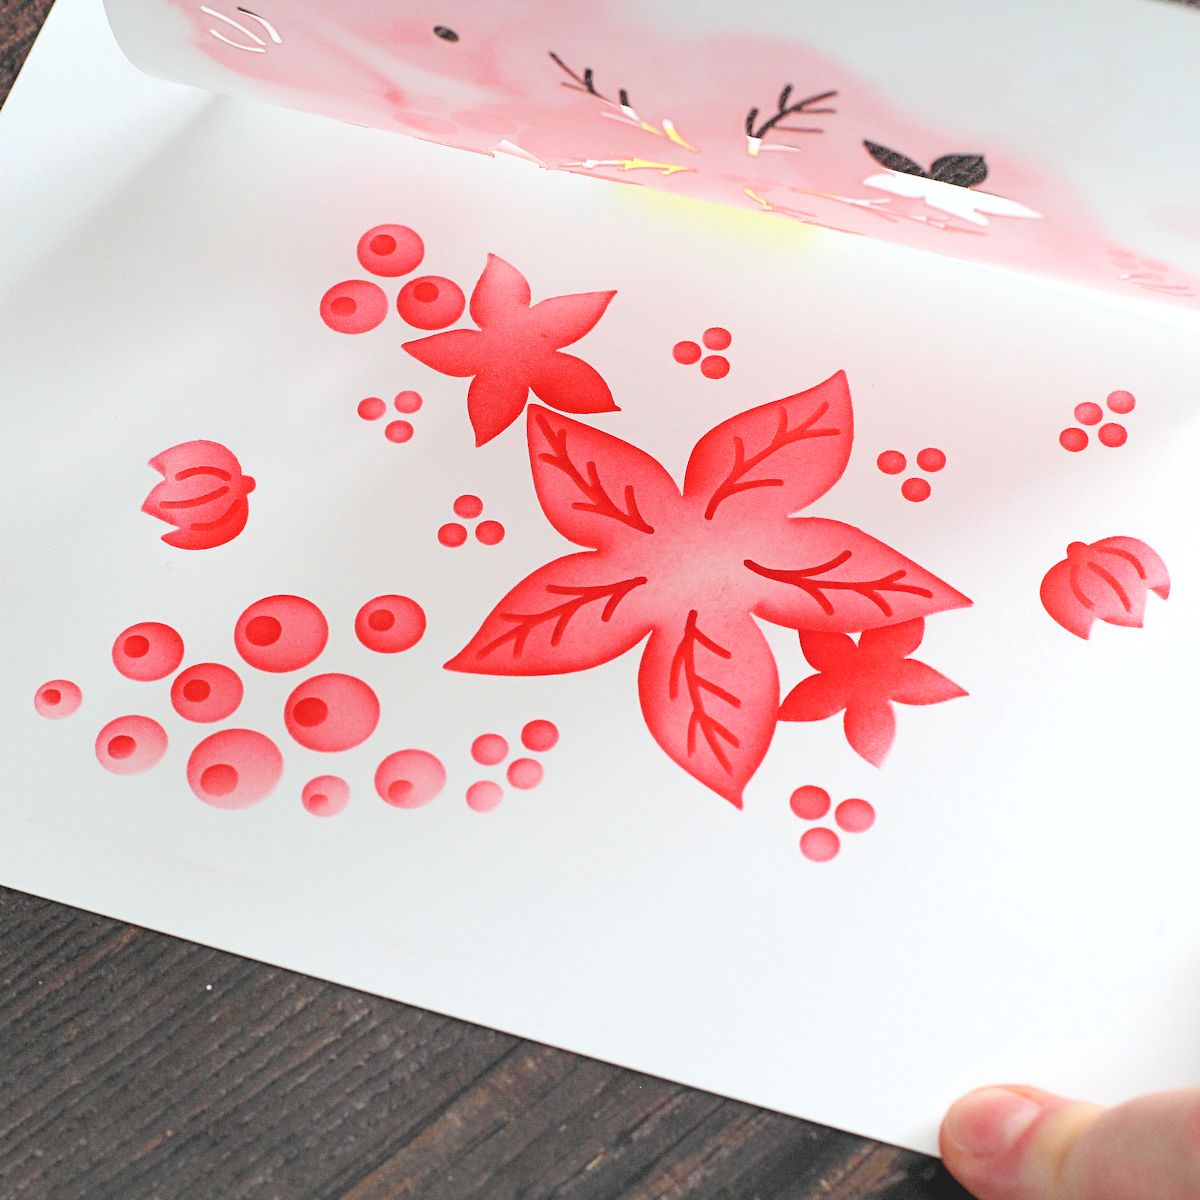
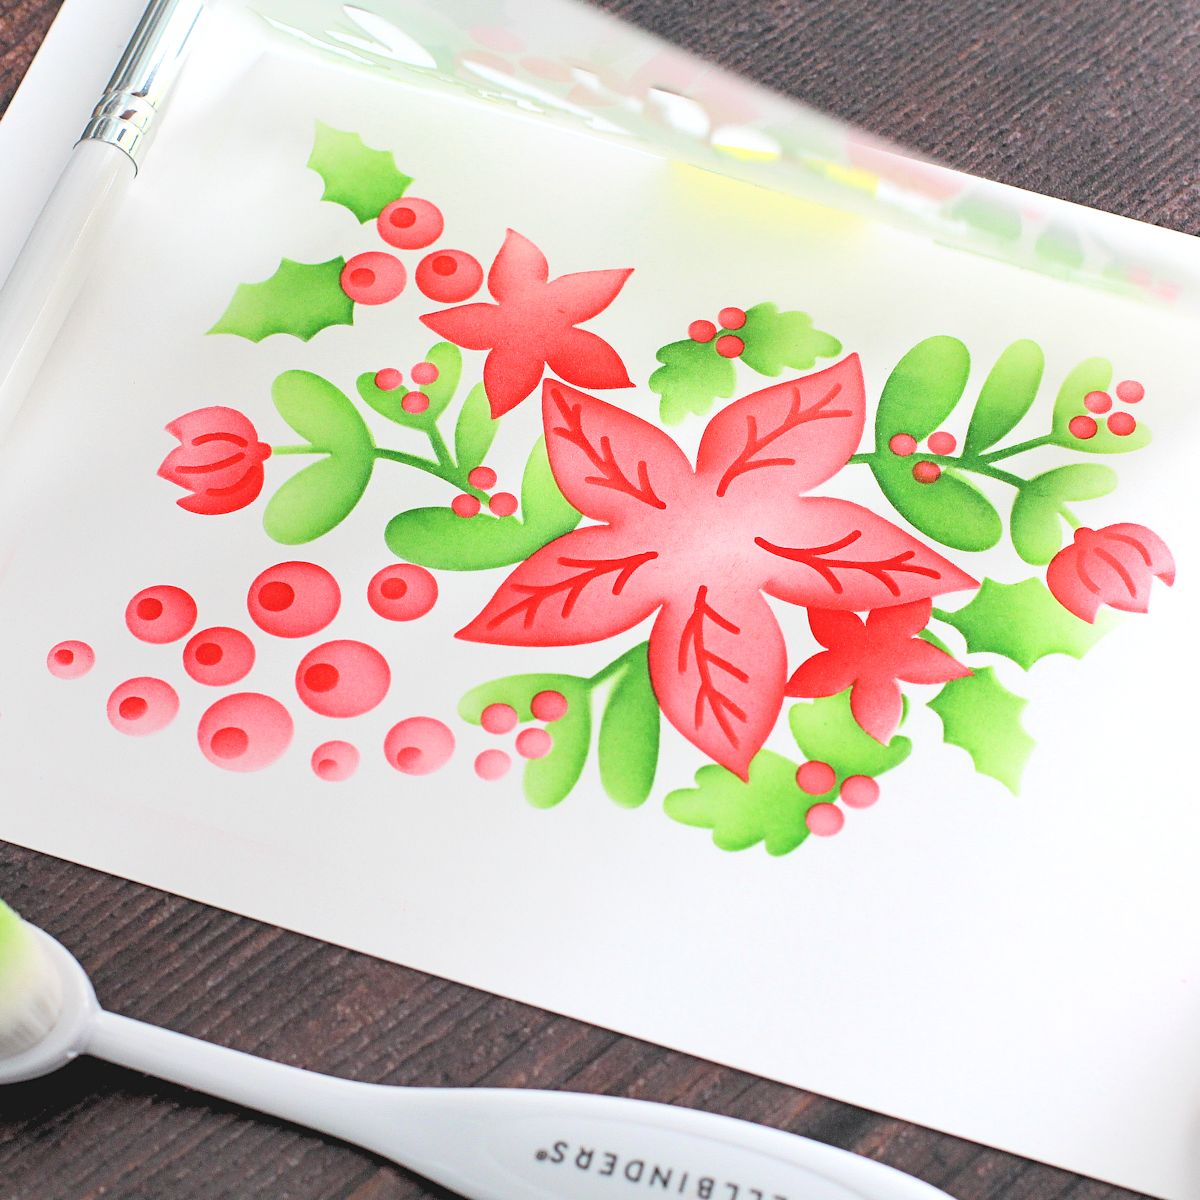
Place the second stencil on top. There are two little holes in the top right and bottom left of the stencils. I found adding some ink to these helped to line up the next stencil perfectly! Add darker red ink for the details of the large flower, berries and also the two smaller flowers.
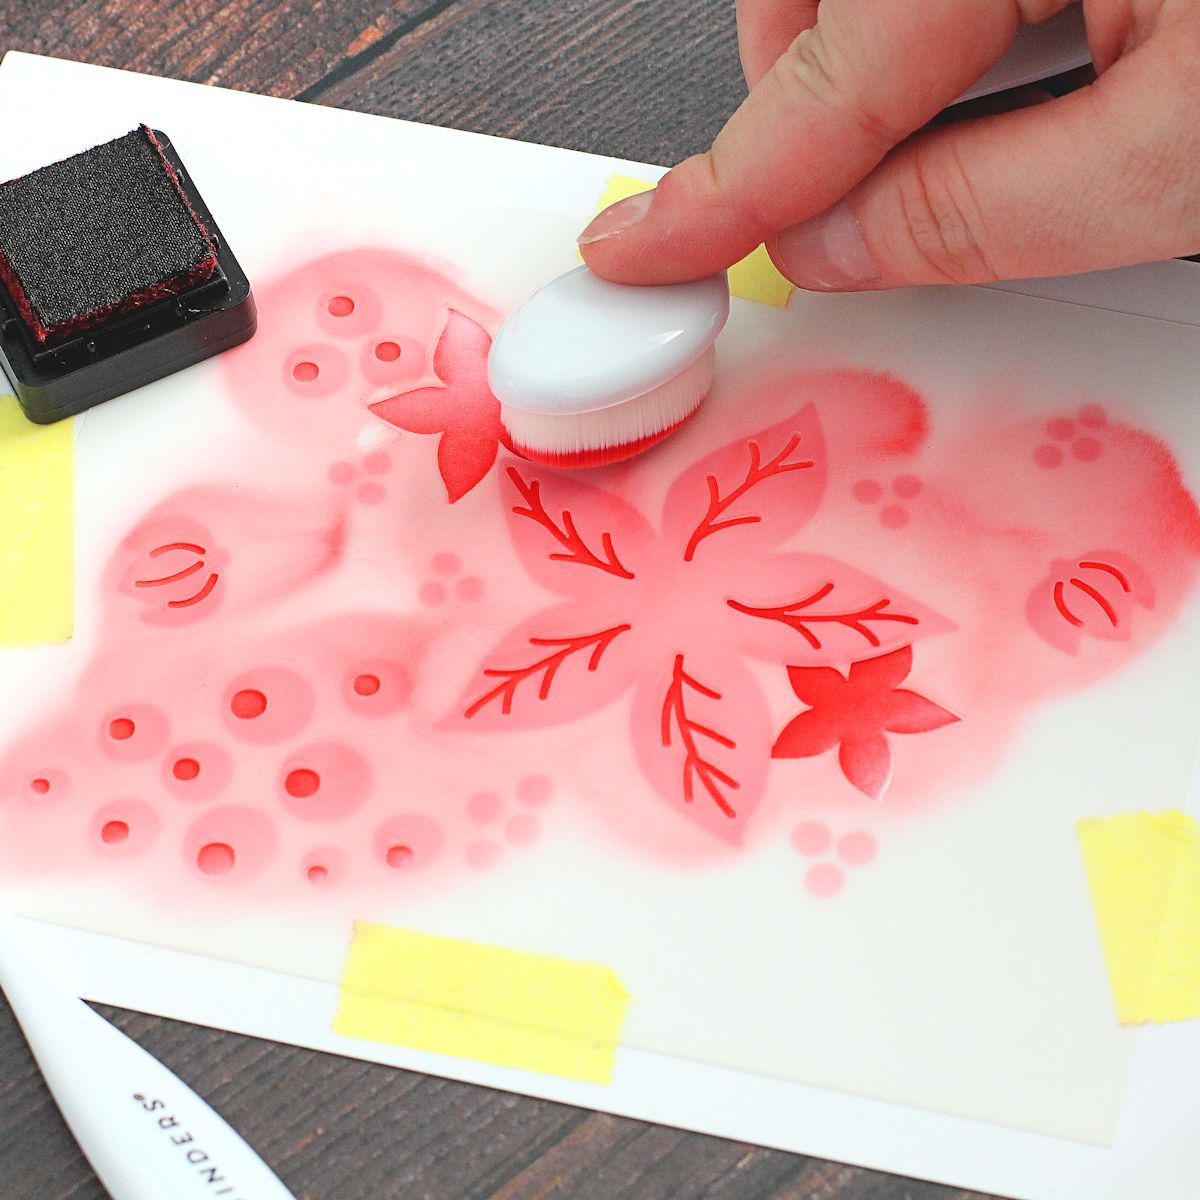
You could definitely make the berries a different color, but I wanted to keep my palette quite limited today.
STEP 3
Place the third stencil on top and secure it with the same tape (I reused the same tape for all the layers). This layer is for the leaves. Blend green ink onto the leaves, with a heavier hand towards the bottom.
To add more interest and dimension, blend darker green ink towards the bottom of the leaves with a Mini Blending Brush.
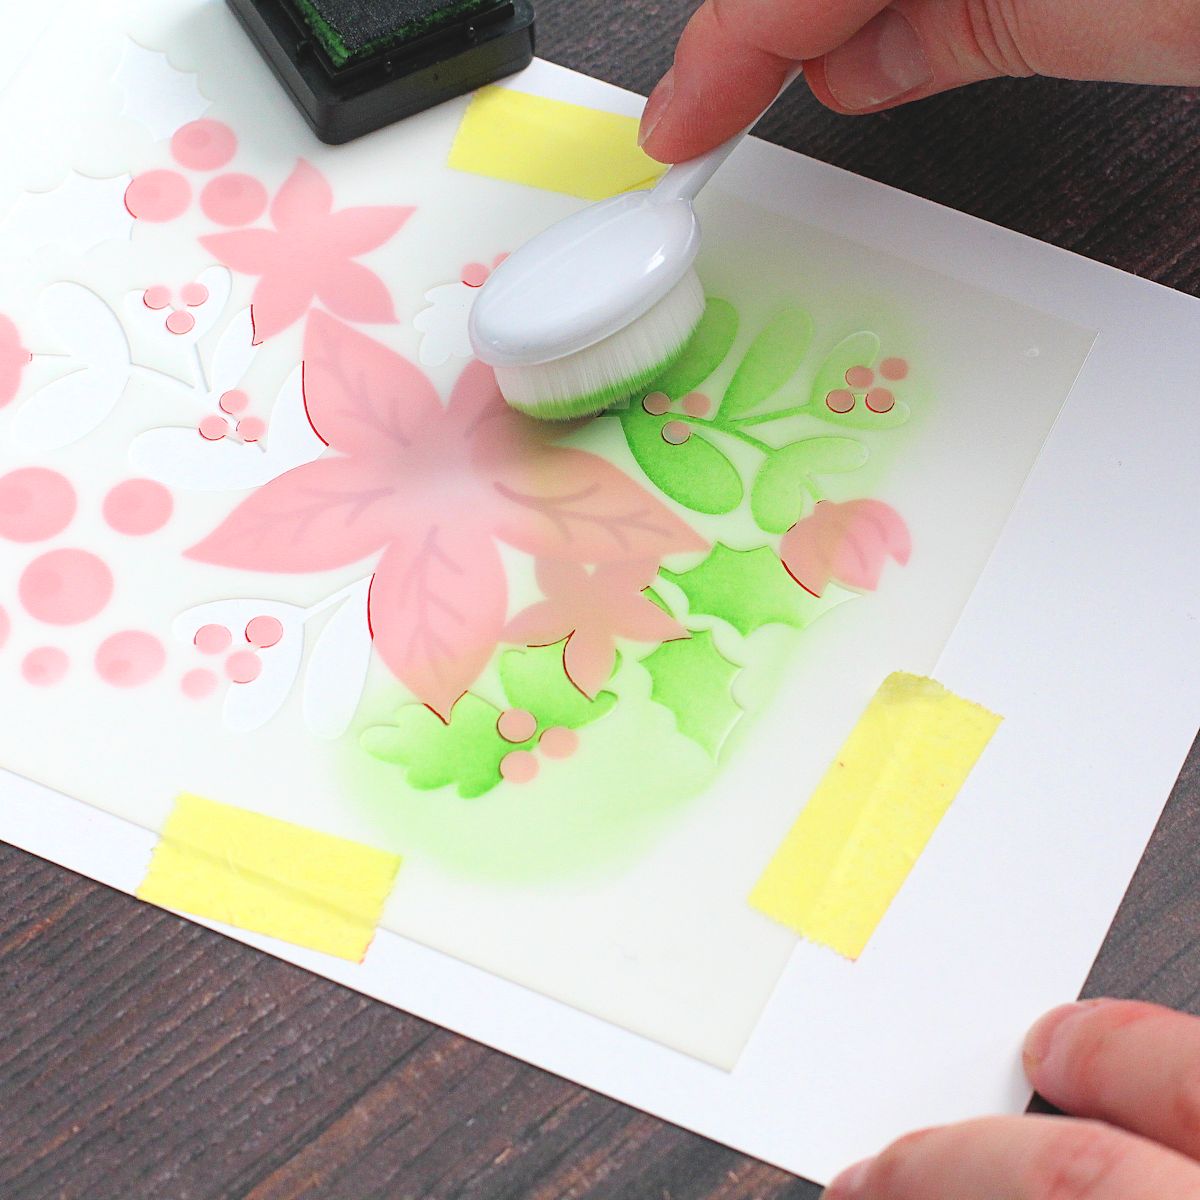
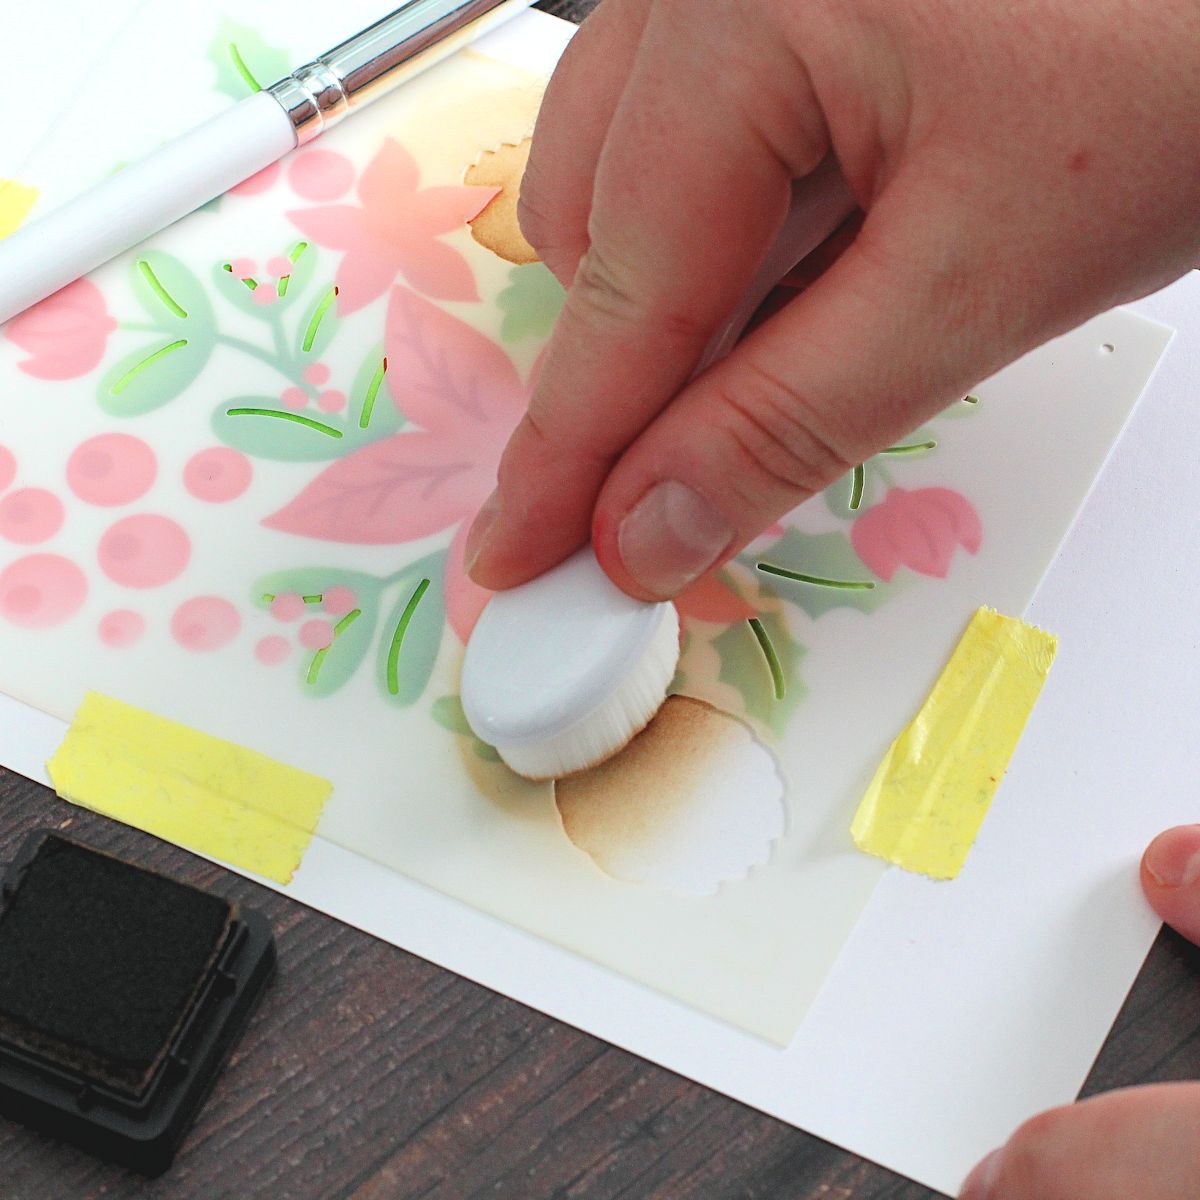
STEP 4
Remove stencil 3 and replace it with stencil 4. This layer adds a base layer for the pinecones and also the detail layers of the leaves. Use a light brown on the pinecones and the same dark green from the last step for the leaves.
STEP 5
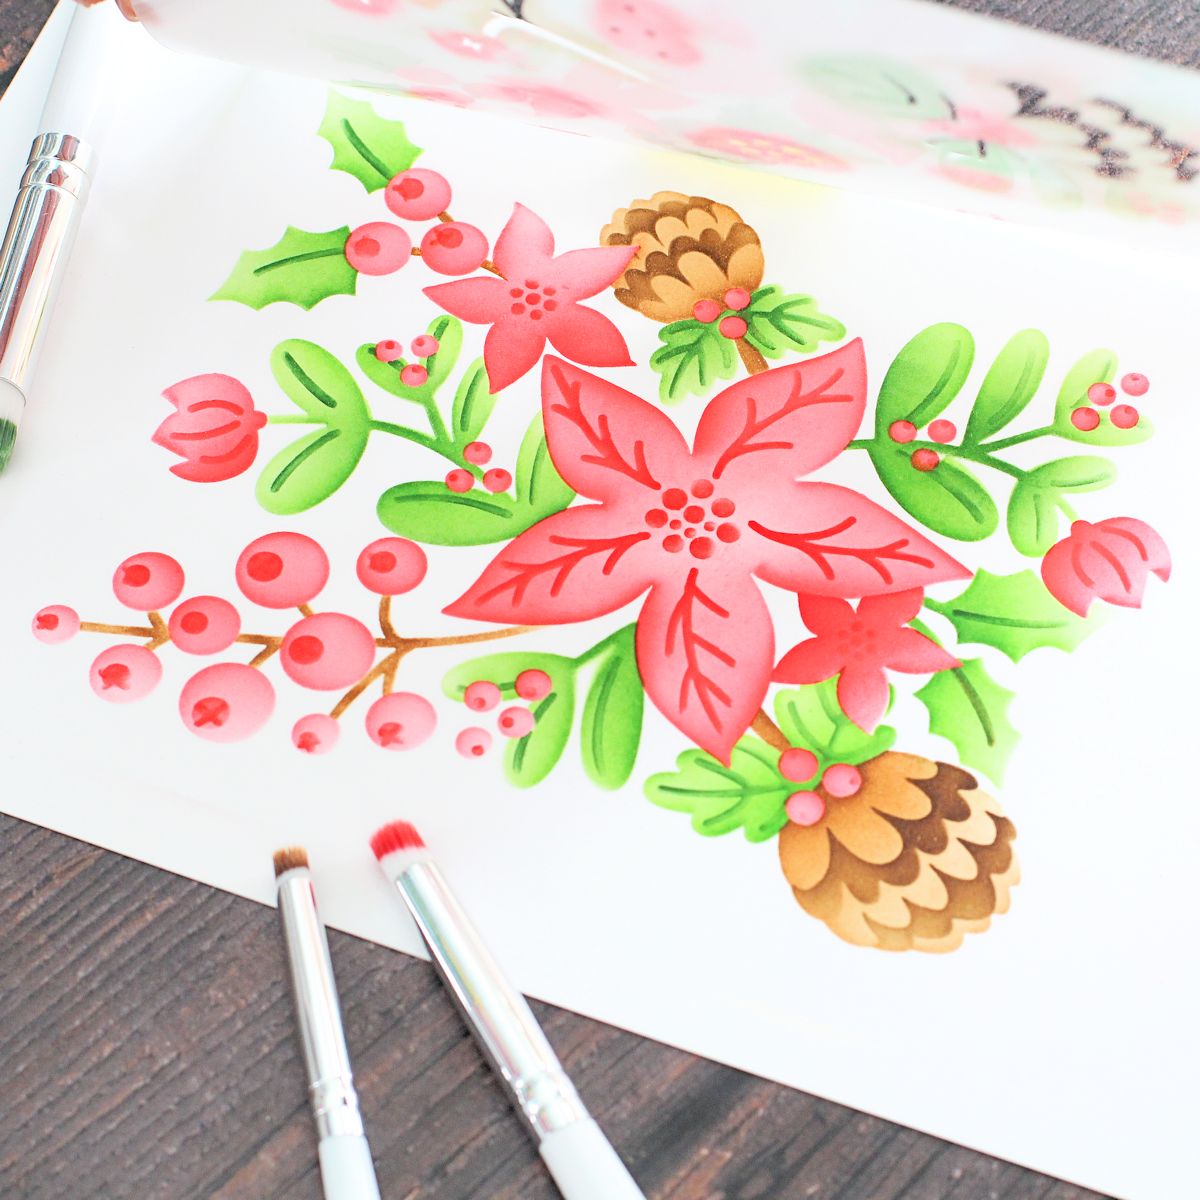
Remove stencil 4 and replace it with stencil 5. This layer adds a darker layer to the pinecones and also adds details to the berries and centers of the flowers. Mask off the areas above the pinecones and blend on dark brown ink.
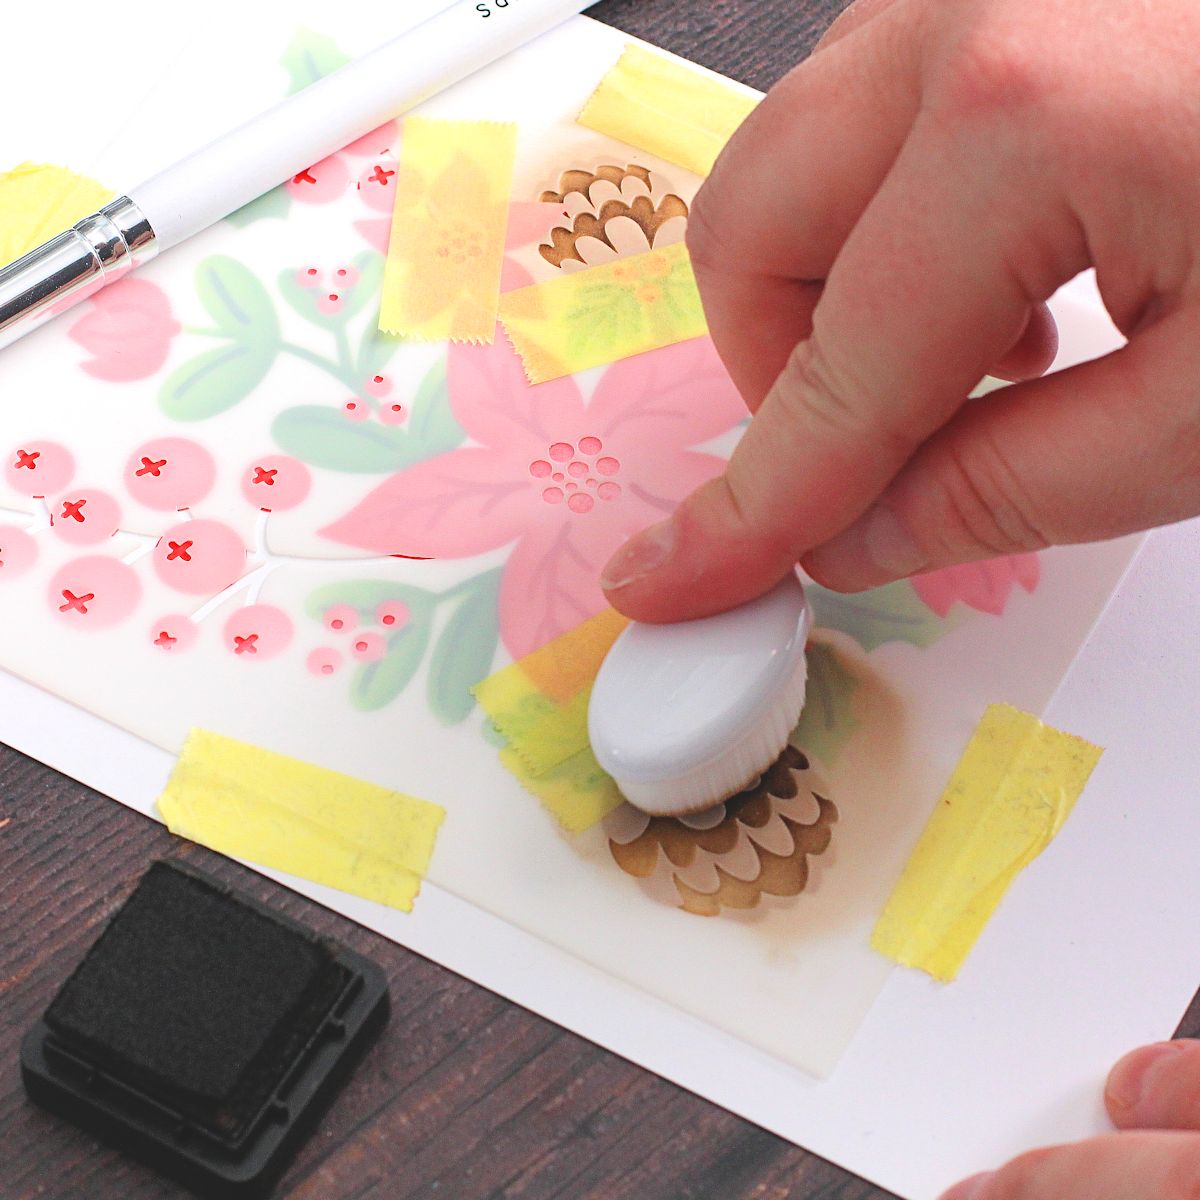
Using a Mini Blending Brush, blend on the darker of the two red inks you have already used, for the other areas, then remove the stencil.
STEP 6
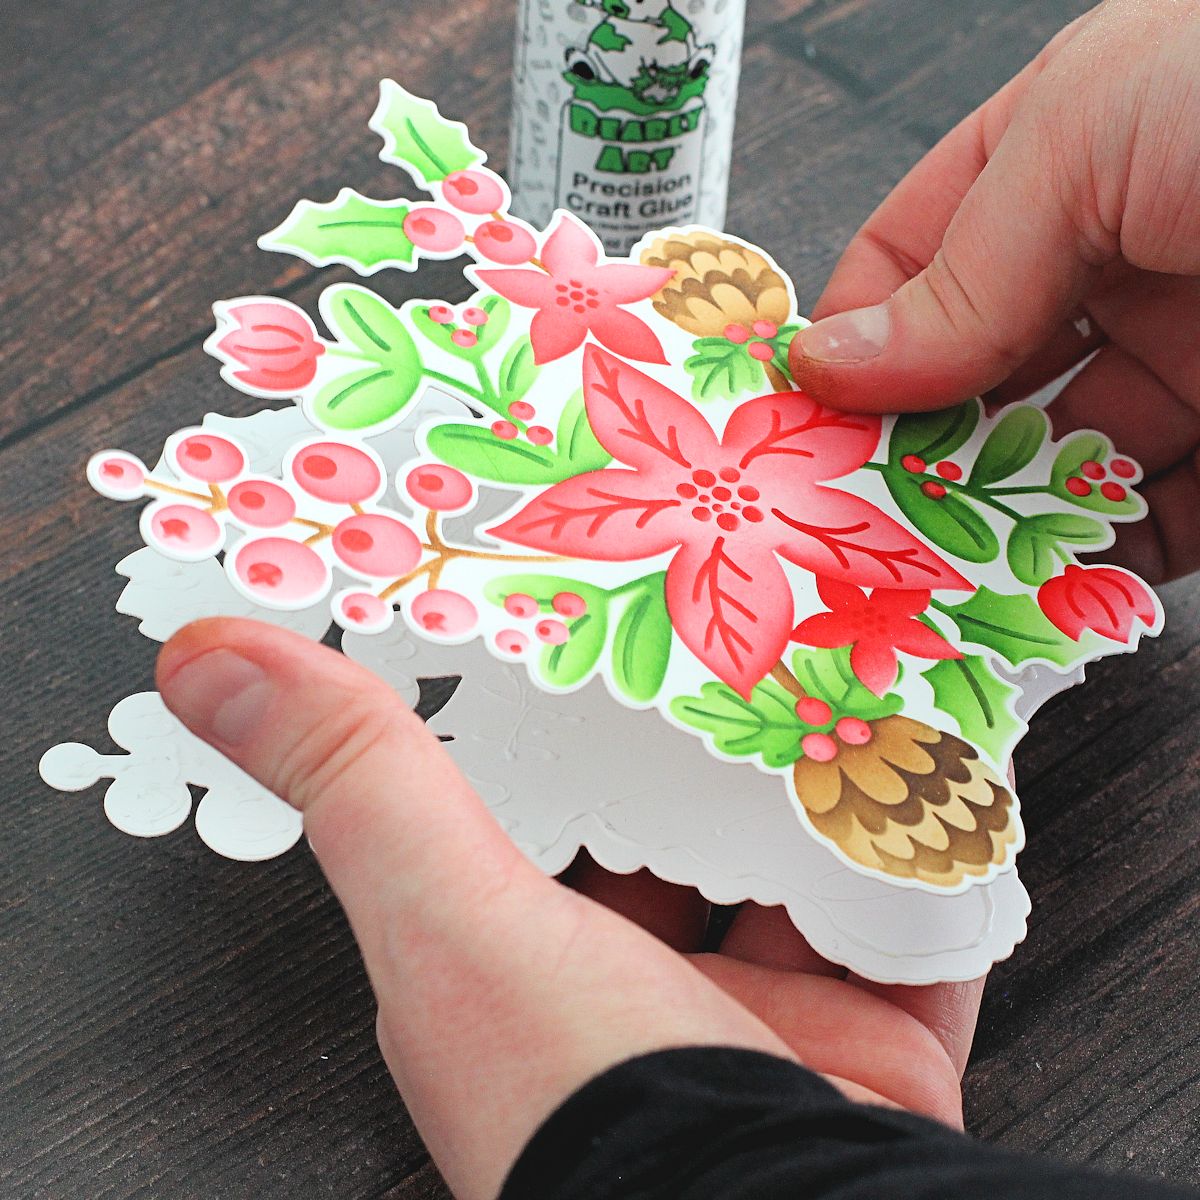
Place the coordinating die from the Christmas Florals & Sentiments Etched Dies set on top and secure with Best Ever Craft Tape. Run through Platinum 6 to die cut out.

STEP 7
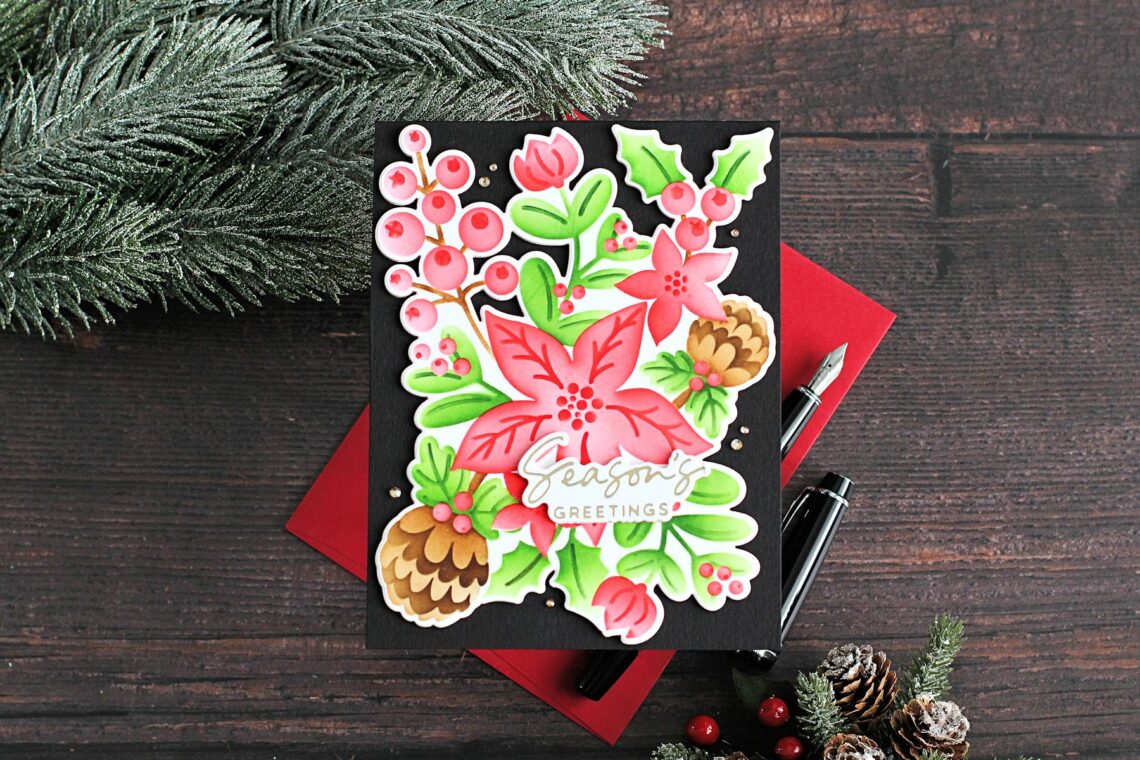
Die cut two more of the dies from white cardstock and adhere them together, one on top of another, using Bearly Art Glue. Adhere to a black A2 card base.
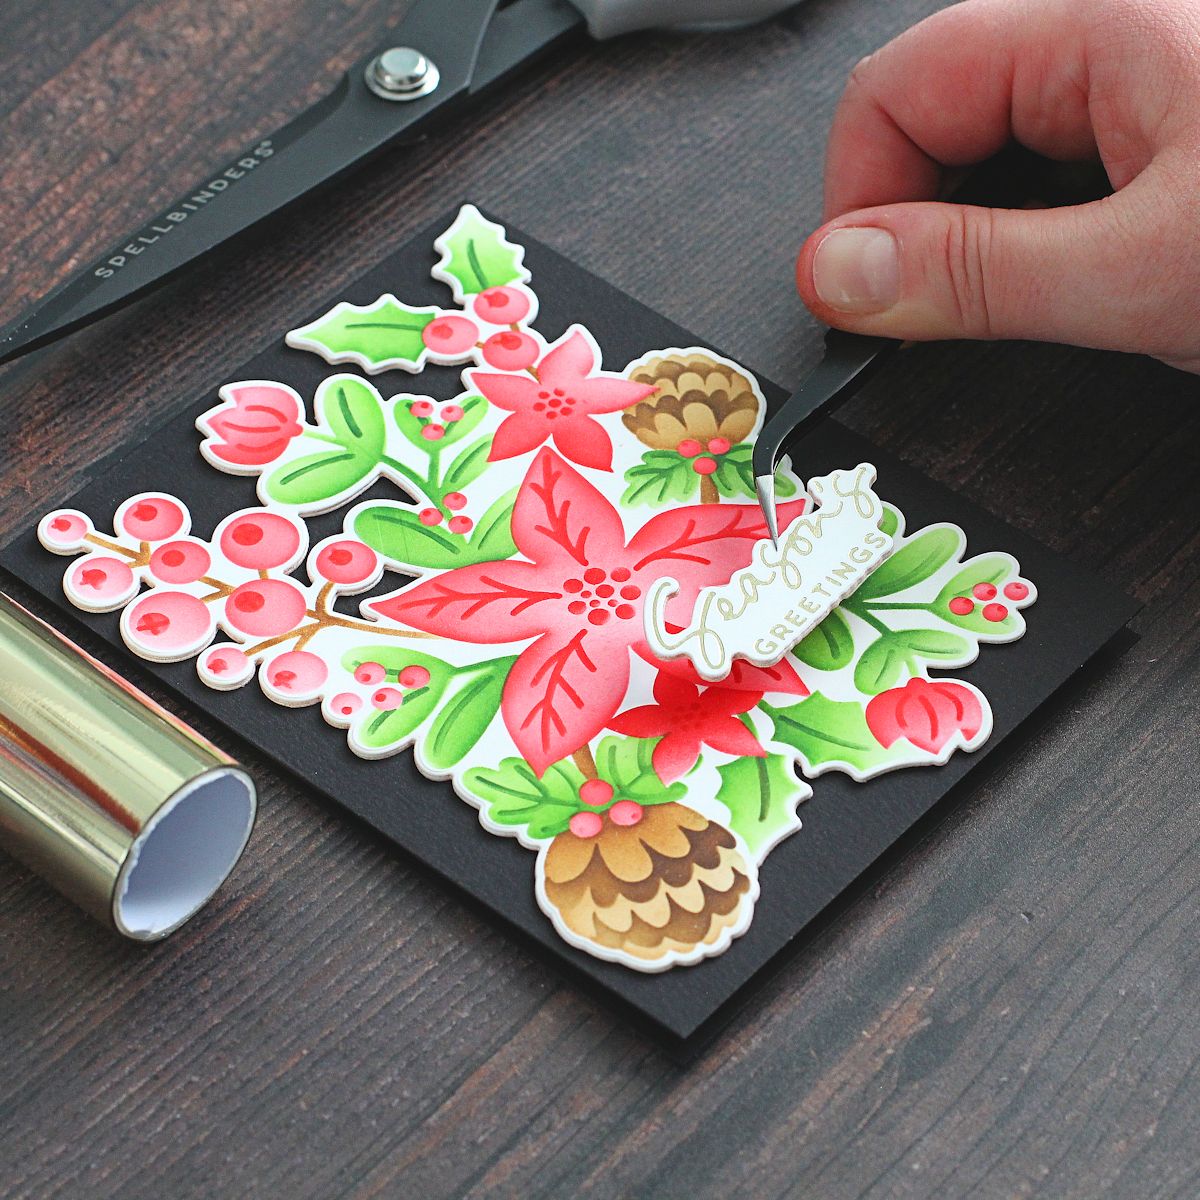
STEP 8
Hot foil sentiment from A Merry Little Christmas Sentiments onto white cardstock using Champagne Foil. Die cut out with a coordinating die and stack another two layers high for added dimension. Adhere to the card using Bearly Art Glue.
STEP 9
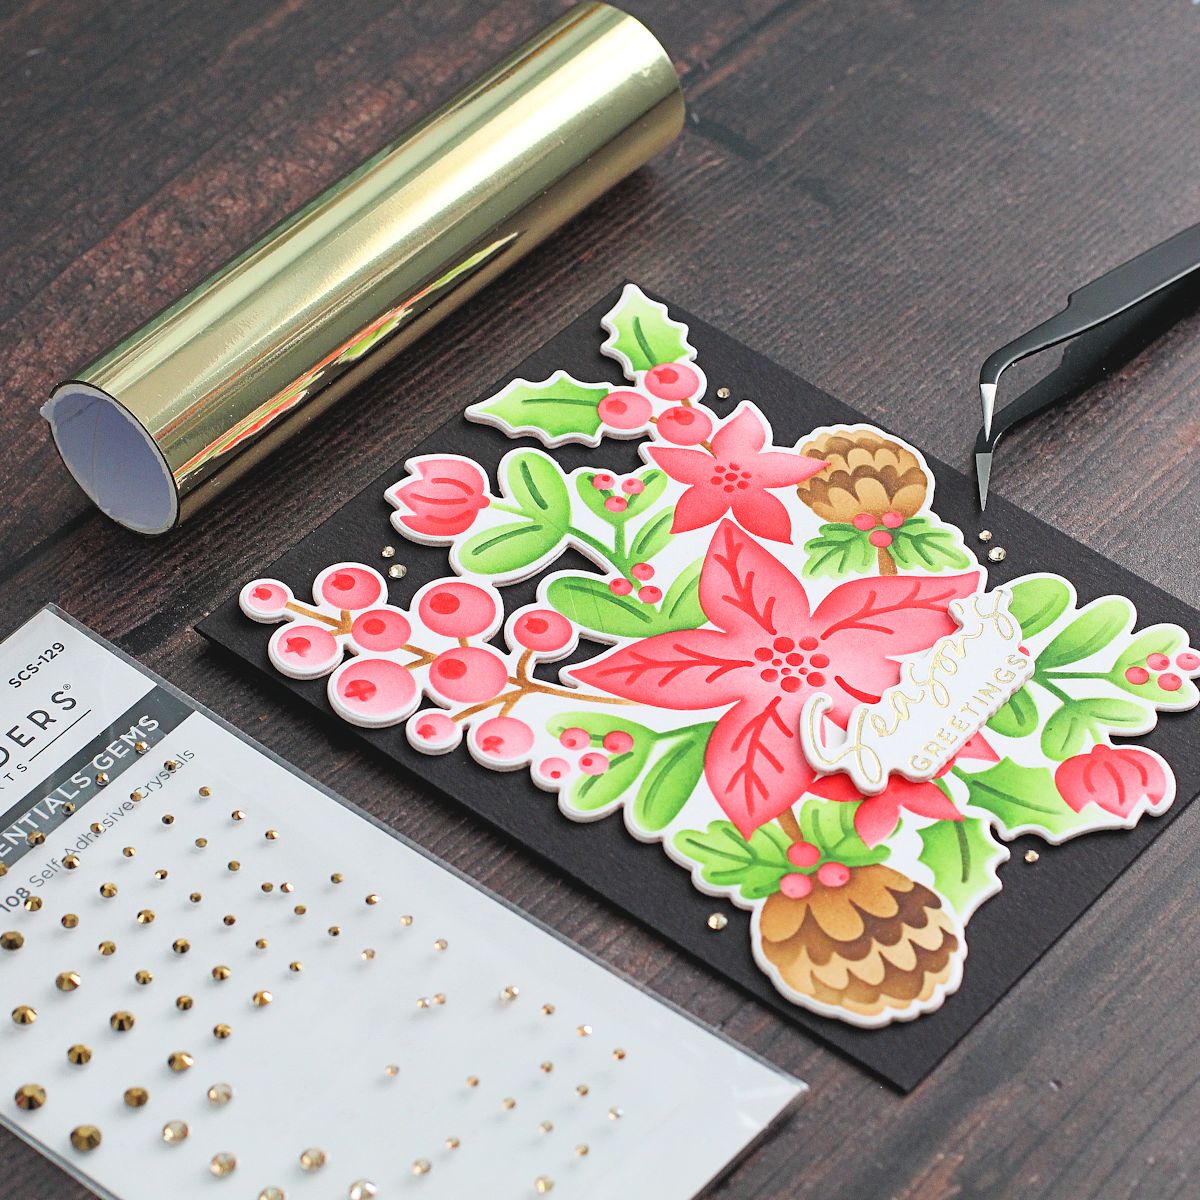
Embellish with Gold Mix Color Essentials Gems. I think it would look nice to add some to the centers of the flowers too, but for my card today, I just added them around the floral arrangement.
I hope I have inspired you to try the Christmas Florals Stencil. Although there are a few steps to the stenciling, it comes together really quickly! Thank you so much for stopping by today, I hope you have a wonderful day!
Spellbinders Supplies:

Other Supplies
Worn Lipstick Distress Ink, Festive Berries Distress ink, Mowed Lawn Distress Ink, Rustic Wilderness Distress Ink, Vintage Photo Distress Ink, Walnut Stain Distress Ink.
Get Your Spook On with Jean Manis

Romantic Forest Shadowbox and Shadowbox as a Photo Frame with Karin