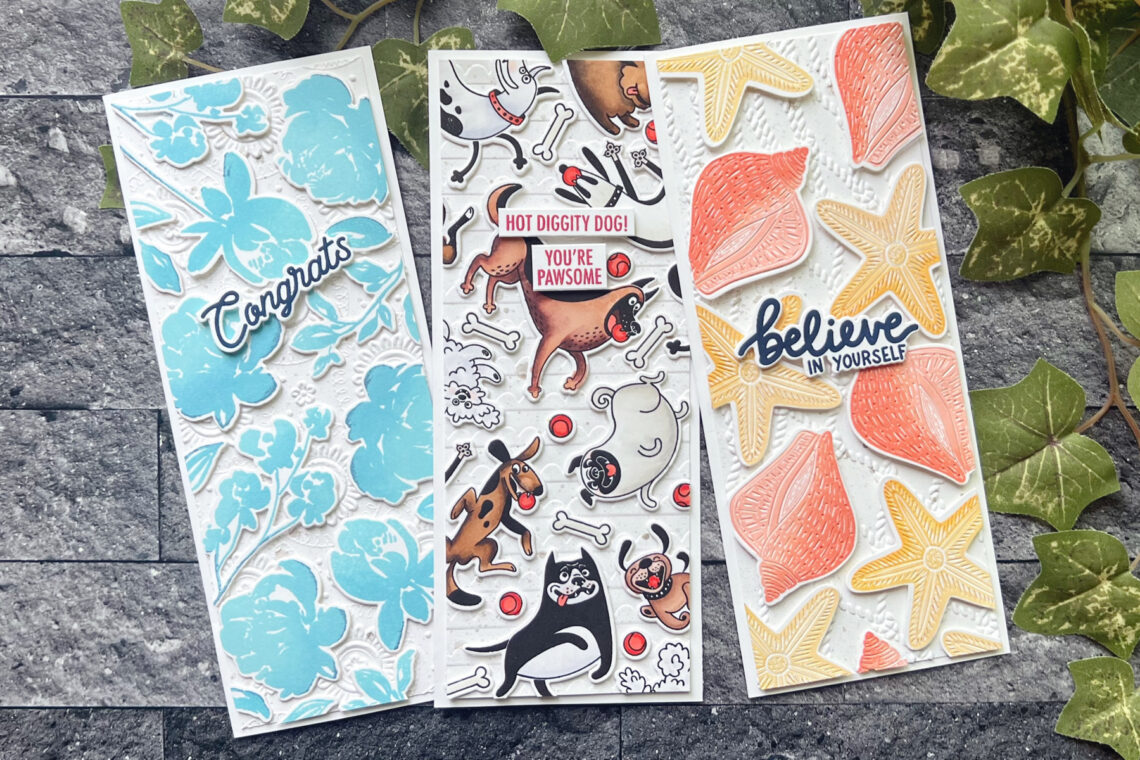
Easy Pattern Cards
Hello! I’m Jen Kotas from Who Stole My Glitter and I’m happy to be here today to share three cards featuring the newest Simon Hurley release. I enjoy filling a card panel with stamped images and today I’m taking things up a notch by die-cutting the images and adhering them to an embossed panel. The texture under the images is such an unexpected and subtle surprise.
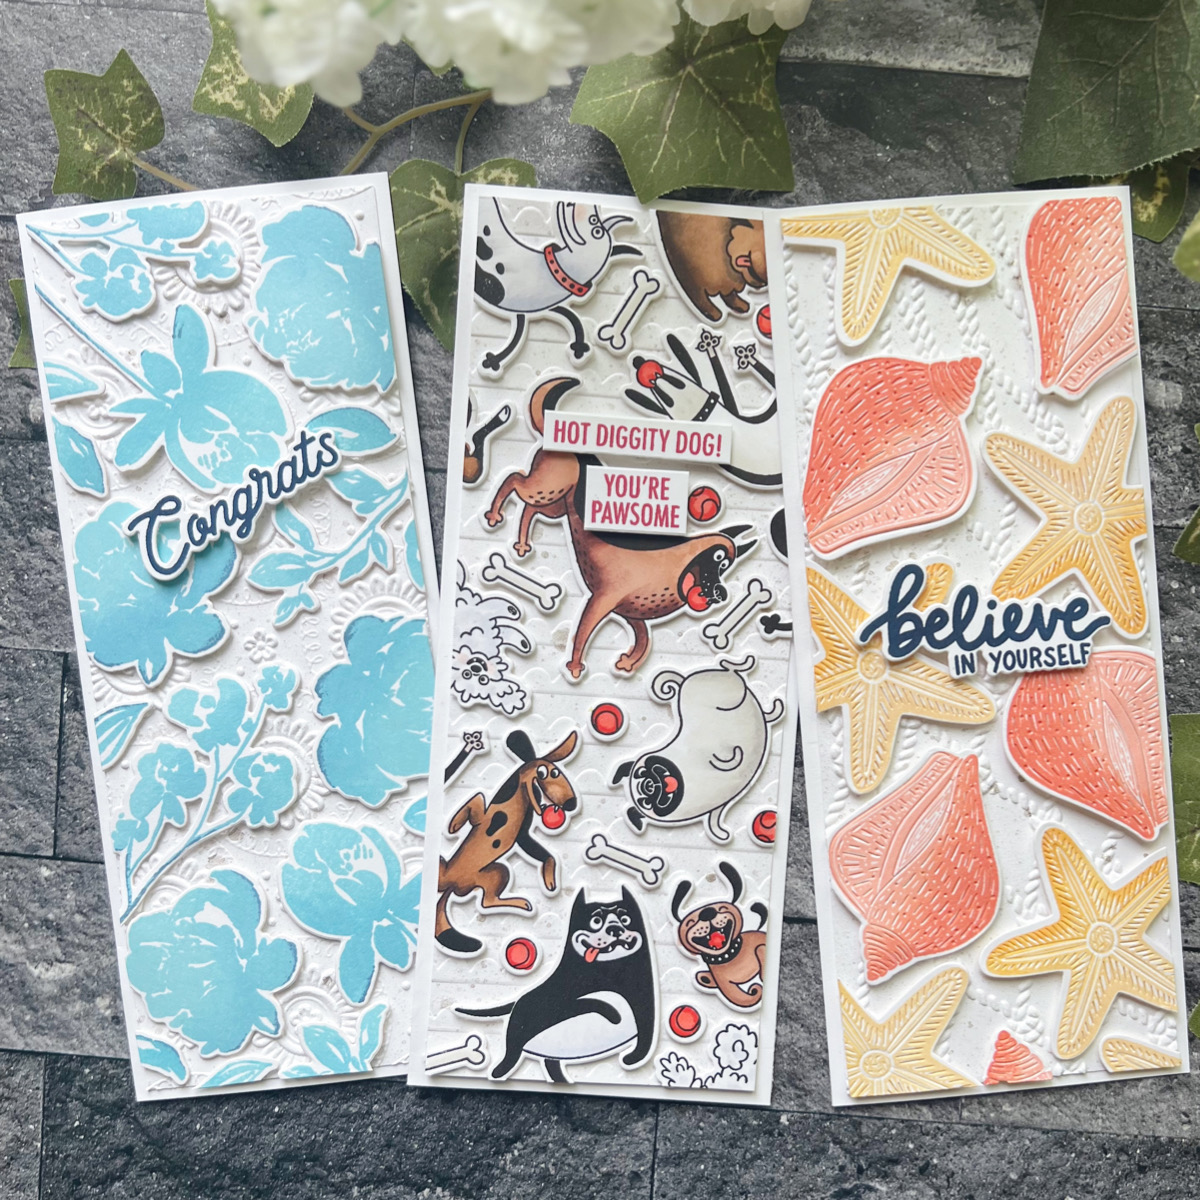
For the first two cards a stamp positioning tool is necessary. The slimline cards I’m using measure 3 1/2” x 8 1/2” when folded.
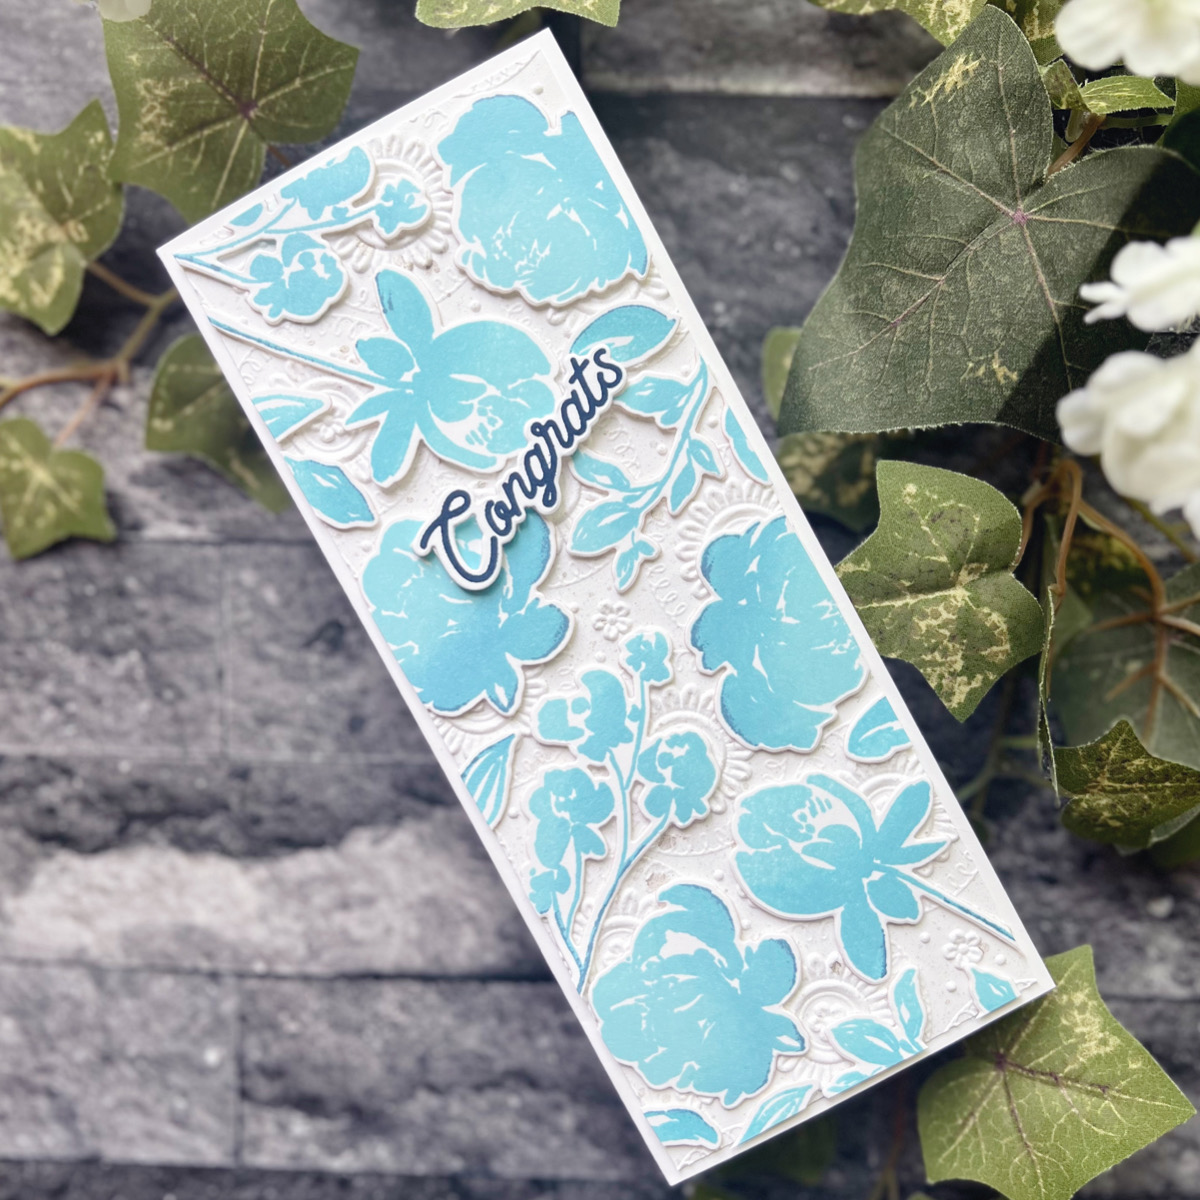
- Emboss a piece of 3 1/4 x 8 1/2” white cardstock with the Mandala 3D Embossing Folder. Splatter with bronze mica spray.
- Stamp all the images in the Watercolor Flowers Stamp Set in light blue ink. Ink up part of each stamp again with medium blue ink and stamp again. Add navy ink just to the very edge of the stamps and stamp once more. Die cut with Watercolor Flowers Dies.
- Arrange the stamped images throughout the embossed panel then adhere with thin foam squares. Cut any overhang. Use these pieces to fill in open areas on the edges.
- Stamp the sentiment in navy ink and cut it out with a coordinating die. Add to card with foam strips.
- Add the panel to a slimline card base.
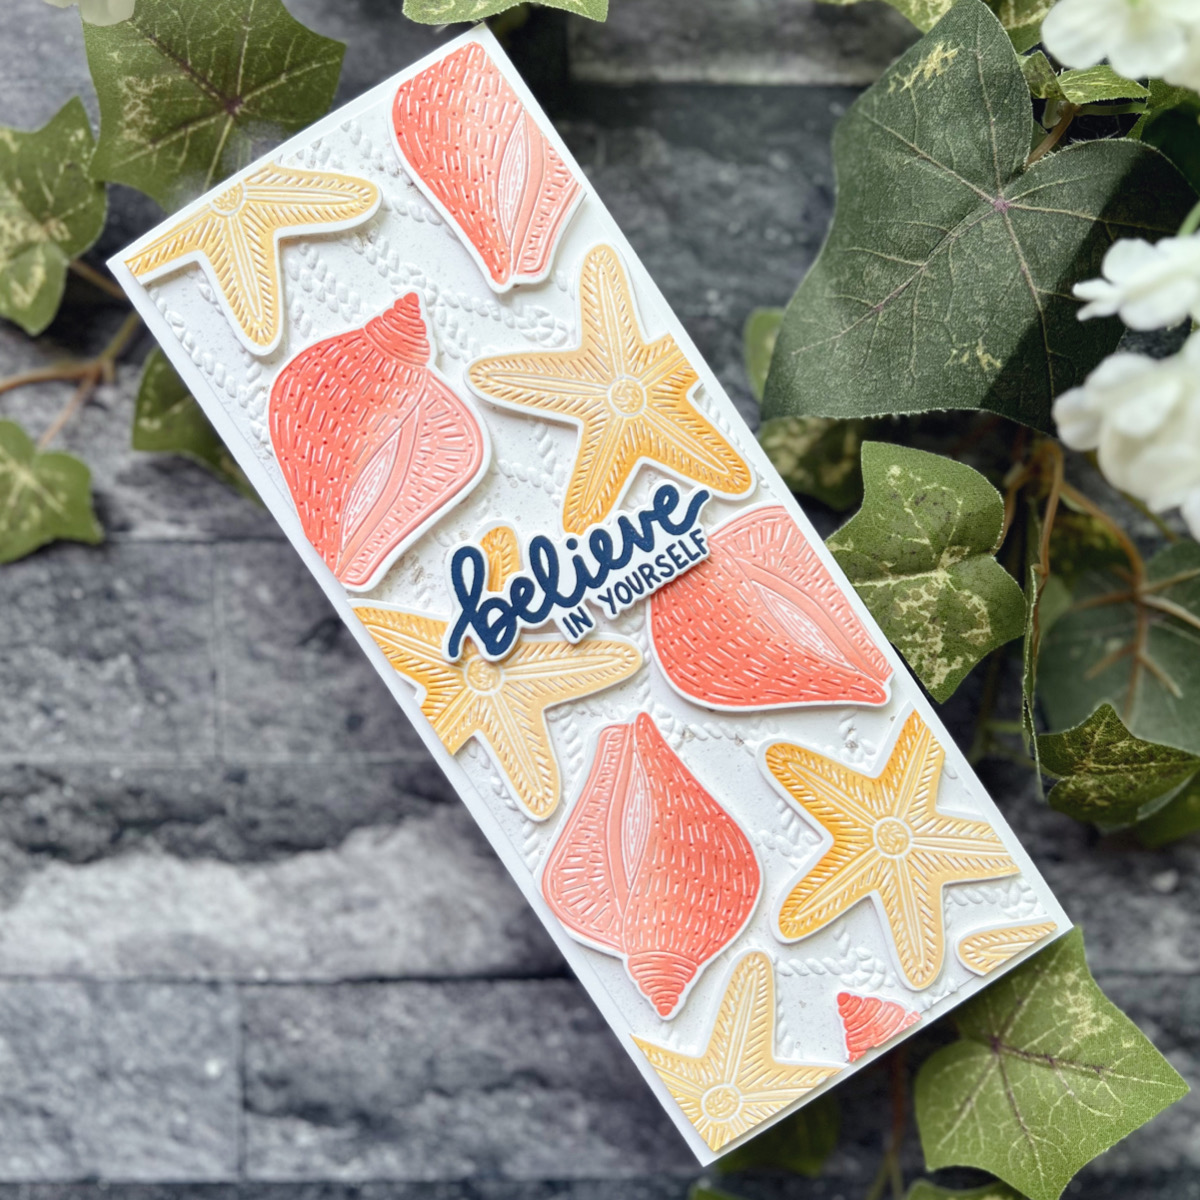
- Emboss a piece of 3 1/4 x 8 1/2” white cardstock with the Cast Away 3D Embossing Folder. Splatter with bronze mica spray.
- Stamp the starfish and shell images in the Smooth Sailing Stamp Set in light peach and light pink inks. Ink up part of each stamp with medium peach and pink inks and stamp again. Die cut with Smooth Sailing Dies.
- Arrange the stamped images throughout the embossed panel then adhere with thin foam squares. Cut any overhang. Use these pieces to fill in open areas on the edges.
- Stamp the sentiment in navy ink and cut it out with a coordinating die. Add to card with foam strips.
- Add the panel to a slimline card base.
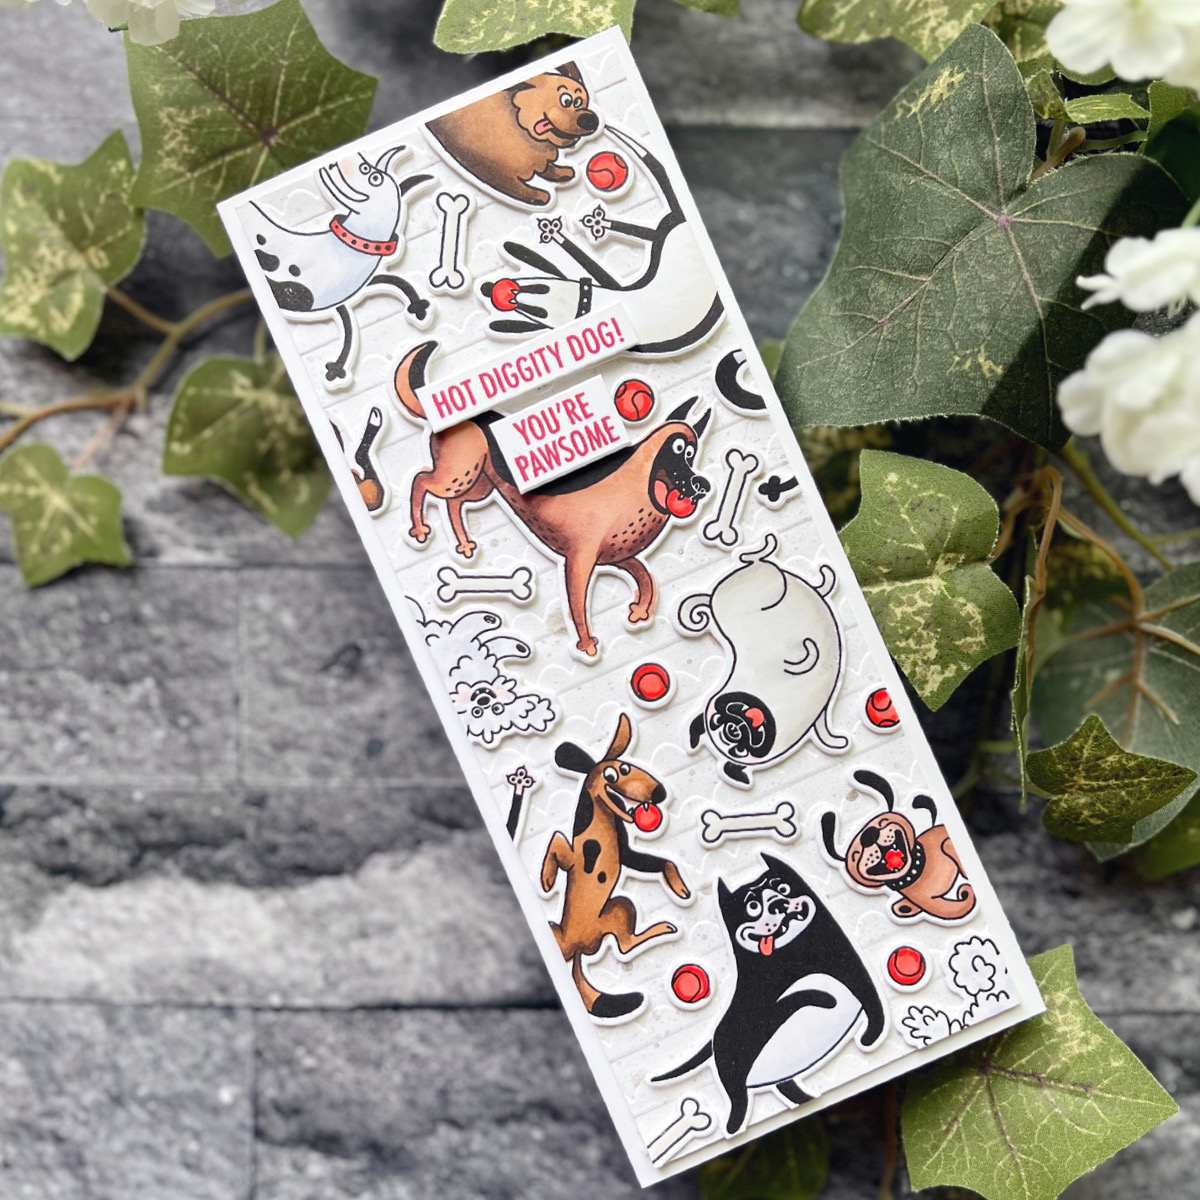
- Emboss a piece of 3 1/4 x 8 1/2” white cardstock with the Hand Drawn Scallops Embossing Folder. Splatter with bronze mica spray.
- Stamp all the images in the Hot Diggity Dog! Stamp. Die cut with Hot Diggity Dog!
- Color the stamped images with alcohol markers.
- Arrange the stamped images throughout the embossed panel then adhere with thin foam squares. Cut any overhang. Use these pieces to fill in open areas on the edges.
- Stamp the sentiments in red ink and cut into strips. Add to card with foam strips.
- Add the panel to a slimline card base.
Spellbinders Supplies:

Other Supplies
Pinkfresh Studios Inks, Neenah Solar White Cardstock, Scrapbook Adhesives Thin Foam Squares, Antiqued Bronze Distress Mica Spray, OLO Markers, Hero Arts Intens-ified Black Ink
Adding shading to the solid stamped images adds a nice bit of interest, especially on the monochromatic card. You can see more cards using individual stamps to create a background on my blog, Who Stole My Glitter or visit my Instagram page for more inspiration. Thanks for visiting!

Die D-Lites Inspiration | Elephant Festival Cards with Jean Manis
Winter Tales Collection Introduction with Zsoka Marko