Layered Joy Tree Stencil How-To
Hey there, crafty friends! It’s Leica, and I have a super fun and simple Christmas card idea to share with all of you. Today, I want to show you how to use the Layered Joy Tree Stencils from the Layered Christmas Stencils Collection. Trust me, it’s really quick and easy to make! I’ll guide you through the process with step-by-step photos and instructions below. Let’s dive in!
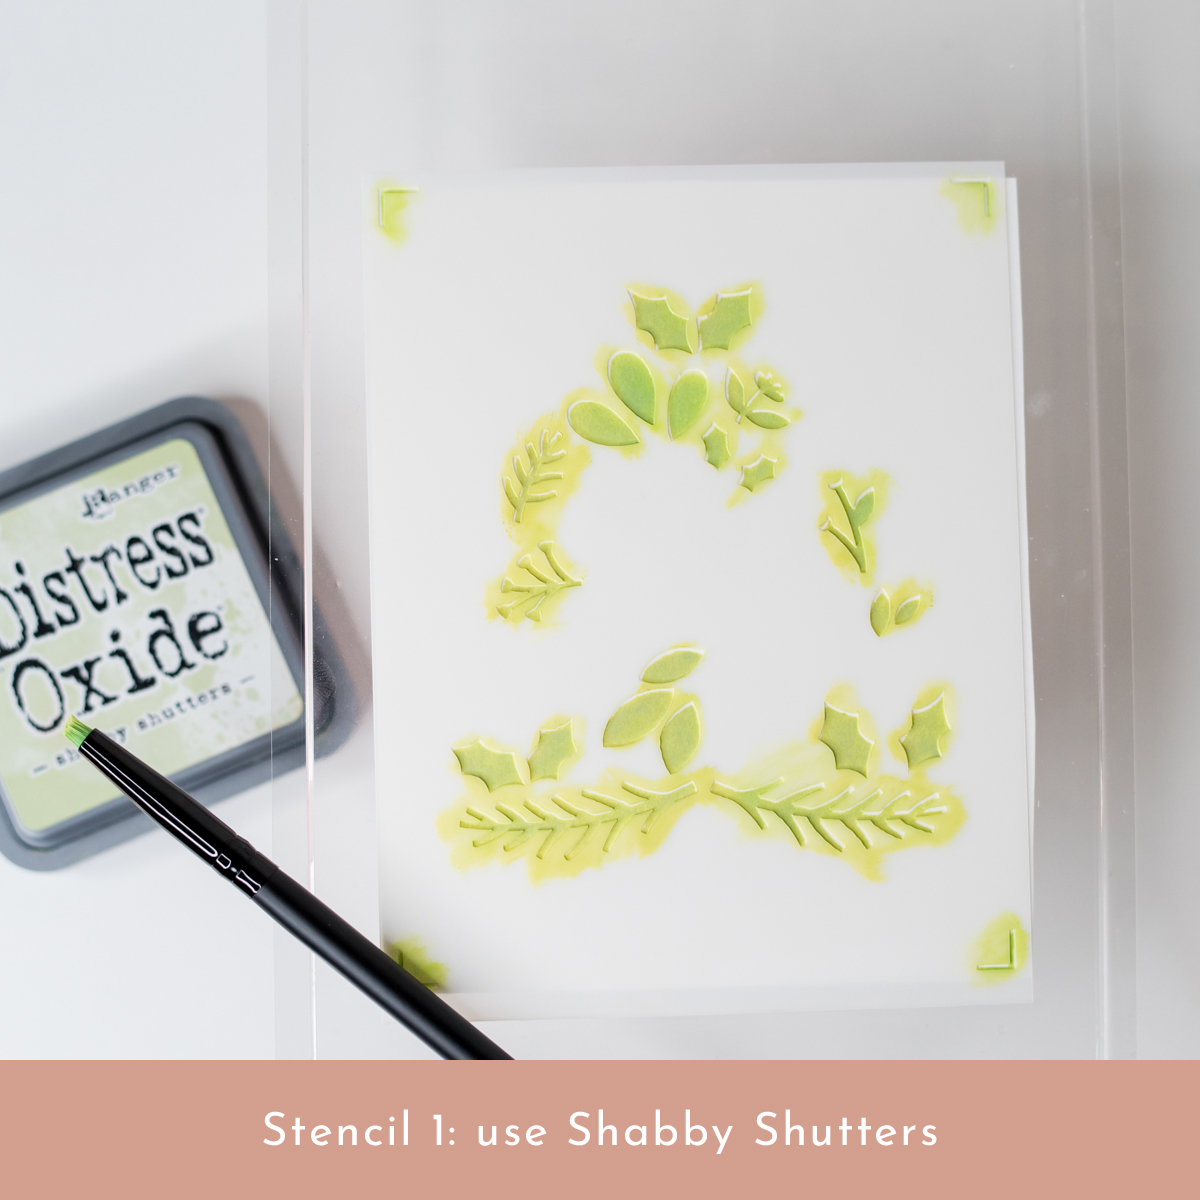
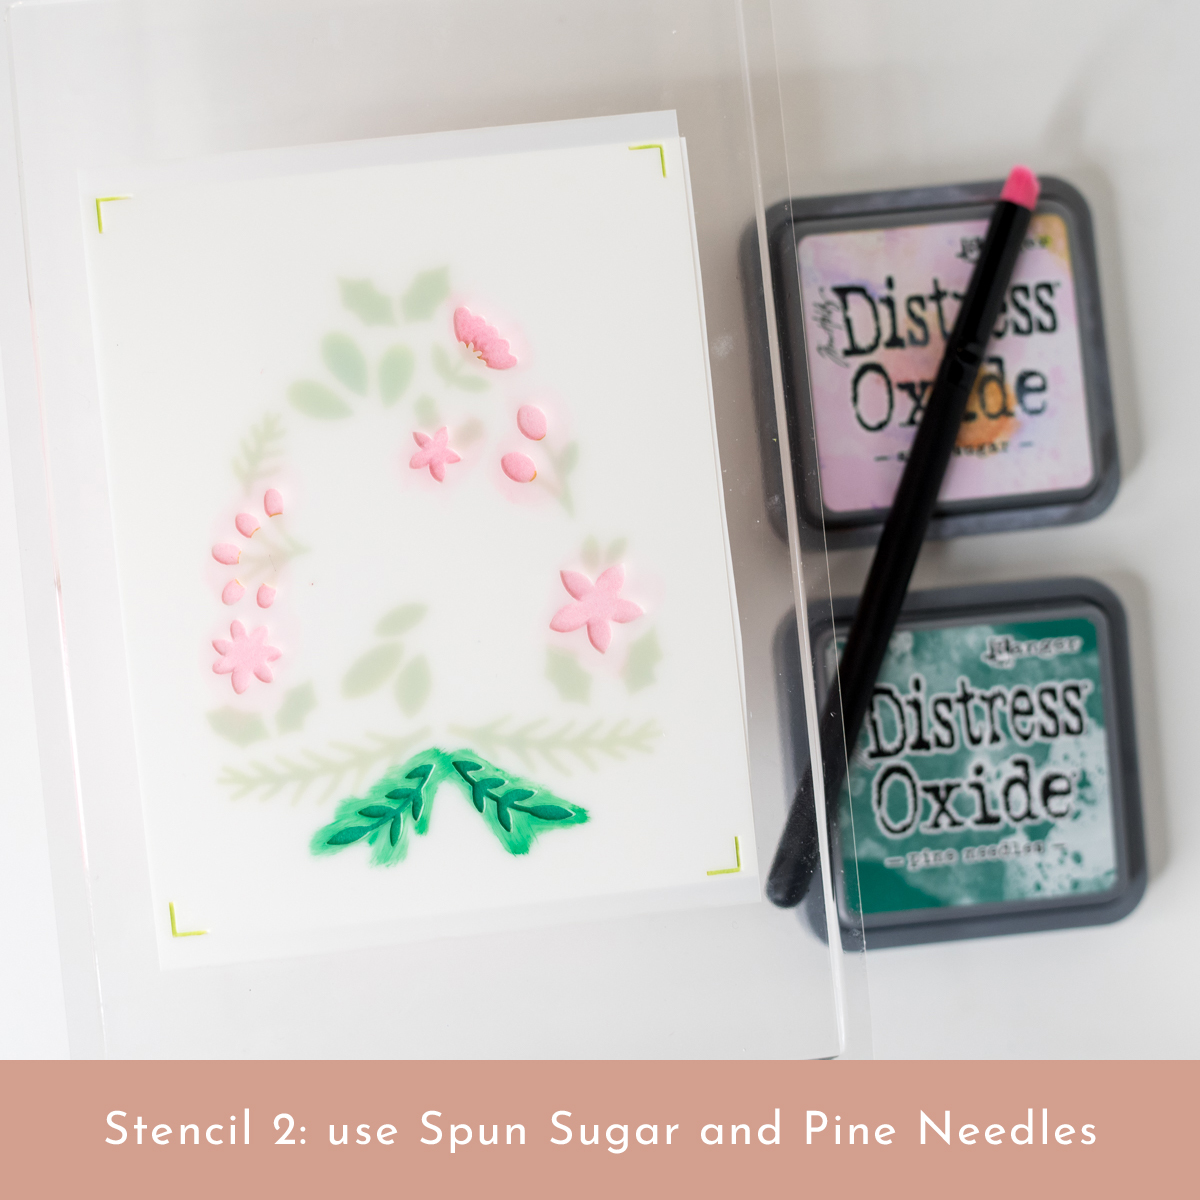
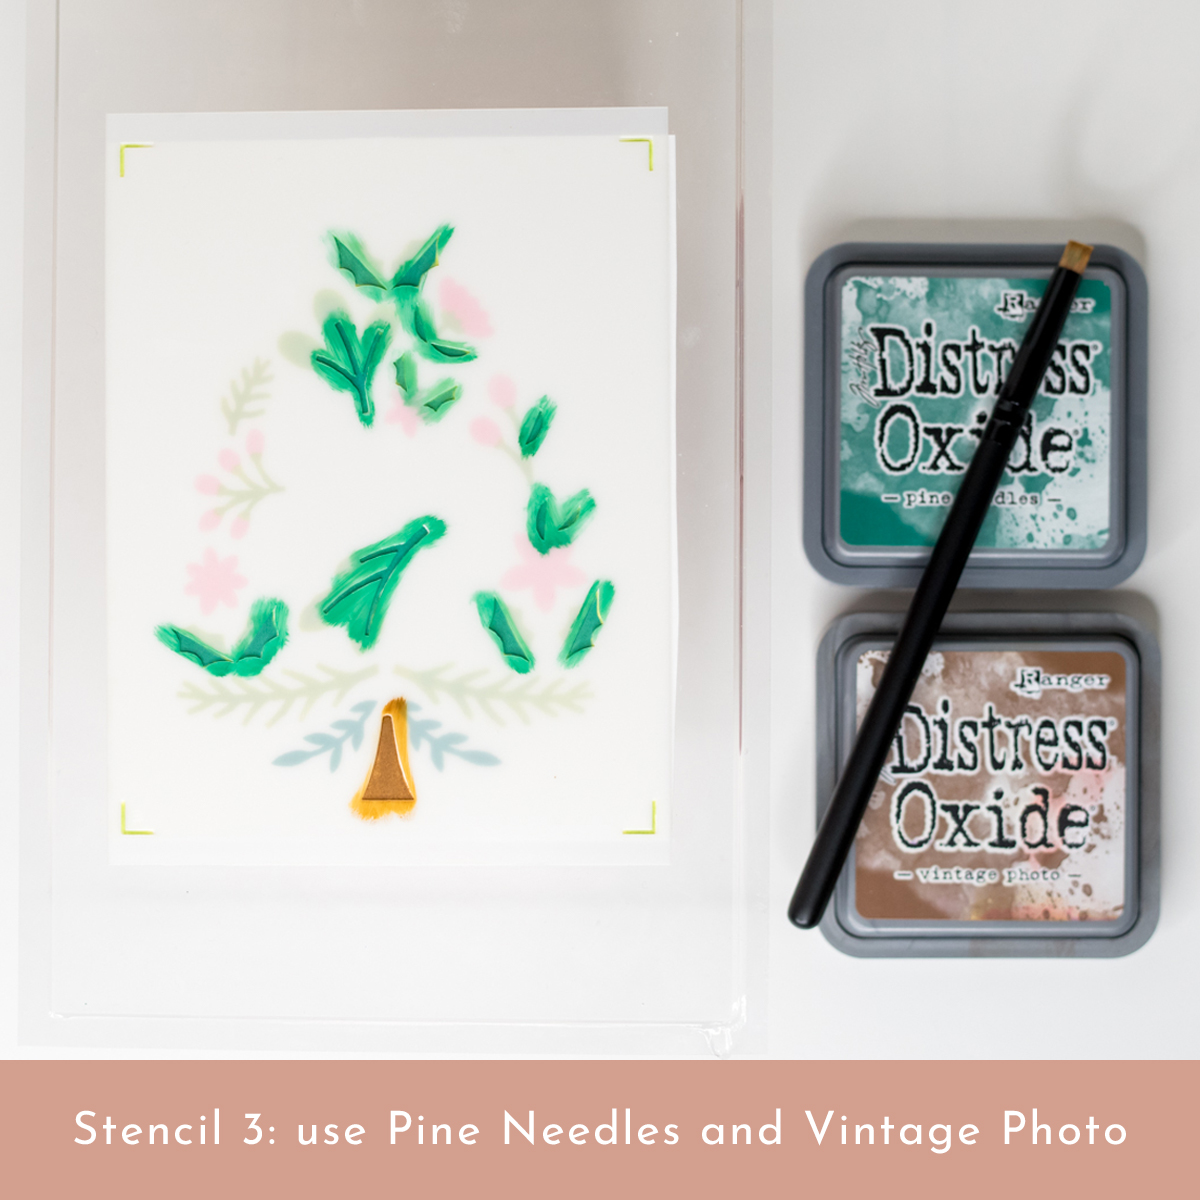
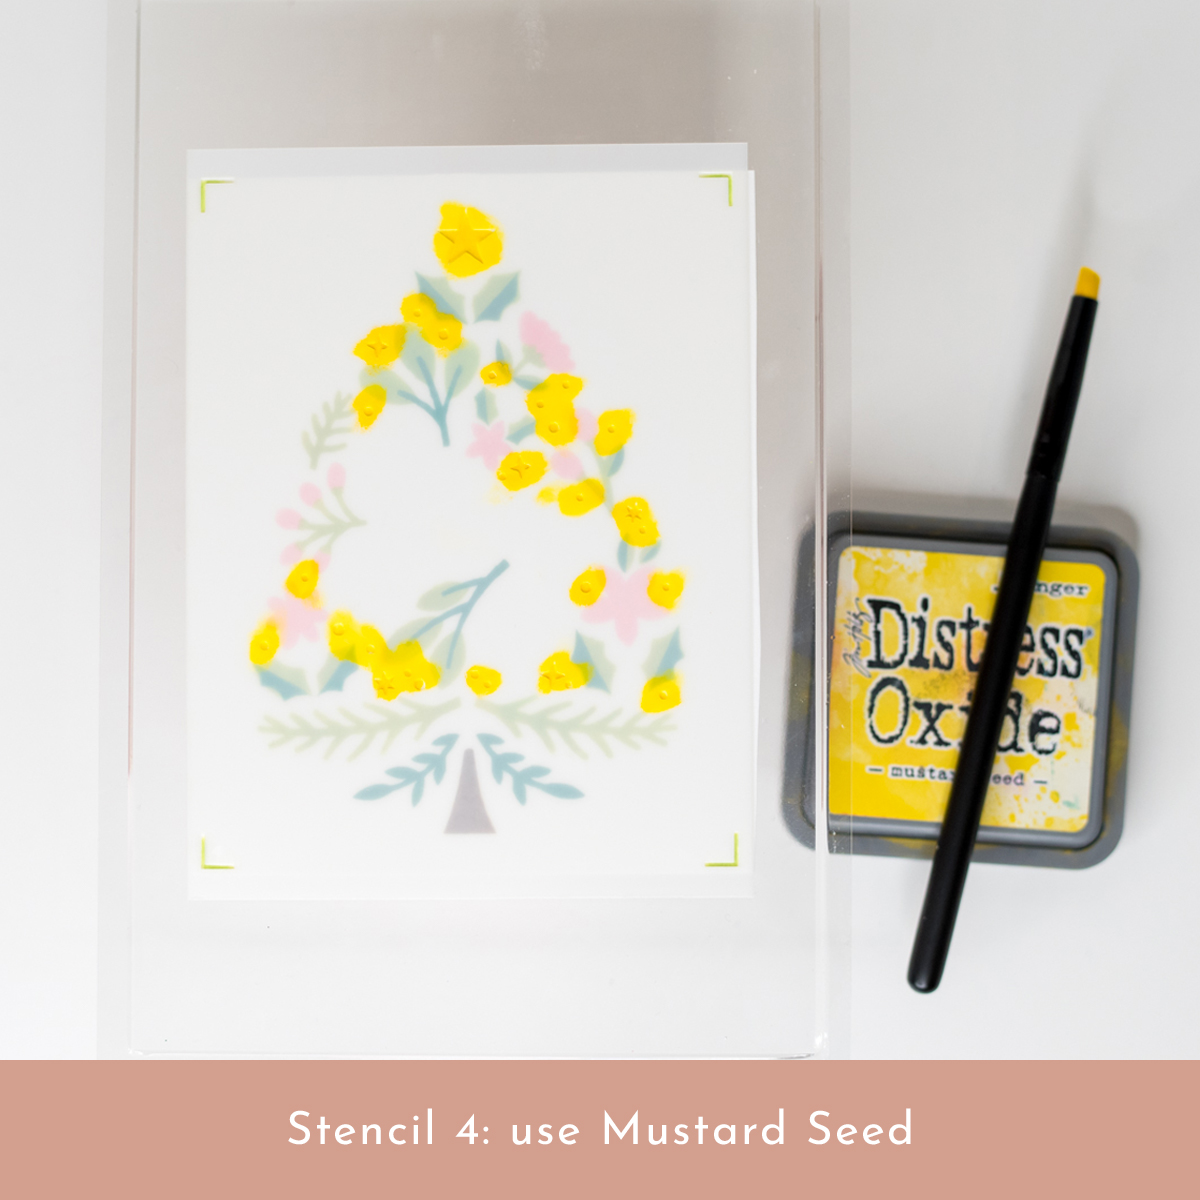
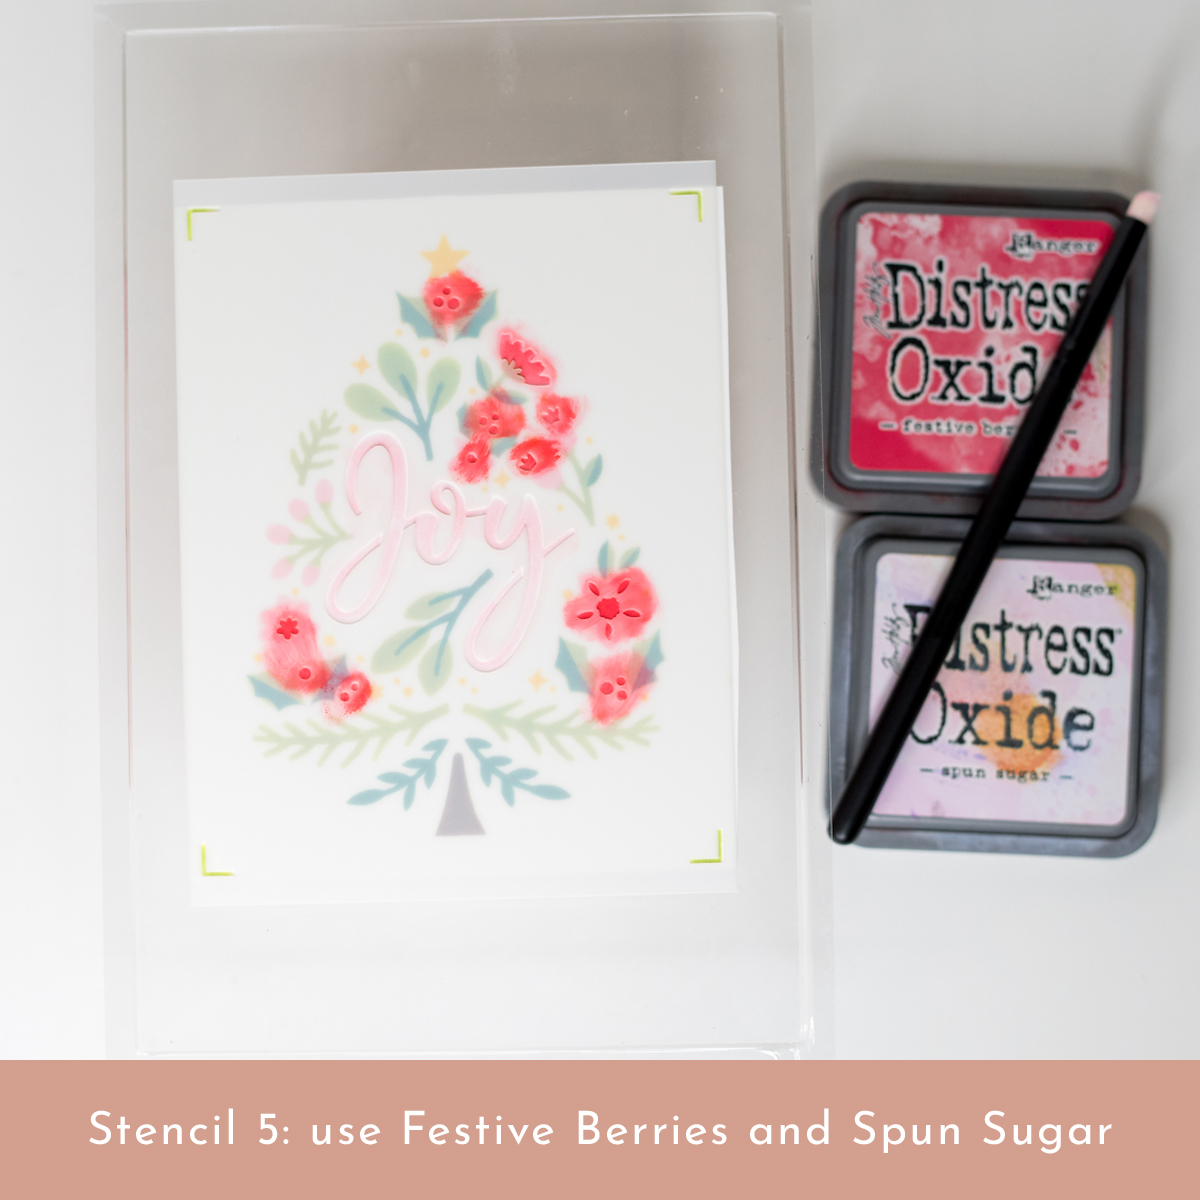
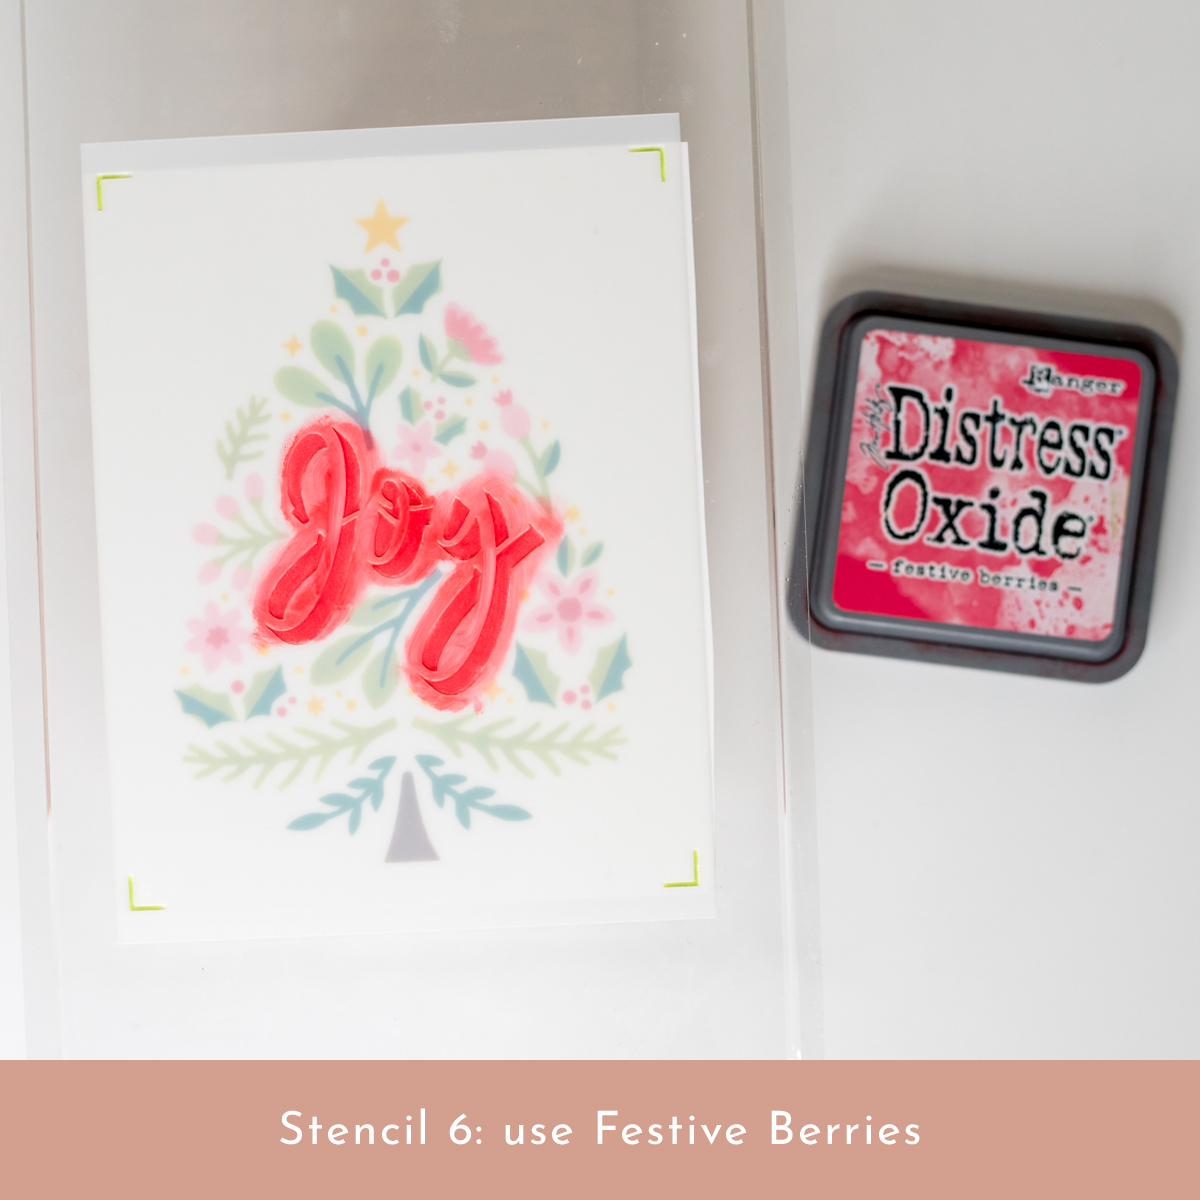
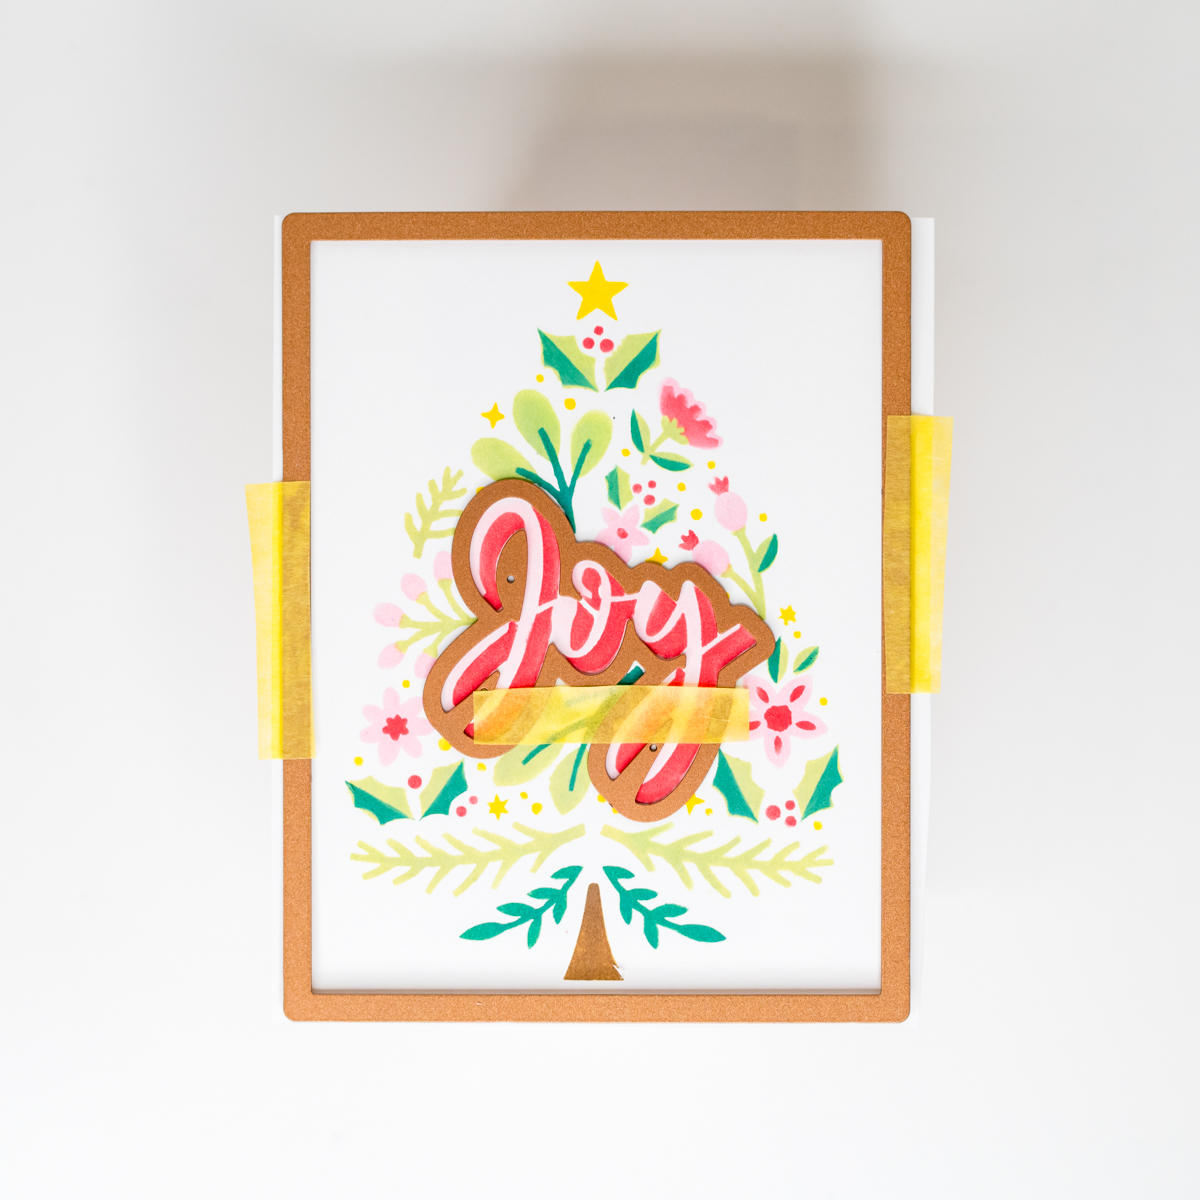
The stencils have numbers on the bottom left corner, so you can easily figure out the order in which to use them. They also have marks on all sides, making it a breeze to align them perfectly.
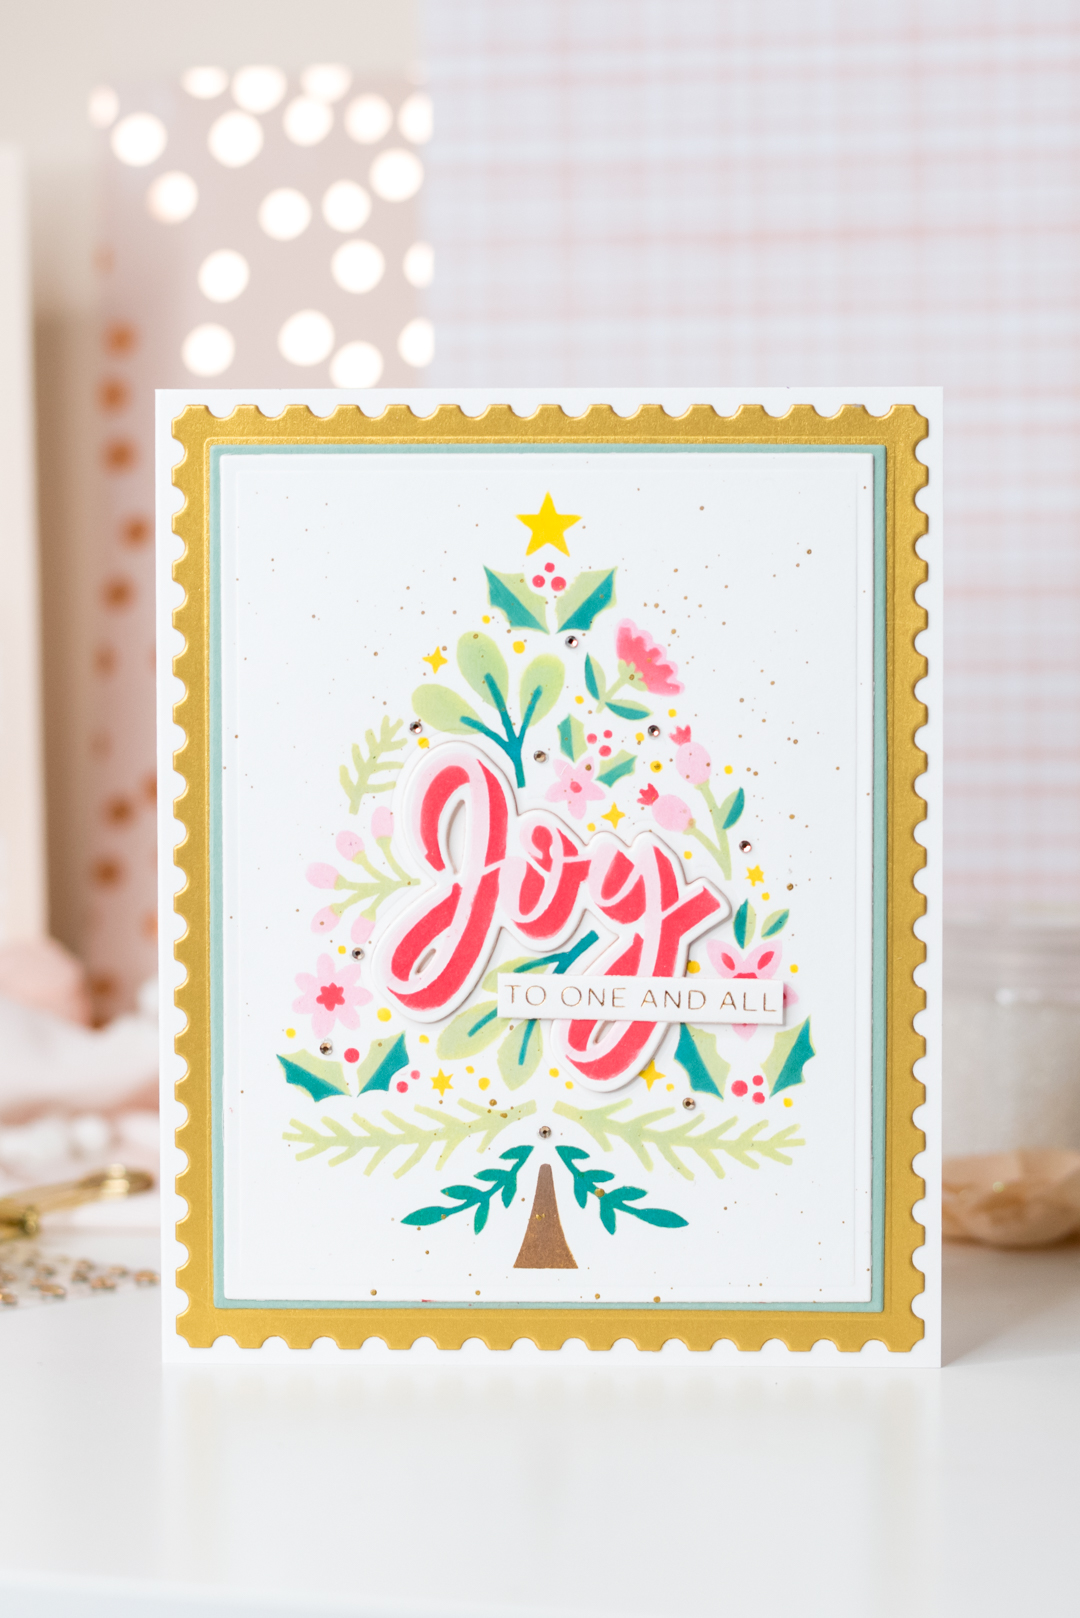
To start, grab a white piece of cardstock that’s slightly bigger than the stencils. Then, using Distress Oxide Inks and a small brush, apply the ink through the stencils onto the cardstock. Don’t forget to ink the 4 small areas in each corner of the first stencil! If you want to keep the stencil in place, you can use tape with low tackiness. I recommend using a Grip Mat to secure the cardstock while stenciling.
Once you’re done with the stenciling, take the largest die from the Precision Layering A2 B Etched Dies and cut the panel. You can also cut out the word ‘Joy’ in the center using the coordinating die. For some added interest, splatter a bit of gold acrylic paint on the card panel.
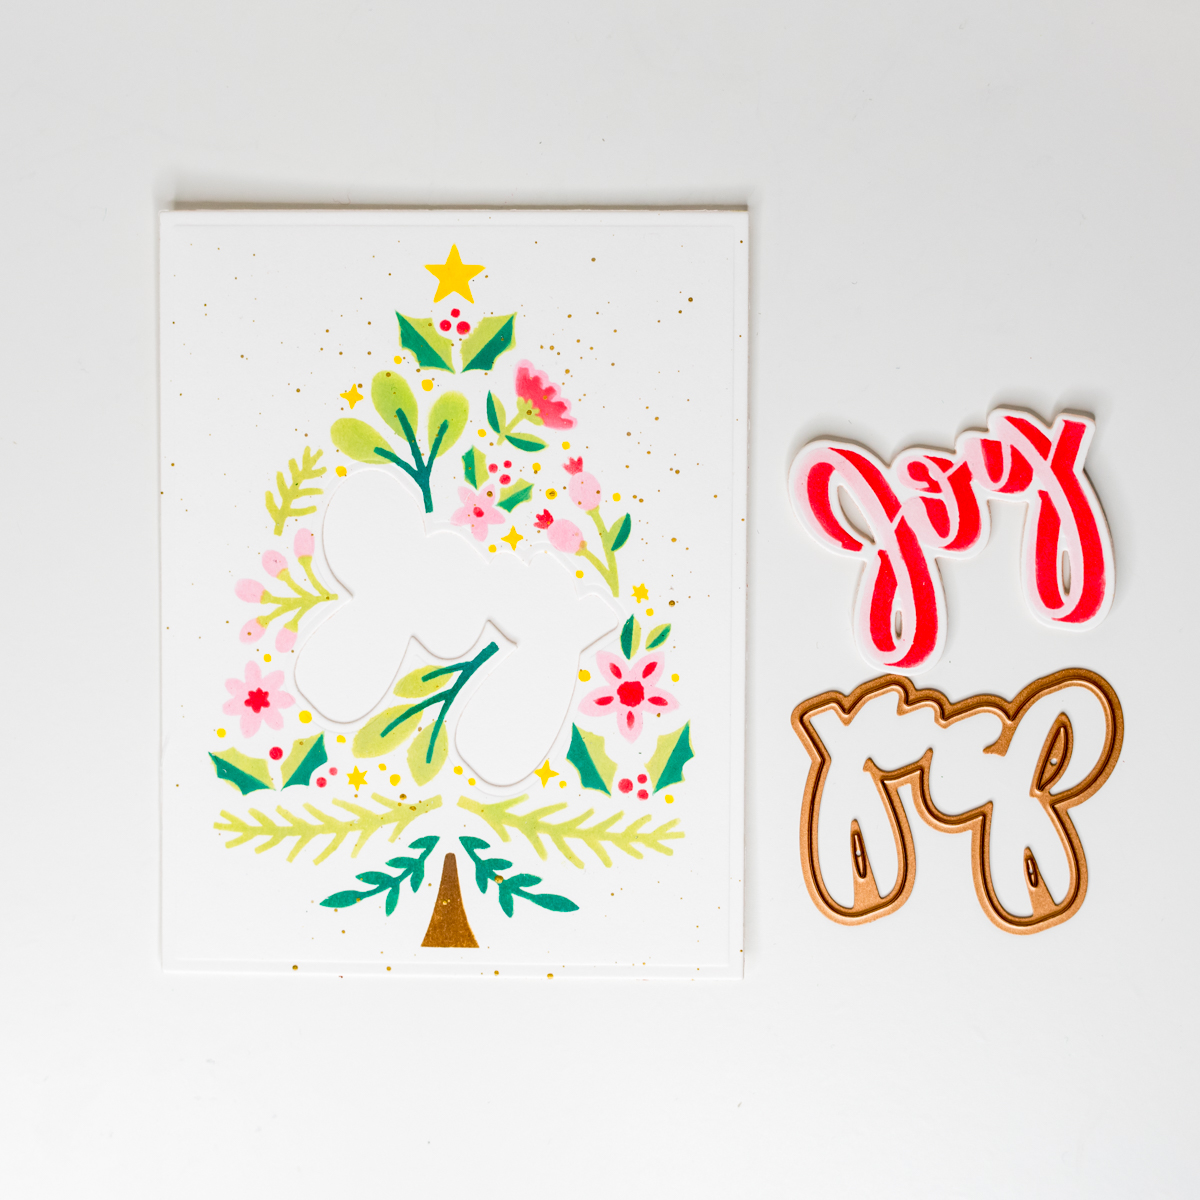
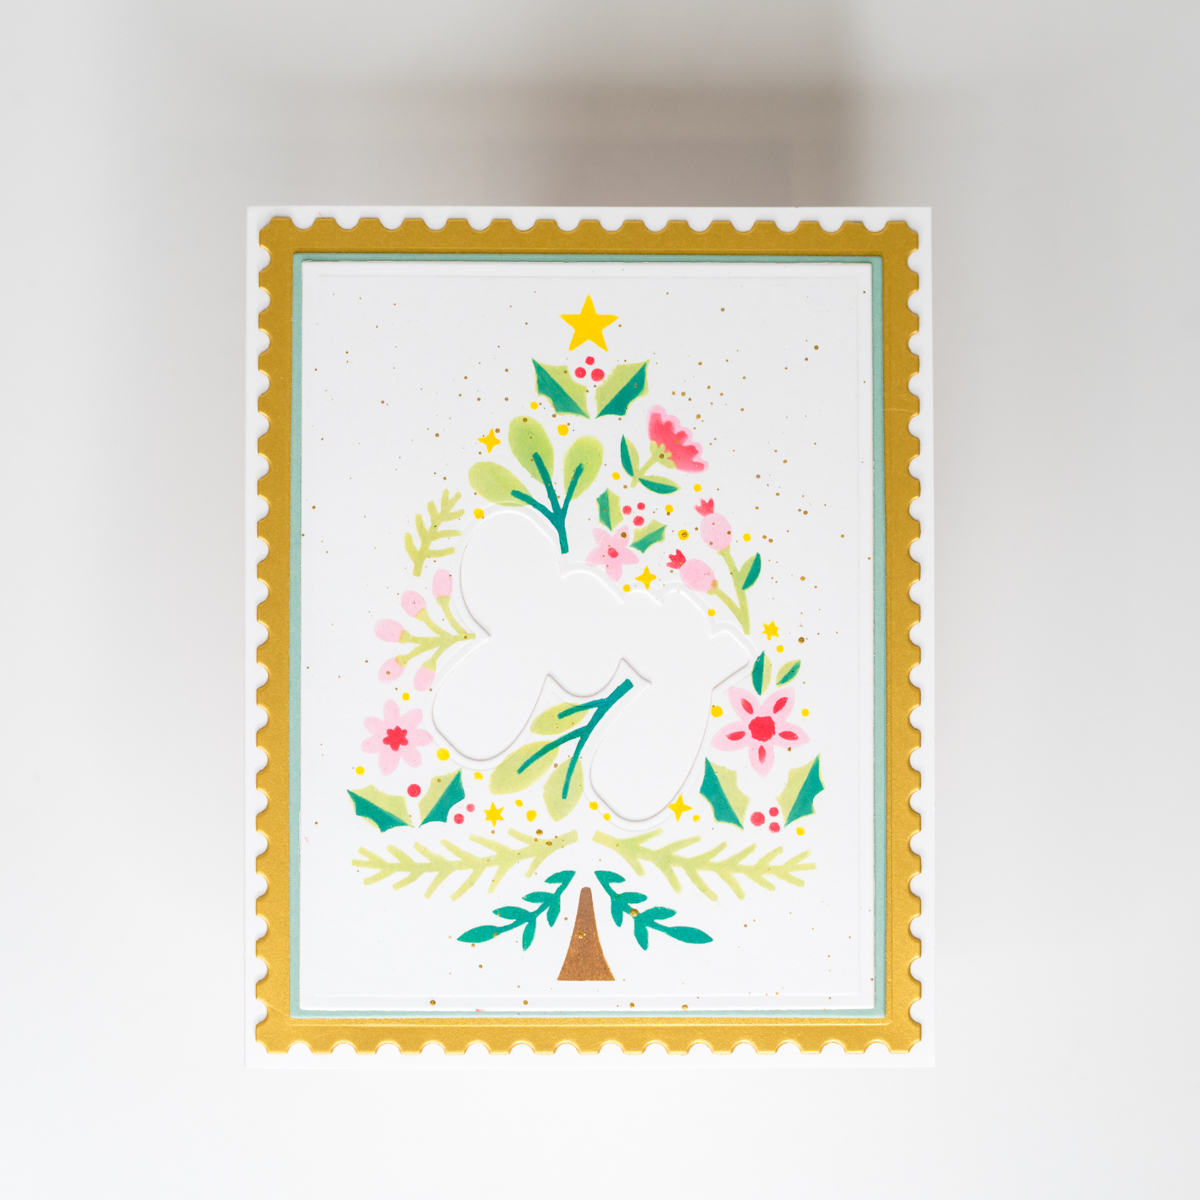
Next, glue a small piece of white cardstock to the back of the cutout on the card panel. Then, using the largest die from the Precision Layering A2 A Etched Dies, cut another panel from Sage cardstock. This will serve as a colorful border. Afterward, mat it on a gold cardstock cut from the Postage Edge Rectangles Etched Dies. Finally, adhere the entire piece onto a card base measuring 5 x 6.25 inches.
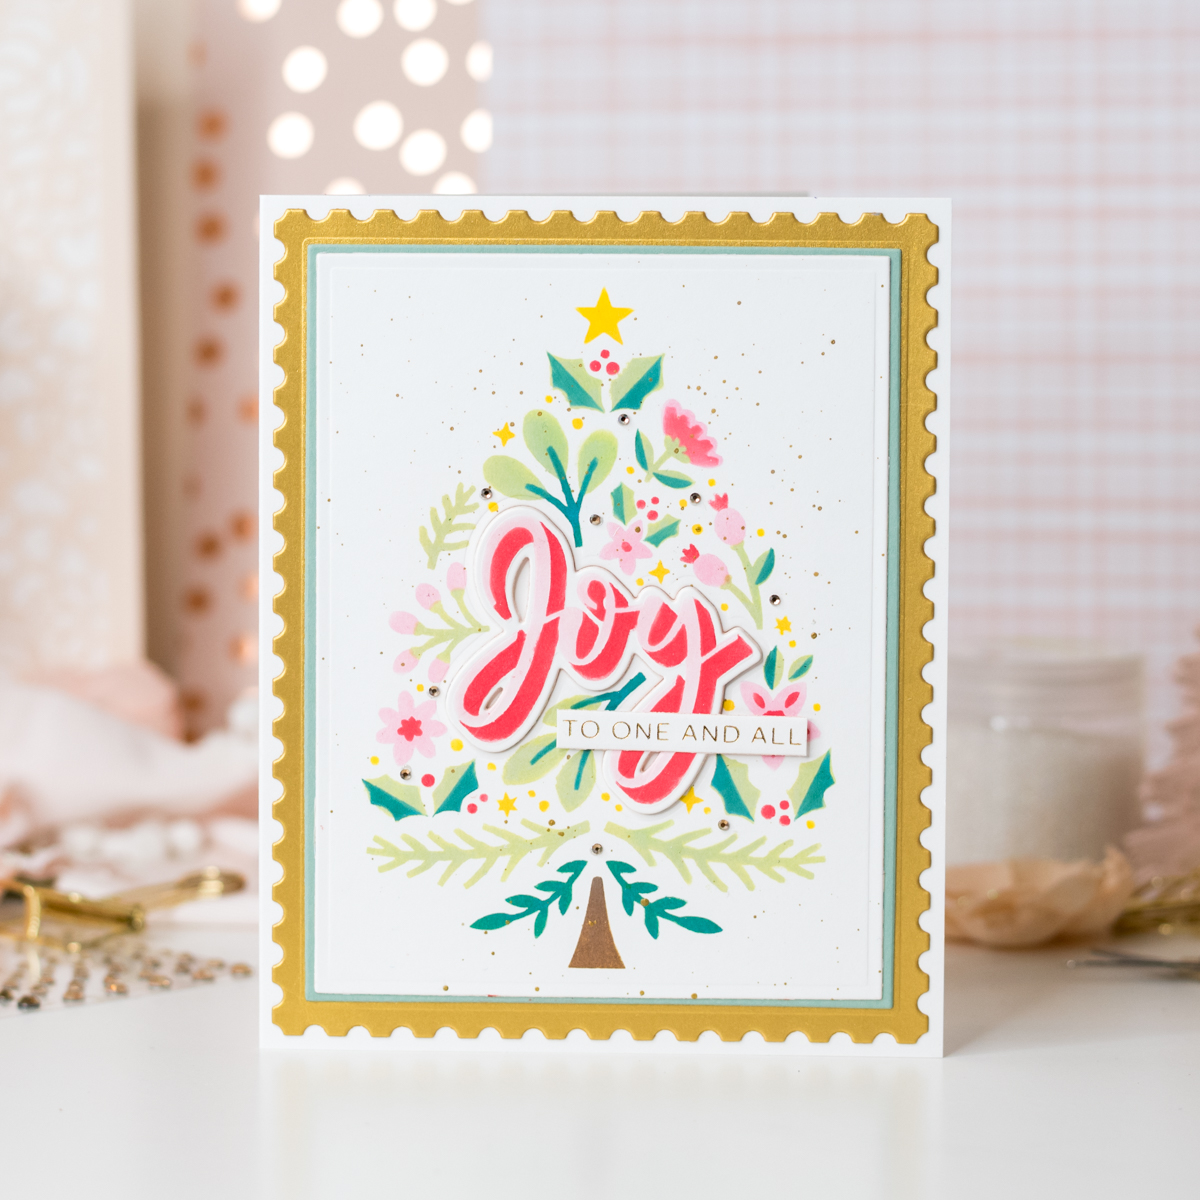
To give the card some dimension, die-cut a few more pieces of the ‘Joy’ sentiment and stack them together. Glue this layered sentiment back into the cutout on the card panel. I also added a sub-sentiment from the Christmas Die & Glimmer Sentiments Hot Foil Plate. For a touch of sparkle and shine, add some gold gems in various spots.
Thank you so much for joining me today on the Spellbinders Blog. I hope you’ll give these stencils a try to create a beautiful and easy card. Have an amazing day!
Spellbinders Supplies:

Other Supplies
Distress Oxide Inks, Prima Metallique Acrylic Paint, Waffle Flower Grip Mat
Stunning Watercolor Floral Card + Glimmer Accents | Spellbinders Live
Make Sentiments the Star!