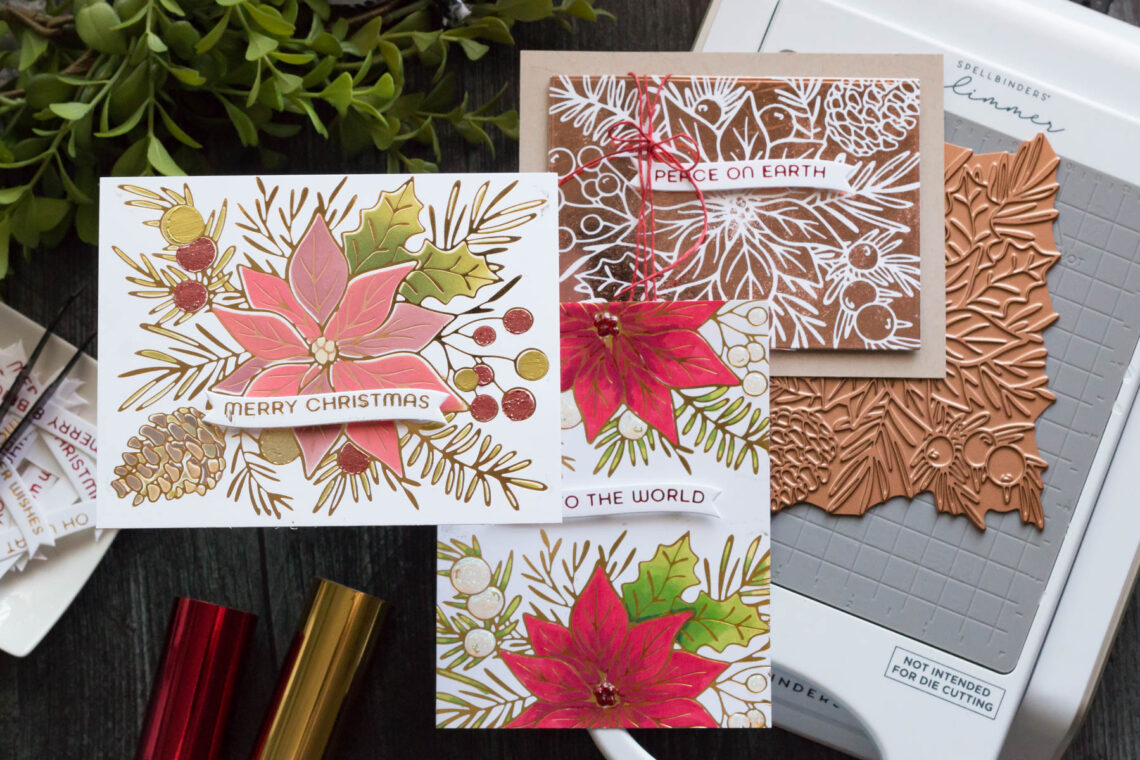
Full Bloom Poinsettia – Glimmered Three Ways
Hello, friends! It’s Marie again from Marie Nicole Designs. I’m sharing some more glimmered Christmas cards with you. This time, I’m using the Full Bloom Poinsettia Glimmer Plate but Im showing how to get three different glimmered designs. Let’s get started!
GLIMMER A FULL CARD FRONT
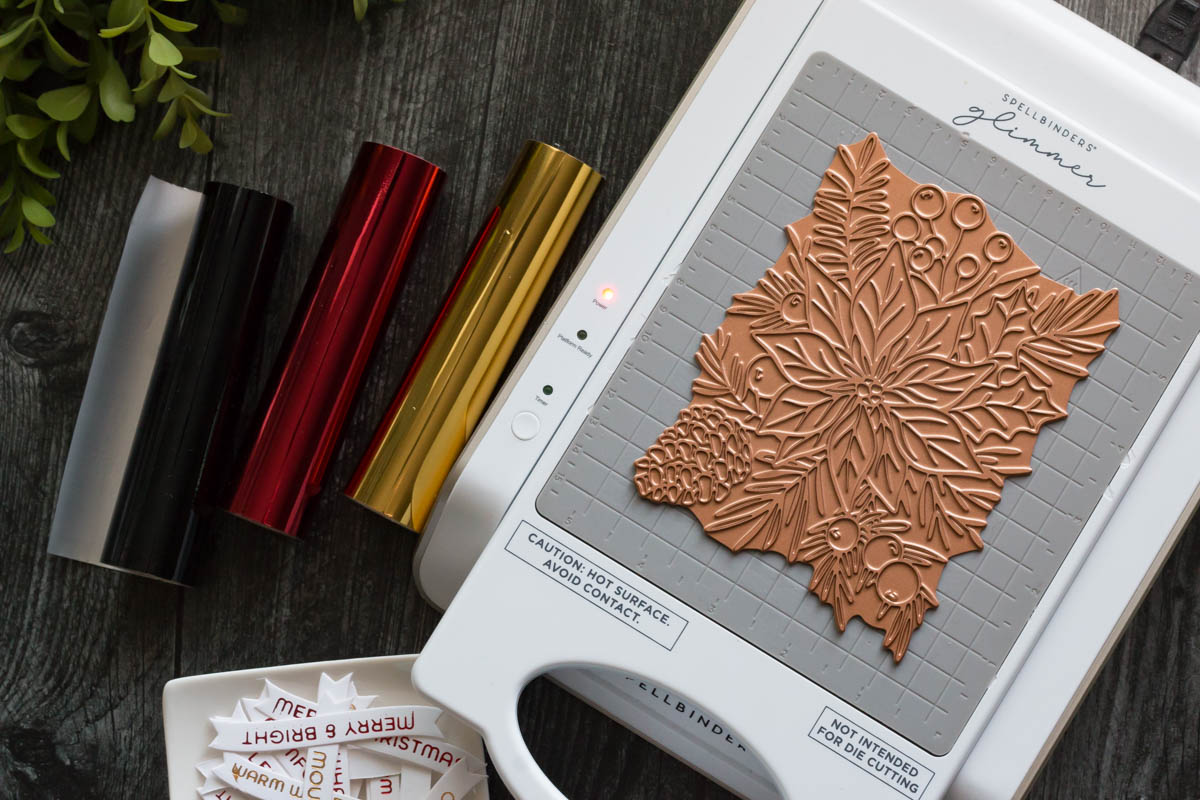
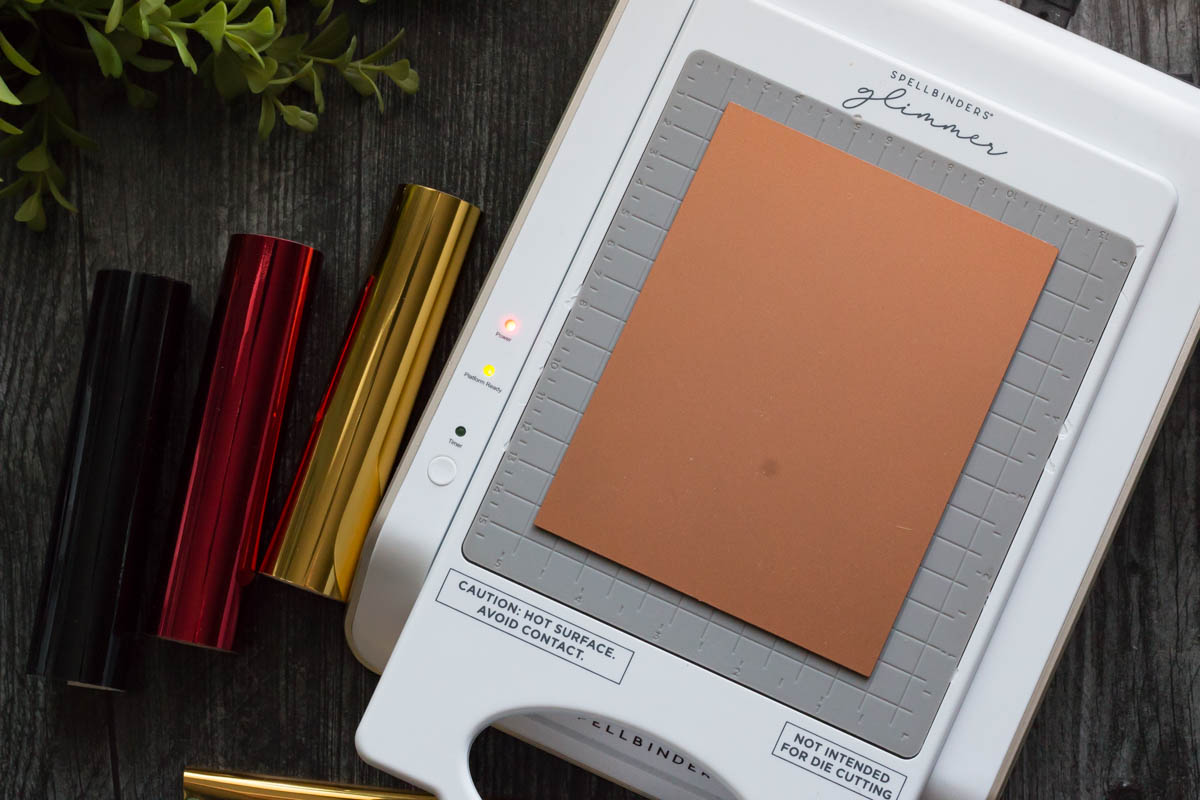
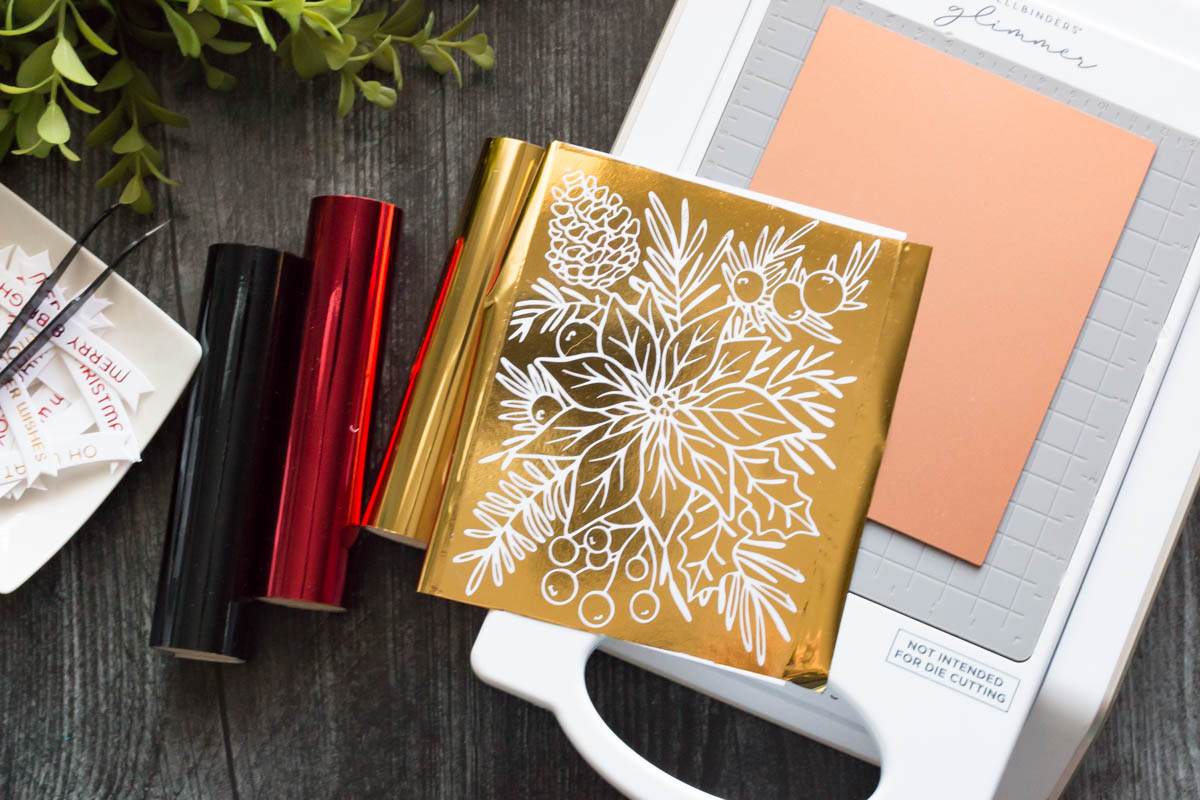
We will start by glimmering the plate onto a piece of white cardstock to create a full design for a card front. I have the plate warming up on the Glimmer machine while I cut some gold foil.
After you cut a piece of foil you can lay it over your glimmer plate as it’s warming. I like to think of the backside of the foil as the “sticky side”. That will be the side that “sticks” to your paper. So like a sticker, the pretty side will be showing.
Since I want the “sticky side” to stick to my paper, I lay a piece of cardstock right down onto my foil and plate. Now, since this plate covers a whole card front, I didn’t feel the need to tape anything into place. If you are using smaller glimmer plates that you do not want shifting on you while you glimmer, you can add the foil to your paper, and then tape the plate over the foil before placing it onto the heating platform.
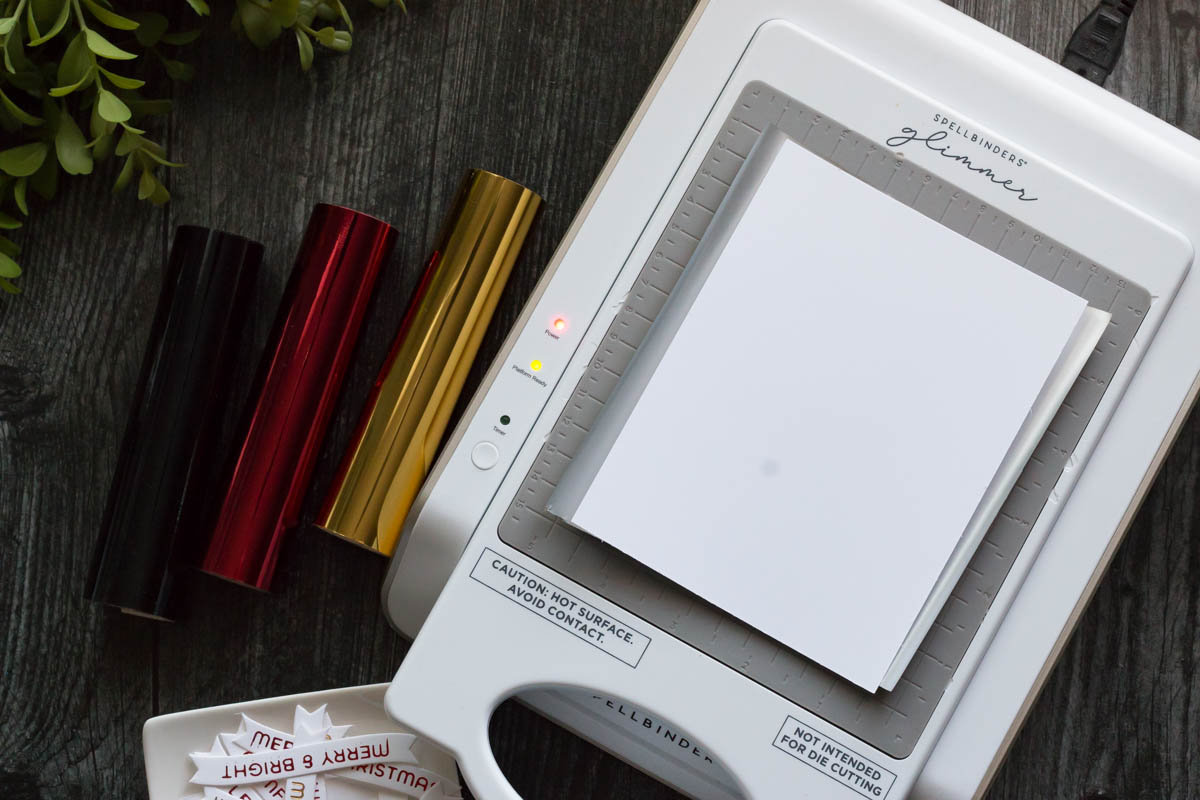
Once you have your plate, foil, and paper all onto the heating platform, place the glimmering plates on top and then run it through your die machine.
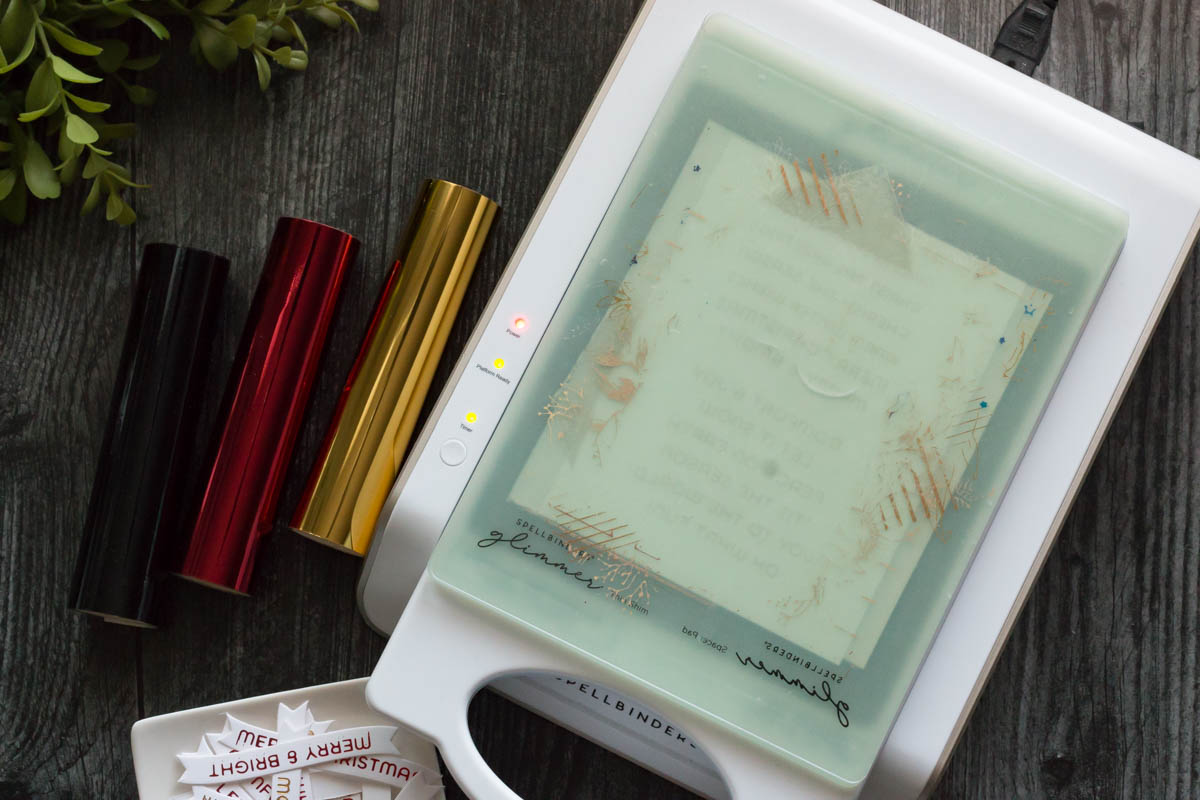
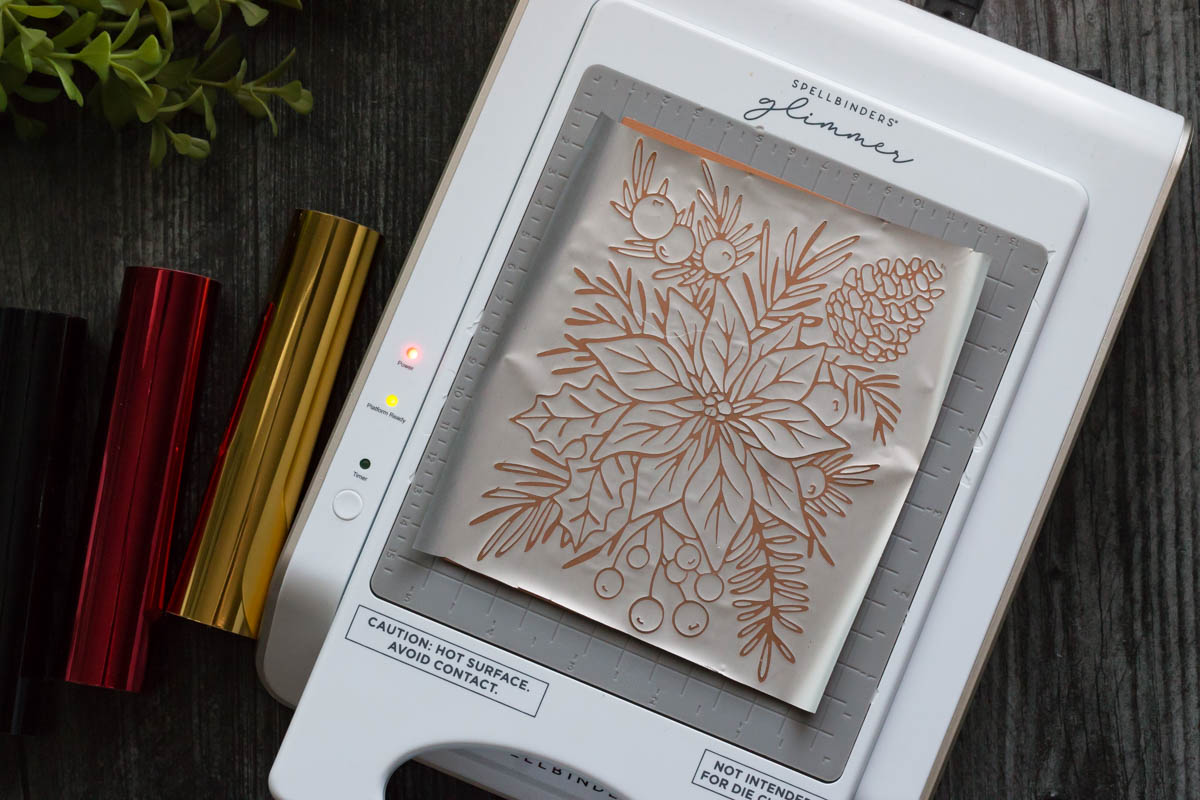
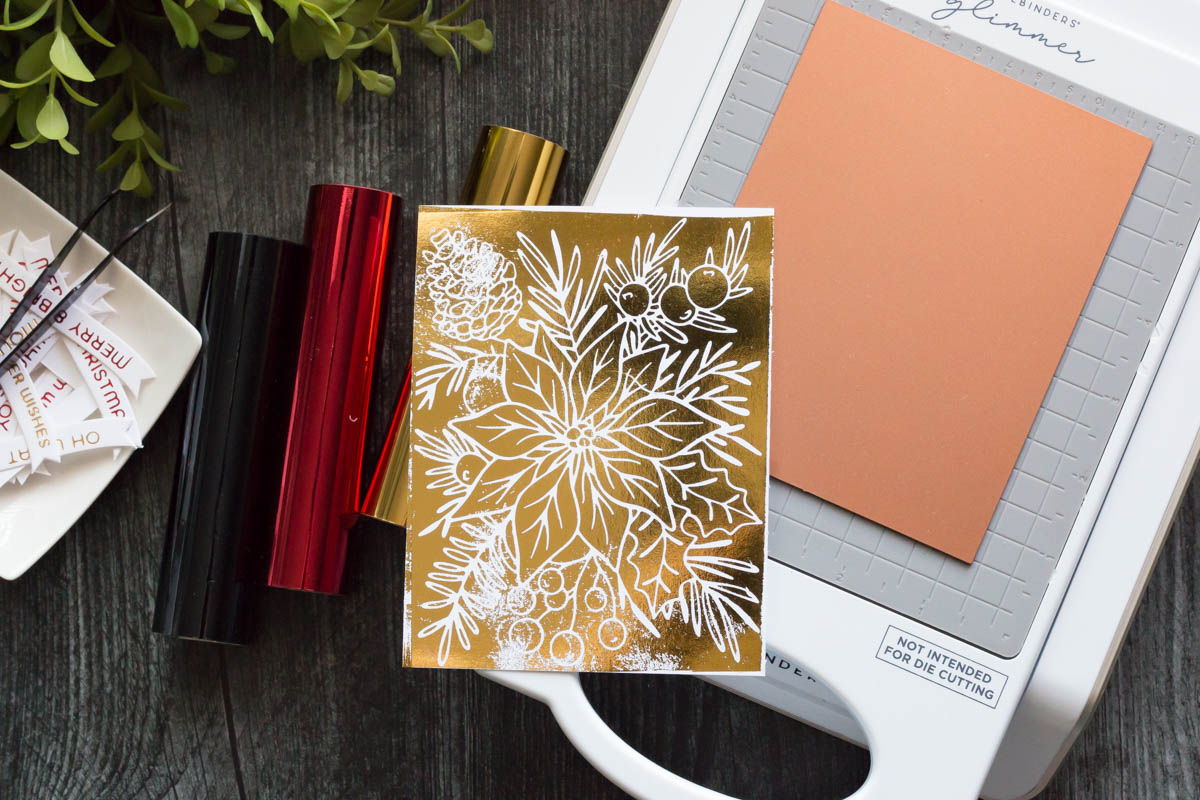
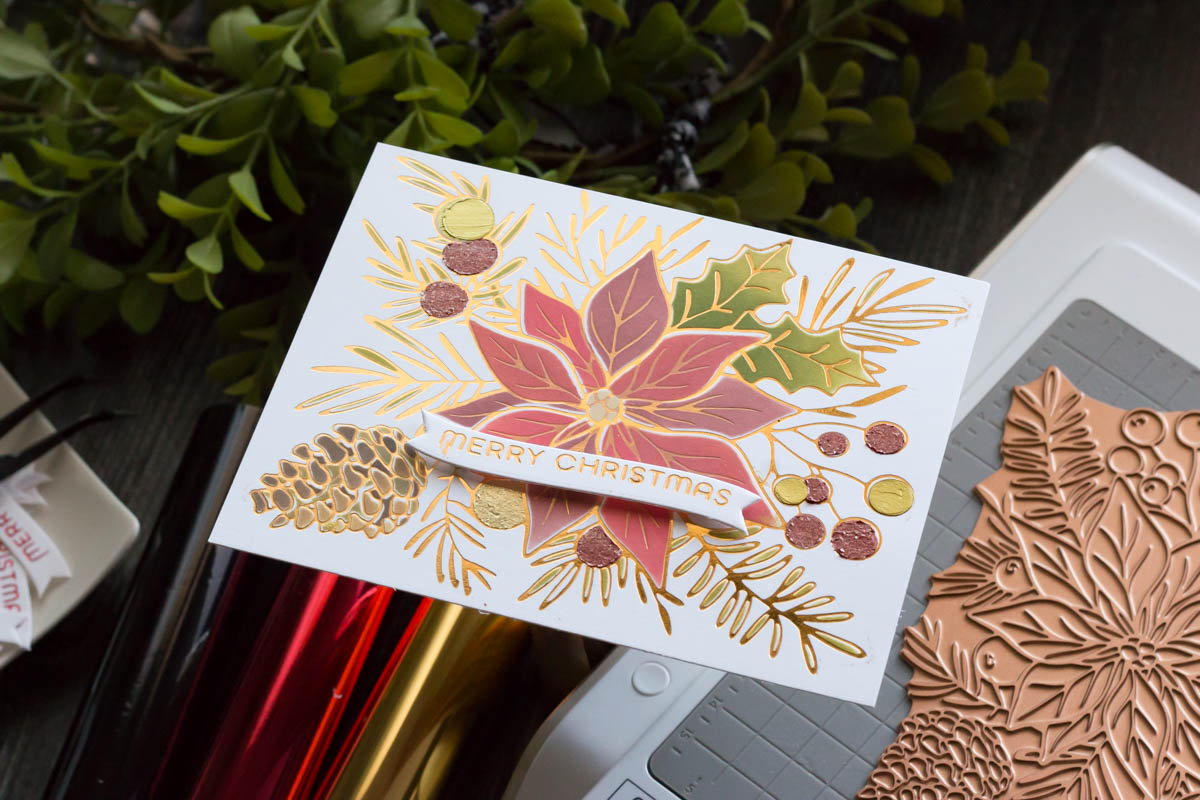
After you run your Glimmer platform through your die machine, the pressure should press the foil into the paper in the design on the plate. You can see it here on the cardstock before I peel off the foil.
After you peel off the foil, the gorgeous glimmered design is left behind! This is so much different than embossing with powder because the foil is pressed right into the paper rather than a raised design that is melted on.
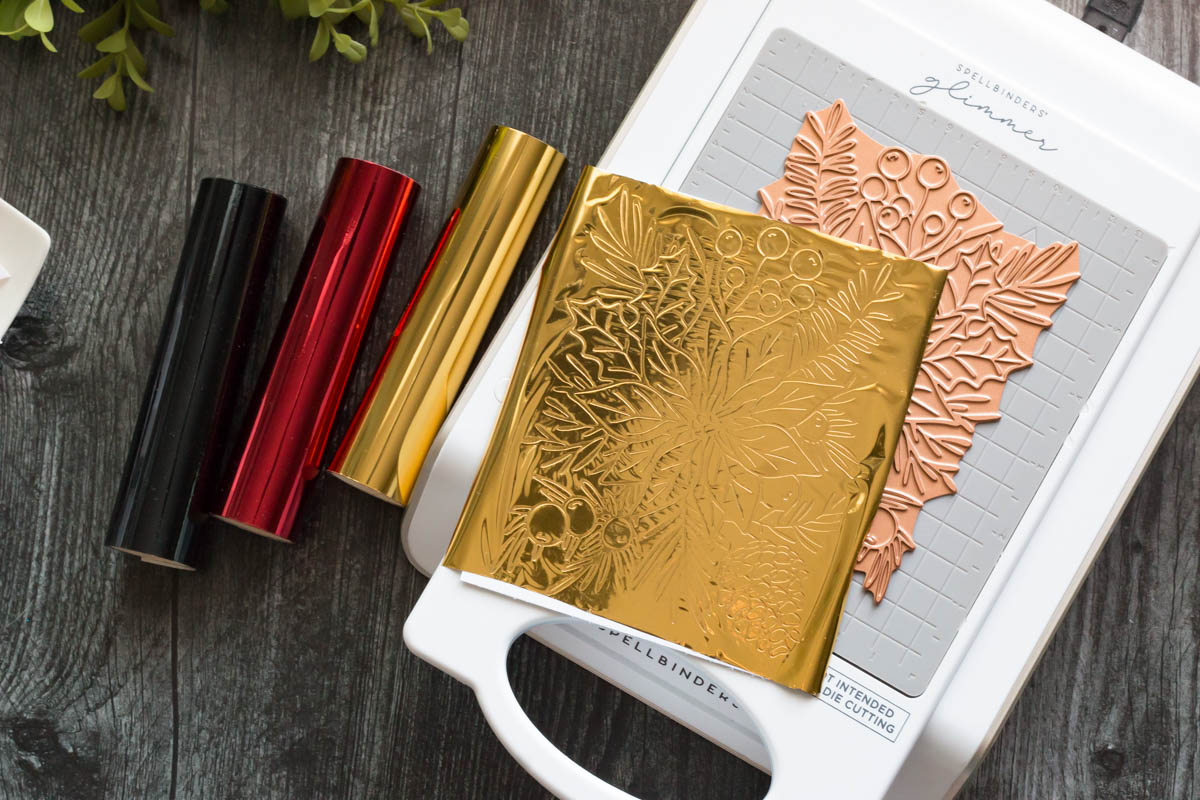
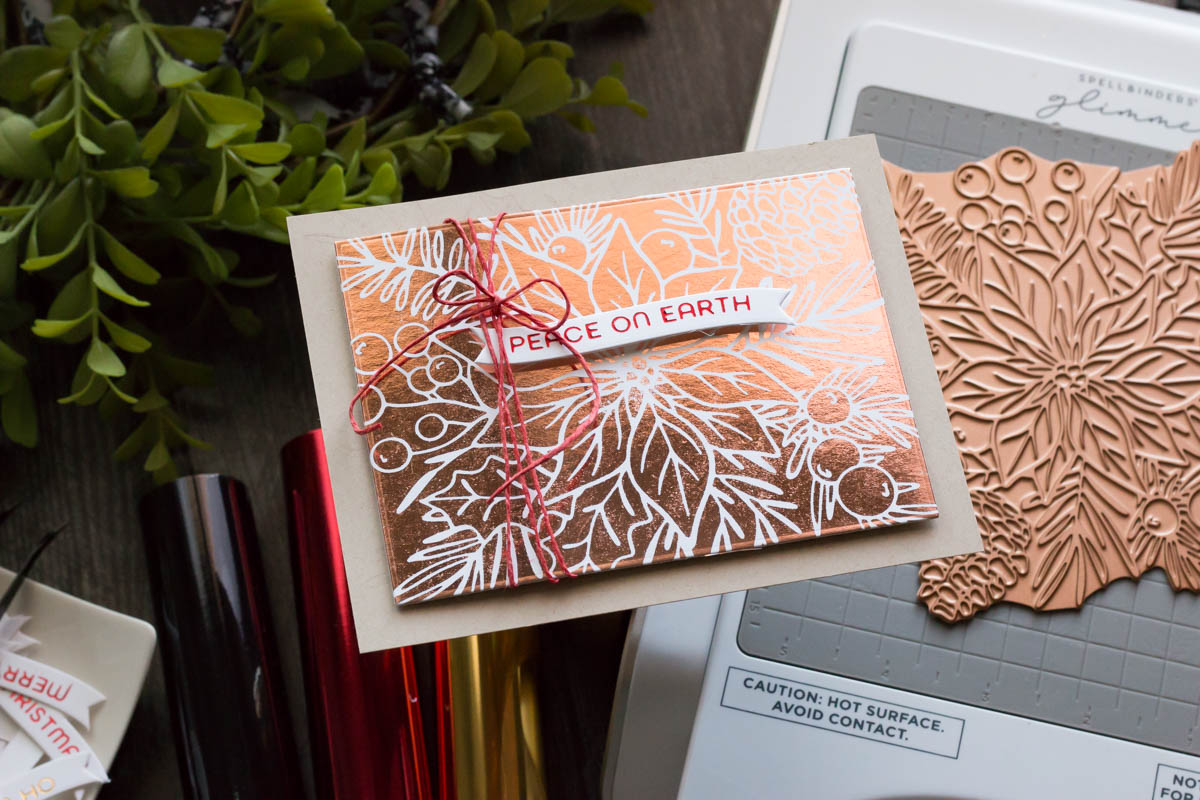
ALSO, do NOT throw away that beautiful piece of foil you peeled off! I am going to show you how to create a second card using the foil negative…
A NEGATIVE DESIGN THAT IS POSITIVELY BEAUTIFUL
Ok, let’s use that foil negative to make a second card. This is a fun way to get more use out of your foil!
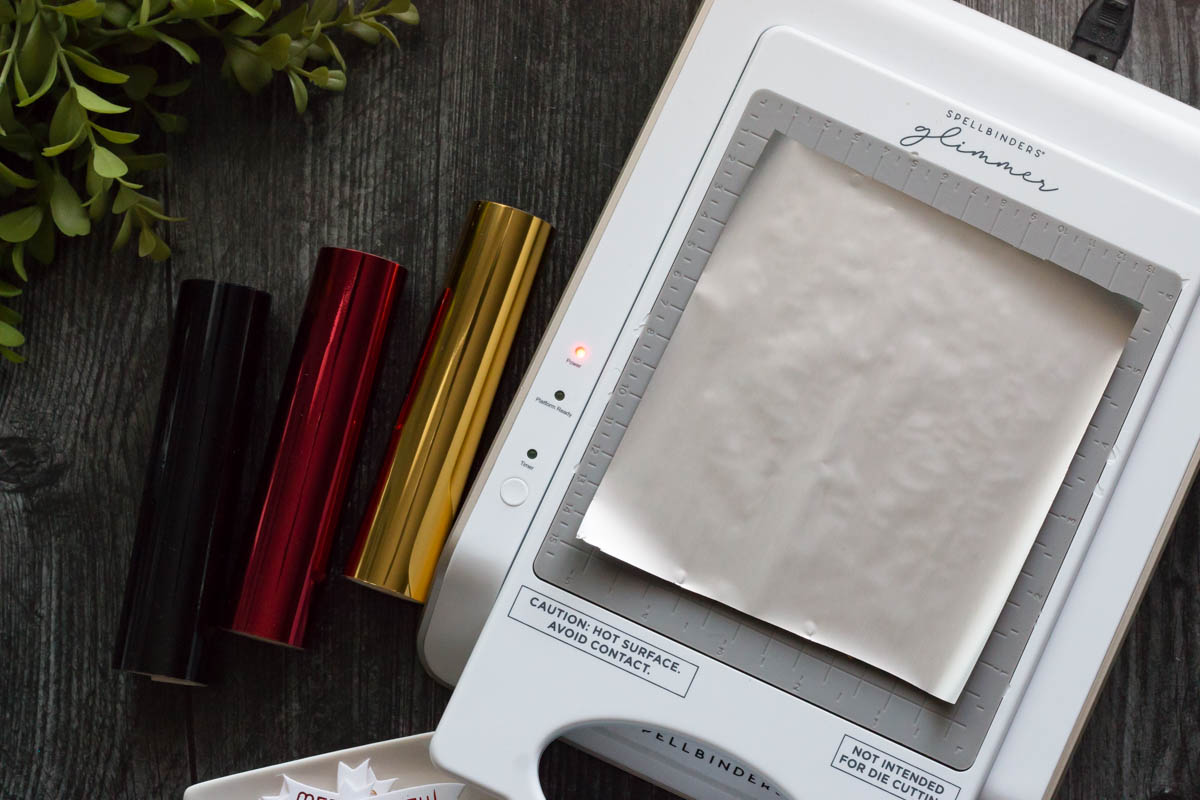
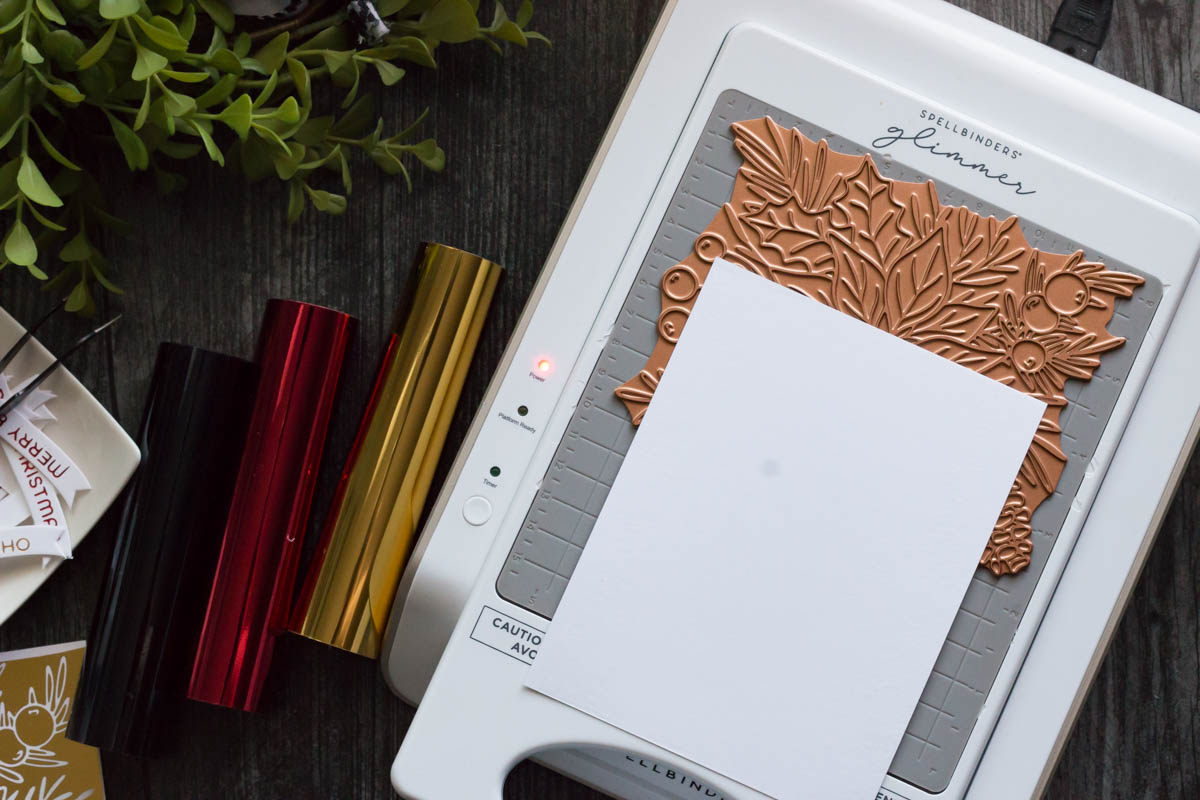
I like to start by placing a full-sized glimmer plate onto my heating platform but placing it with the design facing down. That way, I have the whole flat surface on the back to work with.
Next, place your foil piece on top of the glimmer plate. Remember, the back side is the sticky side! Make sure you have it so that it will come in contact with your cardstock, otherwise, you will glimmer your plate!

If your plate gets glimmered, don’t worry. It will still work properly but it’ll just be a little prettier.
Place your cardstock onto the foil.
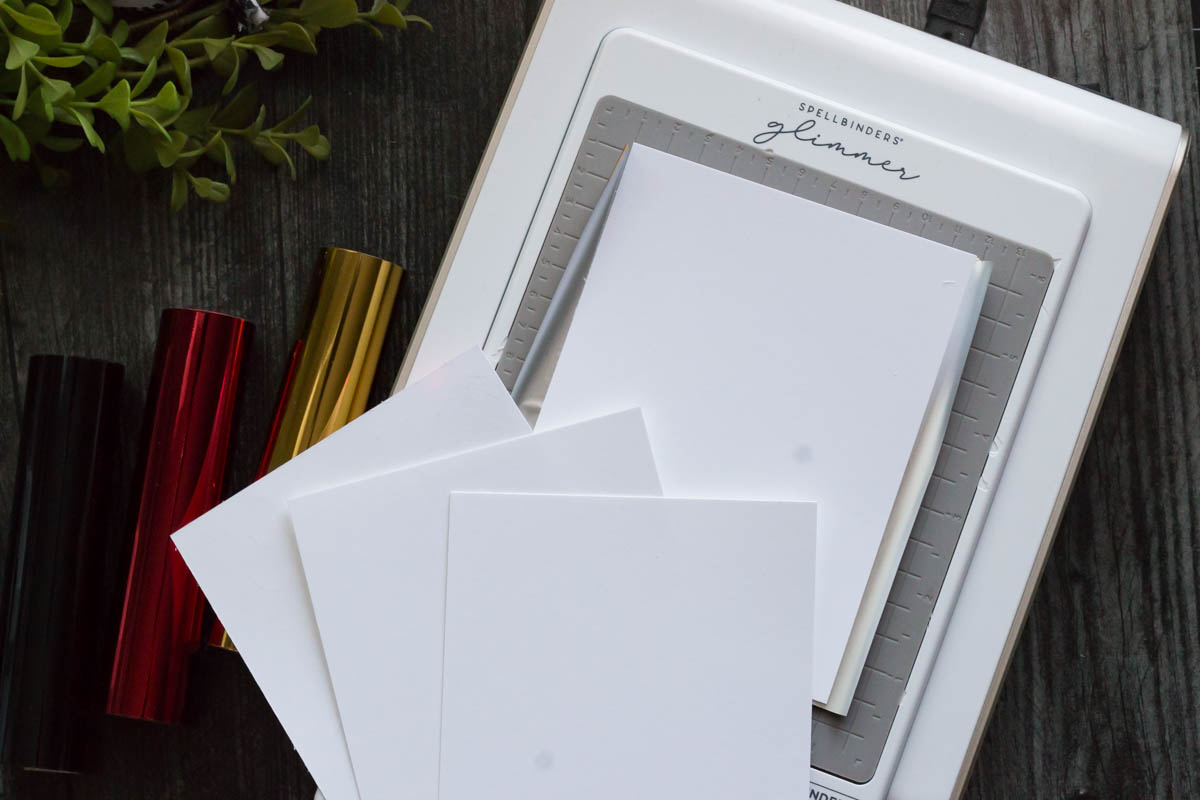
And then you also want to add some extra pressure so that you can get all of that foil to stick to your cardstock. So I like to take a few more layers of cardstock to place over the card front I’m foiling. I used three more pieces of cardstock. It was a little difficult to crank through my die machine but it can be done!
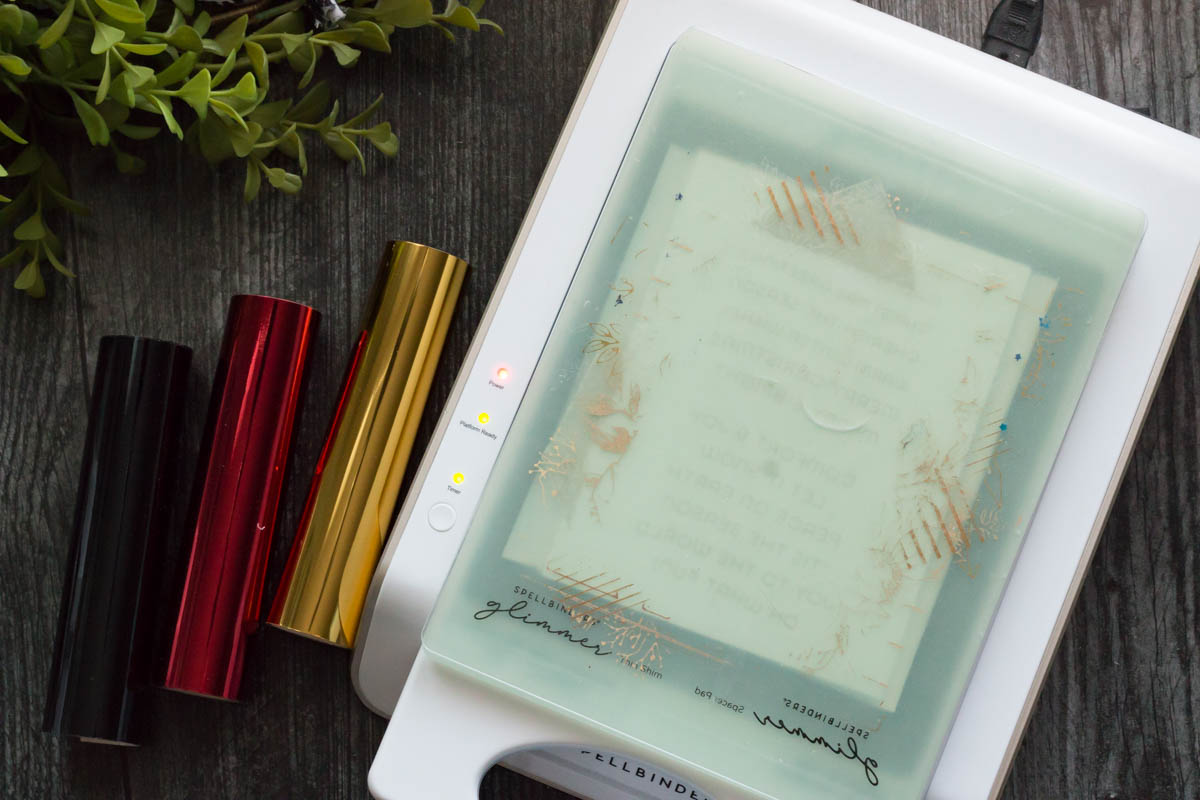
Once the light is solid green, place your glimmering plates on top of your glimmer plate, foil, and paper, and run it through your die machine!
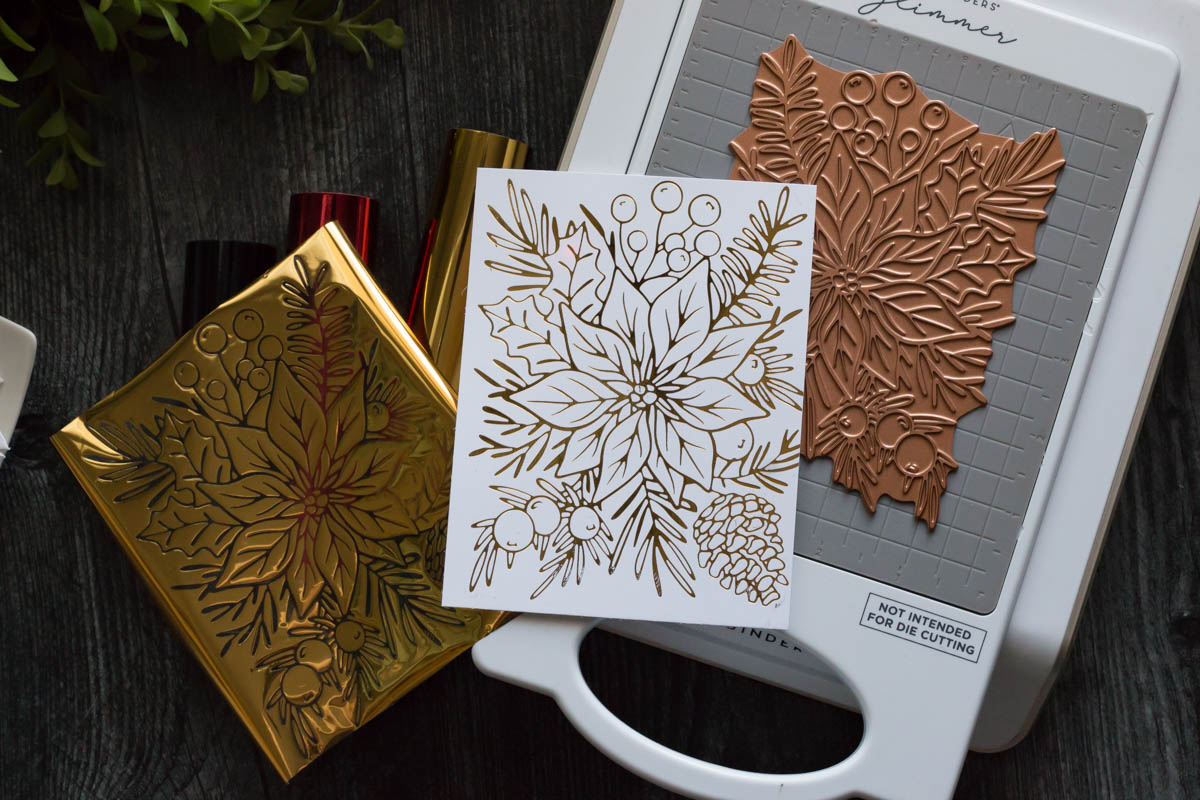
You can see that the foil has adhered itself to the cardstock. Carefully and slowly peel it off to reveal the negative image of the design you previously foiled! Now, using the negative can be tricky, and sometimes it does not completely adhere to the cardstock. You can see in my photo there are a few areas where the foil didn’t completely stick. That’s ok! It may take a few times to get the hang of it.
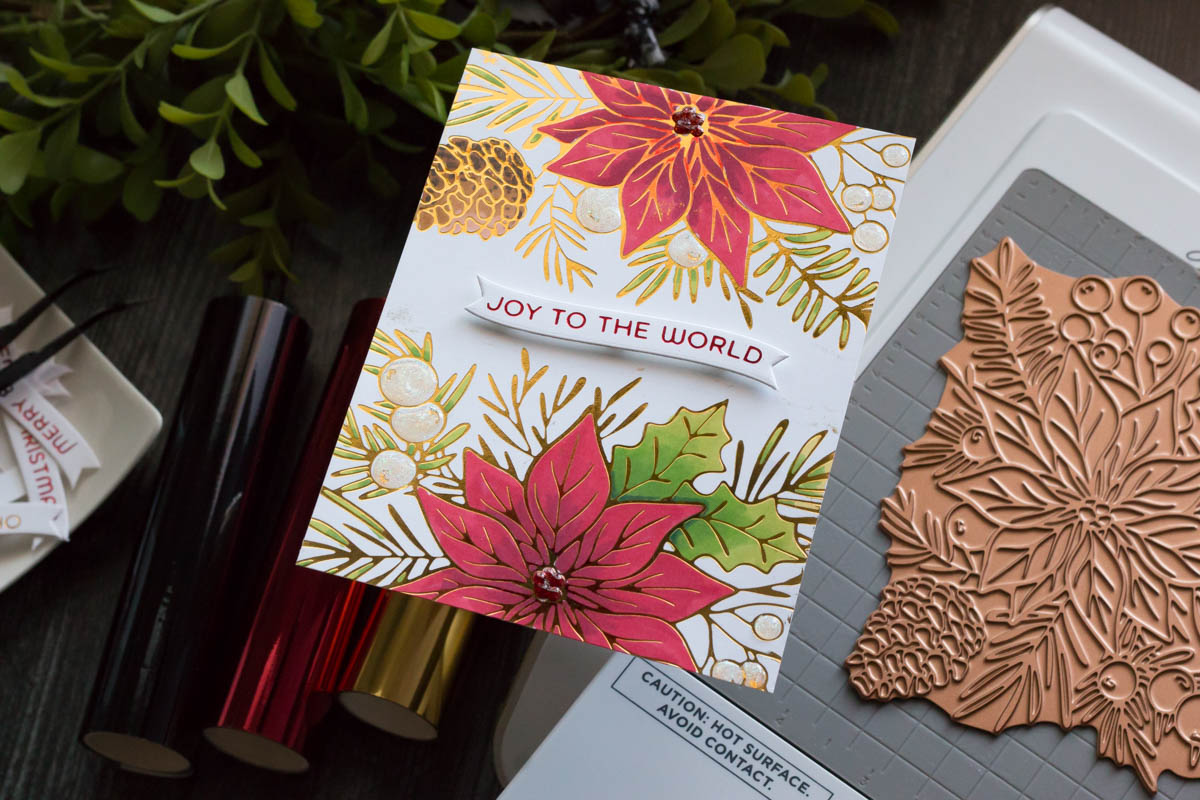
SPLIT THE IMAGE
The third way you can use this Full Bloom Poinsettia Glimmer plate is to split the image. You place it onto your heating platform like you normally would to foil. Then, add your foil and lay your paper onto only PART of the plate. Now, in my photo, I left out the foil so you can see how I am only going to be adding foil to part of the cardstock. I also made sure to place the plate at the top of my platform to give more room for the rest of the cardstock that will not be glimmered.
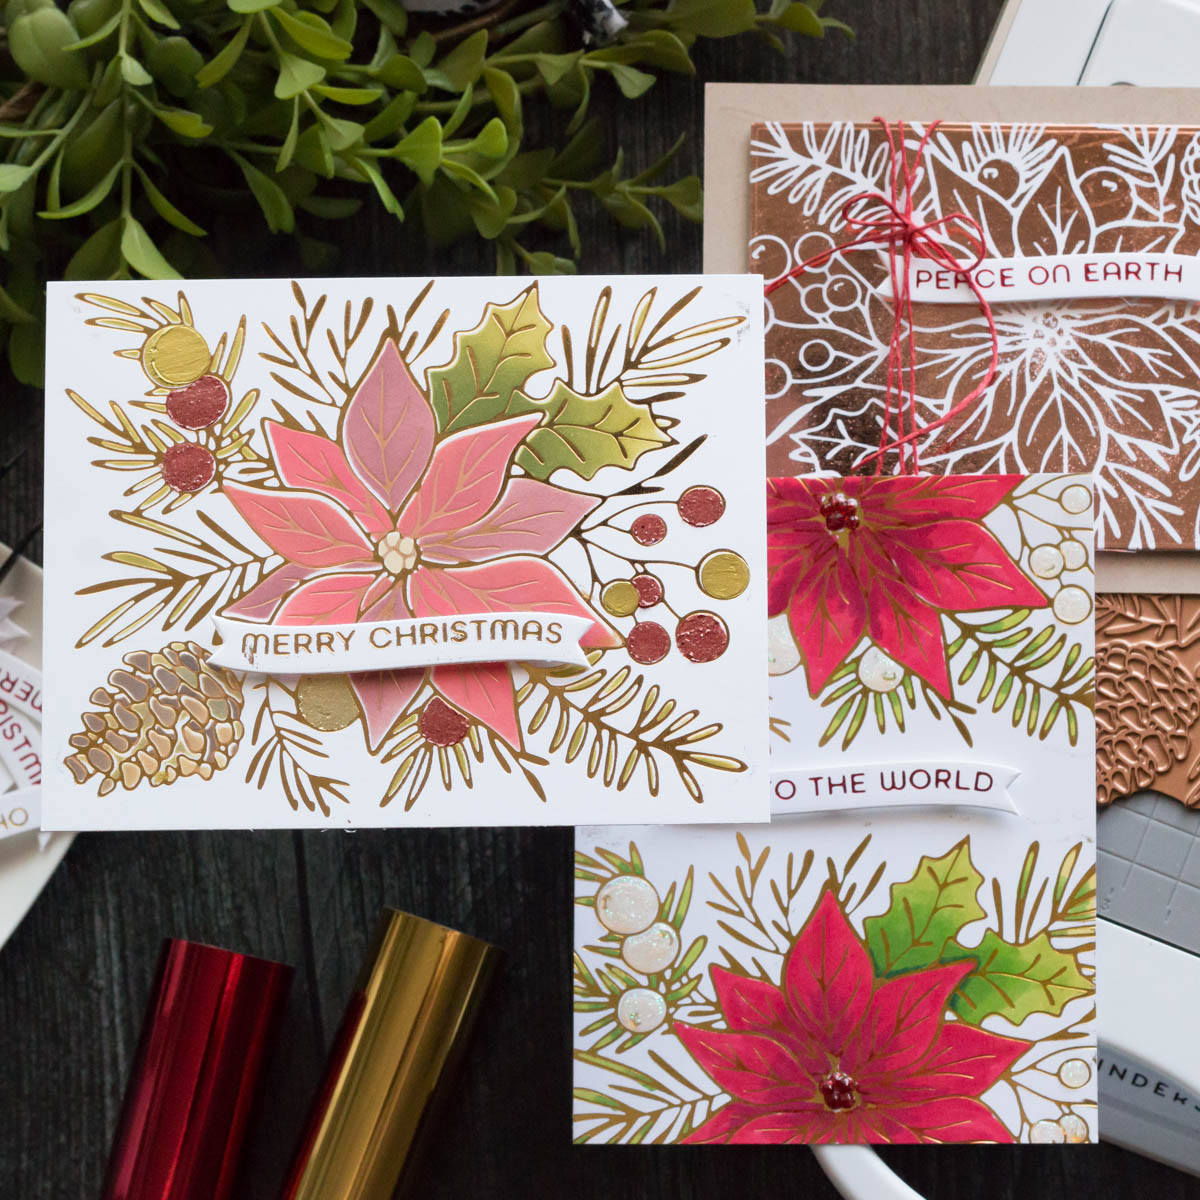
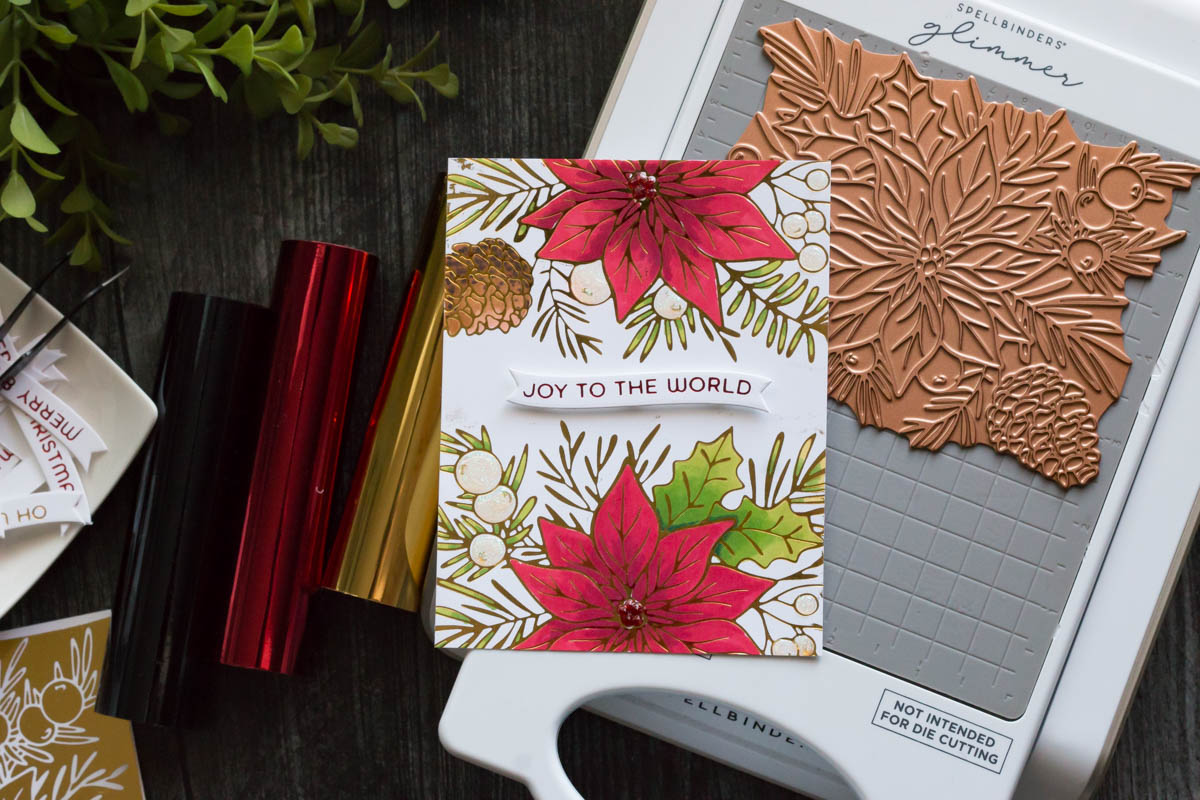
Here’s the finished card! I glimmered the partial image on the top and the bottom, and then I colored with alcohol markers. Then I also added some glitter drops and the glimmered sentiment. So pretty!
NOW TURN THEM INTO CARDS
Now that you have these card backgrounds glimmered, what to do with them? Well, you already saw the first one I created with the split image. You can add color with coloring mediums like markers, watercolors, colored pencils, and more.
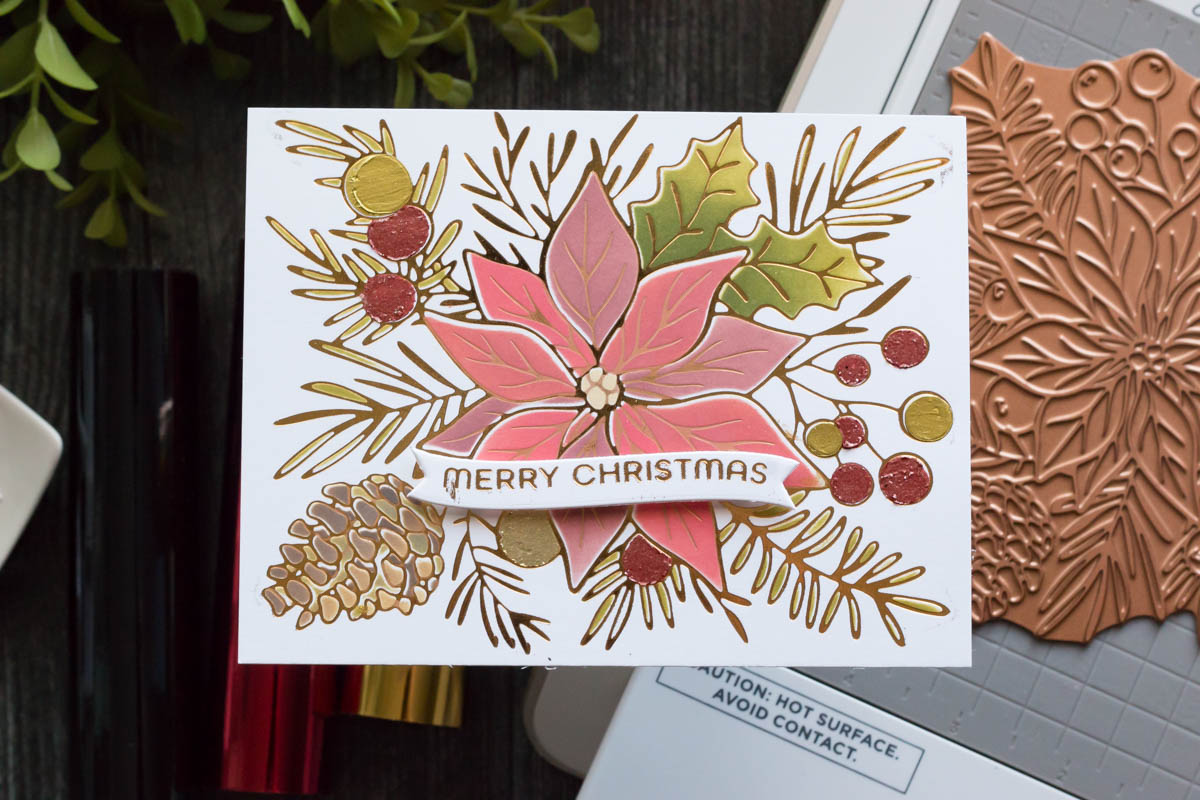
For the first background I created, I colored in the image using the coordinating stencils that go with this design. The stencils are perfect for adding inks or other mediums. For the flower and the leaves, I added several colors of ink, and then for the berries I added some glitter pastes. Add a sentiment and then you have a beautiful card!
Remember that foil negative that we used? I trimmed it down to make a smaller card layer, added it with some foam adhesive, and then finished it with a sentiment and some red cord. Simple and shiny!
There you have it! Three ways to use the Full Bloom Poinsettia Glimmer plate for your Christmas and holiday cards.
Thanks for stopping by! Hope this gives some ideas and inspiration for you.
Until next time,
Marie Nicole
Spellbinders Supplies:

Other supplies
Markers, inks, ink blenders, glue, foam adhesive, glitter drops, cardstock, paper trimmer

One Comment
Trudie Vick
Gorgeous and versatile. Thanks for sharing.