Merry & Bright Collection – Card Inspiration
Hi there, this is Annie Williams and I’m excited to be back on the blog today to share a couple of cards made with the Merry & Bright Collection from Spellbinders. The bold designs and beautiful florals in this collection inspired me to create three simple and pretty cards perfect for sending a holiday hello.
Oversized Double Bow Card
I thought the giant bow from the All Occasion Bow Die Set was such a fun design that I pulled it out first to play with. Here I doubled up my bow loops for this oversized holiday card featuring tons of color and stripes.
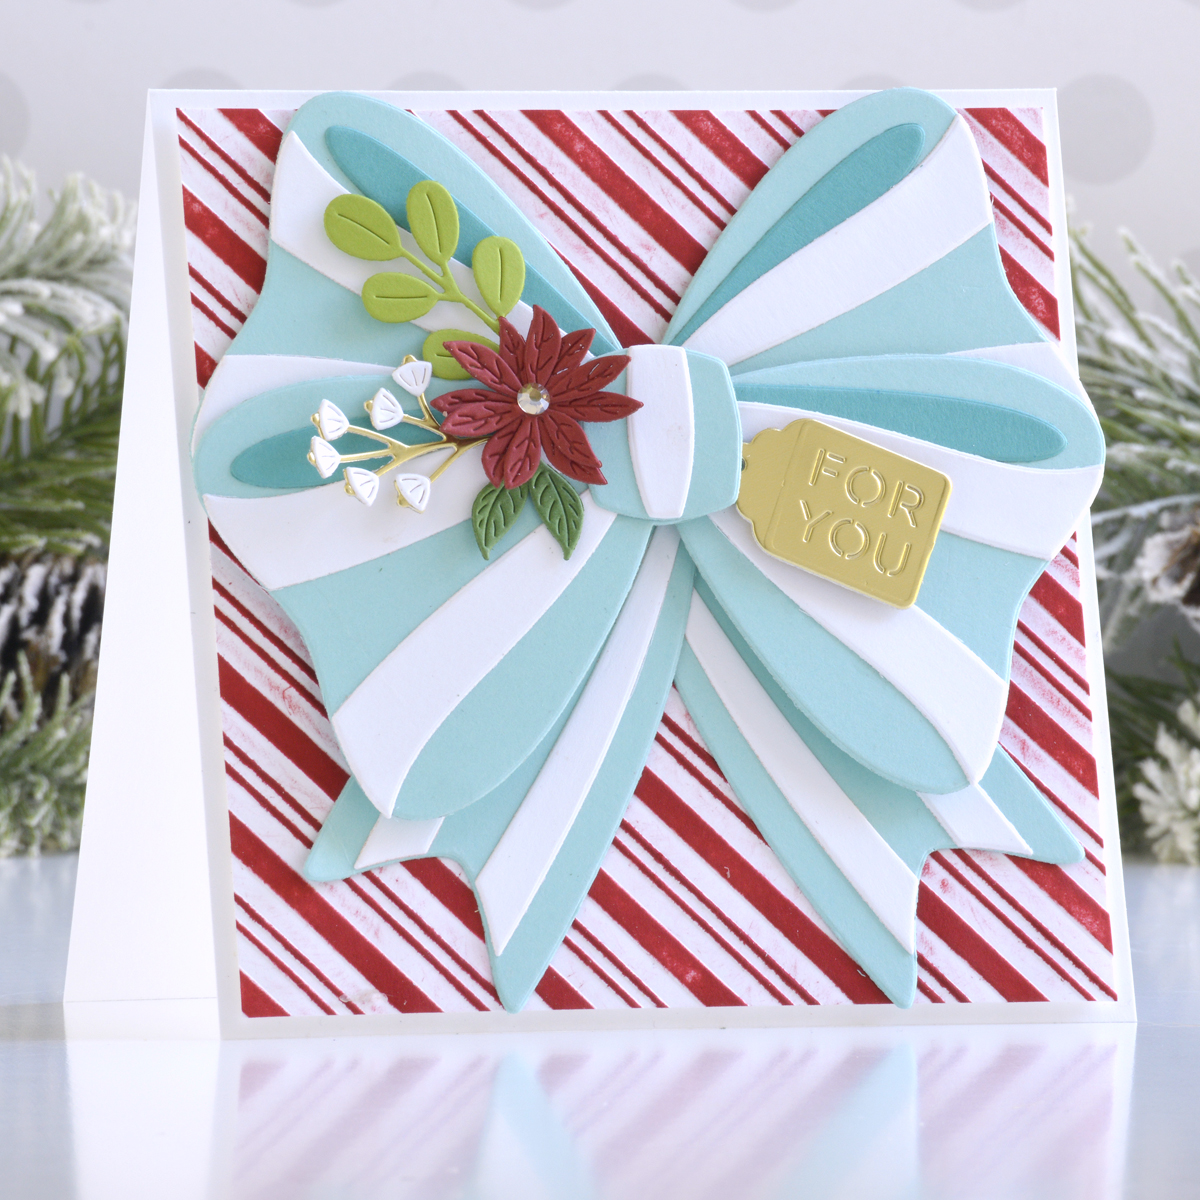
Die cut white, Waterfall, and Teal Topaz Cardstock using the All Occasion Bow Die Set, cutting an extra two sets of bow loops to create the double bow. Assemble with liquid glue and foam adhesive for tons of dimension. Die cut Pomegranate, Fern, Rainforest, and Mirror Gold Cardstock using the flowers and tag from the Petite Blooms & Sentiments Die Set.
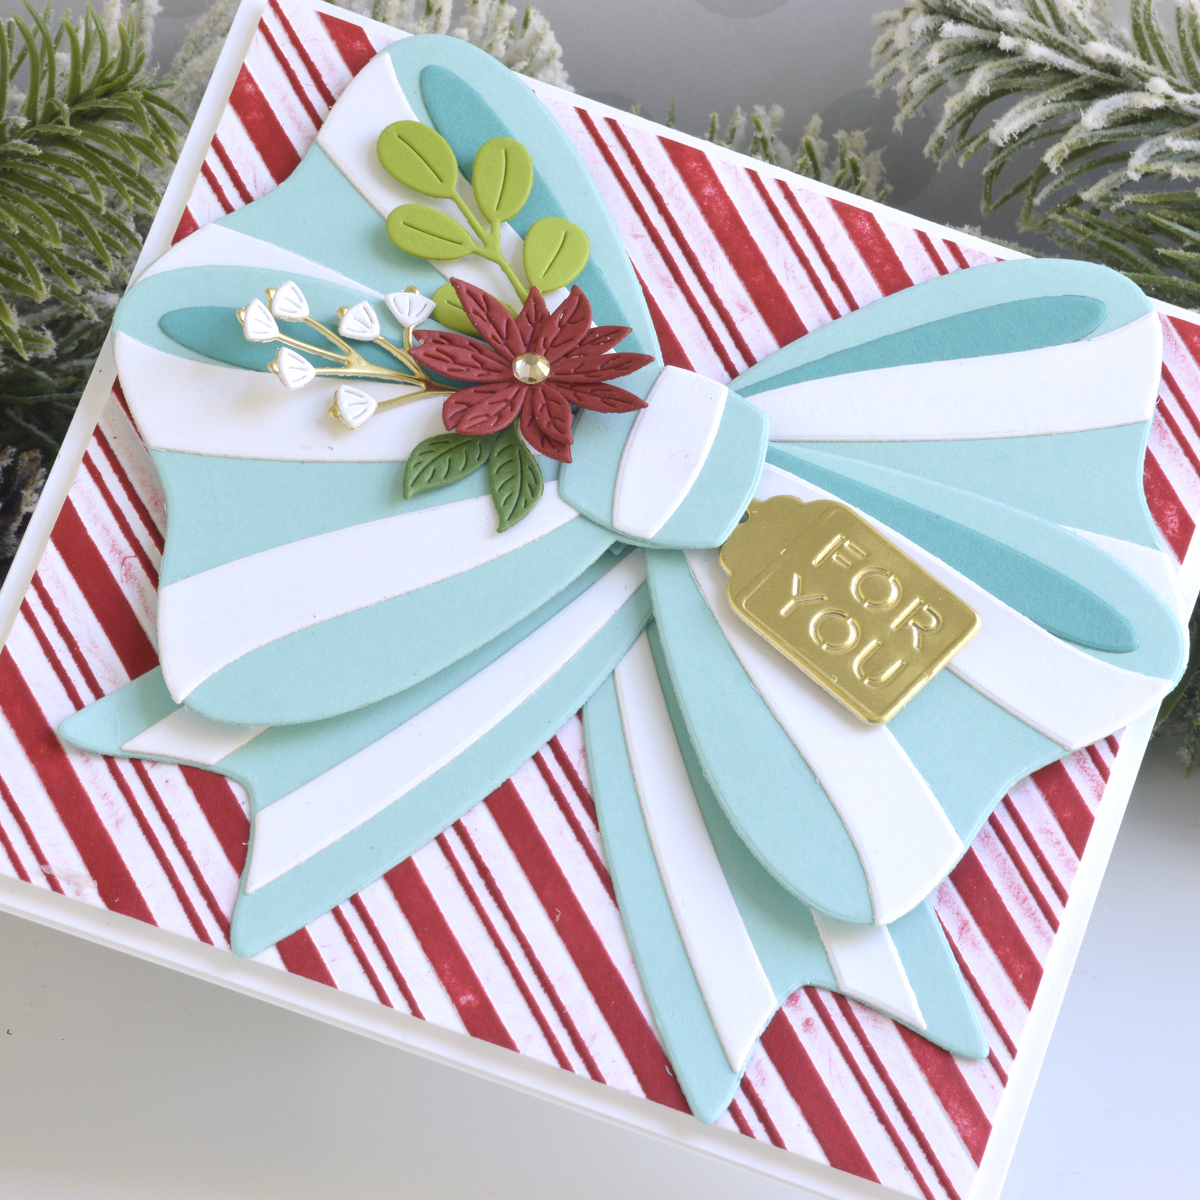
To create the background, trim a piece of white cardstock to 5.25” square and emboss it using the Peppermint Stripes Embossing Folder. Rub Festive Berries Distress Ink over the raised areas using the ink pad directly to paper until the stripes are dyed red. Mount the background panel onto a 5.5” square white card base with foam adhesive and add the bow and florals on top with more foam adhesive.
Frosty Merry Wishes Card
The fun tree design from the Merry & Bright Die Set is such a bold focal point, I didn’t want to add too much else to my card to compete with it. Here I cut several frosty colors of glitter foam and added just an embossed background for this simple winter card.
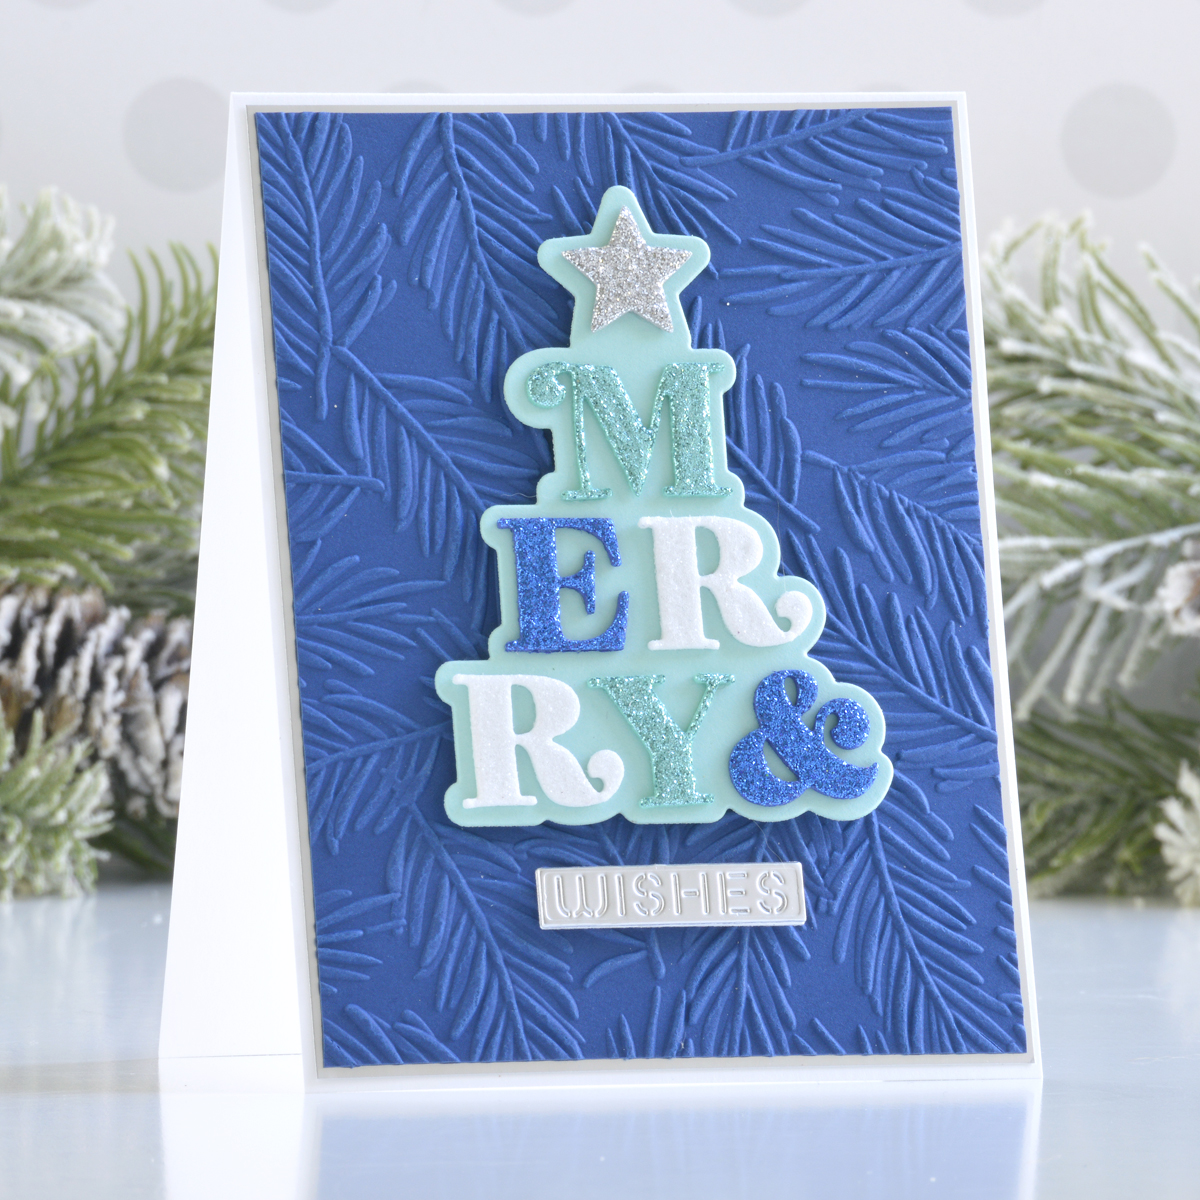
Die-cut Silver, Teal, Blue, and White Glitter Foam Sheets using the Merry & Bright Die Set and adhere them to the base cut from Waterfall Cardstock using liquid glue. Die cut the secondary sentiment from Mirror Silver Cardstock.
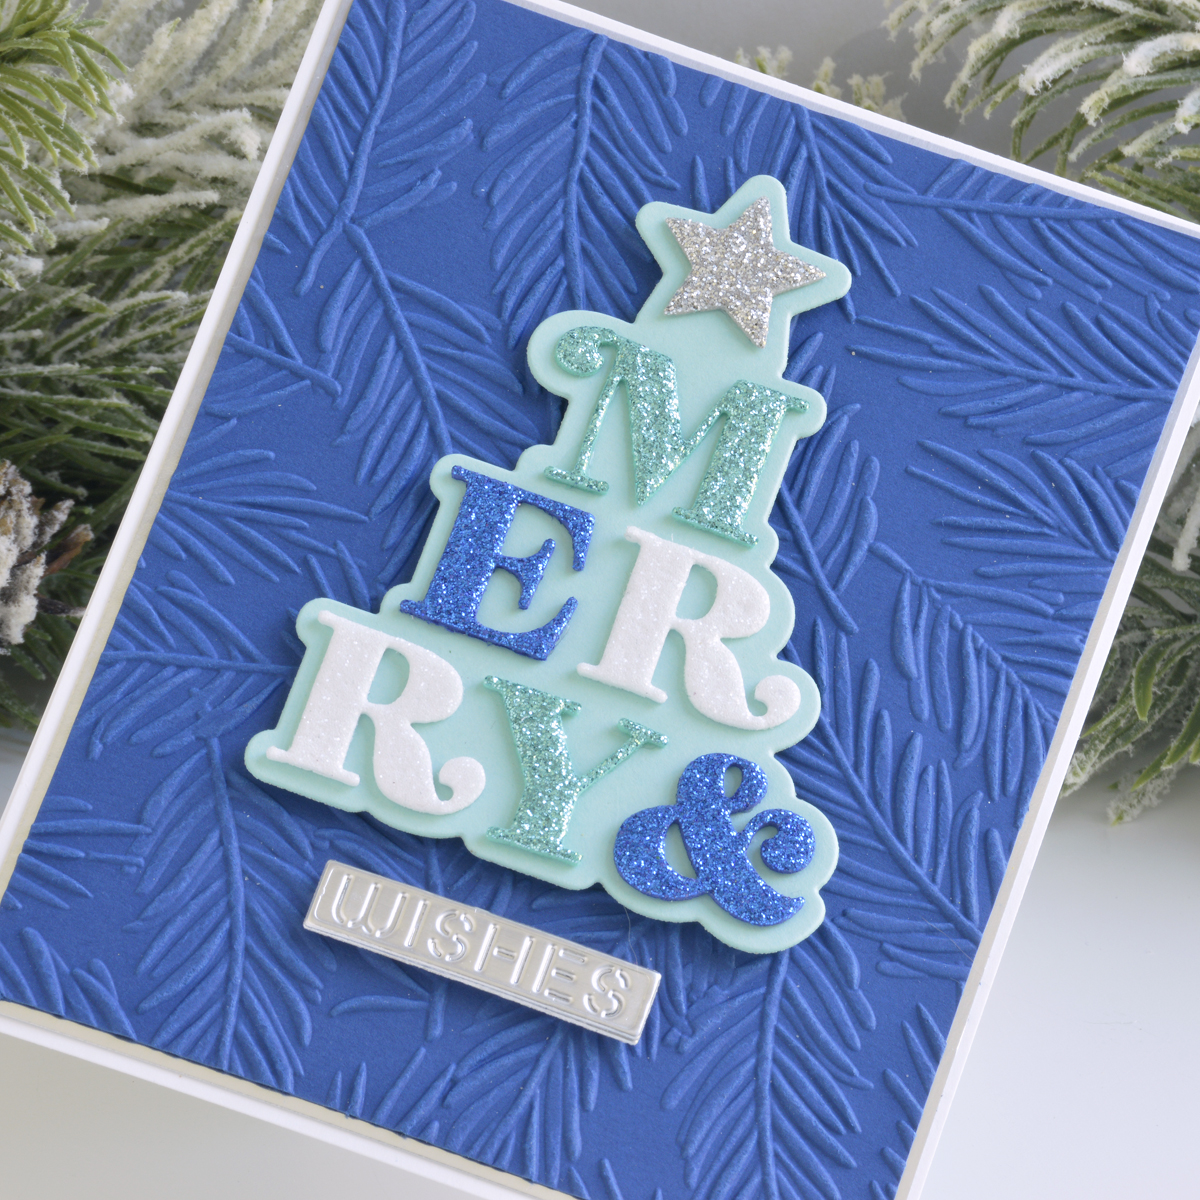
Trim a piece of Cosmic Sky Cardstock to 4 x 5.25”, emboss it with the Peppermint Stripe Embossing Folder, mat it with Mirror Silver Cardstock, and adhere it to a top-folding A2-sized white card base. Pop the tree and sentiment up on top of the card front with foam adhesive.
Merry Little Christmas Card
Lastly, I wanted to create another pretty background with that Peppermint Stripe Embossing Folder to show off some of those beautiful flowers from the Petite Blooms & Sentiments Die Set.
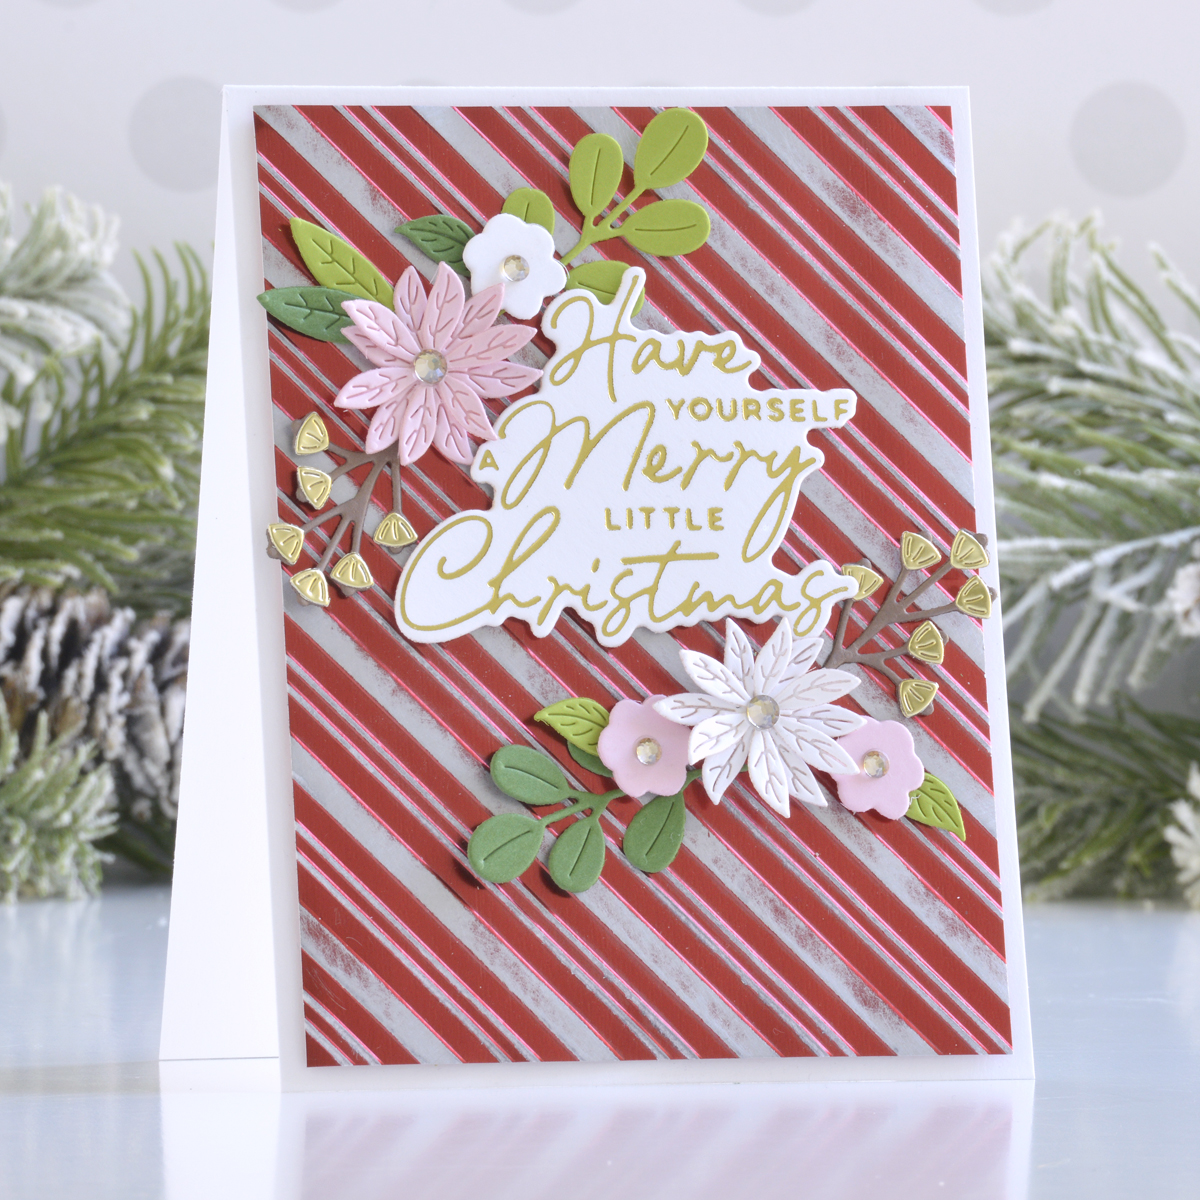
Trim a piece of Mirror Red Cardstock to 4” x 5.25”, emboss it with the Peppermint Stripe Embossing Folder, and then lightly sand the red finish off of the raised areas using a sanding block. This will reveal a brushed silver look that is perfect for holiday cards! Mount the panel onto a top-folding A2-sized white card base with foam adhesive.

Apply Gold Hot Foil to white cardstock using one of the sentiments from the A Merry Little Christmas Sentiments Glimmer Plate Set, cut it out with the coordinating die, and pop it up on top of the card front with foam adhesive. Die cut white, Pink Sand, Fern, Rainforest, Latte, and Mirror Gold Cardstock using the Petite Blooms & Sentiments Die Set and assemble in two bunches around the sentiment. Embellish the flower centers with Gold Mix Gems.
Spellbinders Supplies:

Other supplies
White heavyweight cardstock, Festive Berries Distress Ink, sanding block, tape runner, foam adhesive.
I hope you enjoyed these fun holiday cards and thanks so much for stopping by today. You can find more inspiration over at my blog AnnieBWills.com or on Instagram.
NEW Clear Stamps | Flowers & Butterflies with Brenda Noelke
April 2019 Small Die of the Month is Here – Layered Colorful Blooms