Autumn Garden & Foliage Cards
Hello and welcome, creative friends! It’s Dilay here from JustCallMeDee.com, and I’m thrilled to return for another guest post on the Spellbinders blog! Today, I’ll be showcasing a few projects featuring the beautiful Birds & Bees Garden collection. I hope you find my creations inspiring and feel motivated to get crafty. Let’s dive right in!
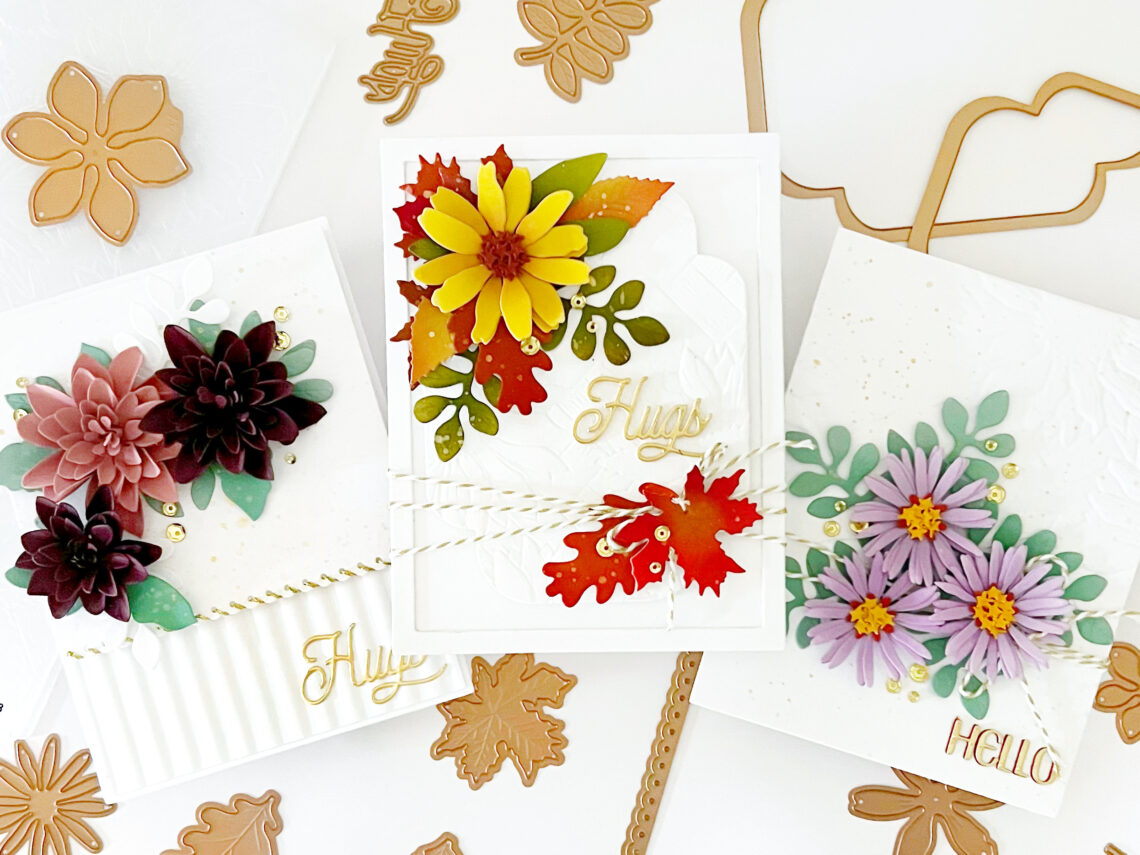
Autumn Foliage Hugs
For the first card, I created a subtle yet dimensional background by die-cutting a frame using two of the largest Precision A2 Layering dies. Then, I die-cut another piece of white cardstock with the third largest of the Essential Four Petal Labels dies and embossed it using the Basket of Sunflowers 3D Embossing Folder. Once completed, I adhered the frame and the embossed Four Petal Label die-cut to the center of a top-folding A2-sized card base.
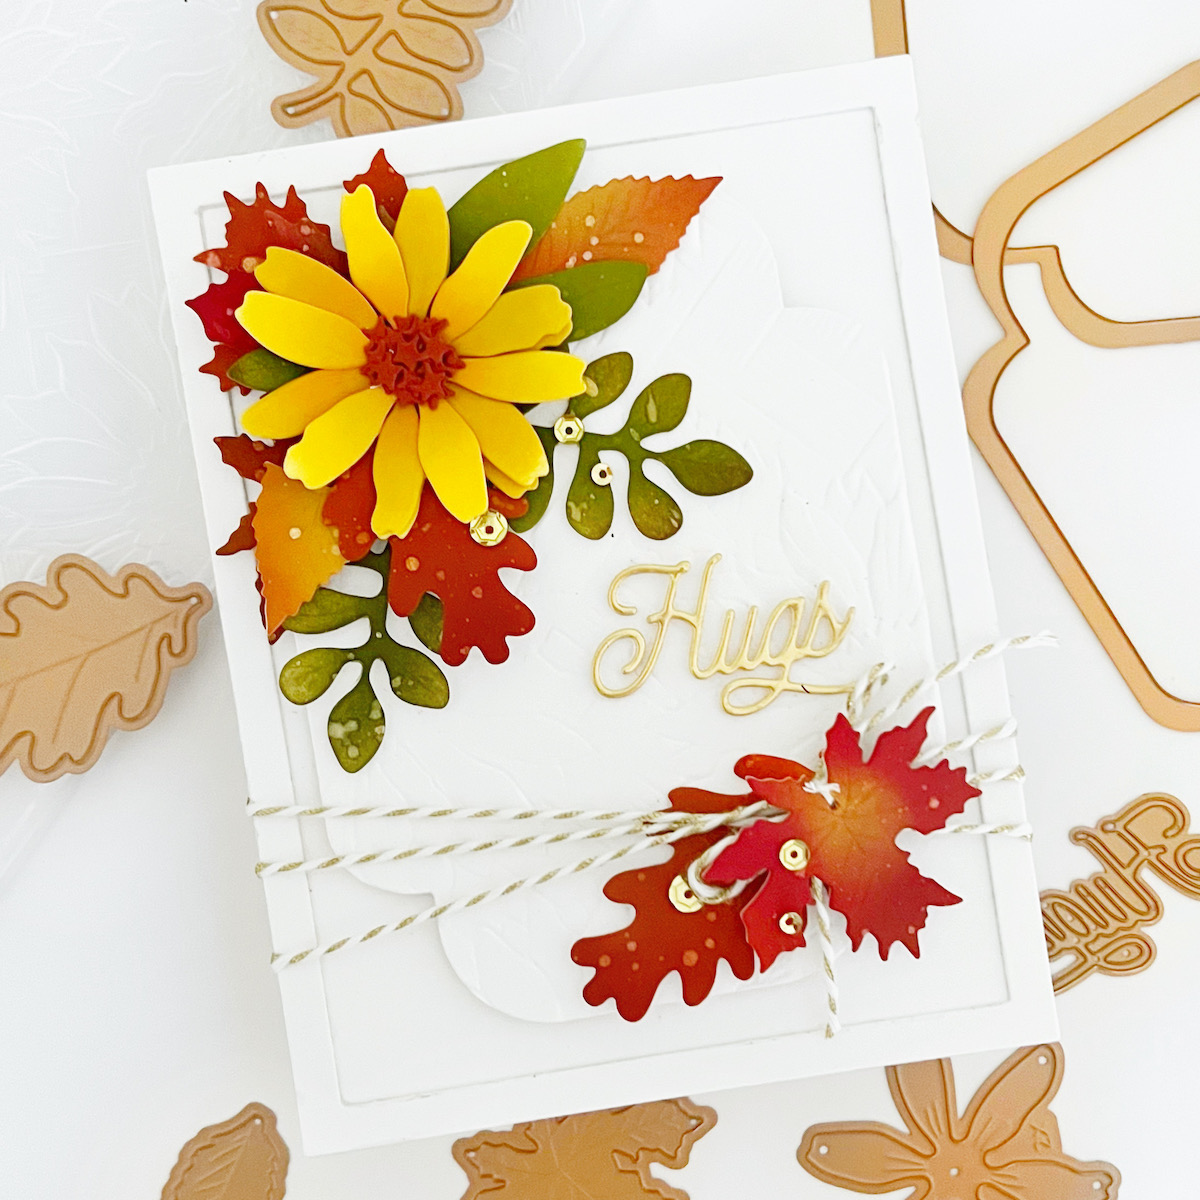
For a pop of color, I die-cut and ink-blended leaves from the Autumn Foliage die set. These were used to create a nest for the die-cut flower created using the Black Eyed Susan dies. After ink-blending them all, I adhered most of the foliage down and then used foam adhesive to raise the flower. With the few remaining pieces of foliage, I decided to wrap a piece of gold and white twine and then attach the leaves to it. To finish, I die-cut ‘hugs’ from the Mix & Match Holiday Greetings die set and adhered it to the middle of the card.
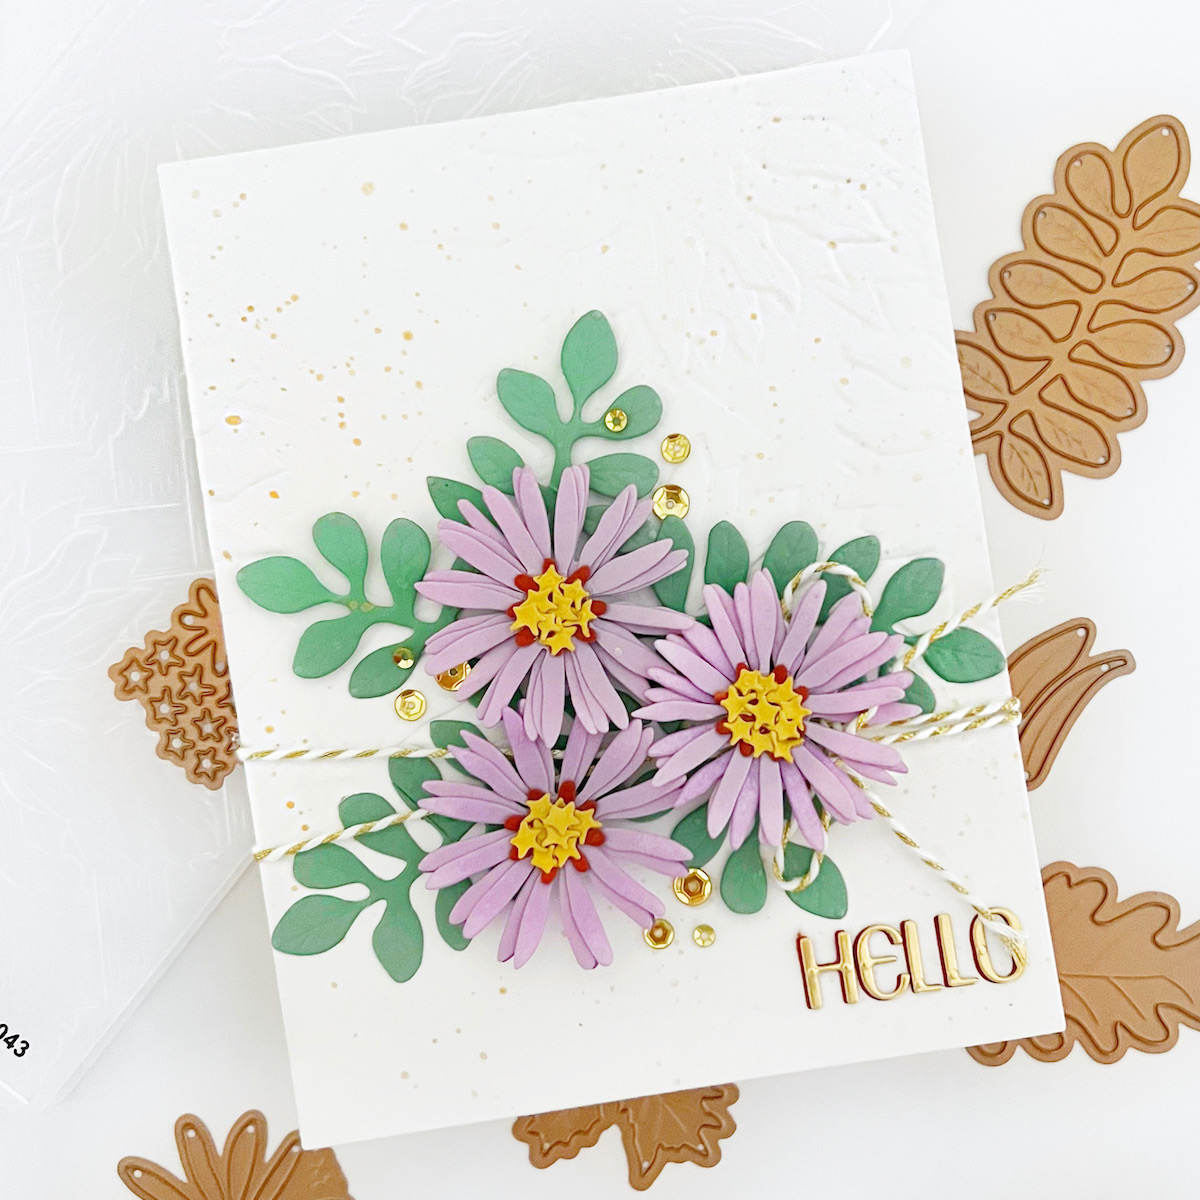
Aster Blooms Hello
For this card, I partially (about 3/4 down) embossed an A2-sized piece of white cardstock with the Basket of Sunflowers 3D Embossing folder. I splattered the embossed card front with gold paint and set it aside to dry. Once it was dry, I wrapped a piece of twine around the card front and adhered it to an A2 top-folding card base. Next, I die-cut leaves from the Autumn Foliage die set using Sage cardstock and Aster blooms in Purple Mist and Saffron cardstock, then adhered them to the top of the card front. To finish, I die-cut ‘hello’ from the Stylish Oval Hello You Floral die set in gold and Pomegranate cardstock and adhered it to the bottom corner.
Pom Pom Dahlia Hugs
For my final card, I created a background with depth and dimension using the Corrugated 3D Embossing Folder. I cut it down to 5” x 4.75” and adhered it on top of a top-folding A2-sized card base. Next, I cut another piece of white cardstock down to 5” x 4.75” and splattered it with gold paint. For a little extra sparkle and texture, I die-cut the edge using the Winter Borders die and wove it through with gold embroidery floss. Once completed, I adhered that over the embossed card front.
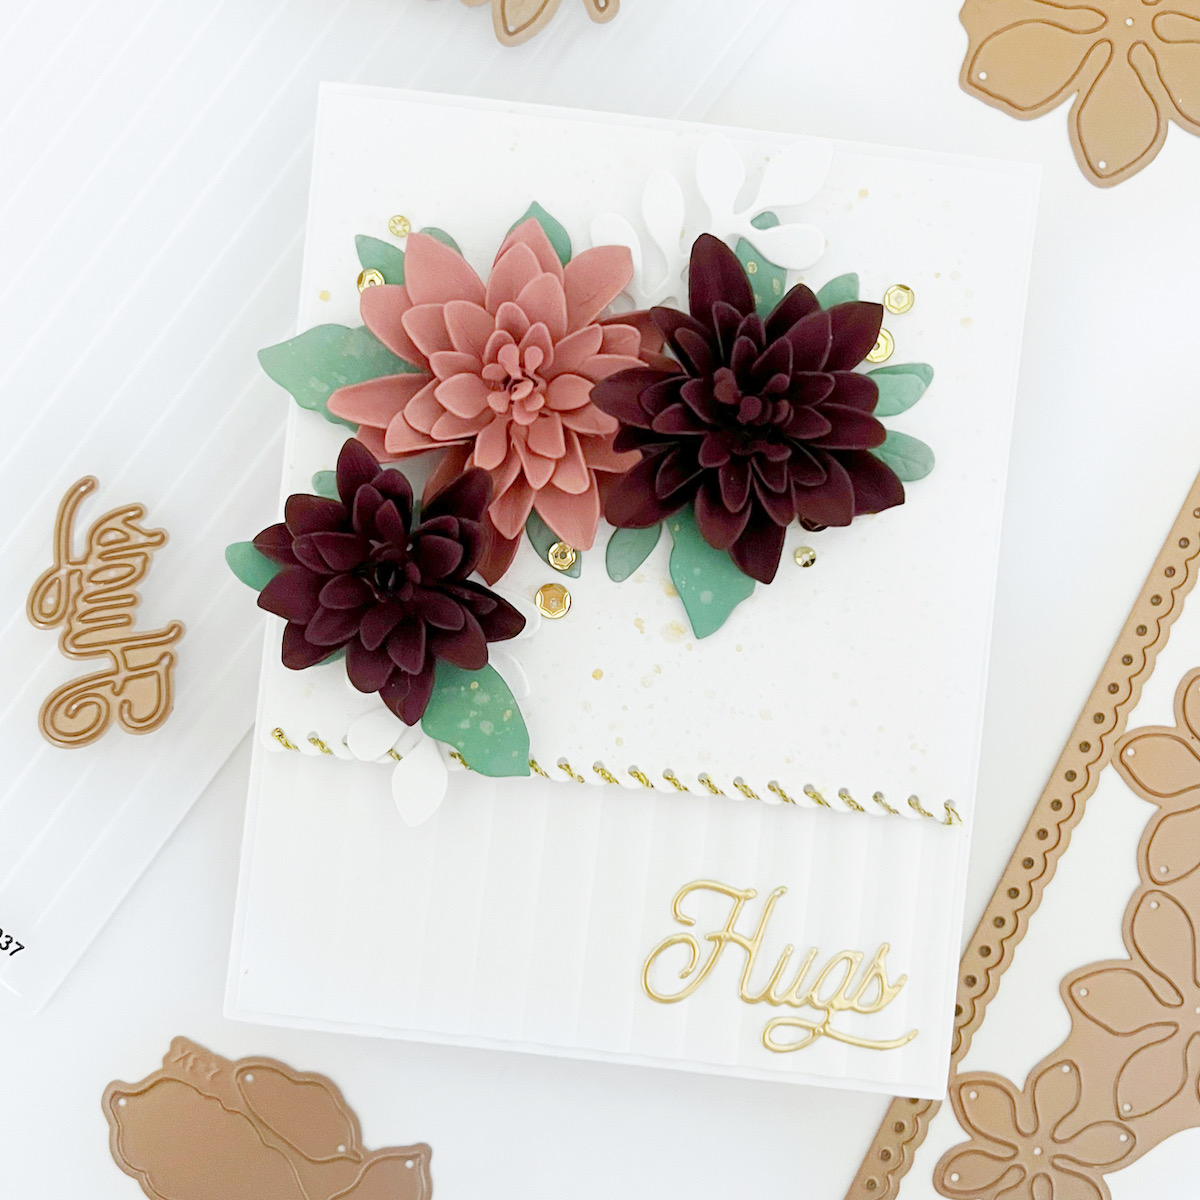
For the blooms, I die-cut the Pom Pom Dahlia and Ladybugs using Mahogany and Dahlia cardstock and the leaves from Sage cardstock. I shaped them using Susan’s Garden Ultimate Tool Kit and assembled them before adhering them to the card front. I also die-cut two extra white leaves from the Autumn Foliage die set and tucked those in behind the Pom Pom Dahlias. Finally, I finished by adding ‘Hugs’ from the previous card and more gold sequins.
Spellbinders Supplies:

I hope you enjoyed reading about these cards and are now inspired to create your own beautiful Autumn Garden! Thank you so much for joining me. If you have any questions or thoughts to share, please feel free to leave a comment below. Your feedback is always appreciated. Stay tuned for more exciting content coming your way soon!
Destinations Japan Inspiration | Cardmaking Ideas with Mayline
12 Days of Stitchmas Advent Calendar | Day 7 with Nichol Spohr