Adding Sprays and Inks to Textured Backgrounds
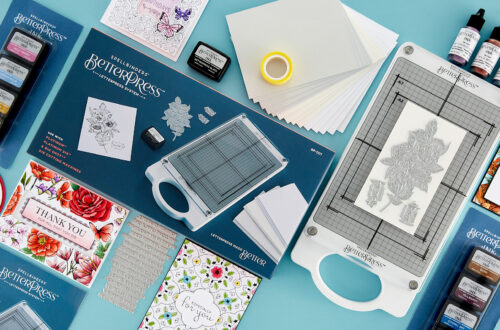
Hi everyone. Alanna Moses from EmbellishCraftLove.com and I’m super happy to be guesting again on the Spellbinders blog. I will be sharing with you three different projects using products from the new January 2024 Exclusive collection. This is an exclusive collection to Spellbinders with just two items which include the Kaleidoscope Garden Press Plate and the Colorful Burst Flower die set.
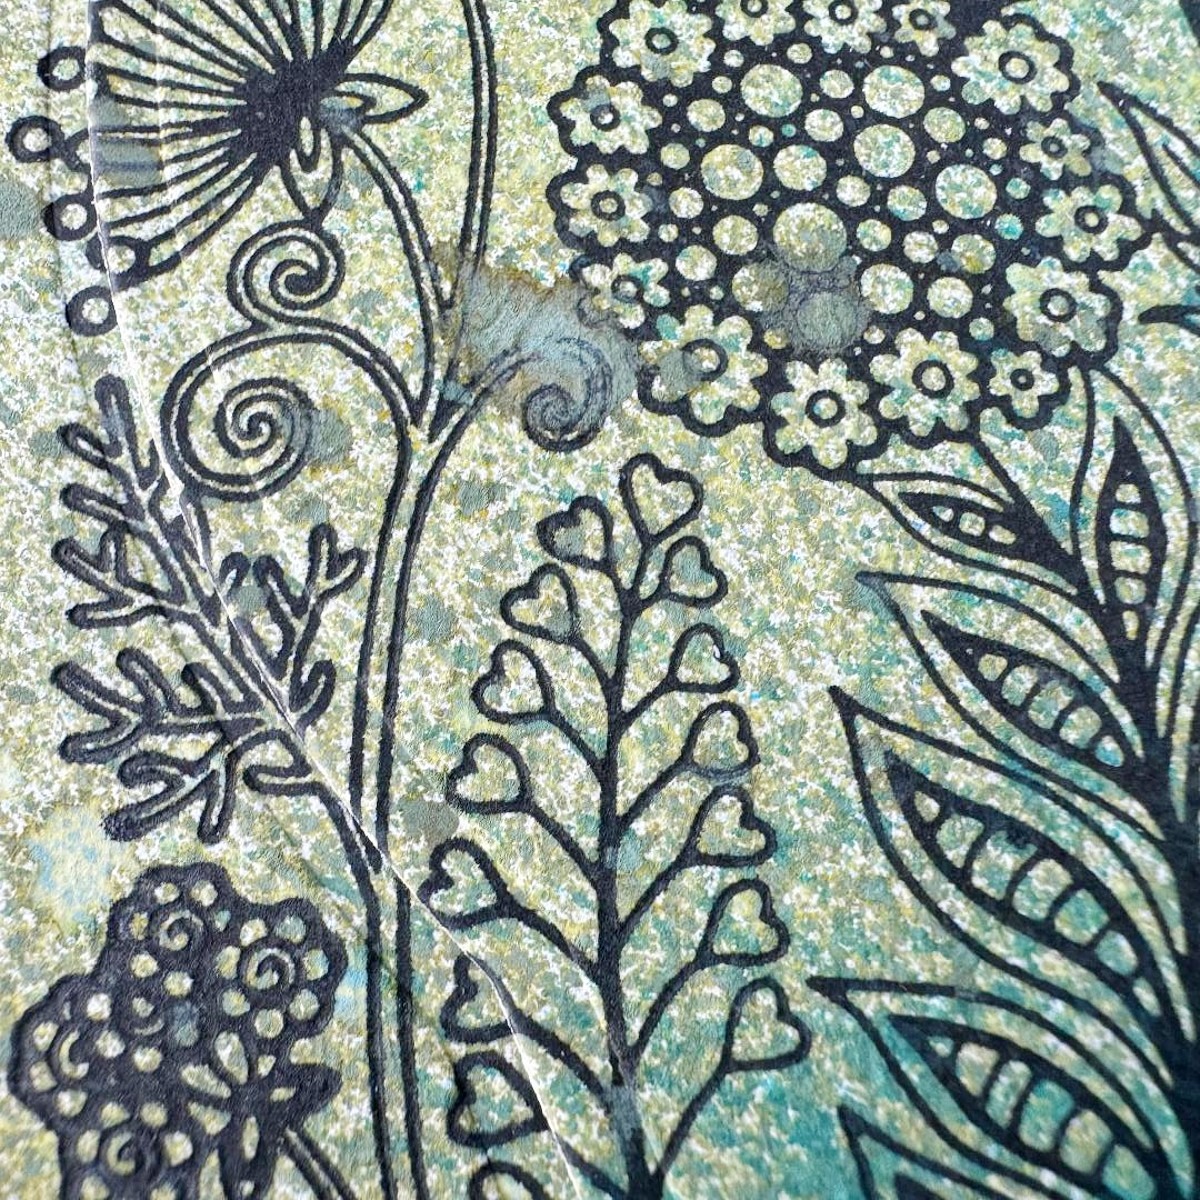
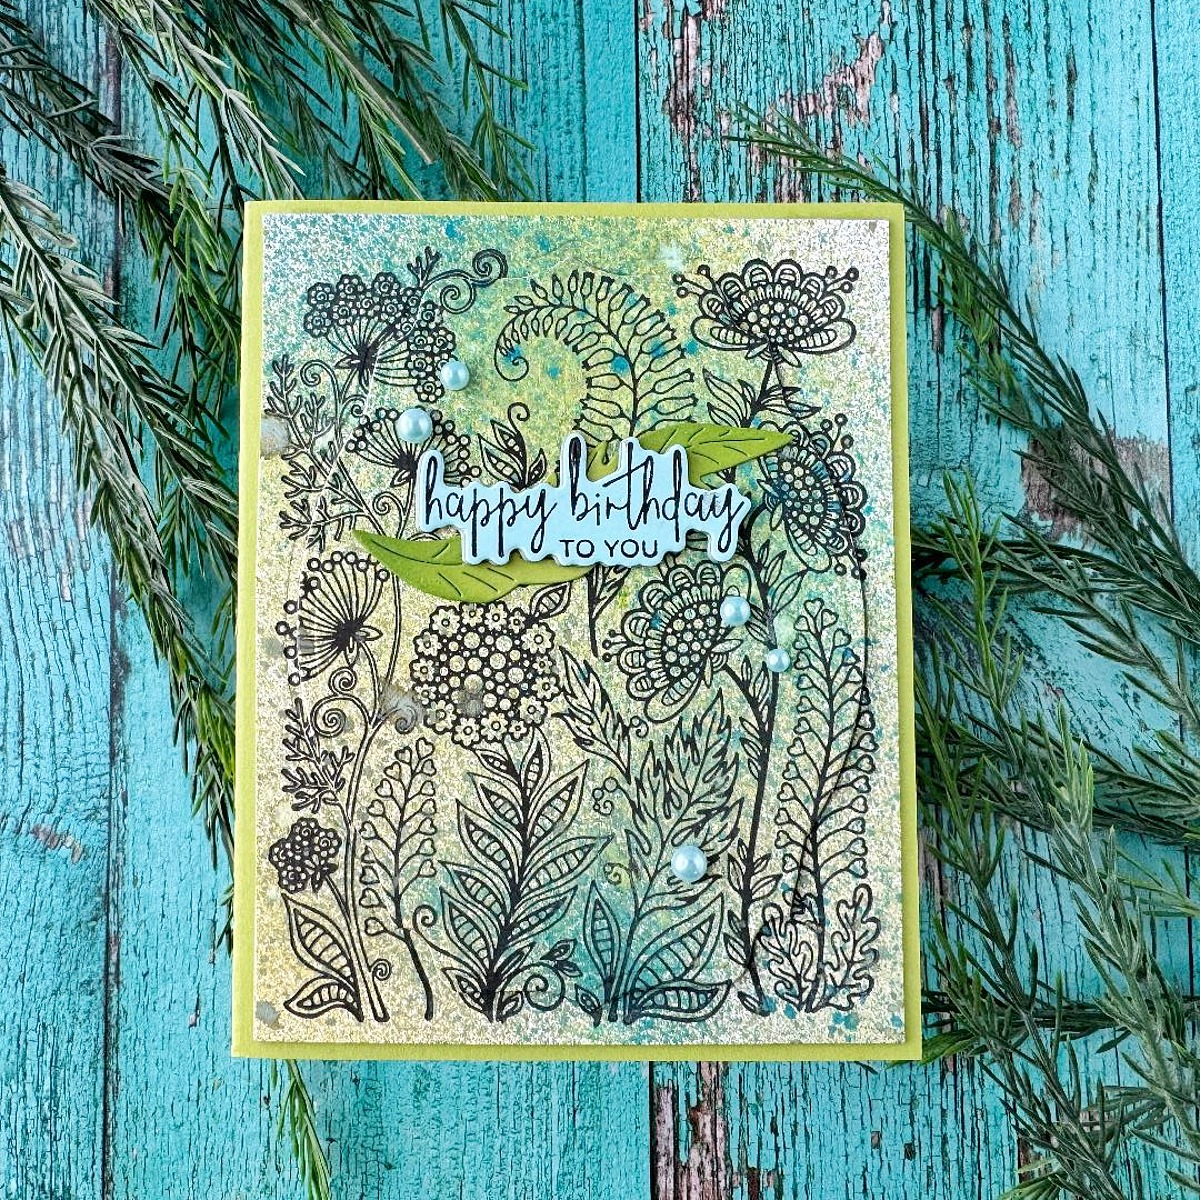
For my first card, I started by taking a piece of the Porcelain BetterPress A2 Cotton Card Panels and I lightly misted it with some water. I then took two colors of Distress Oxide Sprays, in Salty Ocean and Peeled Paint and added some color to the background. Once I was happy with the amount of color I had, I spritzed on a little more water to help move the colors just a bit more. I sat this aside to dry and got to work prepping my BetterPress system. I took the Kaleidoscope Garden Press Plate and centered it in the center of my platform. I inked it up with Black Betterpress ink and then adhered my panel with some of Spellbinders Best Ever Craft Tape. I ran everything through my Platinum 6 die-cutting machine and I was left with a beautiful deep impression. I wish photos could truly capture the beautiful letterpress effect.
While I was working with my BetterPress system, I took one of the sentiments from the A Little Message Sentiments Press Plate & Die set and inked it up running it through my BetterPress system. I took the coordinating die and die cut it out and ran the die two more times through my Platinum 6 machine so I could build up the dimension. I sat this aside and then got to work on assembling my card.
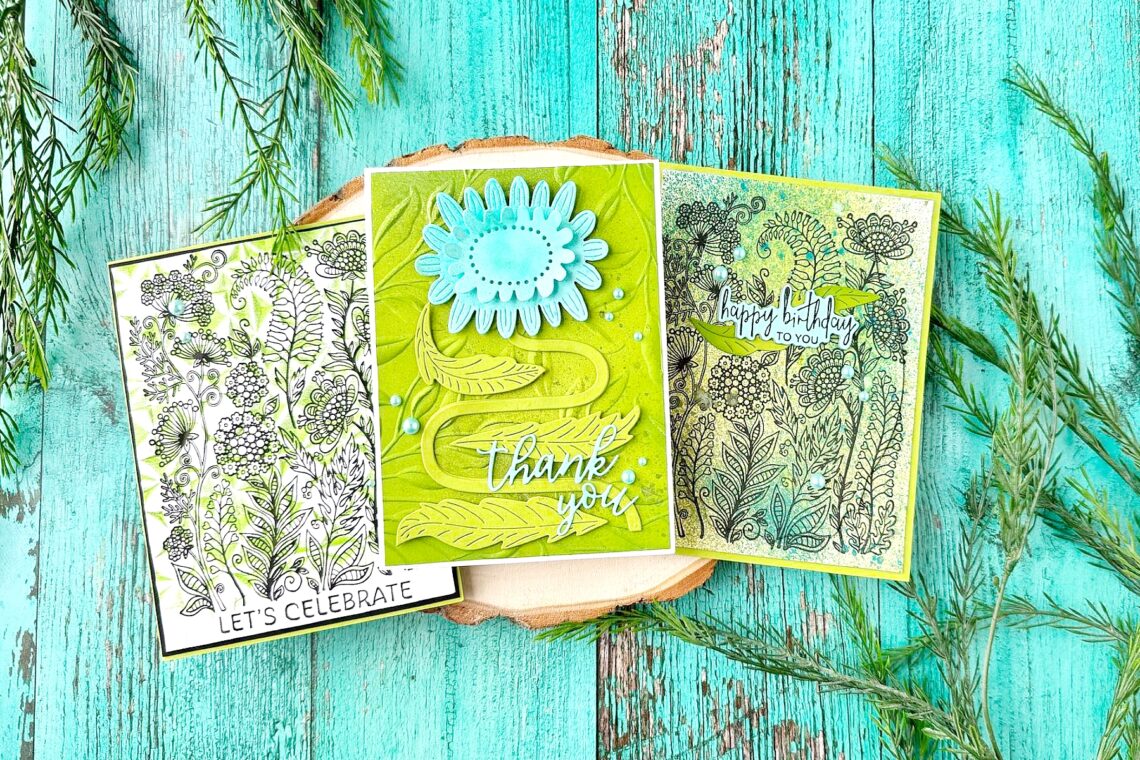
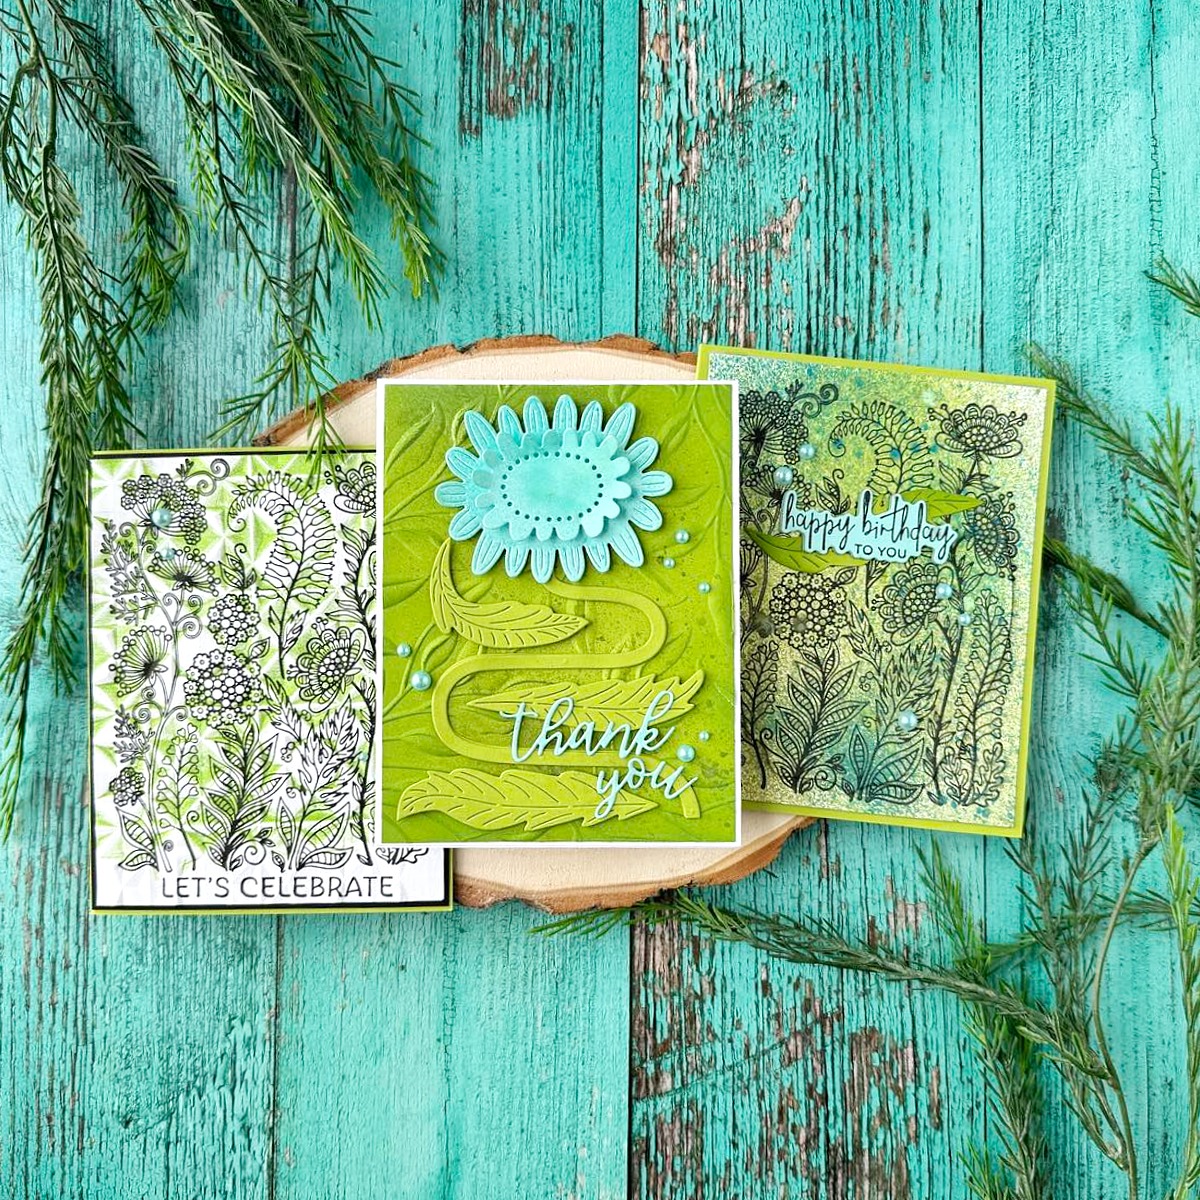
After this, I took the largest die from the Nestabilities Labels Thirty-Six die collection and centered it over my inked and pressed panel and die-cut the large frame from it. I kept the outer portion and added it to a notecard that I had made with Spellbinders Rainforest cardstock. I then took the inner portion and added some thicker foam tape behind it and then laid it back inside matching up the inking. I love the dimension this gives.
I then took one of the leaf dies from the Colorful Burst Flower die set and die-cut it using the same Rainforest cardstock. I added some green ink around the edges to give a bit of shading. I then added over top of the leaf my sentiment. I finished off the card by adding in some Fashion Topaz Color Essential Pearl Dots.
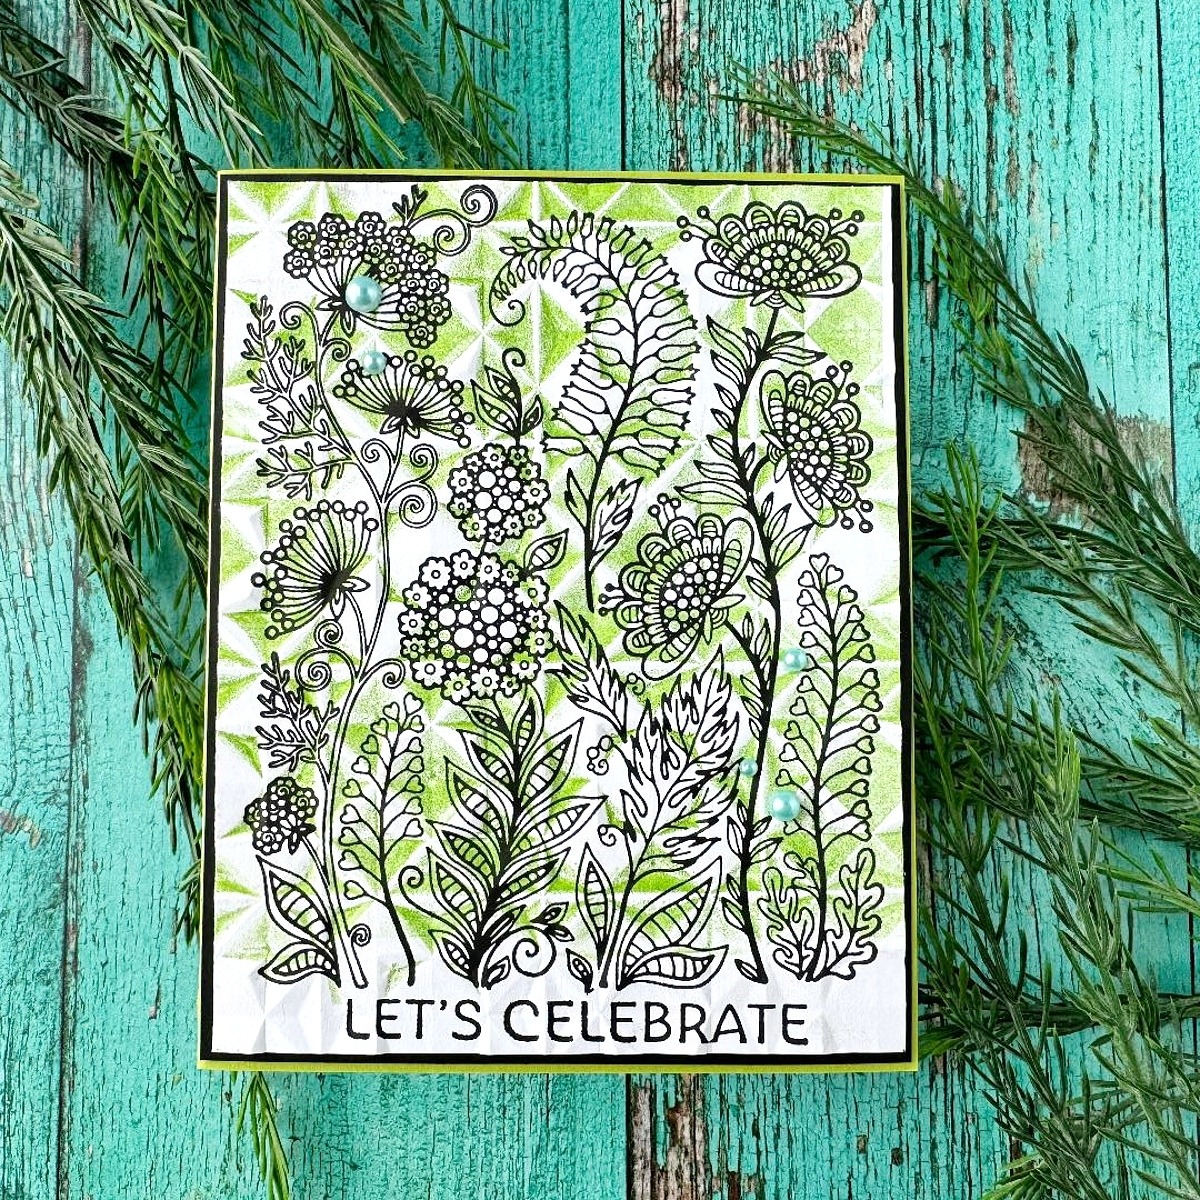
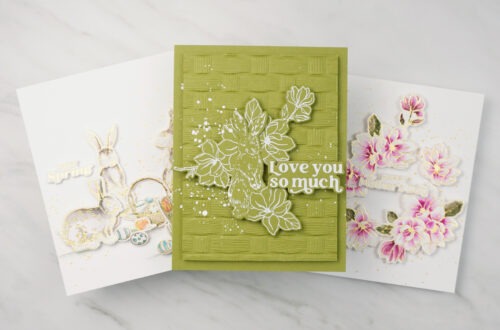
For my second card, I again started by inking up the Kaleidoscope Garden Press Plate just as I did in the card before using the same paper and ink. This time, though, I added as sentiment from the Happy Birthday Celebrate Press Plate set at the bottom. I inked everything up at the same time. I then took out the Geo Quilt 3D Embossing Folder and I added some green ink over top one of the sides. I added my inked panel inside the embossing folder, making sure not to cover the sentiment area as I didn’t want that part inked.
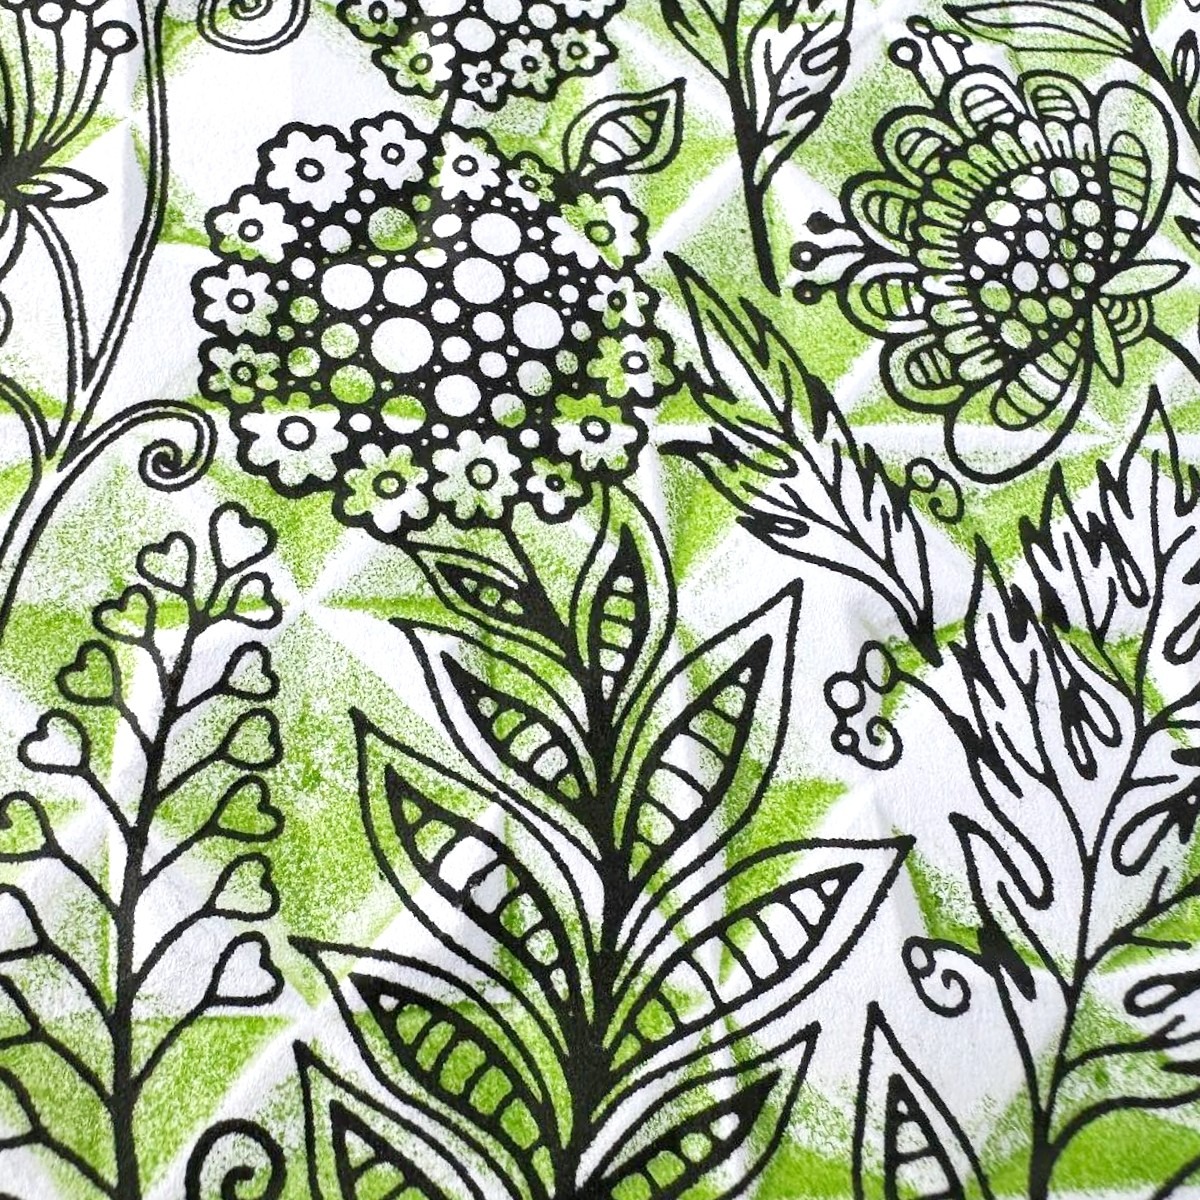
I ran the panel through my Platinum 6 machine using the Universal Plate System and what I ended up with was not only an embossed letterpress image but the green ink as well. I really liked how this turned out. I added my inked and embossed panel to a piece of Spellbinders Onyx cardstock and then added it to a notecard that I had made with the Rainforest cardstock from Spellbinders. As I did with the first card, I finished off this card with some of the Fashion Topaz Color Essential Pearl Dots.
For my final card, I am showcasing the super fun Colorful Burst Flower die set. I started by die-cutting several of the dies in both the Rainforest and Waterfall cardstocks from Spellbinders. I sat those aside and then took a piece of Rainforest cardstock and ran it through my Platinum 6 machine with the Leafy 3D embossing folder. I trimmed the panel down and then blended on some green ink. I then took the Wicked Elixir Distress Mica Stain and added some of that to my embossed panel. When it was dry, I added it to a white notecard. I then added the curved die cuts which I did two of for a little extra dimension. I figured out where I wanted that to go and then I added three of the leaf die cuts surrounding it. Those were popped up with foam tape.
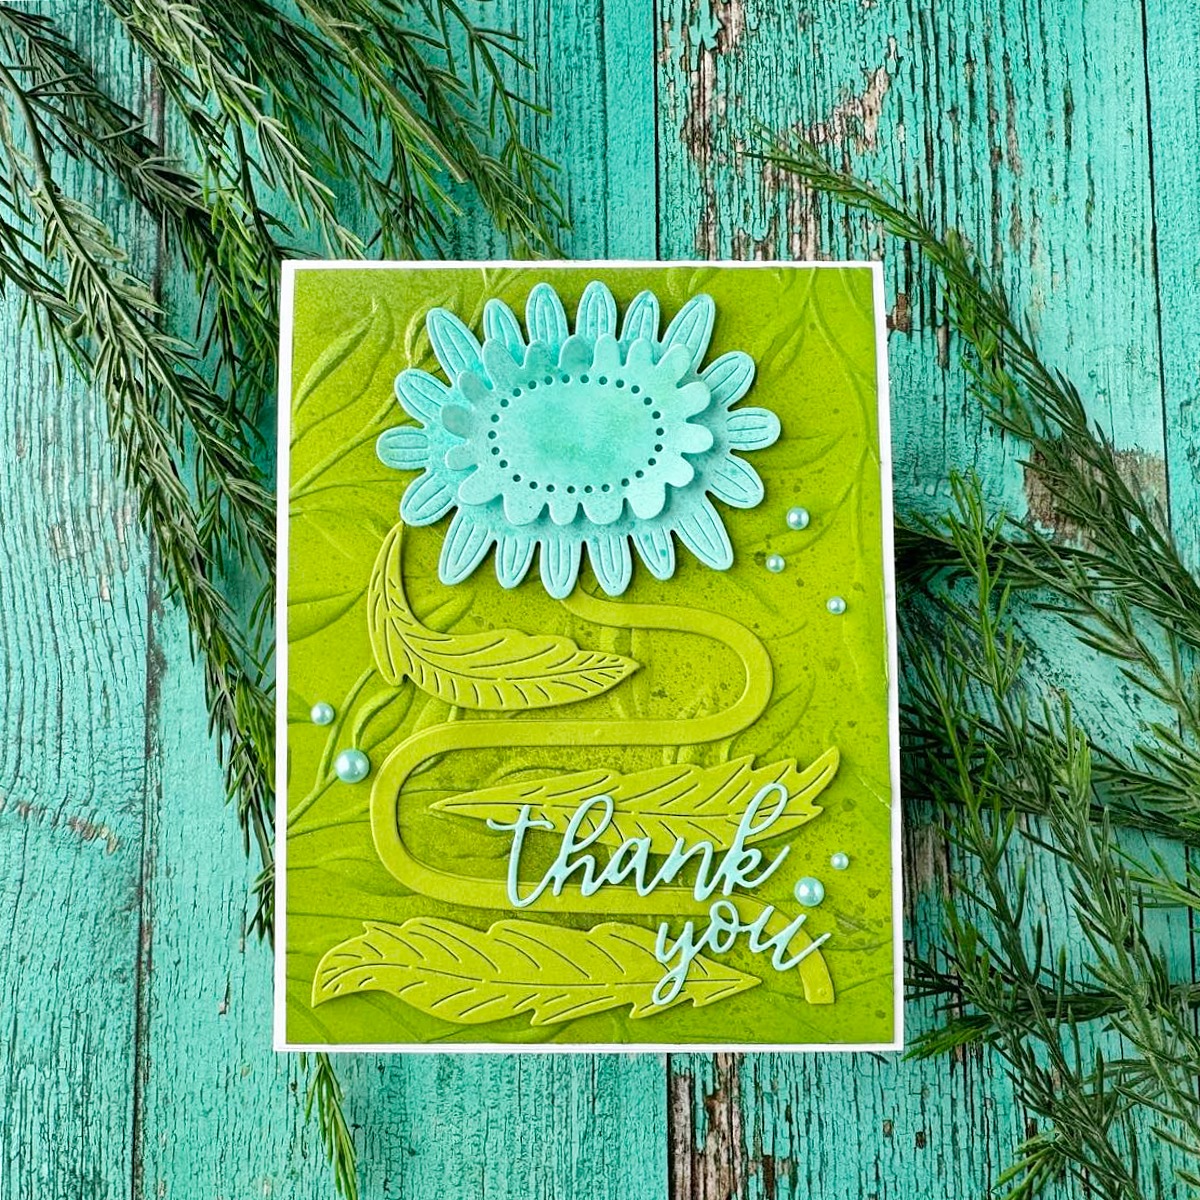
I decided my blue flower needed just a bit of something, so I sprayed both portions with the Wonderland Distress Mica Stain. I added foam tape to both portions to give lots of dimension. I then added a die-cut sentiment which is from the Serenade Sentiments die set. And as I did with the other two cards, I finished the card off with some of the Fashion Topaz Color Essential Pearl Dots.
Spellbinders Supplies:

Other supplies: InkOn3 Goddess Green ink, Salty Ocean Distress Oxide Spray, Peeled Paint Distress Oxide Spray, Wicked Elixir Distress Mica Spray Stain, Wonderland Distress Mica Stain, liquid adhesive, foam tape
I hope you’ve been inspired by my projects today. I appreciate you visiting the Spellbinders blog today. I would love it if you would come find me on my blog, FaceBook or Instagram. Happy crafting! ~ Alanna
As Easy as ABC – Alphabet Plates 3 Ways
3 Expert Monochrome Techniques featuring Letter Pressed Cards