Colorful Floral Designs With the Let’s Celebrate Collection
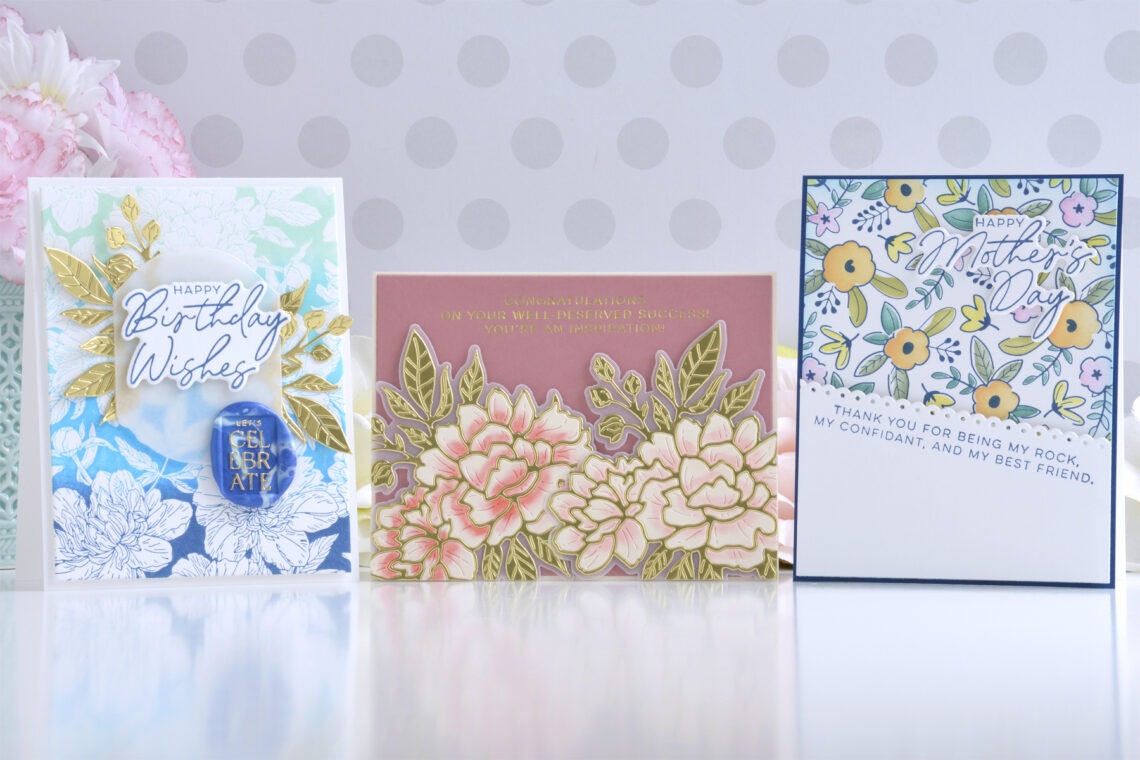
Hi there, this is Annie Williams and I’m excited to be back on the blog today to share a couple of colorful cards made with the new Let’s Celebrate Collection by Yana Smakula. The gorgeous floral designs and sweet sentiments in the collection inspired me to create three cards in pretty spring color schemes for all different occasions.
Birthday In Blues Card
The floral design in the Peony Background Press Plate is so intricate it reminded me a little of toile, so I inked it in several different shades of blue to create a backdrop for this fun floral birthday card.
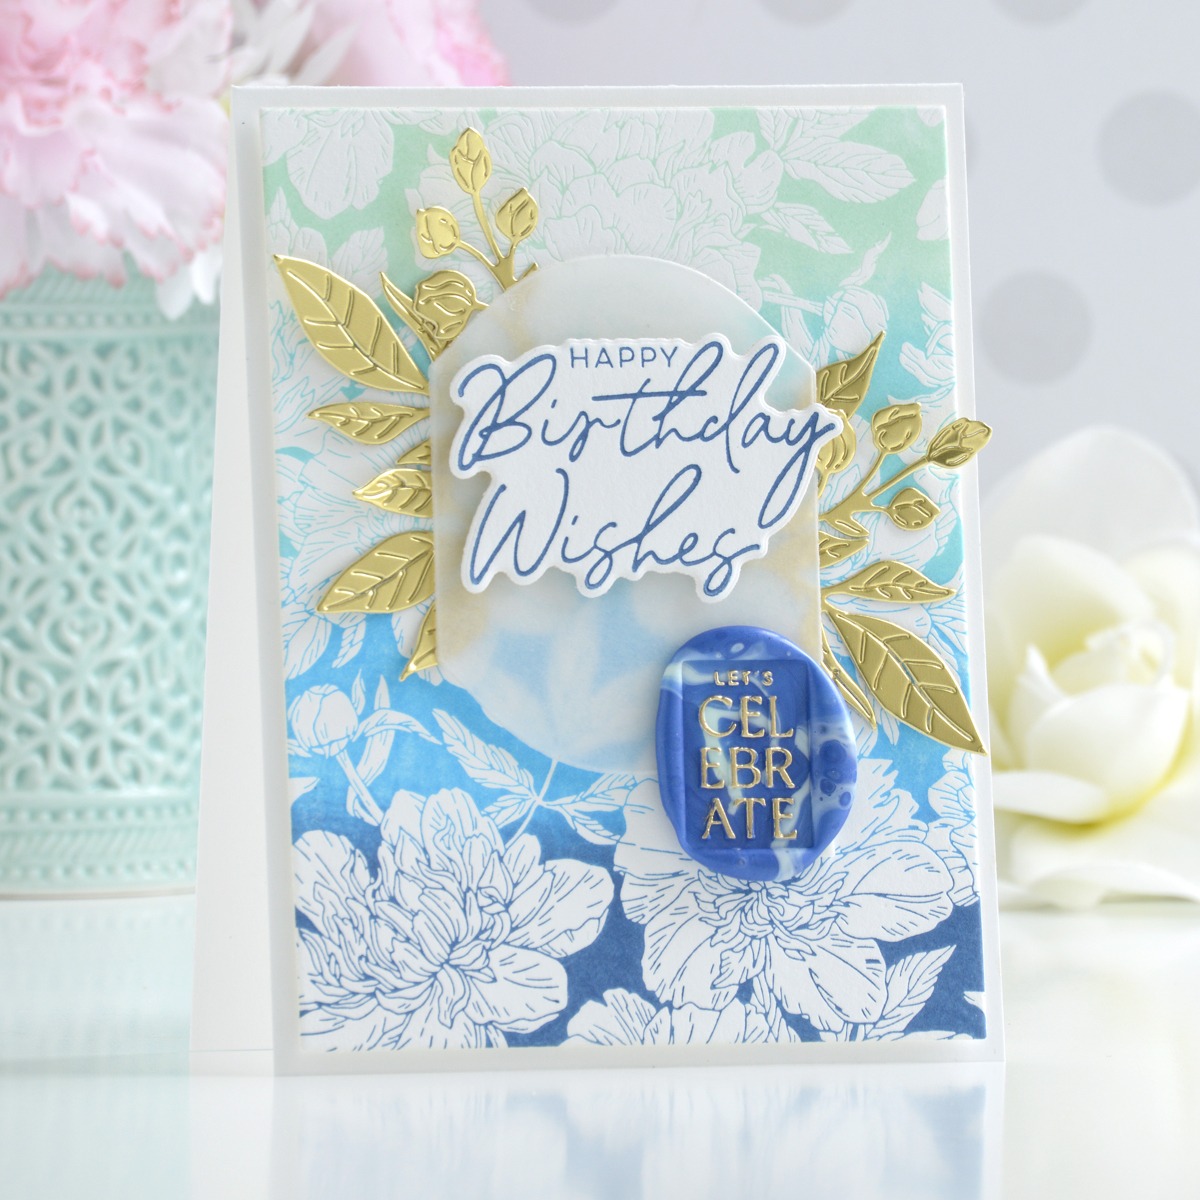
Apply Cruise, Teal Topaz, Azure, and Cosmic Sky BetterPress Ink to the Peony Background Press Plate and press the design onto Porcelain Cotton Cardstock. Trim the panel down to 4” x 5.25” and adhere it to a top-folding A2-sized white card base with foam adhesive. Press the sentiment from the Let’s Celebrate Sentiments Press Plate Set onto Porcelain Cotton Cardstock using Cosmic Sky BetterPress Ink and cut it out with the coordinating die.
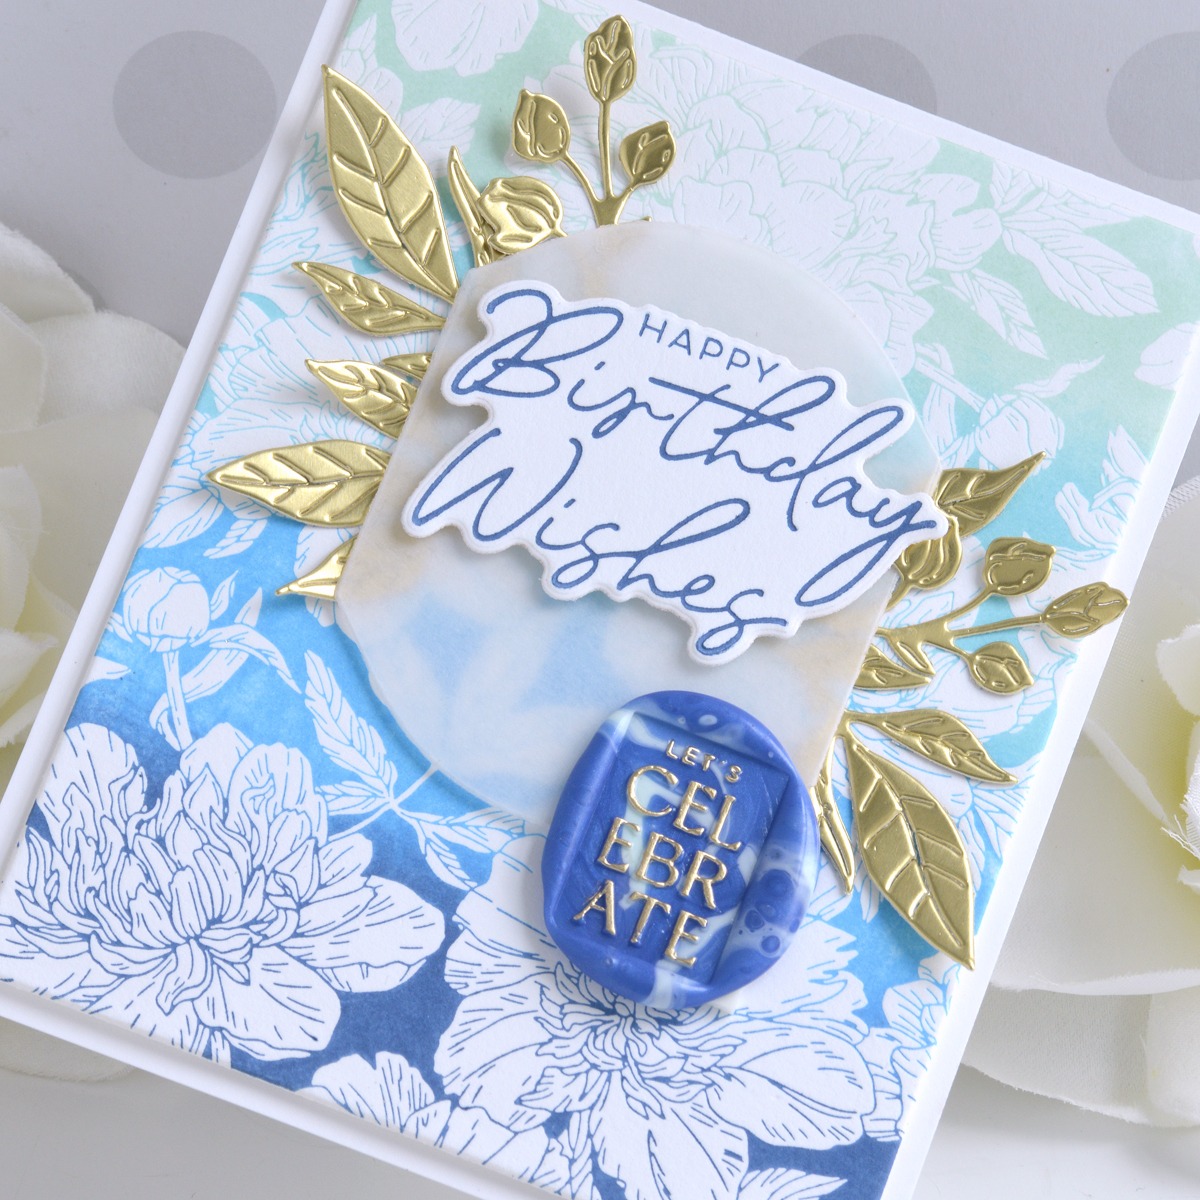
Die cut a piece of heavyweight vellum using one of the Mirrored Arch Dies and Mirror Gold Cardstock using the Peony Celebration Die Set. Trim off the buds and leaves from the gold die-cut and adhere behind the vellum die-cut to form a little floral spray before adhering the sentiment on top with foam adhesive. Melt Royal Blue and Pastel Aqua Wax Beads, press the Let’s Celebrate Wax Seal Stamp into it, and highlight the raised design with a gold metallic marker before adhering it to the card front.
Gilded Peony Congrats Card
Yana has designed another gorgeous floral bunch die-cut with the new Peony Celebration Die Set. I cut the border and leaves of this elegant design from gold cardstock to coordinate with some pretty gold foiling on this congrats card for a friend.
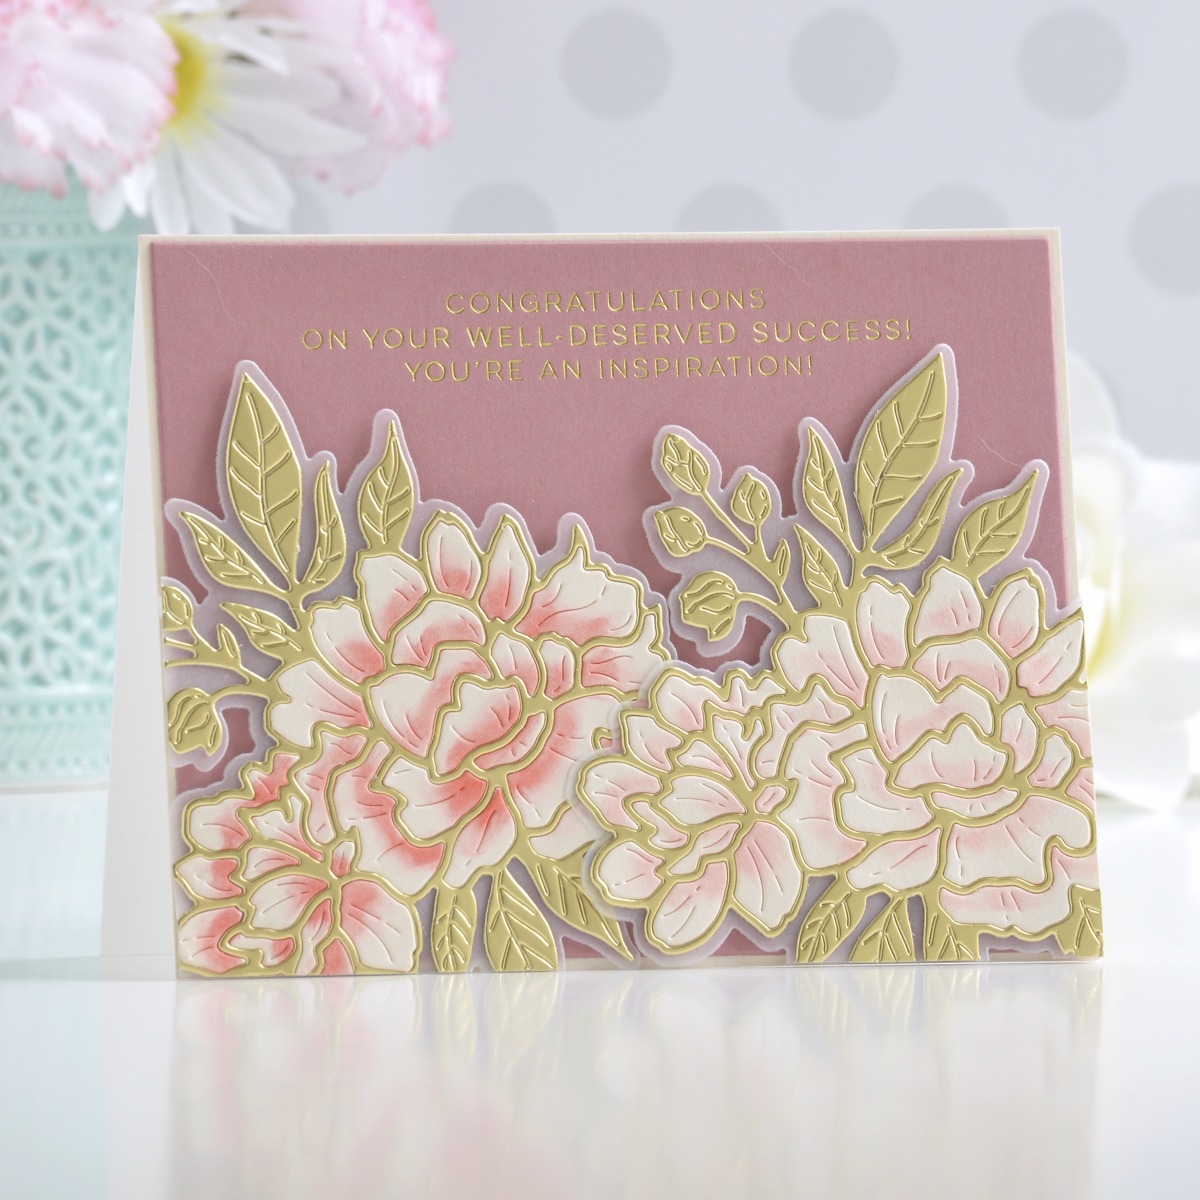
Die cut Mirror Gold and Barely Peach Cardstock twice using the peony die and heavyweight vellum using the base die from the Peony Celebration Die Set. Adhere just the gold border to the vellum base die-cut with liquid glue and ink the peach die-cuts with either Saltwater Taffy or Abandoned Coral Distress Ink before inlaying them within the gold outline.
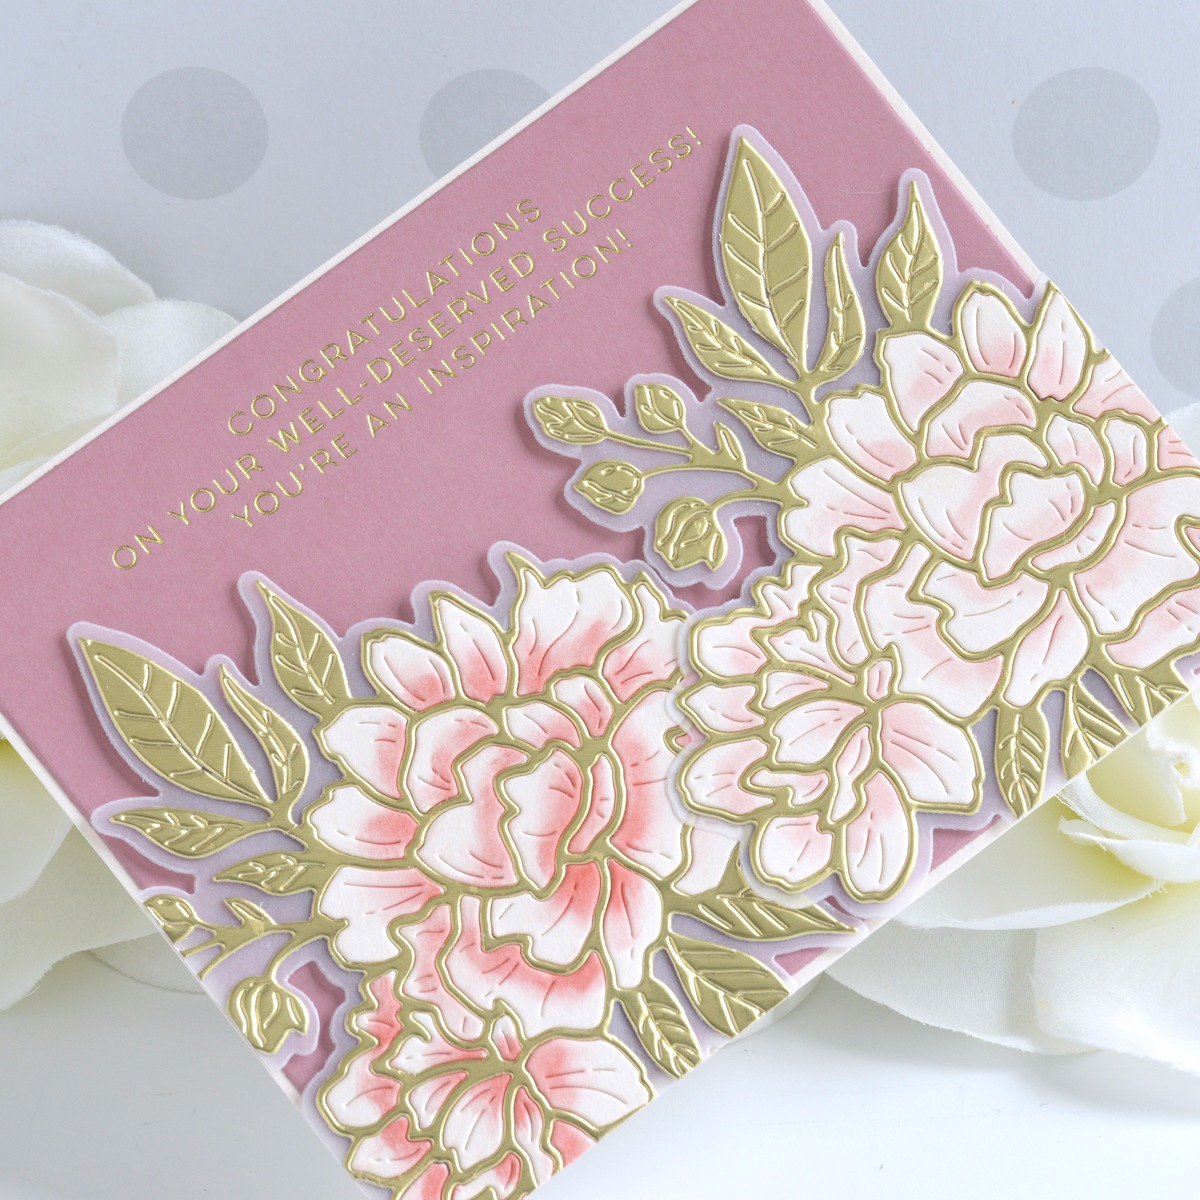
Apply Gold Hot Foil to the top of a piece of Velvet Rose Cardstock using one of the sentiments from the Let’s Celebrate Sentiments Press Plate Set. Trim the panel down to 4.125” x 5.375”, mat with Barely Peach Cardstock, and adhere to a top-folding A2-sized white card base. Pop the two peony die-cuts up on top of the card front with foam adhesive and trim off any overhanging pieces with scissors.
Floral Mother’s Day Card
The Floral Celebration Press Plate and Stencil Bundle create such a pretty and colorful background in no time at all. Here I inked it up in cooler tones for this easy floral Mother’s Day card.
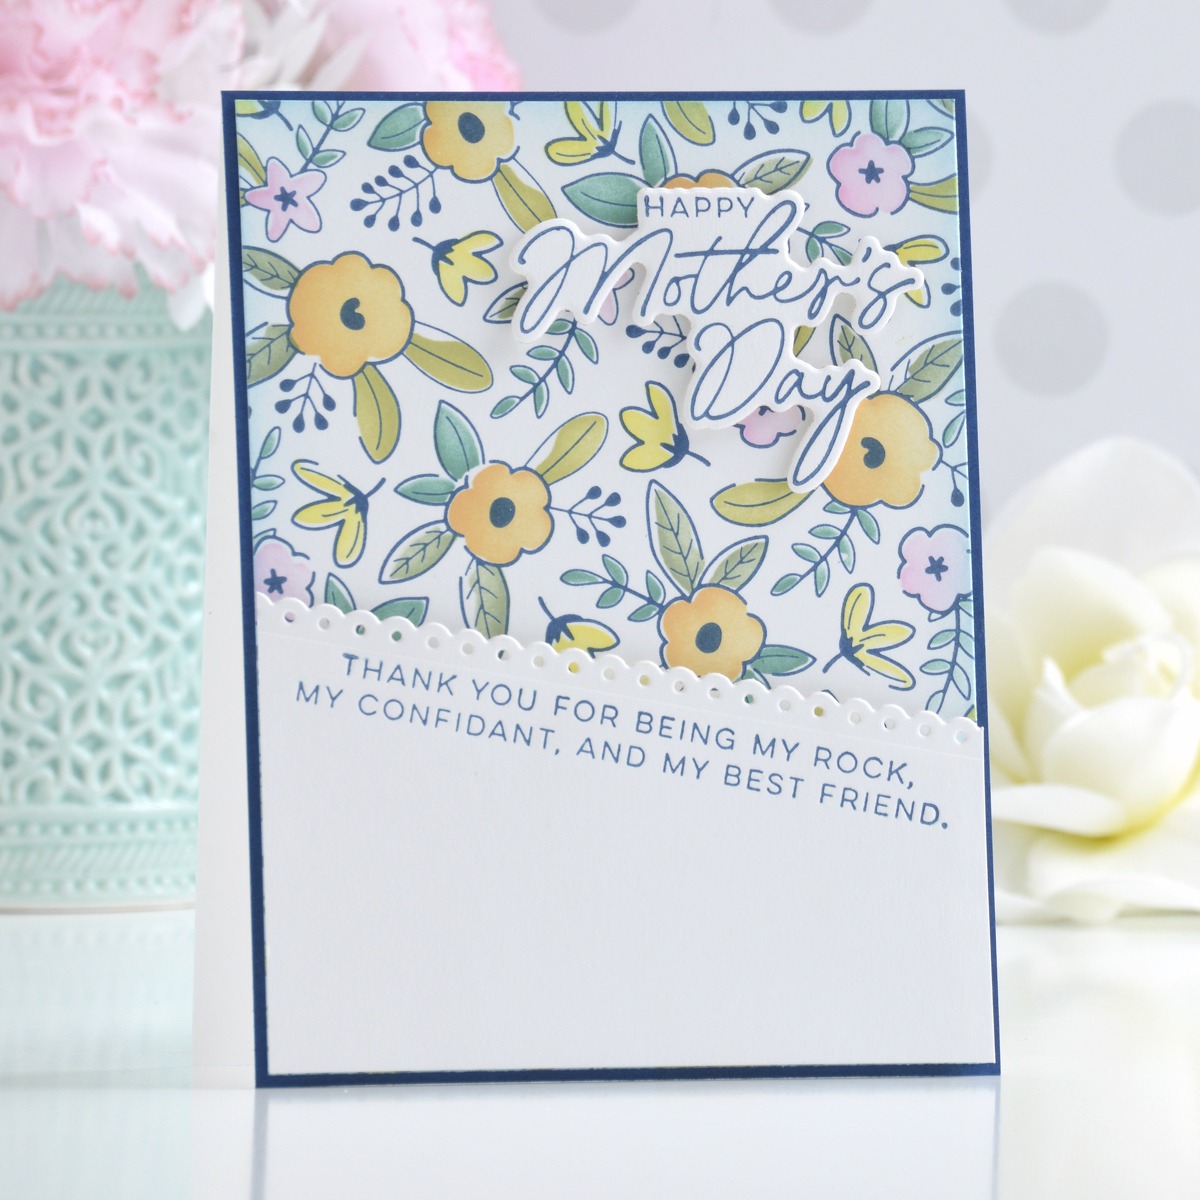
Apply Cosmic Sky BetterPress Ink to the Floral Celebration Press Plate and press it onto Porcelain Cotton Cardstock. Blend Dried Marigold, Squeezed Lemonade, Kitsch Flamingo, Bundled Sage, Shabby Shutters, and Evergreen Bough Distress Ink onto the background using the coordinating layering stencils. Trim the panel down to 4.125” x 5.375” and blend Tumbled Glass Distress Ink around the edges before matting it with Cosmic Sky Cardstock and adhering it to a top-folding A2-sized white card base.
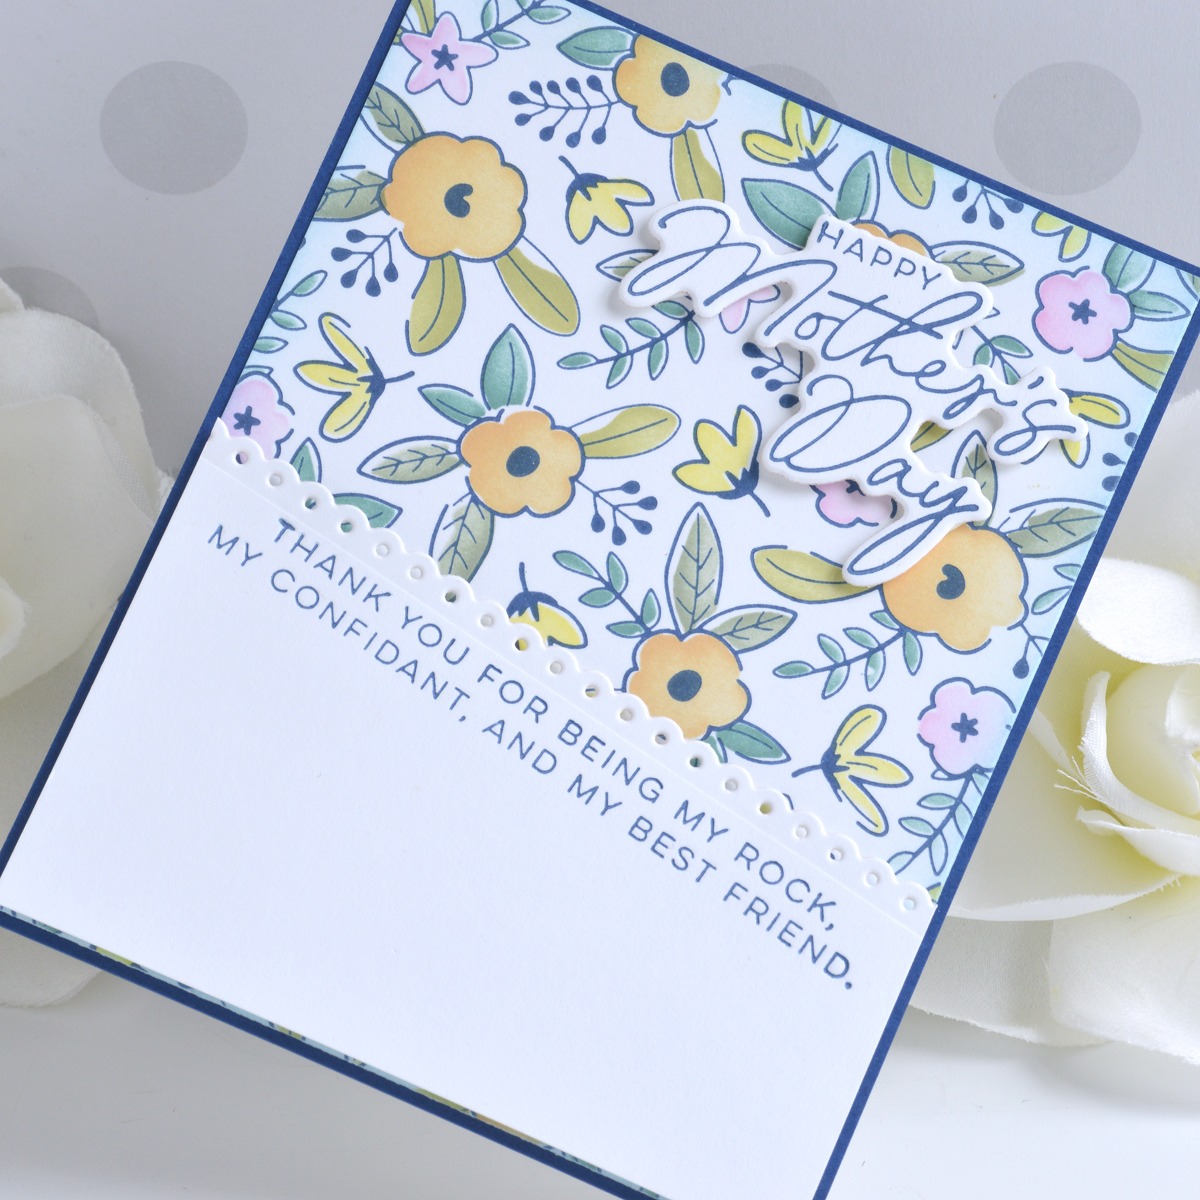
Press one of the long sentiments from the Let’s Celebrate Sentiments Press Plate Set diagonally onto a panel of white cardstock using Cosmic Sky BetterPress Ink and repeat using the Mother’s Day sentiment on a separate small piece of white cardstock. Die cut the panel diagonally just above the long sentiment using one of the borders from the Winter Borders Die Set and cut the other sentiment out using the coordinating die. Pop both the panel and die-cut sentiment up on top of the card front using foam adhesive
Spellbinders Supplies:

Other supplies
White heavyweight cardstock, heavyweight vellum, Dried Marigold, Squeezed Lemonade, Kitsch Flamingo, Tumbled Glass, Saltwater Taffy, Abandoned Coral, Bundled Sage, Shabby Shutters, and Evergreen Bough Distress Ink, sponge daubers, tape runner, foam adhesive
I hope you enjoyed these pretty floral cards and thanks so much for stopping by today. You can find more inspiration over at my blog AnnieBWills.com or on Instagram.
Betterpress-ing on Different Types of Cardstock
More Betterpress Christmas Inspiration