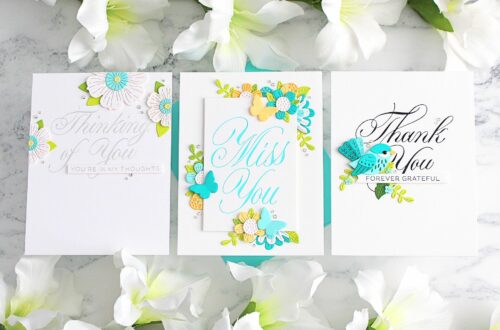
Summer Blooms Made Easy – Press To Impress!
Hello there! This is Lisa from My Card Trip and I am thrilled to be a guest here on the Spellbinders blog again today. I am sharing a couple of ideas using the gorgeous new BetterPress Place & Press Registration Collection along with some of the new colors of BetterPress Inks. When I first saw the new BetterPress Place & Press Registration line, I was not only intrigued but also super excited! What a great innovation to be able to use different colored inks to build your image. Not only that, the grid template makes these plates really simple to use and they create beautiful results. I’m sure you are going to love them! If you enjoy creating floral cards, then you have two choices of plates. Both are so pretty! One creates a thank you card and the other has a choice of sentiments including birthday, thanks, and a general hello sentiment.
So, let’s get started with the first card.
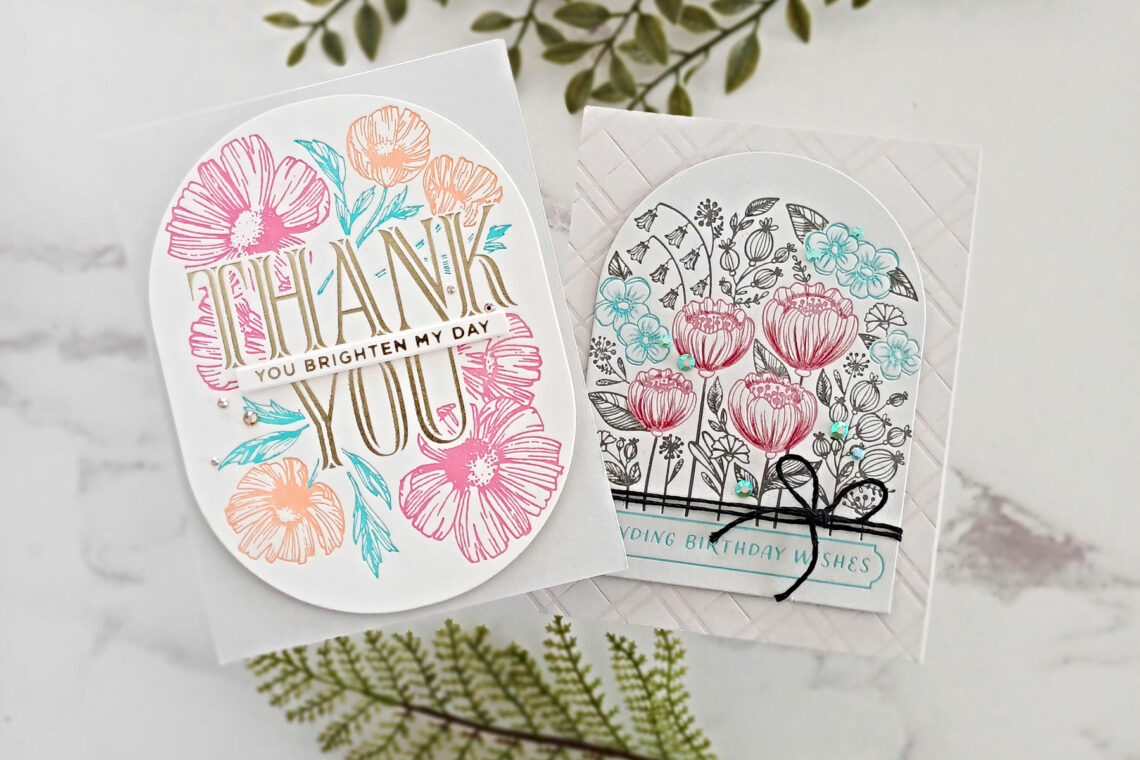
Thank You – You Brighten My Day
I began by taping a panel of BetterPress Porcelain Cardstock to the underside of the clear plate that comes with the BetterPress Letterpress System. I used tiny pieces of Best Ever Craft Tape in all four corners which seemed to hold the card well. Next, I took the grid template from Thank You Blooms Registration Press Plates and taped it to my magnetic platform, again using yellow tape.
Tip: You want to make sure that you line up the green lines on the grid template with the black lines on the magnetic platform. Super simple!
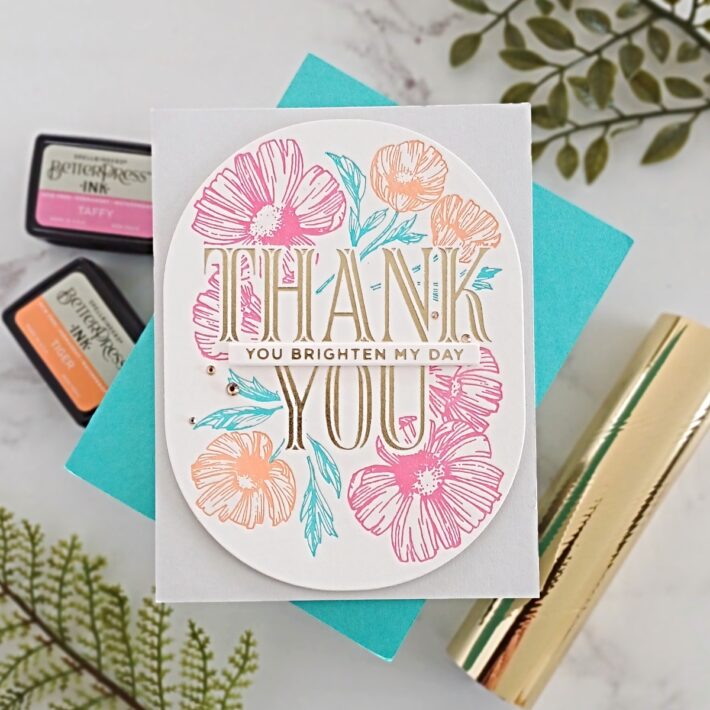
I then took the two plates that I was going to use for the two largest flowers. I placed them down onto the grid where indicated and then inked them up with Taffy BetterPress Ink. This is a beautiful pink and is part of the new Jet Set BetterPress Ink Set. I ran the platform through my Platinum 6 and lifted the clear plate to see how it was looking so far. So gorgeous, I must say! There is nothing quite like the look and texture that the plates give you.
Tip – I have removed one of the three shims in my BetterPress LetterPress System. I have found that this gives me the best impression. If I run the platform through my machine with three shims, I tend to find that I can get a little bit of smudging from the ink. Play around with your shims. You may need two, or three, depending on the pressure of your die-cutting machine. My Platinum 6 is only a few months old so the pressure is really good.
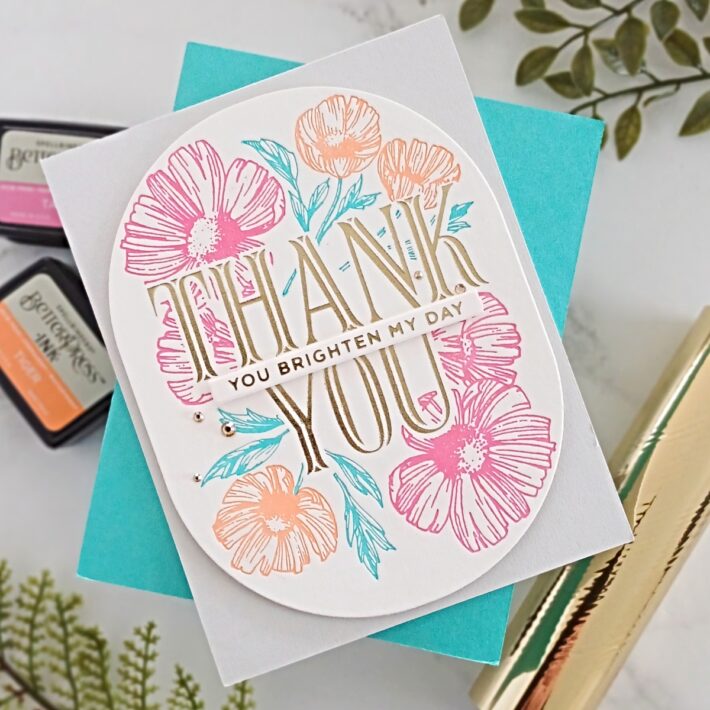
Next, I took the smaller flowers and positioned them over the grid where indicated. I then inked them up with Tiger BetterPress Ink. This pretty orange color is from the new Tropical BetterPress Ink Mini Set.
Tip – if your plates move a little during the inking process, just use the tip of your Tool ‘n One to reposition them. This saves you from getting ink transferred to your fingers and you then need to re-ink the plate!
I ran the platform through my Platinum 6 and then I repeated the process for the leaves. The leaves were inked up with Teal Topaz.
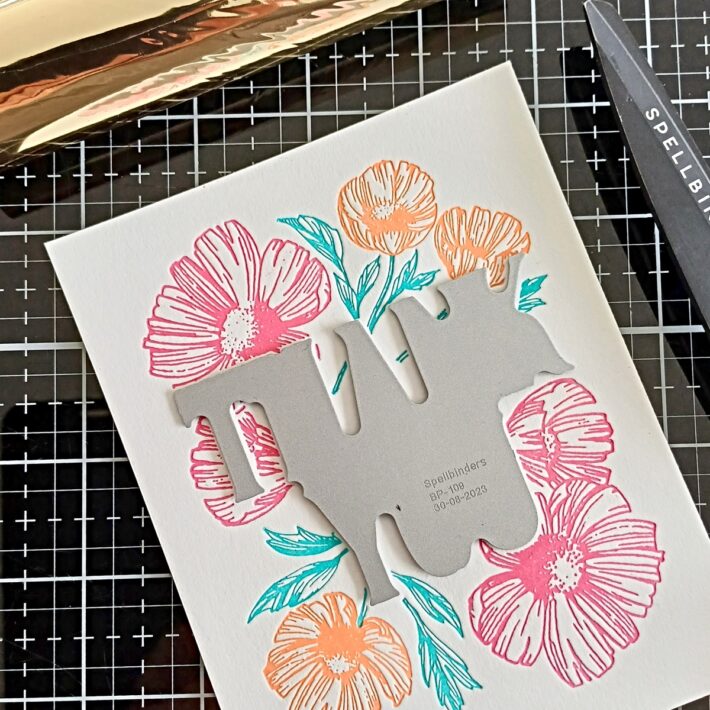
The reason that I left the “Thank You” plate until the end was so that I could foil it. Once you have pressed the flowers and leaves, you can then really clearly see where your “thank you” plate needs to be inserted in order for you to foil it. You can see from the picture above how simple this is to do at this final stage.

Once it was positioned correctly, I then created a small hinge on the plate using two pieces of yellow tape. I lifted the plate and inserted some Champagne Glimmer Hot Foil and then foiled the plate using the Glimmer Hot Foil System. I have foiled with many of my press plates now and I am still bowled over by how well they foil. I really didn’t expect to get such a good impression on this cardstock as it is textured, but the results are beautiful!
The panel was then trimmed down using an Essential Stylish Oval Etched Die. I added some thin foam tape onto the back and adhered it down onto an A2 panel of Fog Color Essentials Cardstock. This was then added to a top folding A2 heavyweight white note card.
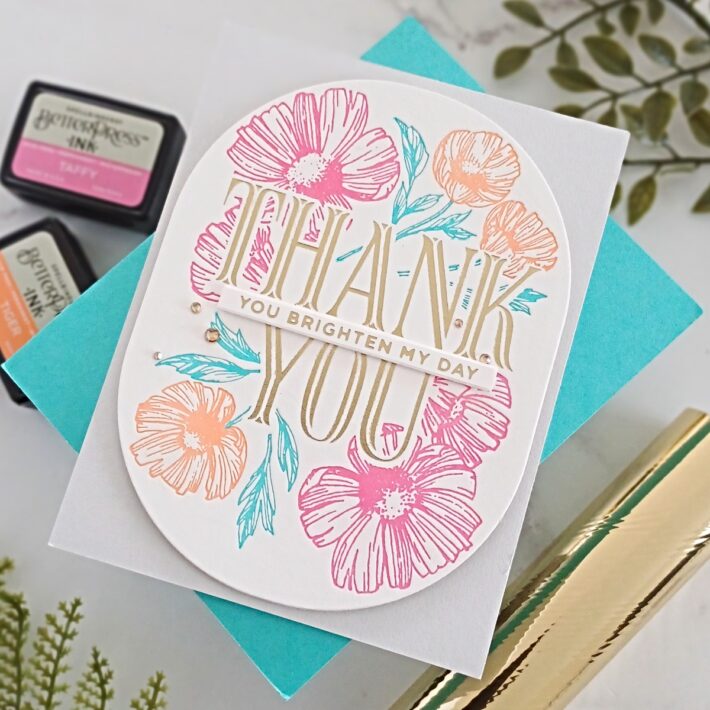
To finish, I foiled a sentiment from Mini Everyday Sentiments Glimmer Hot Foil Plate and Die Set onto Neenah 80lb white card and I then added some foam tape onto the back. It was then added across the center of my card. I also adhered a few Gold Mix Color Essential Gems for an extra bit of sparkle!
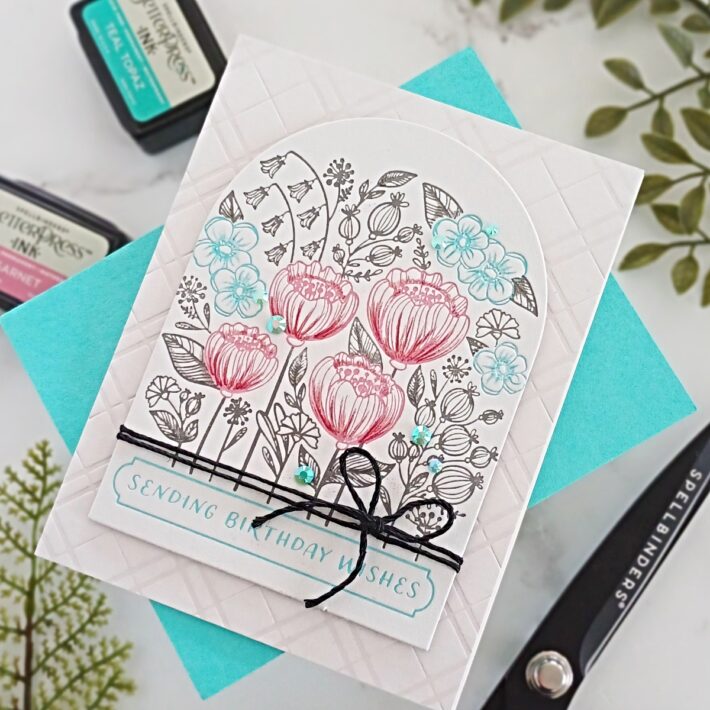
Sending Birthday Wishes
For my next card I am using the Blooming Garden Press Plates but this time I added some basic pencil coloring for additional interest.
I am a big fan of neutral-colored cardstocks and use them often! So, for this card, I have used Pebble BetterPress Cardstock. This was taped to the underside of the clear plate from the BetterPress LetterPress System. I followed the same process as I did on my first card. I added the grid template to my magnetic platform and taped it down using Best Ever Craft Tape.

I positioned the largest plate onto the grid and inked it up with Thunder BetterPress Ink. I ran it through my Platinum 6 and then did the same with the remaining plates. The large flowers in the center were inked with Garnet BetterPress Ink and the small flowers and sentiment with Teal Topaz BetterPress Ink.
To add a bit more depth to my flowers, I did a little bit of very basic pencil coloring. I used Faber Castell Polychromos Pencils with a tiny bit of Cobalt Green (9201-156) added onto the teal flowers, Dark Red (9201-225) onto the red flowers, and Warm Grey (9201-274) onto some of the leaves. I then cut the panel using a die from Essential Arches Etched Dies. For a bit of extra interest, I grabbed my Journey Black Twine and created a little bow just above the sentiment. I added some foam tape to the back of my panel and set it to one side.
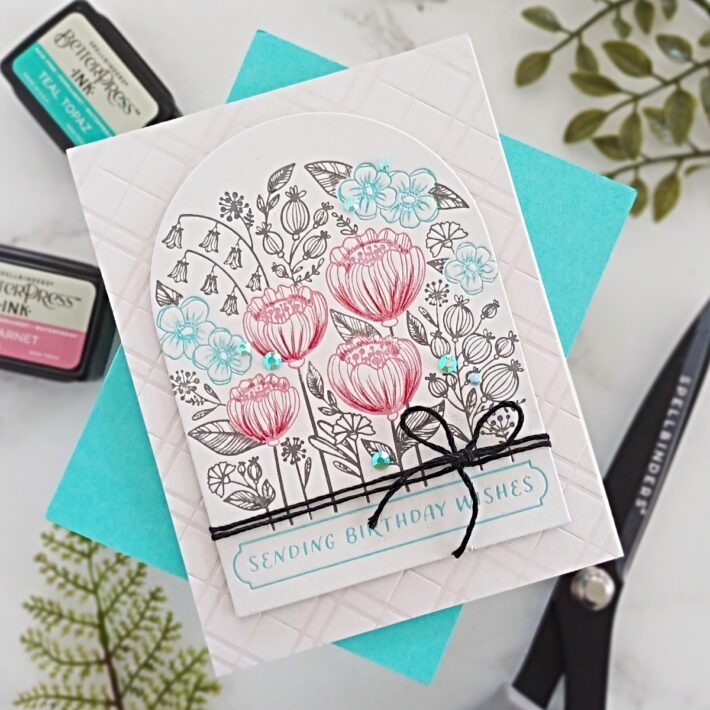
I just LOVE to create tone-on-tone backgrounds on my cards! I often do this when I want a bit of something “extra” going on, but don’t want the card to look too busy. It’s definitely a personal choice and as I create relatively clean and simple-looking cards, it always works well for me. I create the tone-on-tone look by using Opal Glimmer Hot Foil with any colored cardstock. It also looks really great on white cardstock! In this case, I used Fog Color Essentials Cardstock and I foiled the Plaid Tidings Background Glimmer Hot Foil Plate using the Glimmer Hot Foil System. I trimmed it down to A2 size and then adhered it onto a top folding A2 white note card using Bearly Art Glue. The arch-pressed panel was then added on top and I finished by adhering a few aqua-coloured gems from my stash.
That brings us to the end of my two cards. I hope that you have enjoyed seeing the BetterPress Place & Press Registration Collection in action. I cannot wait to see how this new line of plates evolves! They really are very easy to use and give stunning results and it’s a great opportunity to play around with different combinations of inks.
If you would like to see more of my cards, I would love to have you join me over on my blog, Instagram, Facebook or YouTube. In the meantime, thank you so much for spending time with me here on the blog today. I hope that you have a wonderful day!
Spellbinders Supplies:

Other Supplies
Neenah Solar White Classic Crest 80lb and 110lb card, Tweezers, Embellishment Wand, Thin Foam Tape, Lucy’s Cards Shimmering Pool Mix, Faber Castell Polychromos Pencils.
Make Sentiments the Star!
Kaleidoscope Arch – Versatile Products Rock!