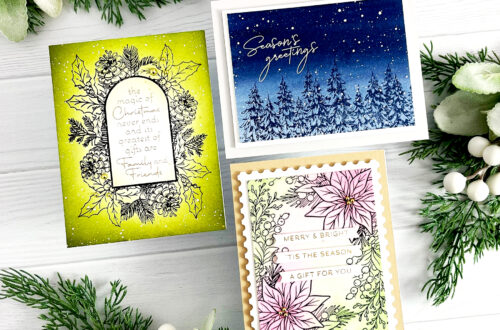
Bright And Breezy Florals to Light Up Your Day
Hello there Spellbinders friends! This is Lisa Tilson from My Card Trip and I am delighted to be back here again with you on the Spellbinders blog. Today, I am sharing three ideas using the beautiful Mirrored Arch Collection. This collection contains three gorgeous new press plates, a set of nesting etched dies and a fabulous new 3D emboss and cut folder. I had fun creating my three cards to share with you so let’s take a look at what I made! I hope that this gives you some ideas for your own cards.
Mom – Thanks For Everything
Have you got your sunglasses on? Well, you will need to keep them on for all three of my cards today! My first card features the Luxe Backdrop and Border 3D Emboss and Cut Folder and the Mother’s and Father’s Day Sentiments Press Plate. The new folder has two embossing options to choose from and I used the flower border which you can cut out with the coordinating die which is also included in this set.
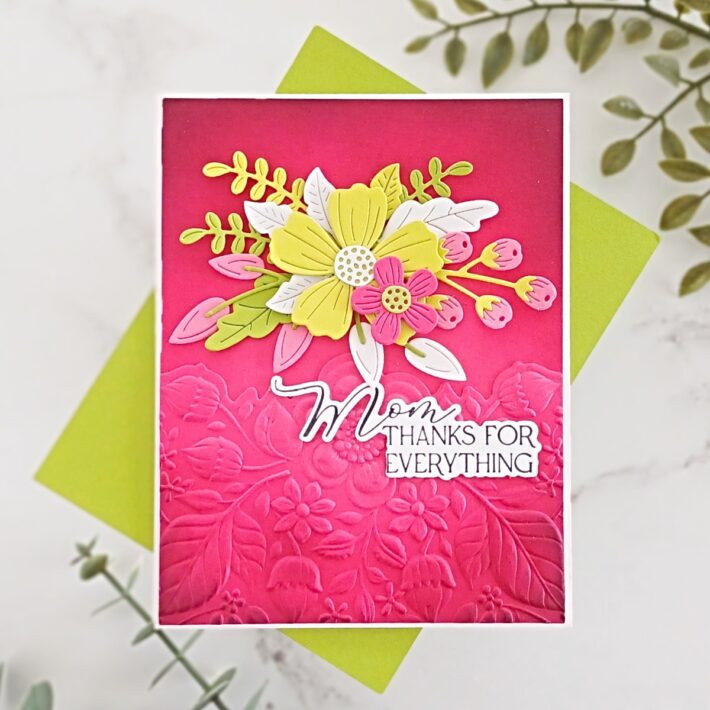
I began by taking an A2 panel of bright pink cardstock from my stash and die cutting the flower border from the Luxe Backdrop and Border 3D Emboss and Cut Folder. It is the first time I have used an emboss and cut folder and it was really simple to use. Slot the die in where it fits in the folder, add your cardstock, and run through your die-cutting machine. Done! It cuts and embosses at the same time!
Using blending brushes, I blended some Hero Arts Raspberry Jam Core Ink around the top edge and sides of the pink A2 panel and also onto the bottom and sides of the flower border piece. I then went in with a little Black Soot Distress Ink just to darken the edges even more. I adhered the flower border to the A2 pink panel using Bearly Art Glue.

I then reached for one of my all-time favorite flower die sets – Be Bold Blooms Etched Dies. I cannot tell you how many cards I have made with this set! I cut all the different pieces out and set them to one side. I used Peridot and Rainforest Color Essentials Cardstock and Neenah 80lb white card for the leaves/foliage/stems. I used Fruit Punch and Peridot Color Essentials Cardstock for some of the flowers, and then the same bright pink card that I used for my main panel to cut out the smallest flower. I adhered the flowers together where necessary and then started to temporarily build my spray.
Once I was happy with how it was looking, I took a photo and then I reassembled the spray to sit just above the flower border. I used a double layer of thin foam tape behind the large green flower which allows me to add all my pieces behind that as there is plenty of height.
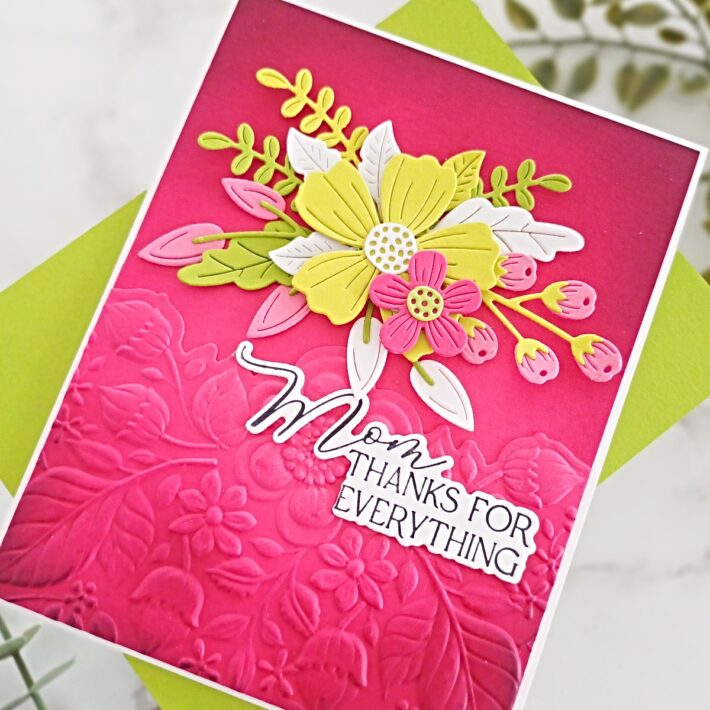
I trimmed the panel down slightly and added it onto a top folding A2 white 110lb note card. For my sentiment, I took the Mother’s and Father’s Day Sentiments Press Plate and inked it up with BetterPress Black Ink onto Porcelain Cardstock. I then ran the sandwich through my Platinum 6 to press the plate. It turned out beautifully so I went ahead and cut out the sentiments with the coordinating die. The sentiment was then added onto my panel with a little bit of wet adhesive.
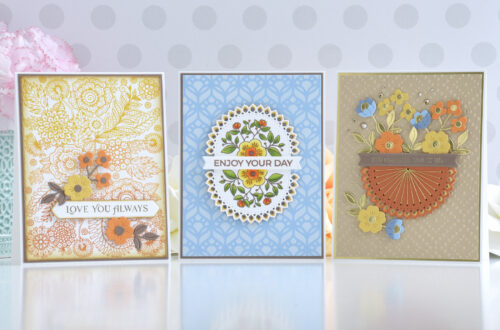
Sending Birthday Wishes To My Most Amazing Friend
For my next card, I use the gorgeous Mirrored Arch Blooms Press Plate. I love this floral plate, it’s so pretty and it gave me a chance to do a little bit of watercolouring. I’m certainly no expert but I enjoy the process!
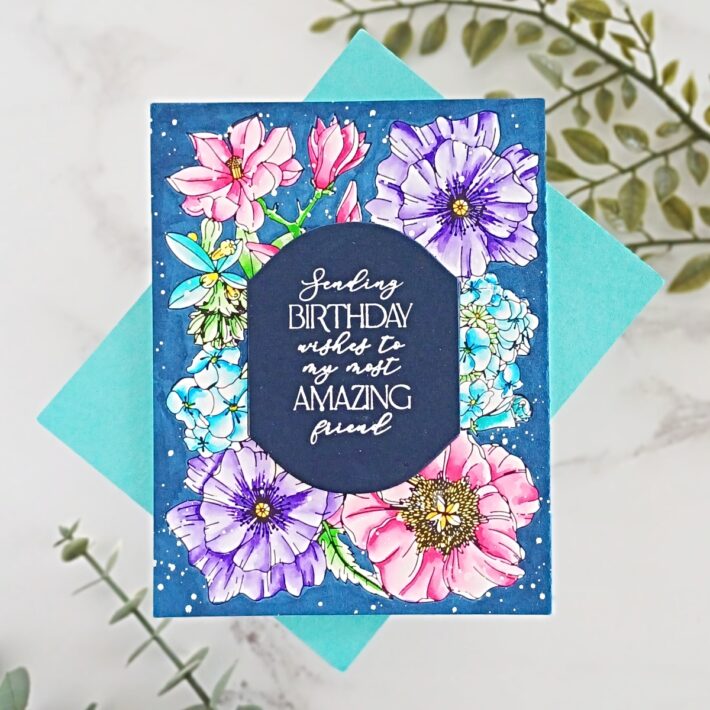
So, I started off by pressing the plate with BetterPress Black Ink onto Porcelain Card. I then used Karin Brushmarker Pro markers to watercolor the image. I used Gold, Cyan, Magenta, Cerise, Violet Blue, and Turquoise to color the flowers and I used Grass for the greenery. I did a few layers on each part of the image, letting the ink dry in between.
I often leave my background white on this type of floral image but this time I thought I would add some dark blue. I used a B37 Copic Marker and I think it really makes all the other colors pop! Copics can bleed easily on this cardstock, so I was really careful when I was coloring next to the black lines. I then placed the panel into a box, splattered some white gouache over it using a No.2 round brush, and then left it to dry before adding it onto a white A2 note card.
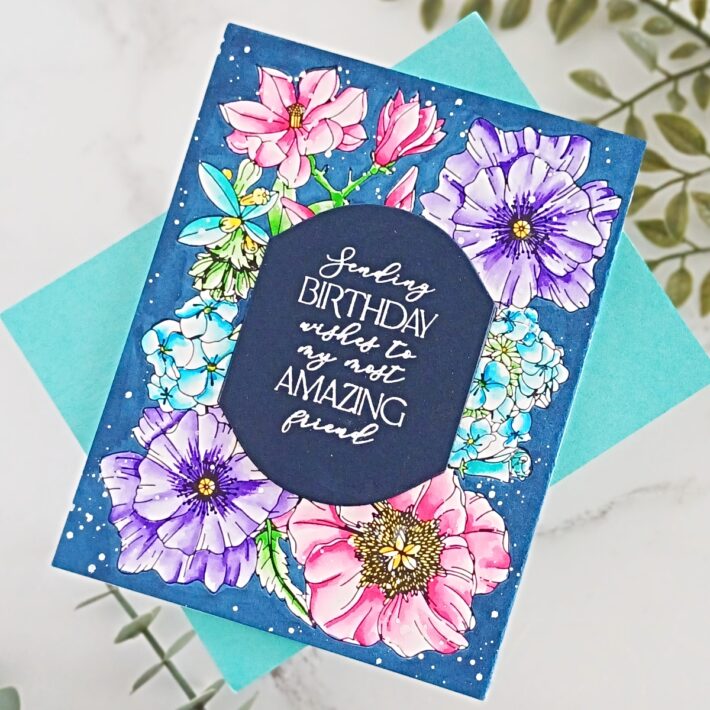
The sentiment in the center of my card is also from the Mirrored Arch Blooms Press Plate and I foiled it onto navy cardstock using White Glimmer Hot Foil and the Glimmer Hot Foil System. I then cut it out with a die from Mirrored Arch Labels Etched Dies. This etched die set works with many elements of this new collection and I love the shape of it. I’m sure it’s going to become a favorite.
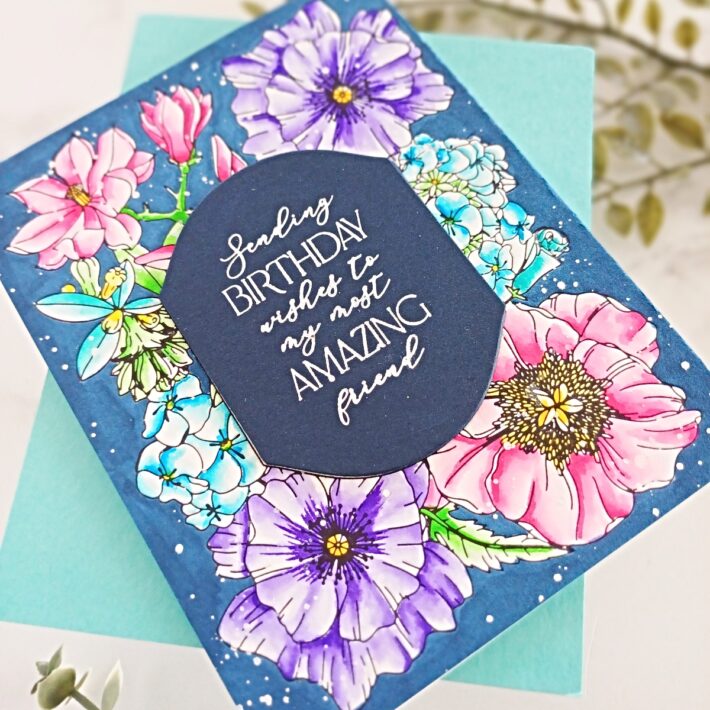
I die cut a further two panels using the same etched die and adhered all three layers together before adding it to the center of my finished card.
Miss You
My last card is a shaker card. I haven’t made one in absolutely ages and I always enjoy creating them! This card features the new Mirrored Arch Nested Sprigs Press Plate, along with the Mirrored Arch Labels Etched Dies and the Copperplate Miss You Press Plate.
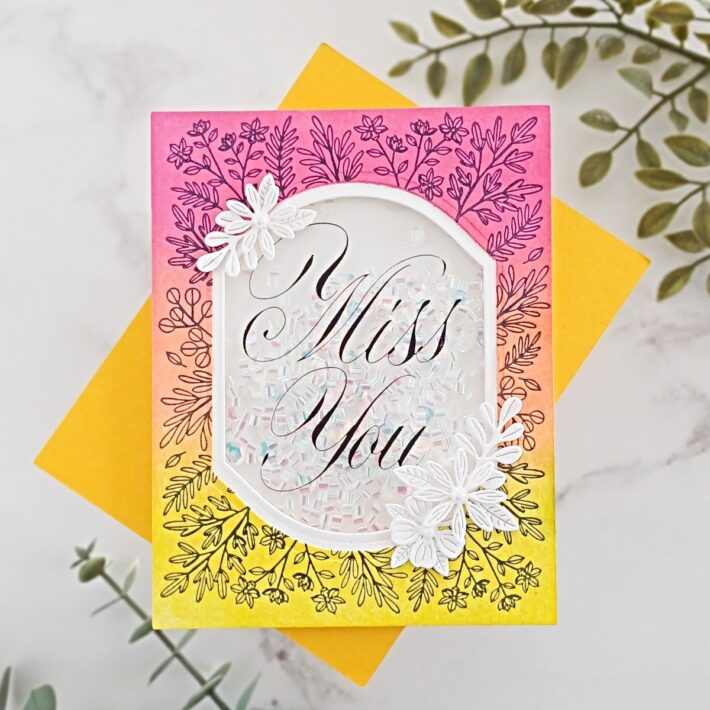
To create my main panel on this card, I tried something new (to me). I took three BetterPress Inks and using the direct-to-paper method I applied Wild Berry, Tiger, and Peridot onto some Porcelain Cardstock going from top to bottom. I went over the panel several times to make sure I got a really deep coverage on the card, as it is textured. It took three or four layers to get the depth I wanted.
I then taped the panel onto the platen of my BetterPress LetterPress System. I placed the Mirrored Arch Nested Sprigs Press Plate onto the magnetic platform and inked it up with BetterPress Black Ink. I ran the sandwich through my Platinum 6 and removed everything to reveal the beautiful result! This is magical. The texture is beautiful and the plates give such fabulous detail.
The center was cut out with a Mirrored Arch Labels Etched Die and I cut another panel from white, using a slightly smaller die, which I then adhered to the back of my colored panel.
Next, I foiled the Copperplate Miss You Press Plate onto some heat-resistant acetate using Opaque Black Glimmer Hot Foil. I then trimmed the acetate down and added it to the back of my window using wet adhesive. I added 3M foam tape to the acetate and set it aside.
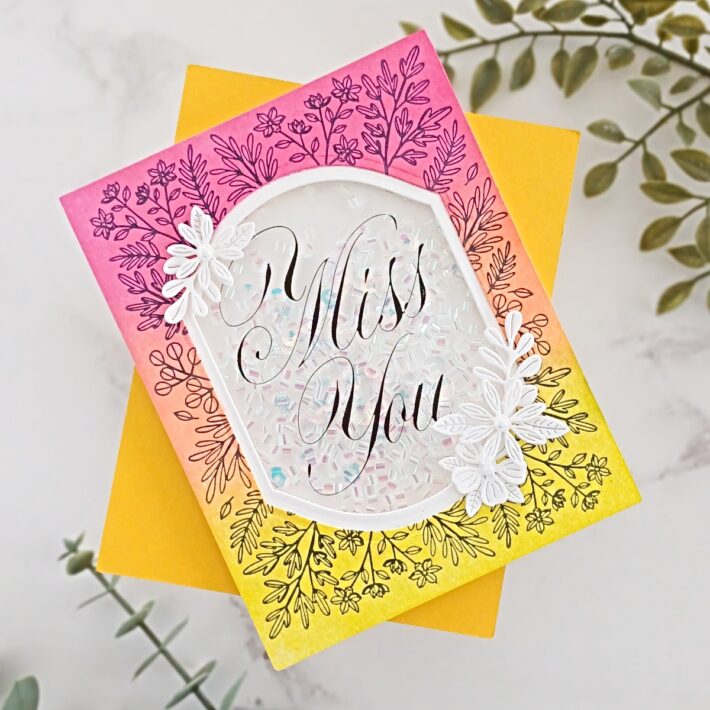
I then placed a white A2 note card onto my work surface and taped it down so it wouldn’t move. I’ve learned this the hard way of course! So many times, I have knocked my note card when it is laden with sequins, so I now tape it down. I added some iridescent sequins and shaker filling onto my card base. I made sure to restrict the mix to the center of my note card, removed the tape from the back of the foam tape, and then pressing my panel down onto my note card. This traps all the sequin mix inside. Shaker cards are such a lovely surprise for the recipient and although they have been around for many years now, I still like to send them. And who doesn’t have lots of sequins in their stash they still need to use?!
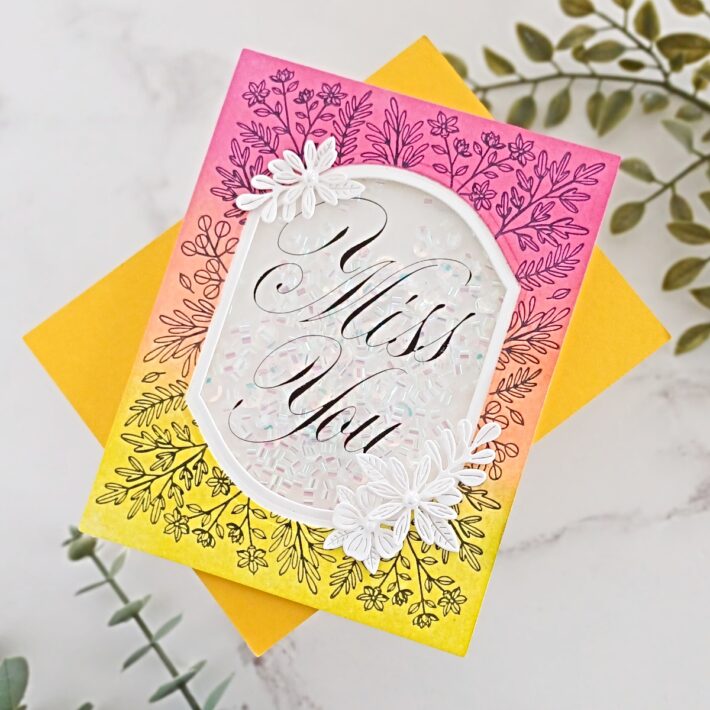
To finish this card, I took some 80lb white card and die-cut a few flowers and leaves from Mini Blooms and Sprigs Etched Dies. These were added around the window with a little foam tape and adhesive and then I added a glossy pearl into the center of each flower.
That brings us to the end of my cards for today! I hope that you like them and that they give you some inspiration for creating with this beautiful collection of press plates, dies, and embossing folder. If you would like to see more of my cards, I would love to have you join me over on my blog, Instagram, Facebook or YouTube. In the meantime, thank you so much for joining me here on the blog today. I hope that you have a wonderful day!
Spellbinders Supplies:

Other Supplies
Neenah Solar White Classic Crest 80lb and 110lb cardstock, Heat Resistant Acetate, Hero Arts Azalea Cardstock, Concord & 9th Midnight Cardstock, Hero Arts Raspberry Jam Core Ink, Distress Ink Black Soot, Picket Fence Studios Iridescent Moonshine Sequins, Picket Fence Studios Iridescent Moonshine Shaker Garnish, Lucy’s Cards Glossy Porcelain Mix, Winsor & Newton White Gouache, Copic B37, Hero Arts Tweezers, Embellishment Wand, Thin Foam Tape, 3M Foam Tape, Blending Brush, Derwent Fine Waterbrush, No.2 Round Brush

Colorful Layout Using Doodlebug Rainbow
Handmade Card Ideas with Kaleidoscope Arch Collection