DIY Party Decor Series – Decorating Packages with Felt Flowers – Finale
Hi friends! Welcome to my final DIY Party Décor series post. I’m Debi Adams, an in-house designer at Spellbinders and celebrations are my favorite. Today I thought it might be fun to work a different party angle by focusing on the gifts rather than the actual decorations. Who wouldn’t be drawn to pretty packaging and embellished presents? It doesn’t need to be fancy or expensive to be expressive and personal. There are truly numerous ways to make a gift sparkle but for today, I have three different designs or embellishments that you can create using felt and only three dies. Jar Topper The first project is a jar topper where…
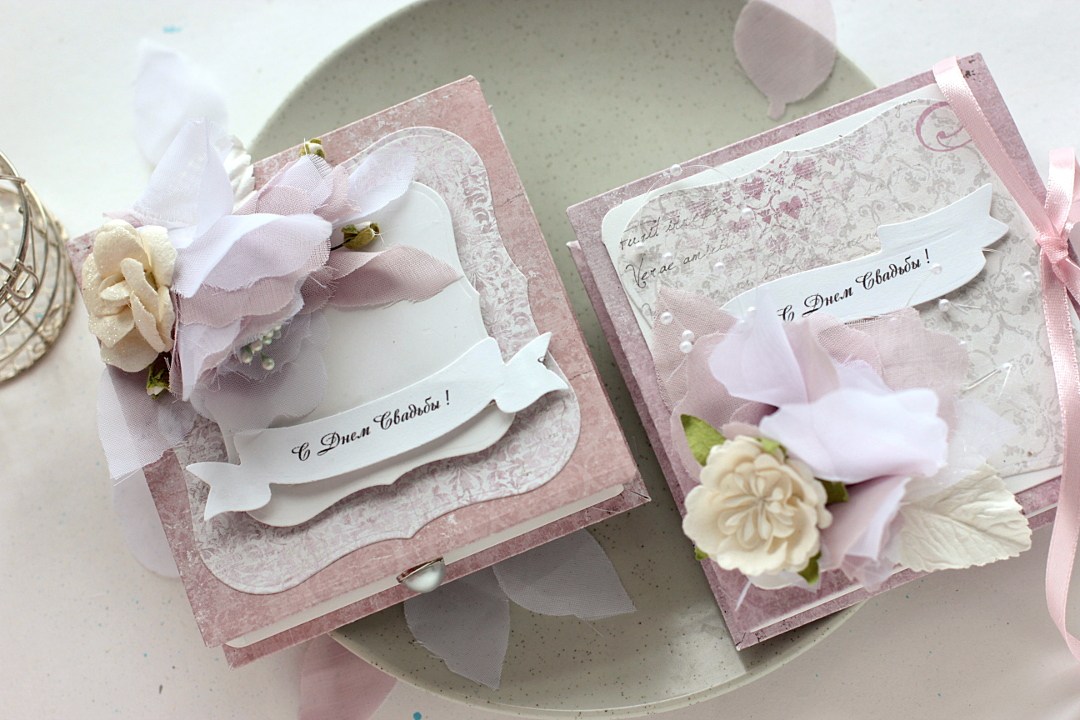
Wedding Gift Box with Positively Peony Contour Steel Rule Die
Hi, it’s Elena here with you today. The wedding season is here and each time I think what can be done more for the special day other than just cards. I thought that a cute little box would be a perfect alternative to making a present. I created a box and made a peony flowers using the SR-038 Positively Peony Contour™ Steel Rule Die To create my flower I used fabric – white tulle and mauve rayon. I colored them myself several years ago when I enjoyed batik and made some paintings on the silk. It was a good time to recycle something that has been kept for so long!…
TBT: Flowers Galore!
Today is a “Throw Back Thursday” (TBT) on all things FLOWERS! We are sharing some clever, innovative and fun ways to create with our flower die templates. Check out the projects below (click each image for a tutorial), be inspired by our wonderful designers and what they do with their FLOWER POWER! Pom Pom Posies Rosettes Spring Thank You Card Positively Peony 3D Wall Decor DIY Floral Phone Case Wedding Day Congratulations Felt Flower Card Video Tutorial Fan Flower Thank You Card Cinch Go Flower Vintage Glass Deco
Art Journaling
How to make a colorful mixed media art piece as found in Stampington’s Fall 2016 Art Journaling magazine. Using a non-stick mat, place several colors of ink face down onto the mat and press gently to release the ink. Remove inkpads and mist area with water until small beads form. Use a piece of 140 lb. mixed-media paper and lay into area. Lift paper and place in another section if paper is not fully covered or redo the ink on the mat and place paper into the new mix. This is how it should look. Go back in and add more color if a more intense color is desired.…