Delicate Impressions Collection – Card & Gift Inspiration with Annie Williams
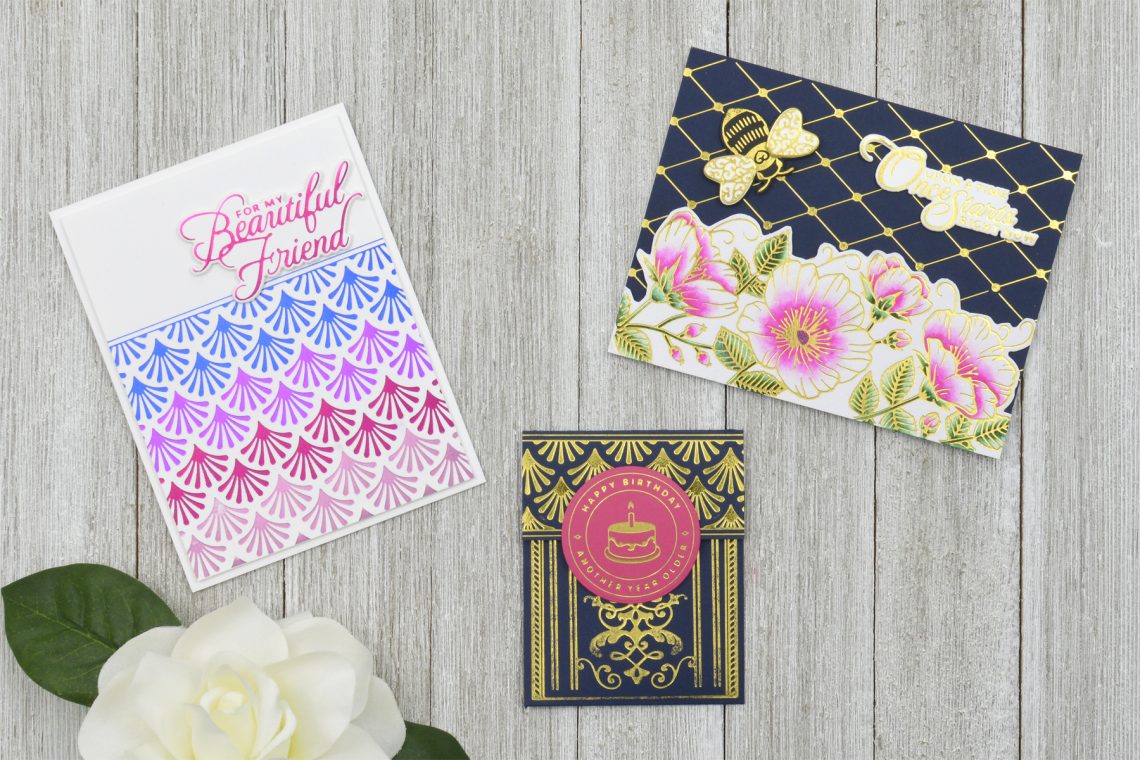
Hi there, this is Annie Williams and I’m so excited to have the opportunity to share a couple of projects using the new Delicate Impressions Collection by Becca Feeken. The gorgeous patterns and beautiful sentiments inspired me to create two cards and a gift card pocket that are delicate and sweet like the designs in the collection.
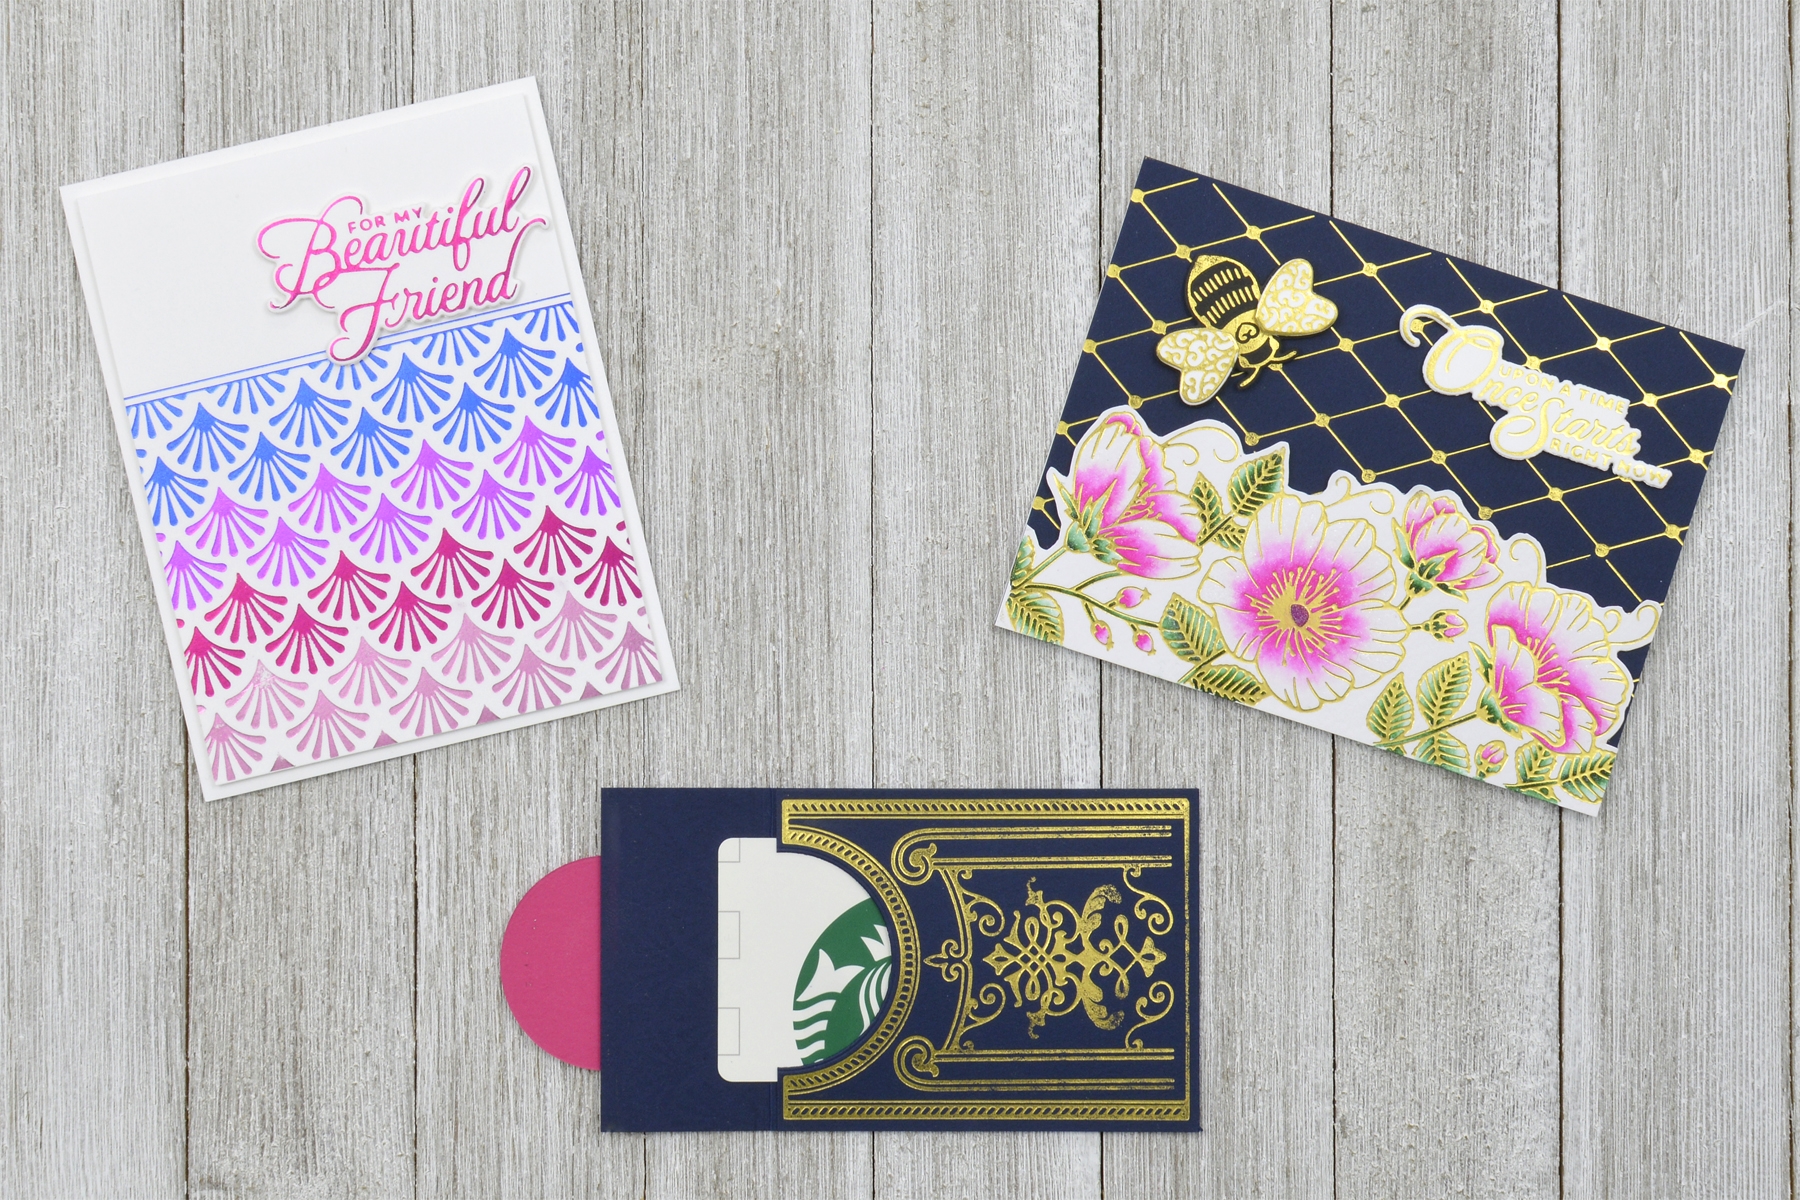
I couldn’t wait to color the beautiful flowers in the Sweet Blooms Border Hot Foil Plate and thought they would look great paired with the Diamonetta Background for a feminine and pretty wedding card.
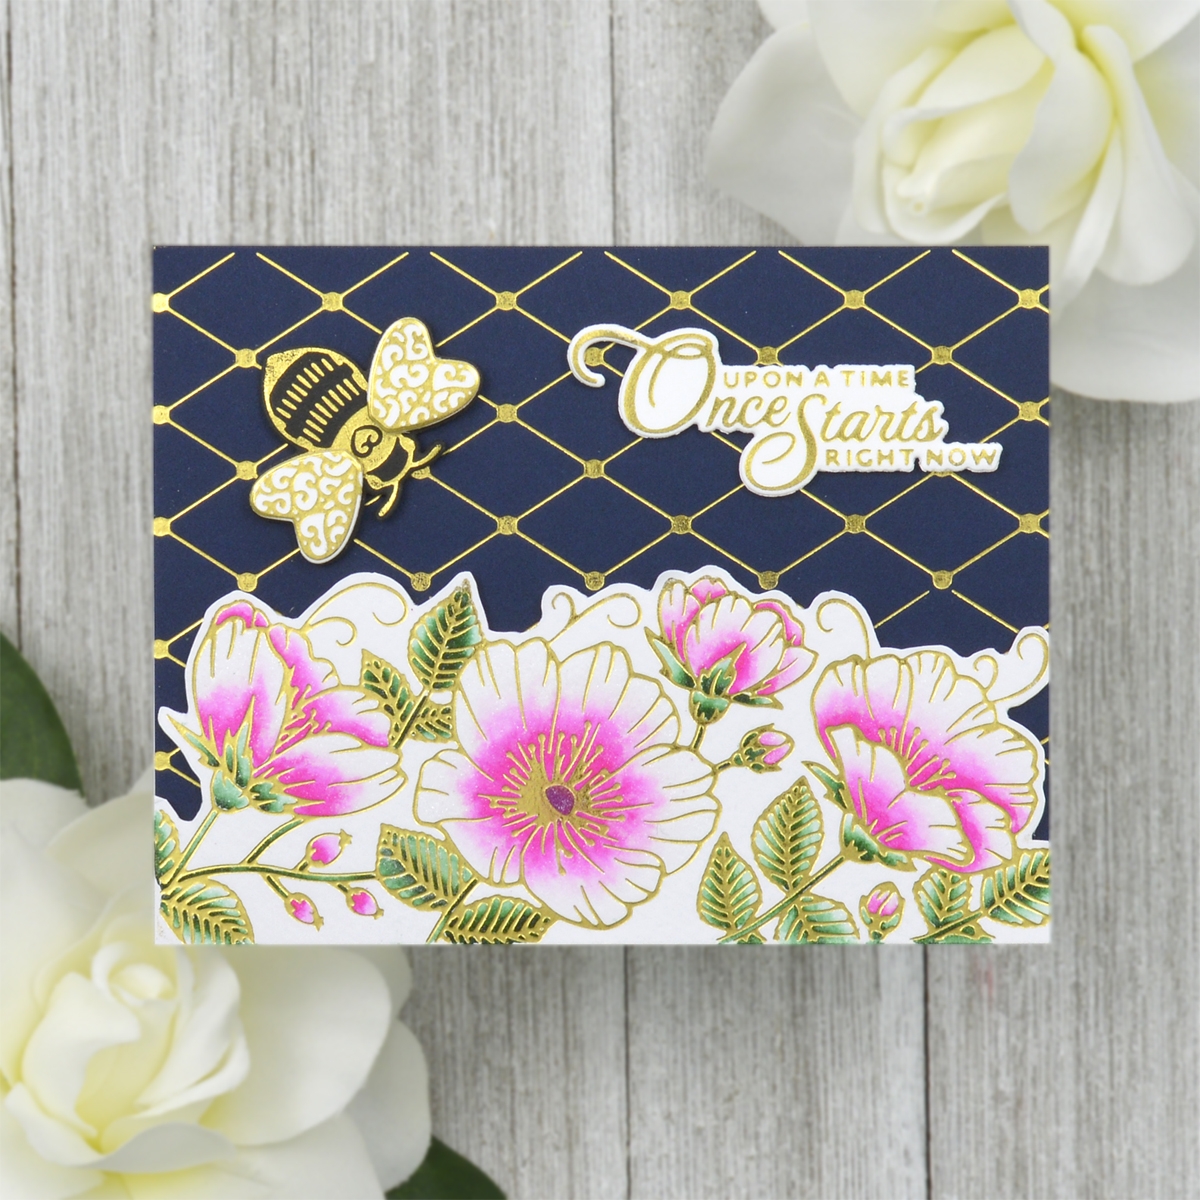
- Trim pieces of watercolor paper and navy blue cardstock to 4.25” x 5.5”.
- Apply Gold Hot Foil twice to the navy blue cardstock using the Diamonetta Background Foil Plate and the Glimmer Hot Foil Machine to completely cover the entire panel.
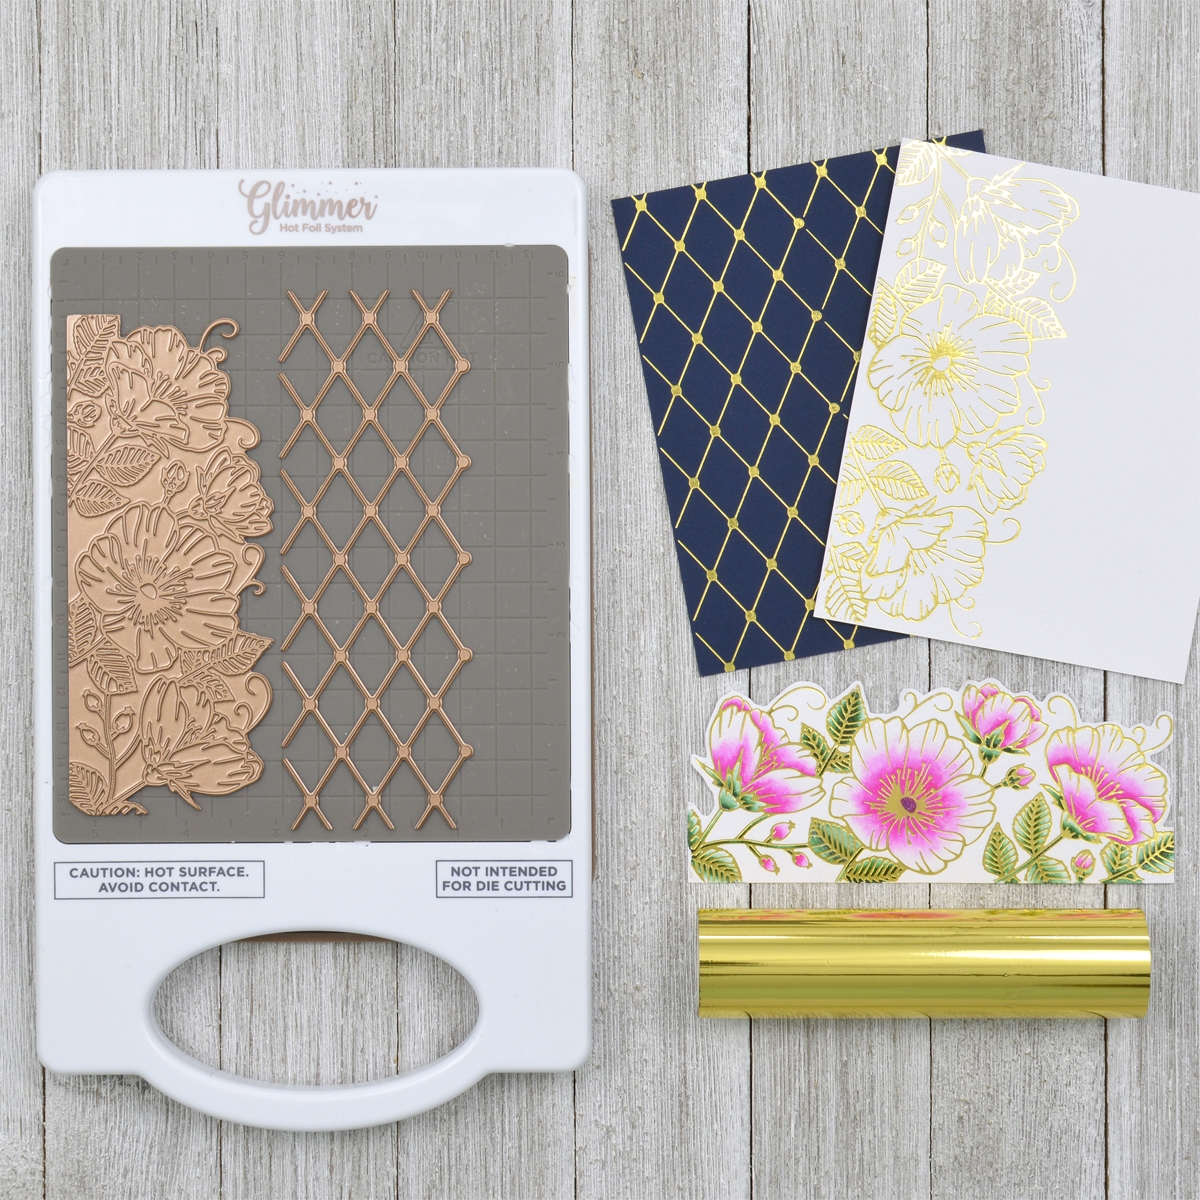
- Apply Gold Hot Foil to the watercolor paper using the Sweet Blooms Border Hot Foil Plate.
- Color the image with watercolors and trim around the one edge with scissors.

- Apply Gold Hot Foil to both black and white cardstock using the Bee Foil Plate from the Just Bee-cause Glimmer Hot Foil Plate Set.
- Die cut the whole bee out of the black cardstock and just the wings out of the white cardstock using the coordinating dies.
- Adhere the wings on top of the bee bodies using foam adhesive.
- Foil a sentiment onto white cardstock using one of the Heart Melt Sentiment plates and cut out with the coordinating die.

- Adhere the navy blue panel to a top-folding A2-sized white card base with tape runner.
- Pop the floral border up on the bottom of the card and the bee and sentiment up on the top of the card with foam adhesive.
Spellbinders Supplies:
Other Supplies
Heavyweight white cardstock, Gina K. Designs In The Navy Cardstock, watercolor paper, Spectrum Noir Sparkle Pens, foam adhesive, tape runner
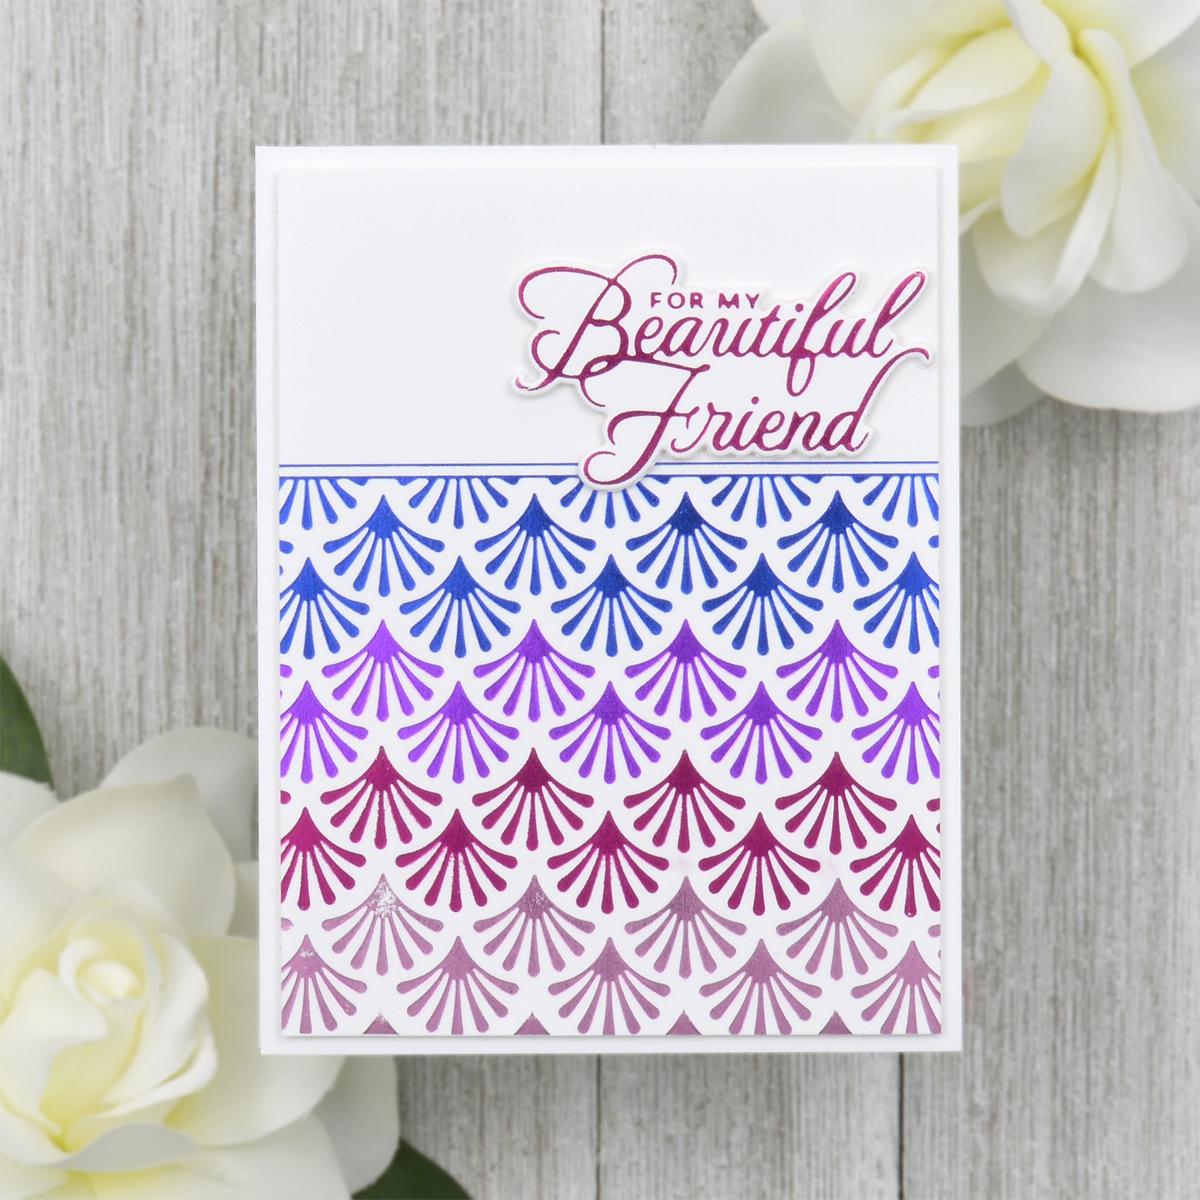
Sometimes a quick foiled background is all you need for a fun card. I used the Fanfare Border to create a pretty repeated pattern for this clean and simple card.
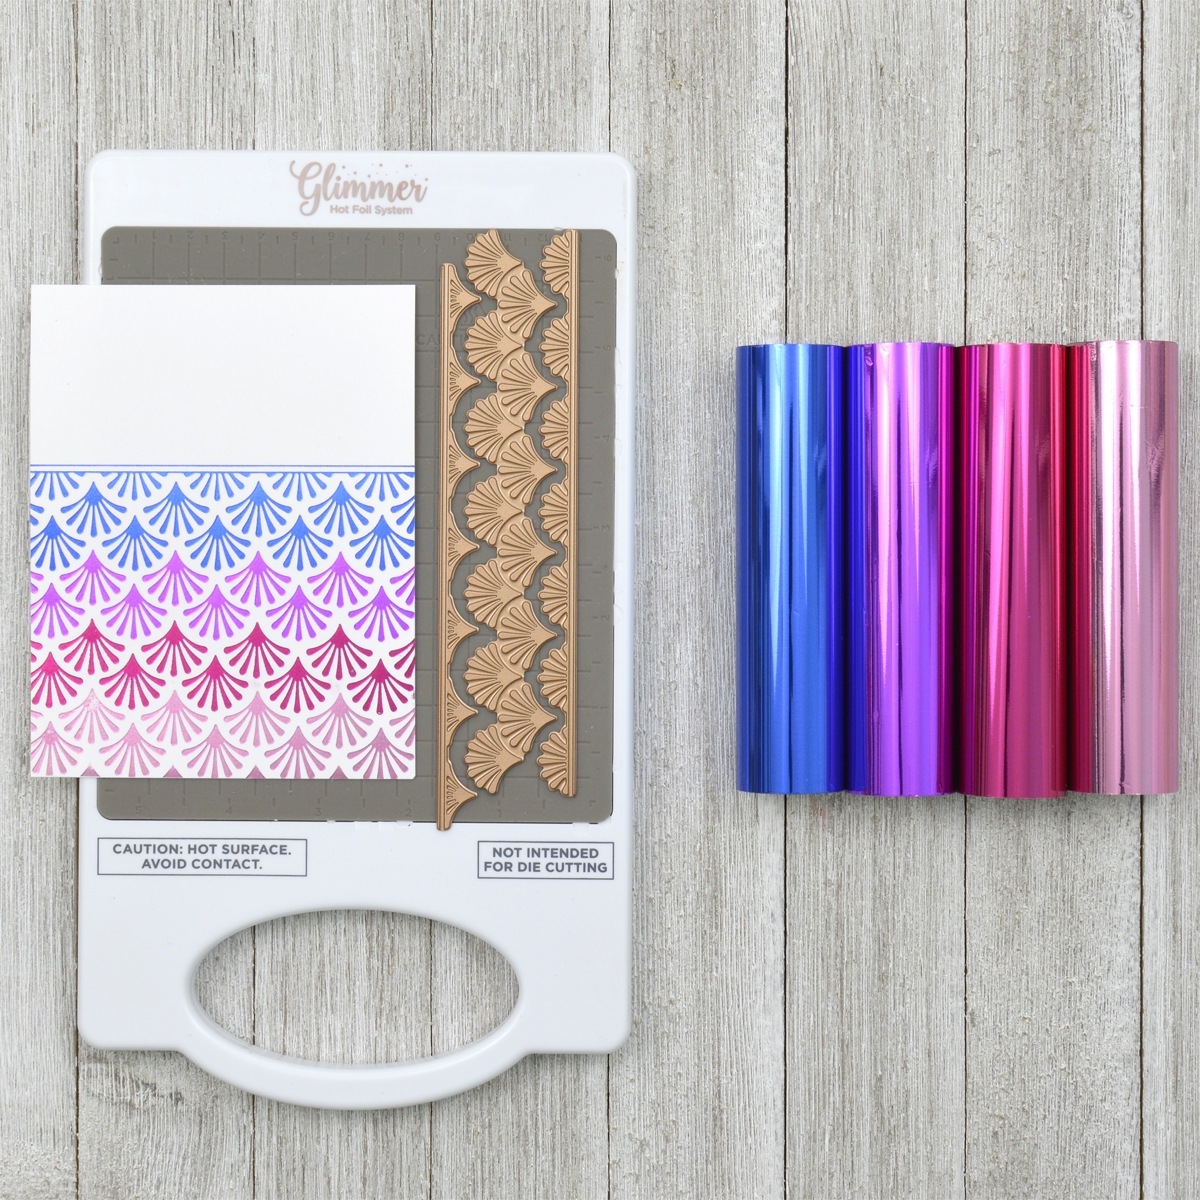
- Trim a piece of white cardstock to 5.25” x 4”.
- Apply Cobalt, Fuchsia Flower, Magenta, and Pink Hot Foil over the bottom two-thirds of the panel using the Fanfare Border Foil Plate Set and the Glimmer Hot Foil Machine.
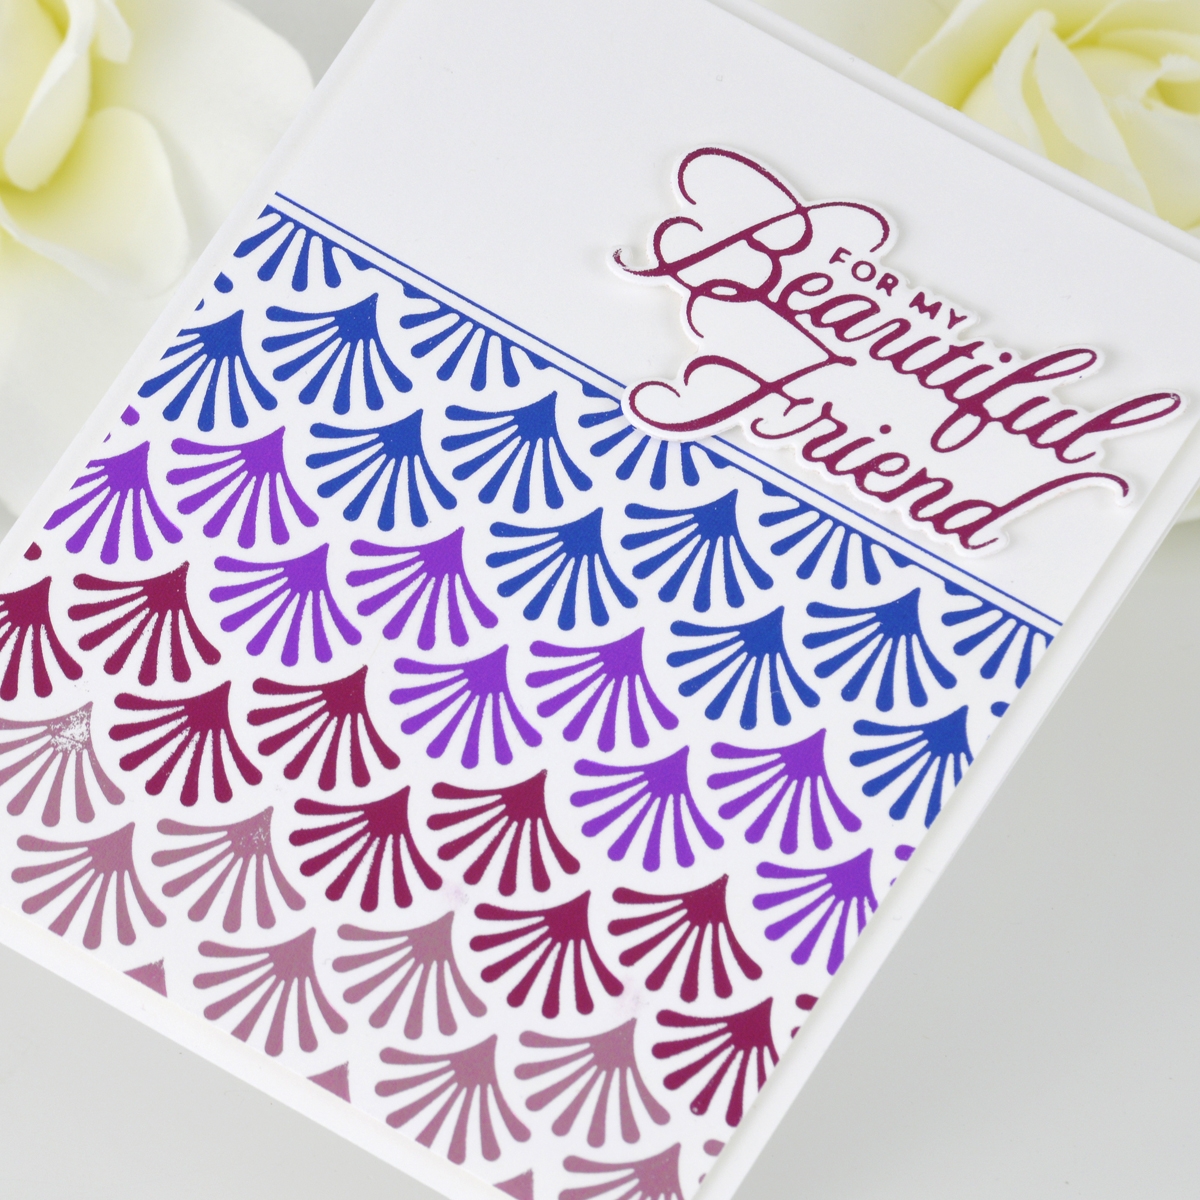
- Foil a sentiment onto white cardstock using one of the Heart Melt Sentiment plates and cut out with the coordinating die.
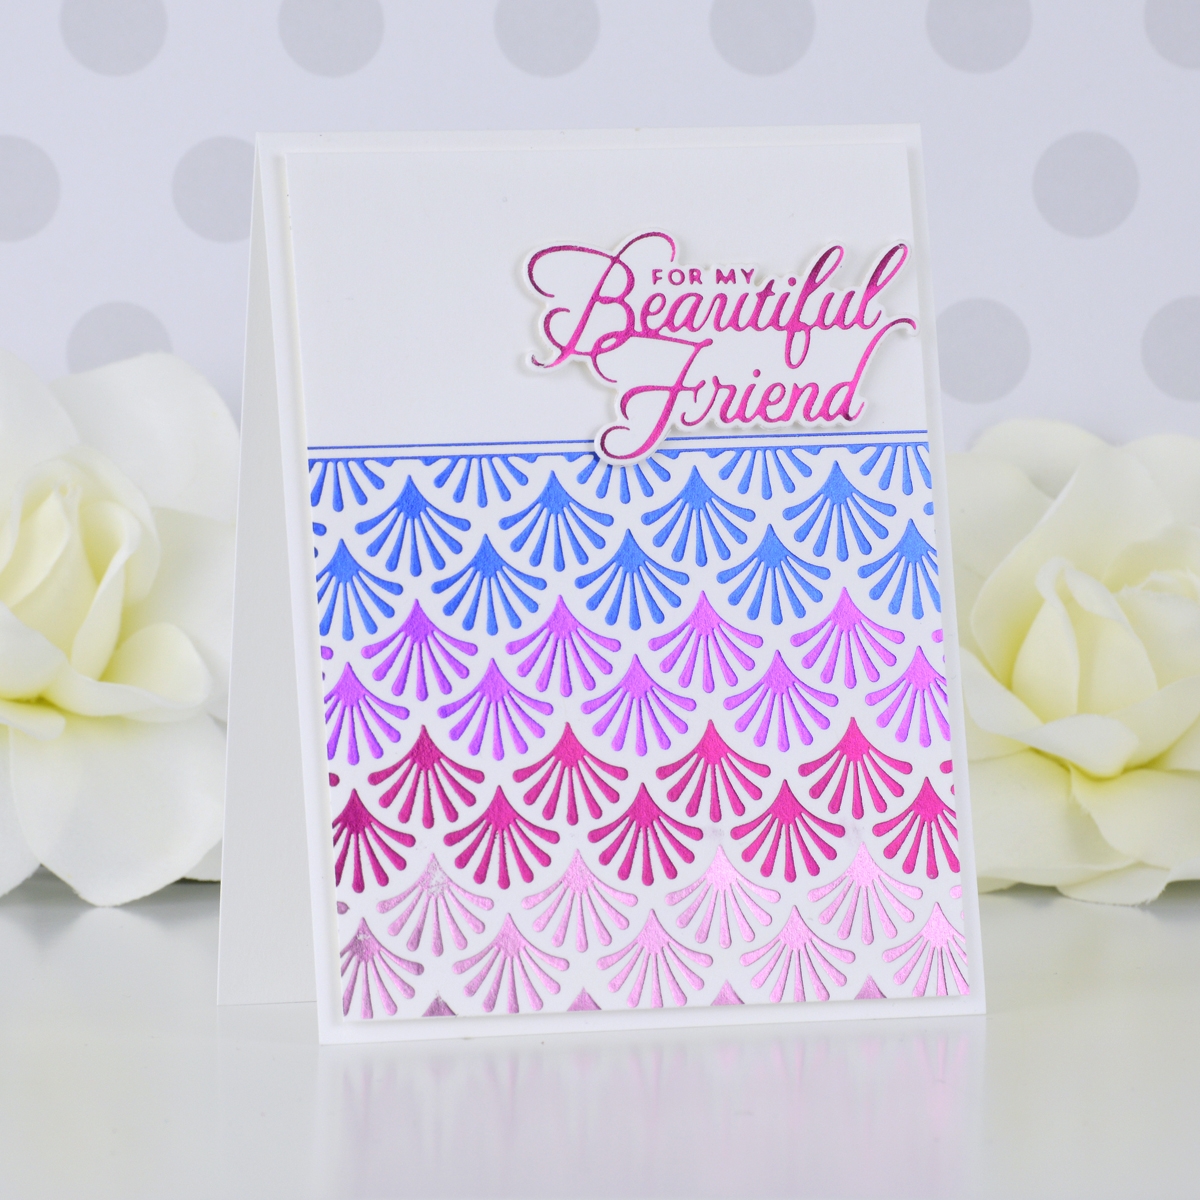
- Adhere the foiled background panel onto a top-folding A2-sized white card base with foam adhesive.
- Pop the sentiment up above the foiled background with foam adhesive.
Spellbinders Supplies:
Other supplies
White cardstock, foam adhesive
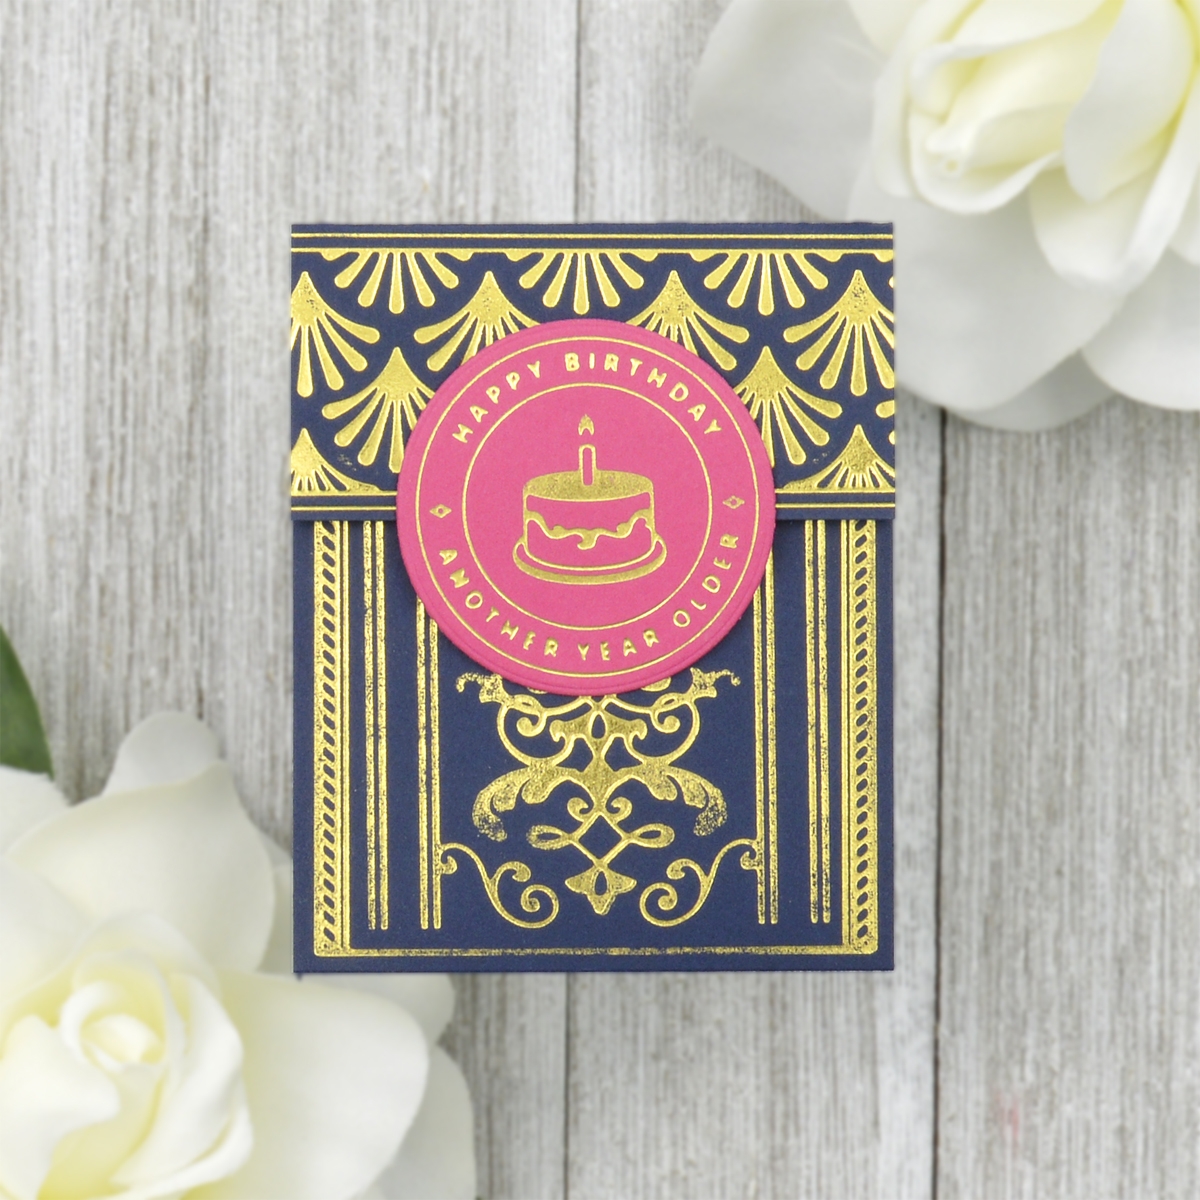
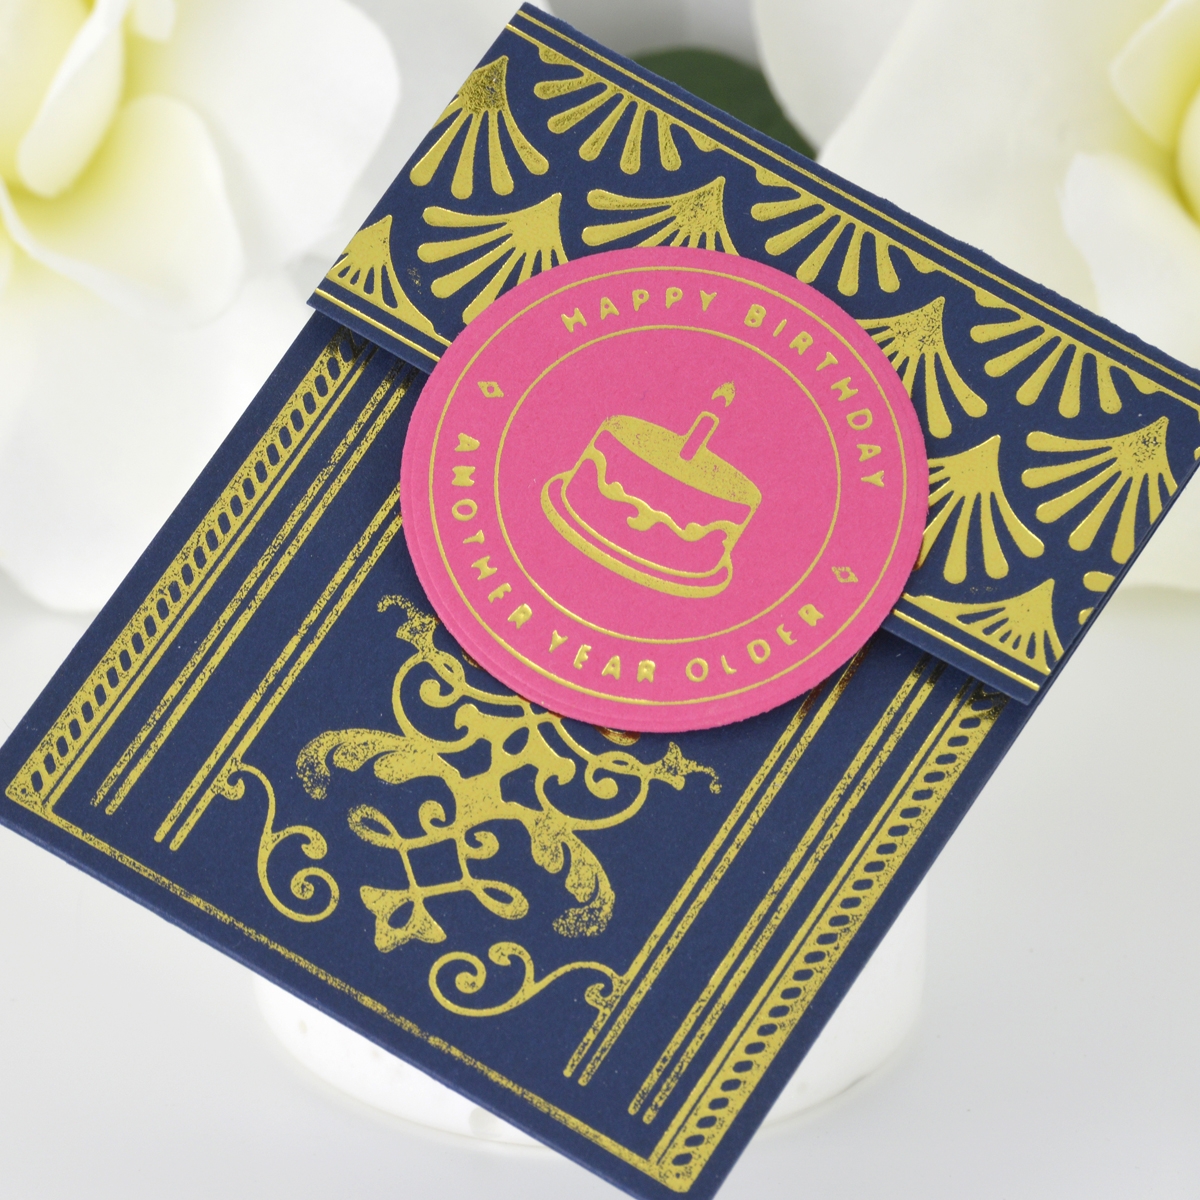
Although the Filigree Crescent Band is a beautiful design element for cards, it’s also the perfect size to embellish a fun gift card pocket!
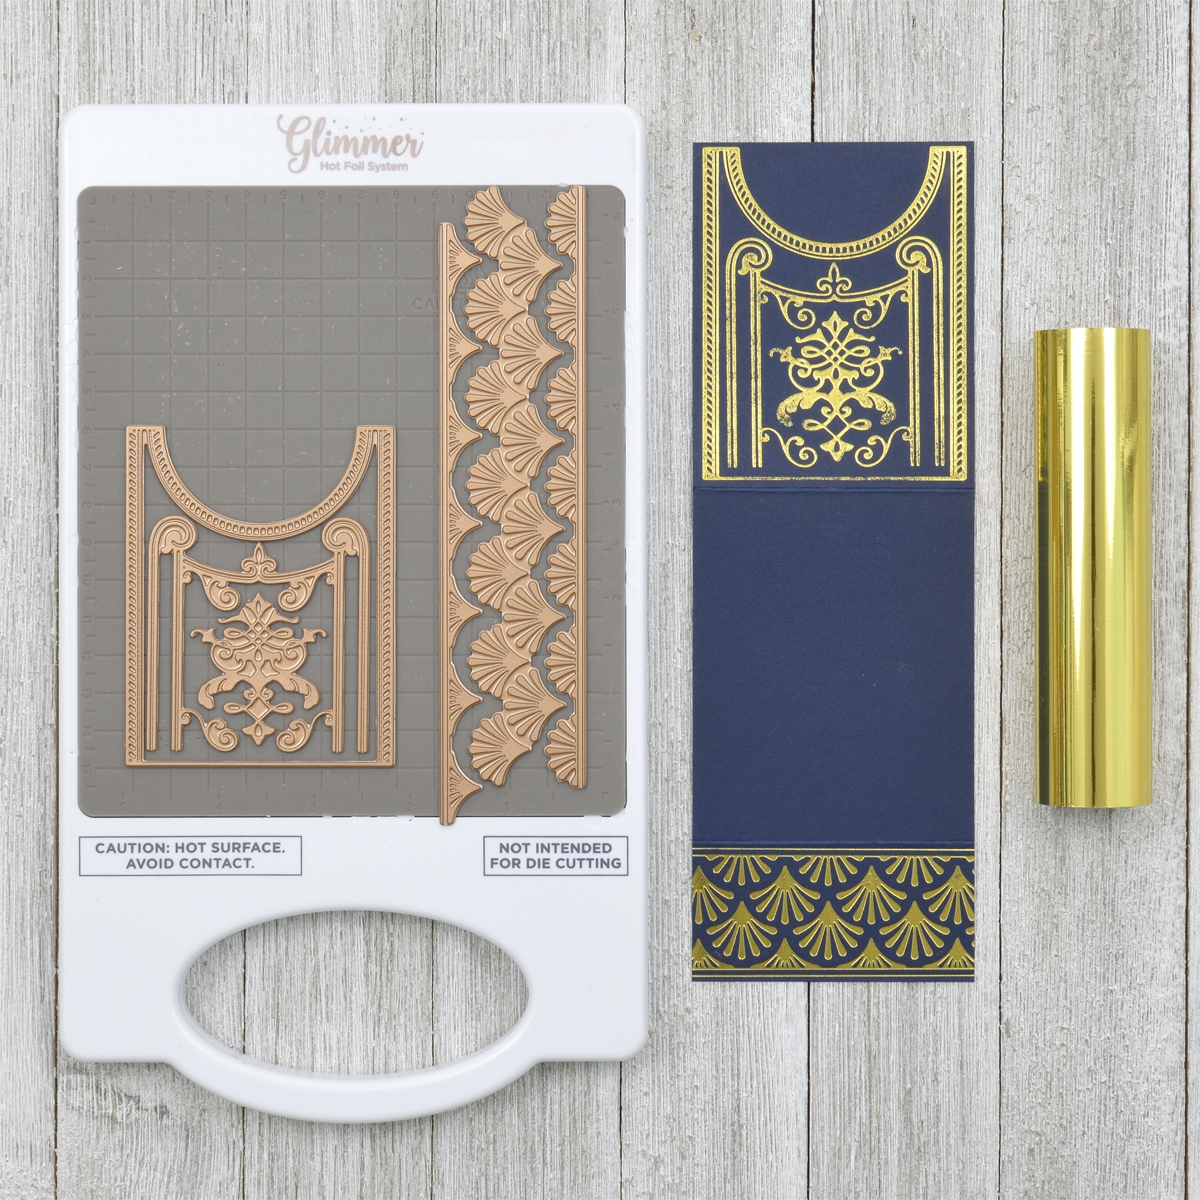
- Trim a piece of navy blue cardstock to 3” x 9” and score it at 3.75” and 7.5” from the short side.
- Apply Gold Hot Foil to the 3.75” section using the Crescent Band, Interior Design, and Flourish plates from the Filigree Crescent Band Hot Foil Plate set.
- Apply Gold Hot Foil to the 1.5” section using the Fanfare Border Glimmer Hot Foil Plates.
- Trim out the semi-circle area from the crescent band, fold the panel upward, and adhere the pocket together on the left and right edges only with strong adhesive.
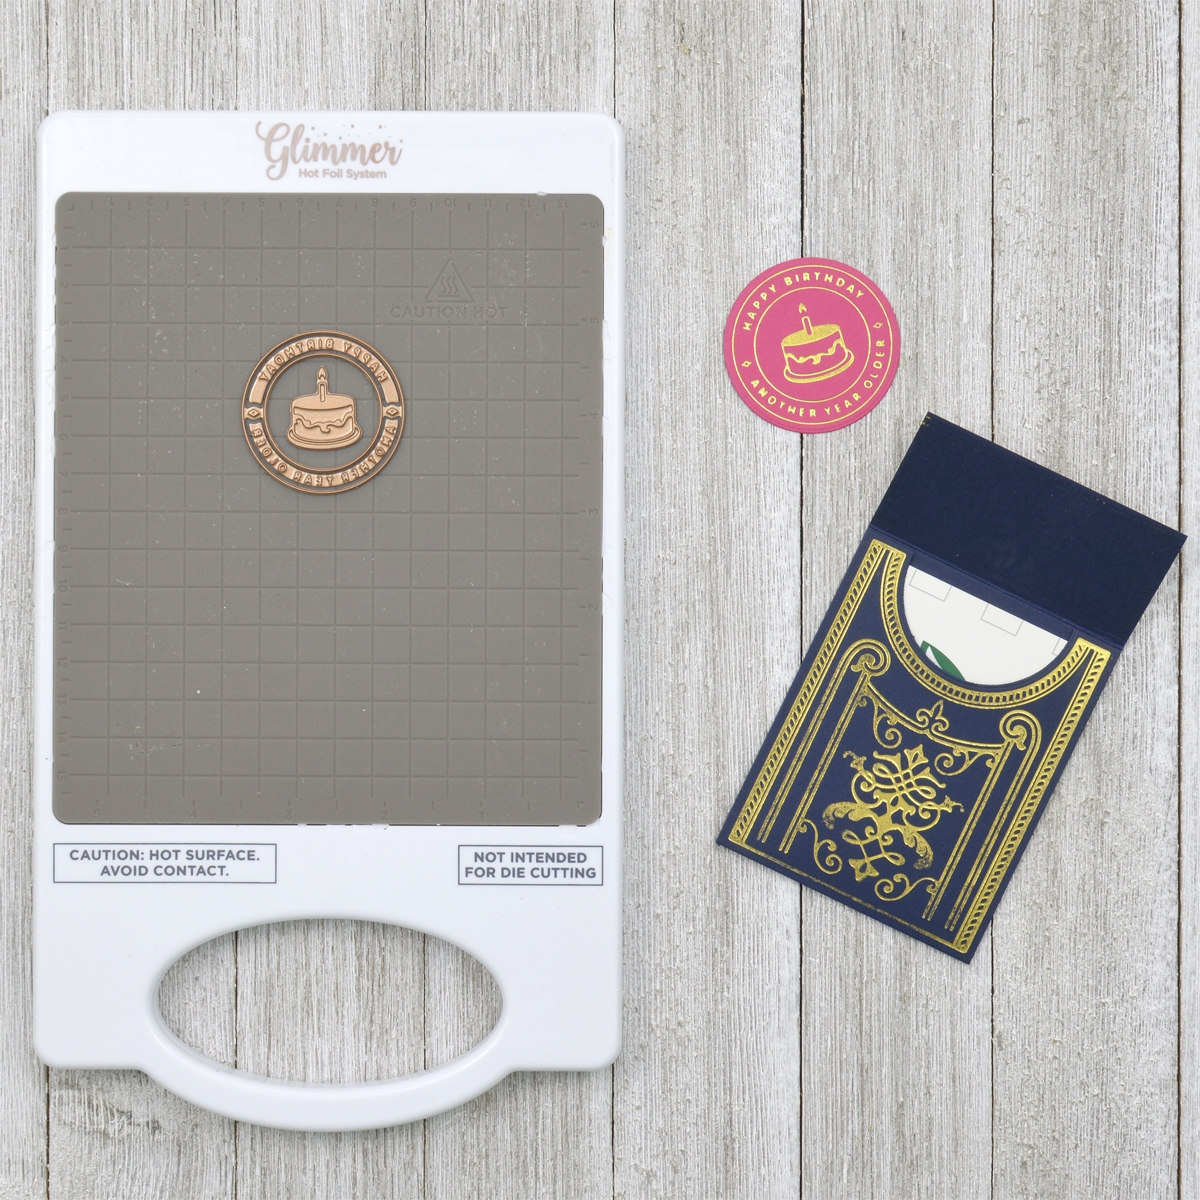
- Apply Gold Hot Foil to pink cardstock using the Circle Frame, Sentiment Inserts, and Cake plates from the Filigree Crescent Band Hot Foil Plate Set. Trim or die cut the circle out.
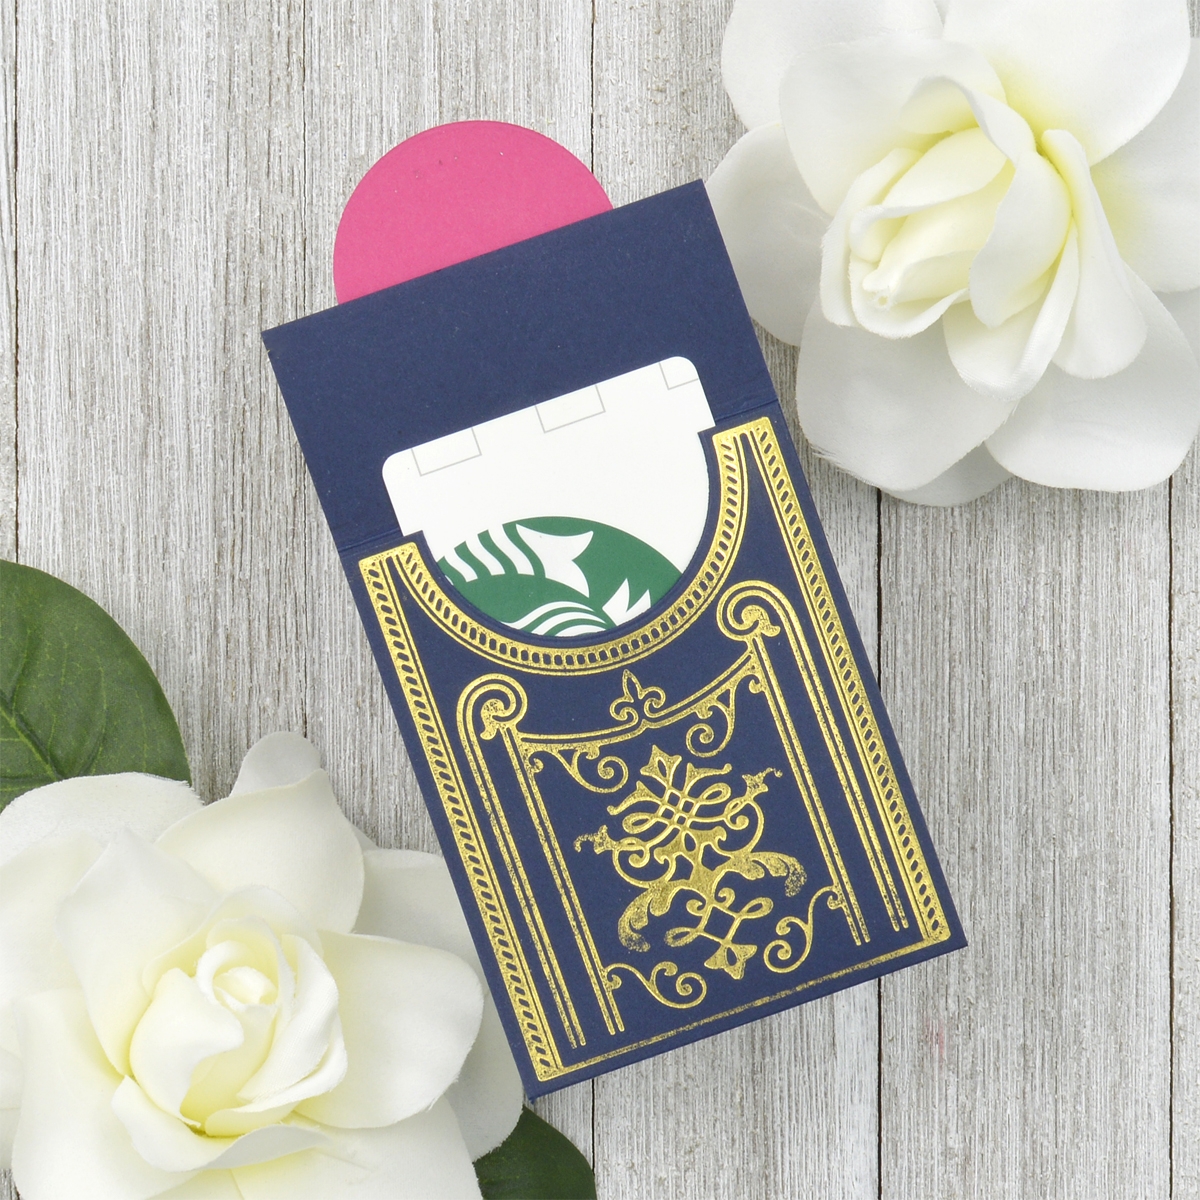
- Adhere the pink sentiment circle to the top flap of the gift card pocket with liquid glue.
- Insert gift card.
- Adhere the top flap down with a removable glue dot or hook-and-loop tab to close.
Spellbinders Supplies:
Other supplies
Gina K. Designs In The Navy Cardstock, Stampin’ Up Melon Mambo cardstock, red liner tape, removable glue dot, liquid glue
I hope you enjoyed these easy card and gift ideas and thanks so much for stopping by today. You can find more inspiration over at my blog AnnieBWills.com.
One Comment
jellybeanerz
wow. So classy the cards! I am loving the new Diamonetta background stamp too! I have no experience with hot foil but I love how it turns out!