
Sweet Street Collection – Card Inspiration with Annie Williams
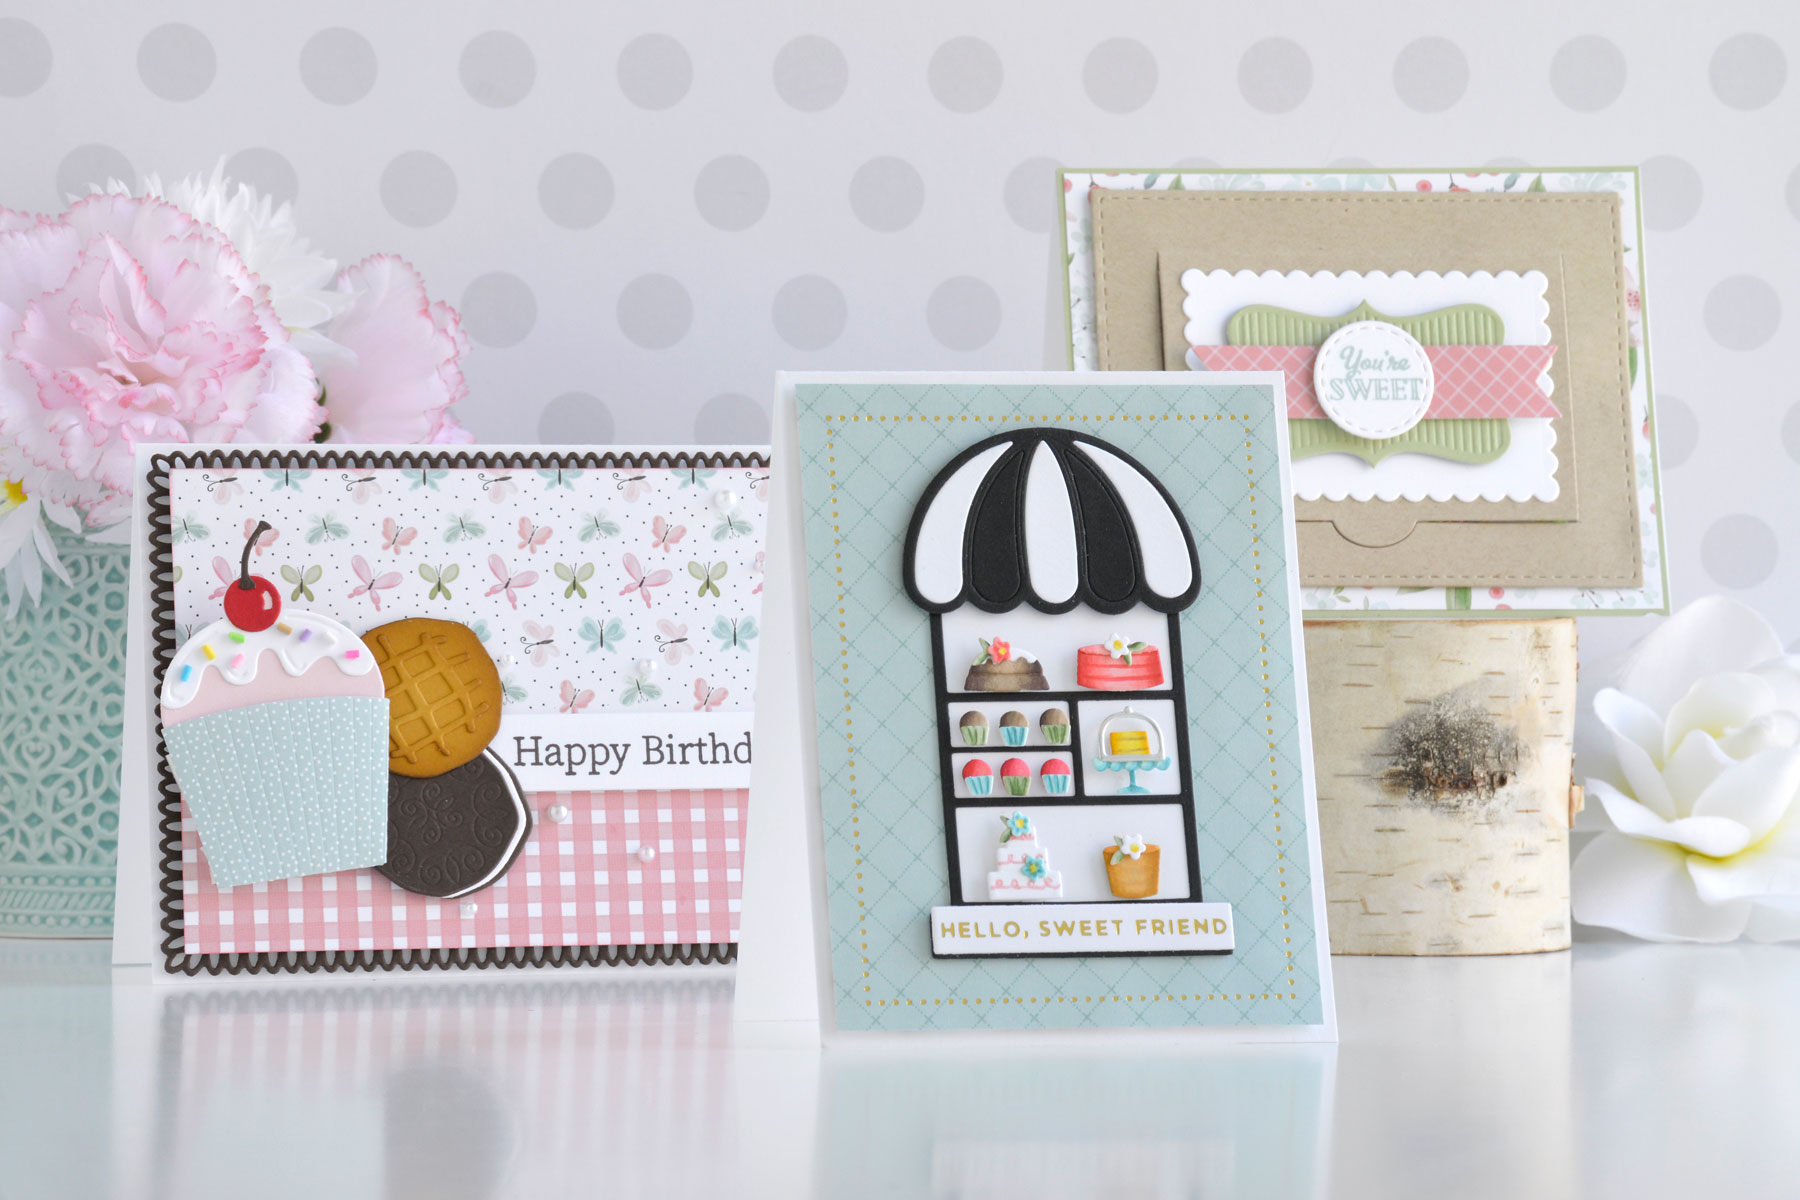
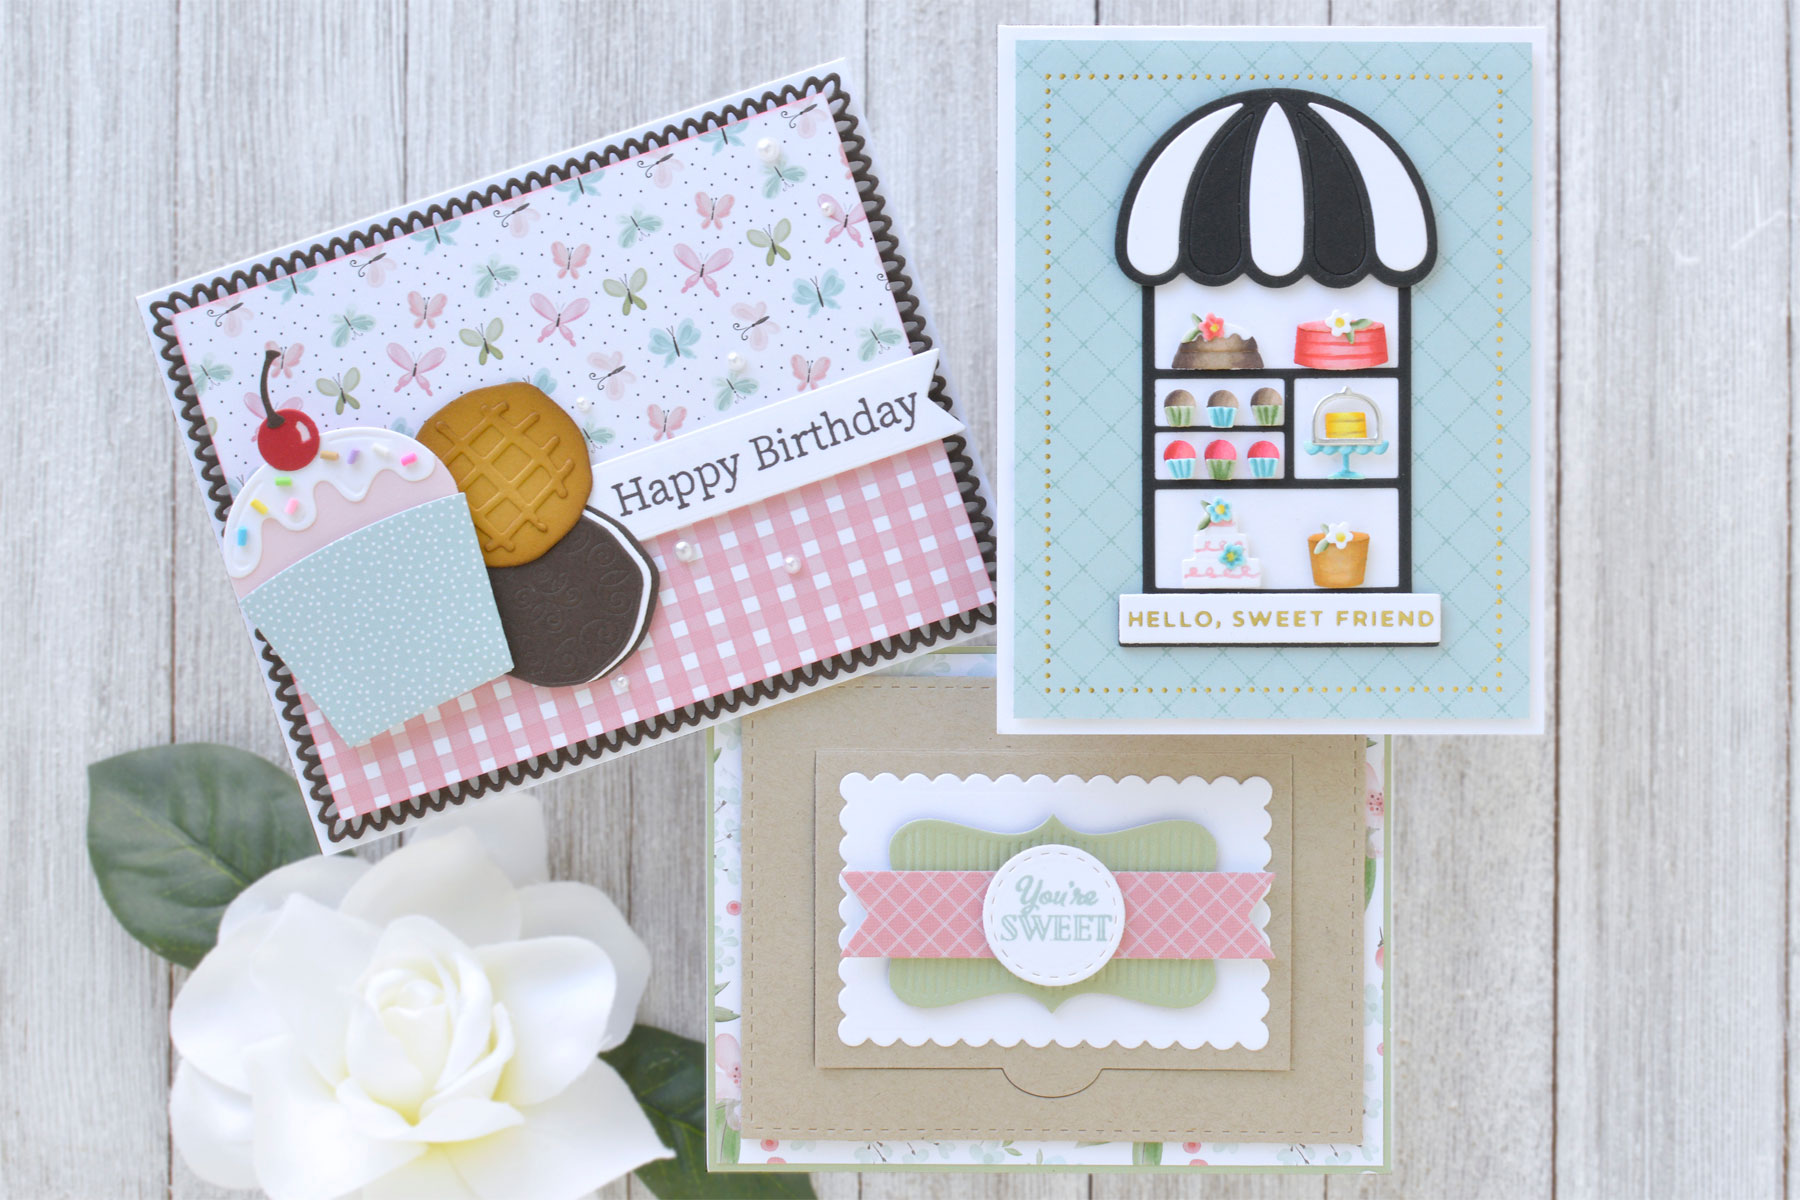
Hi there, this is Annie Williams and I’m excited to be back today to share a couple of projects using the new Sweet Street Collection from Spellbinders. The delicious confections, fun peekaboo elements, and sugary sentiments inspired me to create three sweet cards for various occasions.
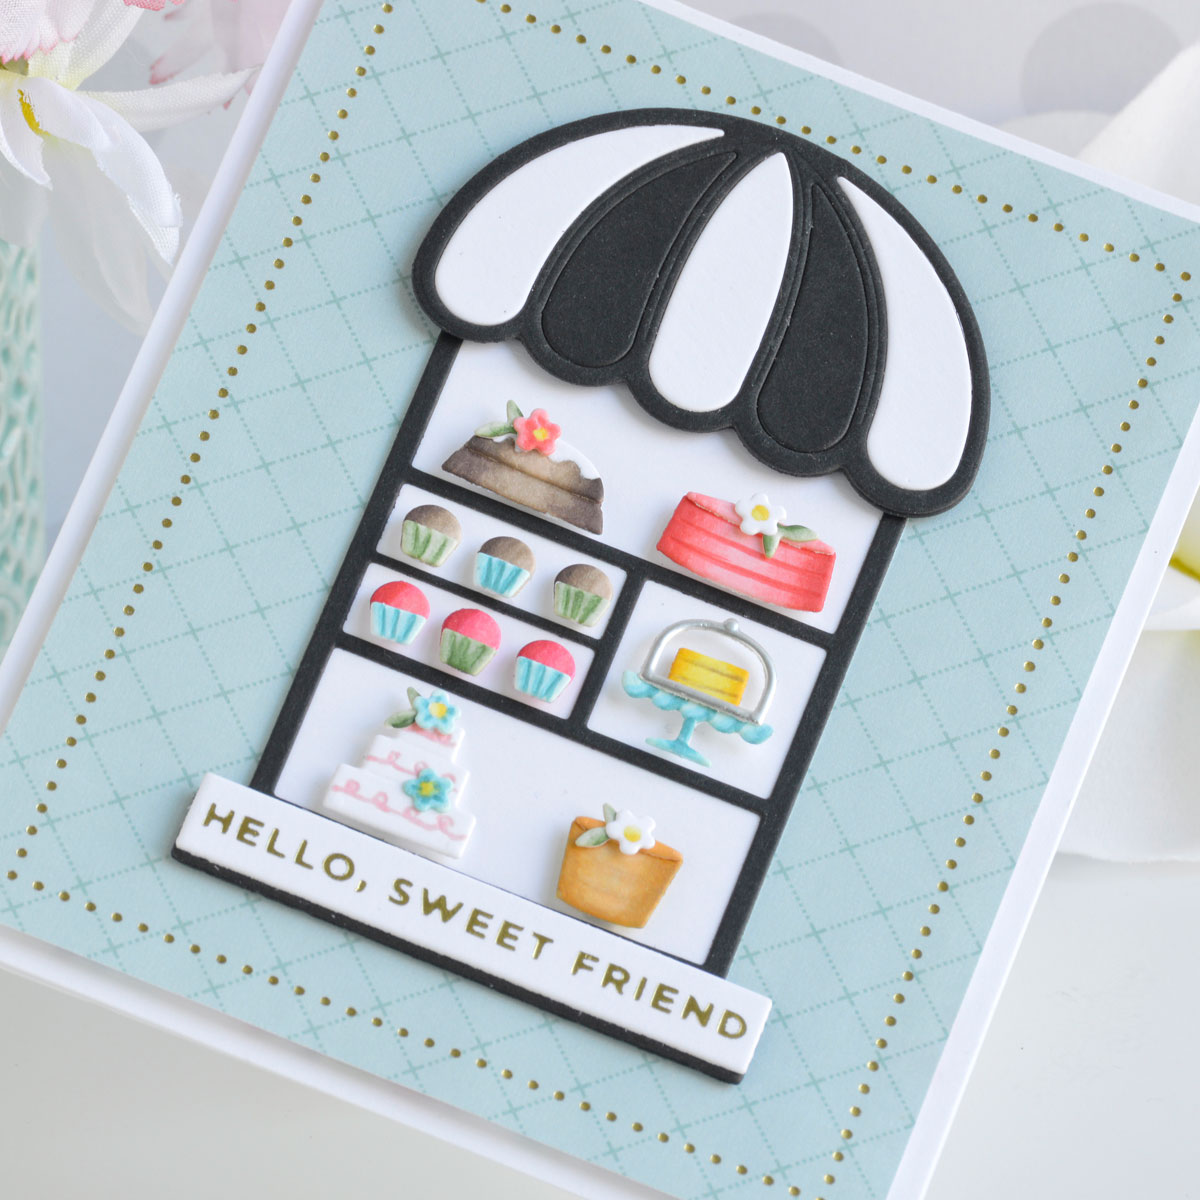
The Sweet Shoppe Card
The Sweet Shoppe die set caught my eye as fast as a fully-stocked bakery window might in real life! I had a blast cutting, coloring, and piecing together each of the delicious little treats in this little shop display to create a pretty hello card.

- Trim a piece of patterned paper to 4”x 5.25”. Apply Gold Hot Foil to the panel using the largest plate from the Essential Glimmer Rectangles Plate Set and the Glimmer Hot Foil Machine.
- Die cut white and black cardstock with the window, sill, and awning dies from the Sweet Shoppe die set. Apply Gold Hot Foil to the white window sill die-cut using one of the sentiment plates from the Mini Everyday Sentiments Glimmer Plate Set.
- Die cut white cardstock using the treat and flower dies from the Sweet Shoppe die set.
- Color the die-cuts with Copic markers and assemble using liquid glue.
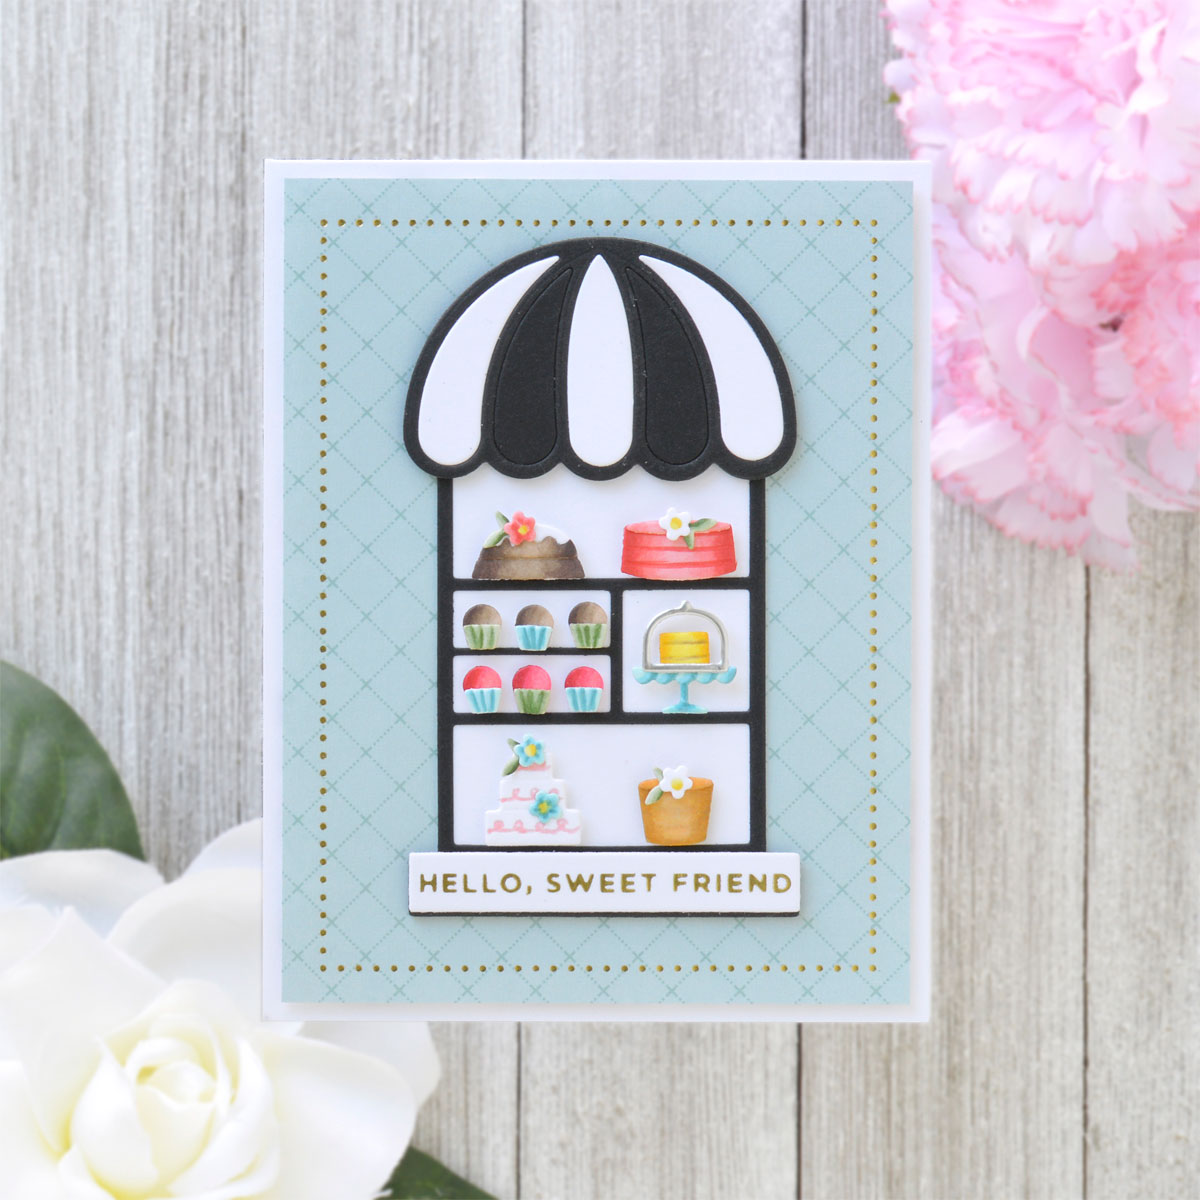
- Adhere the background panel to a top-folding A2-sized white card base with foam adhesive.
- Trim a piece of white cardstock to 2” x 2.5” and adhere the black window die-cut on top with liquid glue. Add the window to the card front with tape runner or liquid glue.
- Adhere the awning above and the sill below the window with foam adhesive.
- Pop the colored treats into the window compartments with more foam adhesive.
Spellbinders Supplies:

Other Supplies
Heavyweight white cardstock, black cardstock, Carta Bella Flower Garden 6×6 Paper Pad, Copic markers, liquid glue, foam adhesive.
Party Cupcake Pocket Card

With so many delicious treats to choose from in this collection, I couldn’t help but toss a few together and create a yummy and feminine birthday card next.
- Die cut brown cardstock with the largest die from the Picot Petite Rectangles die set.
- Trim two coordinating pieces of patterned paper to 4.25” x 5.5” and 2.25” x 5.5” and adhere them together using tape runner.
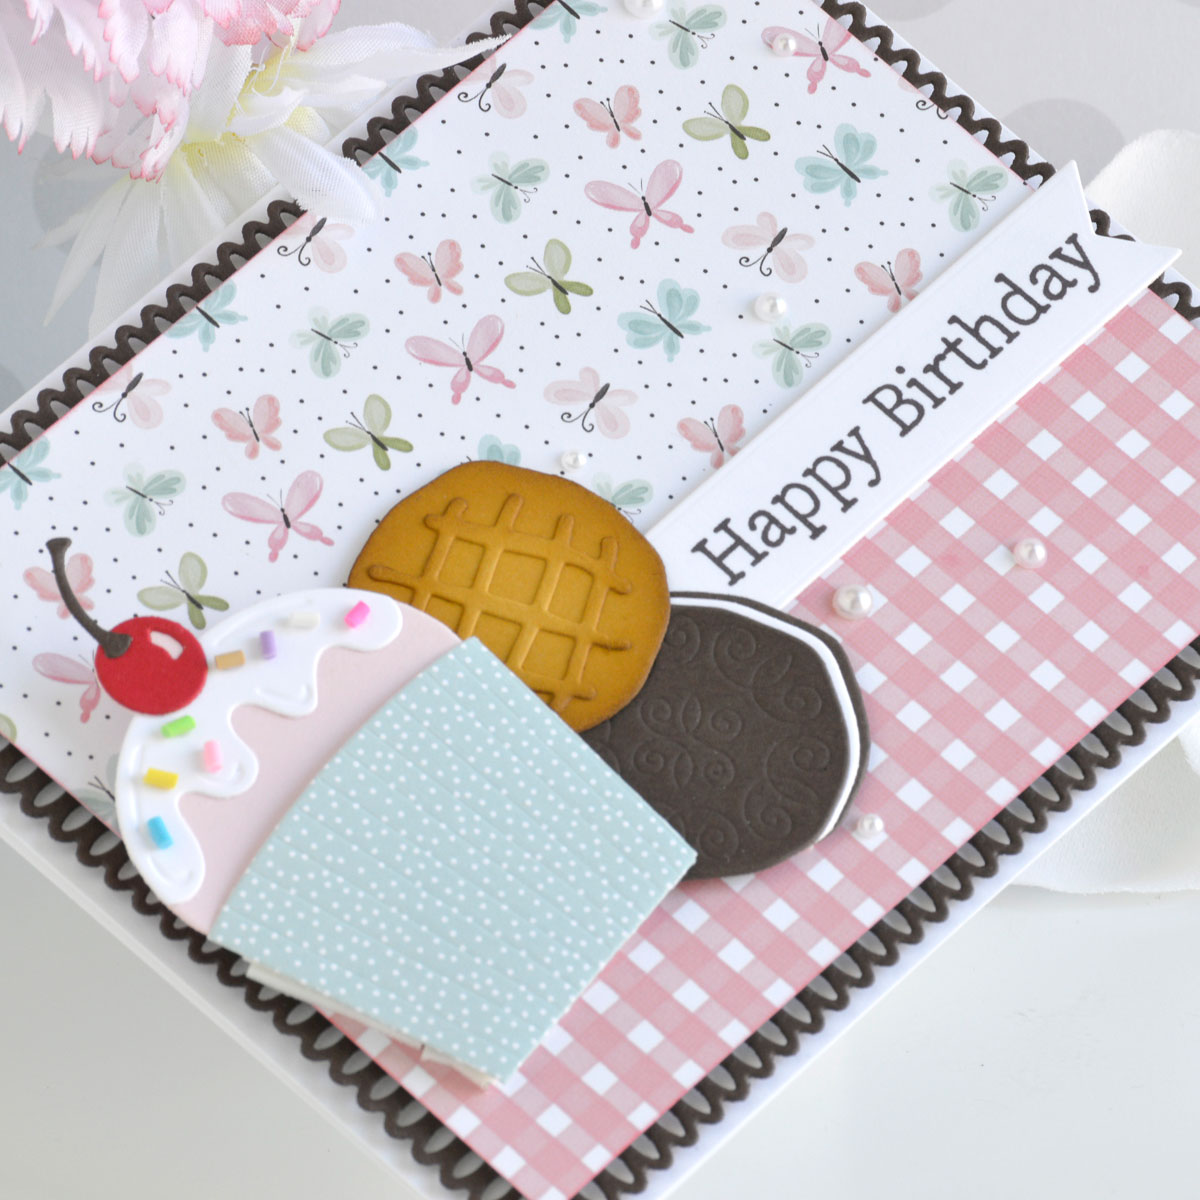
- Die cut the cupcake, frosting, and cherry from the Party Cupcake Pocket die set from pink, white, and red cardstock. Die cut the cupcake wrapper from patterned paper.
- Assemble the cupcake and wrapper with liquid glue. Add sprinkles to the icing using the Sweet Sprinkles Embellishments.
- Stamp a sentiment from the Sugar Coated Sentiments stamp set onto the cupcake body using brown ink.
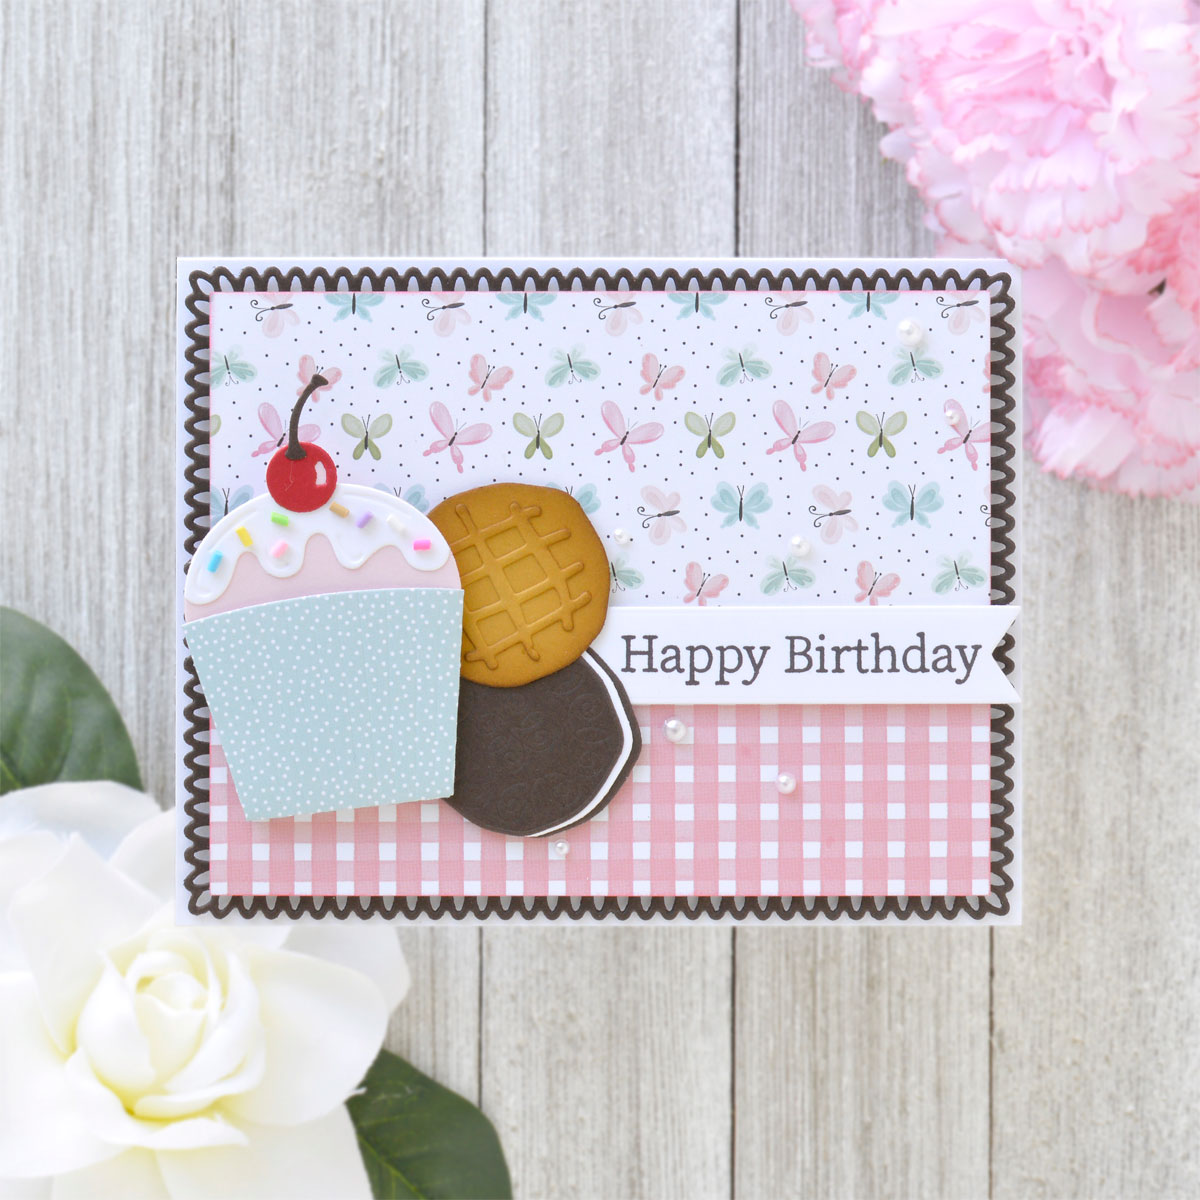
- Die cut brown and white cardstock using the Cookie Corner die set.
- Assemble the crème-filled sandwich cookie with liquid glue.
- Add the hashtag layer on top of the peanut butter cookie with liquid glue, then lightly blend Brushed Corduroy Distress Ink around the edges with a blending brush.

- Stamp a sentiment from the Sugar Coated Sentiments Stamp Set onto white cardstock using brown ink. Die cut it out using the banner die from the Sweet Confections Label and Banner die set.
- Adhere the picot rectangle to a top-folding 4.75” x 6” white card base with foam adhesive, then add the patterned paper layer on top with more foam adhesive.
- Pop the cookies, cupcake, and sentiment banner up on the card front, ensuring that the cupcake can slide out of its wrapper to reveal the message inside.
- Add white pearls to embellish.
Spellbinders Supplies:
Other supplies
White cardstock, various colors of cardstock for diecutting, Carta Bella Flower Garden 6×6 Paper Pad, Pinecone Versafine Clair Ink, Brushed Corduroy Distress Ink, blending brushes, white pearls, tape runner, liquid glue, foam adhesive.
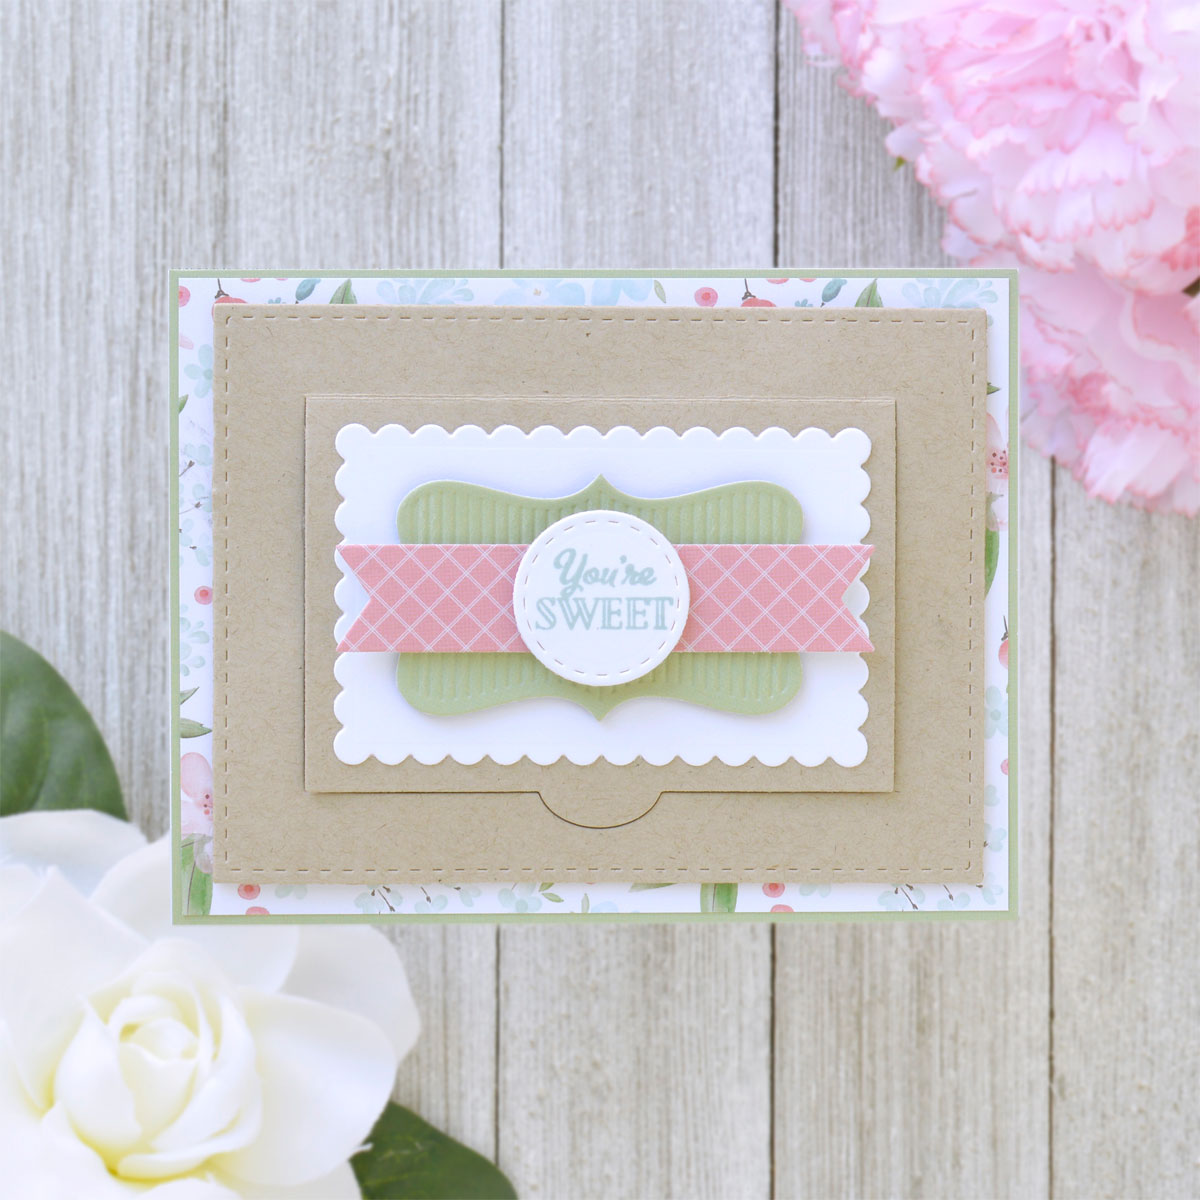
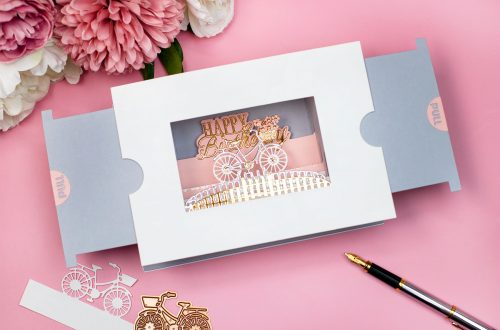
Sweet Treat Box Cookie Card

How adorable is the Sweet Treat Box die set? There are so many ways you can use this die, so I decided to add a handful of sprinkles to my cookie box and make a fun shaker card.
- Die cut kraft cardstock using the bakery box die and white cardstock using the scalloped rectangle die from the Sweet Treat Box die set.
- Trim a piece of white cardstock to about 4” x 3”. Apply Copper Hot Foil to the panel using the More Than Chocolate Glimmer Plate and the Glimmer Hot Foil Machine.
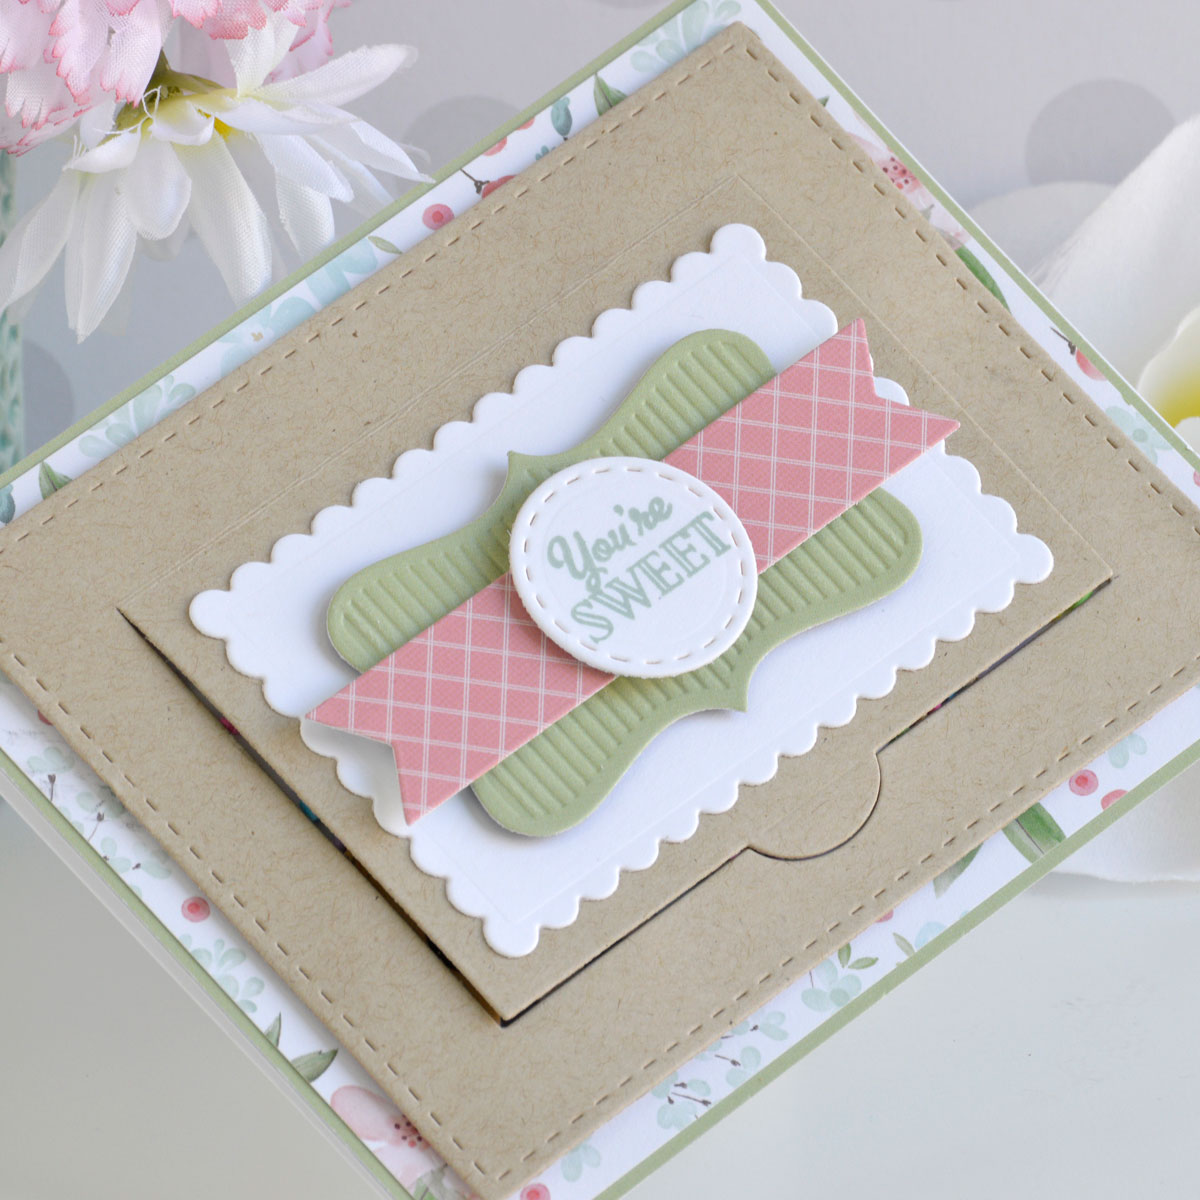
- Die cut green and pink patterned paper with the label and banner dies from the Sweet Confections Label & Banner die set.
- Stamp a sentiment from the Sugar Coated Sentiments stamp set onto white cardstock using Speckled Egg Distress Oxide Ink. Die cut it out using the circle die from the Sweet Confections Label & Banner die set.

- Die cut brown, kraft, and white cardstock with the Cookie Corner die set. Adhere the crème-filled sandwich cookie and chocolate chip cookie layers together with liquid glue. Lightly blend Brushed Corduroy Distress Ink around the edges of the chocolate chip cookie with a blending brush.
- Attach a piece of acetate behind the opening of the bakery box die-cut using liquid glue. Add the cookies into the corners of the box directly behind the acetate and then surround the opening completely with foam adhesive.
- Pour a handful of Sweet Sprinkles Embellishments into the bakery box and seal the shaker pouch up by adding the foiled white sentiment panel to the back.
- Adhere patterned paper to a top-folding A2-sized white card base with tape runner.
- Add the bakery box shaker to the center of the card front with liquid glue.
- Embellish the box with embossed label, banner, and sentiment (layered up with lots of foam adhesive).
- To keep the flap of the box closed, I added a small repositionable glue dot to the tab.
Spellbinders Supplies:
Other supplies
White heavyweight cardstock, kraft cardstock, Carta Bella Flower Garden 6×6 Paper Pad, Speckled Egg Distress Oxide Ink, Brushed Corduroy Distress Ink, blending brush, repositionable glue dot, acetate, liquid glue, tape runner, foam adhesive
I hope you enjoyed this trio of sweet cards and thanks so much for stopping by today. You can find more inspiration over at my blog AnnieBWills.com.
One Comment
Natasha Vacca
These treats are super yummy! A beautiful set of cards!!!!!