Nordic Ornaments 3 Ways Christmas Cardmaking With Michelle Short
Hello there, Michelle Short here to share some inspiration using the Nordic Ornaments Etched Dies from the Winter Tales Collection by Zsoka Marko.

The whole collection is amazing, but I am focusing on the Nordic Ornaments today to share three different ways to use them.
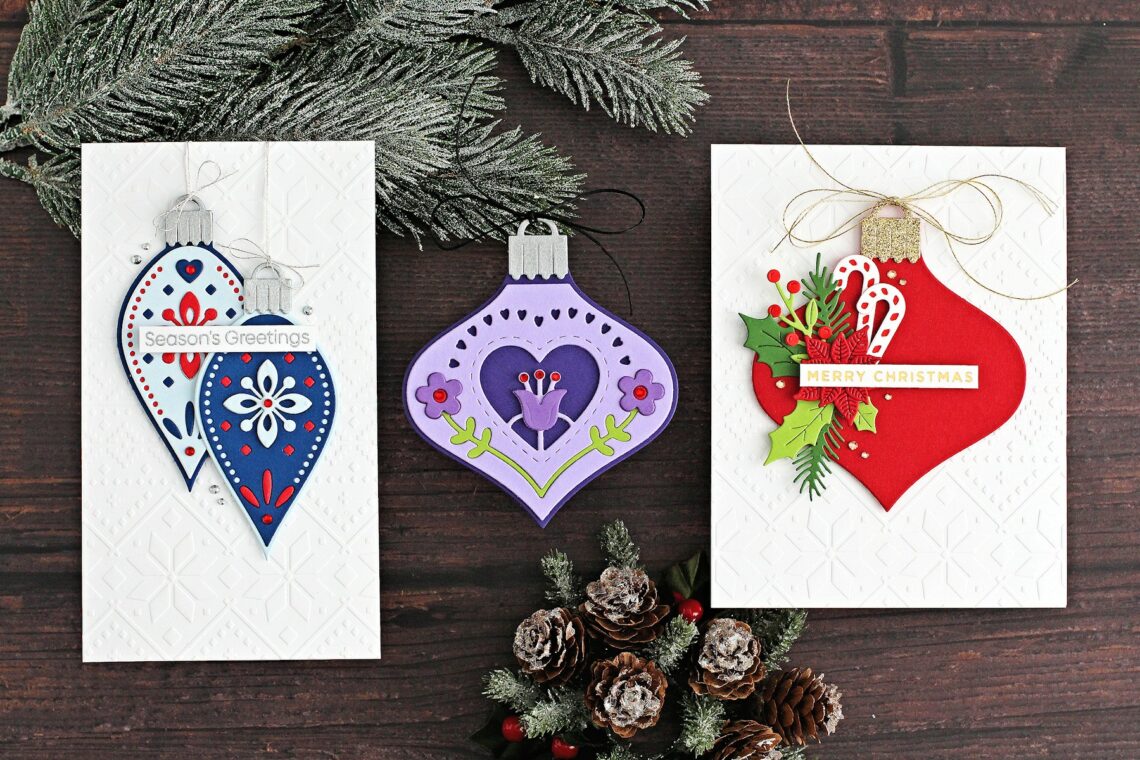
SEASON’S GREETINGS
For my first project, I wanted to go with a Nordic feel, so I chose a color palette of red and blue, with lots of white space. I die-cut the longer of the two Nordic Ornaments twice from Cosmic Sky, Glacier and Poppy Field Cardstock. The toppers were die cut using Brushed Silver Cardstock.
I assembled and adhered them using Bearly Art Glue, raising some of the areas with multiple layers of die-cuts for added dimension and interest.
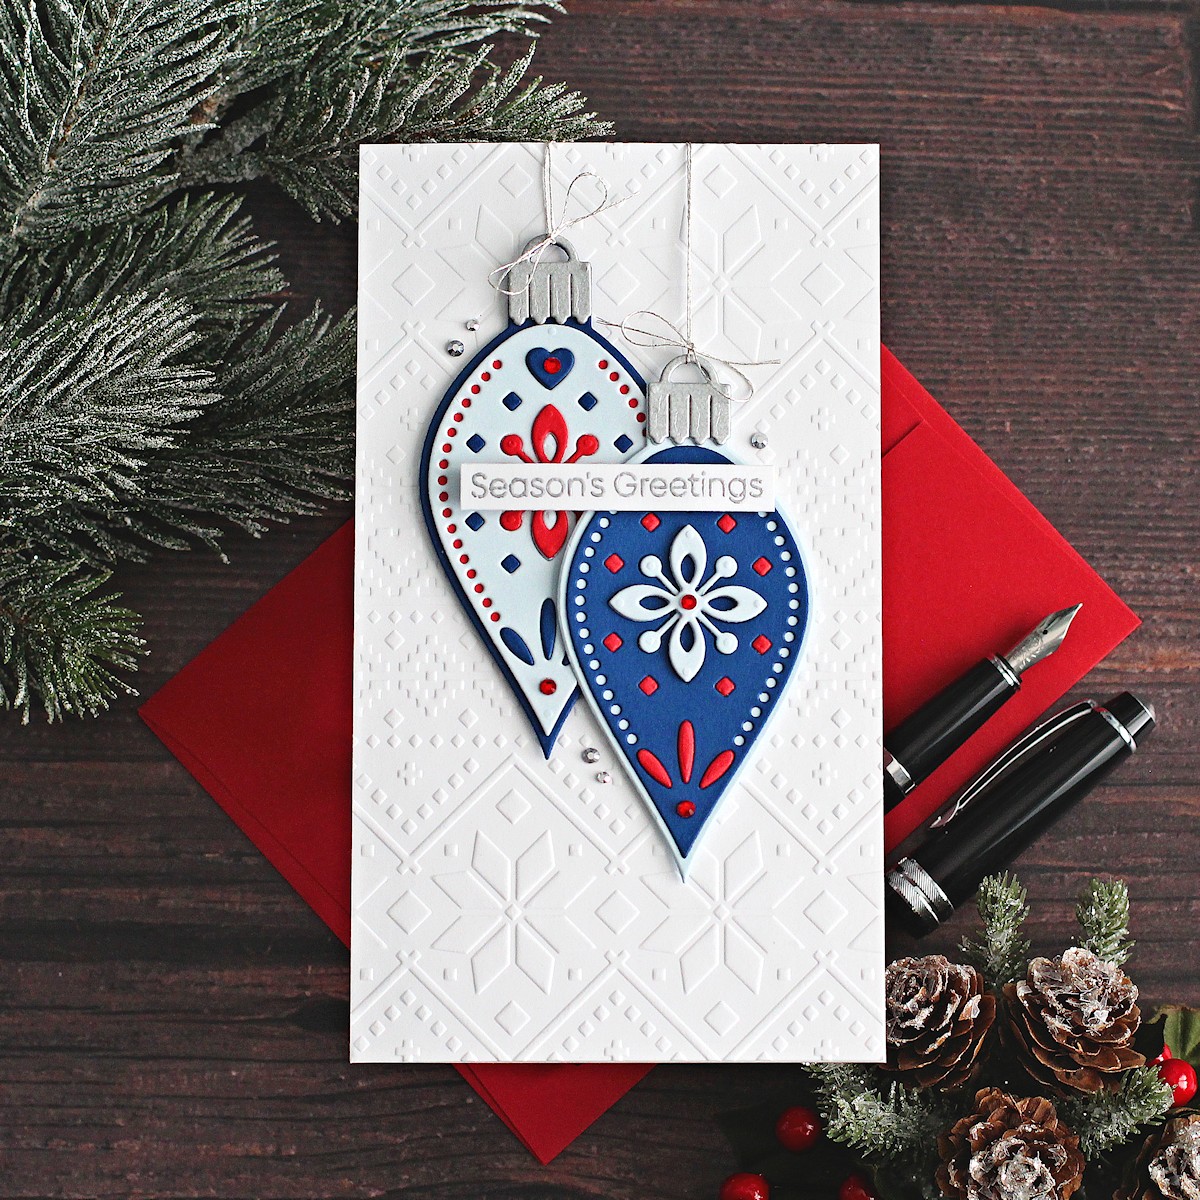
I then took a panel of white cardstock and ran it through my Platinum 6 with the Ski Lodge Embossing Folder. I tied Silver Metallic Thread through the ornaments and adhered them to the panel with thin foam tape. The thread was secured on the back of the panel using tape.
The panel was adhered to a mini slimline card base (3.5” x 6.25”) with tape runner adhesive. I tied bows at the top of the ornaments using the same silver thread.
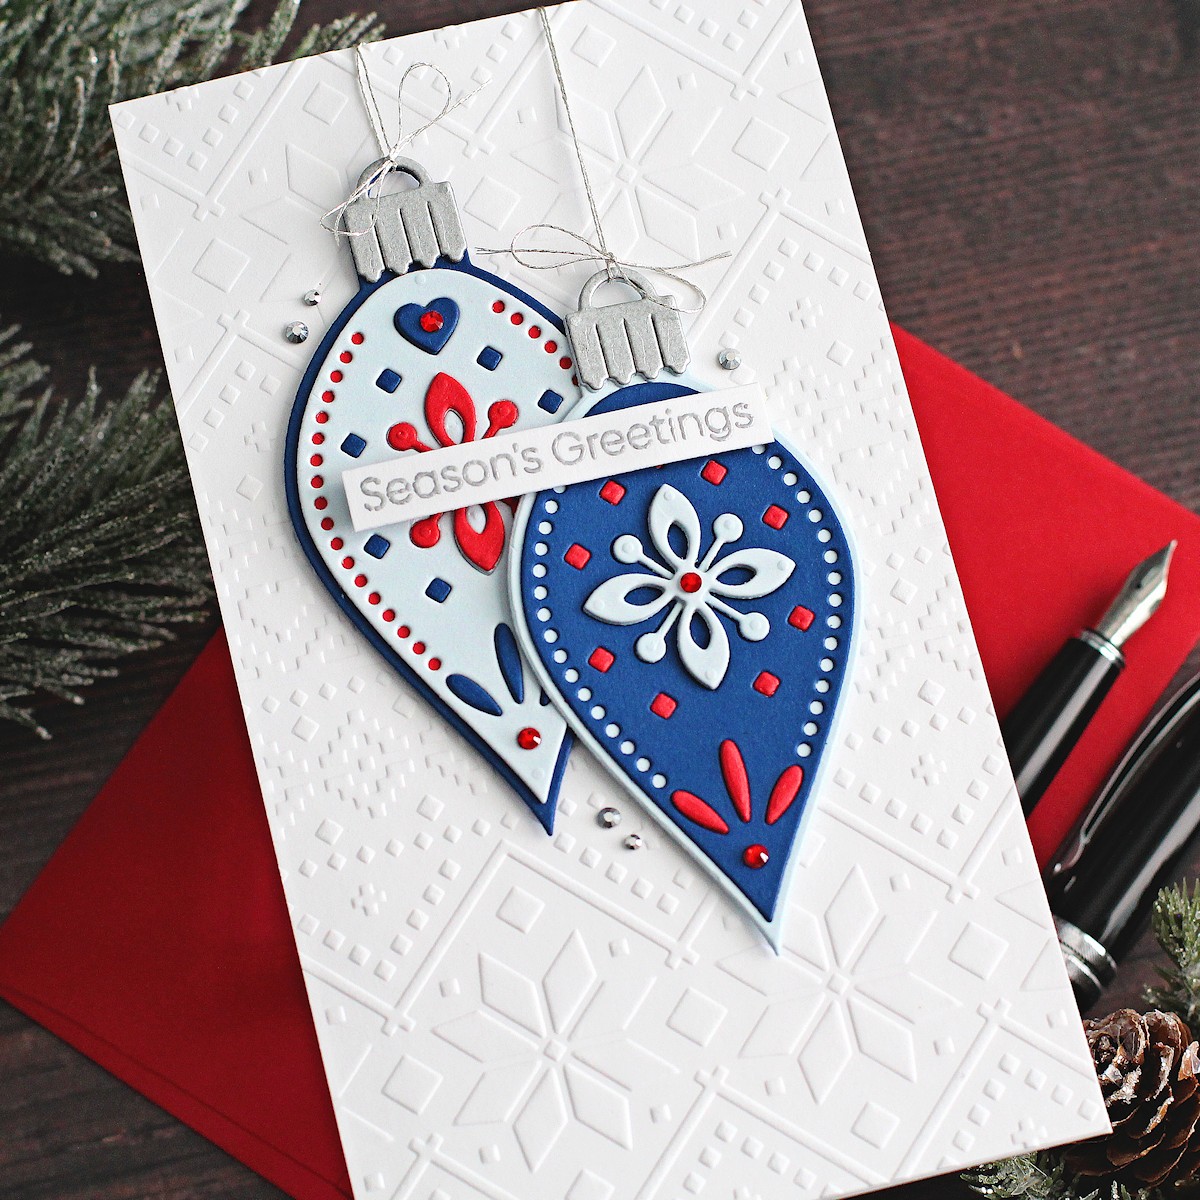
Finally, I took the sentiment from the Peace & Joy Clear Stamp set and stamped it on to white cardstock using Clear Embossing & Watermark Ink. I applied Silver Embossing Powder. It was heat set, cut into a strip and adhered to the card with foam tape.
To finish off, I added a few Red and Silver Mix Color Essentials Gems.
ORNAMENT TAG
The Nordic Ornaments make perfect ornaments to add to cards and other paper crafting projects, but they also work well as a decoration/ornament in itself. You could even use it as a tag too! I die-cut the layers from Amethyst, Lilac Blossom, Purple Mist and Rainforest Cardstock. I die-cut some of the layers more than once to layer them up for some added dimension.
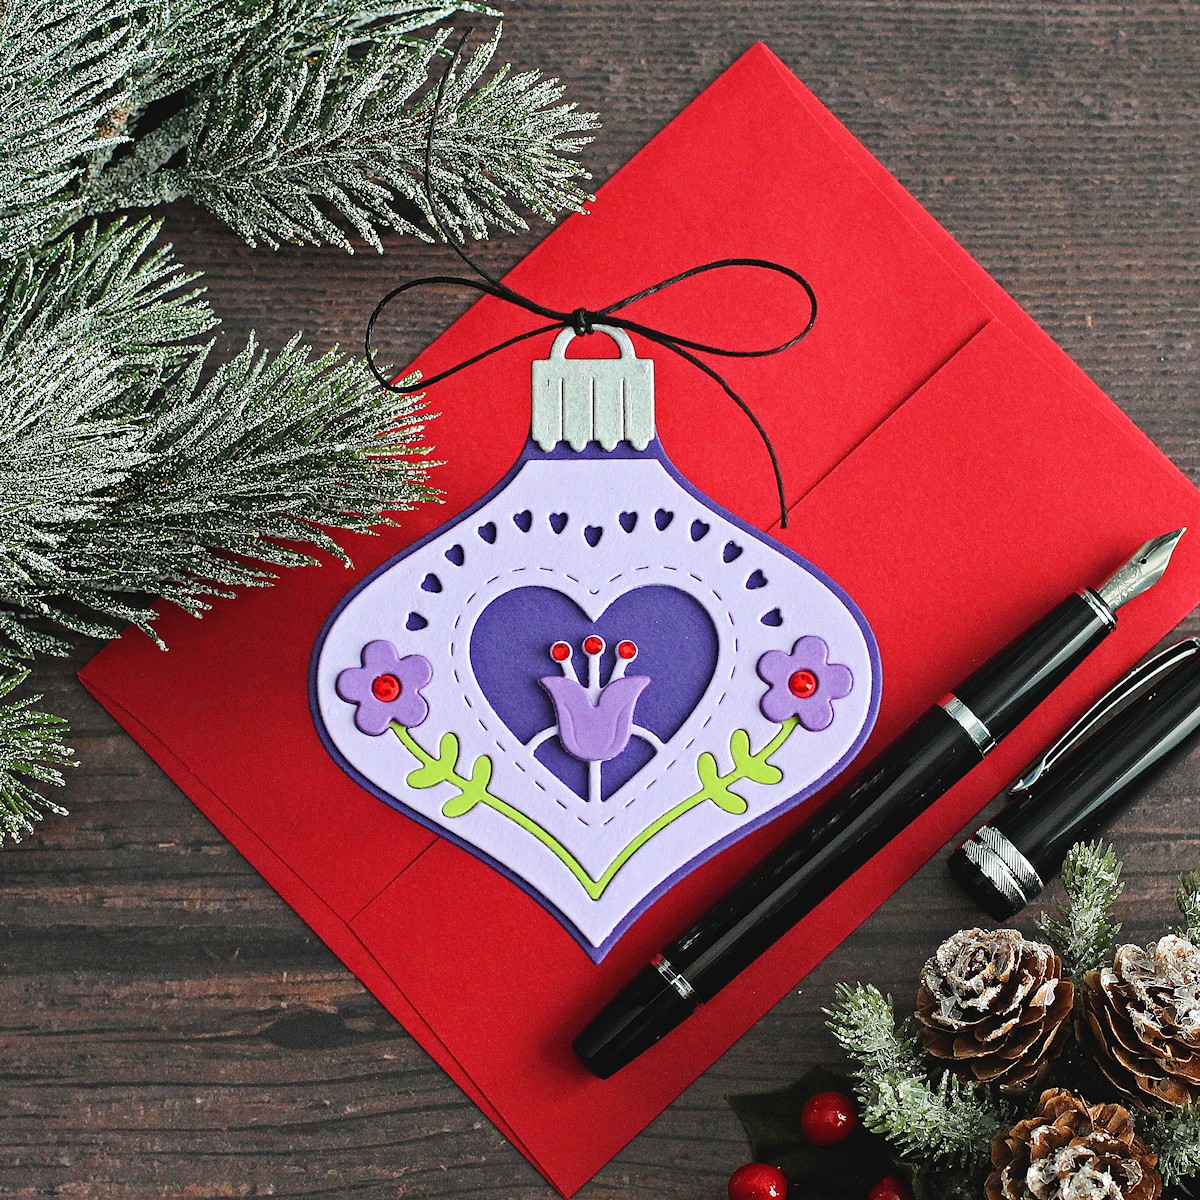
The topper piece was die-cut using Brushed Silver Cardstock. I assembled and adhered the pieces together using Bearly Art Glue. I tied Black Twine through the top of the ornament and tied it in a bow.
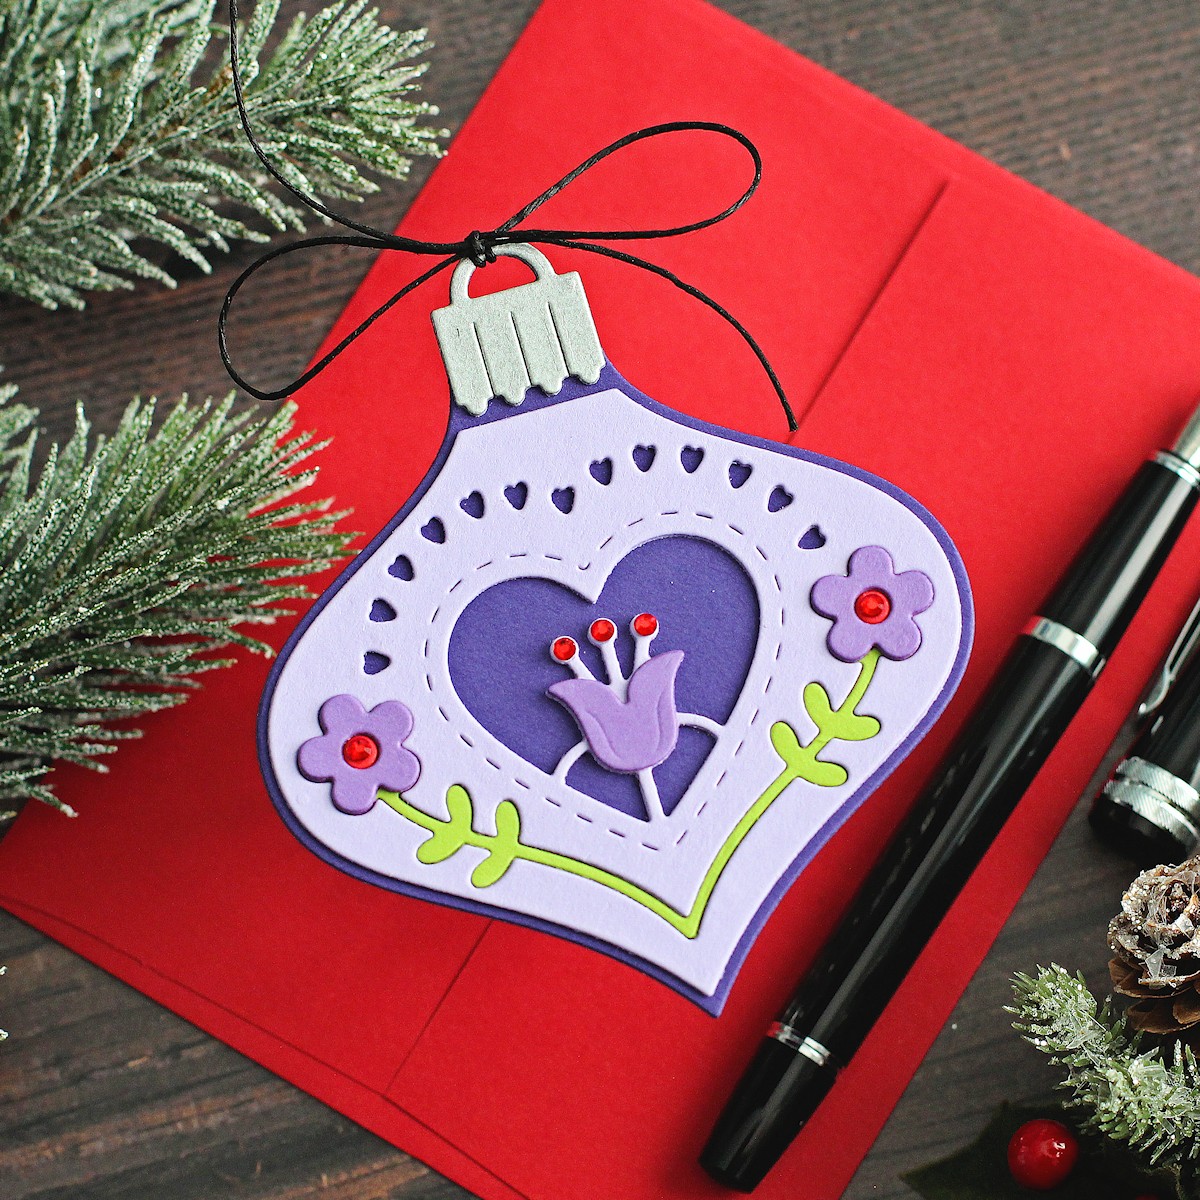
I finished off by embellishing with a few Red Mix Color Essentials Gems. Although this ornament is part of the winter collection, I think it would work perfectly for all year round too!
MERRY CHRISTMAS
For my last project today, I wanted to share how amazing the ornaments are just by die cutting the bottom layer/ornament shape and embellishing with other products that you may already have.
I die-cut the Nordic Ornament from Phone Booth and gold glitter cardstock. They were layered up two die-cuts thick for some added stability.
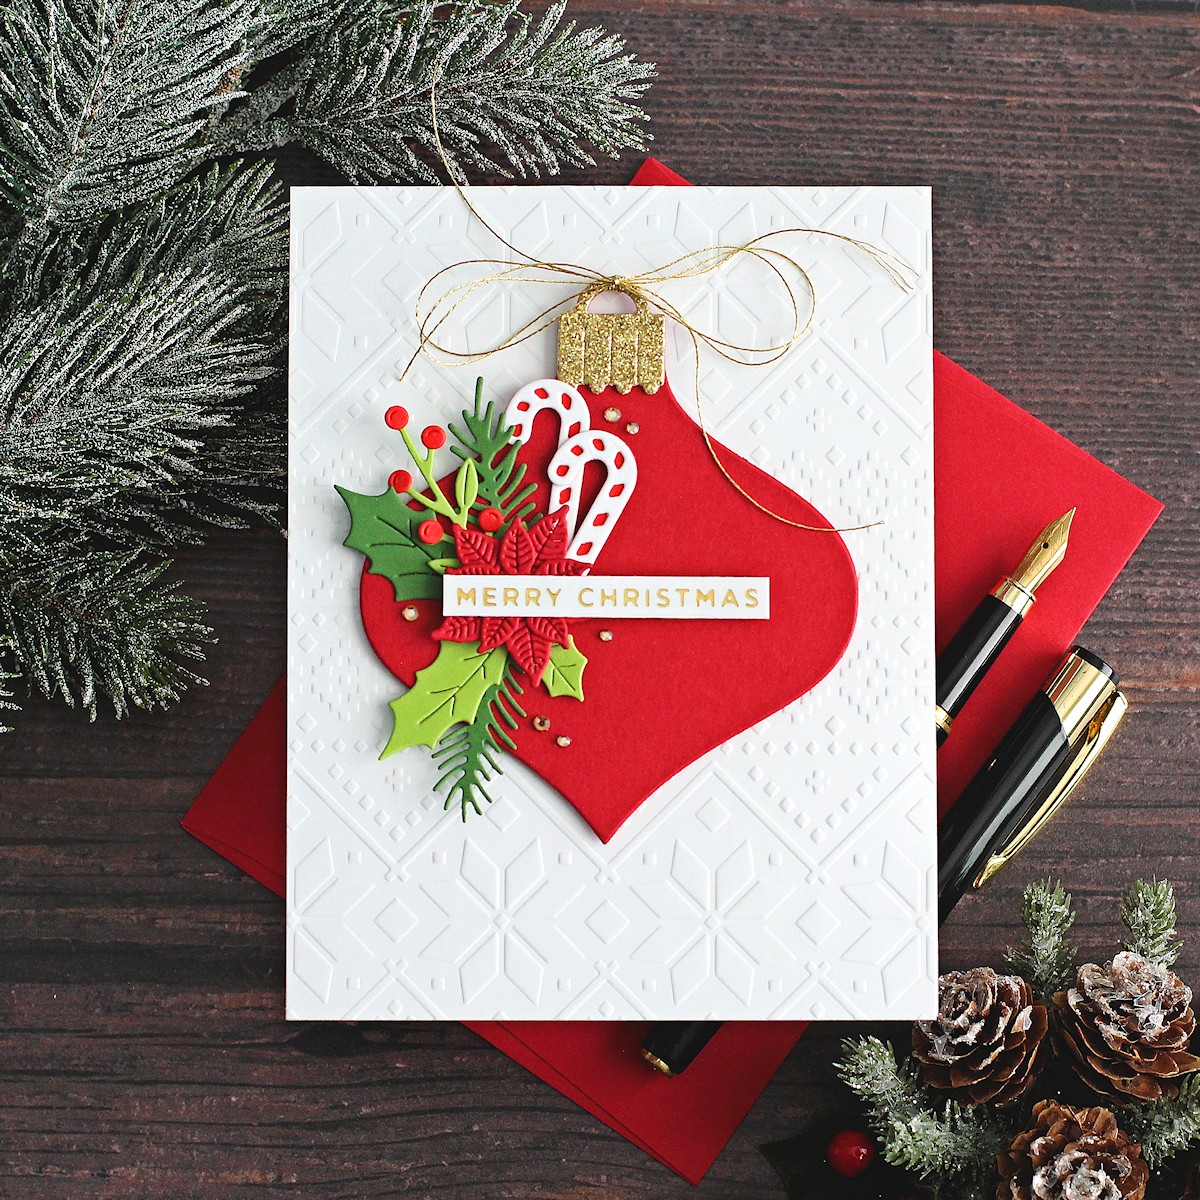
There are so many ways that you could embellish the ornament. I thought some foliage would work nicely, so I die-cut elements from Parcel & Post Christmas Decorations and the poinsettia from Christmas Blooms. I arranged them on top of the ornament and adhered in place.
I took a panel of white cardstock and ran it through my Platinum 6 with the Ski Lodge Embossing Folder. It was adhered to an A2 white card base with tape runner adhesive.
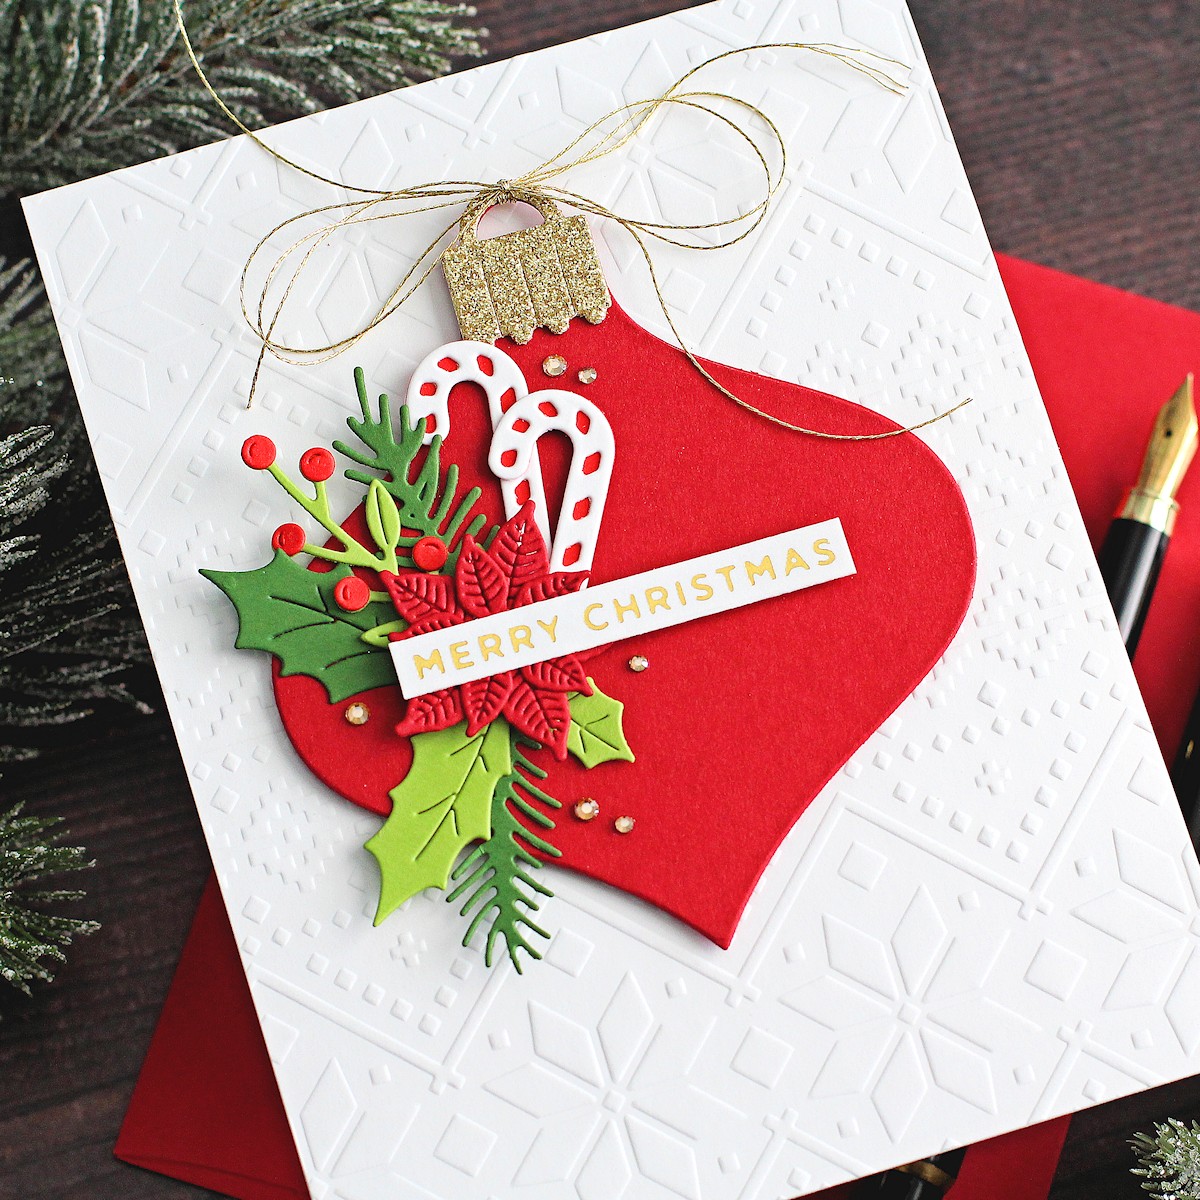
I tied Gold Metallic Thread through the top of the ornament and tied it in a bow. The ornament was then adhered to the card with thin foam tape.
The sentiment from Mini Christmas Sentiment Strips was foiled onto white cardstock with Gold Glimmer Hot Foil Roll. It was cut into a strip and added to the card with more foam tape. To embellish, I added a few Gold Mix Color Essentials Gems.
I hope you have enjoyed seeing my projects today and I have inspired you with some ideas using the Nordic Ornaments Etched Dies. Thank you so much for stopping by, have a great day!
Spellbinders Supplies:

Other Supplies
Thin foam tape, gold glitter cardstock.


2 Comments
Joan B
gorgeous!
Lori Spitzer
Hi, Michelle / Spellbinders – These are GORGEOUS! TFS!! Love the backgrounds, too.
Lori S in PA