Faux-Bleached Letterpress Cards with Annie Williams
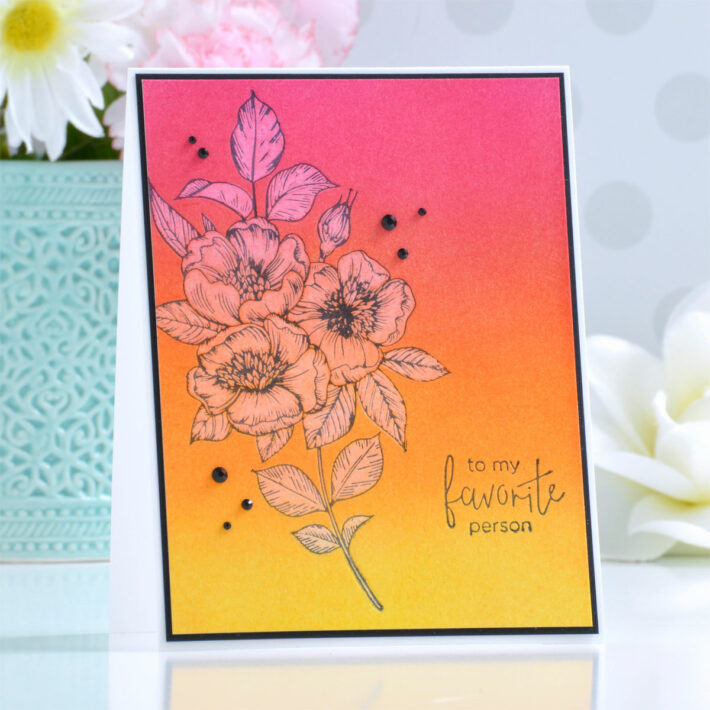
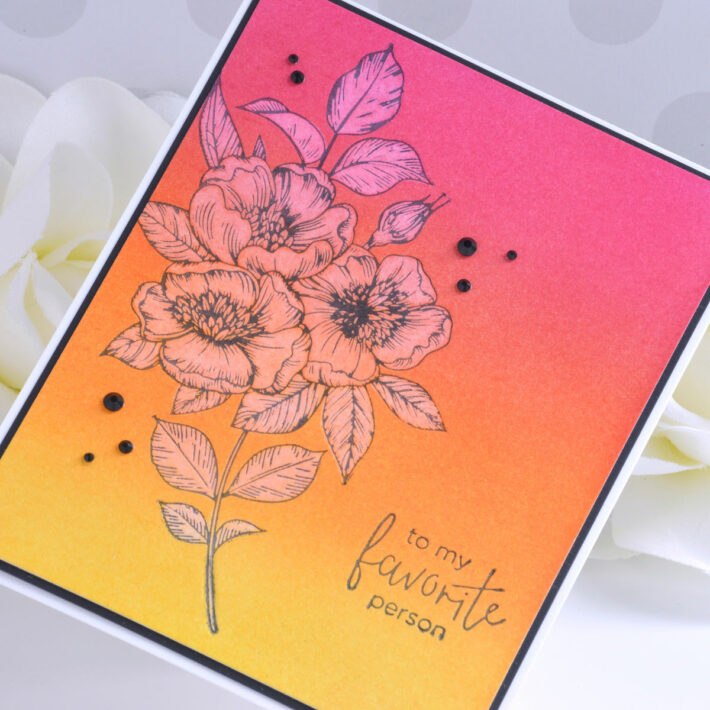
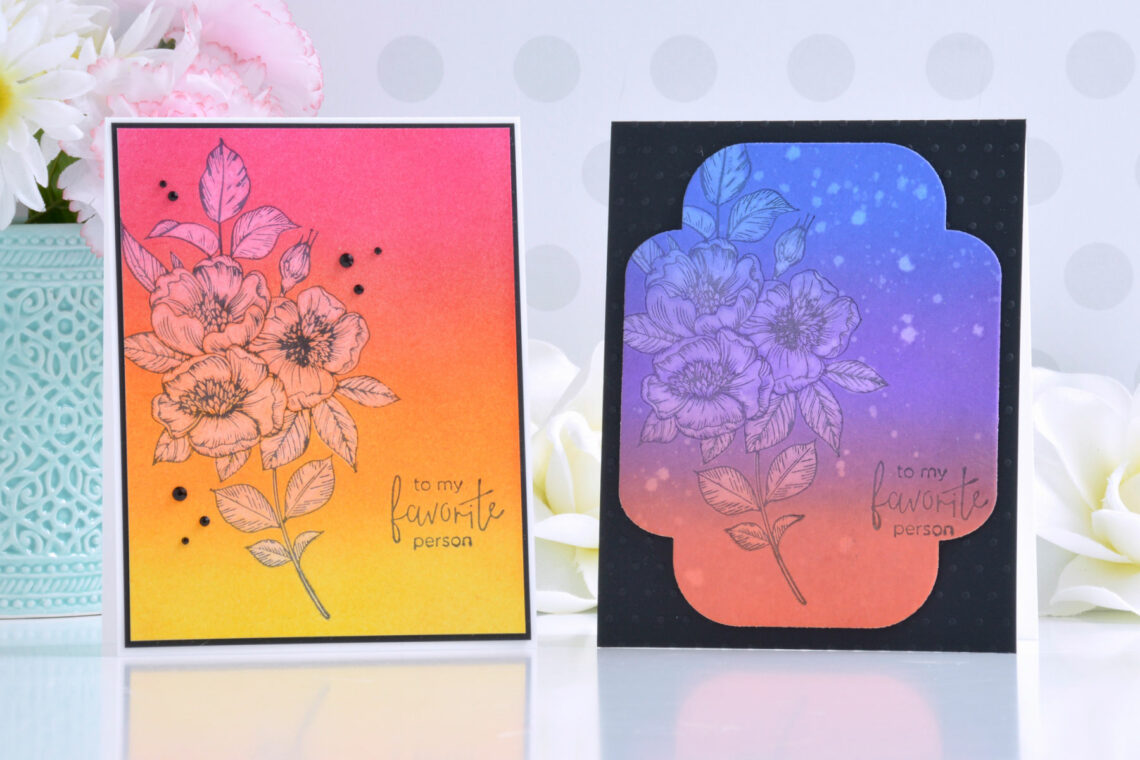
Hi there, this is Annie Williams and I’m excited to be back on the blog today to share this easy and fun faux-bleached letterpress technique with the new BetterPress System from Spellbinders. You can go to town coloring the beautiful BetterPress designs, but with so much gorgeous detail already in the plates, I wanted to play around with simpler coloring techniques. Here I used ink-blended backgrounds with some soft faux-bleaching to create a bold look for these simple and pretty cards.
Distress Inks with Faux-Bleached Letterpress
I started with Distress Inks for this technique because I love the vibrancy of the colors and wanted to create a bold ink-blended background for my floral sprig in bright summer colors.
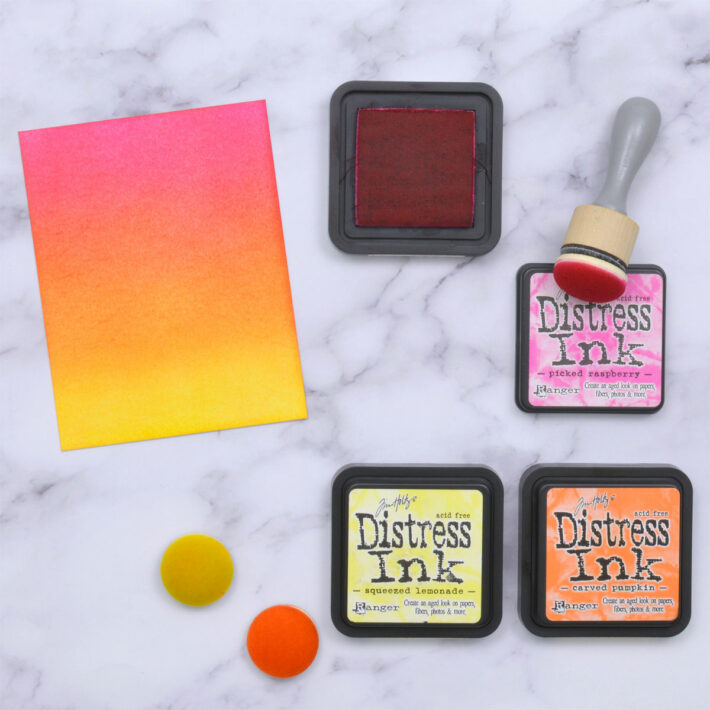
First I took one of the Porcelain BetterPress A2 Cotton Card Panels and blended Picked Raspberry, Carved Pumpkin, and Squeezed Lemonade Distress Ink down the panel with a foam blending tool. The cotton cardstock absorbs the ink quickly, so you will need to apply it heavily for this technique.
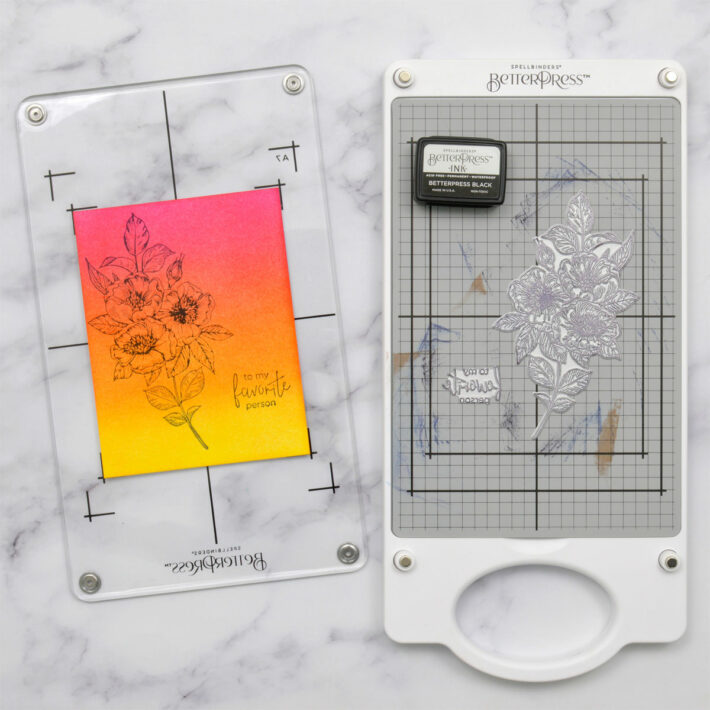
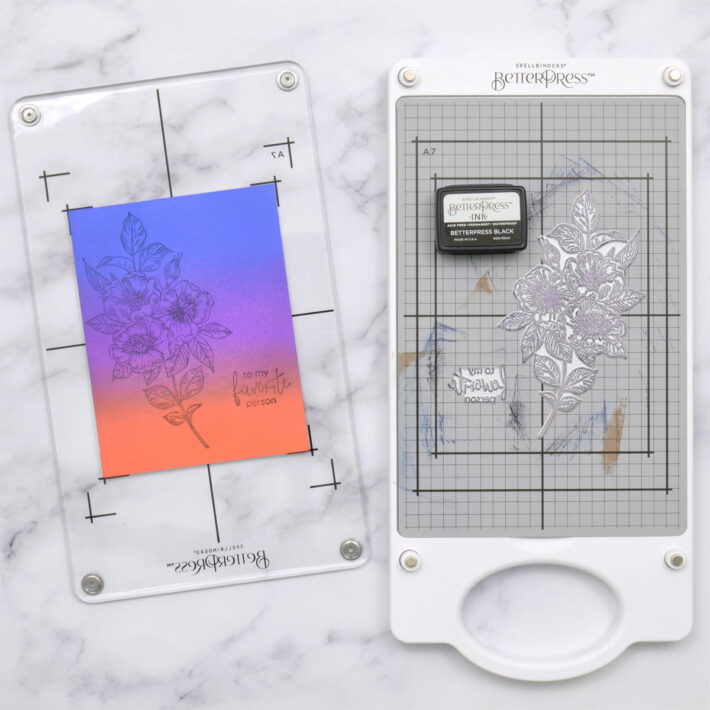
Next, I arranged my floral image and sentiment onto the BetterPress Chase and adhered my ink-blended panel onto the Platen with Best Ever Craft Tape. To ensure I didn’t damage any of my ink blending, I rolled the tape up and adhered it to the backside of the panel instead of taping it down from the front. The BetterPress Black Ink gave a beautiful impression on top of these inks. (Please excuse the messy Chase in my photo…I was experimenting with my system a lot and Archival Ink Remover will help clean this up!)
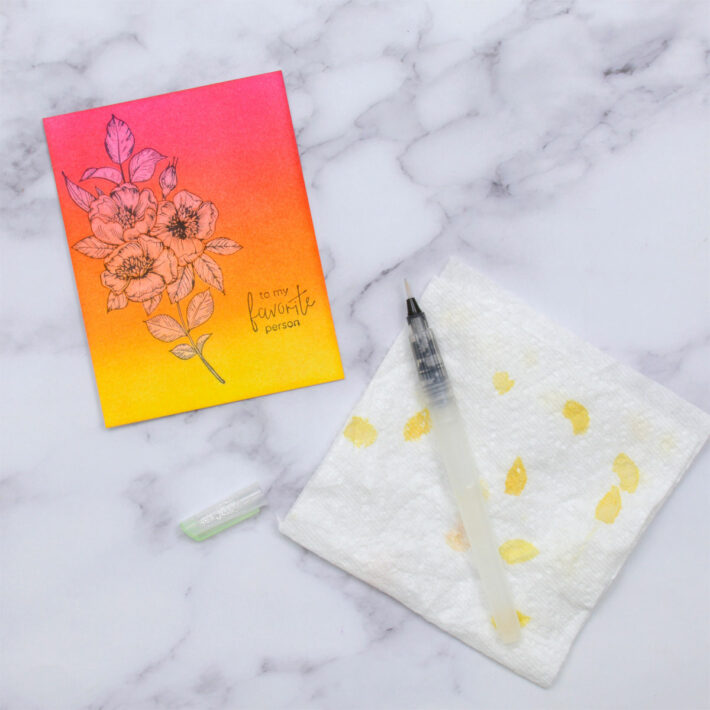
Using a water brush and working on one petal or leaf at a time, I applied clean water to the image, allowed it to sit for a couple of seconds, and then dabbed it off with a paper towel. I repeated this process a second time for each until the entire image was “bleached”.
To finish the card off, I trimmed the panel down to 4” x 5.25”, matted it with Onyx Cardstock, and adhered it to a top-folding A2-sized white card base. Onyx Color Essential Gems were added to embellish.
Distress Oxide Inks with Faux-Bleached Letterpress
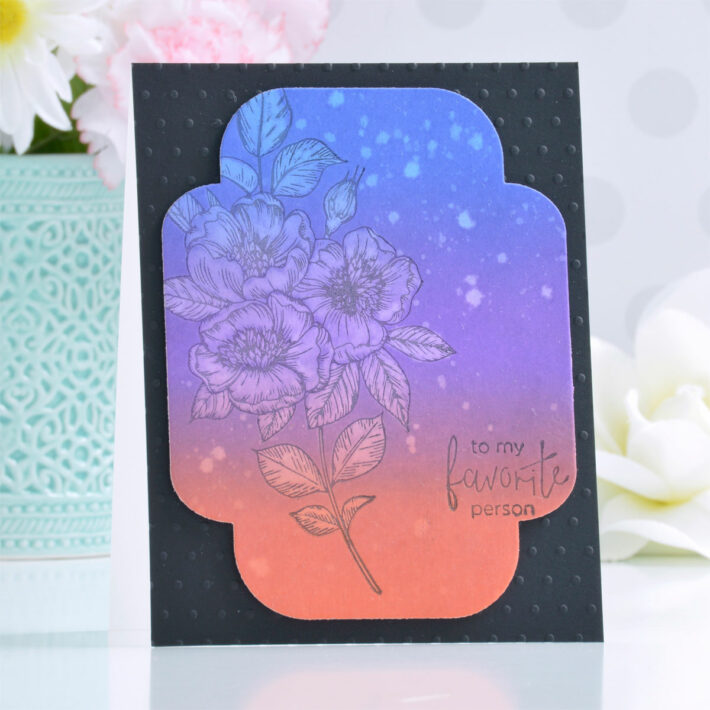
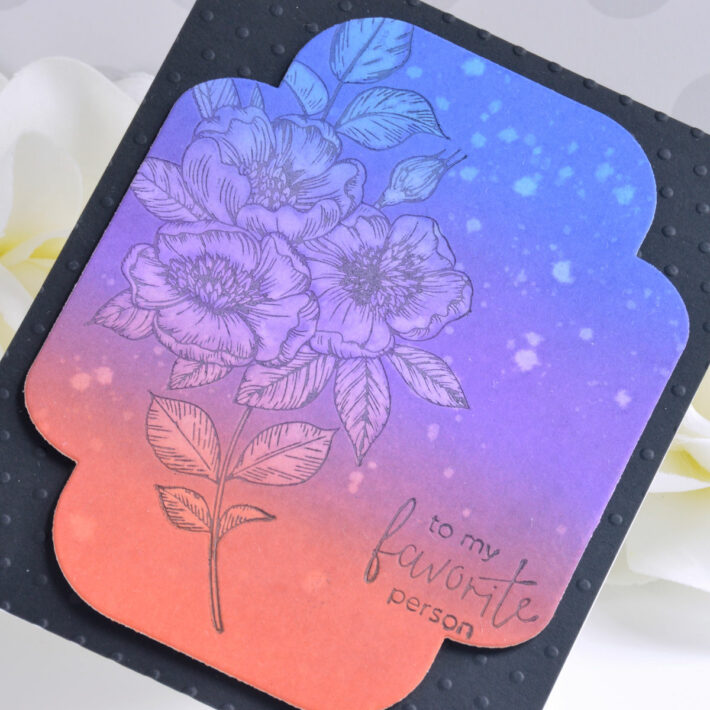
I was curious to see how Distress Oxide Inks would work with this technique, so tried these next. With colors inspired by a summer sunset, I thought the results were a bit more subdued but still pretty interesting!
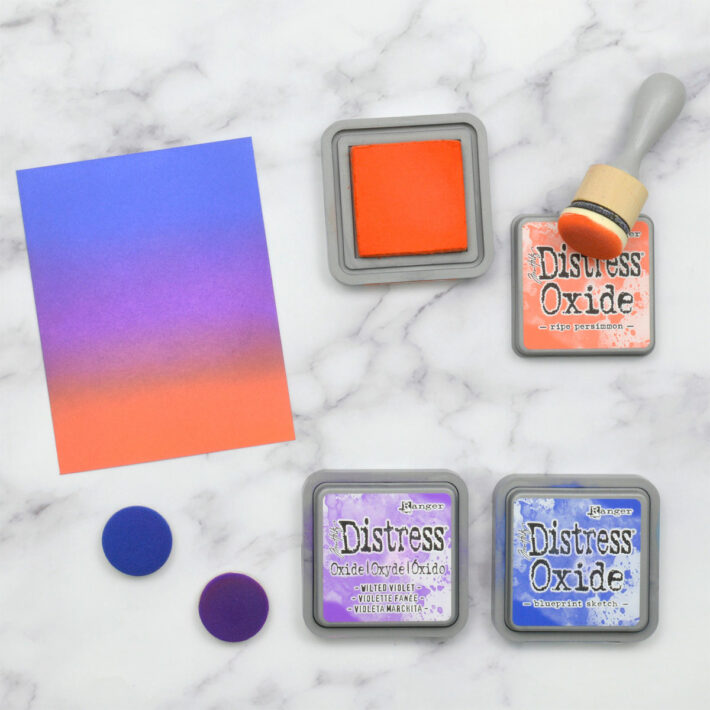
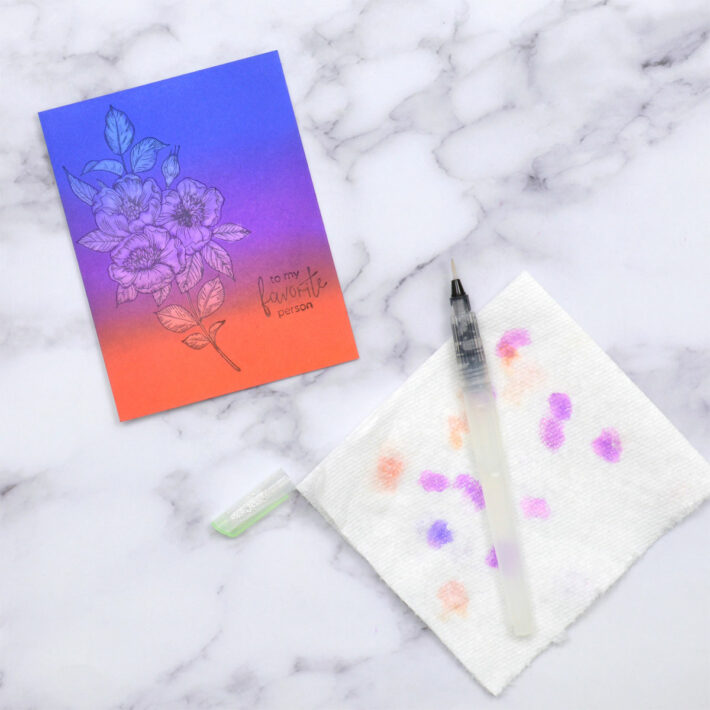
I started by applying Blueprint Sketch, Wilted Violet, and Ripe Persimmon Distress Oxide Ink over a piece of the Porcelain BetterPress Cotton Cardstock with a foam blending tool.
As with the last card, I pressed the floral image and sentiment into the ink-blended panel using BetterPress Black Ink. Note how the image appears fainter this time due to the chalky nature of Distress Oxide Inks.
I applied clean water to the leaves and petals of the image with a water brush again, but only once each this time, and dabbed away with a paper towel as before.
To finish off the card, I splattered some water onto the panel for a little more interest and cut it using one of the dies from the Essential Four Petal Labels Die Set. Then I adhered it on top of an Onyx Panel embossed with the Tiny Dots Embossing Folder.
Spellbinders Supplies:

Other supplies
White heavyweight cardstock, Picked Raspberry, Carved Pumpkin, and Squeezed Lemonade Distress Inks, Blueprint Sketch, Wilted Violet, and Ripe Persimmon Distress Oxide Inks, foam blending tools, waterbrush, tape runner, foam adhesive.
I hope you enjoyed this fun faux-bleached letterpress technique and will give it a try! Thanks so much for stopping by today…you can find more inspiration over at my blog AnnieBWills.com.

