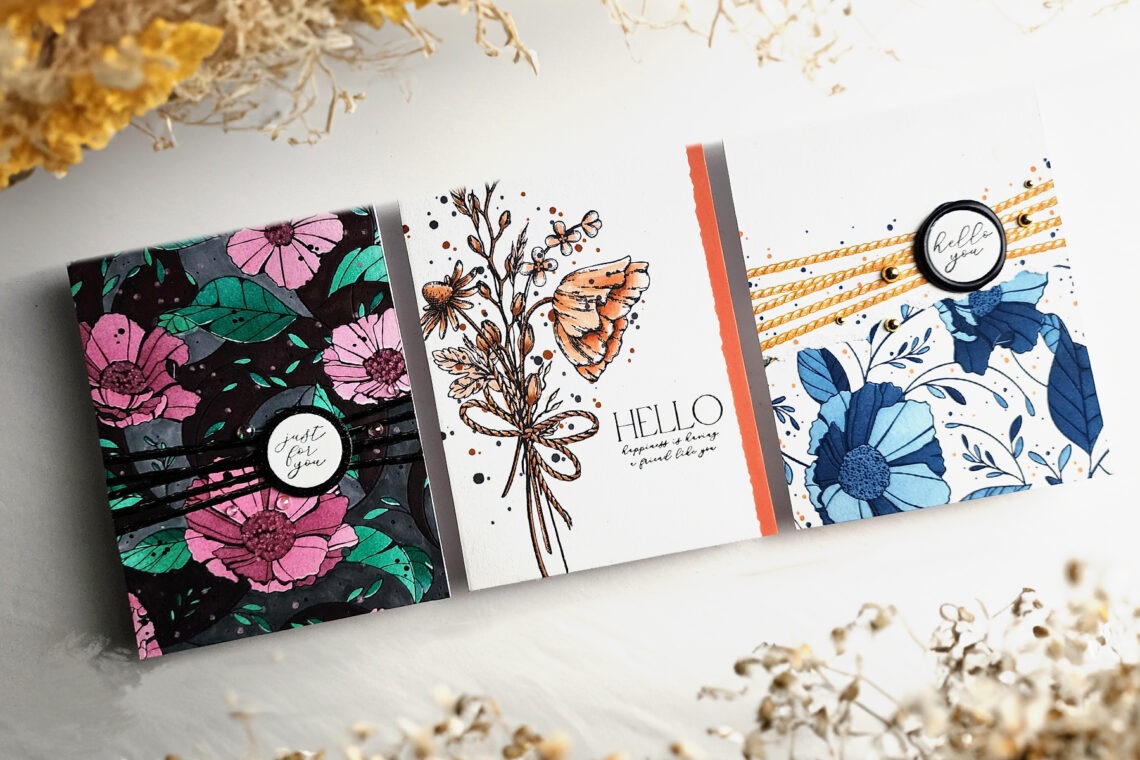
Adding Color to BetterPress Images
Hey there! Daniel West, here, with three fun projects from the BetterPress Spring Collection. When BetterPress came out in 2023, I felt like dancin’. The letterpress feel and look are super easy to achieve with this system and the results with just plain black and white ink and card make it easy to create a project without adding color to the images. But, you can get more out of your BetterPress plates if you pair them with coordinating stencils and alcohol markers.
Coordinating stencils make adding color a breeze to these BetterPress Spring goodies. Here, I created two cards with stenciled-in colors and Copic Marker accents. The card in the middle I colored with just Copic markers.
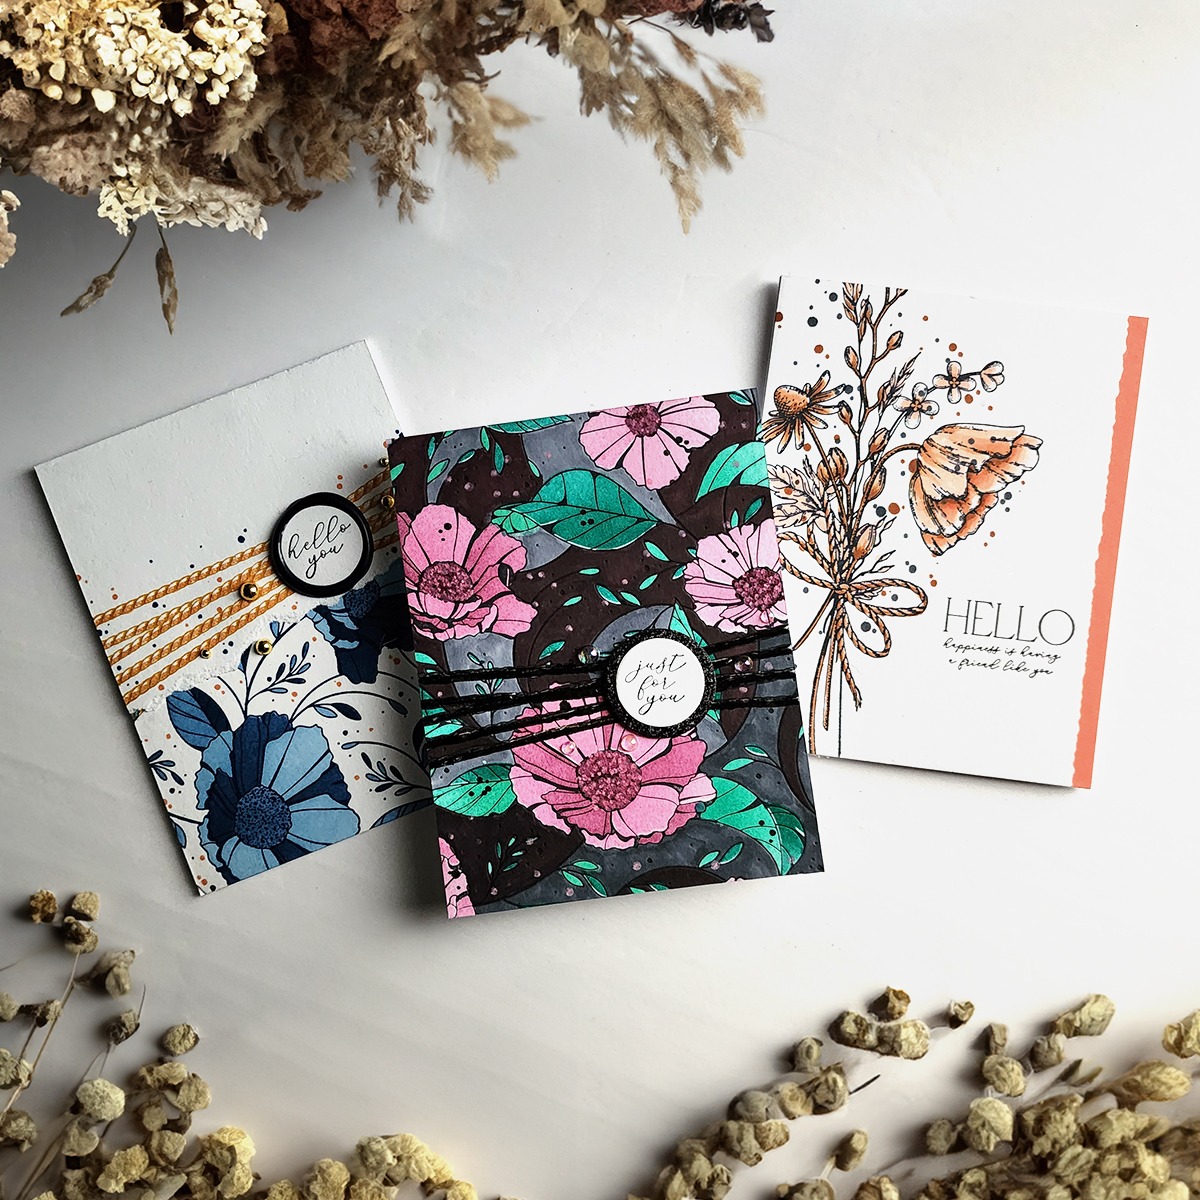
Just for You Project
For this project, I used the Cosmos Backdrop Press Plate and Stencil Bundle along with some red-violet and blue-green inks. After pressing the image onto a panel of Porcelain Cotton Cardstock with BetterPress Black Ink, I added the pink and green inks through the stencils with the Large Blending Brushes from Spellbinders. These large brushes feature a big and fluffy head of bristles for covering large areas softly. But they work with these stencils, perfectly, too.
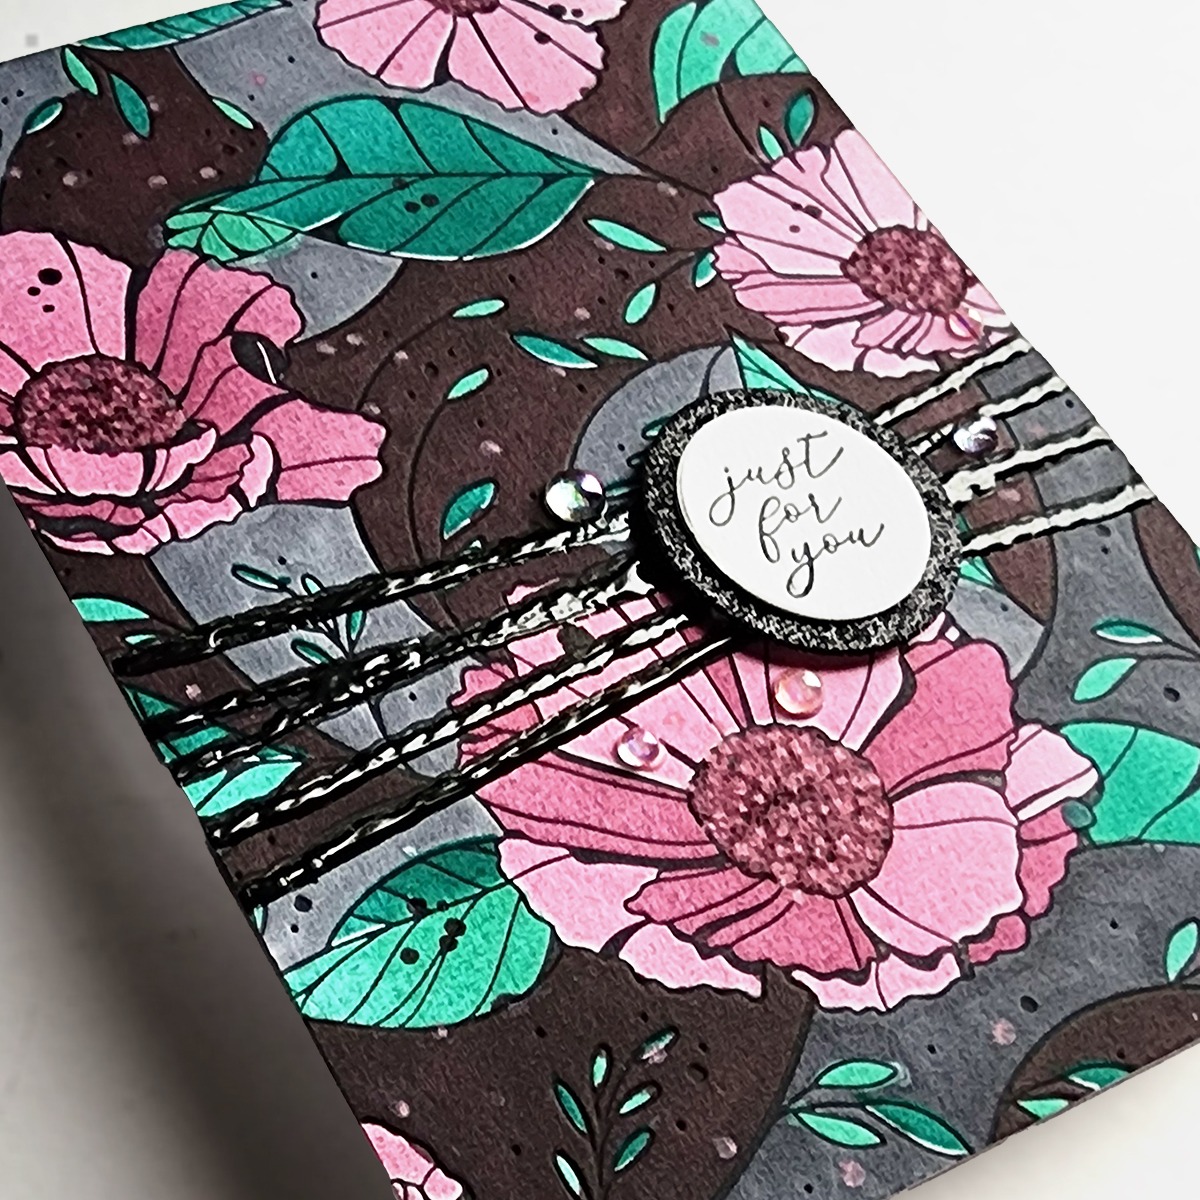
Then, I colored in the background with Copic cool gray inks C-10 and C-7. Next, I pressed the Sealed Cord & Faux Seal Sentiments Press Plate into the panel with Black Ink, and colored it in with Copic 110. I added some Glossy Accents over it, too.
I made several sentiments from the same Sealed Cord & Faux Seal set adhered one over a circle of black glitter cardstock. To finish off the project, I adhered some clear embellishments to the front with liquid adhesive.
Hello You Project
Here, I used the same backdrop press plate, but changed the color palette to a monochrome blue. I inked up the plate with dark blue ink and pressed it into a panel of Porcelain Cotton cardstock. As I stenciled, I just varied the pressure I used with the blending brush for each layer. There was no need to use different blue inks.
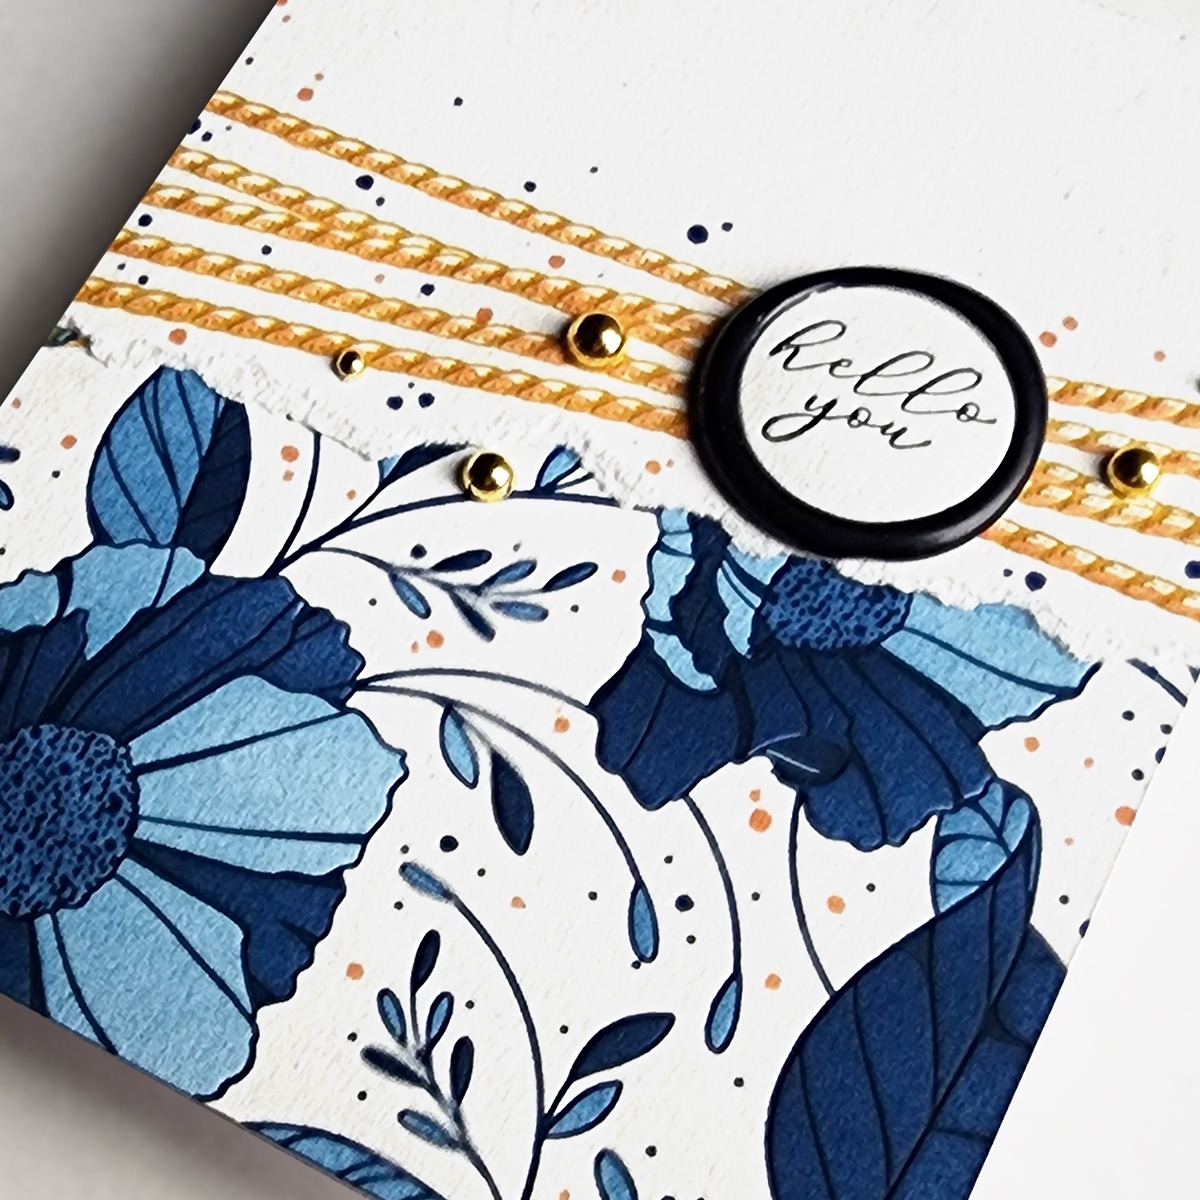
Then, I pressed the Sealed Cord plate into another panel of cardstock with BetterPress Tuscan Ink and added some color with Copic E99 and E97. Next, I tore the edge of that panel under the image and adhered it over the blue panel.
For the sentiment, I pressed the Hello You pressed sentiment into a hot wax seal made of black and blue beads and adhered it to the front of my card base with more hot wax.
I wanted to tie in both pieces of my project together, so I added dots of Copic B99 and E97 to both pieces in varying sizes. To finish off the card, I added some gold embellishments with liquid adhesive.
Hello Project
For my final project, I pressed the A Friend Like You Bouquet Press Plate and sentiments into a panel of Porcelain Cotton Cardstock with Black Ink. Then, after I let it dry for a bit, I colored it in with an earthy monochrome palette of Copic E99, E97 and E93. I added some specks of color to the panel with Copic C10 and E97.
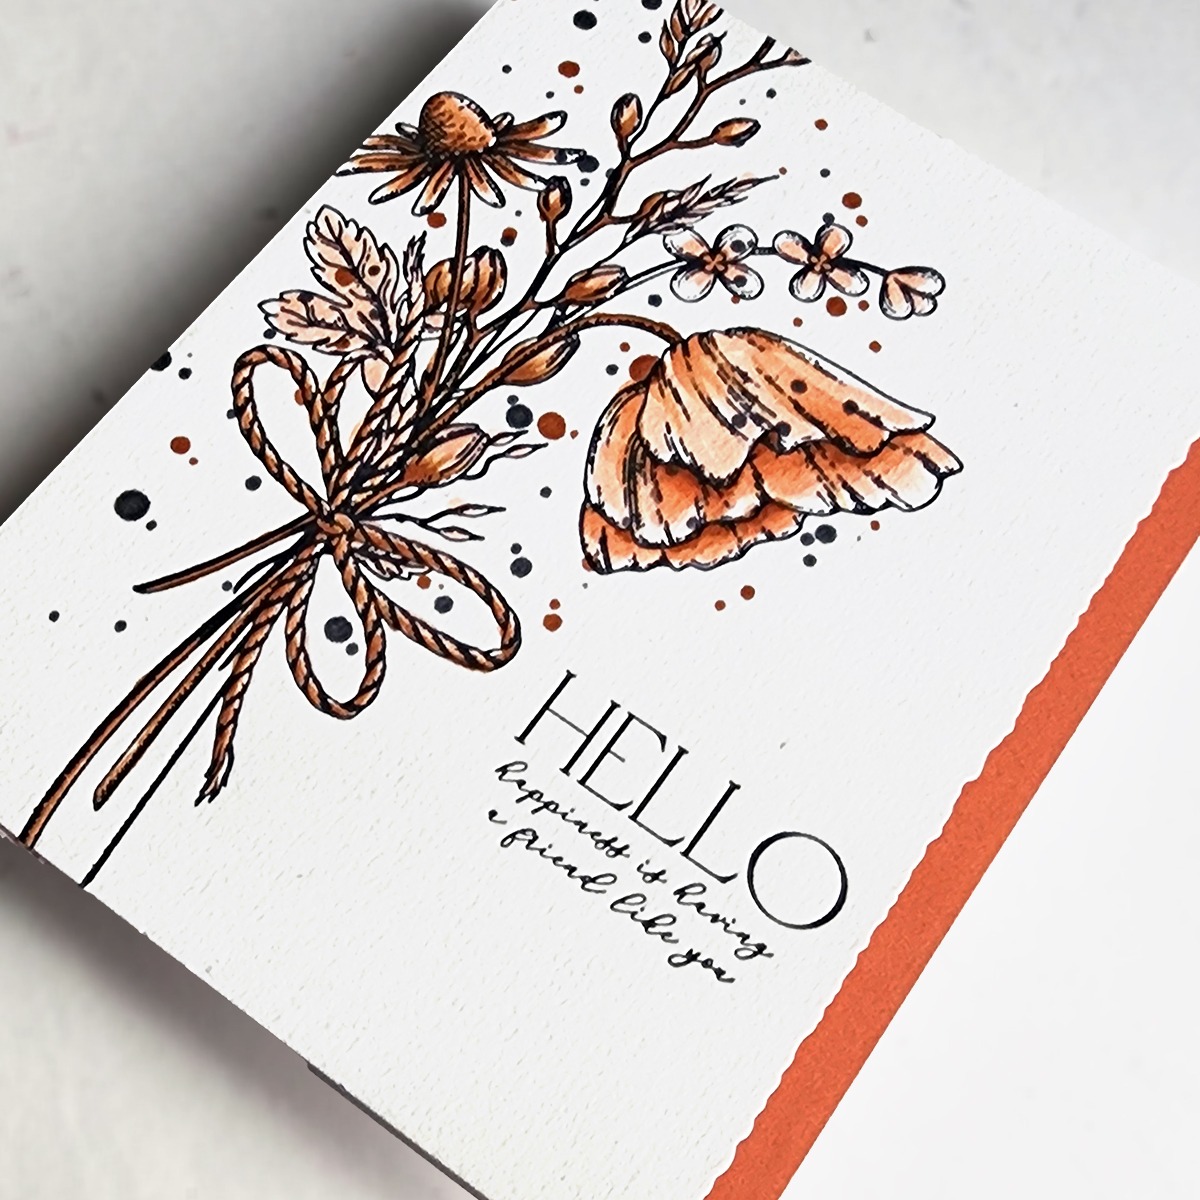
I trimmed the side of the panel down a quarter inch with a deckle trimmer and layered the panel over a piece of coordinating cardstock to finish it all off.
Thank you for joining me today. I hope you will give these coloring ideas a try.
Have a crafty week,
Daniel
Spellbinders Supplies:

Other Supplies
Dark blue ink, glue, embellishments, Copic markers, Glossy Accents, coral cardstock.

3 Comments
Delia Wilkes
Gorgeous cards. Love your creations. You’ve used some unusual colour ways here that I’d love to try out. Thank you for sharing your creations.
Louise Neveu
Your cards are so beautiful. Love the techniques. Thank you for sharing.
Darla
Love these cards and I’m going to enjoy trying your techniques and color choices. Thanks!