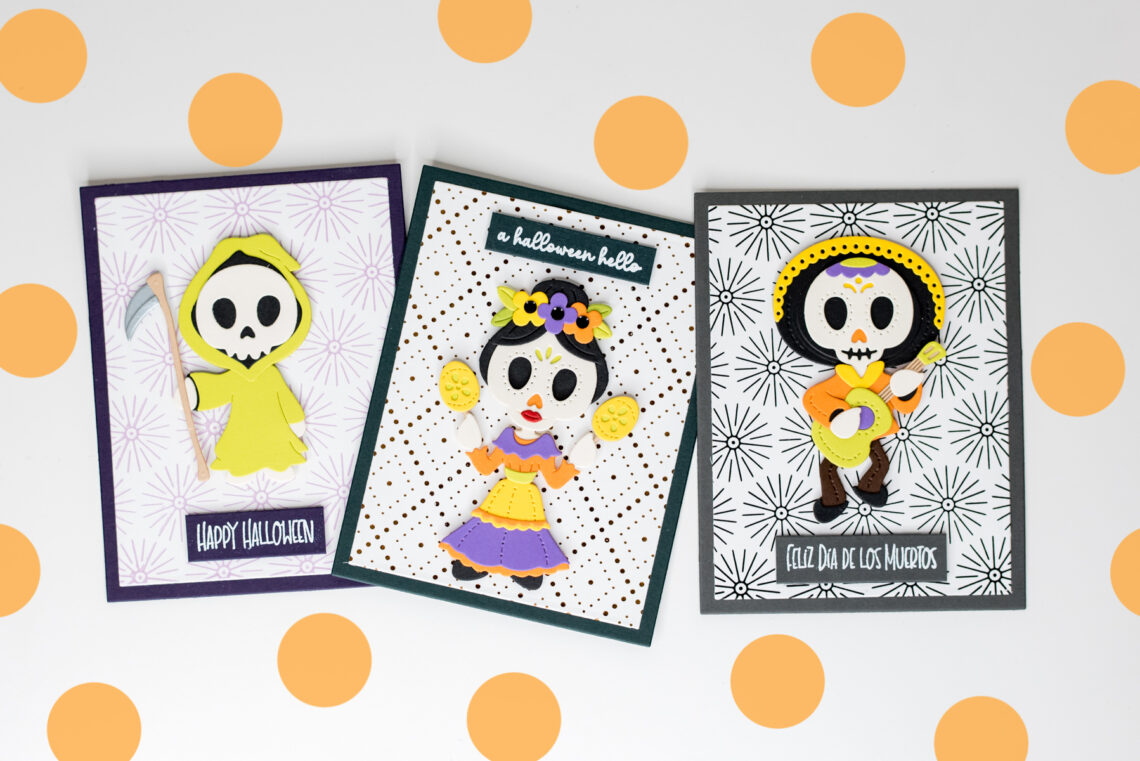
Easy Interactive Halloween Cards with Dancin’ Halloween Dies
Hey there, my crafty pals! It’s Leica here, and today I have a step-by-step photo tutorial to show you how to make three awesome cards using the Dancin’ Halloween collection. Trust me, they’re super fun to create! Don’t worry if you feel a bit overwhelmed by all the different parts in this collection. Putting them together is actually quite easy. The packaging even includes a picture of the final product, which makes it really simple to follow along.
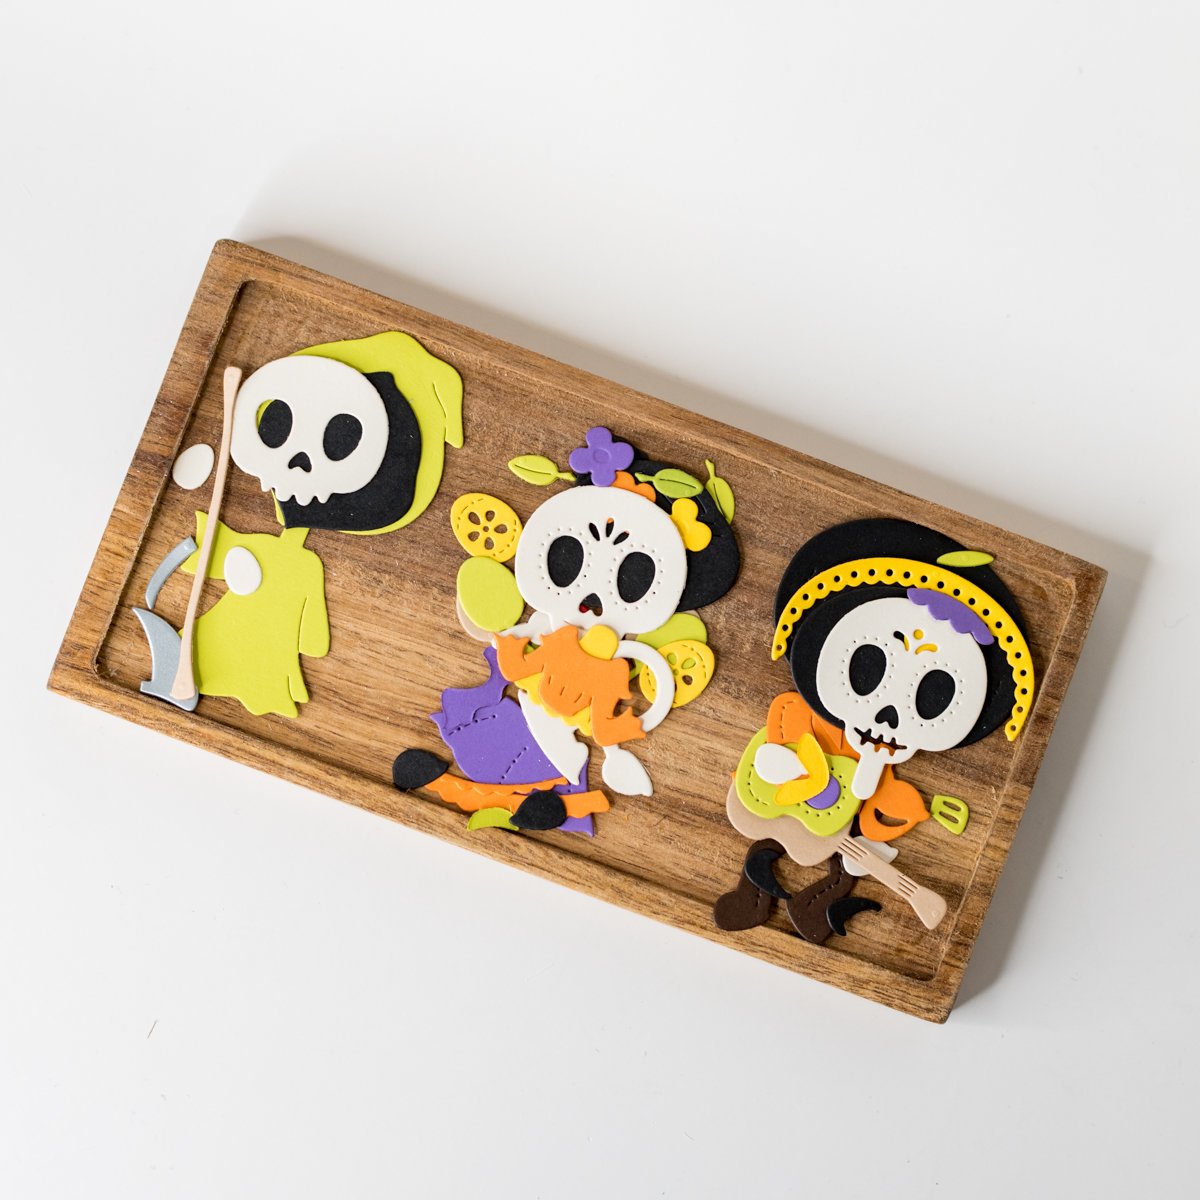
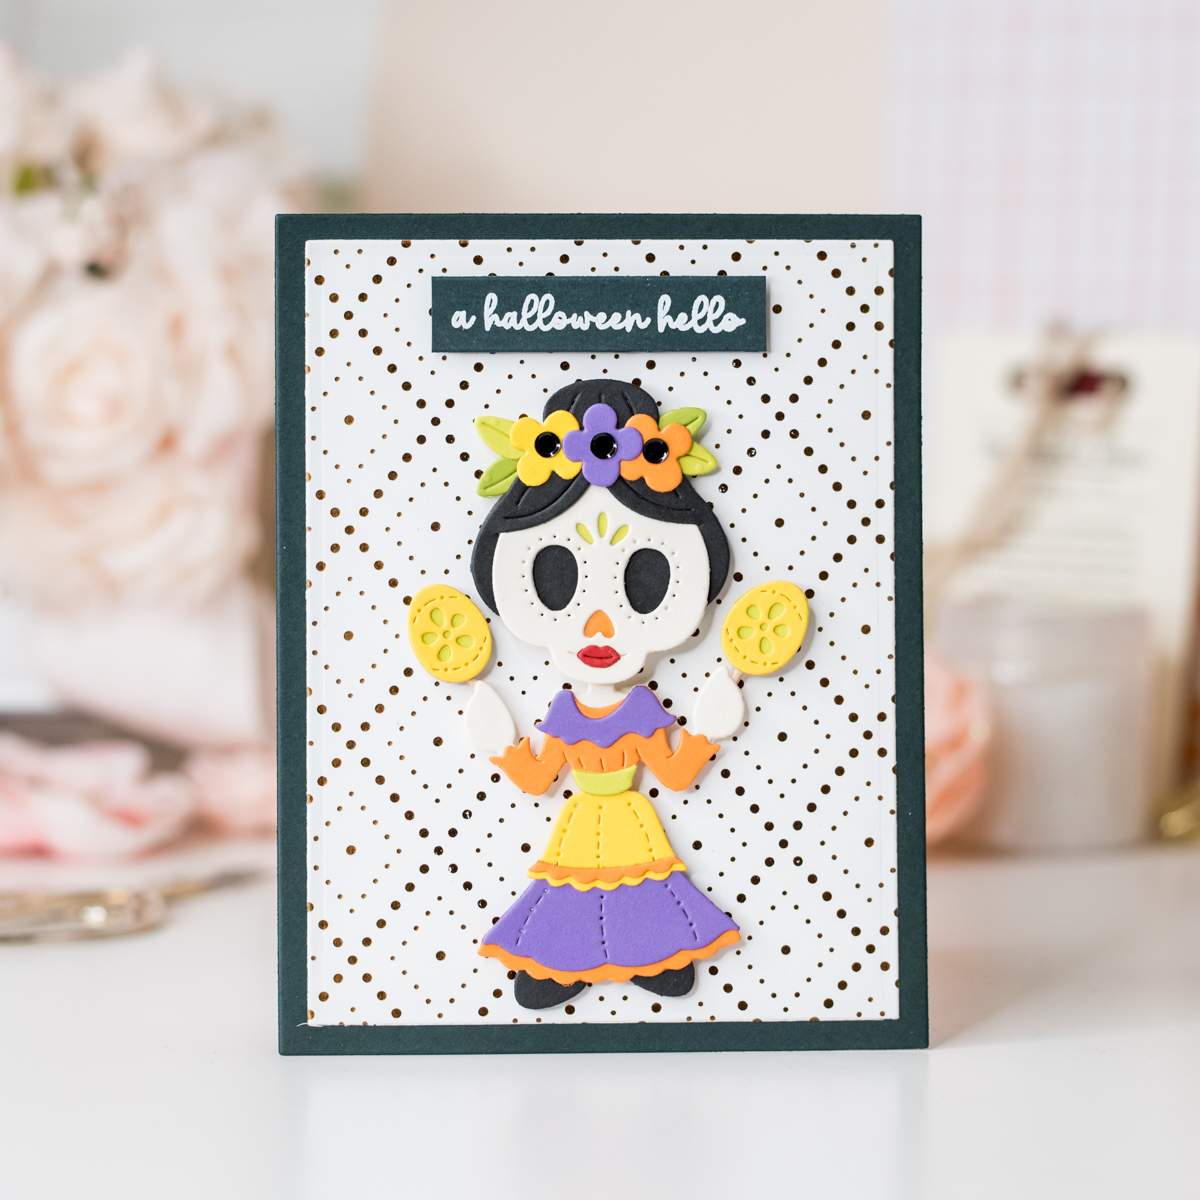
To start, I picked out a bunch of colors for the cardstock: Lilac Blossom, Peridot, Persimmon, and Sunkissed. I also used Alabaster and Onyx cardstocks. To save time and make things easier, I cut out all the shapes using the dies. Then, I assembled each one of them – the Dancin’ Boy of the Dead, Dancin’ Girl of the Dead, and Dancin’ Grim.
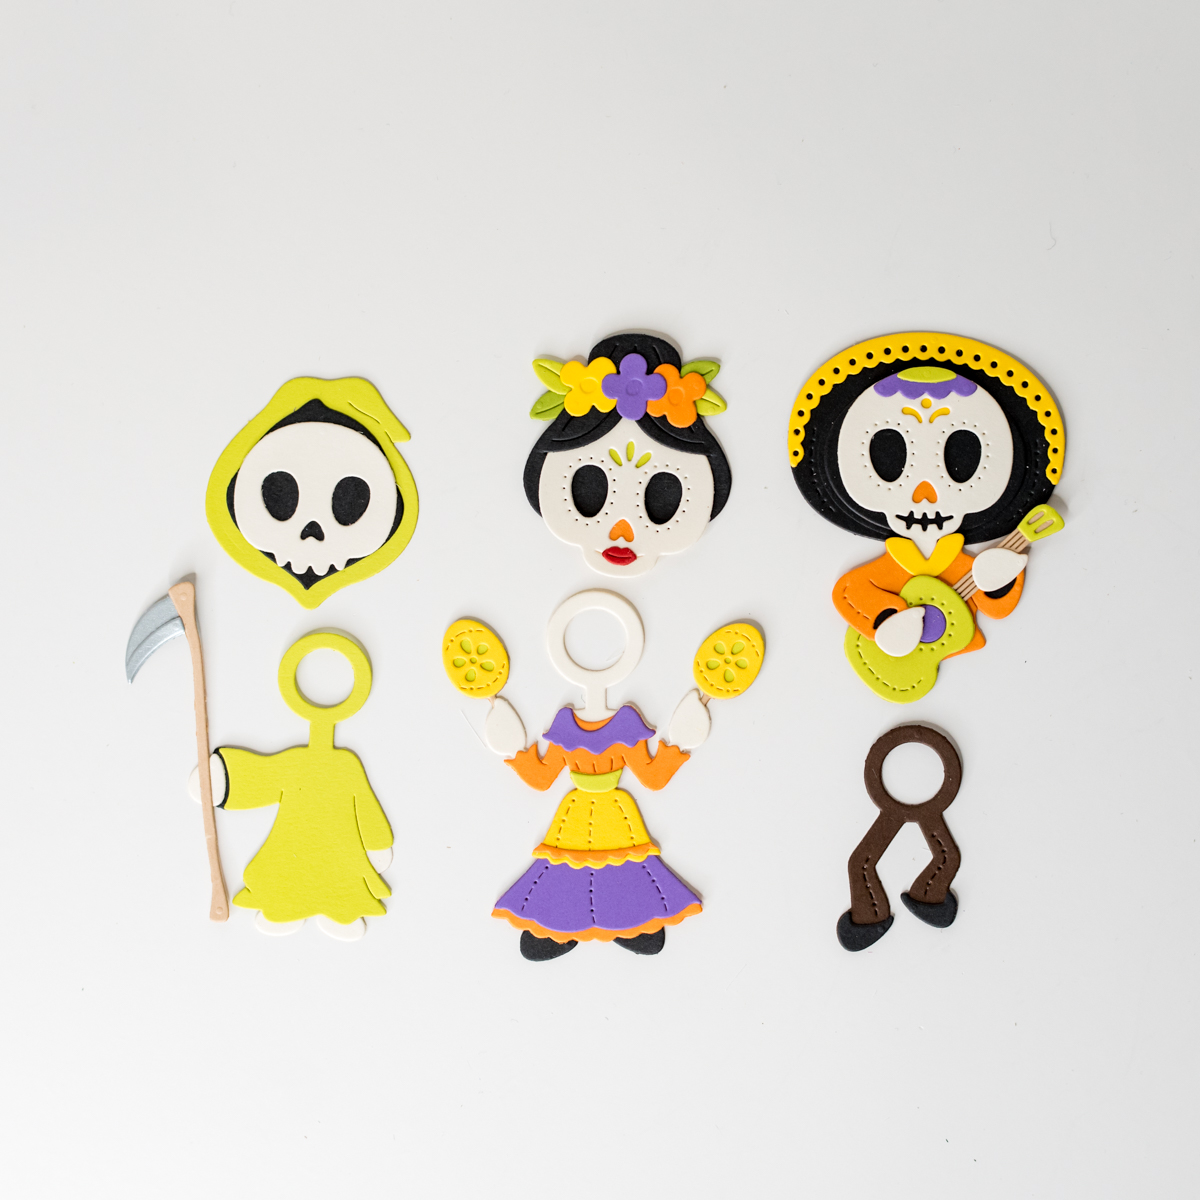
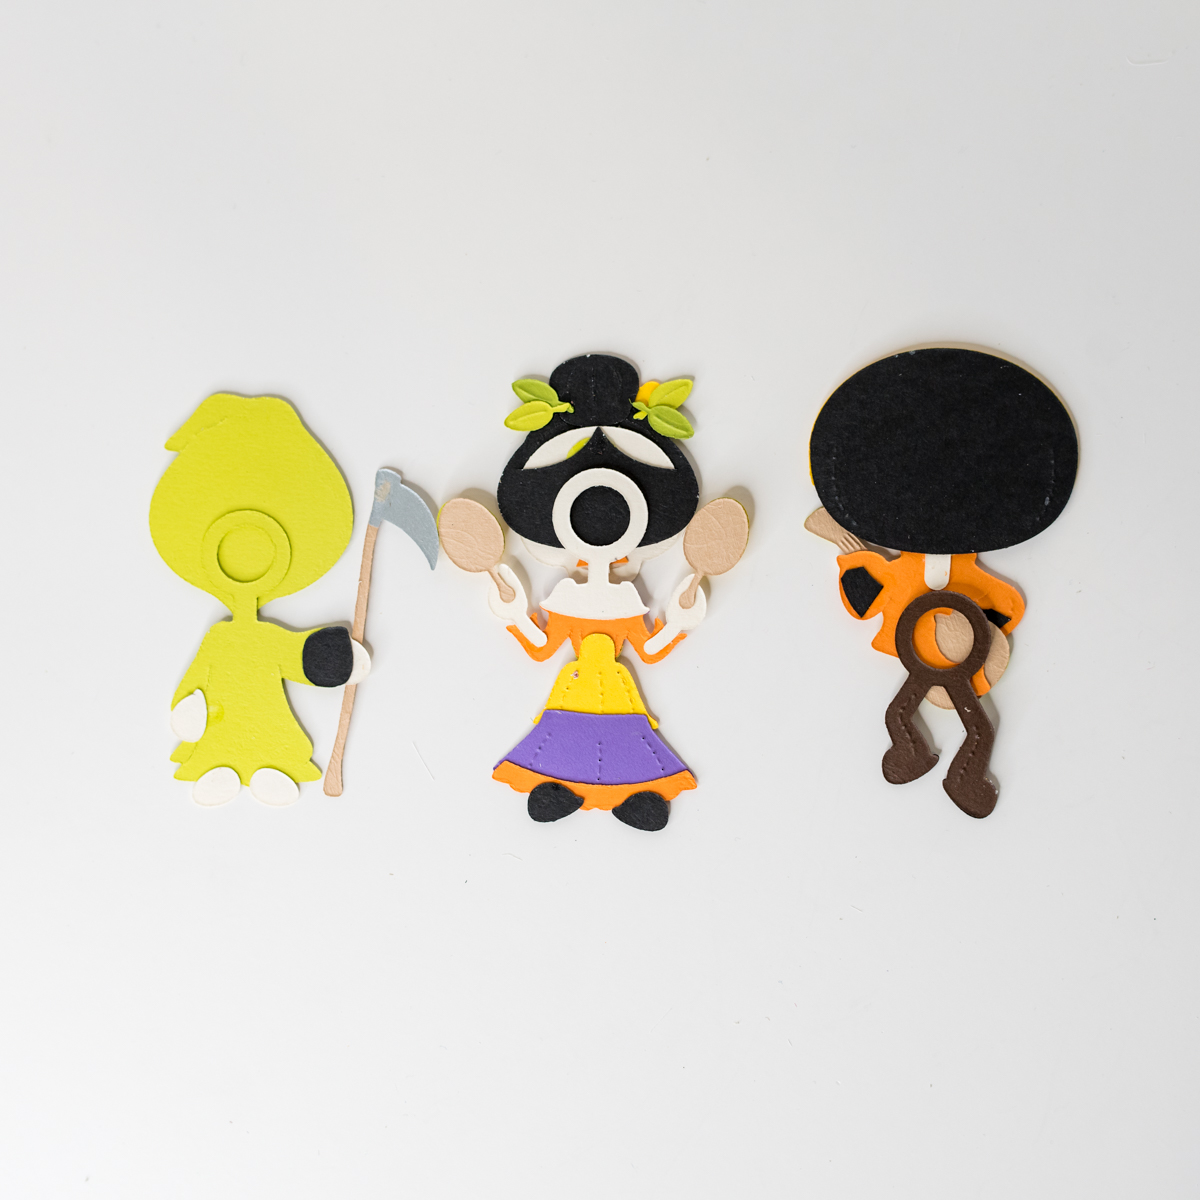
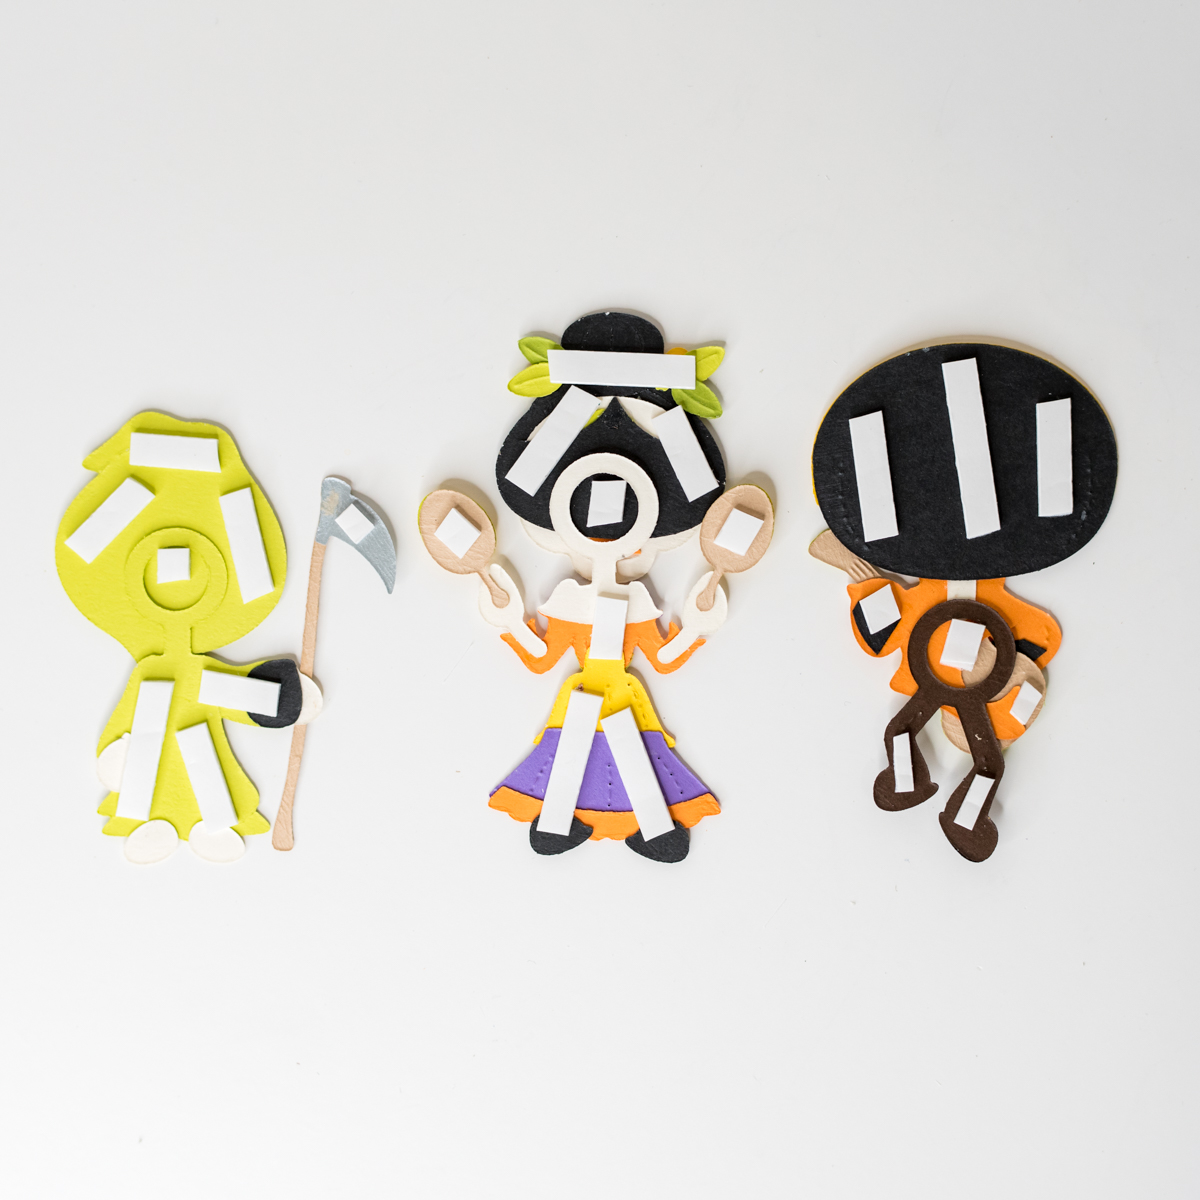
I turned each dancin’ shape over and added foam tape to the back. To make sure that the swinging element can swing from side to side, just add a small piece of foam tape inside the hole. This hole is what allows the legs or lower body to swing. I realized later on that it’s best to use circle foam tape.
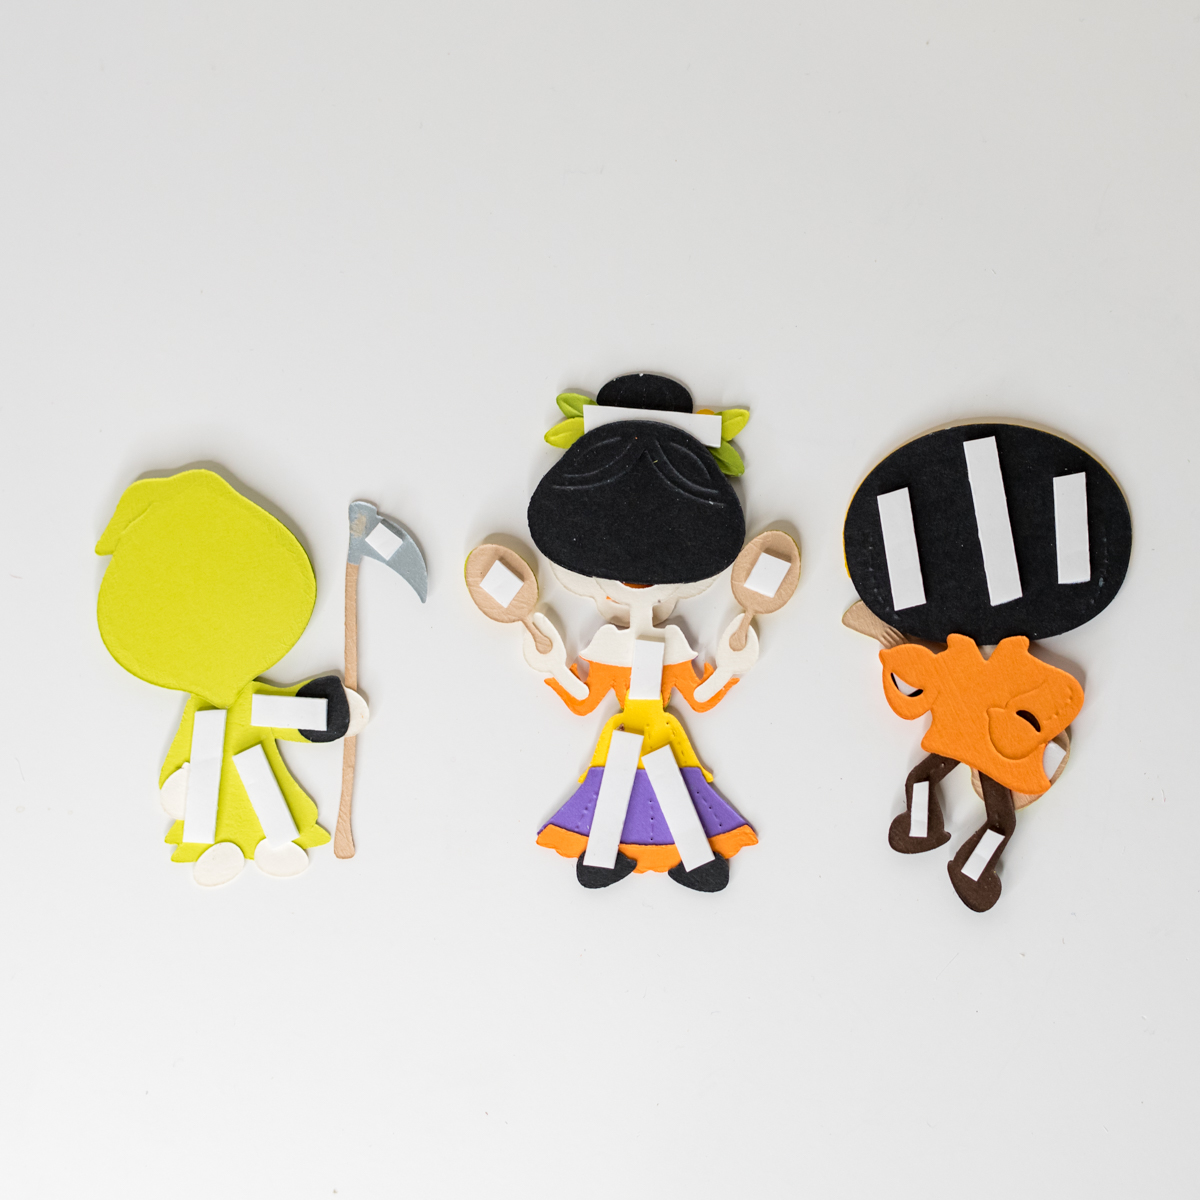
Next, I cut out some extra pieces: a hood from the Dancin’ Grim, hair from the Dancin’ Girl of the Dead, and a shirt from the Dancin’ Boy of the Dead. I removed the backing of the foam tape and stuck these extra pieces on. This way, it would be easier for me to attach each dancin’ shape onto the card panels.
For the card panels, I added some hot-foiled backgrounds and heat-embossed the sentiments onto strips of cardstock.
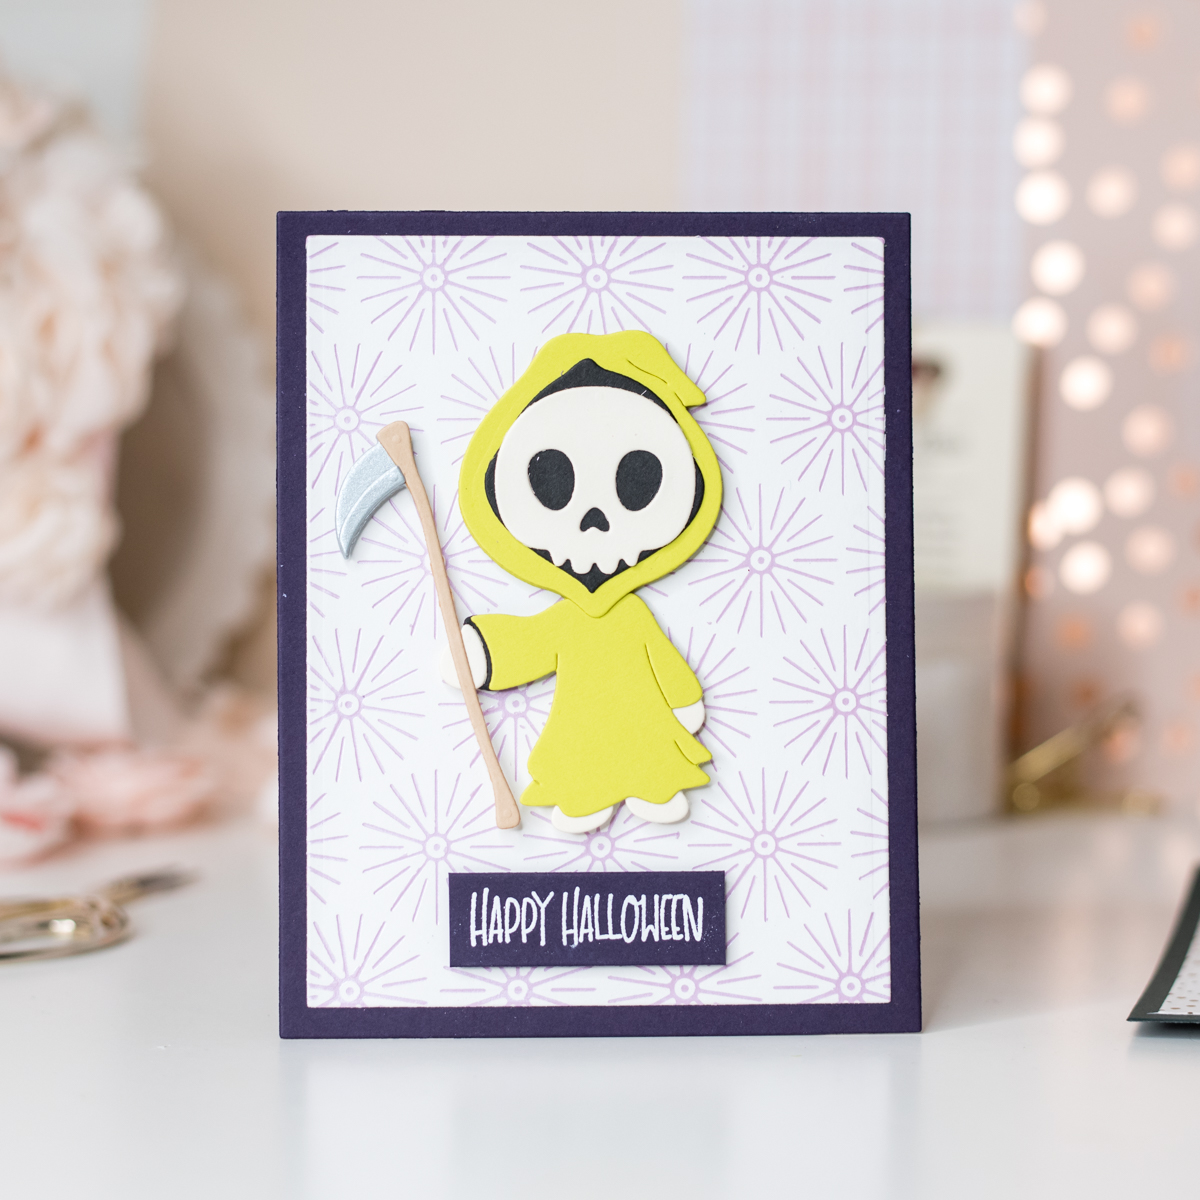
After that, I glued each dancin’ shape onto A2-sized card panels. Even though we added foam tape to the legs and lower part of the body, remember not to remove the backing of the foam tape. We want those pieces to have some dimension and not stick directly to the card panel. You can choose to only add the foam tape to the top portion of the dancin’ shapes if you prefer.
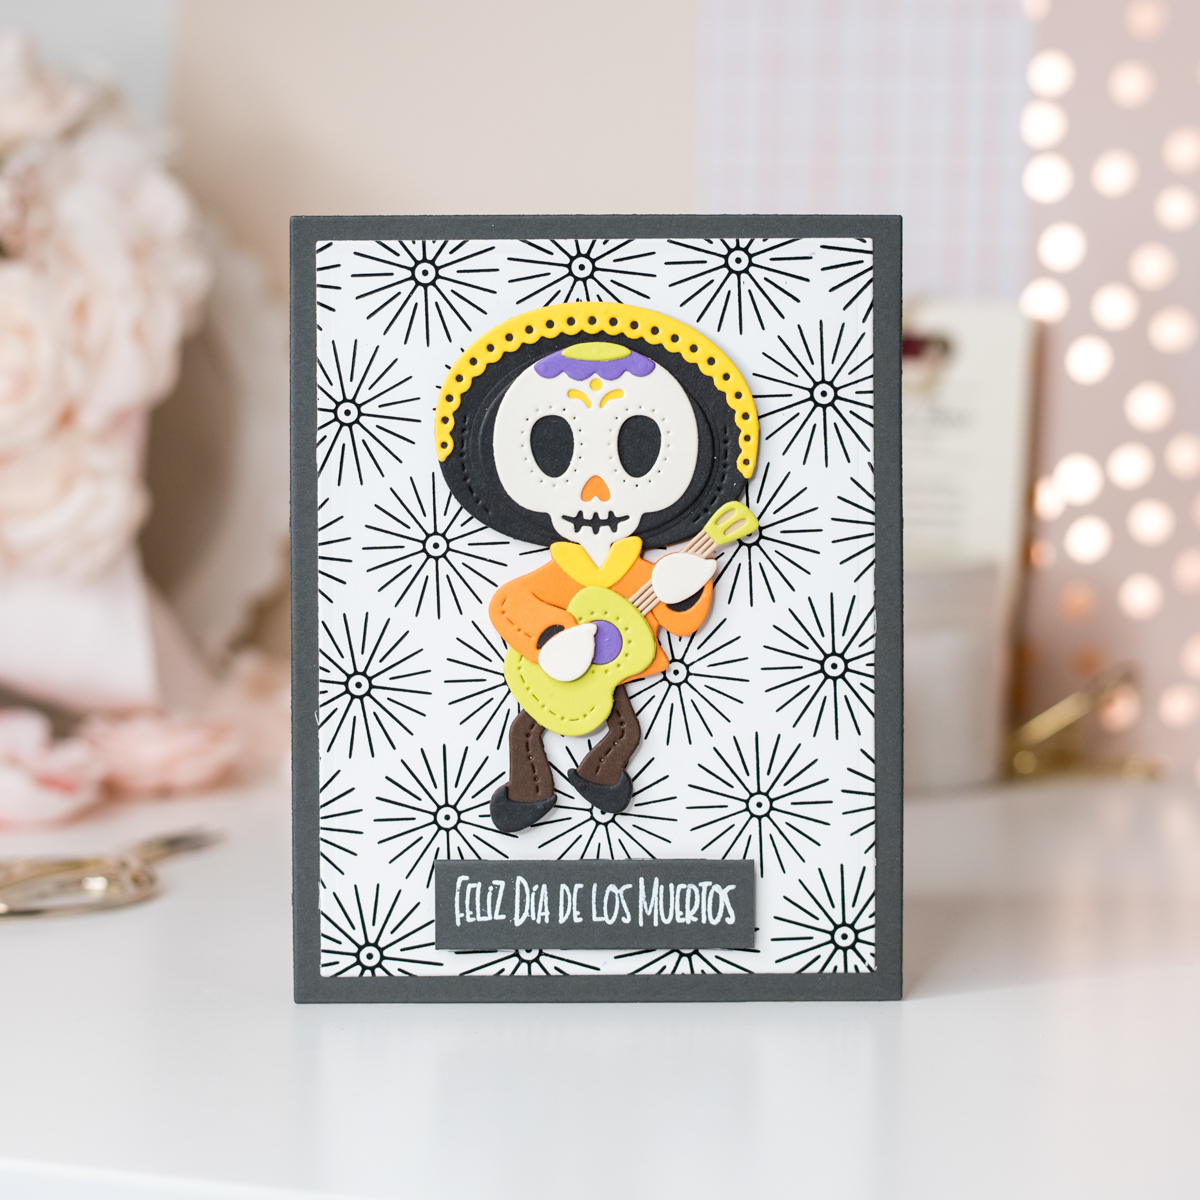
And that’s it for my Halloween cards using the Dancin’ Halloween collection. I had an absolute blast making these cards with all the dancing elements. They turned out so cute and playful! I’m certain you’ll have a great time creating them too. Happy crafting!
Spellbinders Supplies:

December 2020 Card Kit of the Month is Here – Heart Hands
The Winter Garden – Card Inspiration with Annie Williams