Embrace Every Season with 3 Gorgeous Die Cut Wreath Cards
Hi there my Spellbinders’ friends, welcome back to the Spellbinders Blog! My name is Jaycee Gaspar and I’m back again to bring you some creative inspiration using the gorgeous Beautiful Wreaths collection by Suzanne Hue. In this blog post, I’ll be sharing three stunning modern wreath card designs that will elevate your card-making game.
With the Build-A-Wreath and Garden Wreath Add-Ons, this collection offers limitless possibilities for crafting a beautiful wreath base. Then all you need to do is pick your card occasion and pair your wreath base with the other die sets in Suzanne Hue’s collection. Keep reading as I share my tips and tricks for creating breathtaking die-cut wreath cards that can be enjoyed all year round!
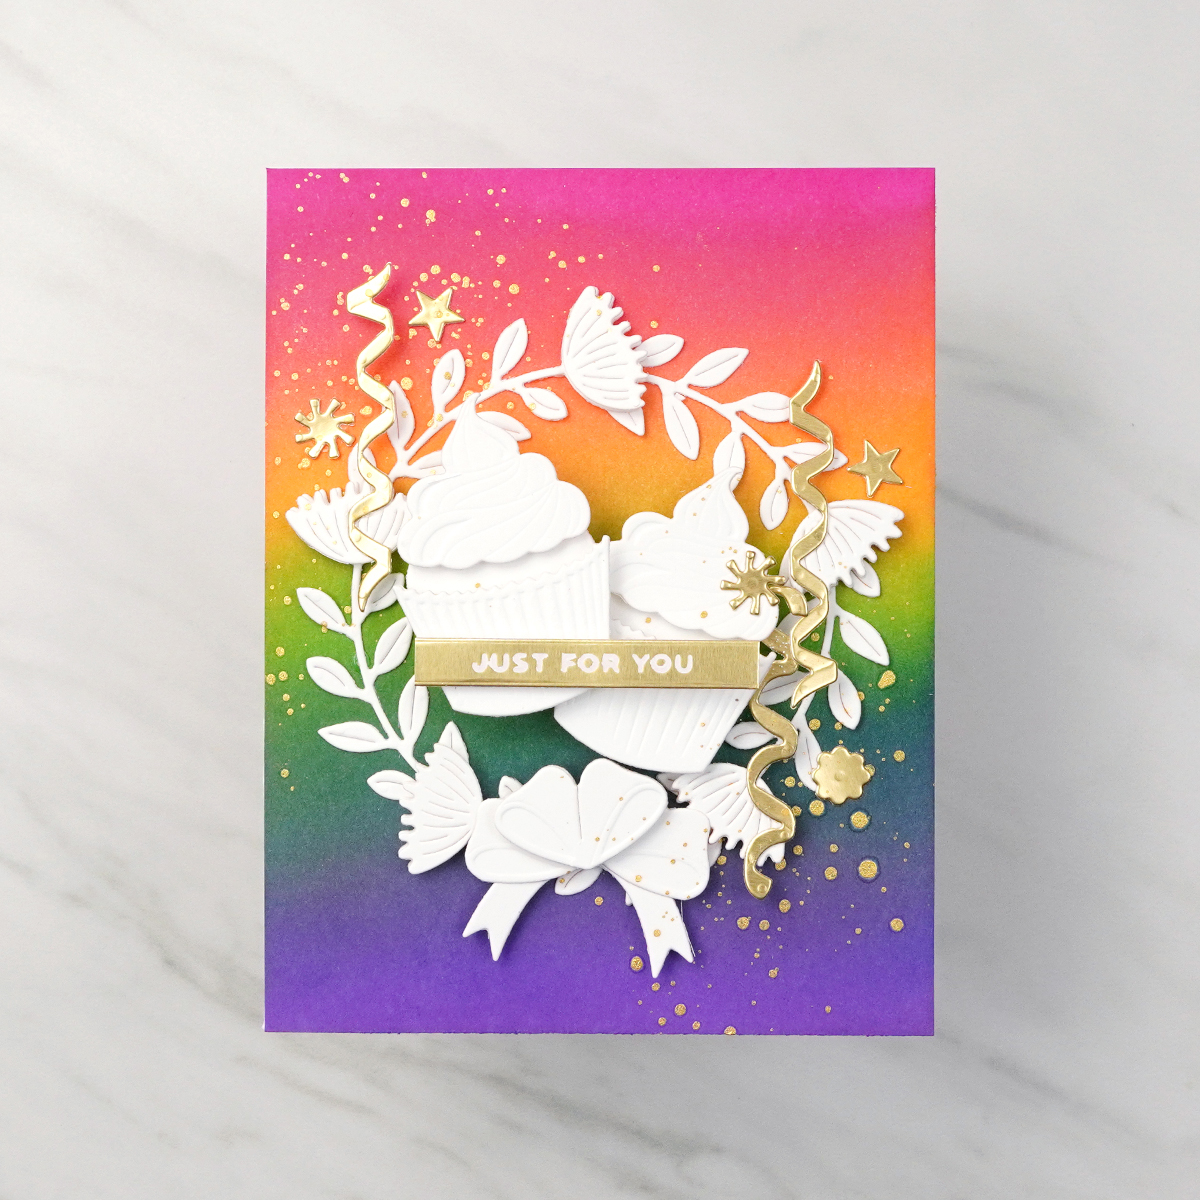
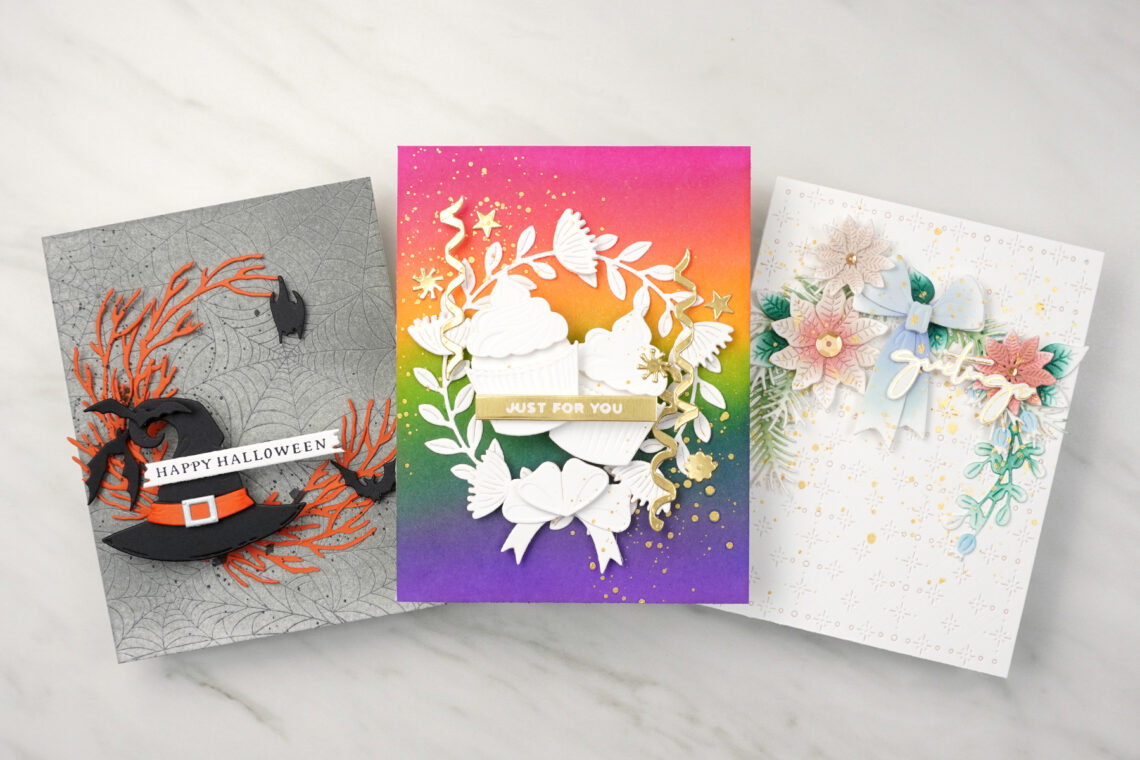
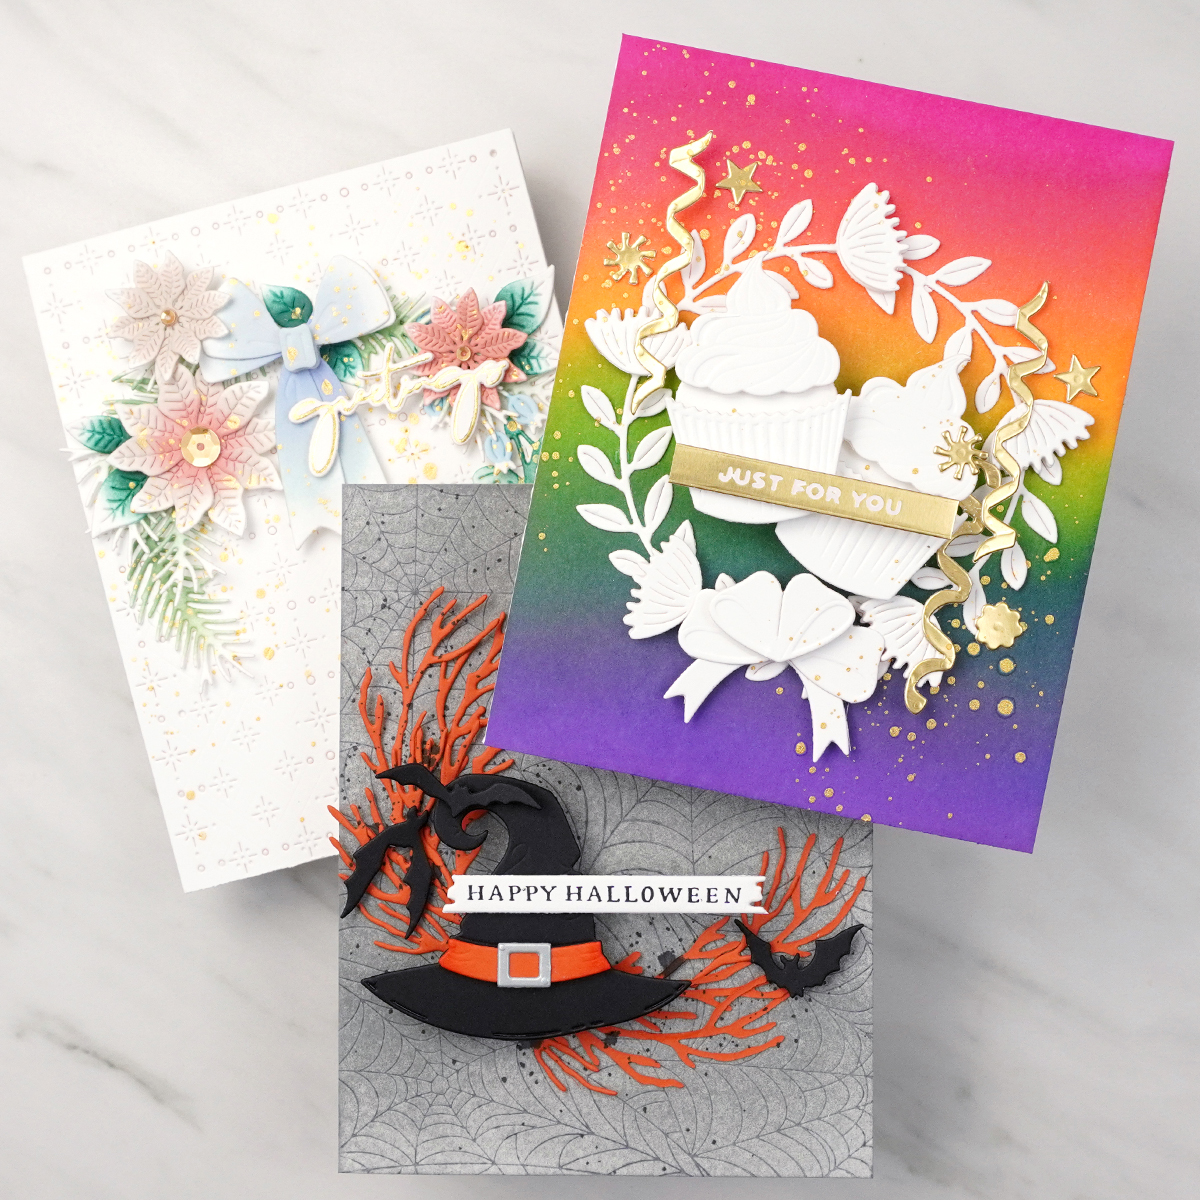
Full circular wreaths are a great base shape to start with. Imagine circling an important item on a document—we can use that same principle on your card fronts. I started with a rainbow gradient using my collection of dye inks and a blending tool. Then with the Birthday Wreath Add-Ons Die Set, I die cut the cupcake twice and the small gift bow from white cardstock. I then assembled the cardstock pieces with glue and foam squares. Then I die cut the cascading ribbon and small star embellishments from mirror gold cardstock. From the Garden Wreath Add-Ons Die Set, I cut one of the branched open flower images from white cardstock and arranged five of those images to make a circle in the center of my rainbow background. Then I enveloped and circled the two cupcake images and the sentiment to the center of the circle. I embellished this card with coordinating gold metallic splatters.
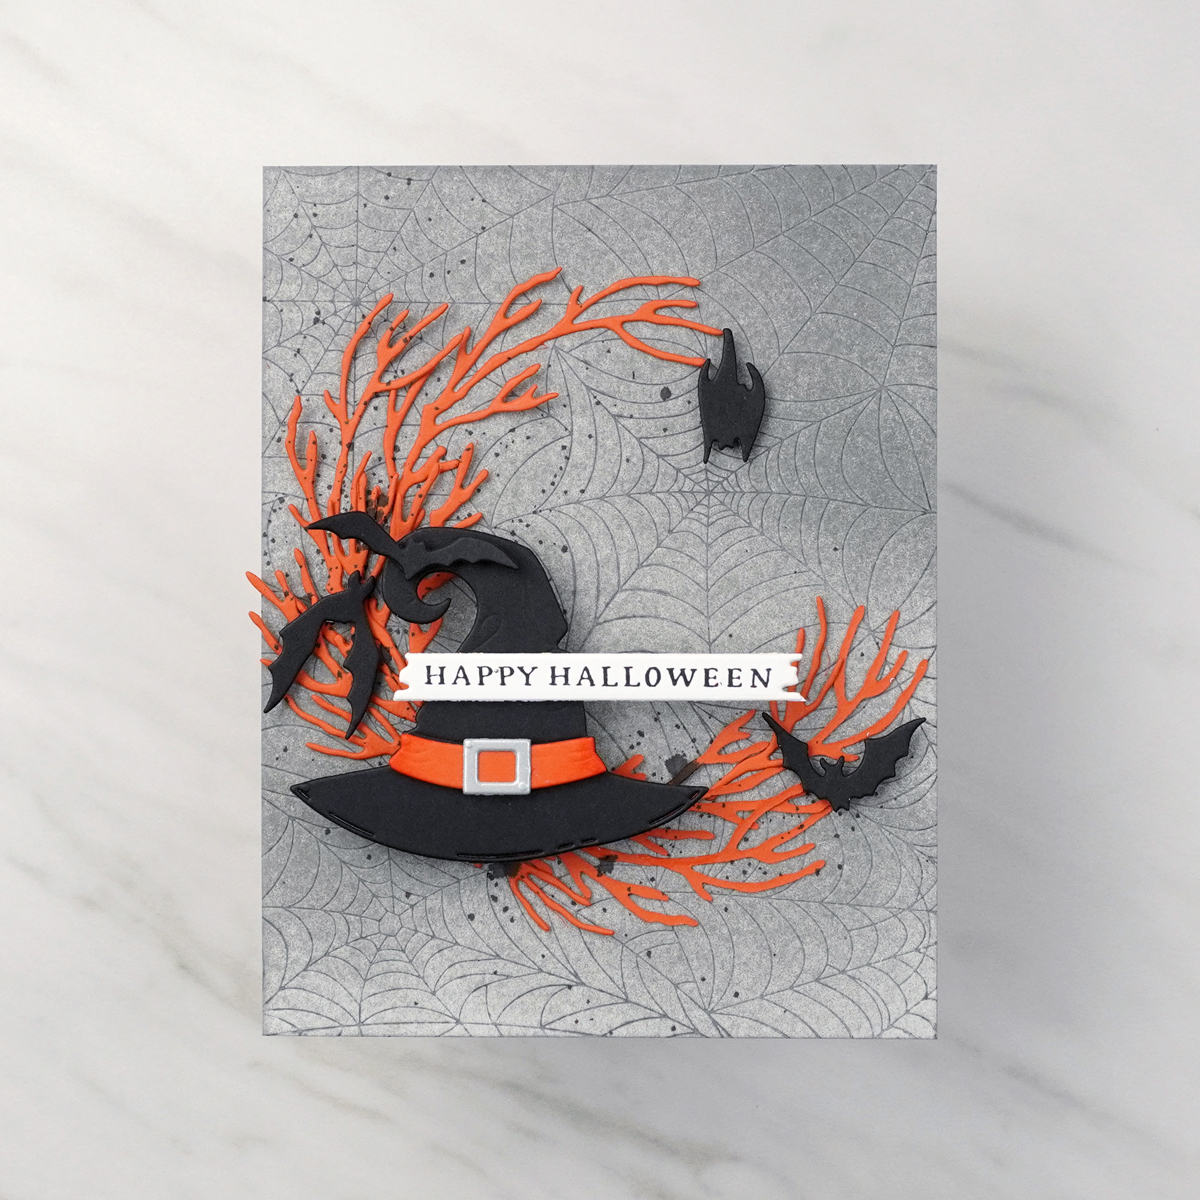
For the next card, I made a modern crescent wreath shape. I started with a Spider Web Background Press Plate pressed onto a panel of cotton cardstock I colored grey with dye ink. Then I used the Build-A-Wreath Etched Die Set to cut the fragmented branch images from Terra Cotta Cardstock. I arranged several of these images into a crescent shape, like a haunting bewitched moon. In the Halloween Wreath Add-Ons Die Set, I cut the bats and witch’s hat from black cardstock and arranged them around my crescent wreath. I finished this card with black splatters and a sentiment from the Halloween Icons Press Plate and Die Set. The key to a successful crescent arrangement is a strong focal area like the witch’s hat and sentiment accompanied by the bats. This anchors your arrangement for a balanced wreath.
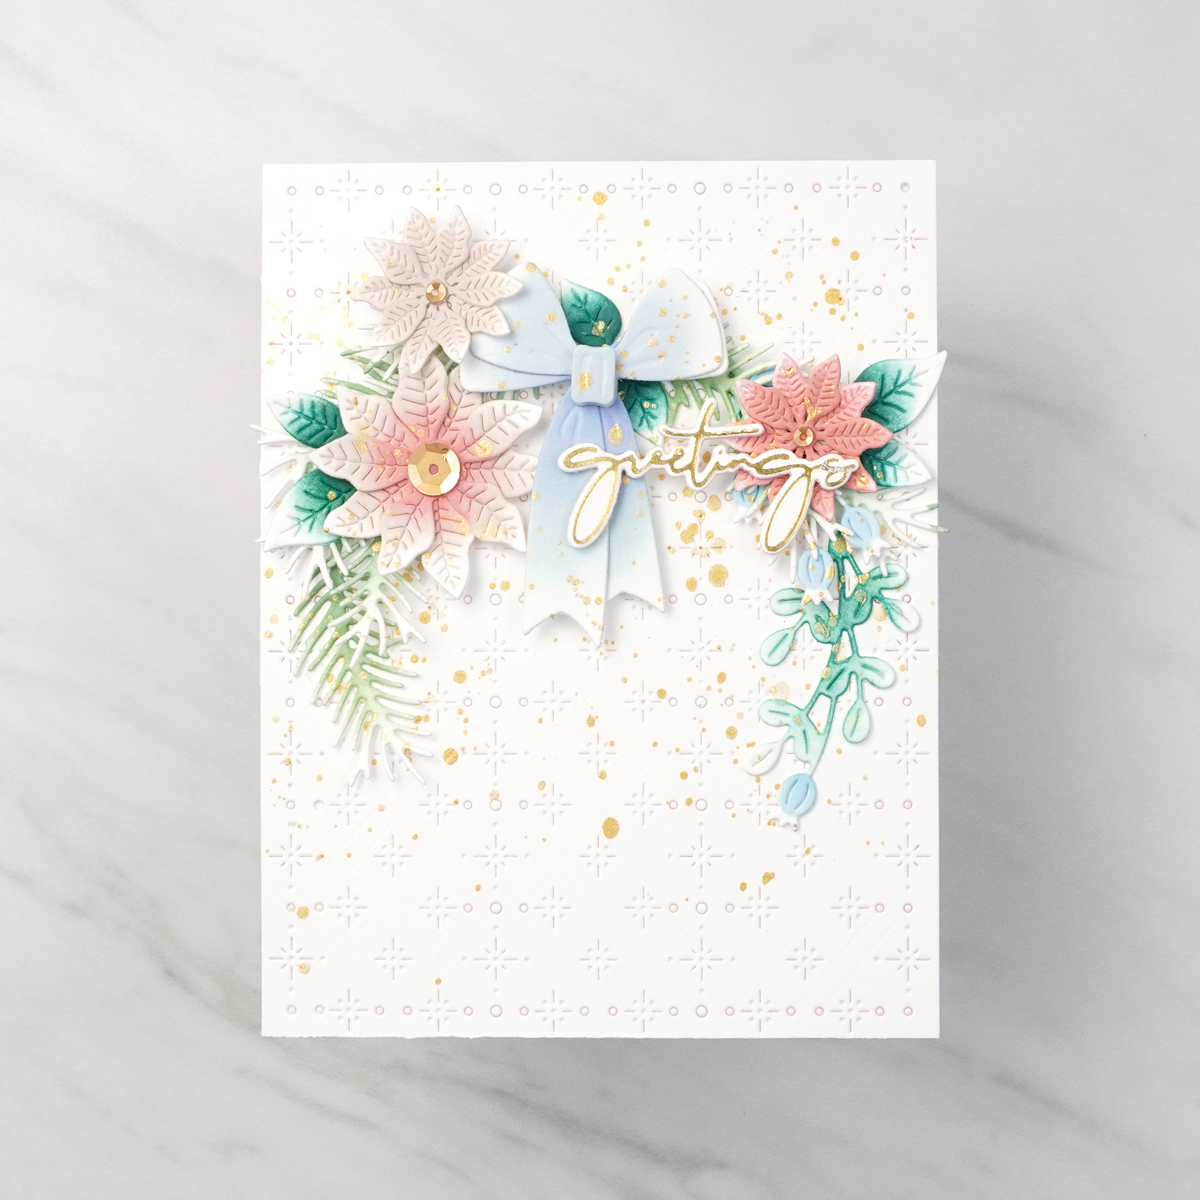
My final card features a cascading arch like the last Halloween card. You’ll notice I also have a strong center focal element with the sentiment, bow, and poinsettias. I started with the previously mentioned images from the Christmas Wreath Add-Ons. I ink-blended gradients onto each image leaving a substantial amount of white space to give the illusion of white flocking. I arranged the evergreen images from Build-A-Wreath Die Set and the die cuts from Christmas Wreath onto a white panel of Stitched Starry Argyle. I finished this card with metallic gold splatters and a foiled sentiment from Yana’s Sentiments.
Spellbinders Supplies:

Other Supplies
Altenew-Fresh Dye Inks, Altenew-Ink Blending Tools
Huge thanks to the Spellbinders team for letting me share these three die-cut wreath projects with you all! You can find more of my card projects on YouTube, Instagram, and my blog. I hope to see you all again very soon!
December 2020 Clear Stamp of the Month is Here – Ballerina Sentiments
July’21 Release Party – Booth Tour & Collections Overview