-
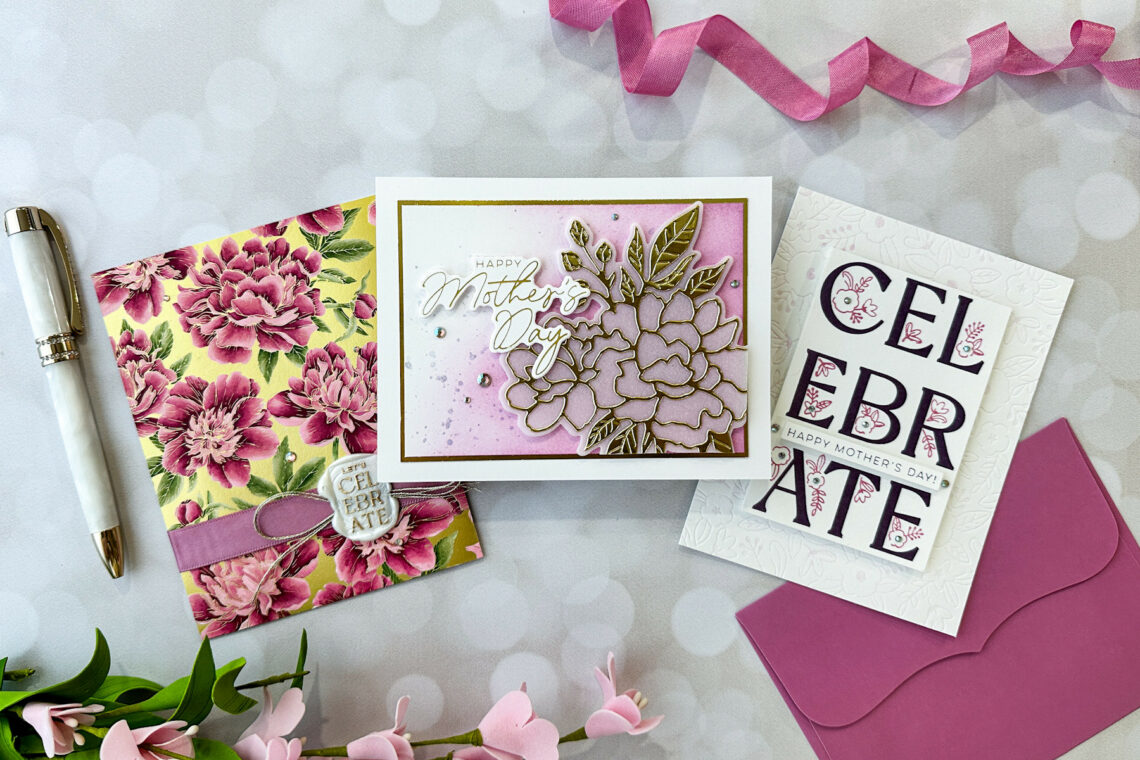
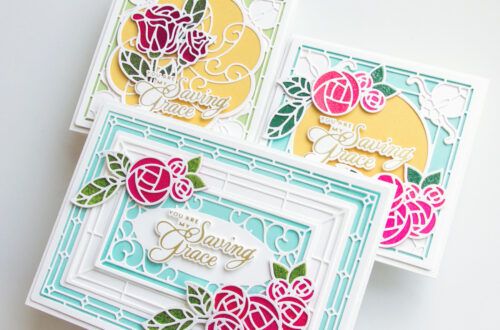
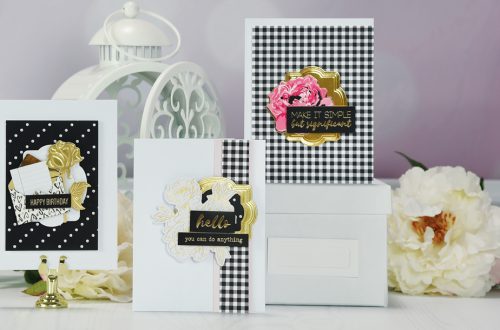
New Let’s Celebrate Collection: Mother’s Day with Mauve and Gold
Hi friends! Emily Midgett here with you today on the Spellbinders blog, and I’m thrilled to be sharing some inspiration using the utterly luscious new collection from Yana Smakula called Let’s Celebrate. Yana’s signature style with elegant florals and beautiful calligraphic sentiments is laced throughout this collection, and it was a true pleasure to play with! The shining star of the collection, for me at least, is the divine Peony Better Press Plate. The Better Press Plates work beautifully with both the Better Press system and the Glimmer Hot Foil System, and both methods work incredibly well with this exquisitely detailed press plate. Whenever I am creating a card set,…
-
Graphic Stylized Design with The Fresh Picked Collection
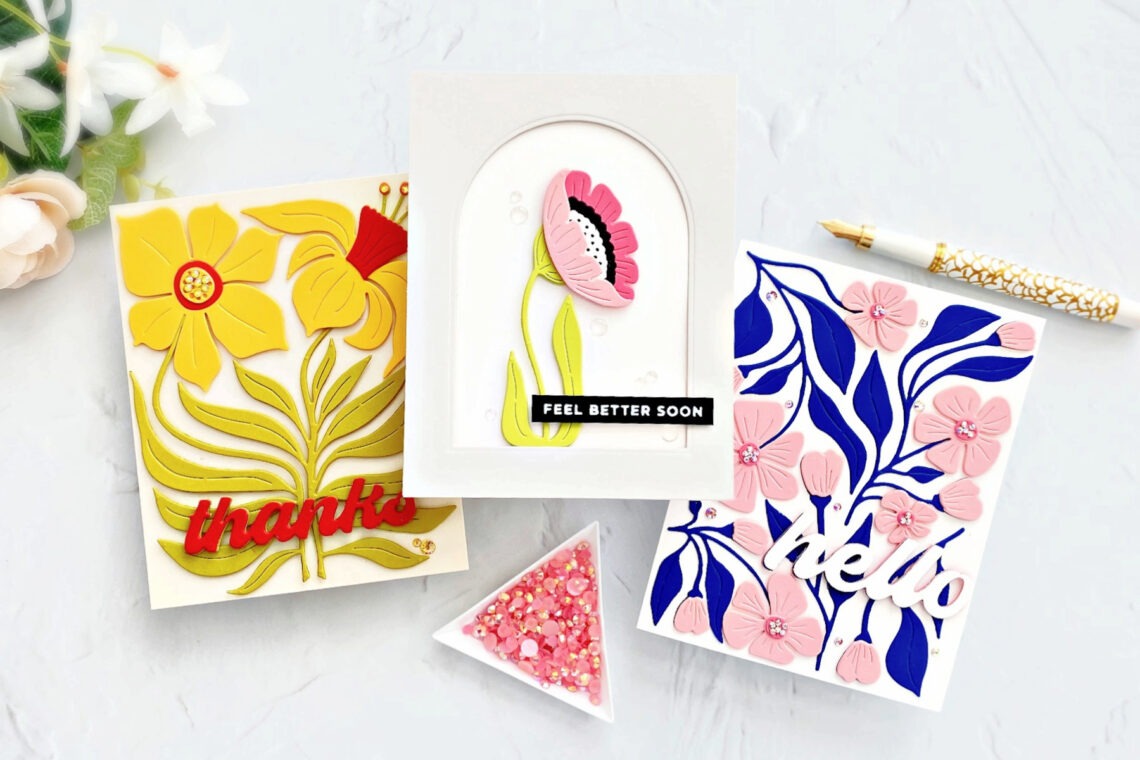
Hello crafters! Joan Bardee here to share some fun colorful cards made with the Fresh Picked Collection. Recently I’ve seen a lot of graphic stylized designs – large florals, fruits, or other images – manipulated so that they fit into a rectangle or other shape like a puzzle. Some describe this design as mid-century modern. You can see examples by checking out my Pinterest page here. In addition, the November Large Die of the Month Towering Blooms is also in that style. The Fresh Picked Collection has that bold aesthetic and I absolutely love it. The collection consists of 4 die sets – Buttercups, Daffodils, Berries, and Anemones. There is…
-
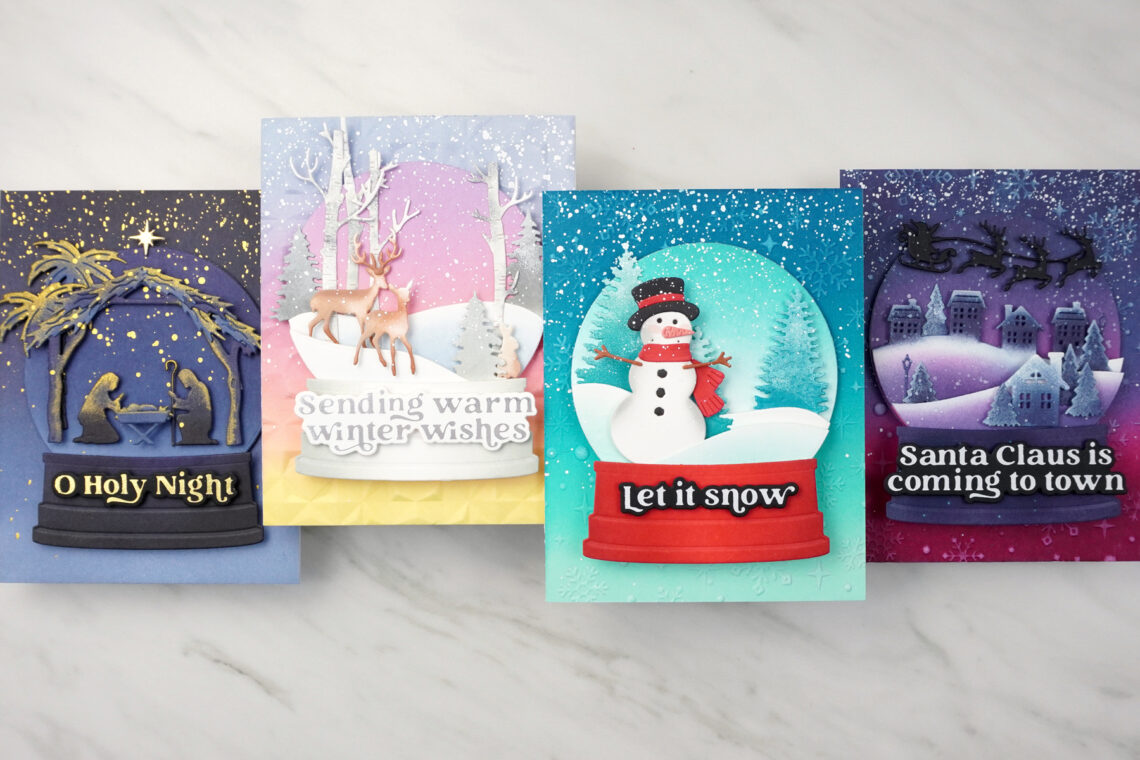
4 Magical Snow Globe Die Cut Scenes for the Holidays
Hi there my Spellbinders’ friends, welcome back to the Spellbinders Blog! My name is Jaycee Gaspar and I’m so excited to share four die-cut snow globe cards featuring the Simon’s Snow Globes collection. This beautiful collection features embossing folders, a hot foil plate sentiment set, and a collection of snow globe scenes. To create the following projects, you’ll need the ‘Simon’s Snow Globe‘ etched dies, which include the globe and base dies, as well as its own town scene, Santa, and sleigh. These dies provide endless versatility, allowing you to create a variety of snow globe scenes that are sure to be admired by your card recipient – just like…
-
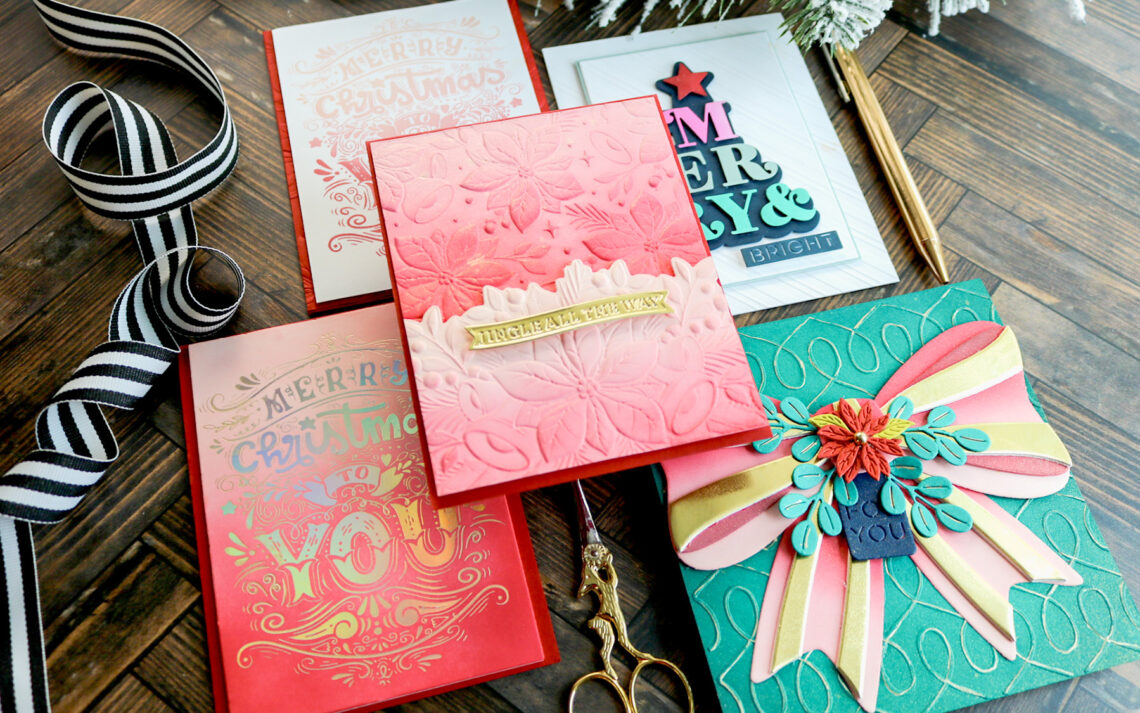
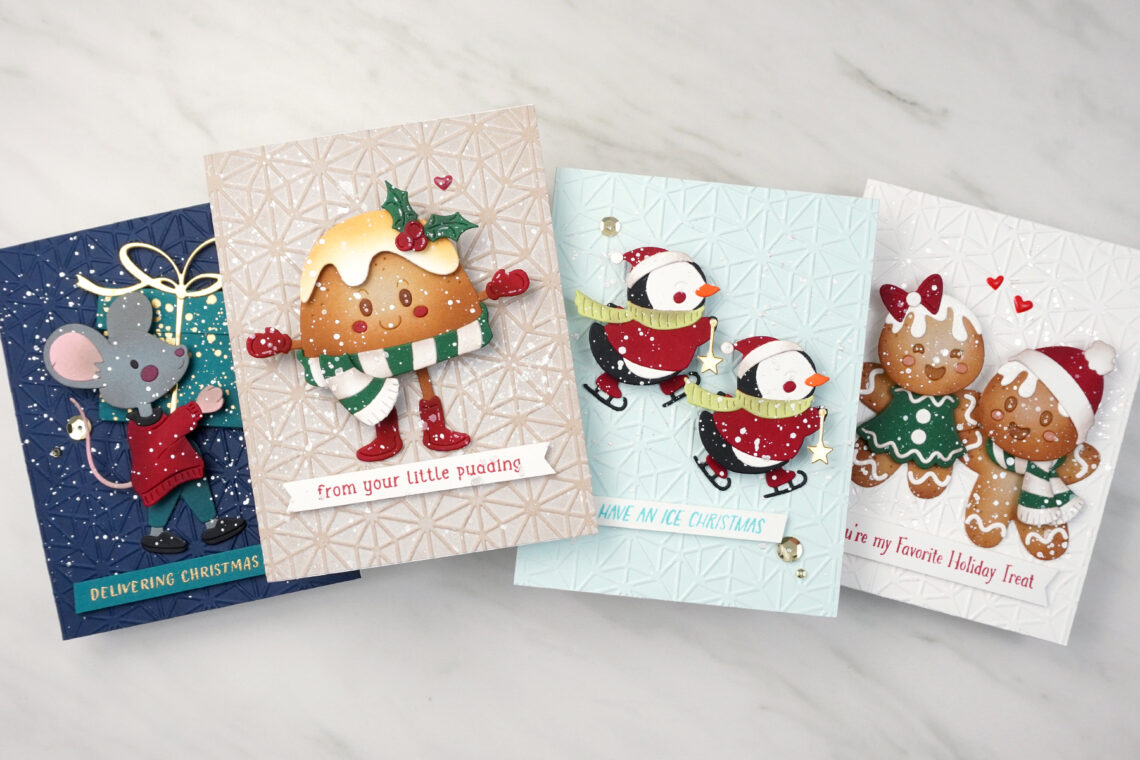
Merry & Bright for a Simply Festive Season of Cardmaking
Sending Christmas cards is a cherished tradition that brings joy and warmth to both the sender and the recipient. While traditional Christmas cards often feature reds, greens, and golds, there is no rule stating that we can’t add a festive twist with unique and non-traditional color palettes. By incorporating Spellbinders different colors and textures using their amazing dies, hot foil plates, embossing folders, and letterpress plates we can create truly one-of-a-kind greetings that stand out from the crowd. Come and join Lisa Mensing from Confetti and Cards as she presents five fun, festive card designs that are perfect for the upcoming Merry & Bright Season. I truly believe that there…
-
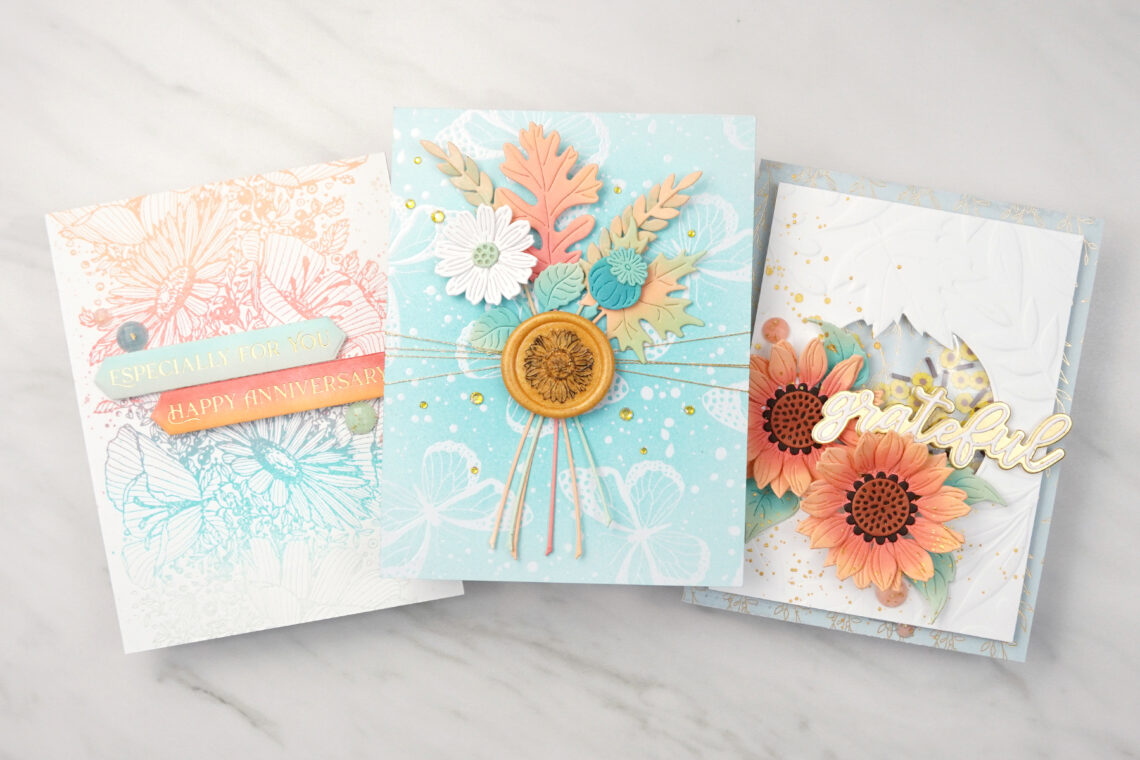
3 Autumn Themed Flower Cards for All Occasions + Bonus Scrapbook Layout
Hi there my Spellbinders’ friends, welcome back to the Spellbinders Blog! My name is Jaycee Gaspar and I’m so excited to share three cards and a scrapbook layout featuring the Serenade of Autumn collection. This collection features BetterPress press plates, steel dies, ephemera, and embellishments! I focused on a cohesive color palette that matches the Serenade of Autumn Gems. I recently crafted some beautiful papercrafts using an enchanting color palette consisting of coral, rose quartz, jade, and aquamarine. By blending inks, I achieved soft tones that perfectly complemented each other, and I also incorporated color complements to create a more muted tone. Although these colors are perfect for autumn themes and…
-
Embrace Every Season with 3 Gorgeous Die Cut Wreath Cards
Hi there my Spellbinders’ friends, welcome back to the Spellbinders Blog! My name is Jaycee Gaspar and I’m back again to bring you some creative inspiration using the gorgeous Beautiful Wreaths collection by Suzanne Hue. In this blog post, I’ll be sharing three stunning modern wreath card designs that will elevate your card-making game. With the Build-A-Wreath and Garden Wreath Add-Ons, this collection offers limitless possibilities for crafting a beautiful wreath base. Then all you need to do is pick your card occasion and pair your wreath base with the other die sets in Suzanne Hue’s collection. Keep reading as I share my tips and tricks for creating breathtaking die-cut wreath…
-
Crafting with Vivant Ribbons, Cords and Twines
Hi there, this is Annie Williams and I’m excited to be back on the blog today to share a couple of cards made with some of the beautiful new ribbons, cords, and twines from Vivant available in the Spellbinders shop. I chose my favorite ribbon techniques and paired them with some gorgeous Spellbinders products to create these three easy cards with tons of texture and a little something extra. Floral Wax Seal Card With all of the beautiful wax seal products released recently, it would be hard to craft with ribbons and not consider using this technique first. Here I paired a floral bouquet and wax seal with a couple…
-
4 Groovy Interactive Cards featuring the Dancin’ Christmas Collection
Hi there my Spellbiners’ friends, Welcome back to the Spellbiners Blog! My name is Jaycee Gaspar and I’m a full-time scientist and part-time content creator and card maker. Today, I’m sharing simple inspiration and projects featuring the Dancin’ Christmas Collection. This collection features four dancing groups, a paired sentiment stamp set, and embossing folder. This group is sure to keep you crafting, but your recipients will be amazed by how clever your Dancin’ Christmas cards are. I used three techniques to make these interactive cards: ink blending, color blocking, and shiny embellishing. Ink blending gives dimension to otherwise solid hues of cardstock. Color blocking helps define clear palettes in your…
-
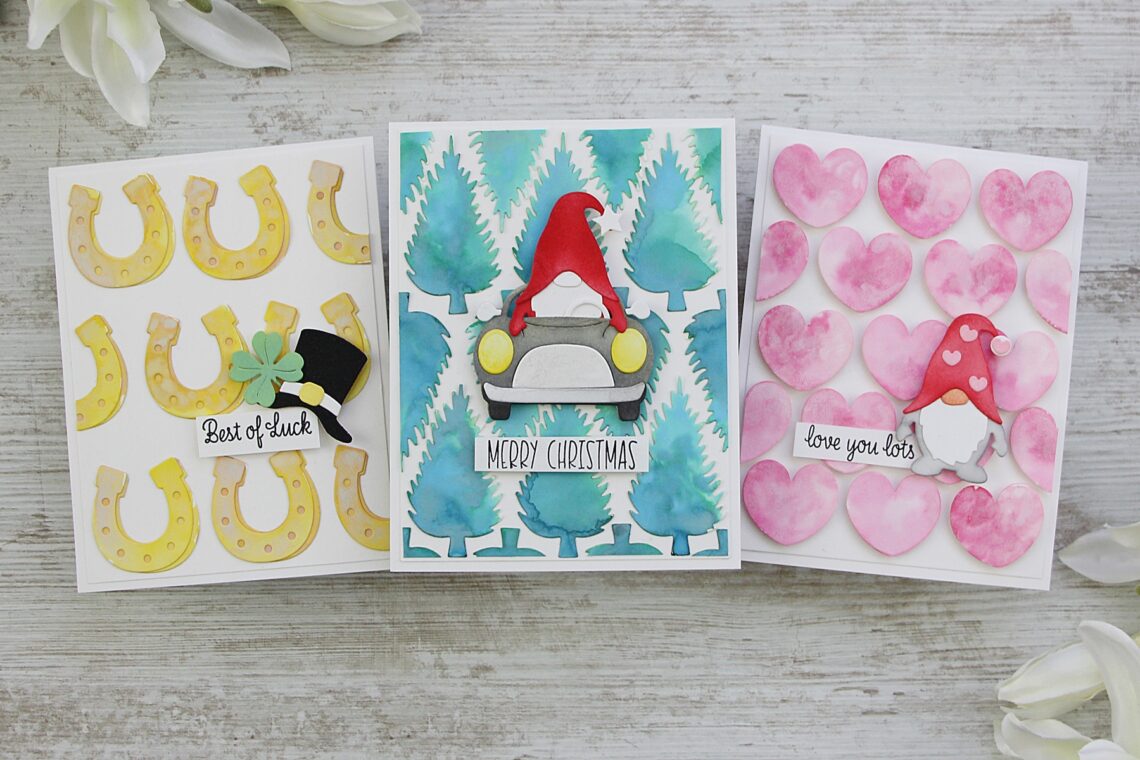
Gnome Drive Collection With a Twist
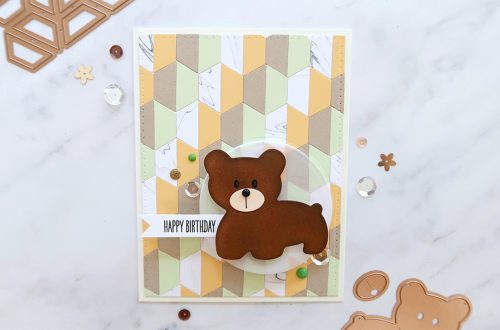
Hej everyone, this is Martina from @fraupony and I am truly excited to be a guest on the Spellbinders Blog again. Today’s post will be focusing on the Gnome Drive Collection – A super sweet and versatile collection that accompanies us throughout the whole year. The Gnome, the car and his Christmas accessories come with the Gnome Drive “Holiday” set. There are 4 more ”Gnome Drive” sets for Valentine’s day, Spring/St. Patrick’s day, Graduation, and Halloween. All these sets come with many great dies which inspired me to create today’s cardsAll three cards are a2 top fold cards, have individual backgrounds with a repeating pattern, created from die cuts made…
-
Adding Dimension to Cards with the Photosynthesis Collection with Joan Bardee
Hello crafters! Joan Bardee here and I’m delighted to share 3 cards chock full of color and dimension using the beautiful Photosynthesis Collection by Simon Hurley. If you love floral cards, you will love this collection. And adding dimension to these cards literally takes them to the next level! Rather than detail all the steps I took for each of these cards, I’m sharing several tips for adding dimension to cards. Sending Hugs This colorful bouquet of flowers uses Ceramic Vases, Floral Stems, and Must Have Sentiments, all part of the Photosynthesis Collection. I added dimension and heft to this card in 4 ways: Stacked die cuts – adhering multiple…