Merry & Bright Collection – Holiday And All-Occasion Ideas
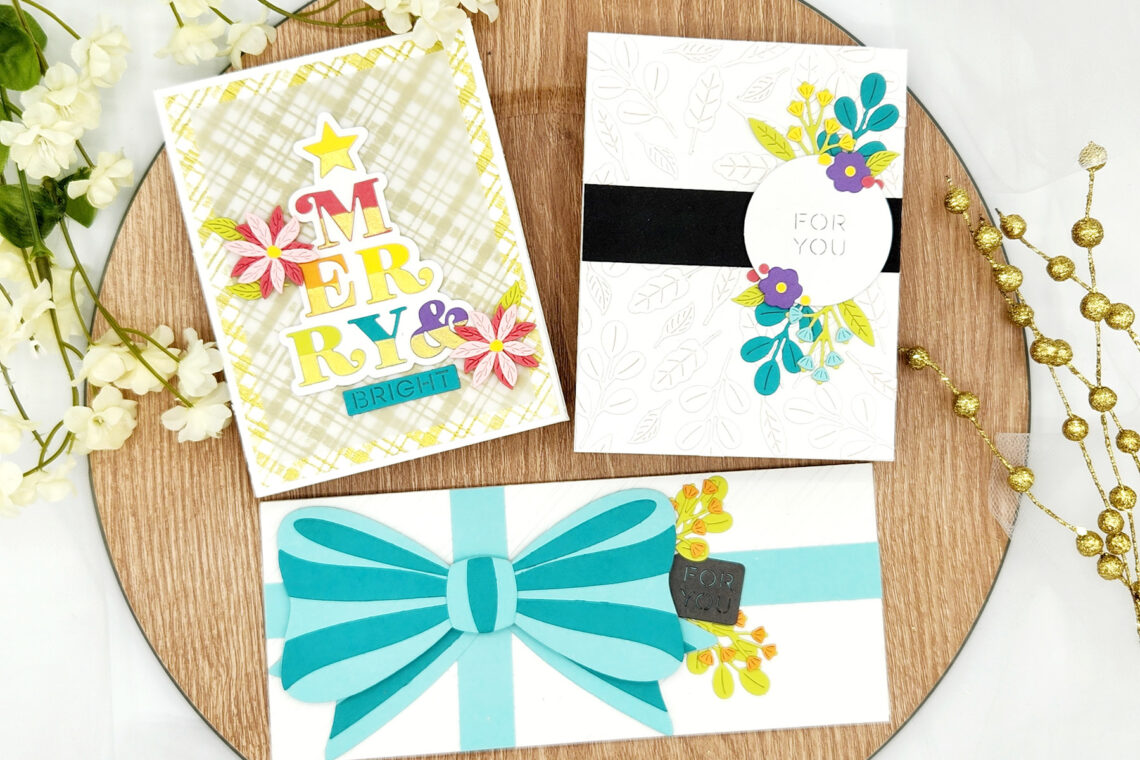
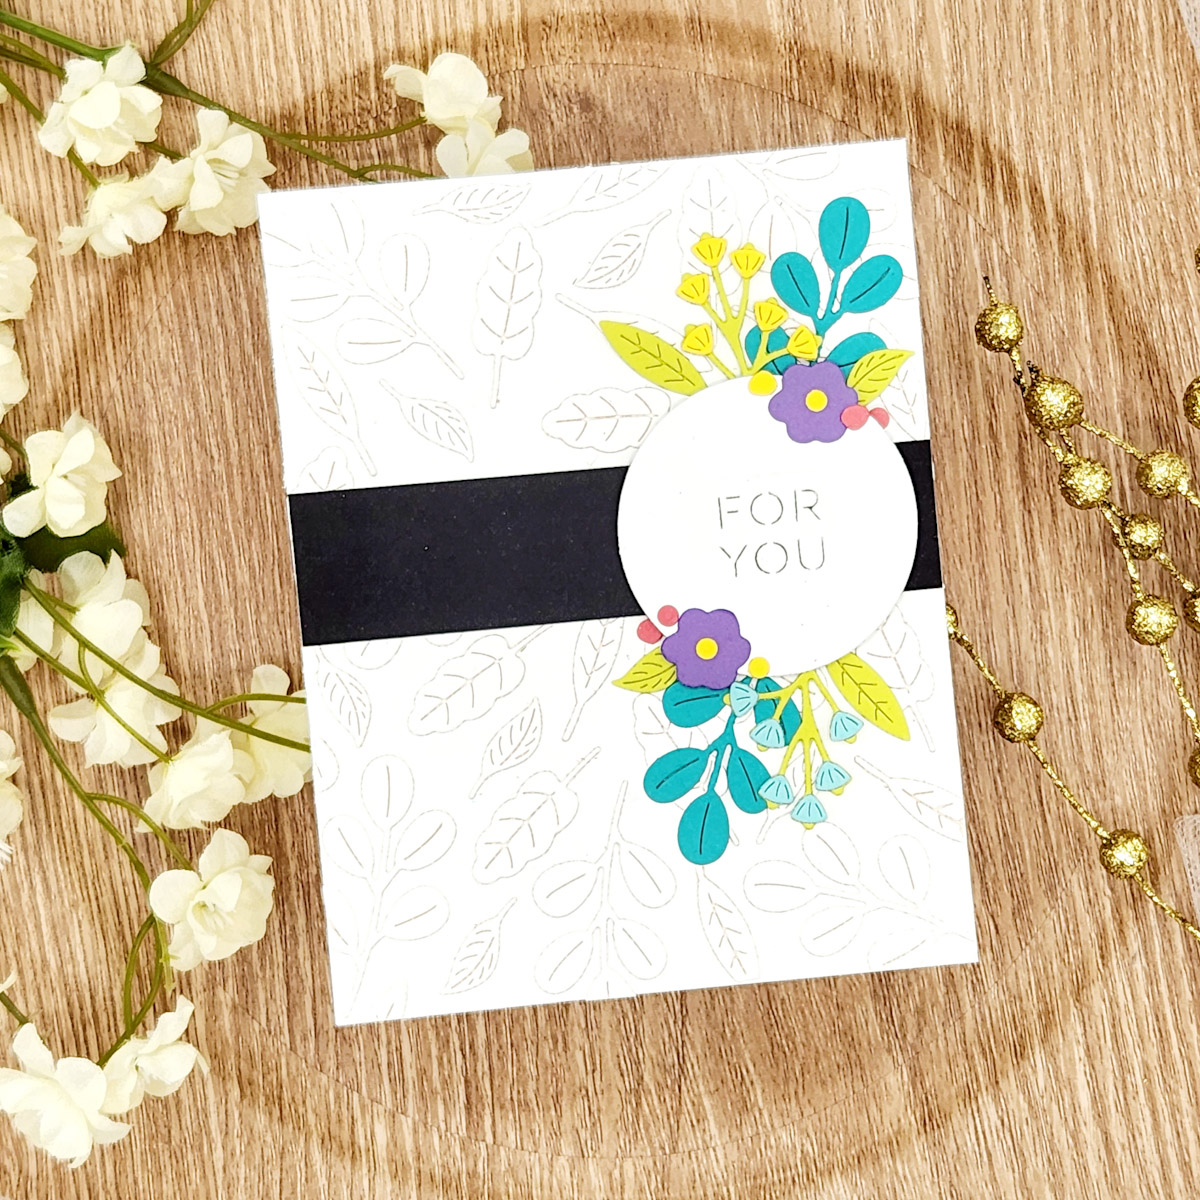
Hello everyone! I’m Meg Brooks from Anchored By Ink and I am so excited to be a guest designer again for the Spellbinders blog! Today, I am featuring 3 cards using the gorgeous Merry & Bright Collection. This collection includes small florals, a striped embossing folder, a large all-occasion bow, and a festive holiday tree.
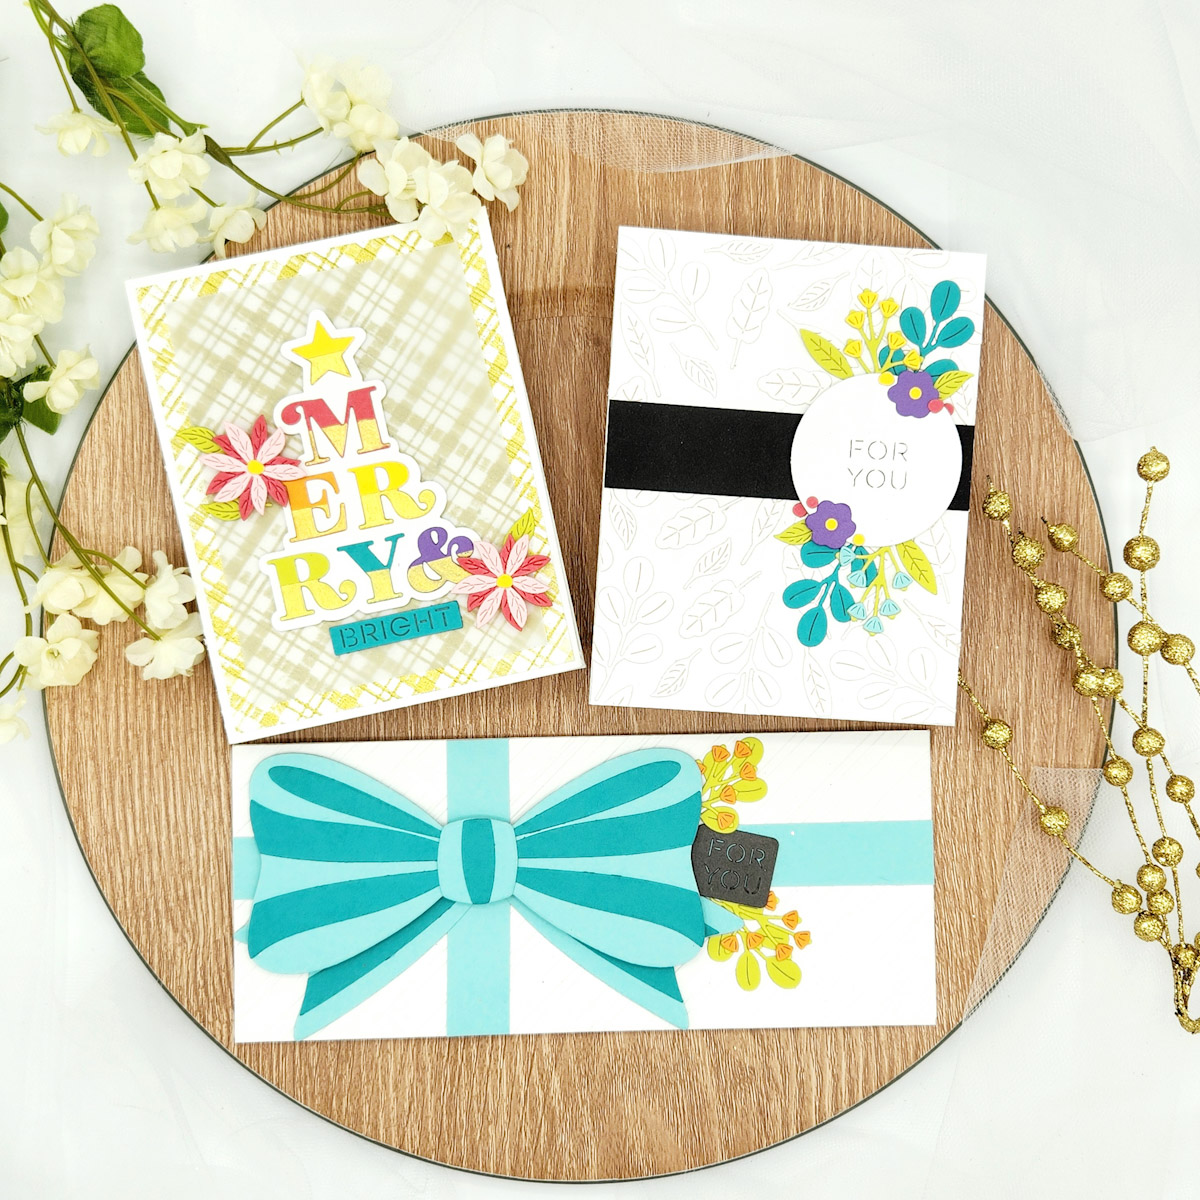
I chose to keep my cards bright and more for all occasions but you could simply switch the color palette to accommodate the holidays.
- Die-cut leaf images from the Petite Blooms and Sentiments from white cardstock.
- Adhere all of the die cuts to a top folding A2 white card base using liquid glue. Be sure to fill in the background. This will create a lot of interest and look beautiful.
- Cut a strip of black cardstock that is 1 inch wide and 4 ¼ inches long. Adhere the strip to the middle/upper half of the card base.
- Using a circle die, die cut the circle and “FOR YOU” sentiment from white cardstock. Apply foam tape to the back and adhere offset and to the right over the black strip.
- Die cut the flowers and foliage from Dahlia, Sunkissed, Peridot, Teal Topaz, Waterfall, and Lilac Blossom.
- Arrange the blooms in clusters above and below the sentiment. Secure using liquid glue.
- Cut a panel of white cardstock to 4 ¼ by 5 ½ inches. Insert the panel in portrait orientation into the Peppermint Stripes embossing folder. Run through your Spellbinders Platinum 6 machine.
- Using a brayer, apply Lunar Paste in “Sike” to the raised areas. Set aside to dry.
- Once the panel is dry, insert the panel into the embossing folder in landscape orientation. This will flatten some of the previous areas but it will create a plaid pattern.
- Apply the Lunar Paste onto the new stripes. Set aside to dry.
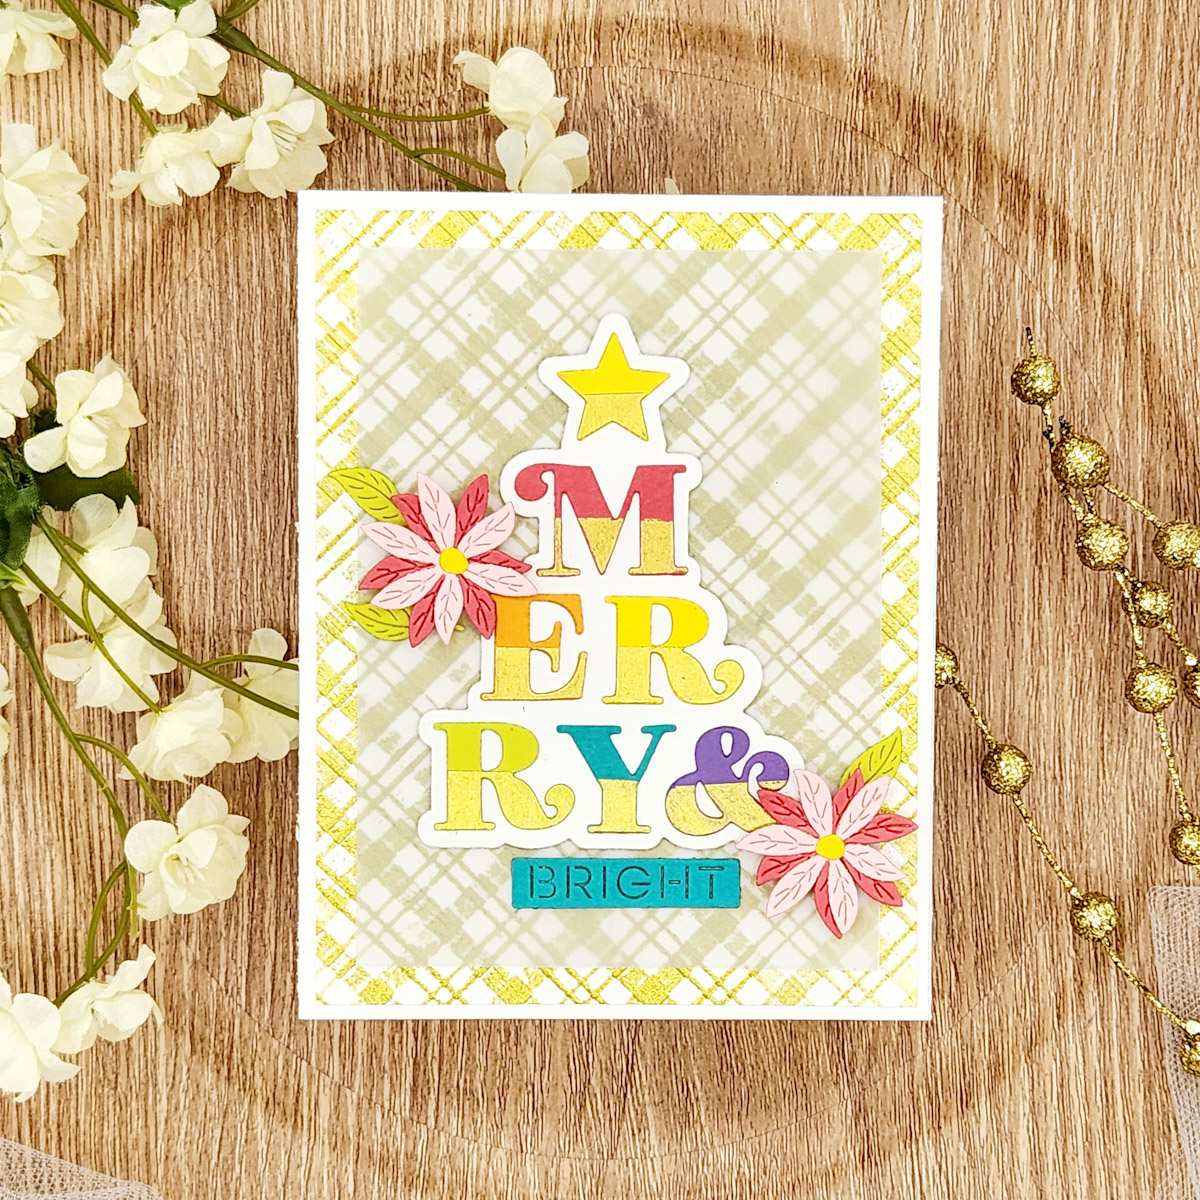
- Die cut the Merry & Bright Tree outline from white cardstock two times and adhere for dimension.
- Die cut the star and letters from Dahlia, Persimmon, Sunkissed, Peridot, Teal Topaz, and Lilac Blossom. I cut the letters twice to stack them for dimension but this isn’t needed.
- Adhere low tack tape to the top half of the letters. Apply Lunar Paste to the bottom half and let dry. Remove the tape once dried.
- Stack the die-cut letters and apply them to the white outline tree with liquid glue.
- Die cut the BRIGHT sentiment from Teal Topaz.
- Die-cut floral blooms and leaves from the Petite Blooms and sentiments from Dahlia, Pink Sand, Sunkissed and Peridot.
- Trim the plaid background to 4 by 5 ¼ inches. Apply to a top folding A2 card base.
- Cut a panel of vellum to 3 ½ by 4 ¾ inches. Adhere the tree and BRIGHT sentiment.
- Add the flowers and leaves around the tree.
- Adhere the vellum panel to the card base.
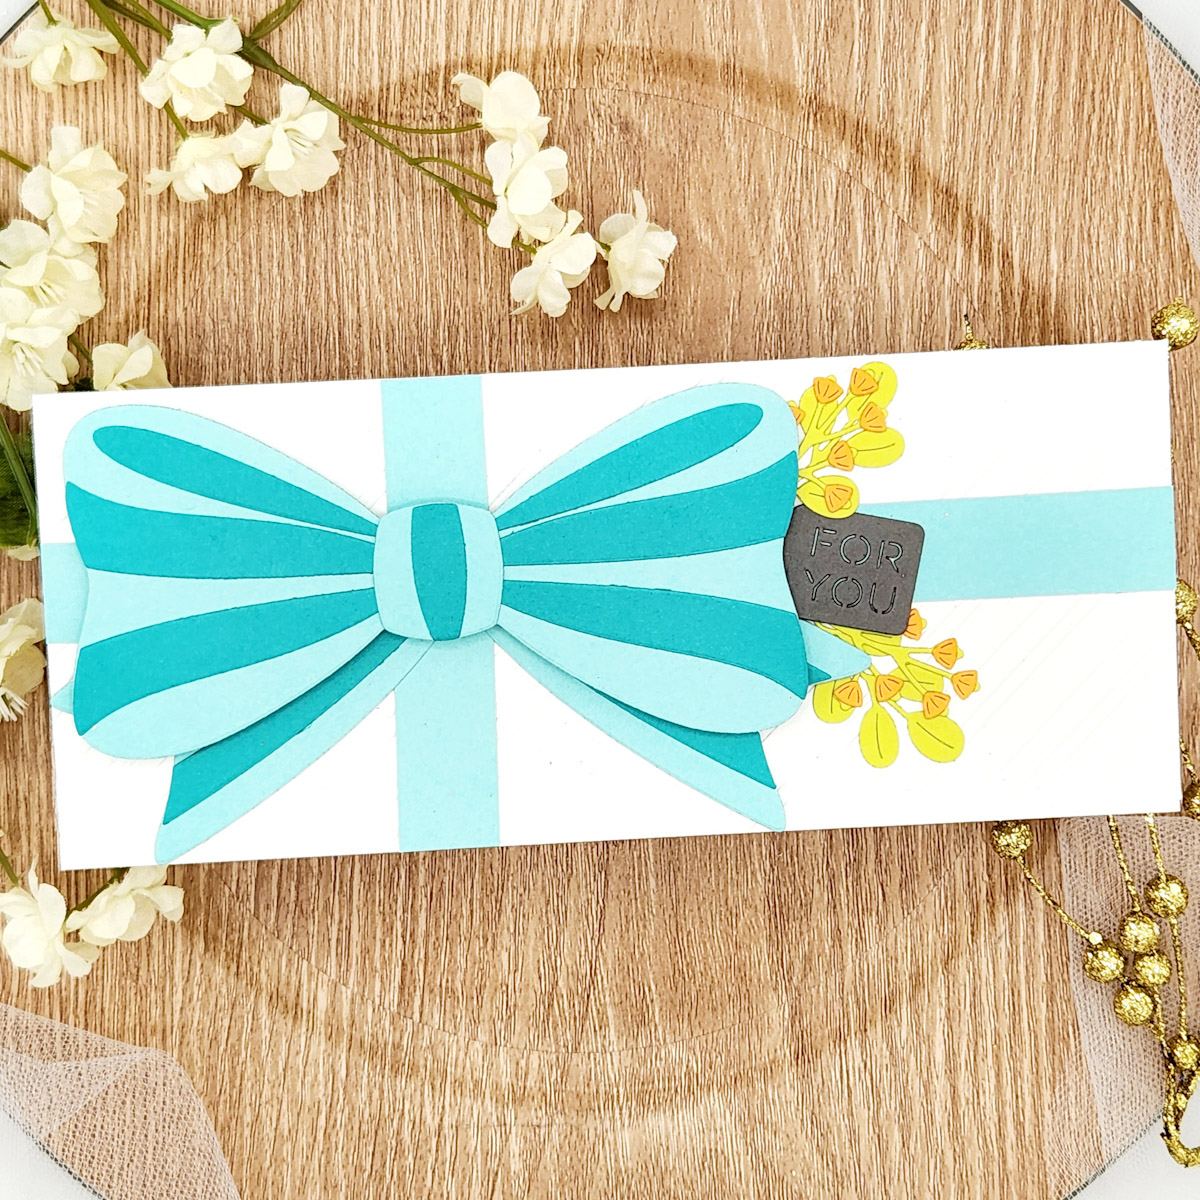
- Cut a panel of white cardstock to 3 ½ by 8 ½ inches. Insert the panel into the Peppermint Stripes embossing folder and run it through your Spellbinder Platinum 6 machine.
- Die cut the large pieces of the All-Occasion Bow from Waterfall and the smaller striped pieces from Teal Topaz. Adhere the bow together.
- Cut two strips of paper ¾ inch wide and a length of 3 ½ inches and 8 ½ inches.
- Apply the strips to the embossed background. The shorter one will be closer to the left.
- Adhere the ends of the bow using liquid glue and add the larger bow pieces with foam squares.
- Die cut the FOR YOU sentiment tag from the Petite Blooms and Sentiments from Lunar Gray cardstock.
- Die-cut leaves and flowers from Peridot and Persimmon cardstock.
- Adhere the tag and foliage to the right of the bow.
- Adhere the finished panel to a slimline card base.
If you would like to see more card making tutorials, you can visit me at my blog Anchored by Ink. You can also see my work on my Instagram page. Thank you for visiting me on the Spellbinders Blog!
Spellbinders Supplies:

Other supplies
Brayer
Easter Blessings | Cards, Projects and More For Spring!

Distress Oxides Five Ways | Spellbinders Live