Merry Mug & Circle Delights Inspiration
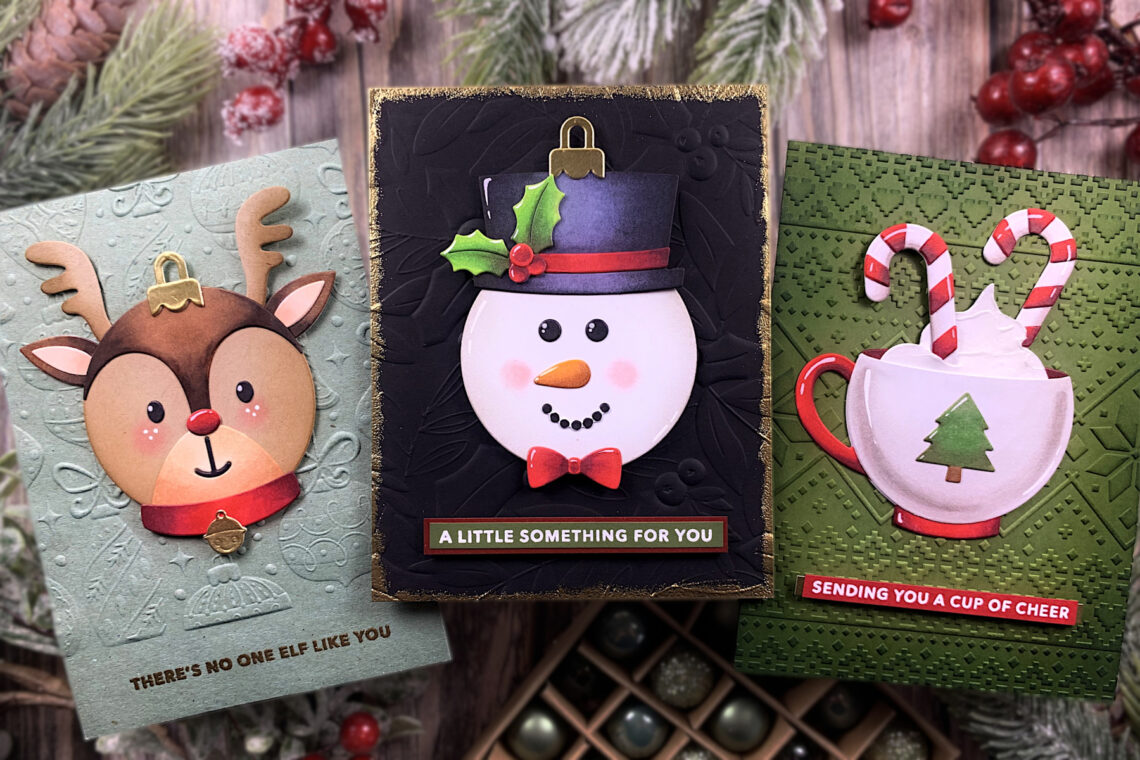
Hello everyone! This is Jennifer Rustioni from @armieritagli! I’m so happy to be here today on the Spellbinders Blog! I want to share with you three Christmas cards I created featuring the new amazing Merry Mug & Circle Delights Collection!
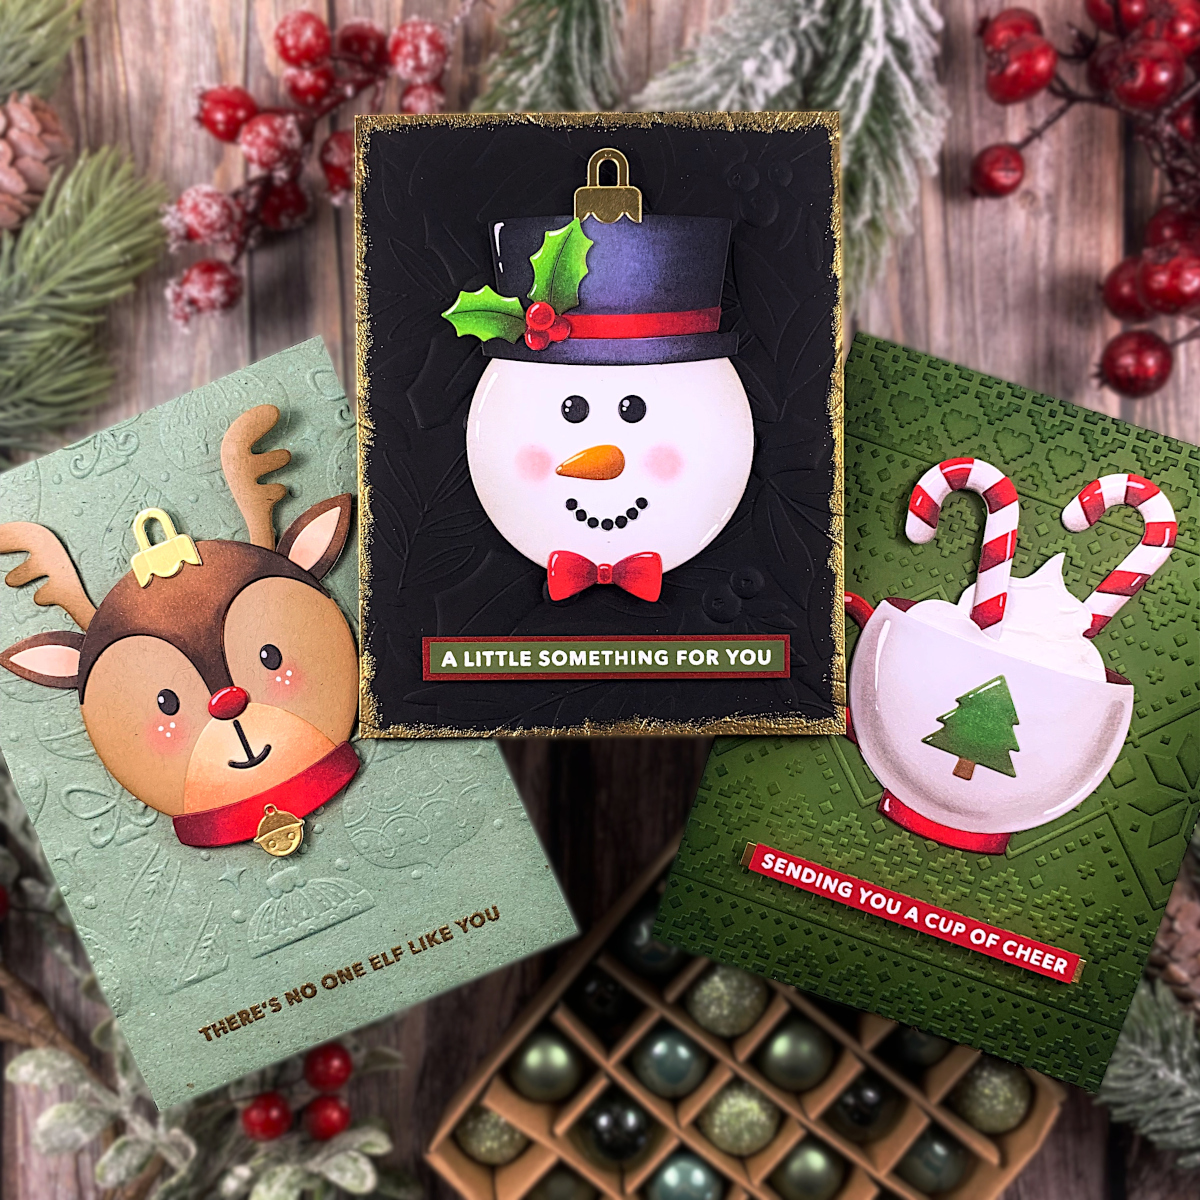
RUDOLPH
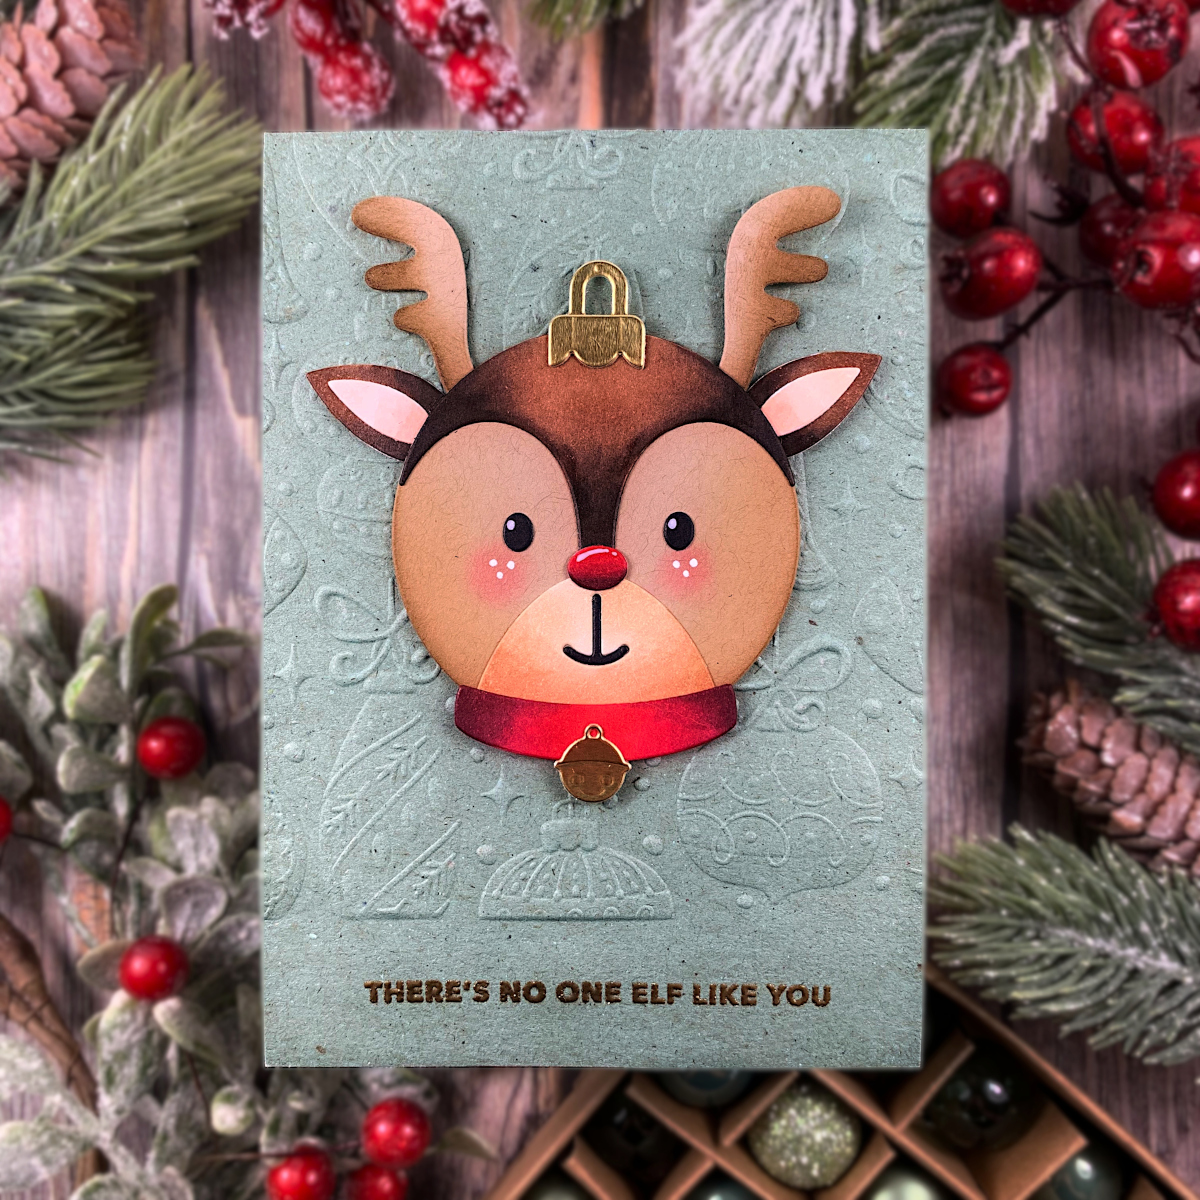
The first card I realized is featuring the super fun Festive Ornaments and Santa’s Festive Circle Crew Etched Dies! I die-cut the circle base for my reindeer using kraft card stock, and then I blended the edges with some Distress Ink. After that, I die-cut the other parts and colored them with Copic Markers. At this point, I assembled the reindeer.

I realized the base of my card by embossing a sage-green cardstock with the Vintage Ornaments 3D Embossing Folder. I chose a sentiment from the Santa’s Sippin’ Sayings Stamp Set and gold embossed it at the bottom of the card. At last, I glued the reindeer and added some highlights with a white gel pen.
FROSTY THE SNOWMAN

For my second project, I chose to use the same dies sets to create a snowman. I die-cut the circle base and lightly blended the edges with the Distress Ink Pumice Stone. I die-cut the other parts and colored them with Copic Markers. I assembled the snowman face and added the highlights with a white gel pen.

I realized the base for my card by embossing a black card stock with the Holly & Foliage 3D Embossing Folder and then I gold embossed the edges. At last, I added a banner with the sentiment at the bottom of my card.
MERRY MUG
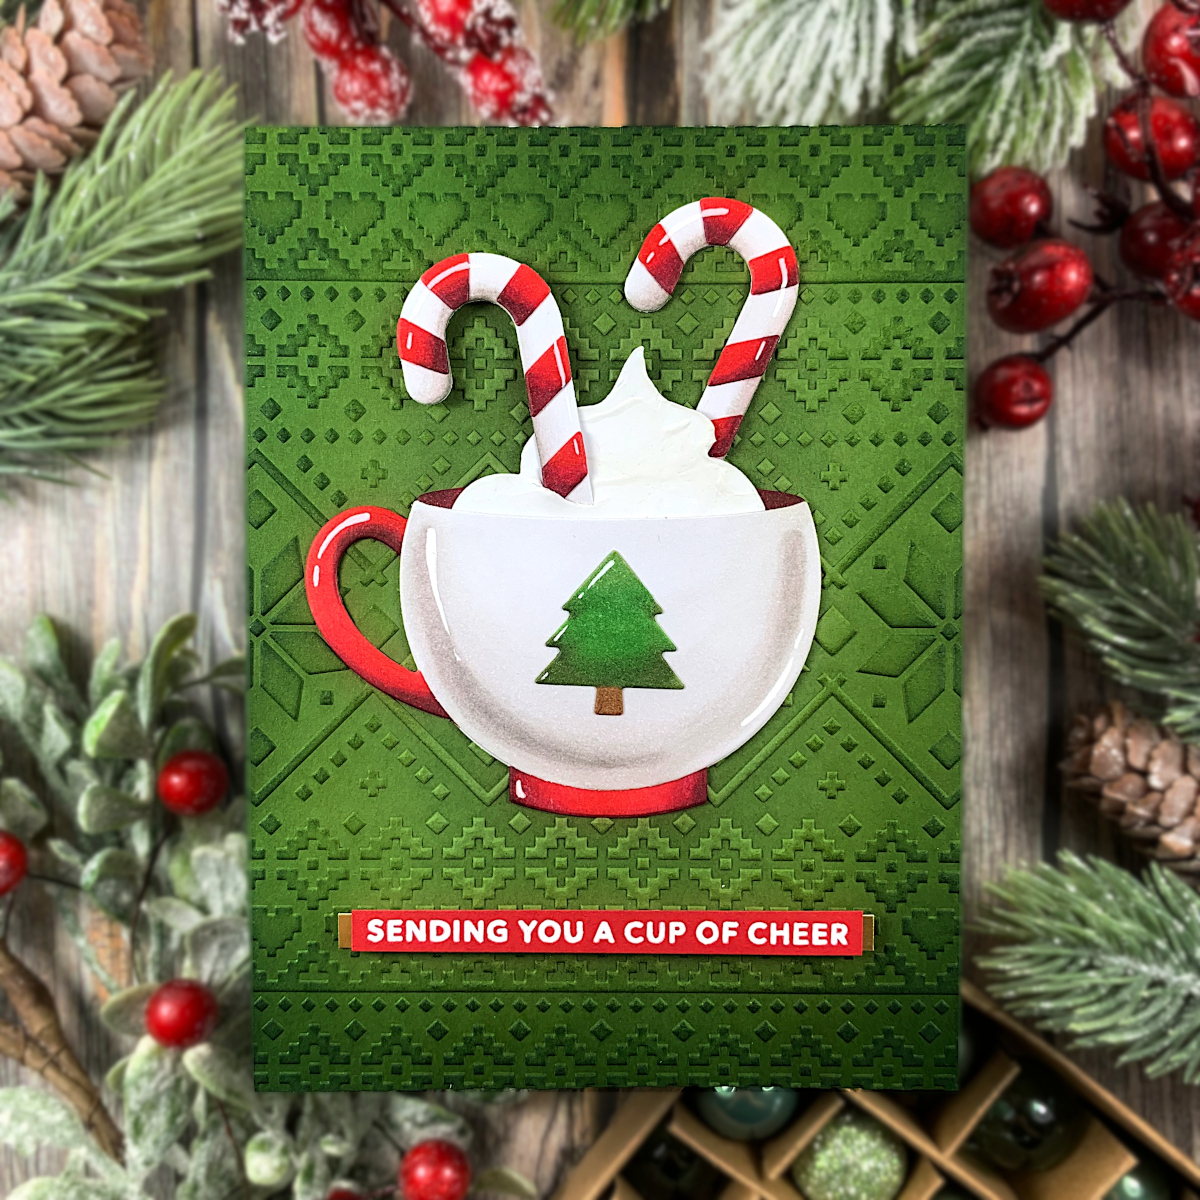
The last card I created features the beautiful Merry Mug Creations Etched Dies. I die cut the mug, the tree and the candy canes and colored them with Copic Markers. Then, I die-cut the cream and covered it with a white acrylic paste. At this point, I assembled my mug and realized the highlights with a white gel pen.

I realized the base for my card by embossing a green card stock with the Sky Lodge Embossing Folder. Then, I blended some Distress Ink in the shades of dark green and loved how the details come out! At last, I assembled my card and added a red banner with the sentiment.
Spellbinders Supplies:

Other supplies
Distress Ink: Peeled Paint, Rustic Wilderness, Walnut Stain, Pumice Stone; Copic Markers: E99, E97, Y38, YG67, YG17, YG03, 100, BV29, BV25, E49, E59, R89, R59, R46, R27, W5, W3, W2, W1, W0, YG67, YG63, E57; X-Press It Blending Cards, Sakura Gelly Roll White
Thanks for reading! I hope my projects will inspire you and wish you all a wonderful day!
Crafting With Doodlebug – Cardmaking Ideas You Need To Try

May 2021 Small Die of the Month Is Here – Arched A2 & Slimline Card Creator