Faux Stitching Ideas To Try with Your Stitching Dies
Hello crafters! This is Lisa from My Card Trip and I am delighted to be a guest on the Spellbinders blog today. I am sharing a fun and simple way to get the look of stitching on your cards, without the need for actual stitching with thread! It is surprisingly easy and very quick to do. Many stitching dies can actually be used without any threads at all, as the patterns are often still really pretty with all the tiny holes. However, you can also add faux stitching with pens to give you a similar look to thread.
I am going to be sharing one card in detail today but I also have a couple of other completed cards towards the end of the post that I hope will provide you with some more inspiration.
So, let’s start by taking a look at the pens I am using today. These are the Marvy Uchida Le Pen Brights.
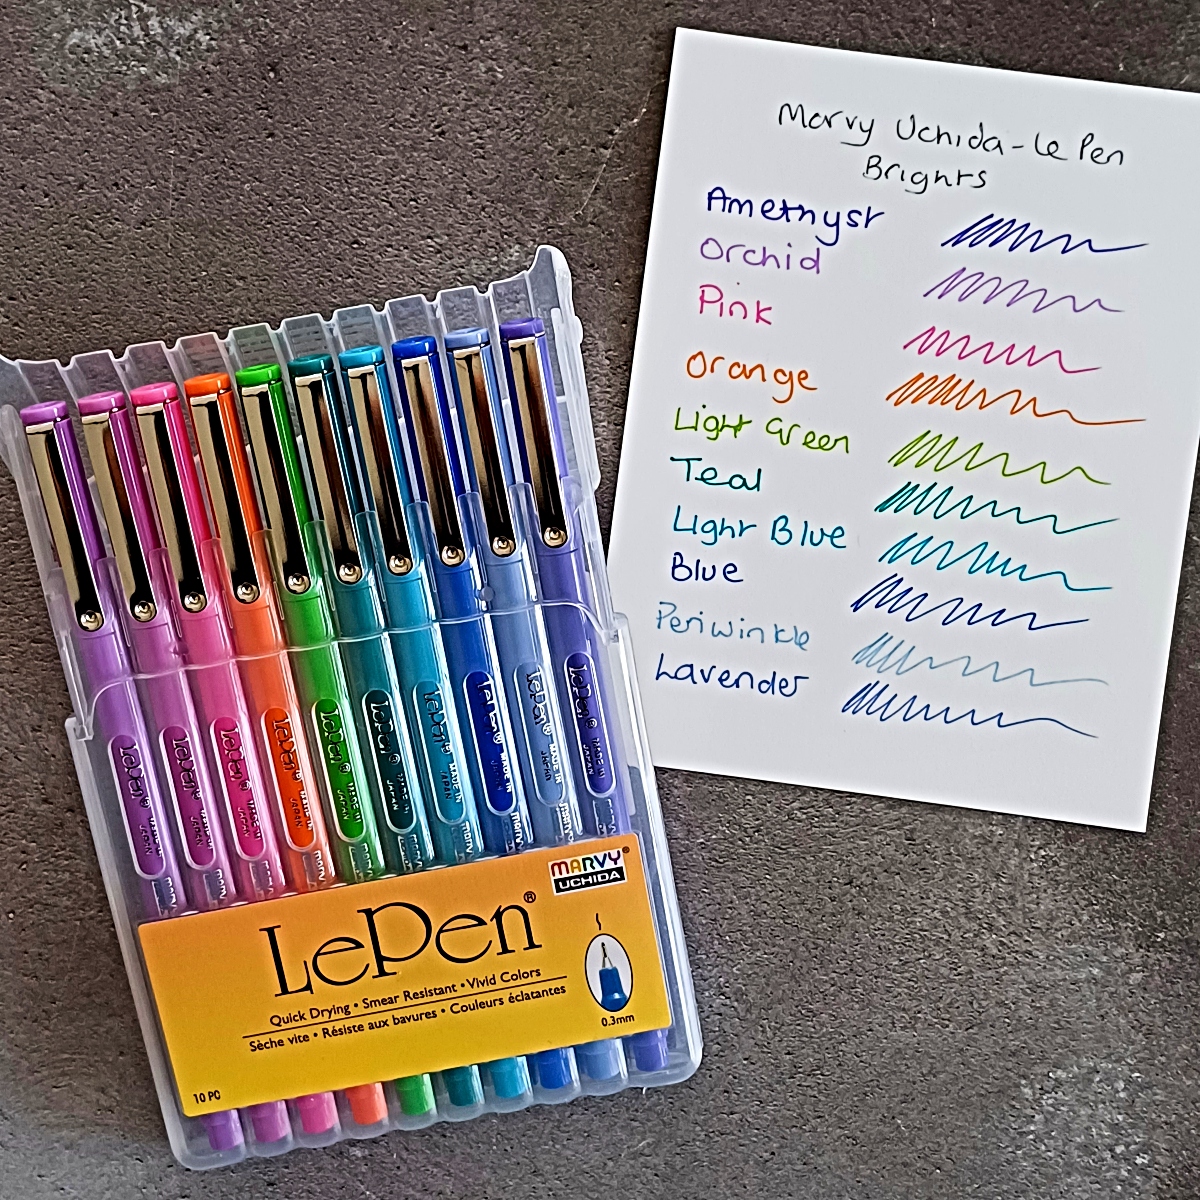
I did a very quick and simple swatch of the ten colors. I named my colors for reference only as the markers themselves do not have a color name on them. What makes them really easy to use is that the ink color matches the barrel. In addition, when you open the pack, the top flips back on itself so you can have the pens tilted up, which makes it easier to remove them.
The pens have a micro-fine plastic point and create very thin lines when you write or draw. The ink is acid-free and non-toxic and it is also smudge-proof. Not only are these pens great for adding lines to stitching die cuts, but if you are a planner, or do bullet journalling, then they would also work really well! There are additional packs available which give you a very wide range of colors to choose from.
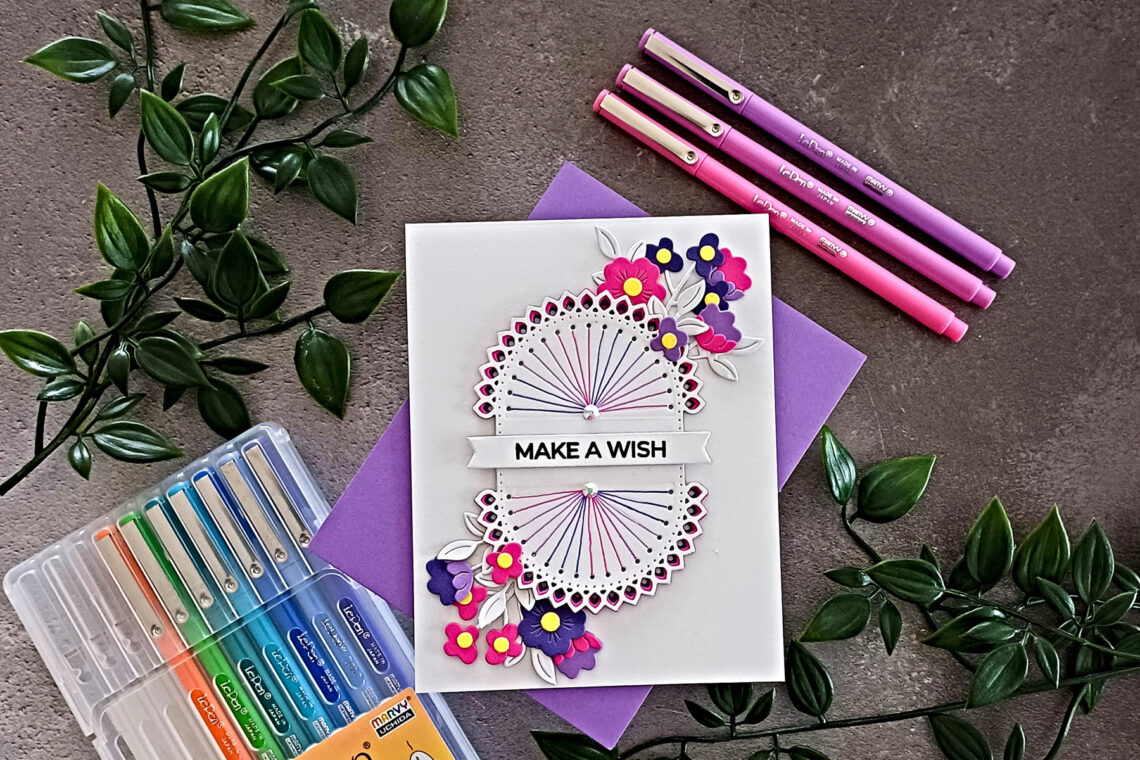
Okay, so on to our project for today! I am using the gorgeous Stitched Kaleidoscope Arch Etched Dies.

I started off by die-cutting the main arch die twice from Fog Color Essentials Cardstock and then I placed the stitching lines die on top and ran both pieces back through my die-cutting machine. For the small arch layers that sit behind the open lacy areas, I used Royal Amethyst Color Essentials Cardstock and some magenta card from my stash. You need to die-cut each of these layers twice for each of the two fog pieces.
So, let’s move onto the faux stitching itself. It really is very simple to do and easy to play with different color options, which can be a bit more tricky if you are using stitching threads.
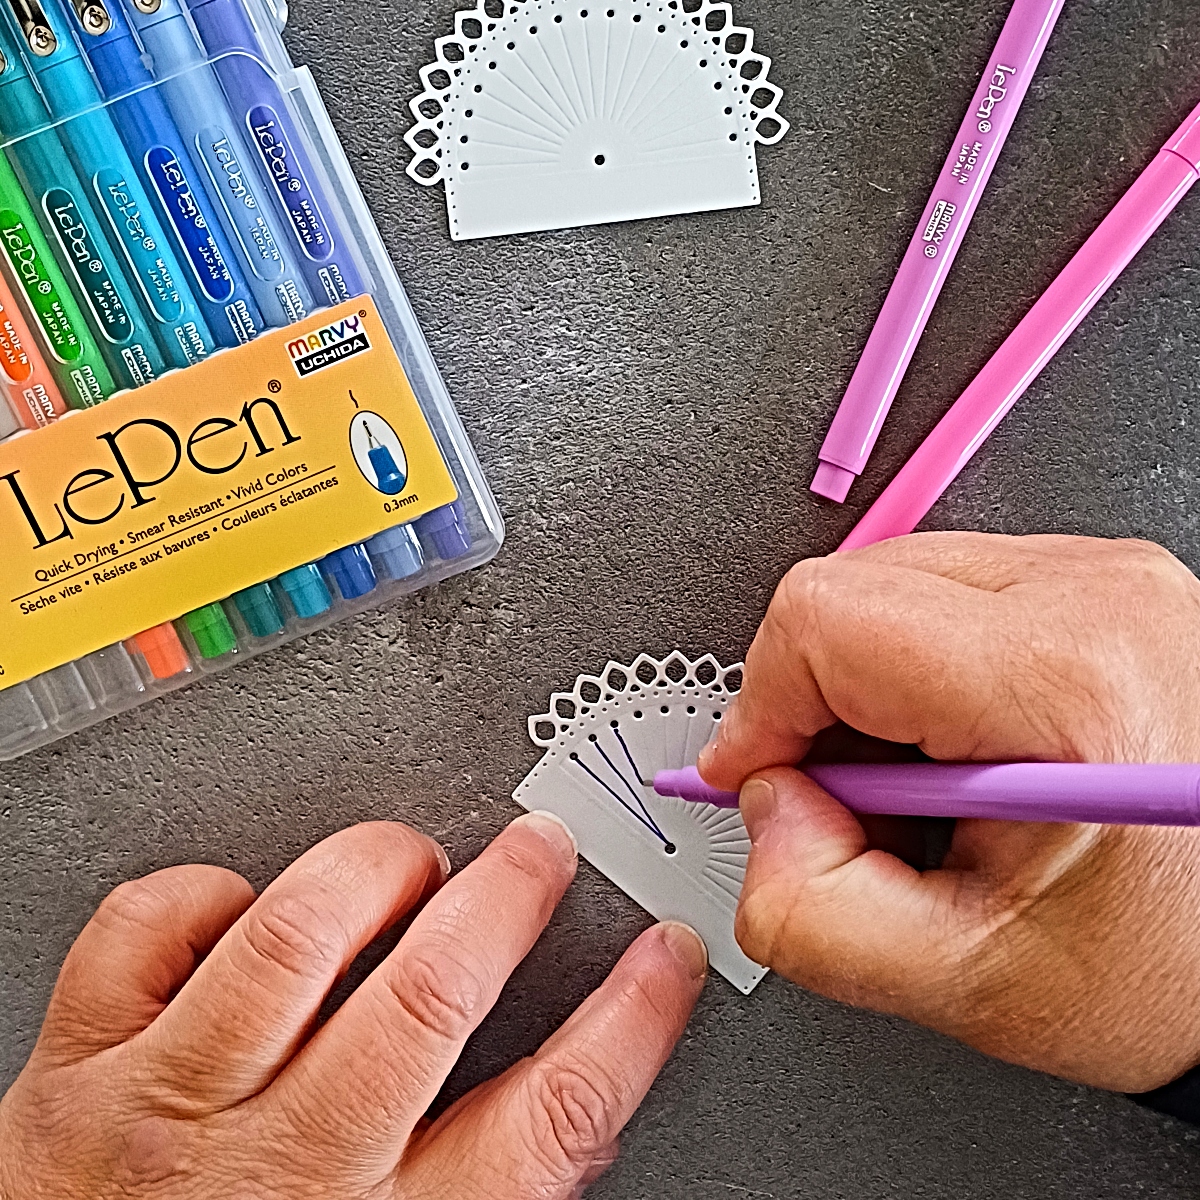
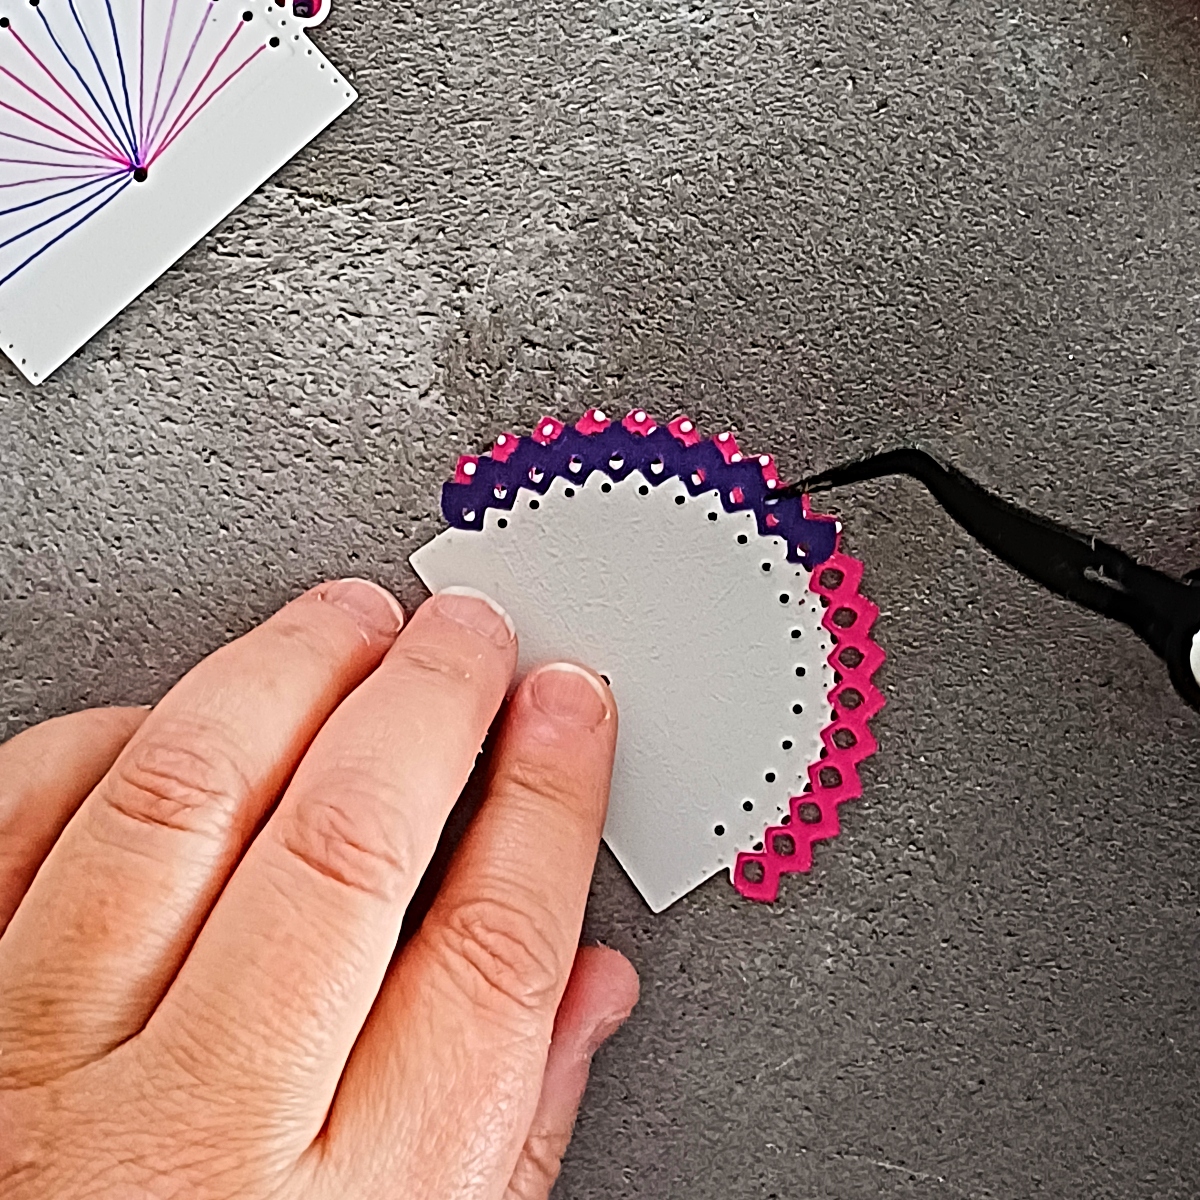
I found it easier to draw my lines from the small outer holes towards the centre hole. You can follow the embossed lines which is super helpful. I didn’t worry if my lines weren’t straight, after all we are trying to mimic stitching and threads rarely sit completely straight. But, if you wanted to be precise you could use a ruler. Working from the left side, for my first three lines I used my Amethyst marker.
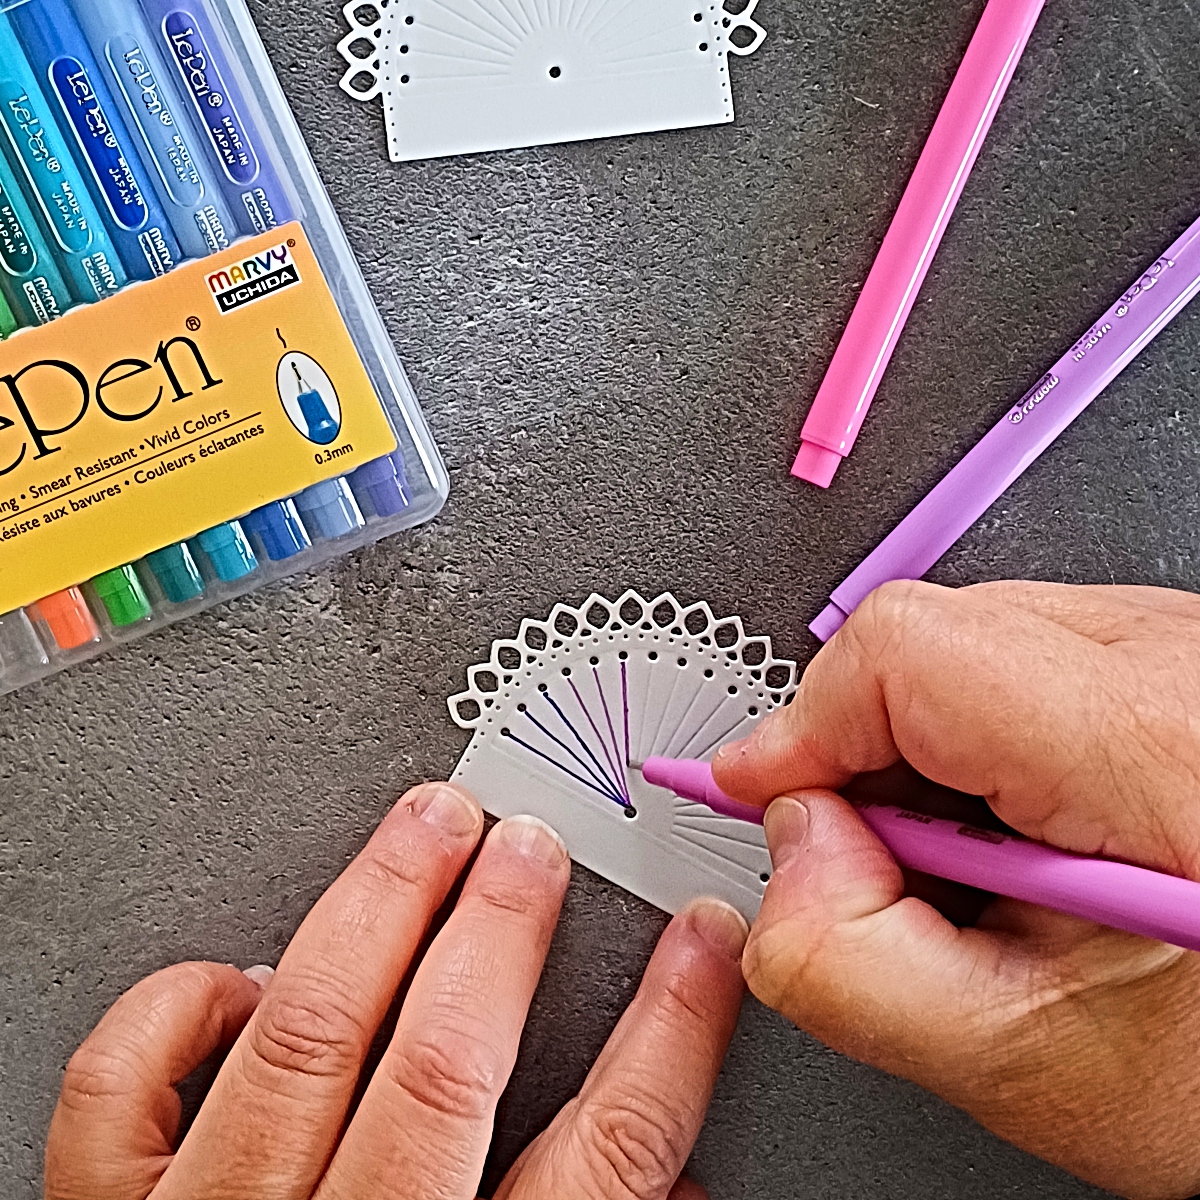
For my second three lines I used Orchid.
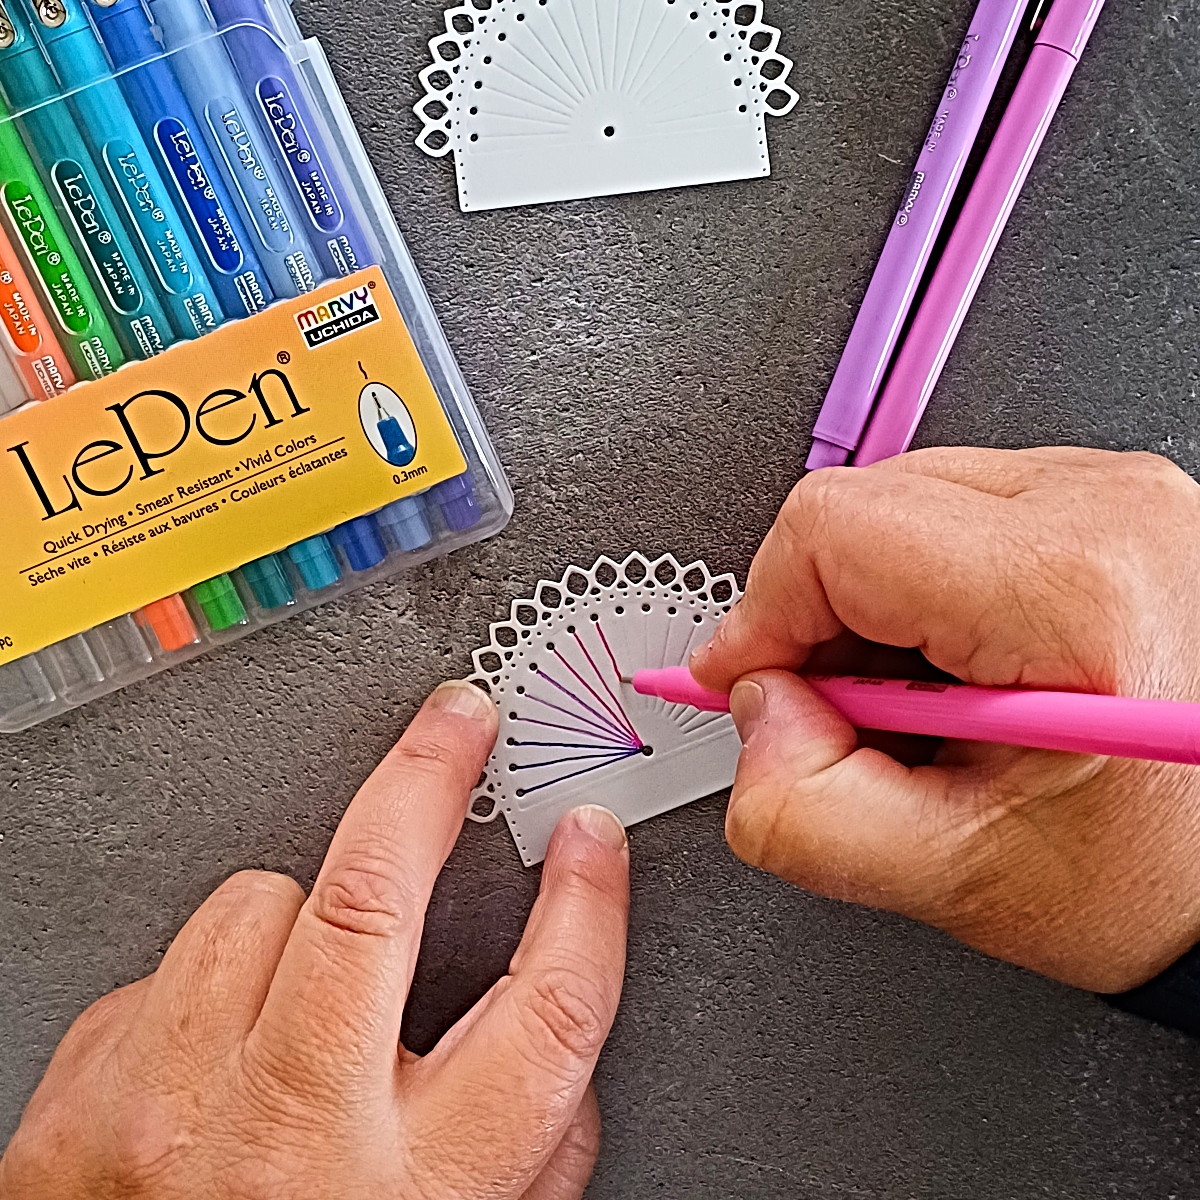
For my third three lines I used my Pink pen. I then continued back through the same order of colors. As there are 17 holes, I was left with just two pink lines at the end but I really don’t think it matters at all. Isn’t this fun and simple to do? I repeated the process for the second die cut.
What I wanted to show you below is that you can also add a double line. The pen nibs are fine enough for that to work out well too. I quite liked the double line as it does reflect the two strands of thread that you would normally use. However, in the end, I decided to go with the single line option for my card.
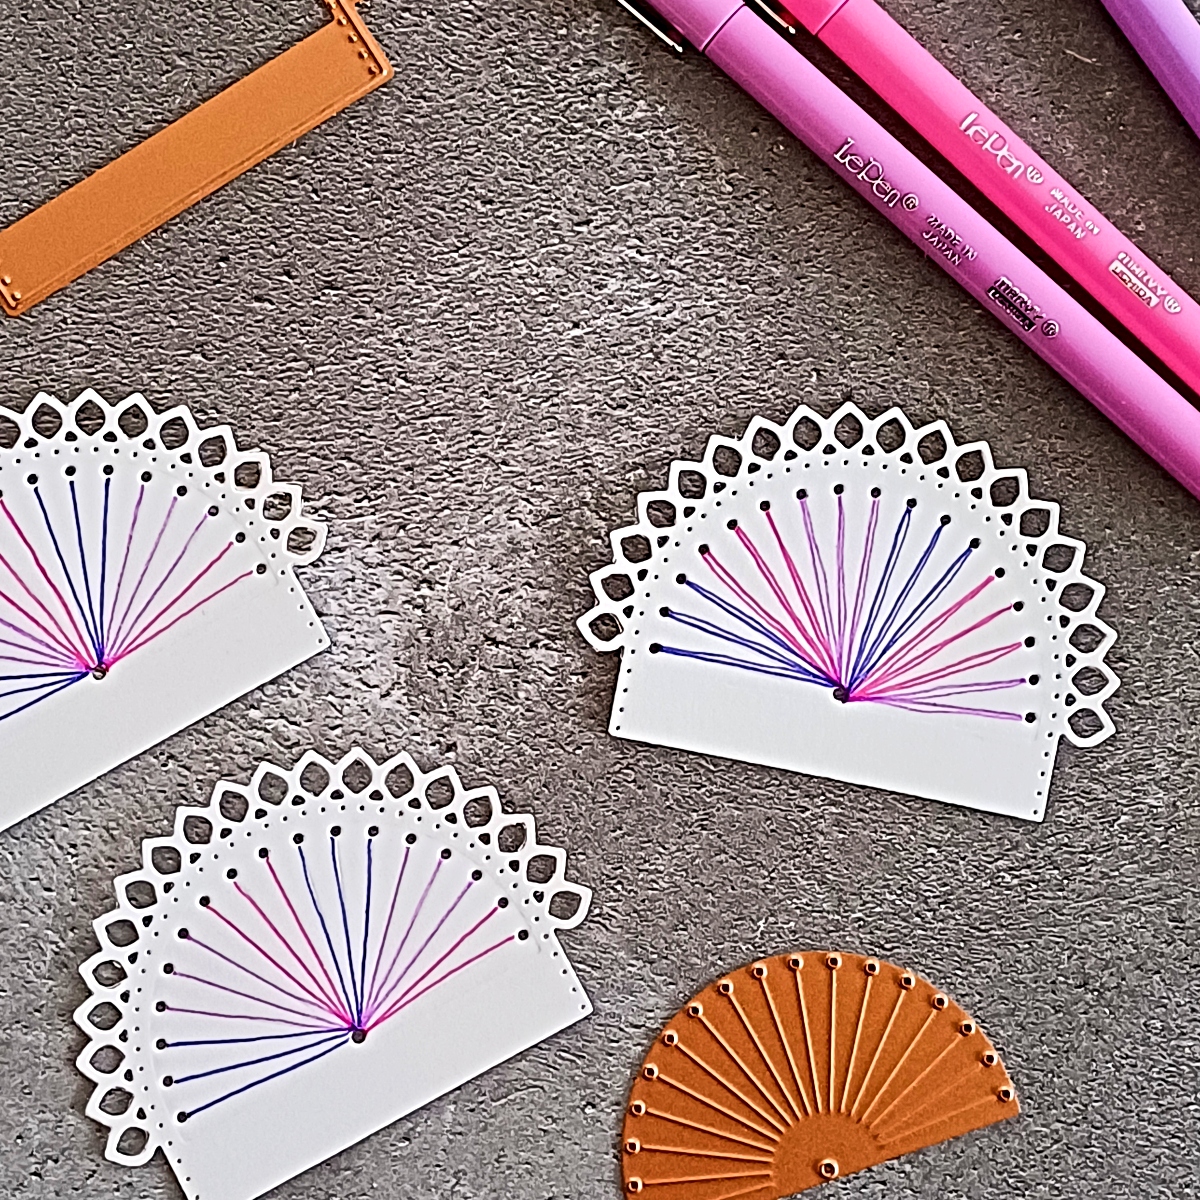
Now let’s move on to the assembly of the additional die-cut arch layers.
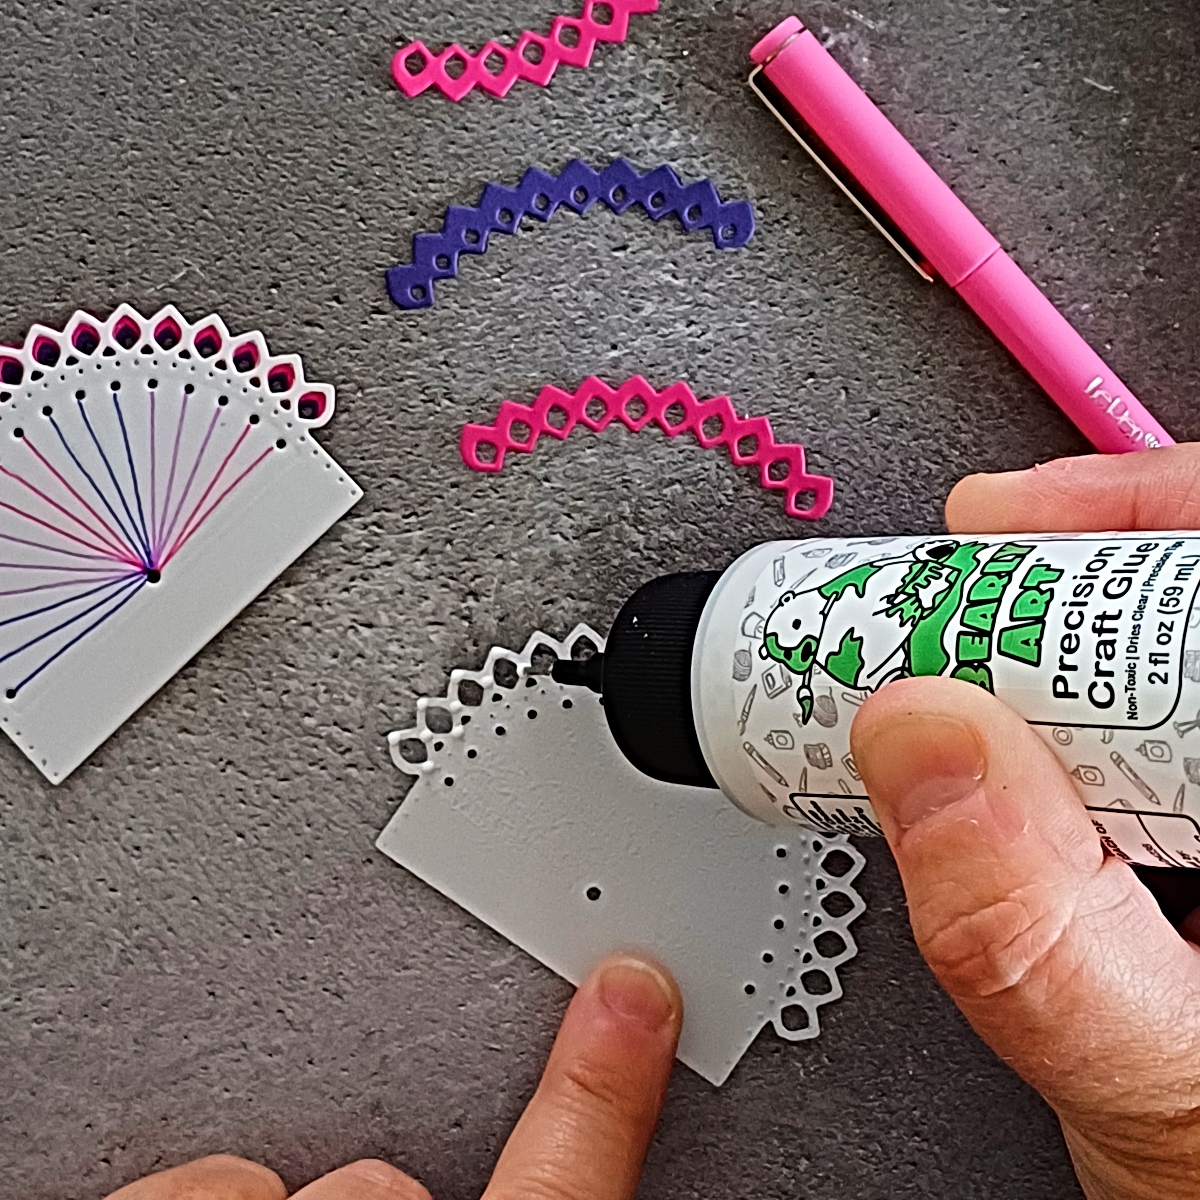
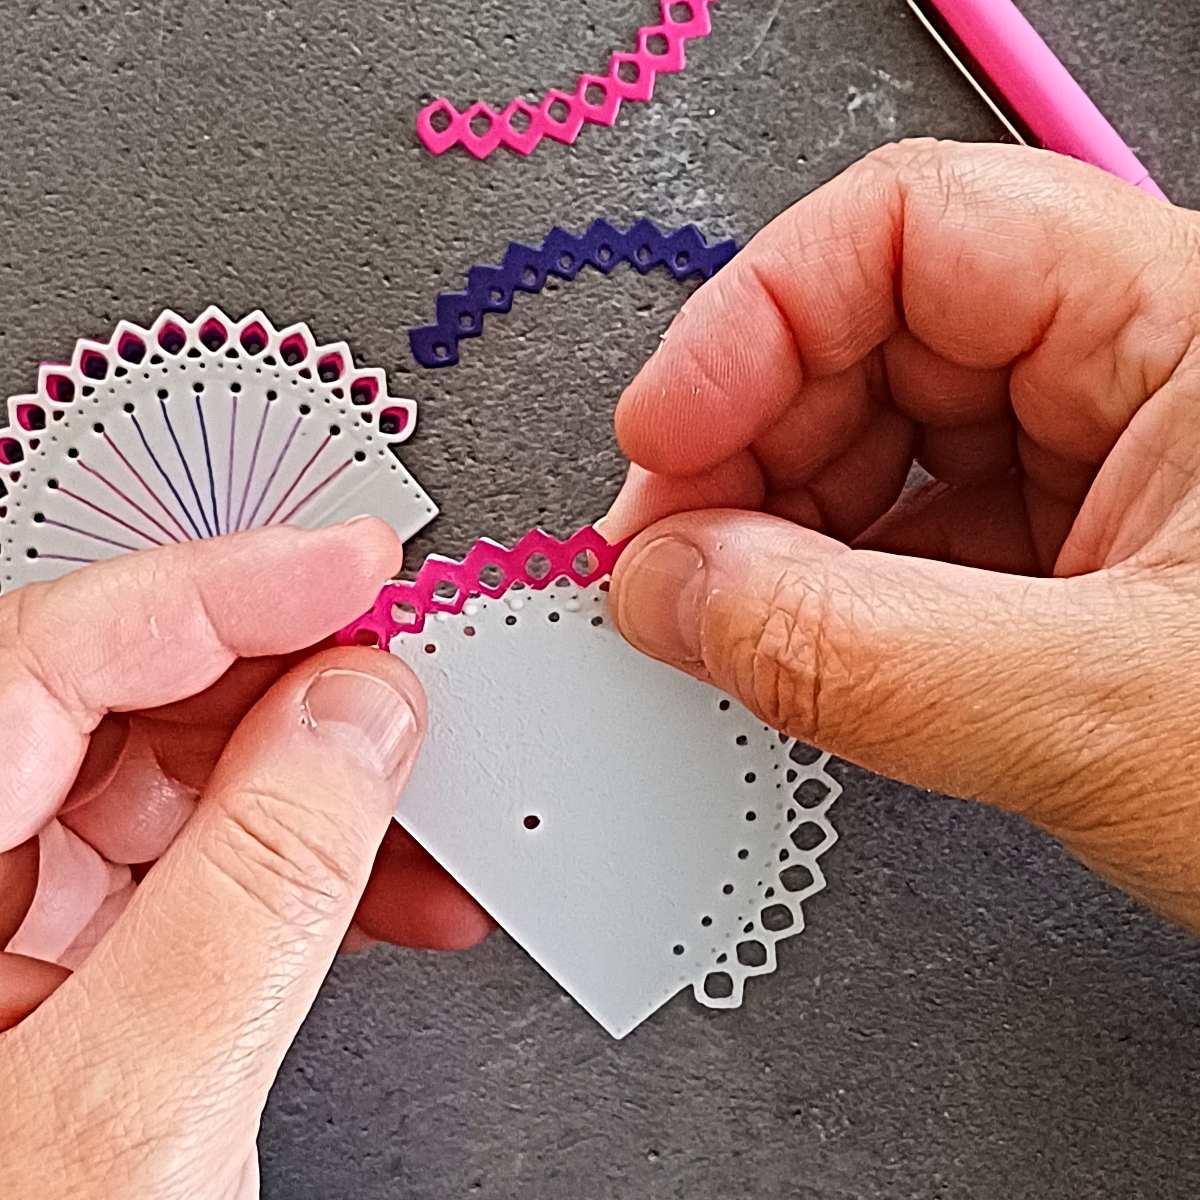
I added some tiny dabs of Bearly Art Glue to the fog die cut and adhered the first pink layer. You need two pink die cuts to complete the semi-circle and they overlap slightly.
I then added the purple layer in the same way. You can then repeat this for the other fog piece. I popped an acrylic block on them whilst they were drying. I love how you get a tiny peek of different colors through those grey holes!
Next, we can add our pretty flowers!
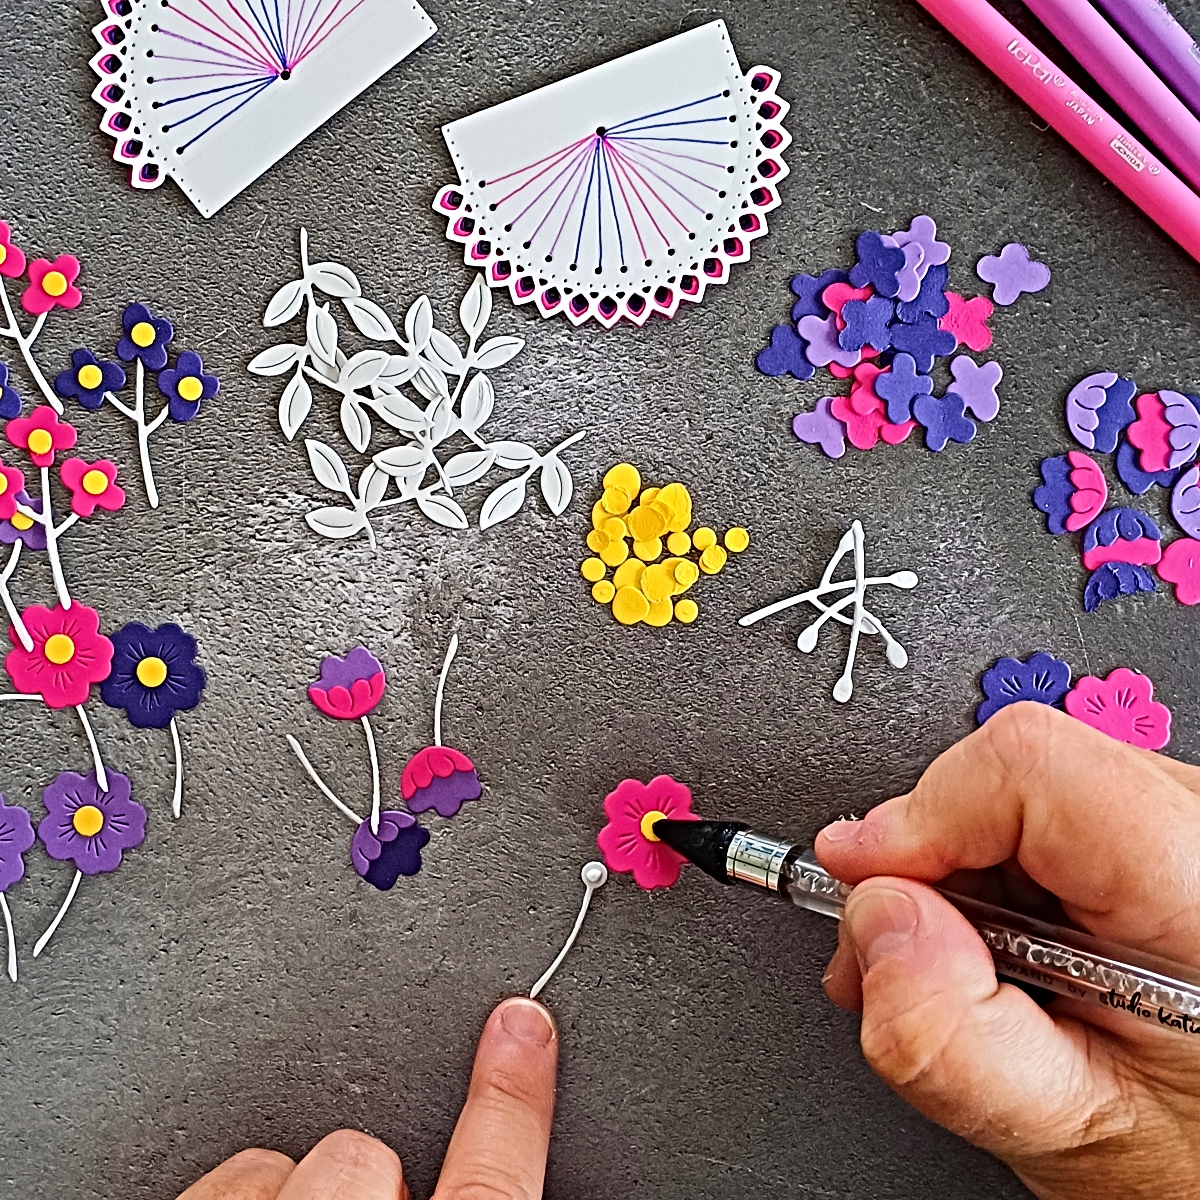
I did a whole load of die cutting as I always like to have more than I think I may need, particularly leaf options as they are good fillers. All of the flowers and leaves come from the Stitched Kaleidoscope Arch Etched Dies.
I used Fog, Royal Amethyst, Lilac Blossom, Sunkissed, and a magenta from my stash for the flowers and I assembled them using Bearly Art Glue. This does take a while but for me I find it very therapeutic.
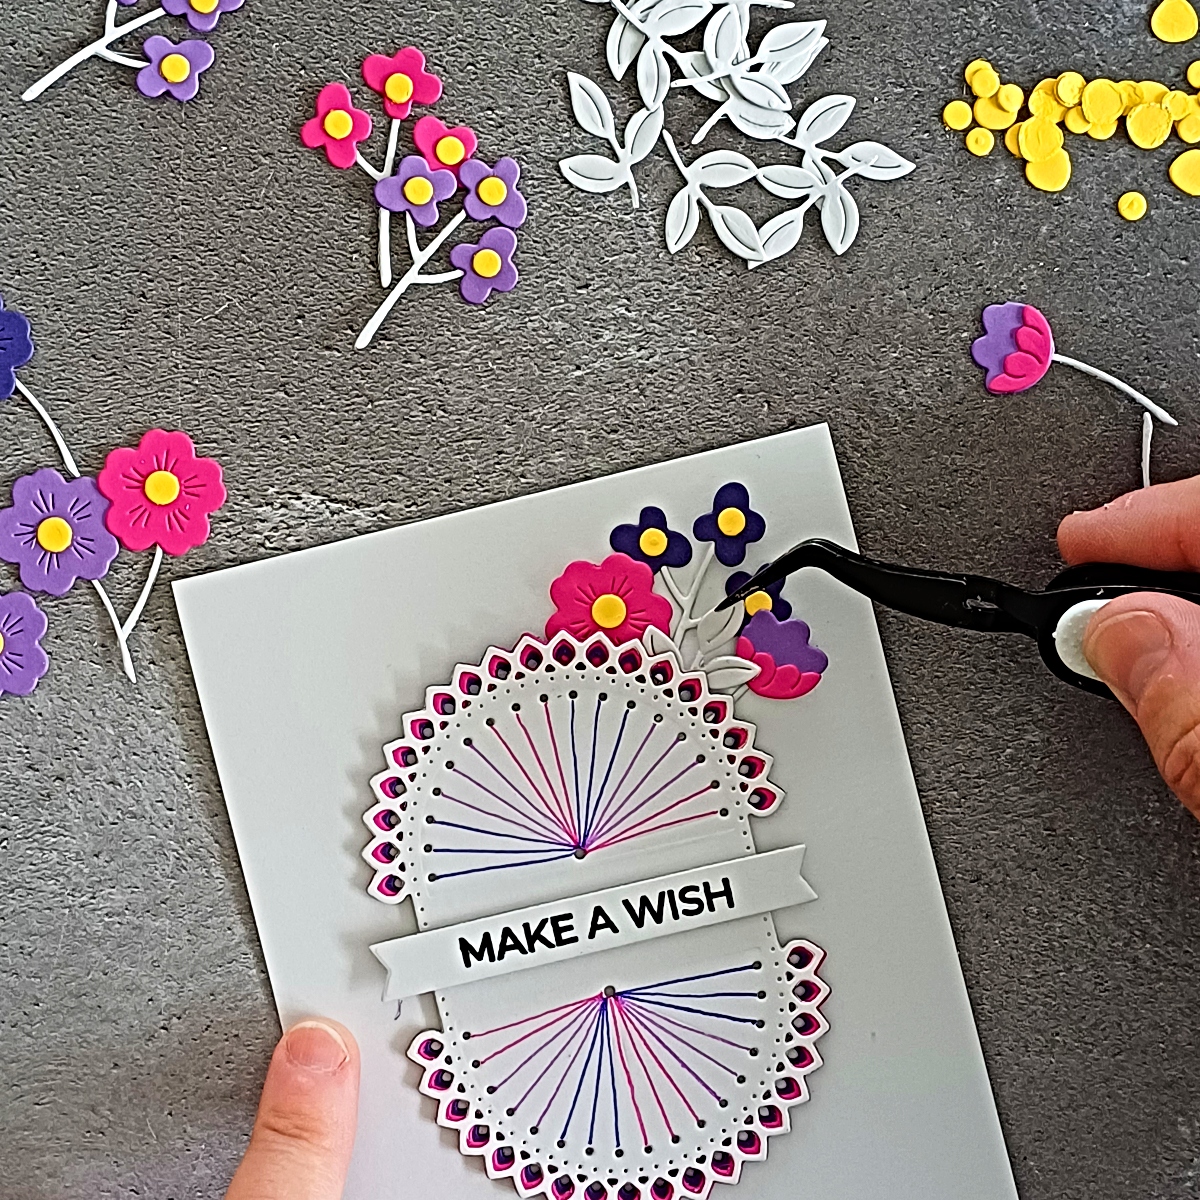
Thin foam tape was added to the back of my kaleidoscope arches and it was adhered onto a top folding note card that I created from Fog card. The sentiment is from Kaleidoscope Arch Sentiments Clear Stamp Set and it was stamped with black pigment ink onto Fog before cutting it out with the banner die from Stitched Kaleidoscope Arch Etched Dies.
We can now add our pretty flowers! I usually start by adhering my largest elements, and then placing other pieces around that. I often arrange my flowers, take a photo, dismantle everything and then adhere them back in place with glue. However for my card today, I just adhered each part straight away.
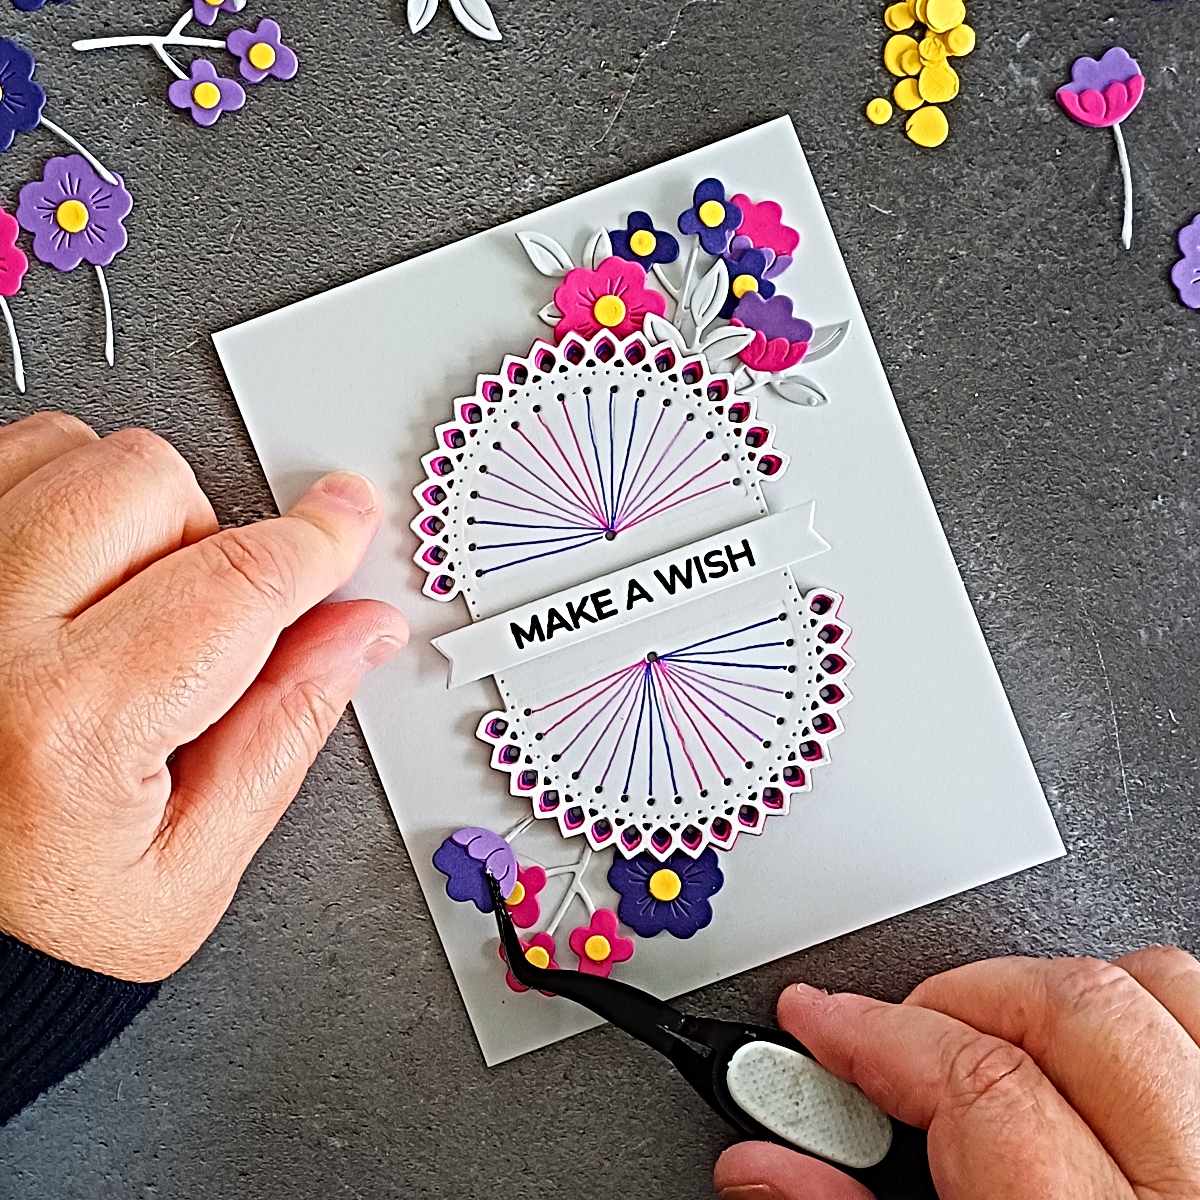
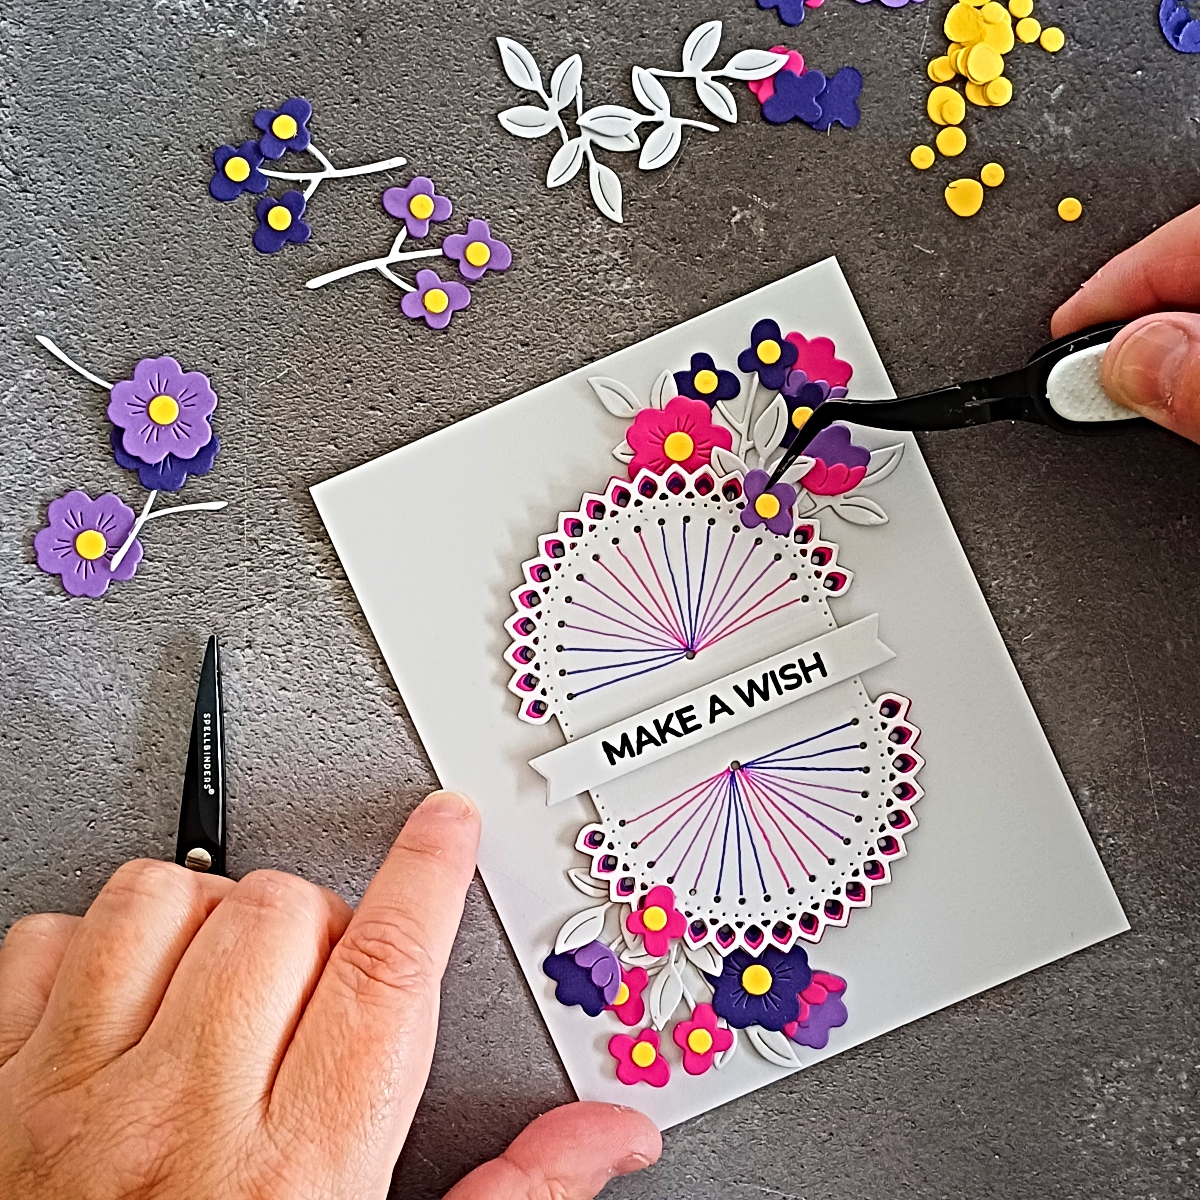
I finished off the top right section and then added some more to the bottom left to create a diagonal design. I ended up adding a couple of smaller flowers just over the faux stitching just so that not everything sat outside of the two arches.
That finishes our main project for today. I really like the look of the faux stitching and will definitely be using it on some other projects in future. I like how easy it is to interchange colors and even though you don’t get the additional texture that you would get from thread, you can still add lots of interest to your project with other elements such as flowers and embellishments. As promised earlier, I did make a few other cards to show you some more ideas.
Hello Lovely
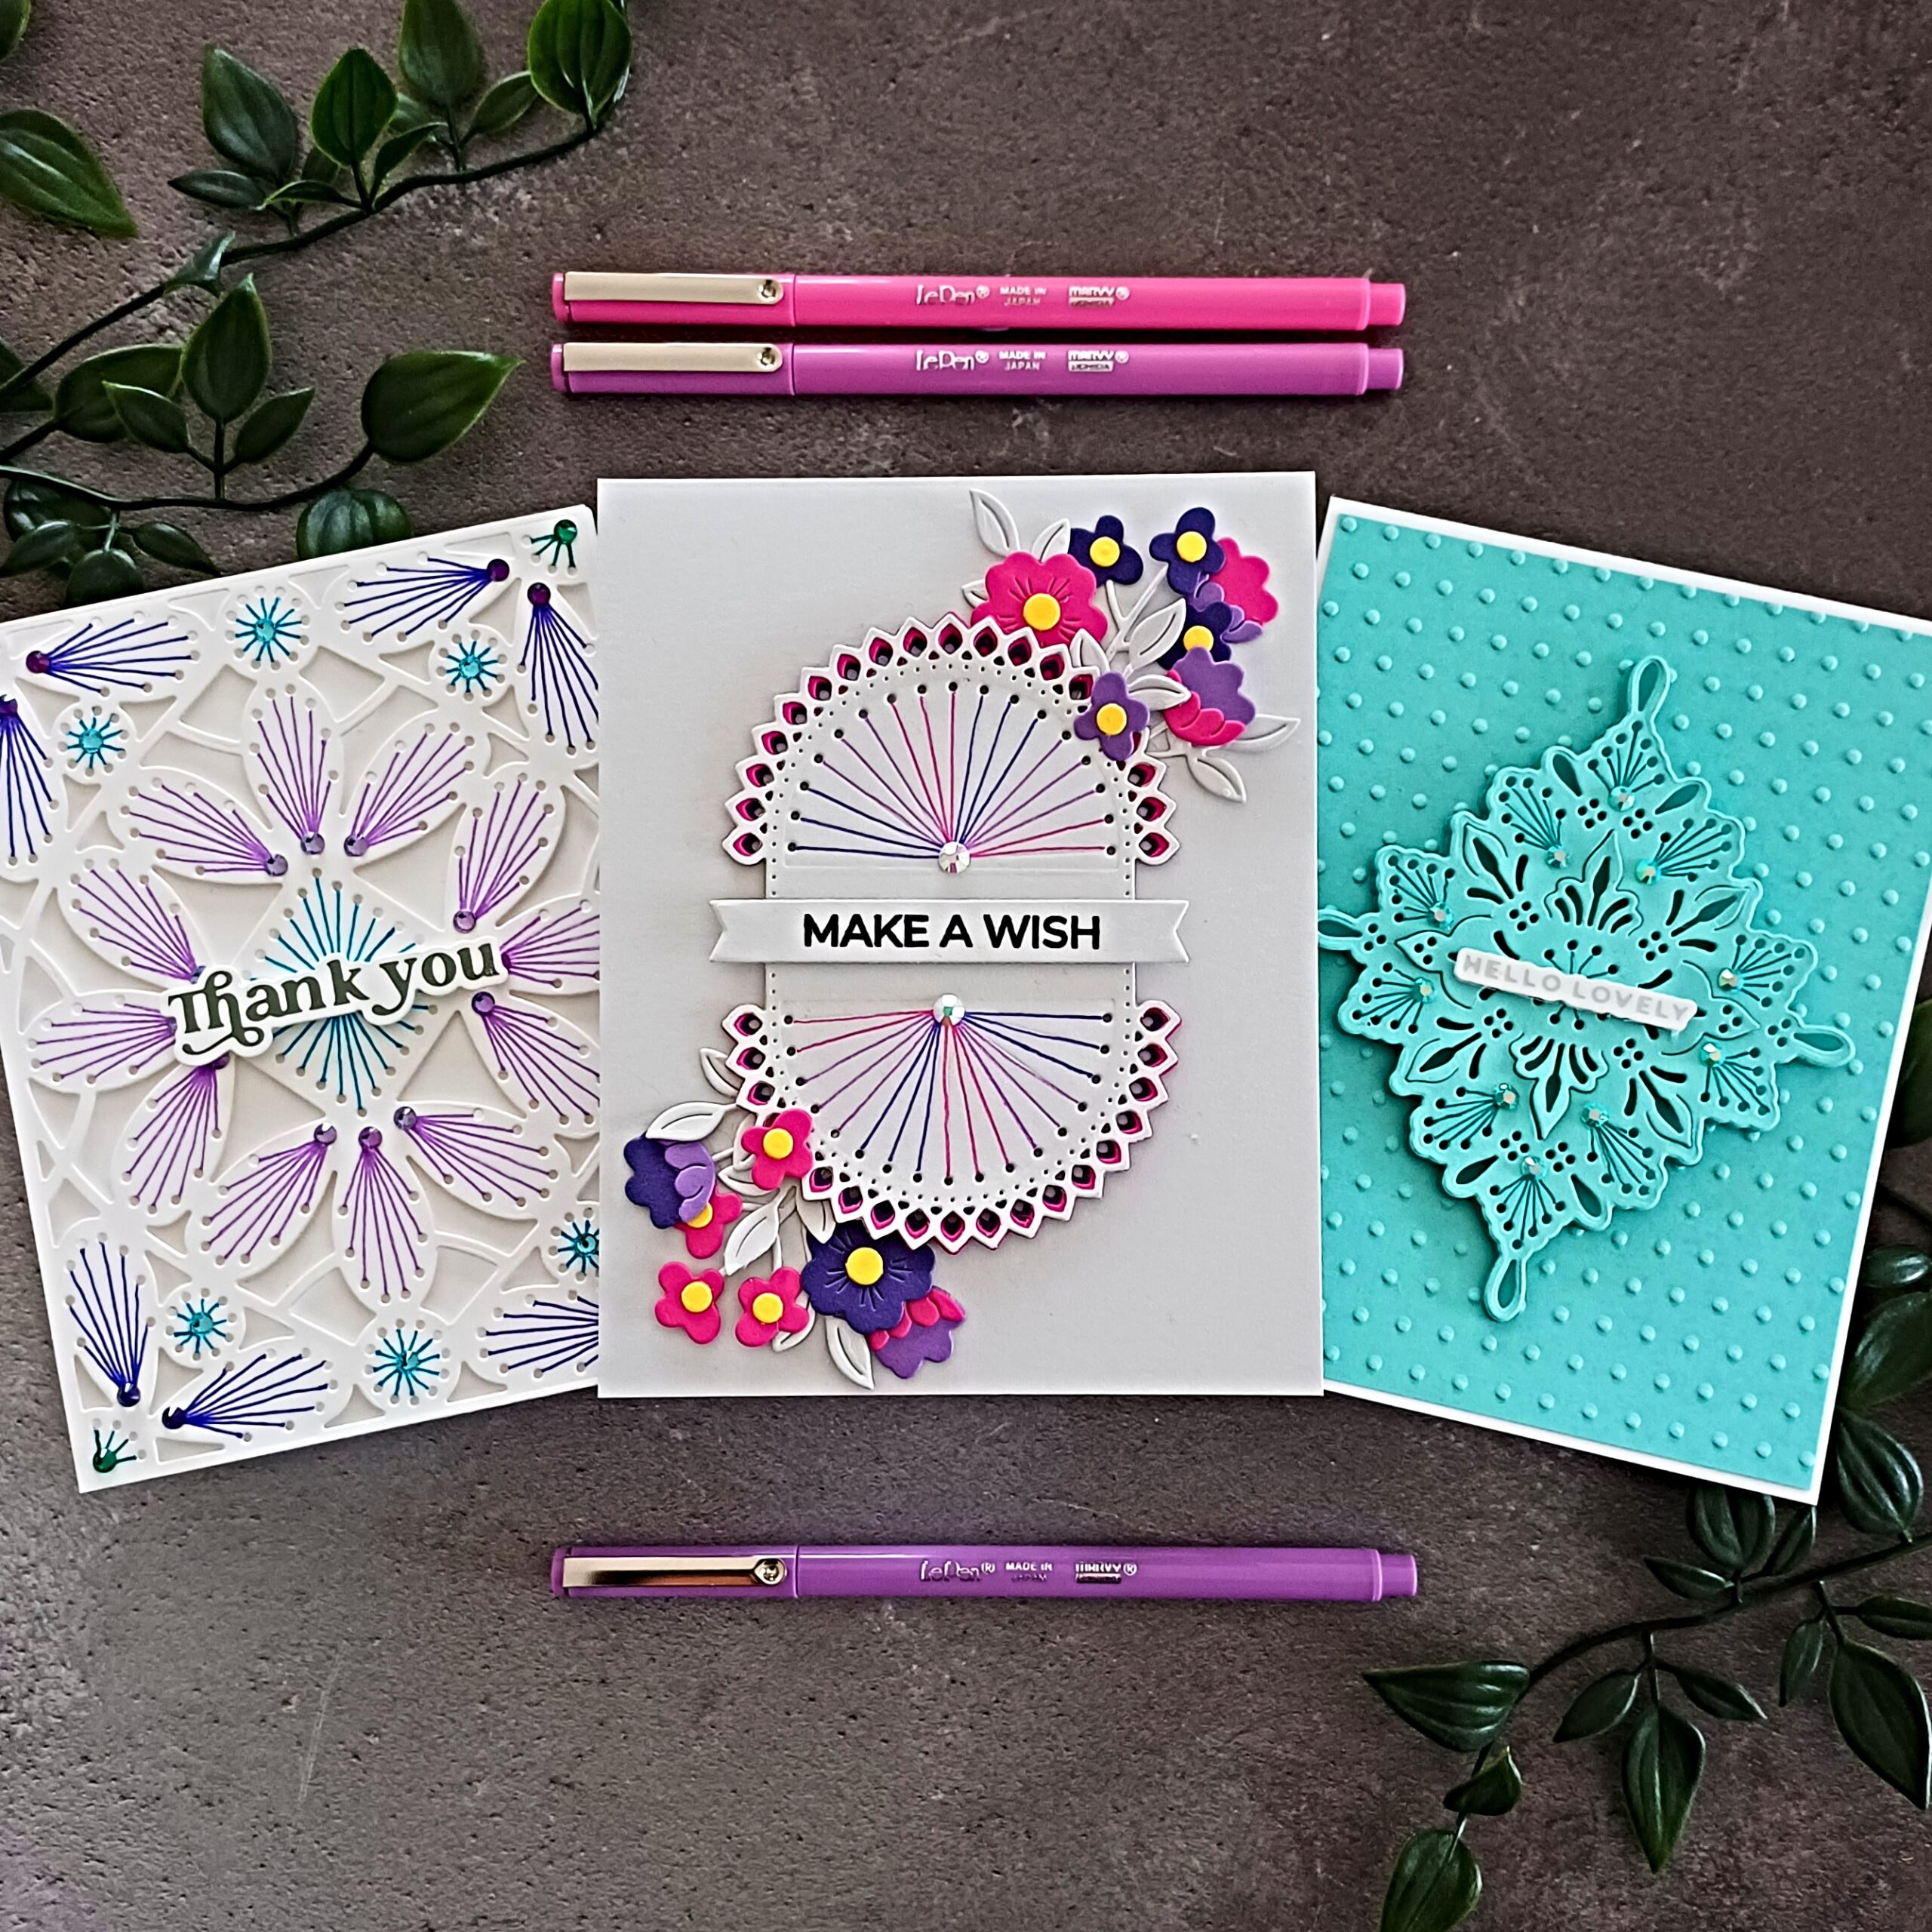
For this card, I used just one pen color (teal) for an almost monochromatic look. Doesn’t the stitching look pretty even with just one colour of pen?
I embossed the Tiny Dots Embossing Folder with some Waterfall Color Essentials Cardstock, trimmed it down a little and added it to a top folding white note card. The Stitched Medallion Etched Dies was also die cut from Waterfall cardstock, the teal pen lines were then drawn on, and I added some thin foam tape onto the back. For added interest and dimension, I cut the outline die from Teal Topaz and placed it under the medallion. So, you can see the teal cardstock when you look from the side and also through the stitching holes.
The sentiment comes from Making Me Smile Sentiments Glimmer Hot Foil Plate and Die Set and it was foiled with Silver Glimmer Hot Foil and the Glimmer Hot Foil System. I cut it out with the coordinating die and added it with foam tape. I found some beautiful aqua gems in my stash and adhered them for some sparkle.
Thank You
I wanted to show you how the pens look on a larger plate as well.
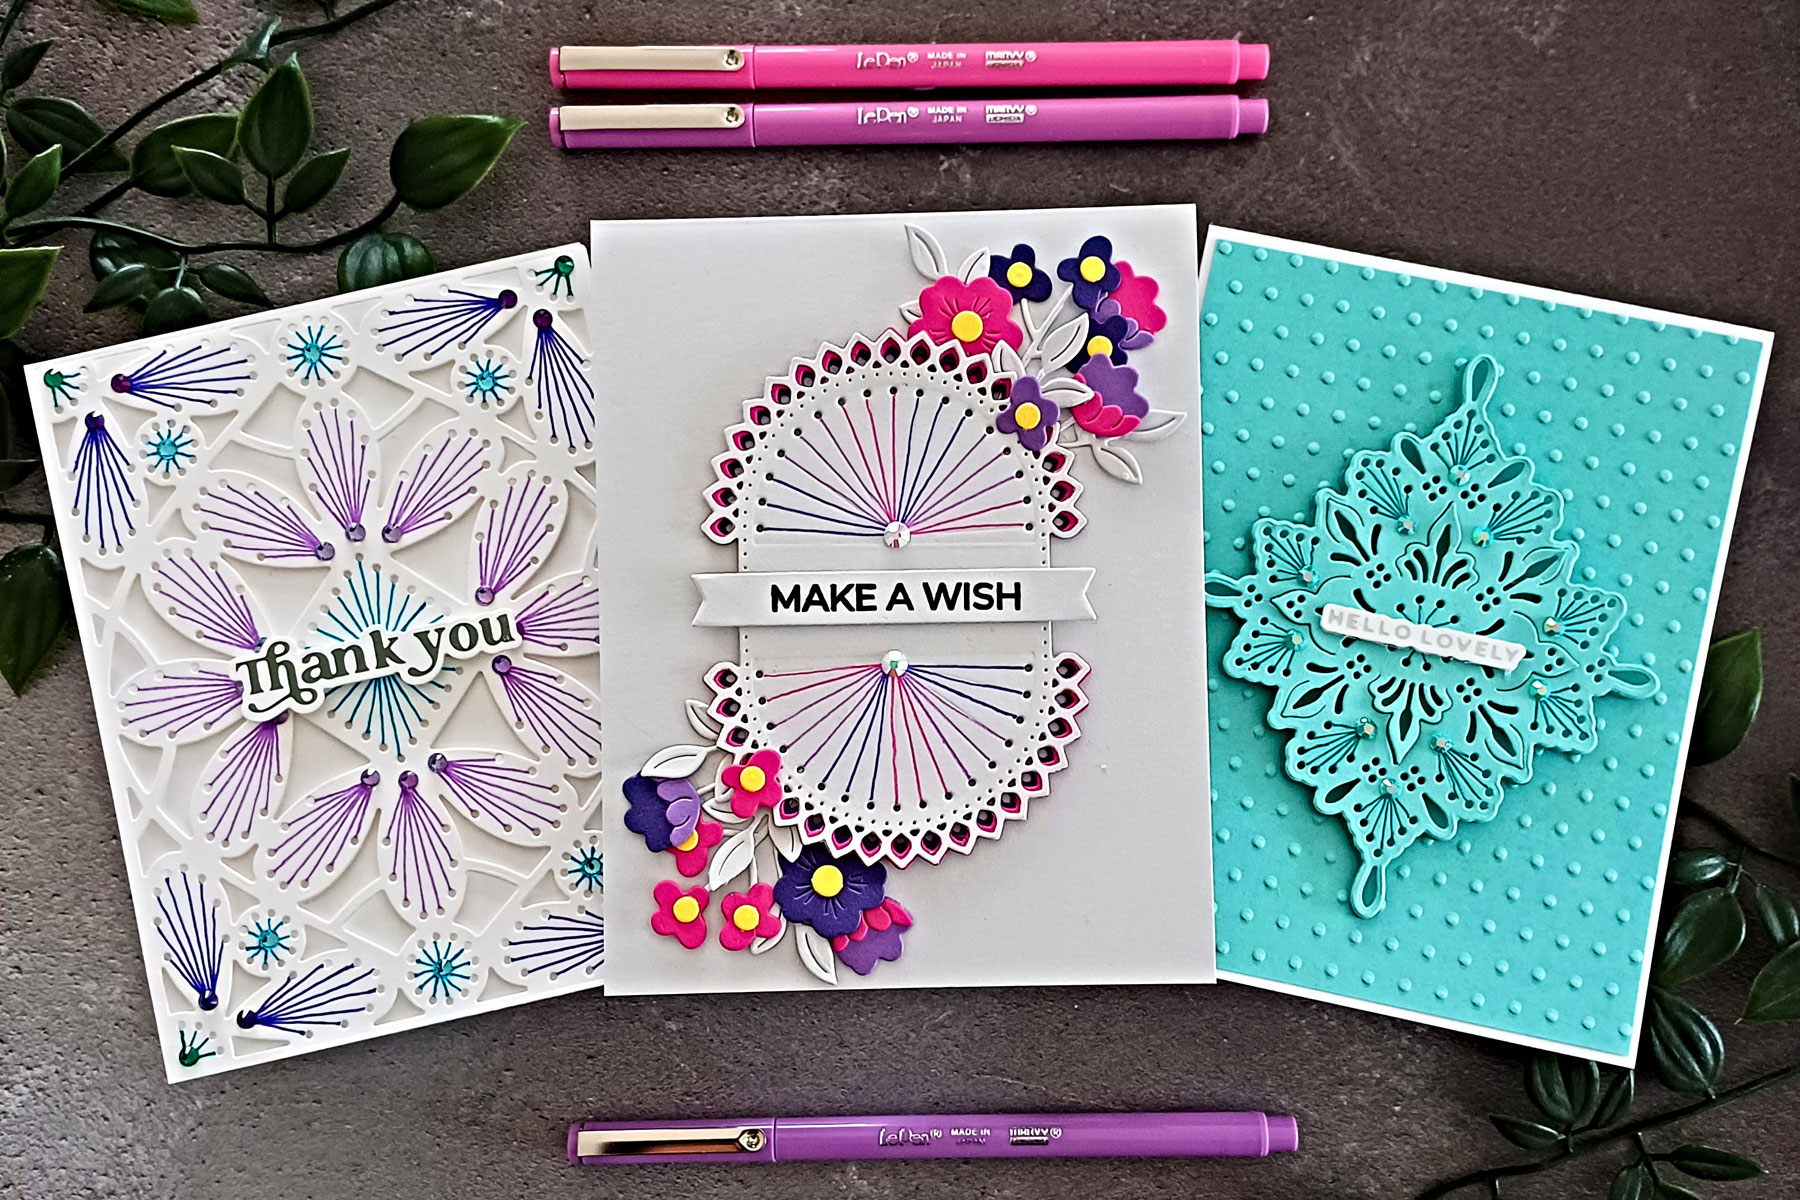
This is the Stitched Petal Frame Etched Dies which covers an entire A2 panel. I picked four pretty pen colors that I thought would look good together and added my lines. I didn’t time this, but I don’t think it took me longer than 20 minutes to add the lines! After I had finished the coloring, I popped some foam tape onto the back and mounted it onto a white note card.
The sentiment is from Must-Have Sentiments Glimmer Hot Foil Plate and Die Set and it was foiled with Skybright Glimmer Hot Foil and the Glimmer Hot Foil System. It was cut out with the coordinating die and added with foam tape. For embellishment, I added some purple, pink, green, and aqua gems from my stash.
Thank you so much for your company here on the blog today. I hope that my cards give you some ideas for how you might use the Marvy Uchida Le Pen Brights on your designs. I think you could have a lot of fun with these pens not just with stitching dies. I hope that you have a great day!
Spellbinders Supplies:

Other Supplies
Die cutting machine, Neenah Solar White Classic Crest 80/110lb, Concord & 9th Dragonfruit card, thin foam tape, Hero Arts tweezers, embellishment wand, Lucy’s Cards Bridal Mix Jewels, Lucy’s Cards Shimmering Pool Mix, aqua, green, pink and purple gems from my stash, Versafine Onyx Black Ink.
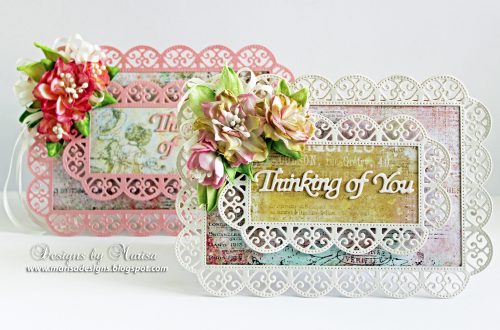
Thinking of You Card by Marisa Job
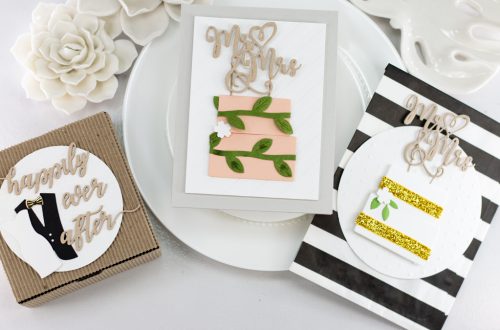
Wedding Season Collection | Wedding Cards with Koren Wiskman | Video